Building a MIDI controller is one of the most rewarding projects a maker or budding electronic engineer can build. Before you begin there are some things worth knowing…
This article is the prerequisite to choosing the best Arduino board for your particular MIDI controller project and contains some important information for beginners and advanced builders.
However feel free to skip this post and head straight over to the board reviews if you just want to know the best board for a DIY MIDI project!
Table of Contents
Prerequisite
In order to find the most suitable Arduino for your project MIDI controller, there are a few things to consider:
- How many analog inputs to you want? (dials, sliders, fancy Infra-red beam-thingi-sensors)
- How many digital inputs you you want? (push buttons, switches, anything that goes on or off)
- Do you want to connect your MIDI controller to the computer with USB?
- Do you need to connect your MIDI controller directly to another piece of music tech gear, such as a synthesizer?
If you already know the answers to these questions, there are still several ways that we can go about building a MIDI controller.
In order to find the most suitable Arduino for your project MIDI controller, there are a few things to consider…
For example, if you want 16 analog inputs (dials, sliders etc) then you could just buy an Arduino Mega as it has 16 analog inputs, right?
Well, yes you could, but it is totally overkill if you will not be using the additional features that you are paying for. It is also a fairly large board and not the easiest to embed in a project.
There are better ways, and cheaper ways…
In this article I will teach you some secrets about building MIDI controllers…
This article is aimed at both beginners and also more advanced users of Arduino.
The main purpose is to determine the best and most cost effective way to build a DIY MIDI controller using Arduino, and what Arduino board would be best for this purpose.
If you are a total beginner and have never heard of Arduino before then do not fear!
I began my whole electronics career because one day I decided to go online and ask the question “how to build a DIY MIDI controller?” Google led me to Arduino and the rest is history… 🙂
I would however recommend total beginners have a quick read about Arduino, just to get an understanding of exactly what it is first.
I would also recommend that total beginners start with the Arduino Starter Kit and work through the projects there first.
The starter kit will teach you the basics and also provide you with an Arduino UNO and enough components to build a simple MIDI controller.
There are also some very handy components that you could add to make building a MIDI controller easier, which I discuss more here.
The Arduino MIDI Library
When I first built MIDI controllers at the dawn of time (I mean, when Arduino was barely a thing) there were not the tools that we have available today.
I will be recommending use of the Arduino MIDI library, it makes things much easier! The recommendation of best Arduino boards for DIY MIDI controllers will be assuming the use of this library.
Arduino MIDI Over USB
The first decision to make is whether or not you need USB MIDI capability or whether good olde’ fashion MIDI ports will suffice.
If you are building a MIDI controller to connect to a piece of hardware with MIDI ports, such as an oldskool synthesizer, you can use practically any Arduino board as all you will need is a serial port.


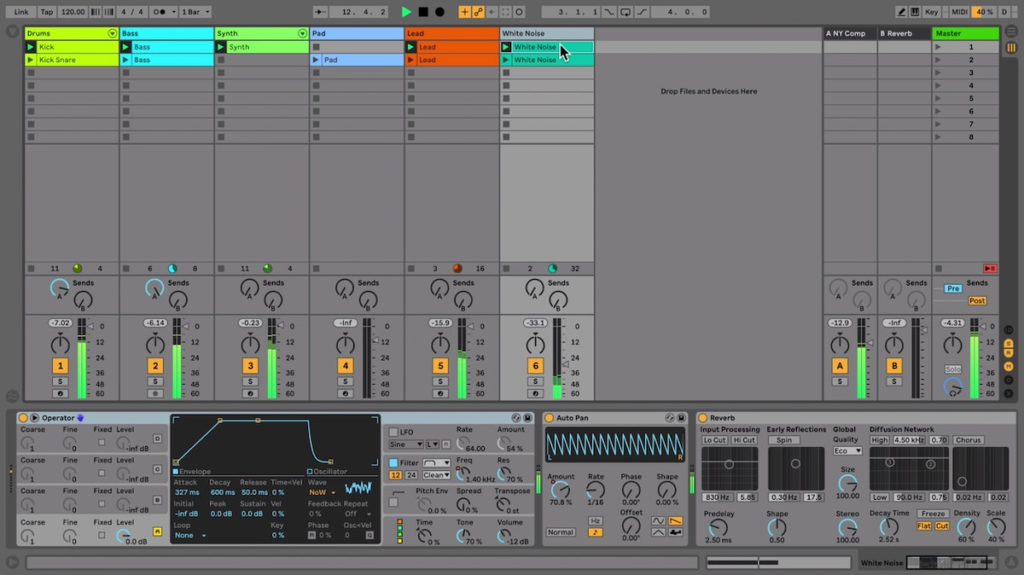
If you want to connect your DIY MIDI controller to a computer in order to control your favorite DAW, such as Ableton Live, you will need to choose a board that is compatible with USB MIDI.
Alternatively you could just go oldskool and use one of these to connect the Arduino serial port to the computer as a MIDI device. However if you do need USB, I would recommend sticking with a board that supports USB MIDI.
The Arduino MIDI library is compatible with all Arduino boards. However not all boards allow USB to be used for MIDI.
If you want to connect your Arduino MIDI controller to the computer and use MIDI over the USB connection, you must select a board that is compatible.
If you have decided whether or not you want USB MIDI capability you are halfway there! The other thing to understand is what kind of controls we want on our MIDI controller.
Once we know what controls we want on our MIDI controller (think buttons, knobs, sliders etc), we can decide on the best board for our project.
Arduino MIDI Over Serial
If you connect your Arduino board to a computer with the USB cable, it will appear to the computer as a serial port device.
You will notice that if you open up your favorite DAW, the Arduino does not show in the available list of MIDI controllers if you have not set it up for MIDI over USB.
This is because the Arduino needs to be seen by the computer as an Audio/MIDI device and not a serial port. This is where the Arduino USB MIDI library comes in.
Although most boards now support MIDI over USB, it does require special hardware and some boards do not support it.
Boards which use USB to Serial chips, like the FTDI or CN340 chip cannot be configured to appear as MIDI devices.
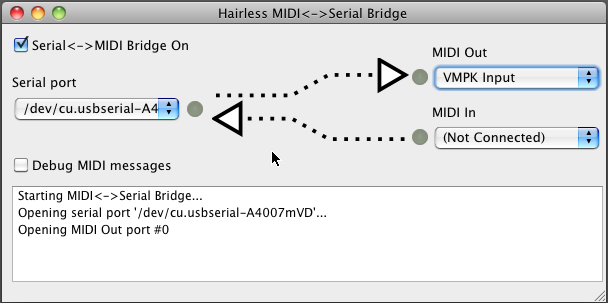
In this case there is an alternative option. You can use a third party software that acts as a bridge between the USB serial input from Arduino and a chosen MIDI device, including the input of your DAW.
There is a very useful and completely free software tool available for establishing a serial to MIDI bridge, check out the Hairless Serial MIDI Bridge for more information.
Inputs and Outputs
There are several types of control we can use with Arduino in order to build our MIDI controller. Prior to choosing an Arduino board, we should decide on what we want.
If you are a total beginner (no Arduino experience) then I would recommend starting with either of the following boards.
- Arduino UNO or Arduino Starter Kit – you can build a MIDI controller with as little as an Arduino UNO and a single potentiometer with this hardware setup.
- Arduino Nano – Also suitable for a beginner to build a very basic MIDI controller, just a little more breadboard friendly.
For beginners and beyond I would recommend first writing a list of all of the controls you want on your MIDI controller prior to choosing a board.
Your list can include dials, switches, sliders and any other wacky sensors you might want to include.
Digital inputs/outputs
Digital inputs and outputs are any device that has either an on or off state. These can include push button switches, rocker switches or LED indicators.
Digital input pins on Arduino boards are capable of sensing the state that a push button and allow us to add a button to our MIDI controller.
Digital output pins on Arduino are capable of illuminating LEDs or switching any other device that has an on and off state, allowing us to add visual feedback to our MIDI controller.
Beginners can connect a switch, or any other digital input to each one of the available digital inputs on the Arduino board.
Intermediate builders may also want to add LEDs for visual feedback and use MIDI IN to receive messages to control the LEDs.
Advanced builders should look at using a clever technique called multiplexing. This allows a greater number of devices to be connected to a much fewer amount of input/output pins on the Arduino board.
Analog inputs
Analog inputs allow us to connect some kind of control or sensor that has a value that varies between A and B.
The most basic example would be a potentiometer (a variable resistor). This is basically a dial that can be turned from an A position to a B position.
When the dial is in the A position the voltage can be 0 volts and as the dial is turned the voltage keeps increasing more and more until it reaches maximum voltage in the B position (often the supply voltage Vcc).
We can use an analog input on an Arduino to ‘read’ the voltage from such a device and turn it into a digital value.
This digital value can then be converted into a series of MIDI messages and allows us to manipulate a MIDI parameter such as volume.
Beginners can connect a potentiometer to any of the free analog inputs and assign each to a different MIDI message.
Intermediate builders can try interfacing different sensors that have an analog output, such as the Sharp IR sensor.
Advanced builders can look at using external circuitry in order to multiplex many analog devices to a smaller amount of input pins on the Arduino board.
Serial inputs
Lastly it is also possible to interface other more sophisticated devices.Anything that can provide Arduino with data can effectively be turned into a MIDI controller!
Some sensors come with a serial interface such as I2C or SPI and use these protocol to communicate with Arduino. Some examples include:
- Potentiometers can be attached via serial data lines using an additional analog to digital convertor with several approaches:
- Using an analog to digital convertor chip, which can be higher resolution than the standard Arduino ADC.
- Using a specific IC for digitising potentiometers, such as the X9C104.
- OLED and LCD displays can be interfaced with serial connection, useful for displaying MIDI controller settings.
- More advanced sensors can be connected, such as an inertial measurement unit. Turn movement into MIDI!
Beginners can connect a potentiometer using a simple single channel digital potentiometer IC.
Intermediate builders can try adding a OLED or LCD display to their projects to display MIDI controller settings and outputted MIDI values.
Advanced builders can look at building something really cool and unusual using a more complex sensor, such as an inertial measurement unit.
What’s next…
In this article we covered some of the prerequisites to building your own DIY MIDI controller with the Arduino platform.
In the next article we have a detailed review of boards and parts that can aid in realising your project! It is aimed at both beginner and advanced builders.
Which Arduino board is best for building MIDI controllers? To find out, head over to the next article or choose your level…
Thanks so much for visiting my site! If this article helped you achieve your goal and you want to say thanks, you can now support my work by buying me a coffee. I promise I won't spend it on beer instead... 😏