Mac computers have long been favored for their sleek design and user-friendly interface, but some individuals prefer the flexibility and customization offered by Linux-based operating systems.
If you are one such enthusiast and wish to explore the power of Debian, a robust and versatile Linux distribution, on your Mac, you’ve come to the right place.
Whether you own a Mac with Apple Silicon (M1/M2) or an Intel-based Mac, this guide will provide you with step-by-step instructions on how to successfully install and run Debian, enabling you to unlock a whole new world of possibilities on your Mac machine!
This article will teach you how to run Debian Linux on macOS using UTM, a popular virtual machine manager.
UTM is my prefered choice for virtual machine manager on Mac, however there are other options and if you are interested in learning which might be best for you, click here to read the reviews of the best virtual machine managers for Mac.
Brief overview of Debian
Debian is a highly regarded and freely available operating system known for its stability, security, and extensive software repository.
Developed by a dedicated community of volunteers, Debian follows the principles of the “Debian Social Contract,” prioritizing user freedom and control over their computing environment.
It offers the Debian GNU/Linux core system, based on the Linux kernel, along with a vast collection of software packages encompassing various applications and utilities, making it a versatile choice for different use cases.
What sets Debian apart is its rigorous quality control process, ensuring that software packages undergo thorough testing before being included in the official repositories.
This meticulous approach guarantees a reliable and stable operating system. Furthermore, Debian benefits from an active and supportive community, providing forums, mailing lists, and extensive documentation resources for users seeking assistance or wishing to contribute to the project.
With its emphasis on user empowerment and a commitment to free software, Debian stands as a robust and community-driven OS that offers a solid foundation for individuals, organizations, and developers to build and customize their computing environments.
Can You Run Debian on Mac?
Yes, you can run Debian on a Mac using virtual machine software. Virtual machines allow you to create a virtualized environment within your Mac, where you can install and run different operating systems, including Debian.
There are several virtual machine manager software options available for Mac, such as UTM, VMware Fusion, Parallels Desktop, and VirtualBox. These software packages provide the necessary tools to create and manage virtual machines on your Mac.
The following steps outline the process for running Debian on macOS using a virtual machine manager:
- Download the Debian ISO: Obtain the Debian ISO file from the official Debian website. Make sure to download the version compatible with your desired architecture, such as Intel or Apple Silicon.
- Create a new virtual machine: Launch the virtual machine software and create a new virtual machine. During the setup, specify the Debian ISO file as the installation media.
- Configure virtual machine settings: Customize the virtual machine settings, such as memory allocation, storage capacity, network settings, and any other options as per your requirements.
- Install Debian: Start the virtual machine and follow the Debian installation process within the virtual environment. This typically involves partitioning the virtual disk, selecting installation options, and configuring the system.
- Complete the installation: Once the Debian installation is complete, you will have a fully functional Debian environment running within the virtual machine on your Mac.
Running Debian within a virtual machine allows you to experience and explore the Debian operating system without affecting your Mac’s primary operating system.
It provides a sandboxed environment where you can test software, develop applications, or simply familiarize yourself with Debian.
Note that running Debian within a virtual machine may have performance limitations compared to running it directly on the hardware, depending on what you want to do with Debian.
The virtual machine’s performance will depend on factors such as the resources allocated to it (CPU, RAM) and the capabilities of your Mac.
Overall, using a virtual machine is a convenient and flexible way to run Debian on a Mac, allowing you to leverage the benefits of both operating systems simultaneously.
Prerequisite
The method in this tutorial is compatible with both Apple Silicon (M1/M2) and Intel Mac computers, so either an Intel-based or Apple Silicon-based Mac will work.
UTM system requirements
- macOS 11.3 or later
Downloads
In order to install and run Debian on macOS you will need the Debian installation image and the UTM virtual machine manager.
Download UTM
UTM is quick and easy to download and install. You can use either of the following links:
- UTM – download from the official website (free)
- UTM – download from the App Store (small fee, if you prefer to donate)
Once you have downloaded the .dmg file, open it and move UTM into your applications directory. You can now launch UTM, which will take you directly to the main application window.
Download Debian
It is important to ensure that you download the correct installation image of Debian for your system.
Navigate to the Debian download page and scroll down to the Small CDs or USB sticks section. Click the appropriate architecture link for your system:
- Apple Silicon – download for arm64
- Intel Mac – download for amd64
Configure a New UTM Virtual Machine
Once you have installed UTM, the next thing to do is create a new virtual machine. You can start this process whilst you wait for Debian to download.
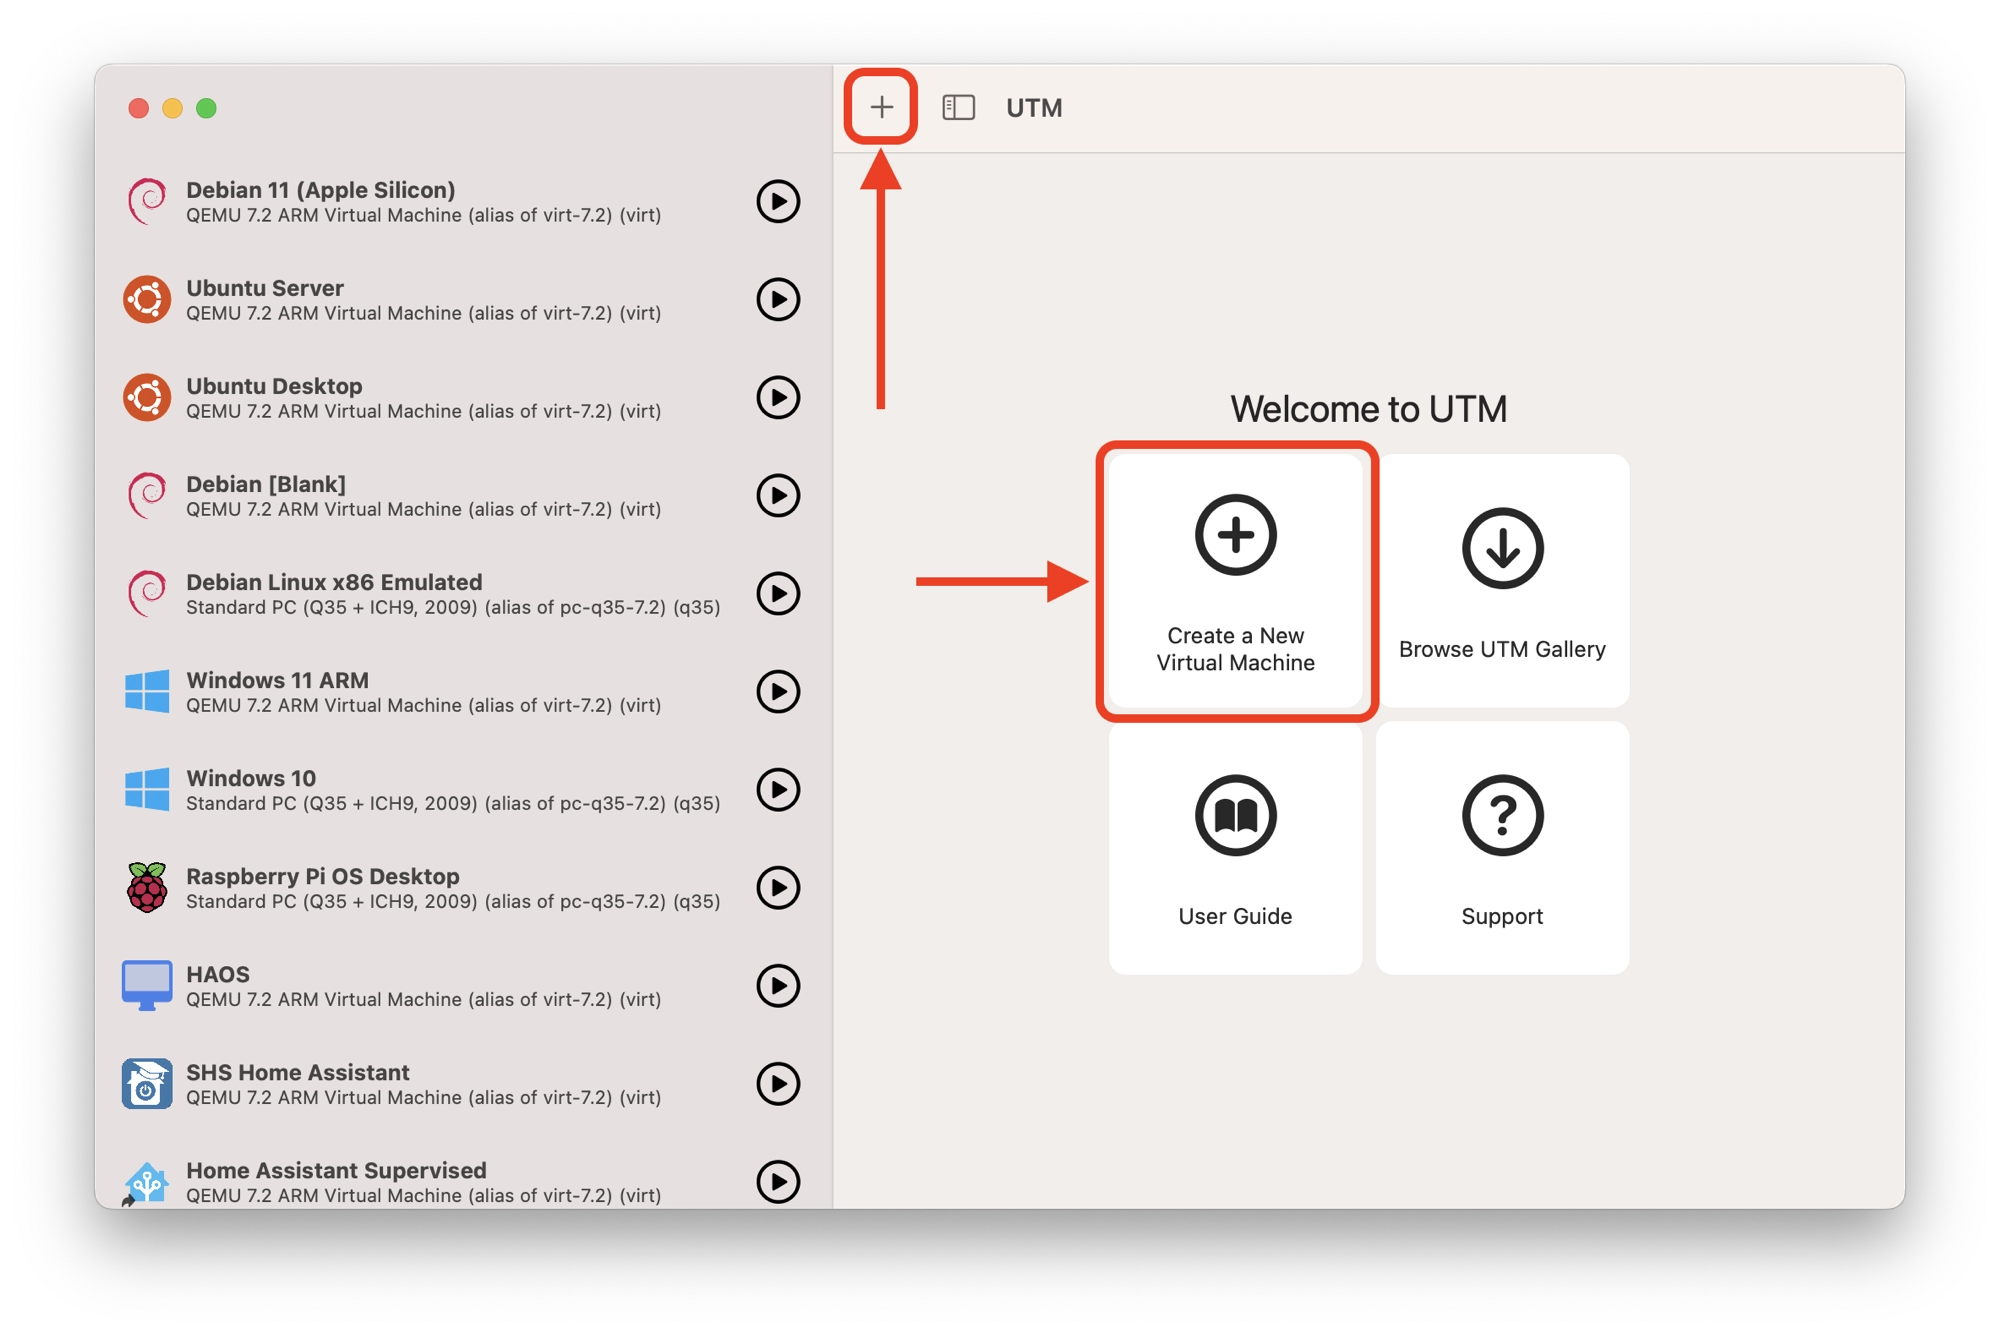
Add a new virtual machine
In order to add a new virtual machine in UTM, click the ‘+’ button at the top of the main window, or choose Create a New Virtual Machine from the main screen:
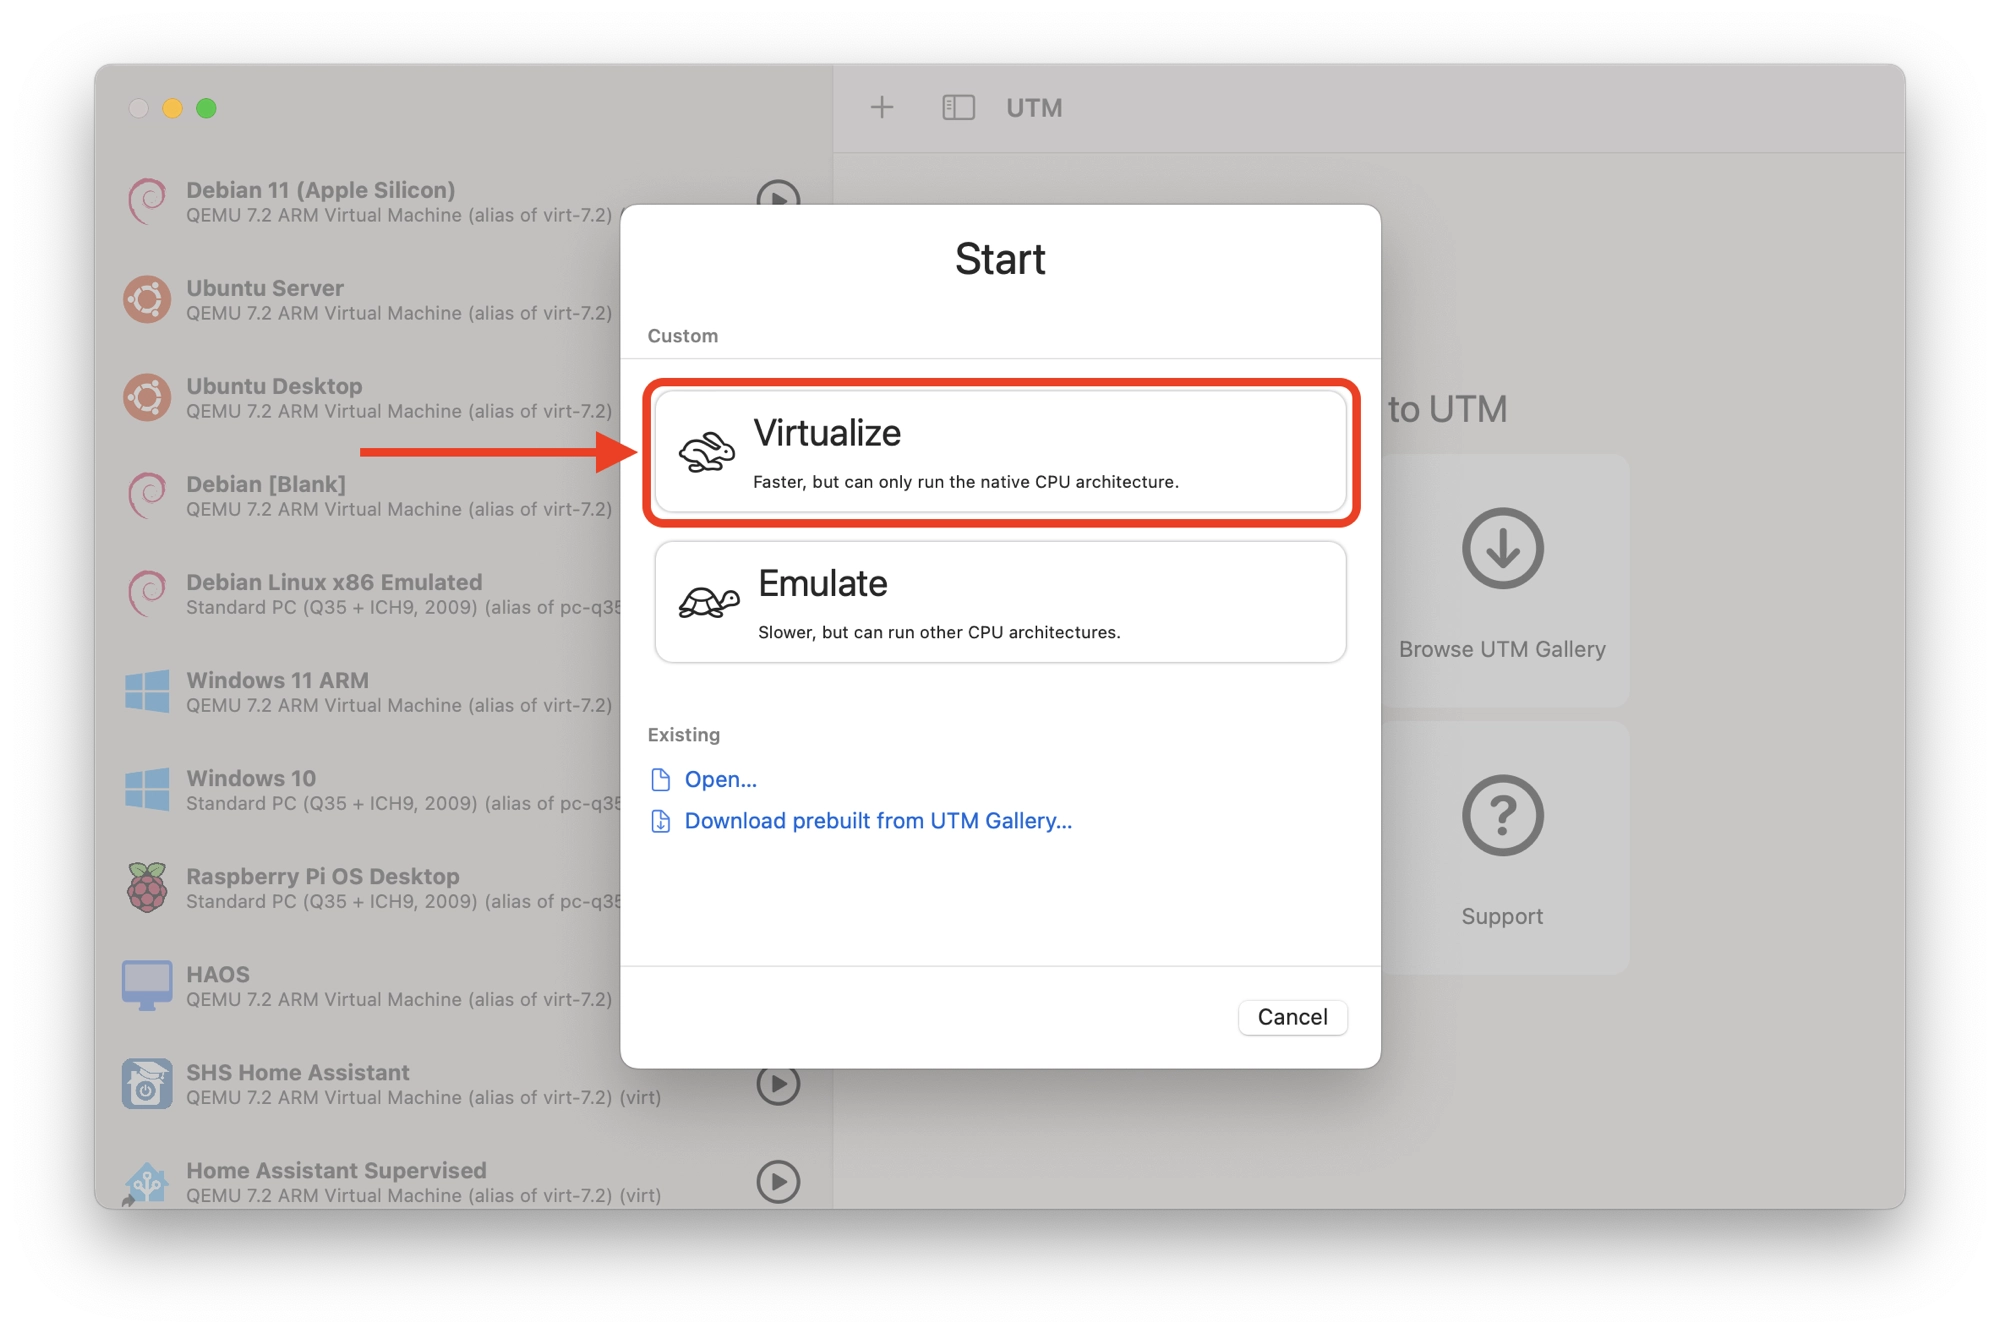
Should I Virtualize or Emulate Debian?
On the first screen, you have the option to choose between virtualization or emulation:
- Virtualization: Virtualization is a technology that enables the creation of virtual versions or replicas of computer resources, such as operating systems, servers, storage devices, or networks. It allows multiple operating systems or applications to run concurrently on a single physical machine. The virtualization layer, known as the hypervisor, manages the allocation and sharing of the underlying physical resources among these virtual instances.
- Emulation: Emulation, on the other hand, involves replicating the behavior of one system or device on another system or device. It entails creating a software or hardware environment that imitates the functions and behaviors of a different system, enabling software or applications designed for one platform to operate on another platform.
Virtualization is generally the preferred choice as it offers significantly better performance compared to emulation. Emulation should only be utilized when the guest operating system or the programs you intend to emulate are incompatible with your computer’s architecture.
As Debian is available for both ARM and Intel architecture, it is possible to virtualize it on any Mac so long as you have downloaded a Debian installation image that is compatible with your system architecture.
Select the virtualization option by clicking the large button:
Choose an operating system
On the next screen we are given the option to choose the type of operating system, which can simplify the configuration.
In this example we will be installing Debian, a popular version of Linux. Therefore go ahead and choose Linux for the operating system.

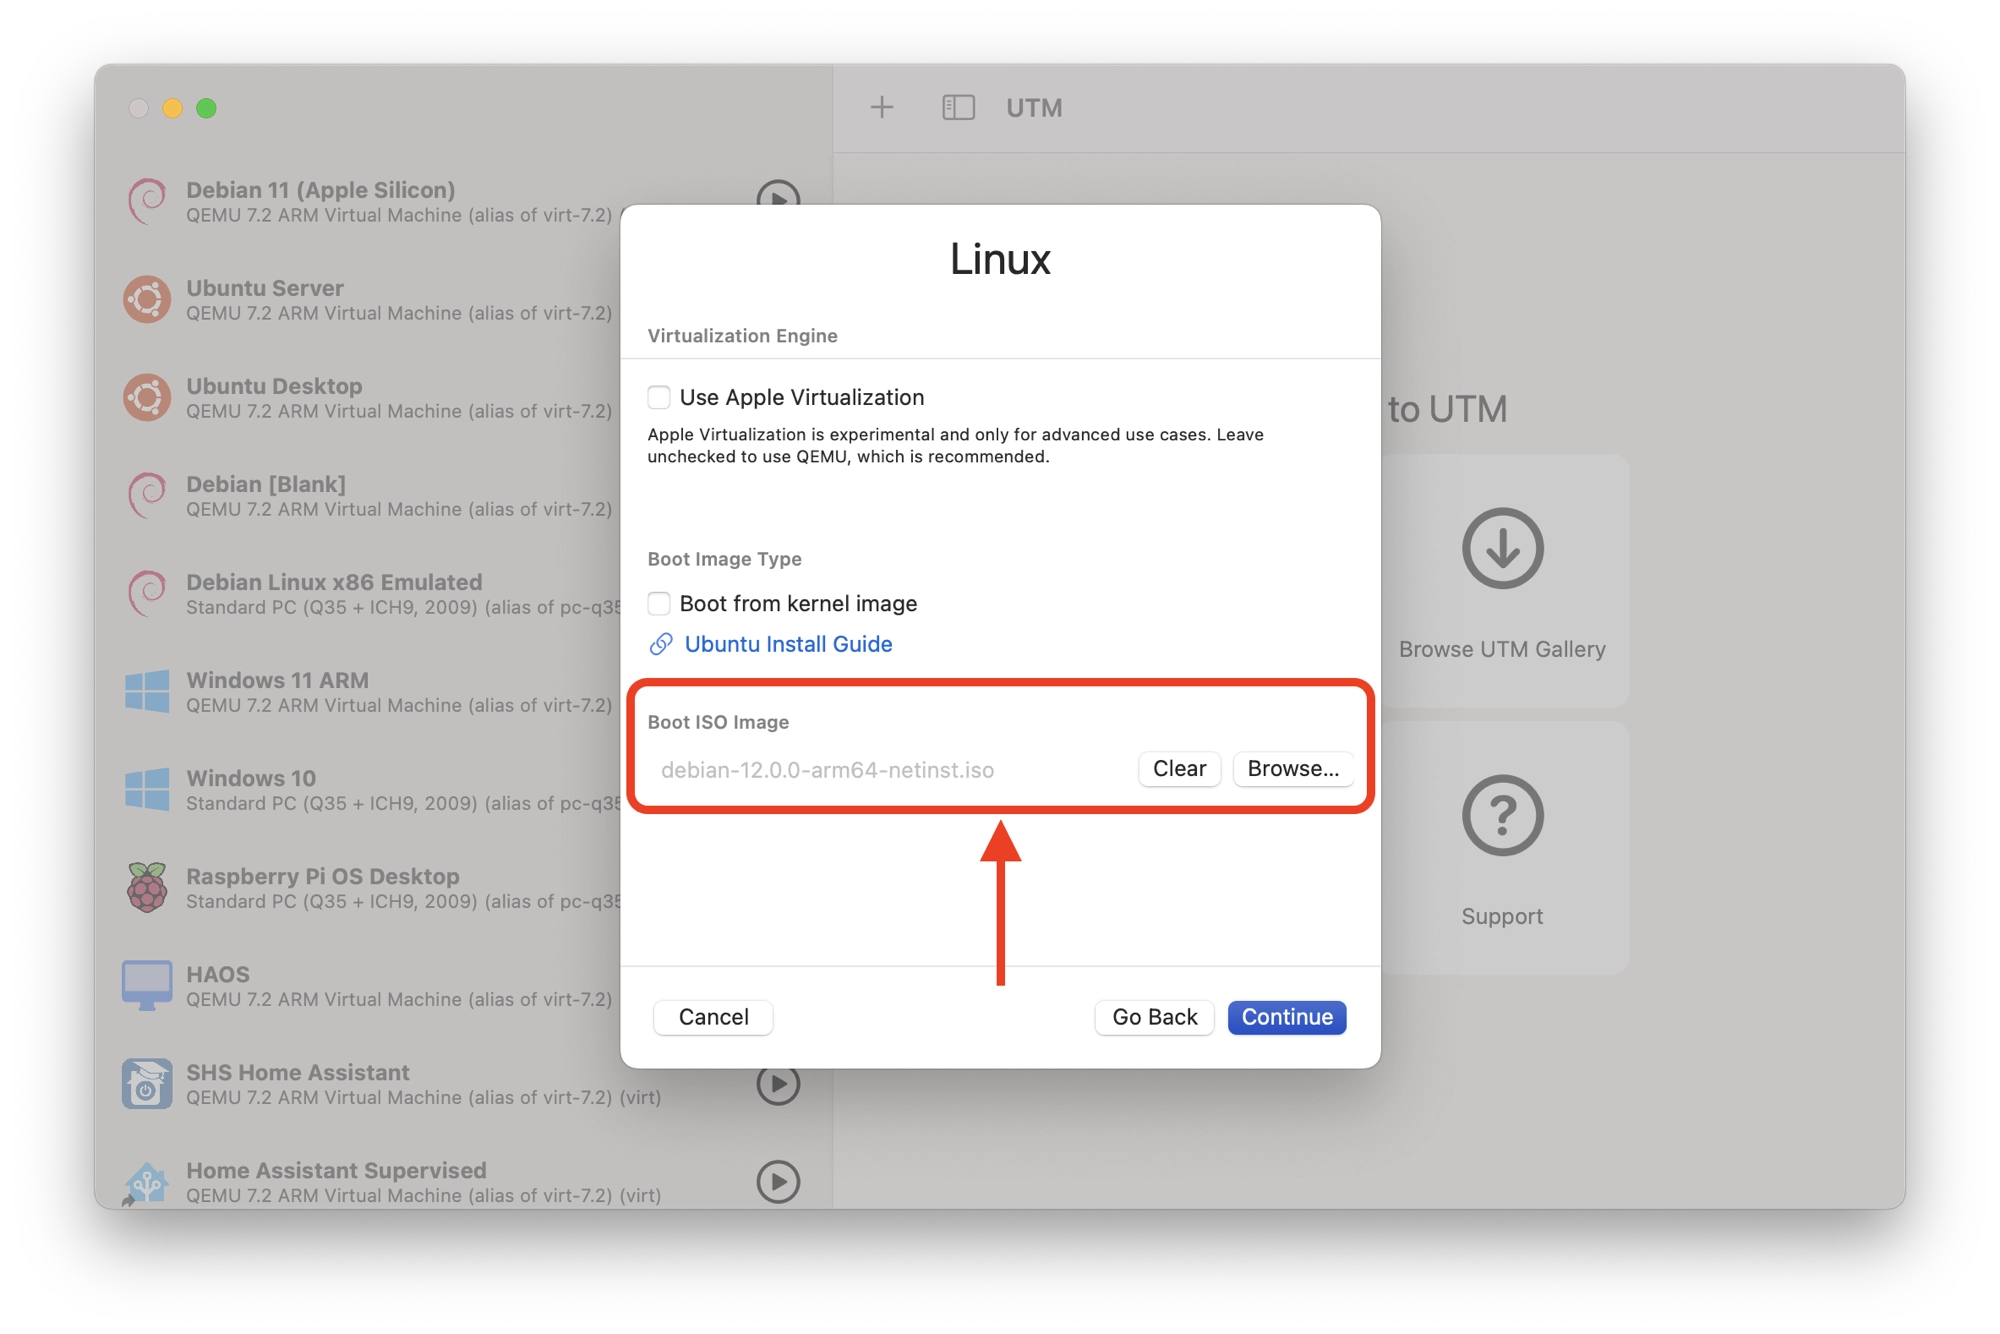
Choose the boot image
Next we need to supply UTM with the disk image that contains the Debian installer. If you have not yet downloaded the Debian installer, you can find the download links in the downloads section of this article.
Click the Browse button and locate the Debian .iso installation image file and select it. Then click Continue to move to the next section.
Choosing the hardware settings
Next, let’s configure the hardware settings for our Debian VM. When determining the amount of RAM to allocate, a general guideline is to choose a value between the minimum requirement specified by the guest OS and half of the total RAM available on the host OS system.
The number of cores can also be specified, but for a virtualized Debian system, it is typically safe to keep this setting at its default value.
If you want to enable hardware OpenGL acceleration on the guest OS, you can check the “Enable hardware OpenGL acceleration” box. This feature is beneficial if you plan to use graphics-intensive applications within the guest OS, although it may introduce some system instability.
If you’re uncertain about the optimal settings to use, you can start with the default configurations and make adjustments later if necessary.
Choosing the disk size
On the subsequent screen, you will have the option to specify the size of the virtual hard disk, which determines the disk size visible to Debian.
You can choose a size starting from the minimum requirement of the guest OS. For a standard Debian Desktop installation, the minimum requirement is typically around 20GB.
If you are installing Debian without a graphical user interface, it is advisable to allocate at least 10GB of disk space. However, for a minimal installation, a disk size as low as 2GB can be sufficient.
While it is possible to adjust the virtual disk size after installing the guest OS, the process can be quite complex. It involves repartitioning the disk, relocating any swap partitions, and expanding the filesystem within the guest OS.
Hence, it is recommended that, whenever feasible, you select a disk size that meets your requirements during the initial configuration of the VM. This approach saves you from the cumbersome task of resizing the disk later on.
Choosing a shared location
If you wish to share files between your guest and host operating systems, you can choose a shared folder.
So long as you install the guest additions, you will be able to access this folder from both the guest and host operating systems, allowing you to easily transfer files.
Click browse and navigate to a folder that you want to share, then click open to select it. Once selected, you will see the path appear under the shared directory path.
You can also check the share is read only box if you wish to prevent the guest OS from writing to the directory.
Finalizing and starting the VM
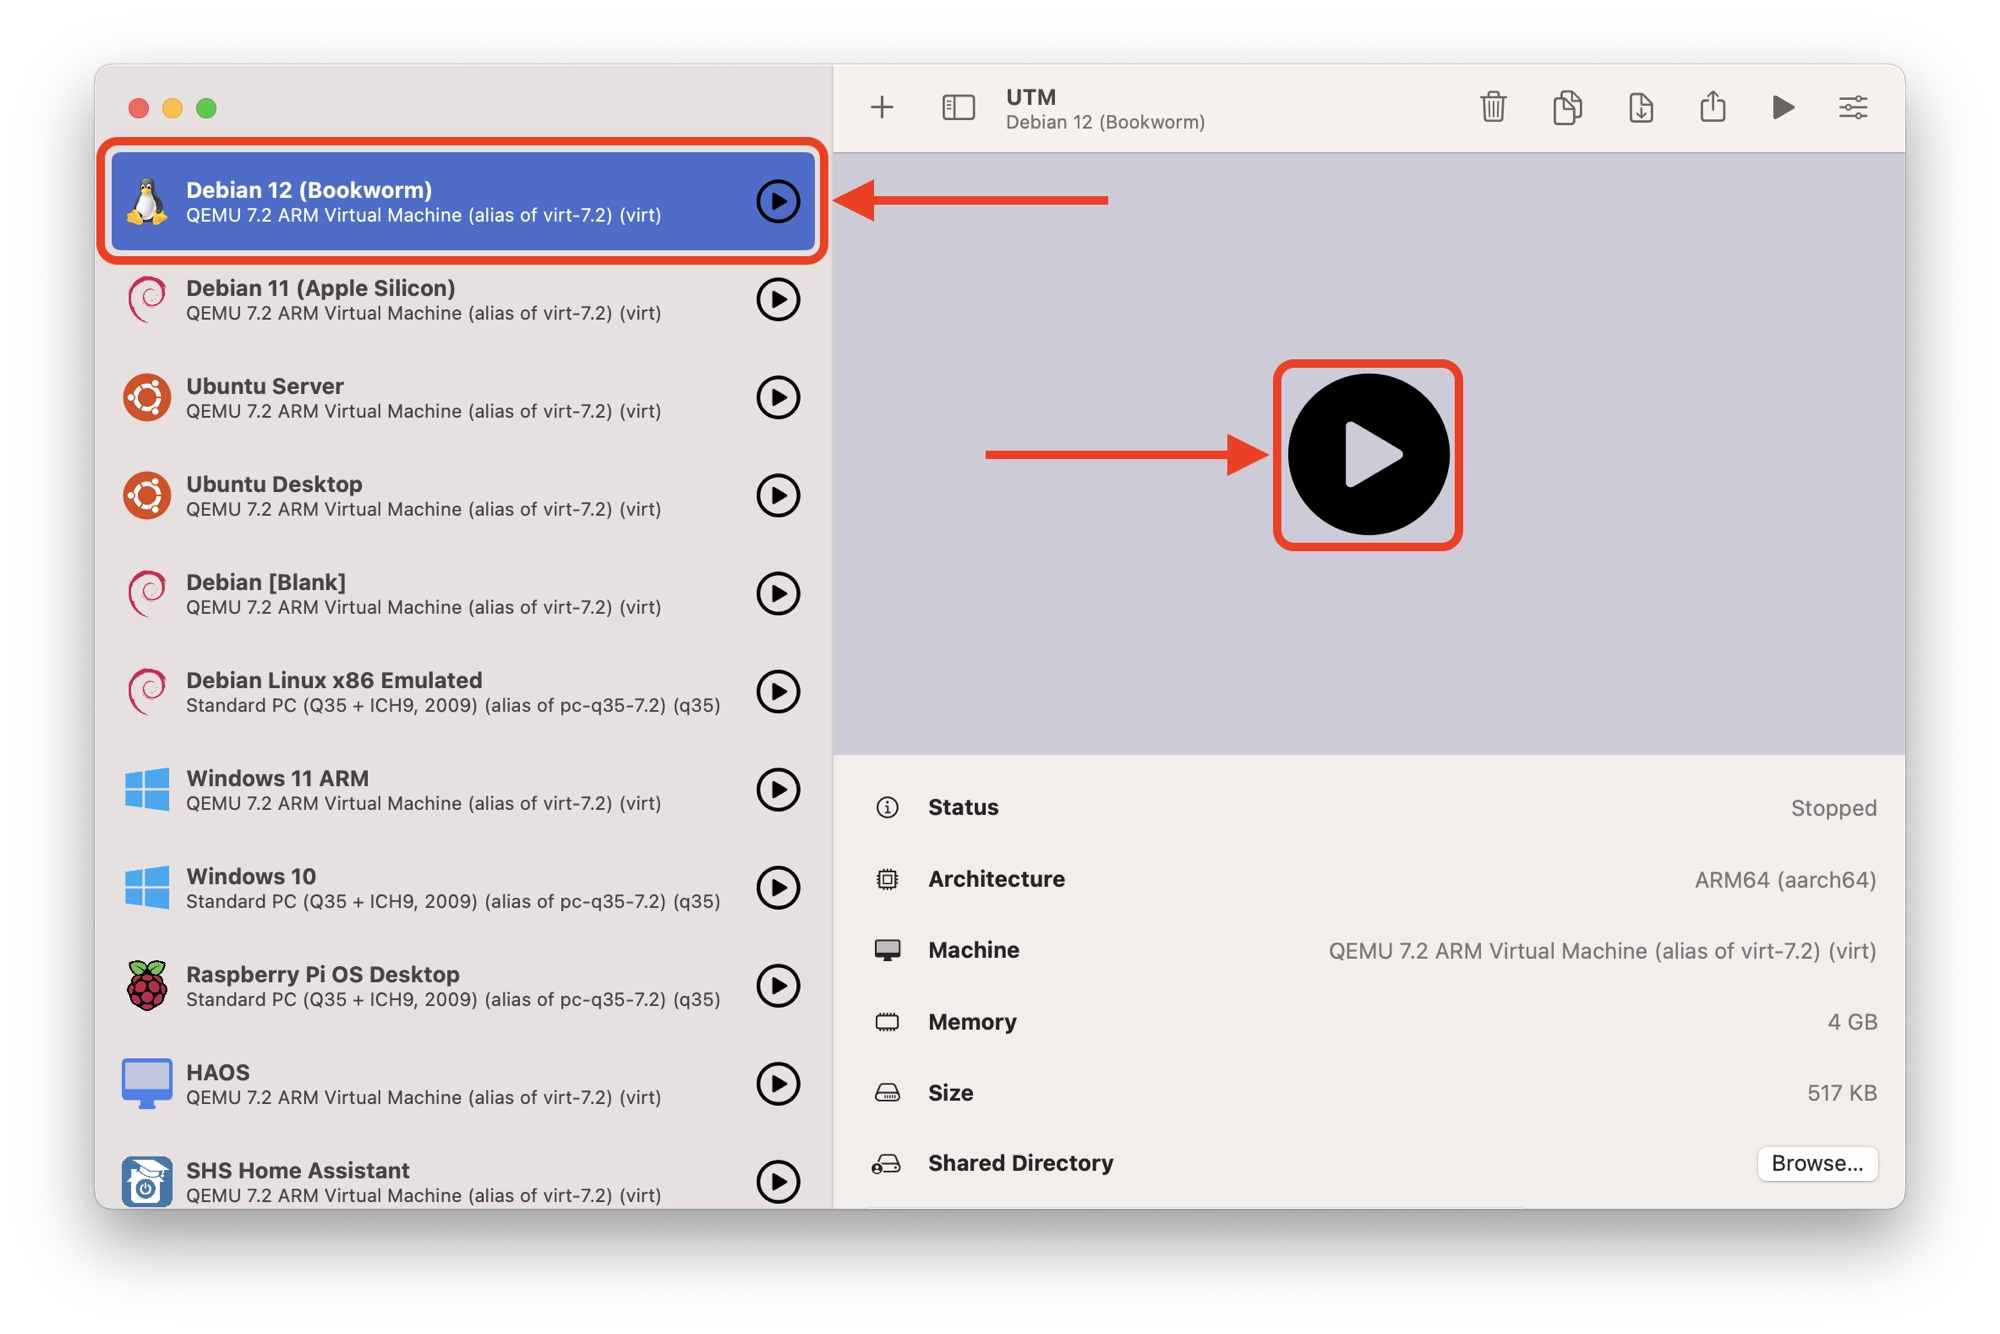
On the final screen you have the opportunity to give your new VM a name, such as Debian 12 (Bookworm). You can review the settings and then click save to add your new virtual machine to UTM.
Next, we can start the newly created virtual machine. Select the VM from the left-hand sidebar menu and then click the play button to boot up the virtual machine.
Note that the default display and network settings should be adequate to get things up and running. You can adjust these at a later point if necessary.
Installing Debian on a UTM Virtual Machine
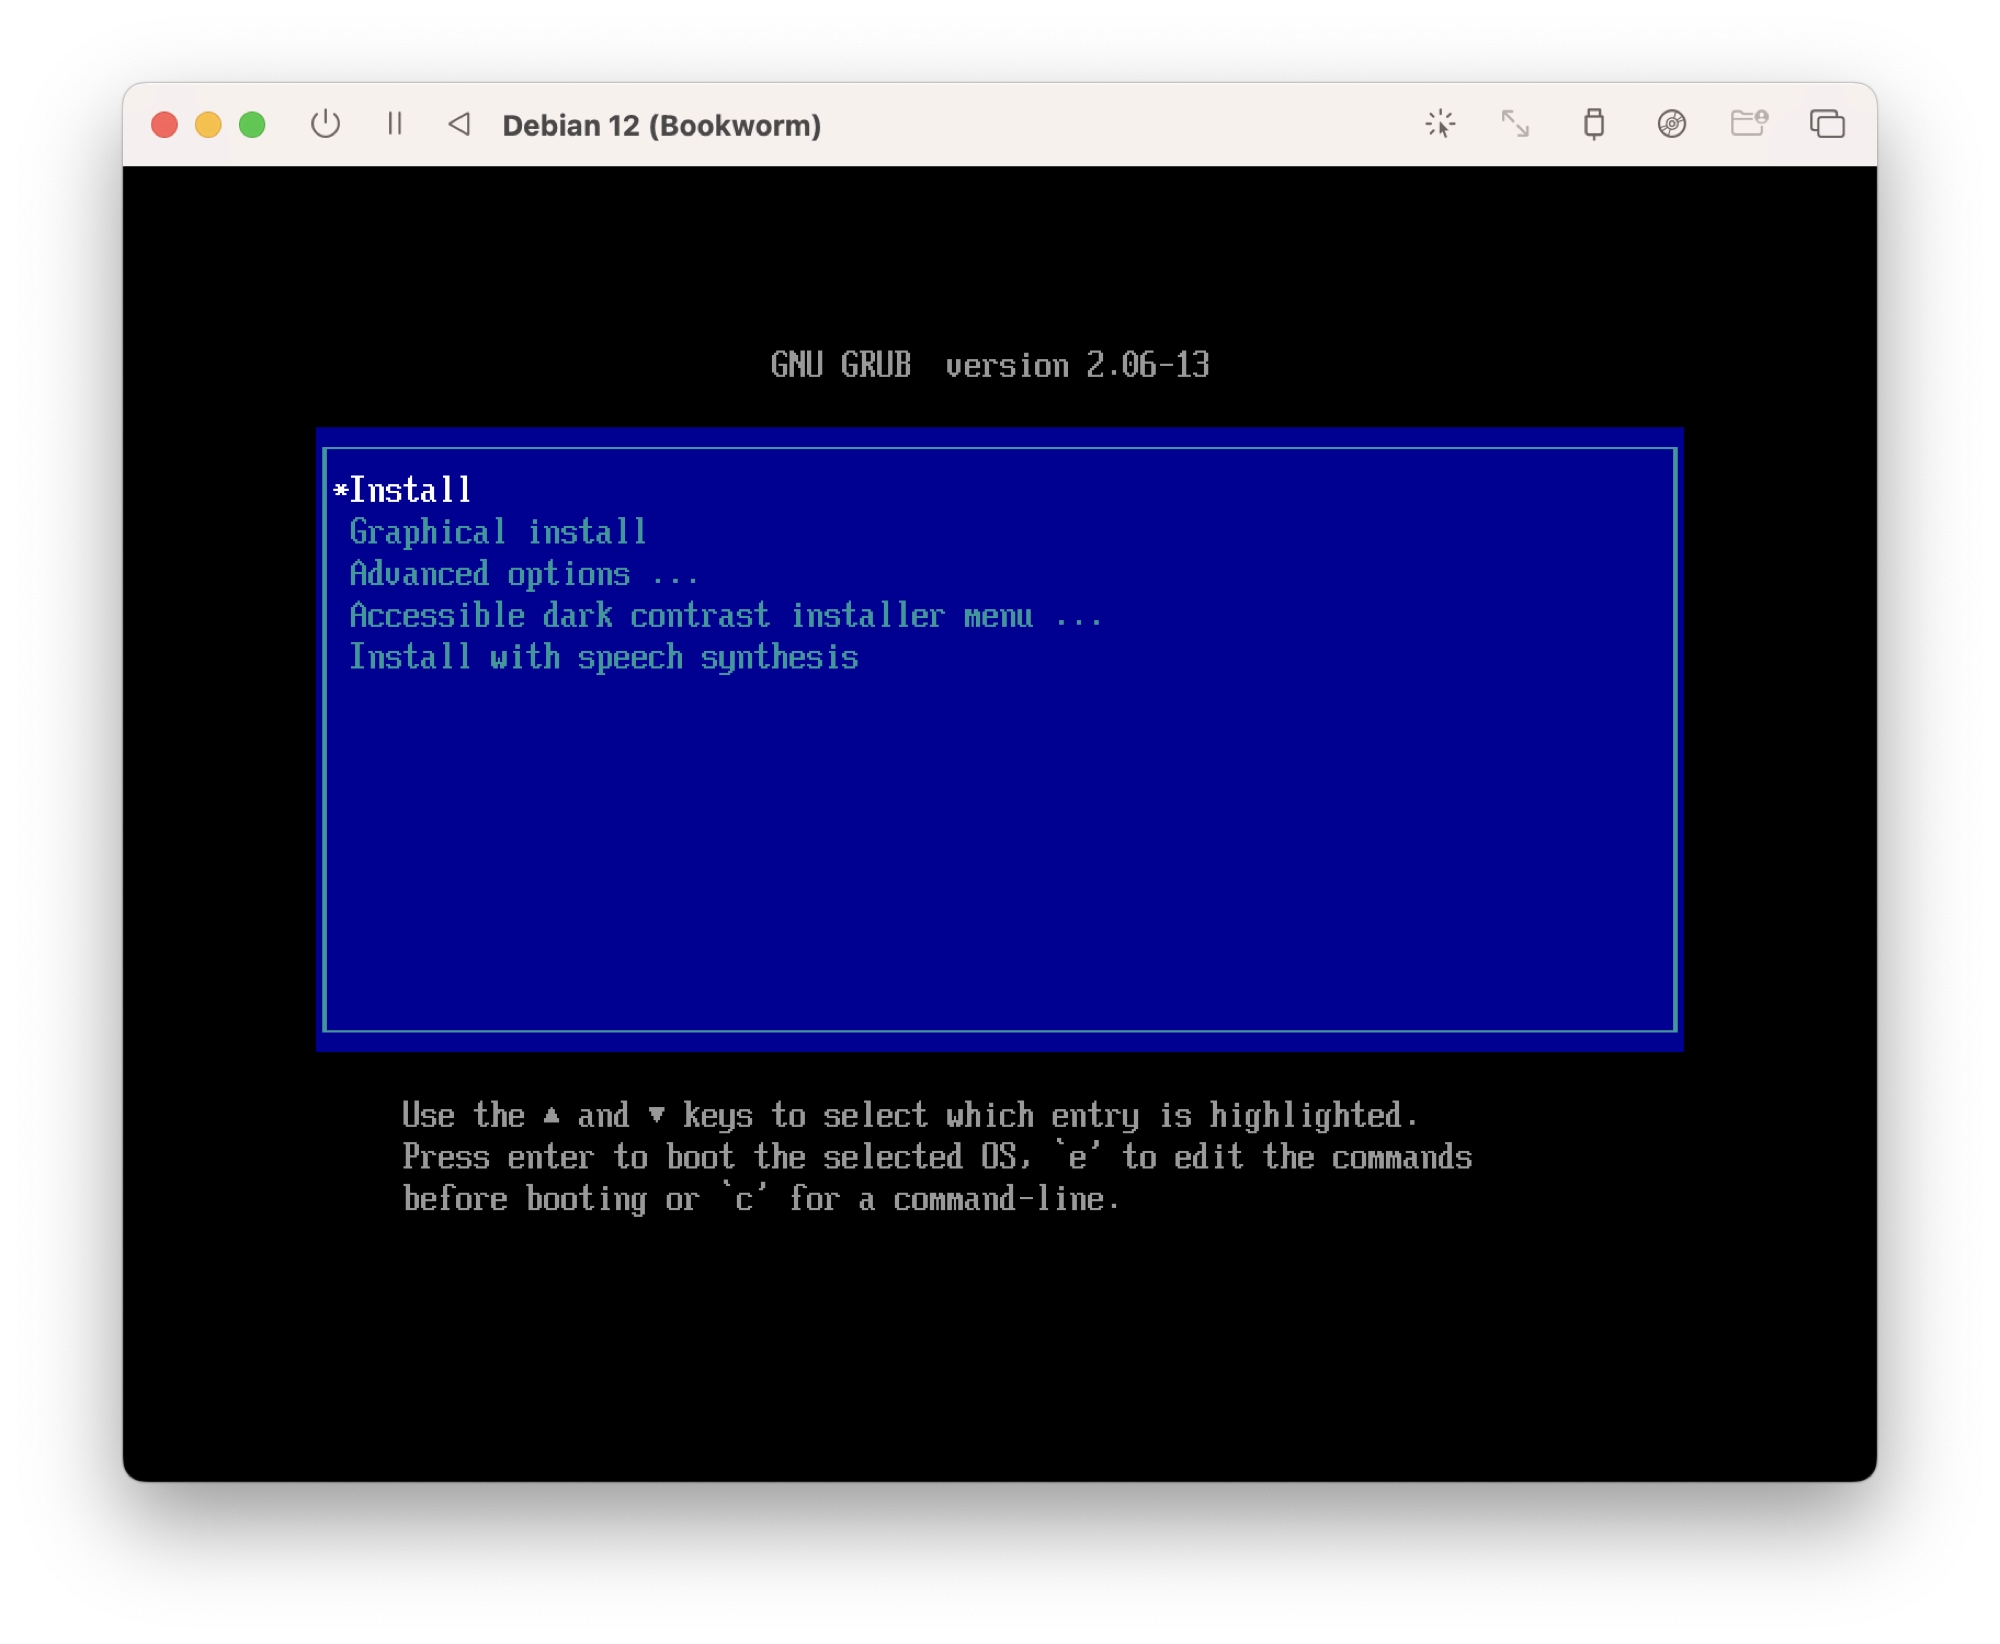
Once you have created and booted up the new virtual machine, the Debian installation will begin.
- Choose Install to begin the installation (you can use Graphical Install if you prefer).
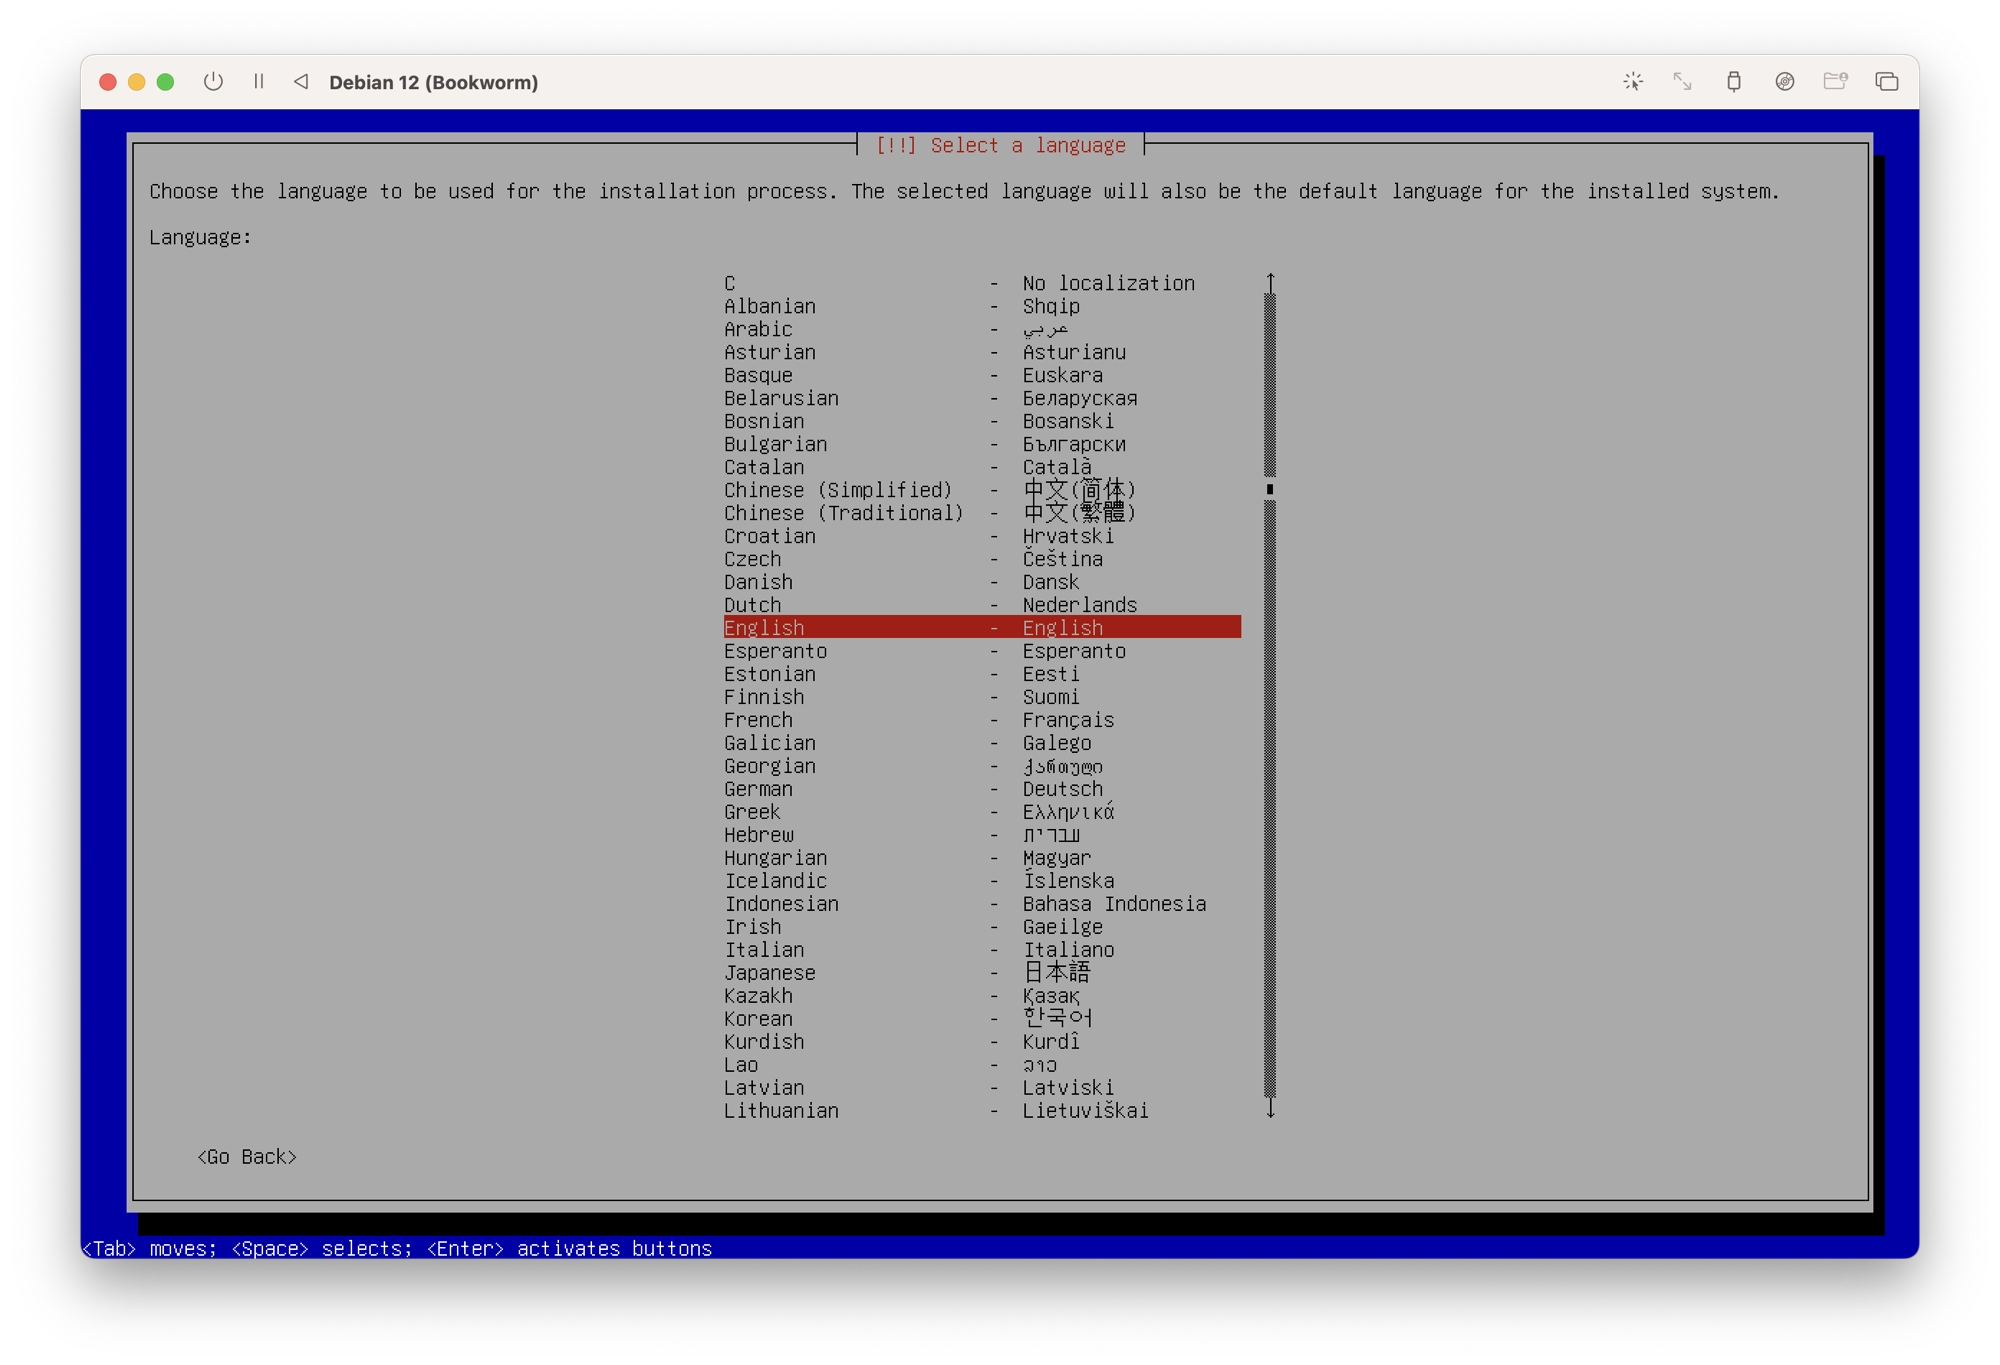
Set up Languages and Location
- First, choose the default system language. This will also be the language used for the installation process:
- Choose your home country. This location will be used to set your time zone and other aspects of the system that are dependent on location.

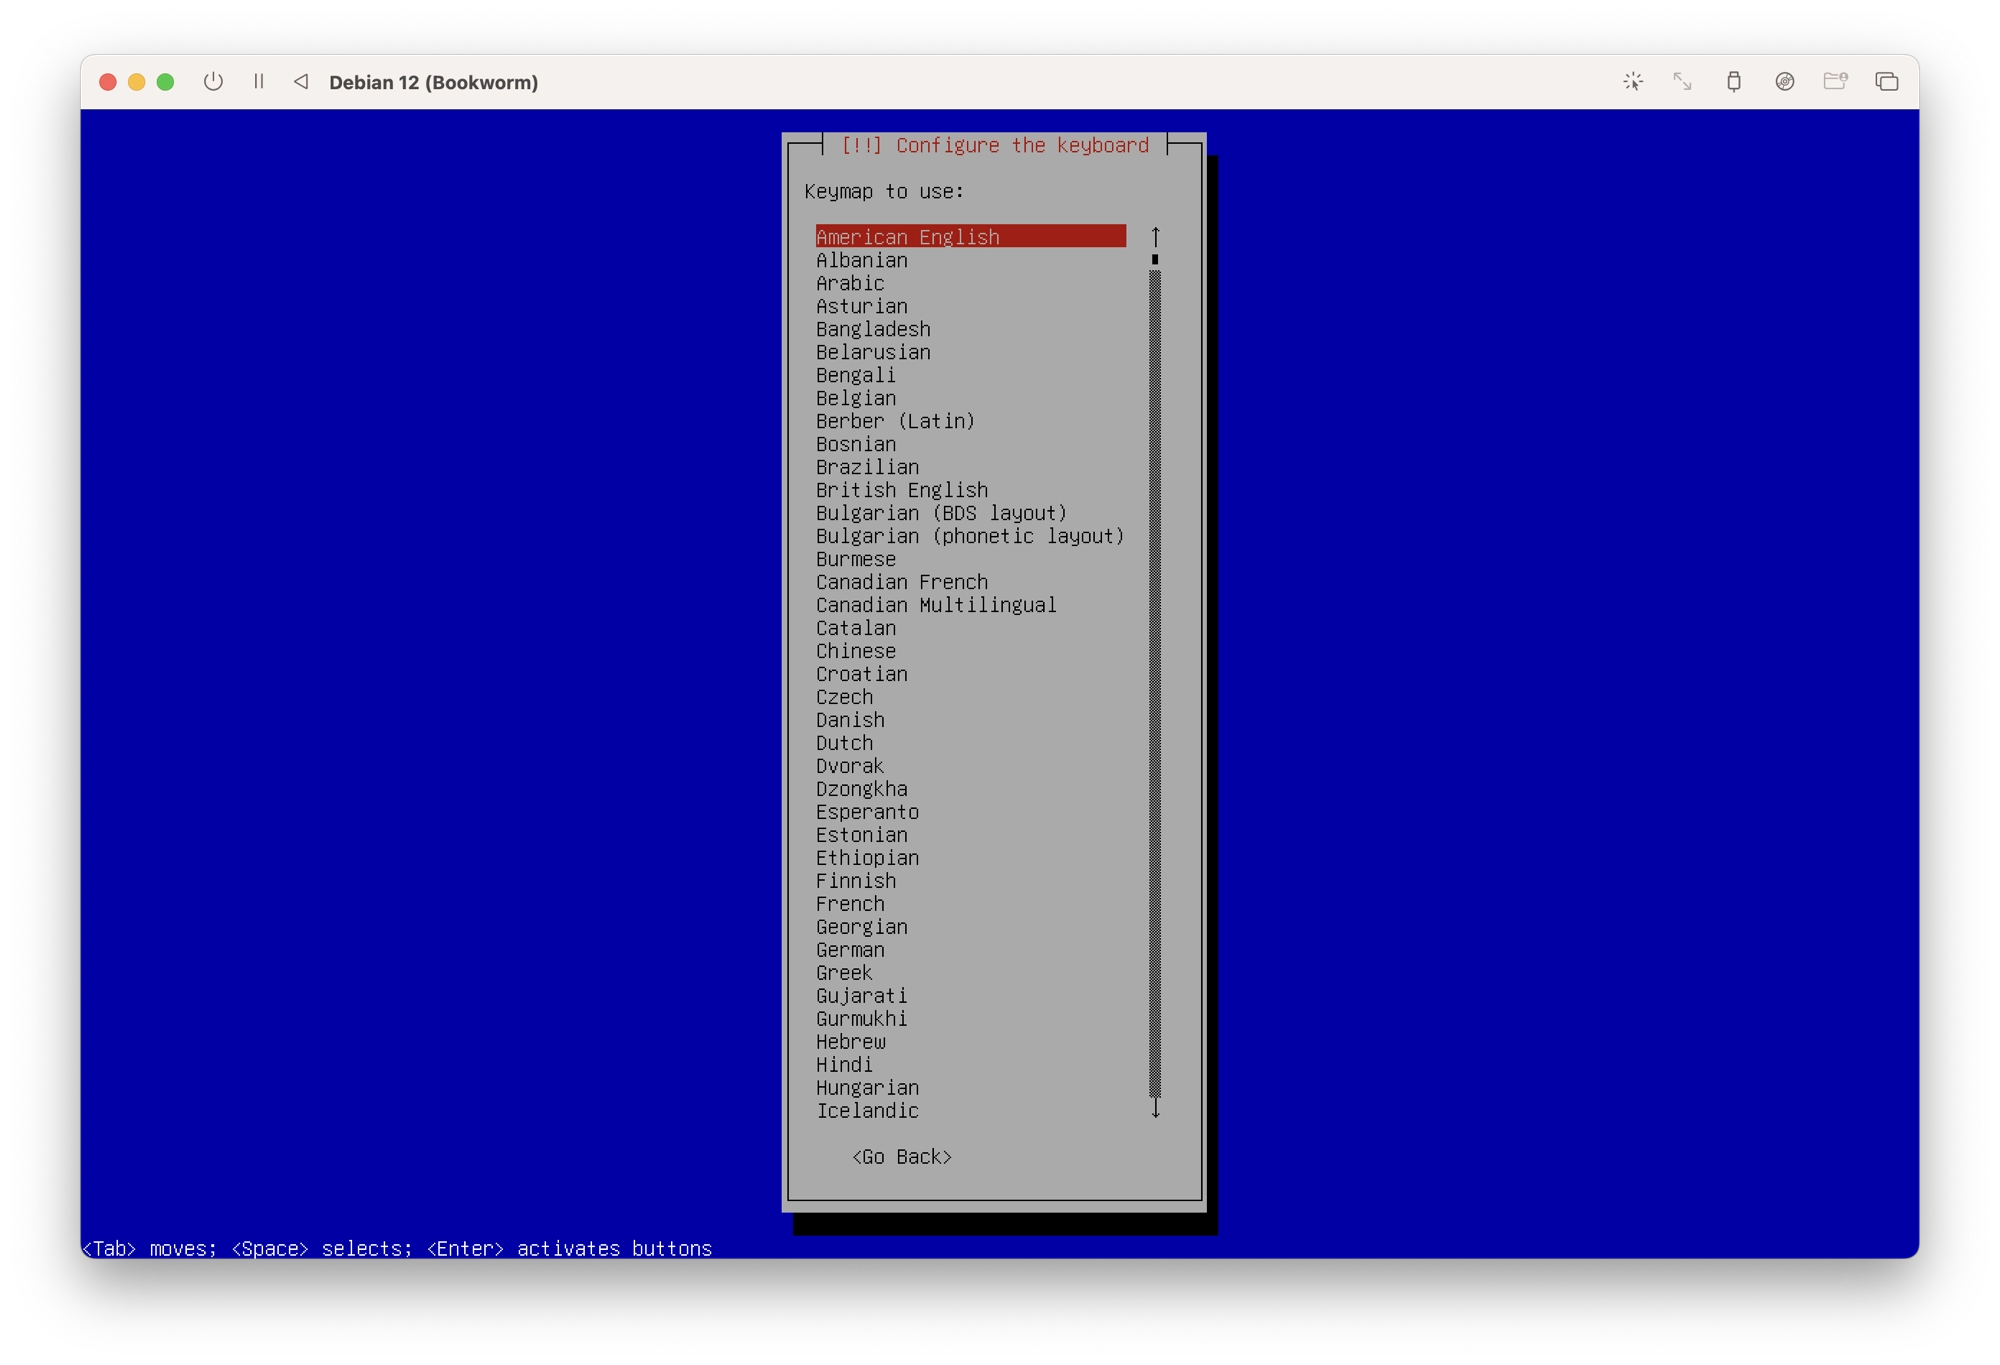
- Choose your keyboard layout.
Set Up the Accounts
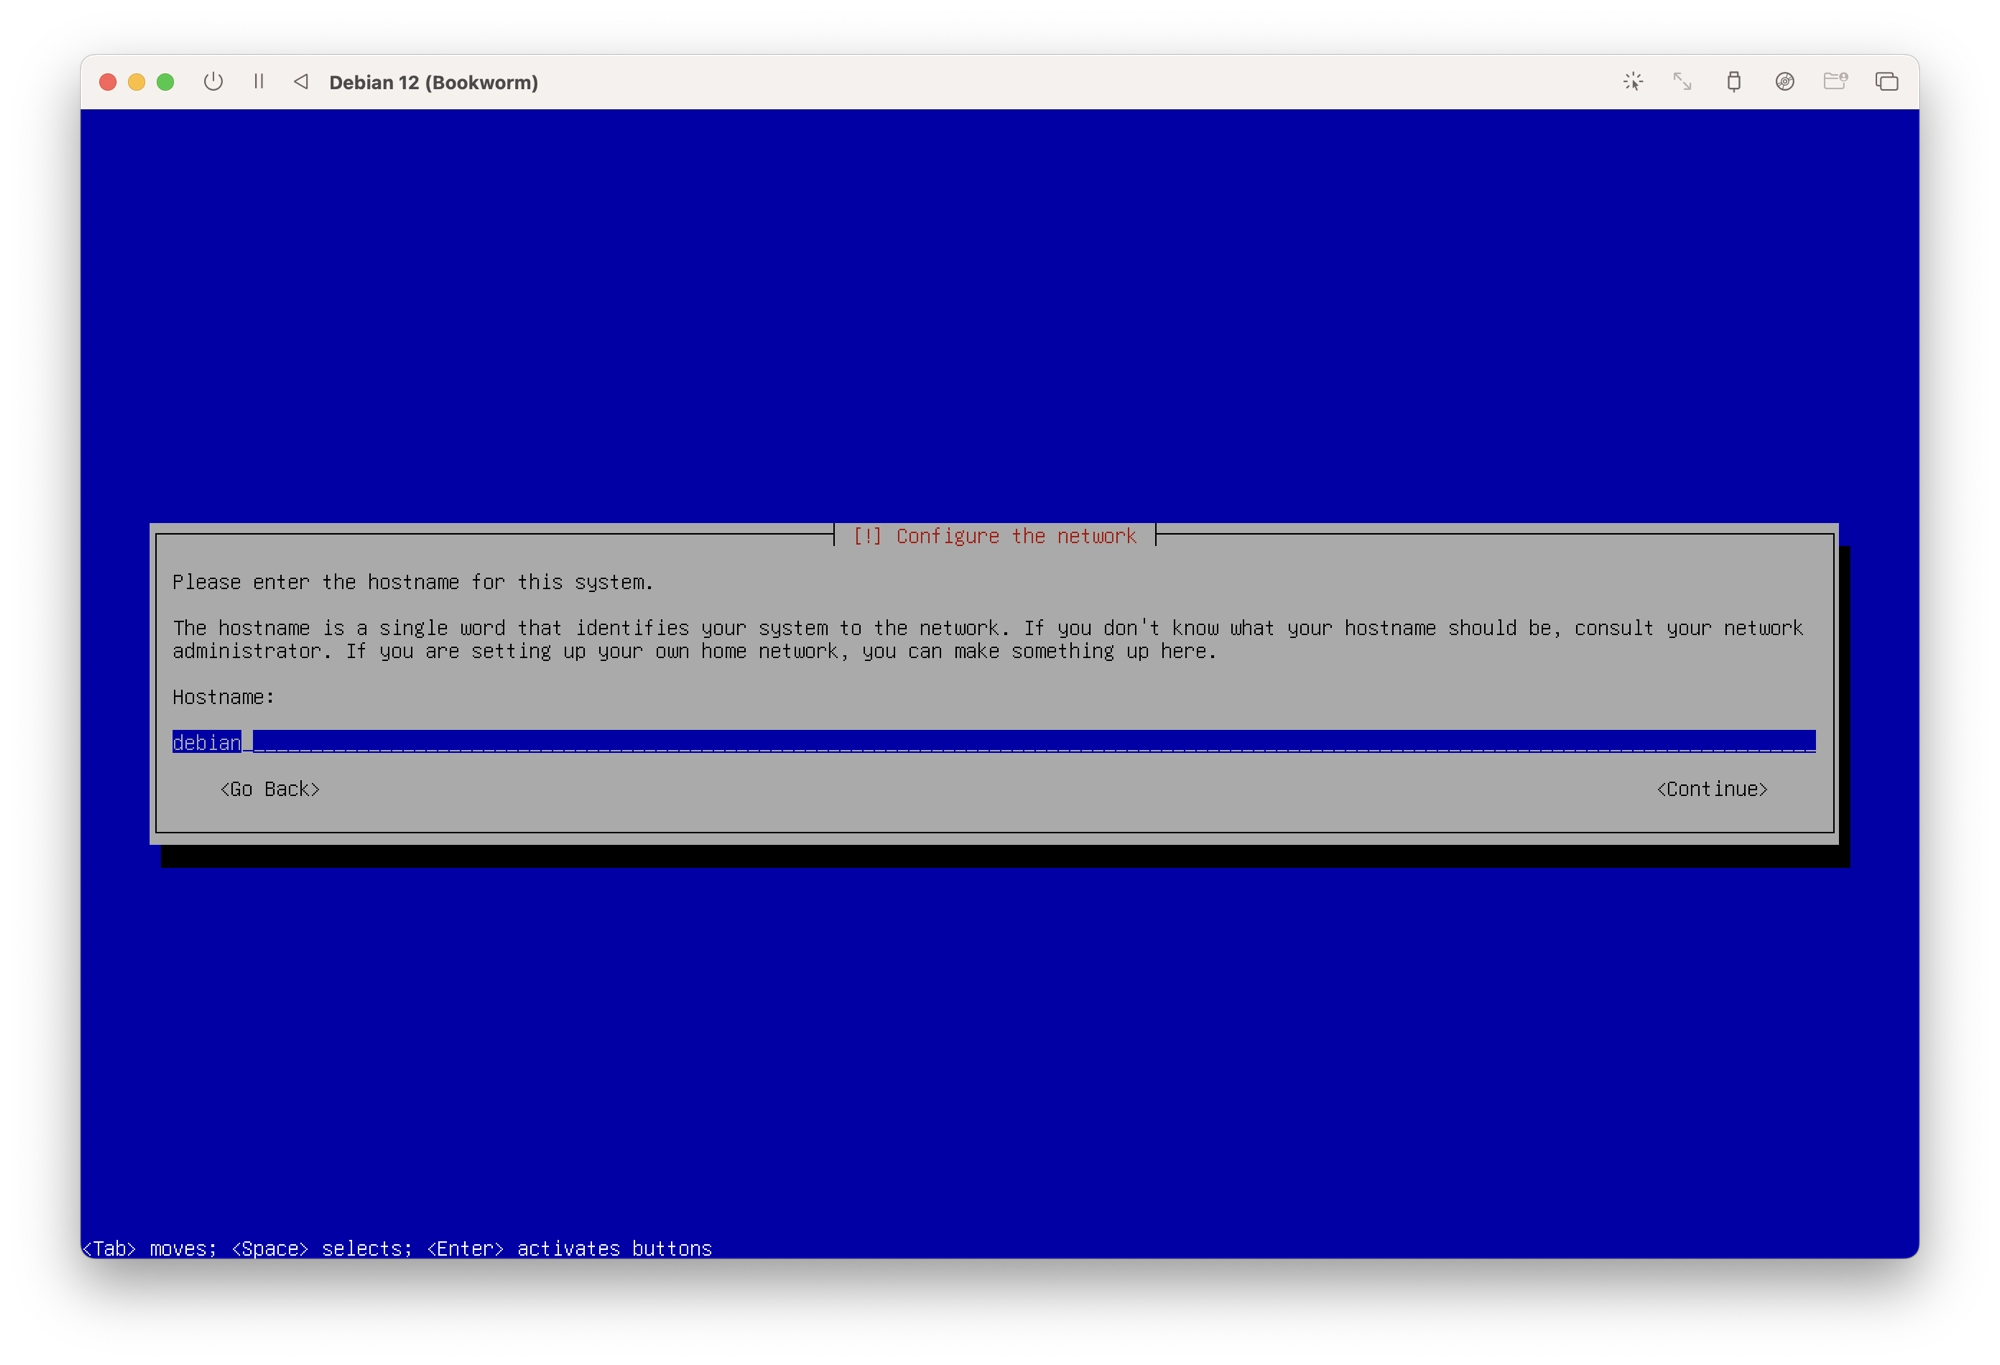
- The hostname is a single word that usually describes the system and can be thought of simply as a name for the system. For this example I will use the default hostname debian.
- A domain name is not required, leave this blank and press enter to continue.
- Enter a password for the root user. Re-enter the password when prompted in order to confirm. It is important that you make a note of this password and keep it safe somewhere as it can be used to log in to the root account and perform any necessary system tasks.
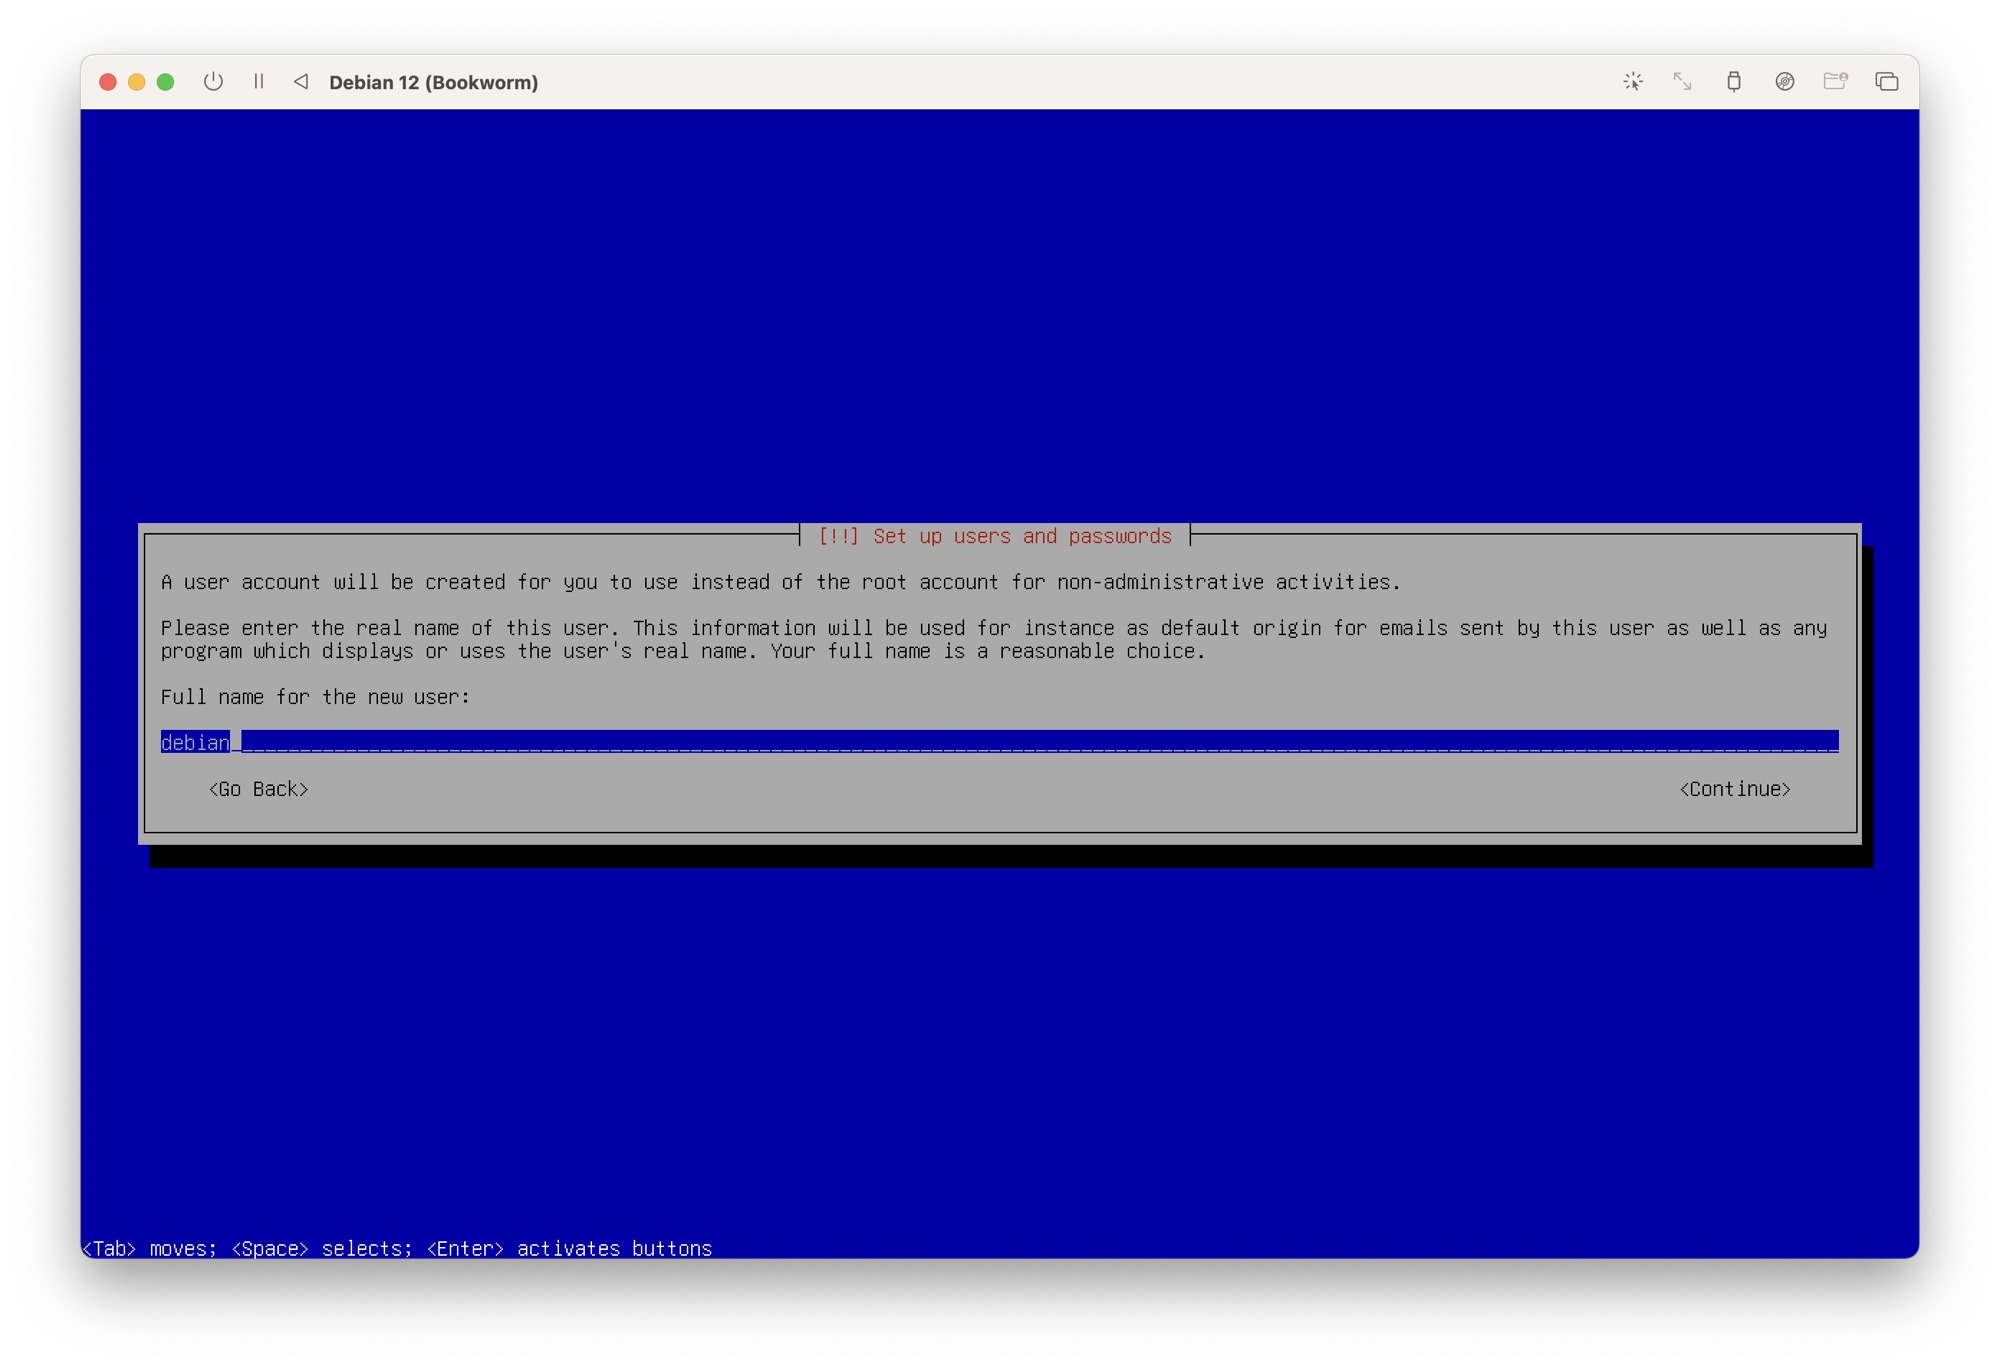
- Enter a name for the system user account. This would usually be your real name, however in this example I will use debian.
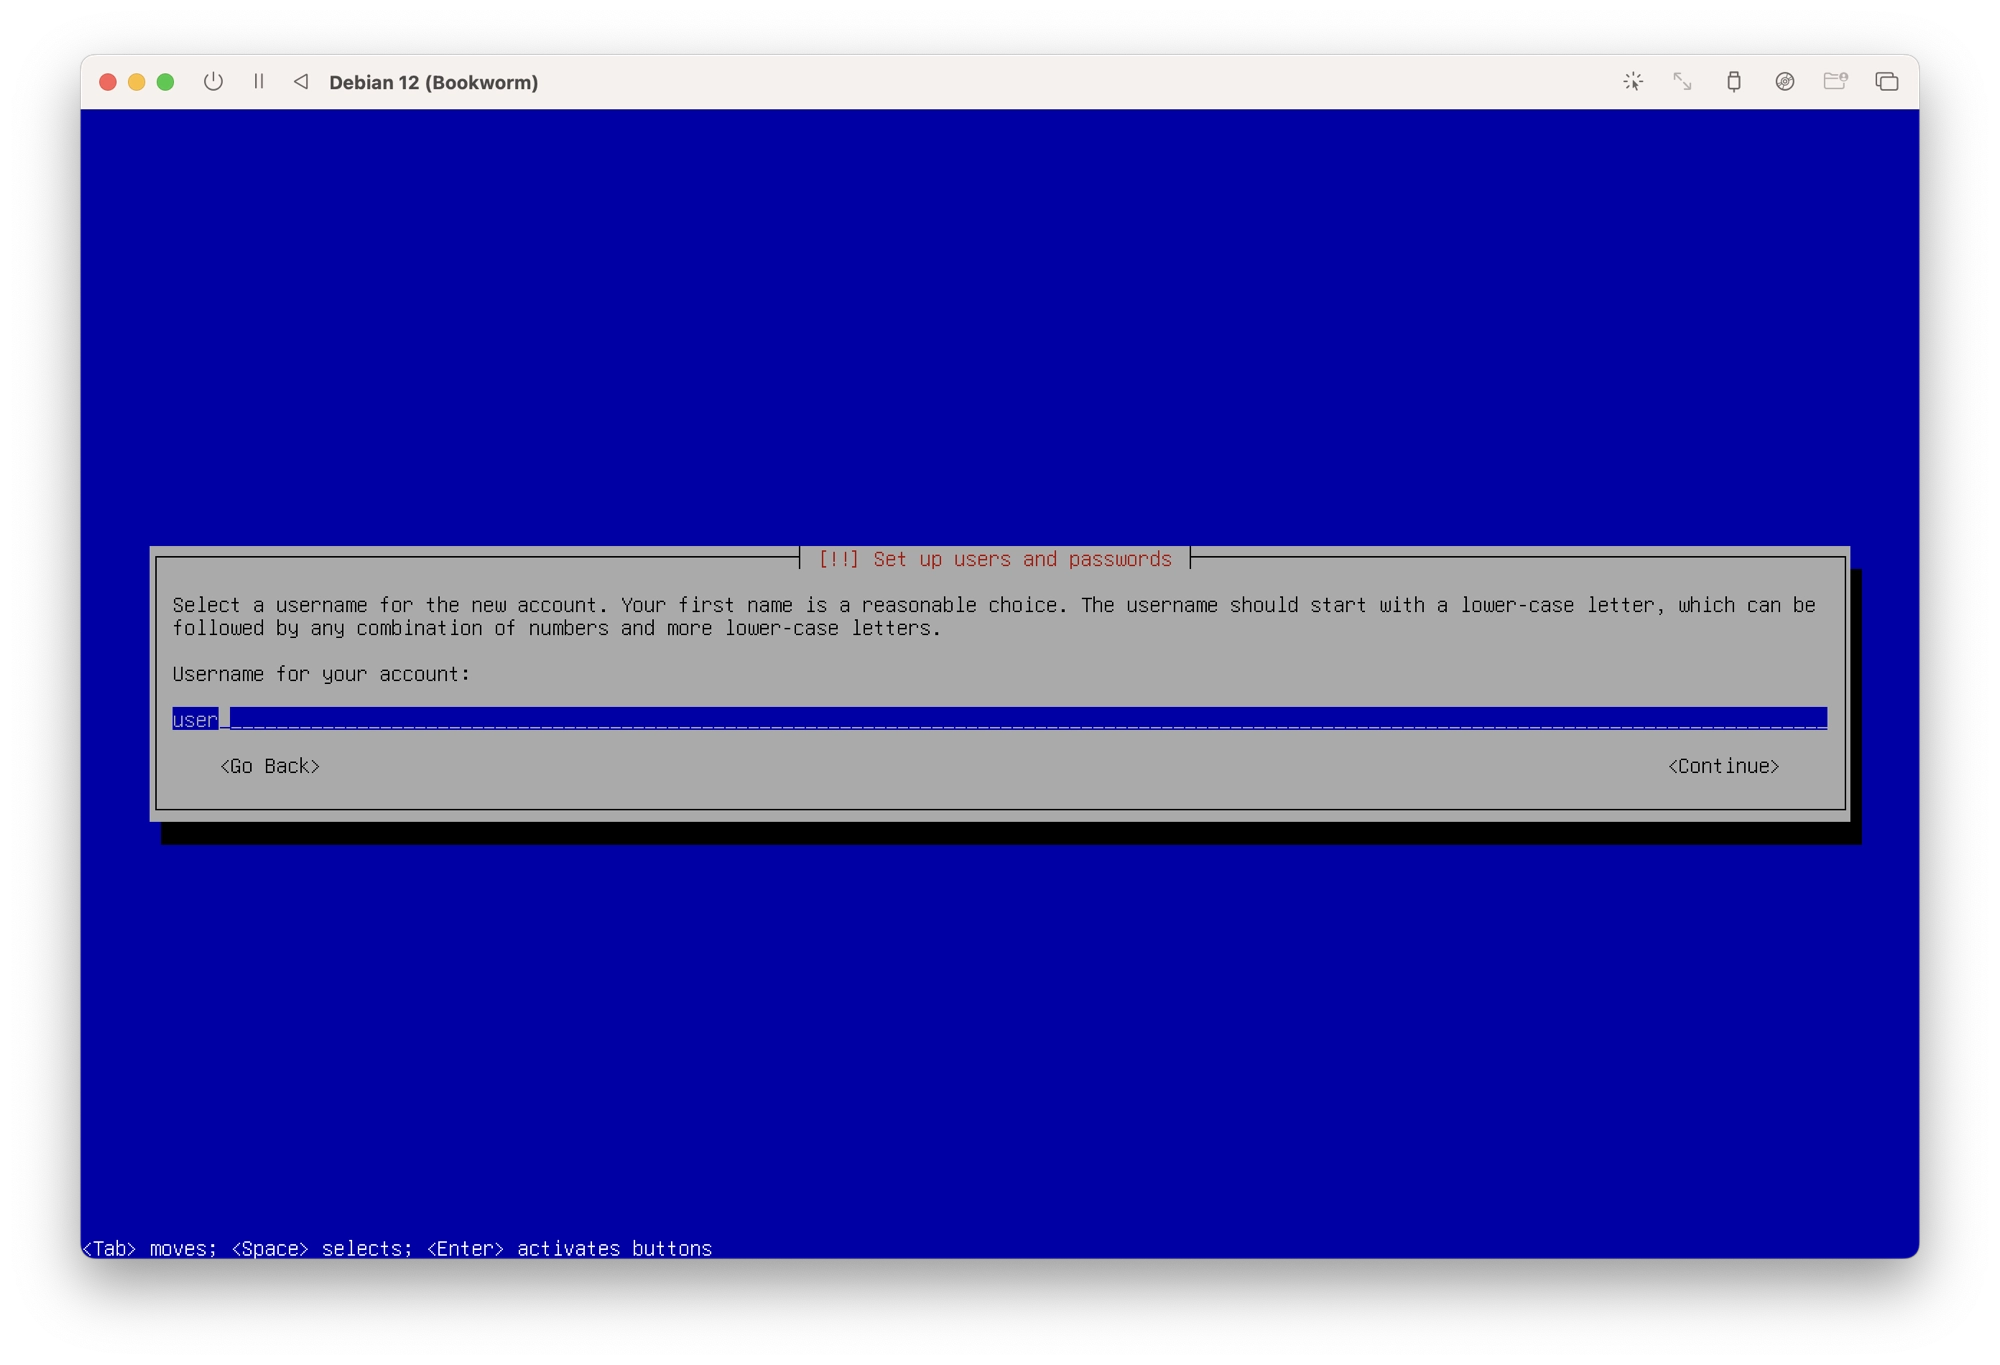
- Enter a username for the user account. This will be the username that you use to login to Debian. In this example I will create the username user.
- Enter a password for the user account. This will be the password used to login to Debian. Re-type the password when prompted to confirm.
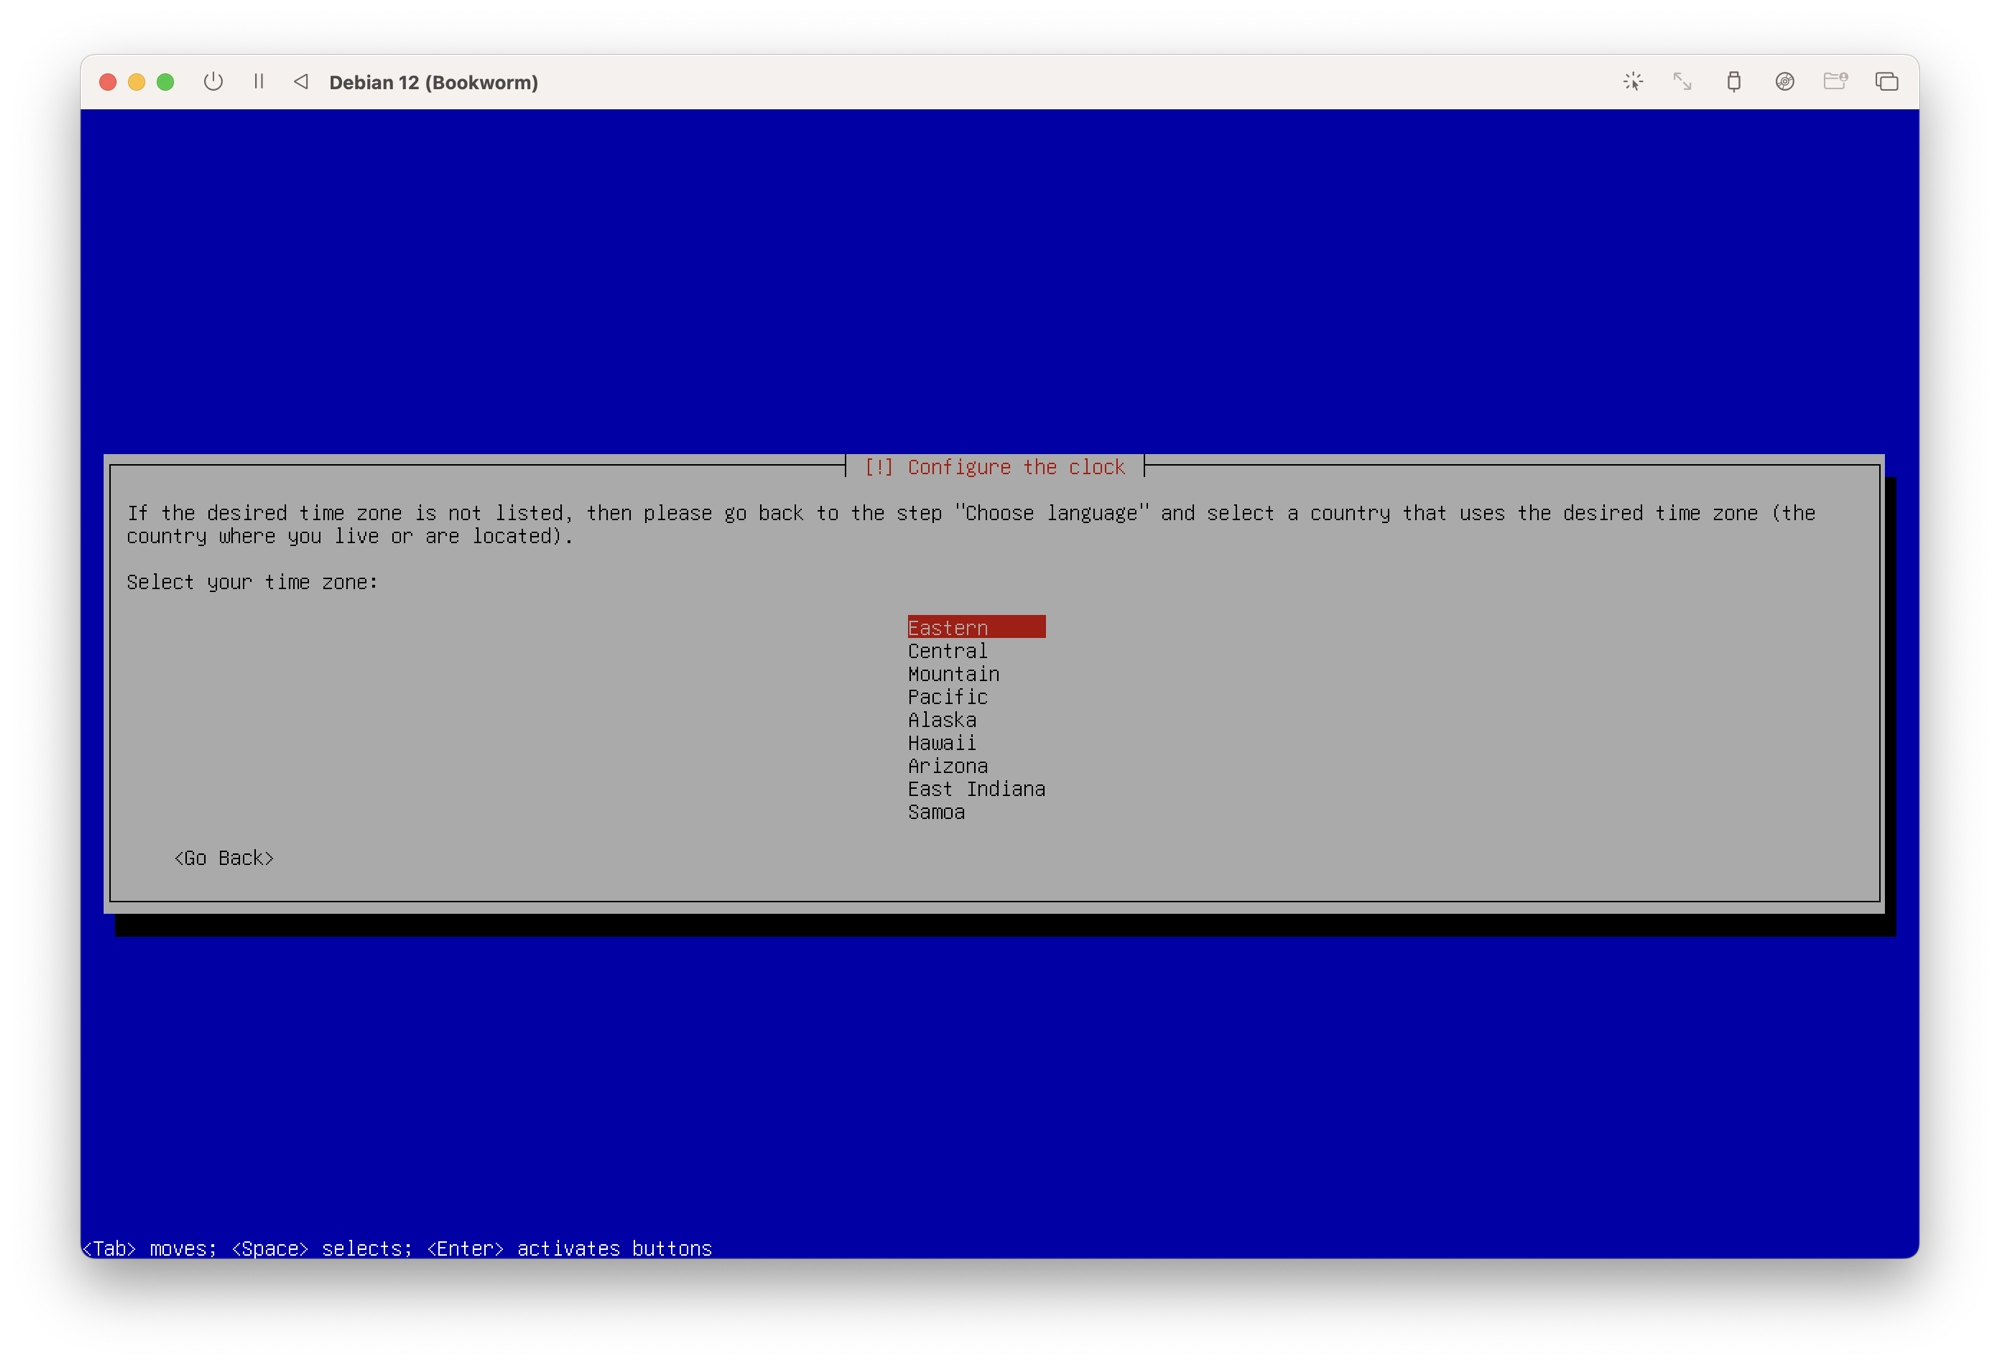
Set Up the Timezone
- Choose your timezone. If you do not see the correct timezone listed, you will need to go back and change the system language. Note that you can change the timezone after installation using the Debian command line.
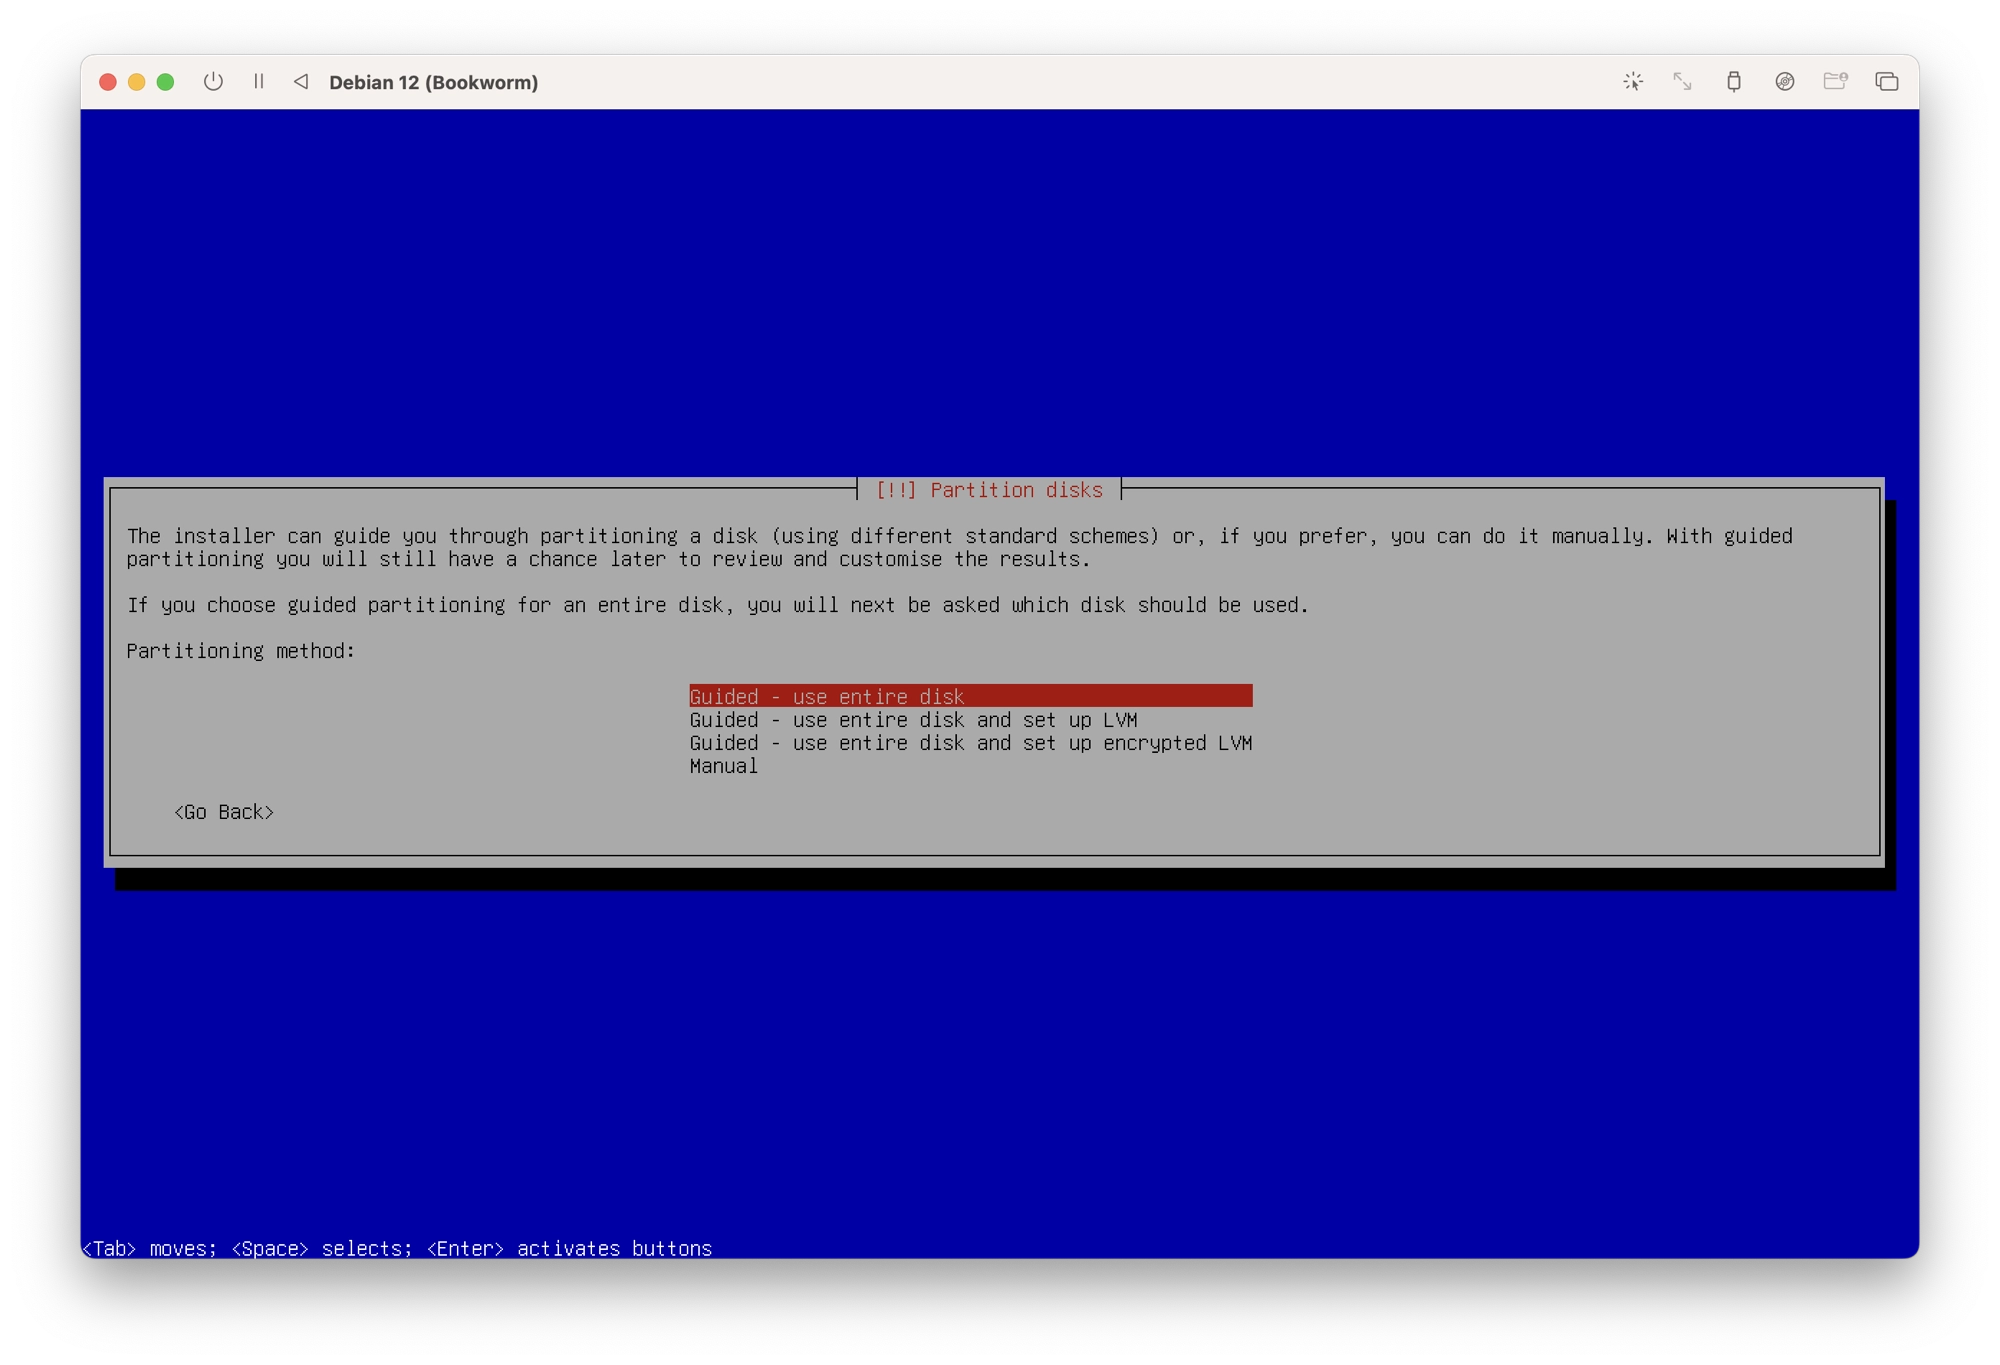
Create the Disk Partitions
- Next, Debian will create the disk partitions. Choose the guided – use entire disk option.
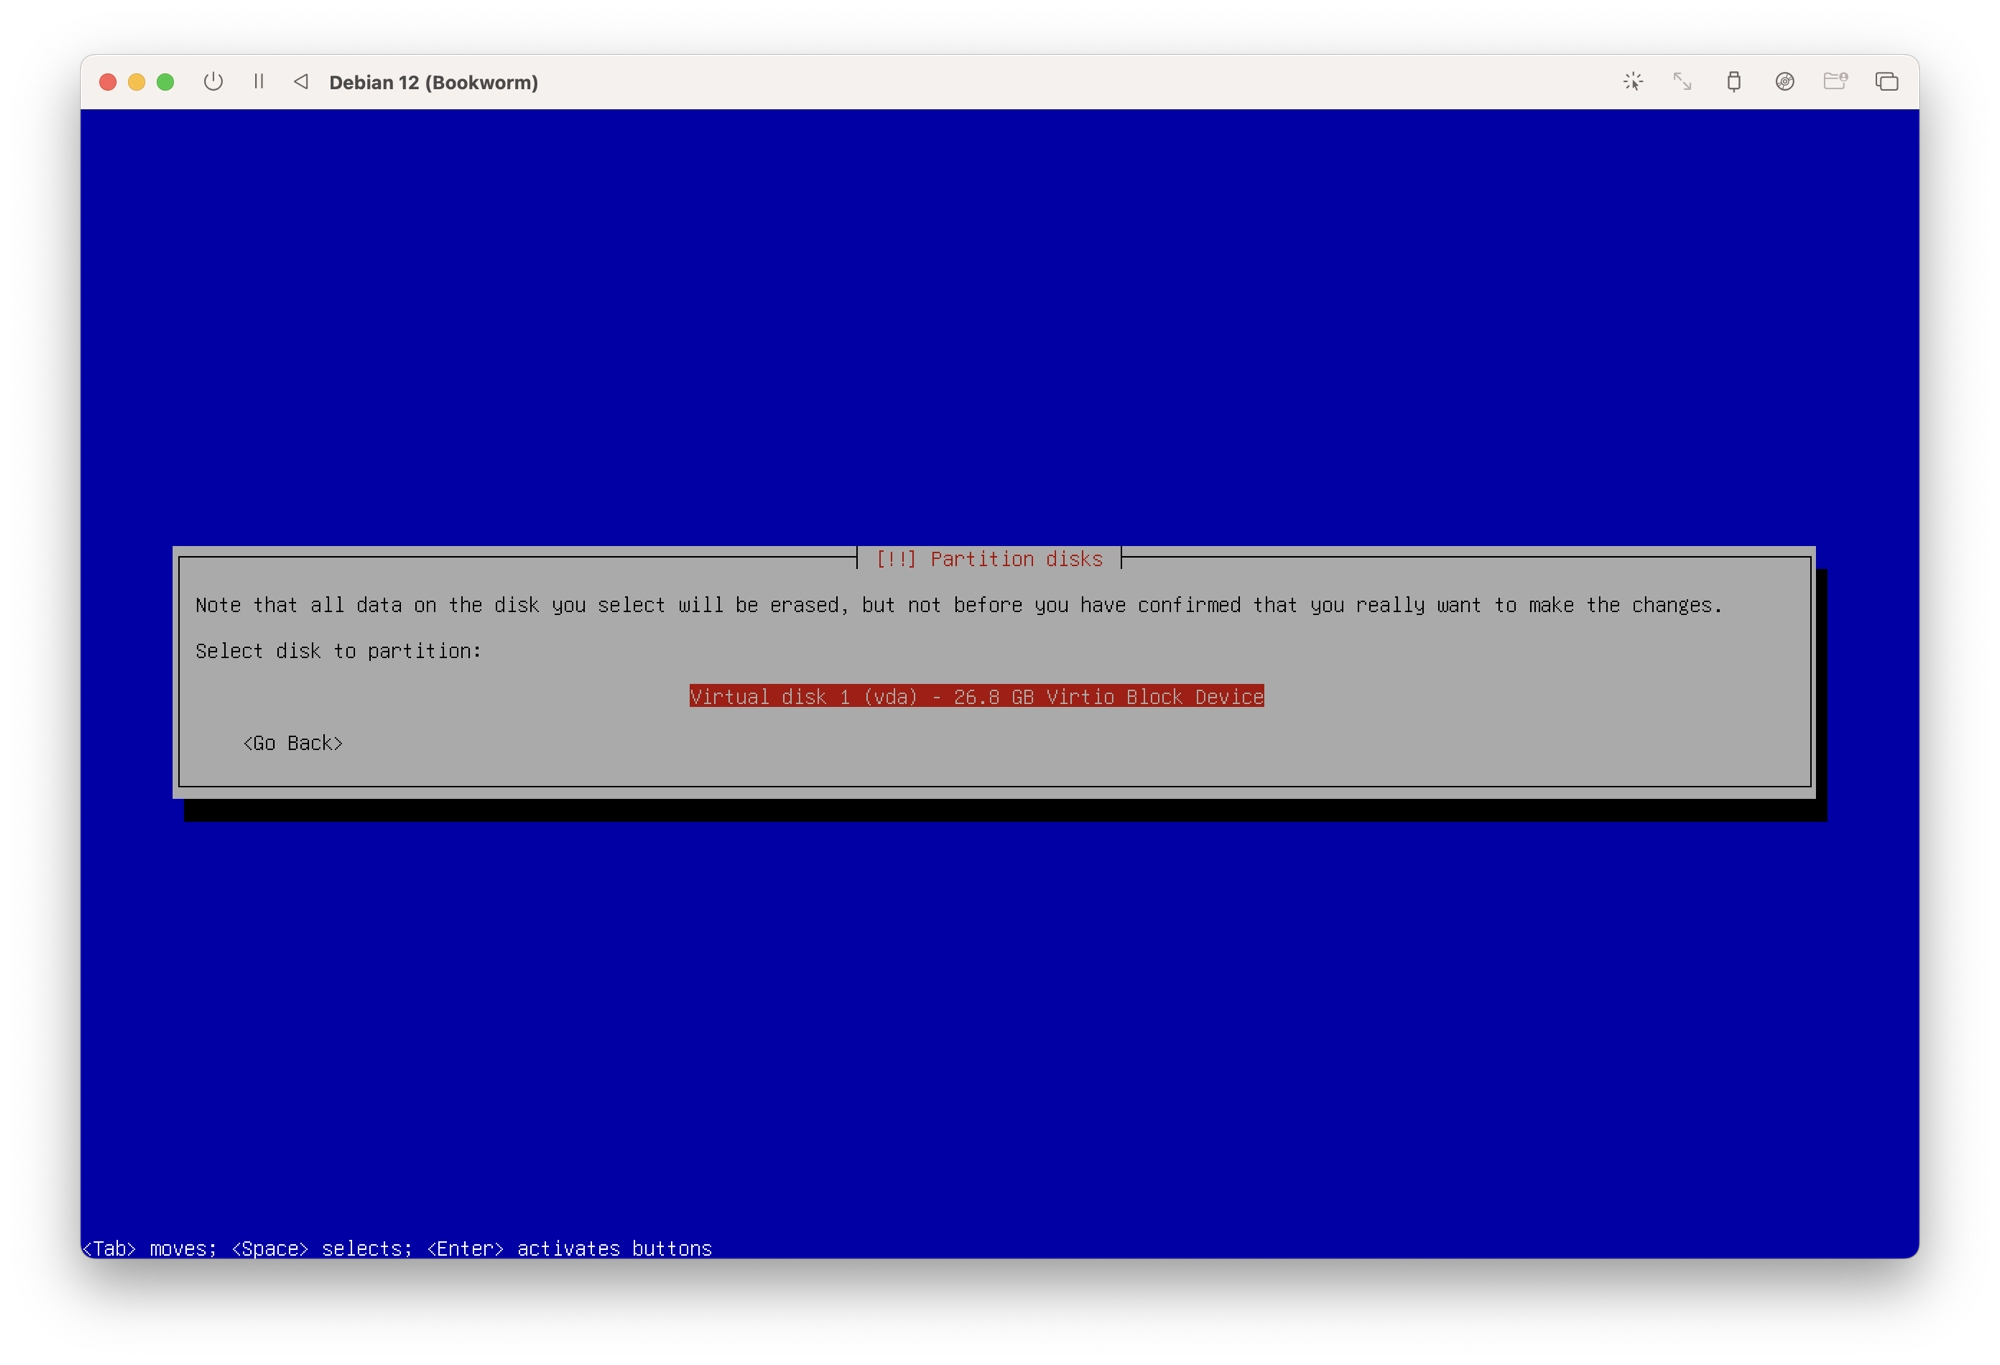
- Choose Virtual Disk 1, it should be the only option available.
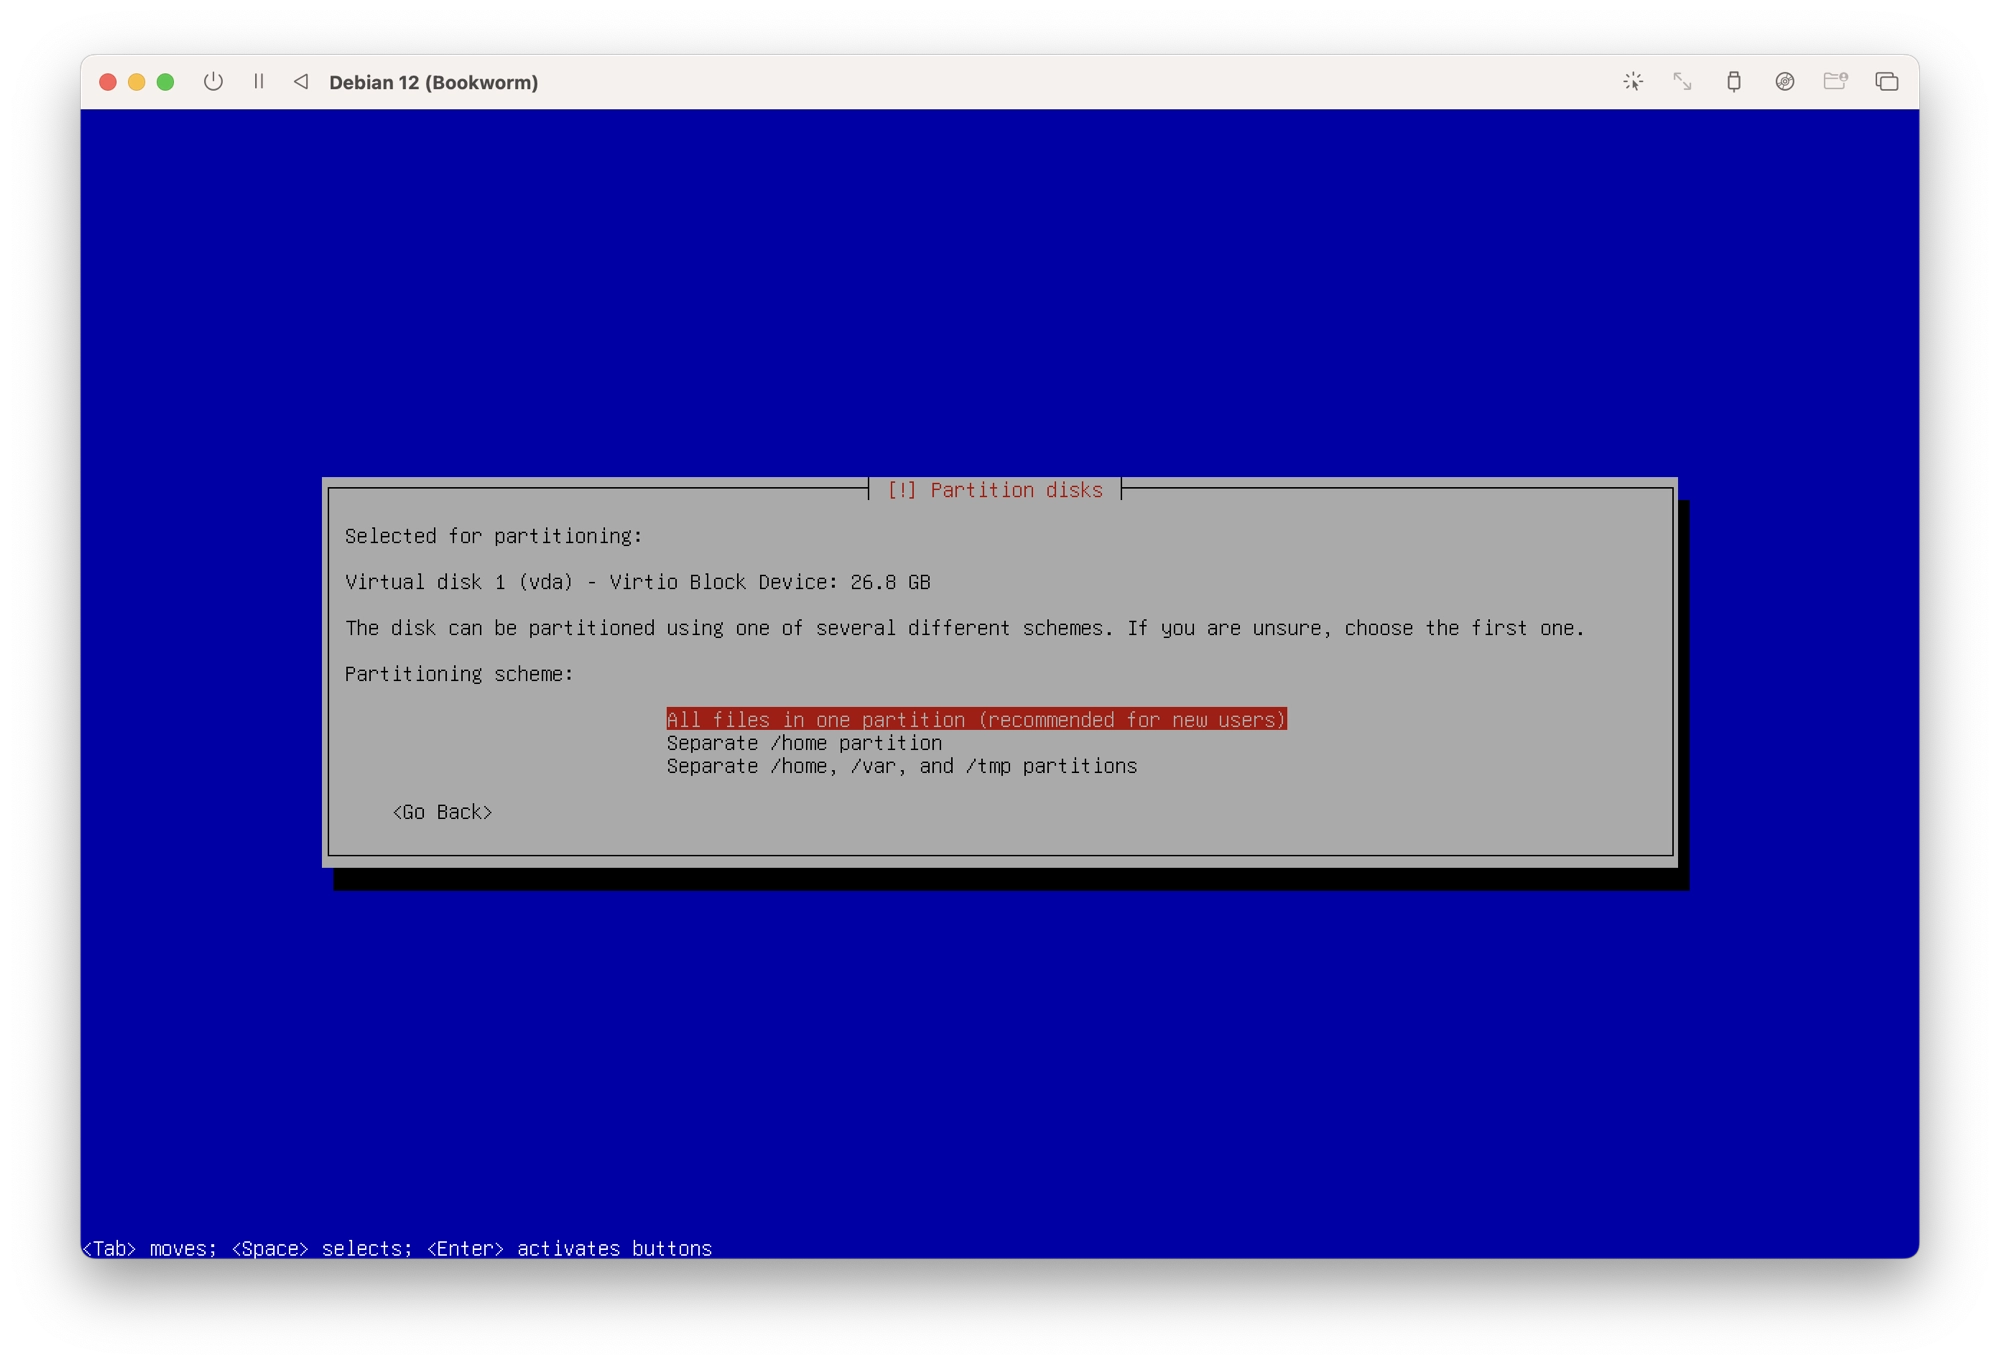
- Choose the option to put all files in one partition.
- You will be shown a summary of the partition settings. Select finish partitioning and write changes to disk and then choose yes in order to complete the process.
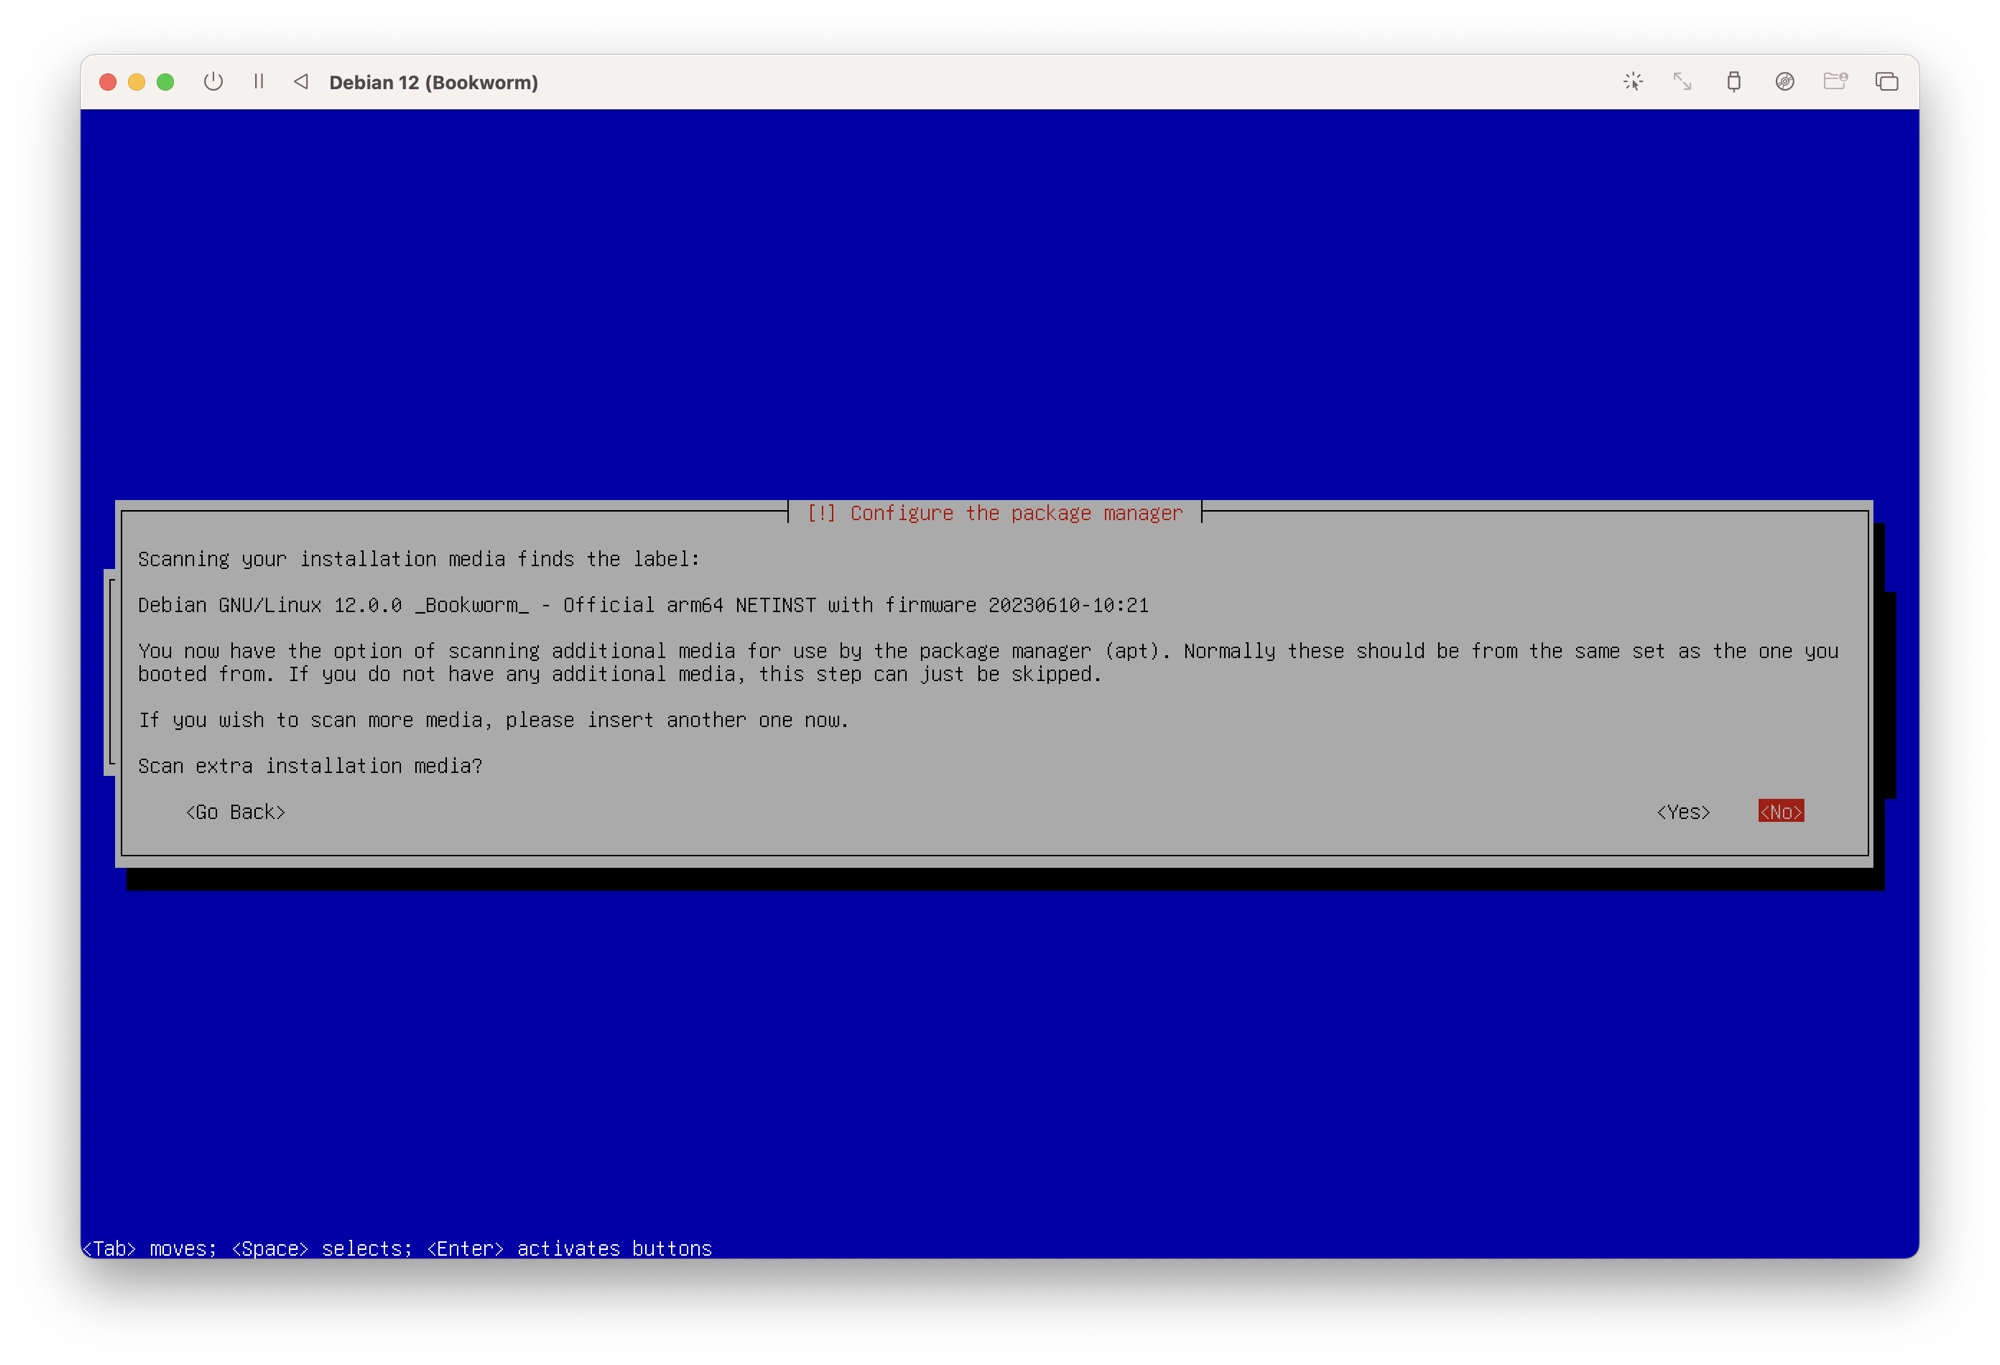
- Next, the base files will be installed and package manager will be configured. When prompted to scan extra installation media, choose no.
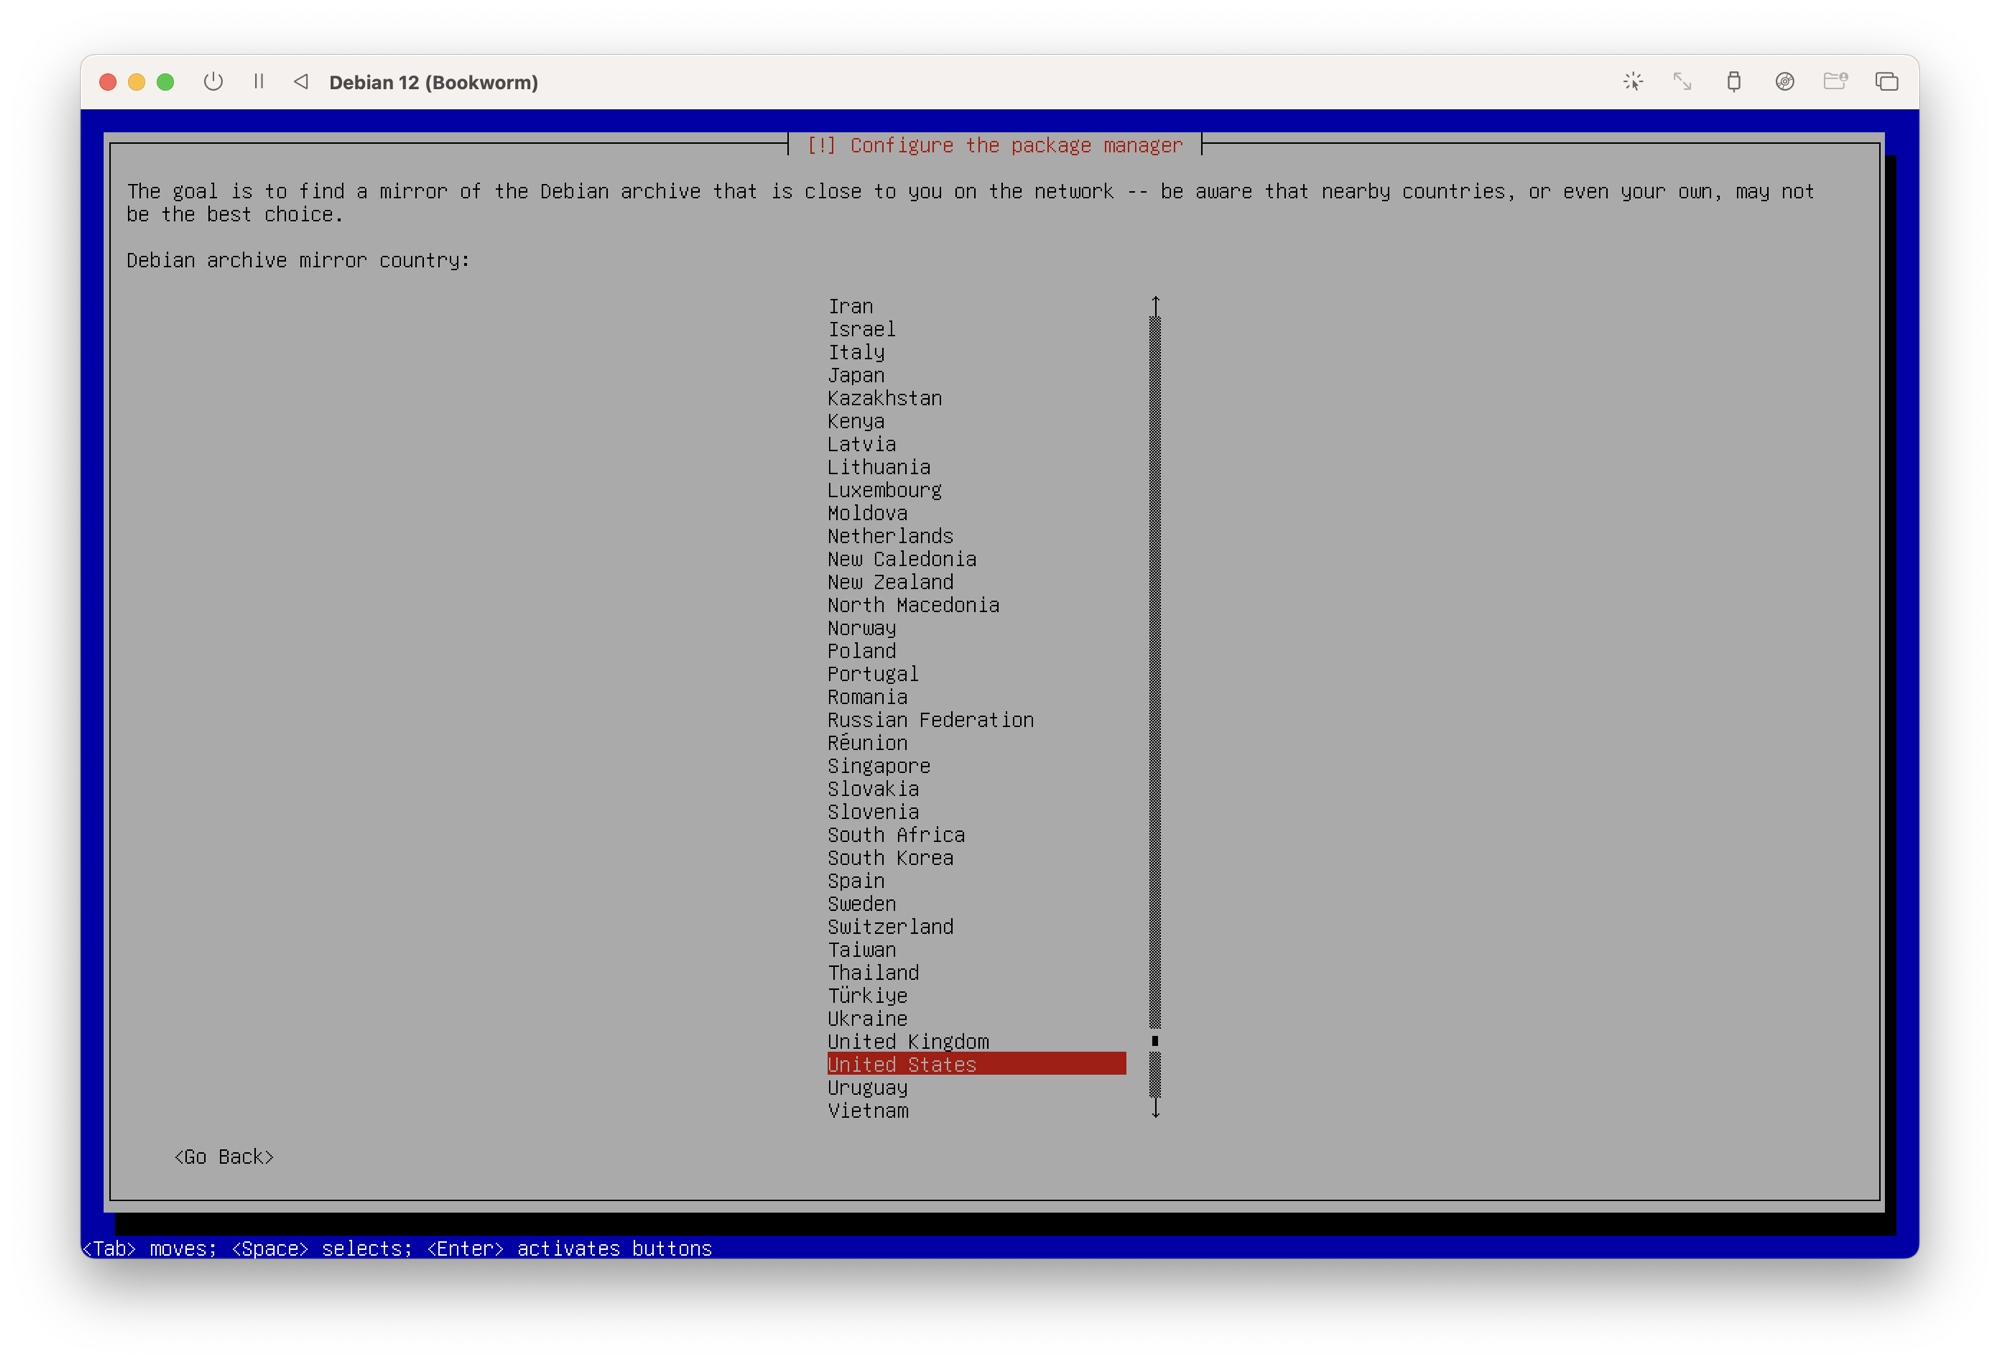
Choose a Mirror
- Next, Debian will connect to the internet to fetch the required files. In order to do this it will connect to one of the available mirrors. Choose the region closest to you in order to select the best mirror. This is not essential, but can speed up the installation process.
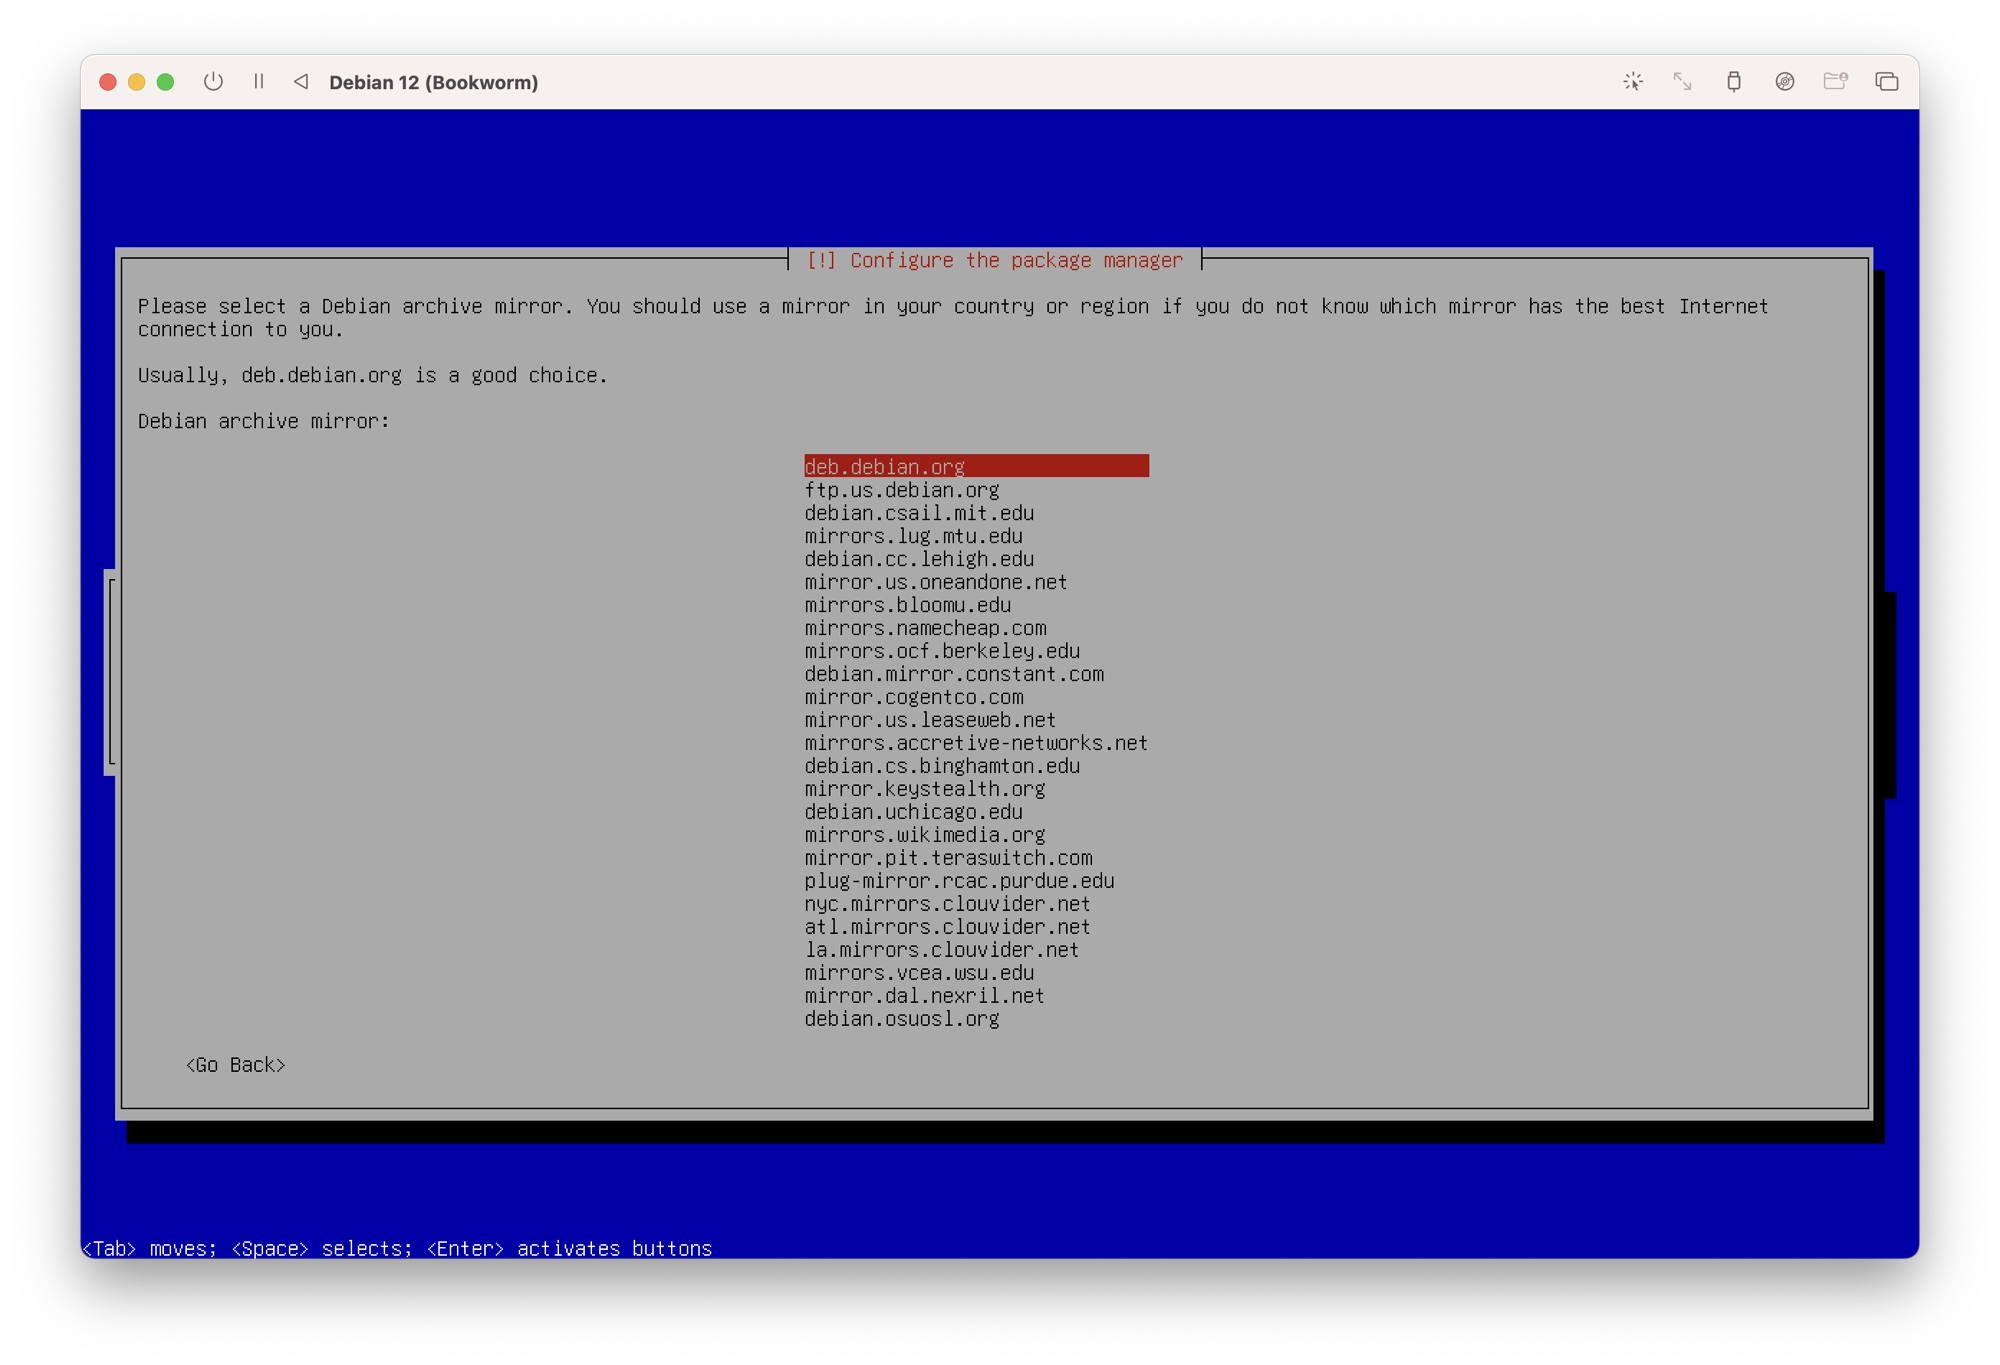
- Select a mirror from the list. If you are unsure of the best mirror to use, just choose
deb.debian.org. - When prompted to choose a proxy, just leave it blank and choose continue.
Complete the Installation
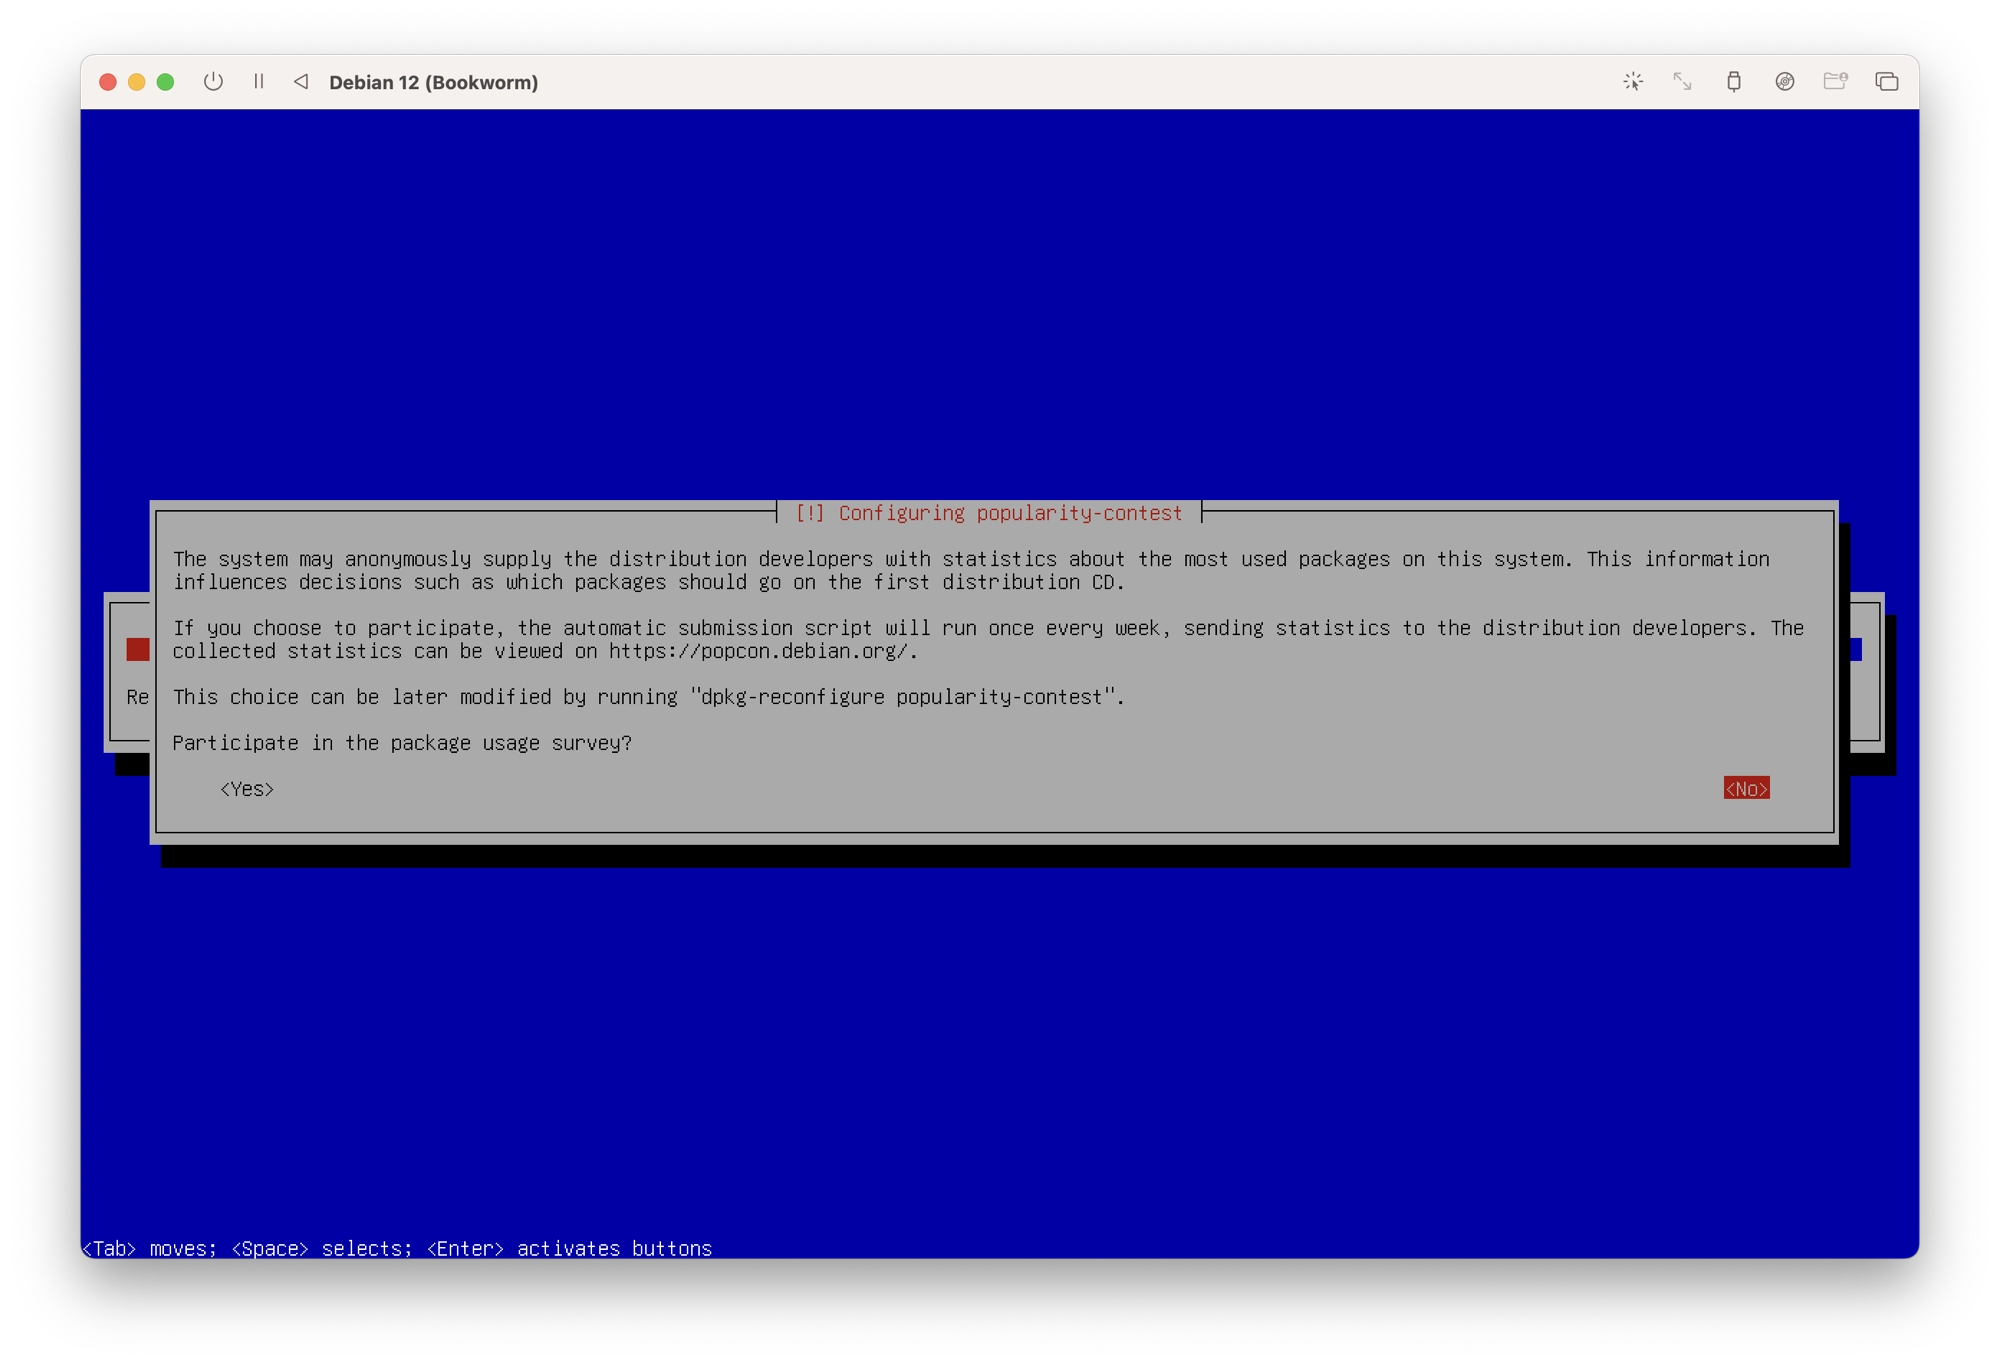
- Debian will now proceed to download and install the necessary files. When prompted to opt in to the popularity contest, you can choose whether or not you wish to take part. Including yourself in the popularity contest can help the Debian developers, however it is not mandatory. If in doubt, just choose no.
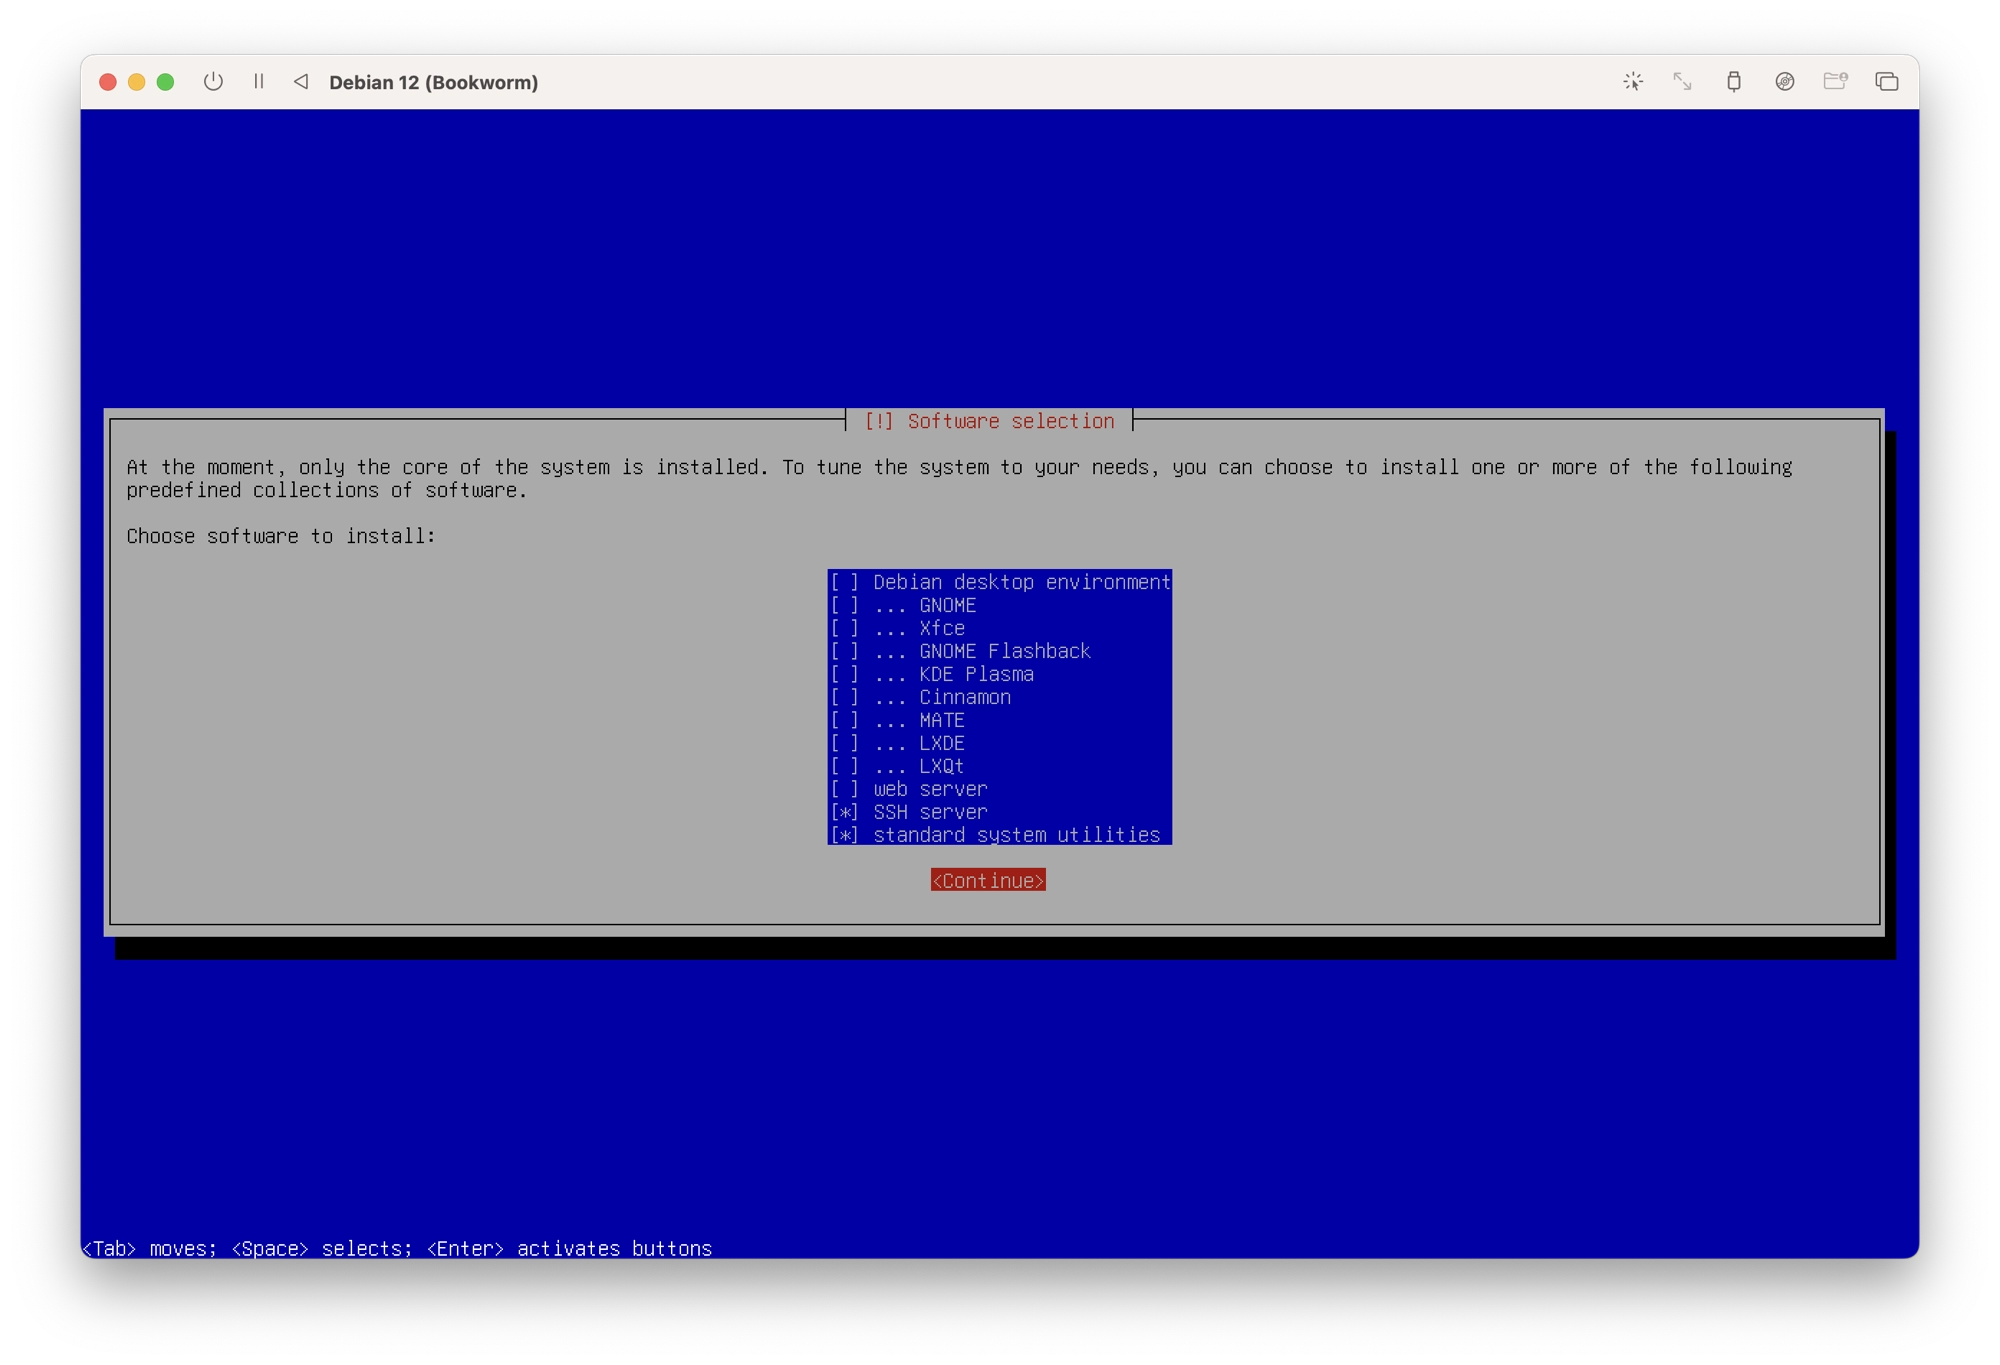
- You will now be given the choice of software tools that you wish to include. In this example we will not opt to install a GUI, as this can be done after the installation. Therefore ensure that only SSH server and standard system utilities are selected. Choose Continue to begin the installation.
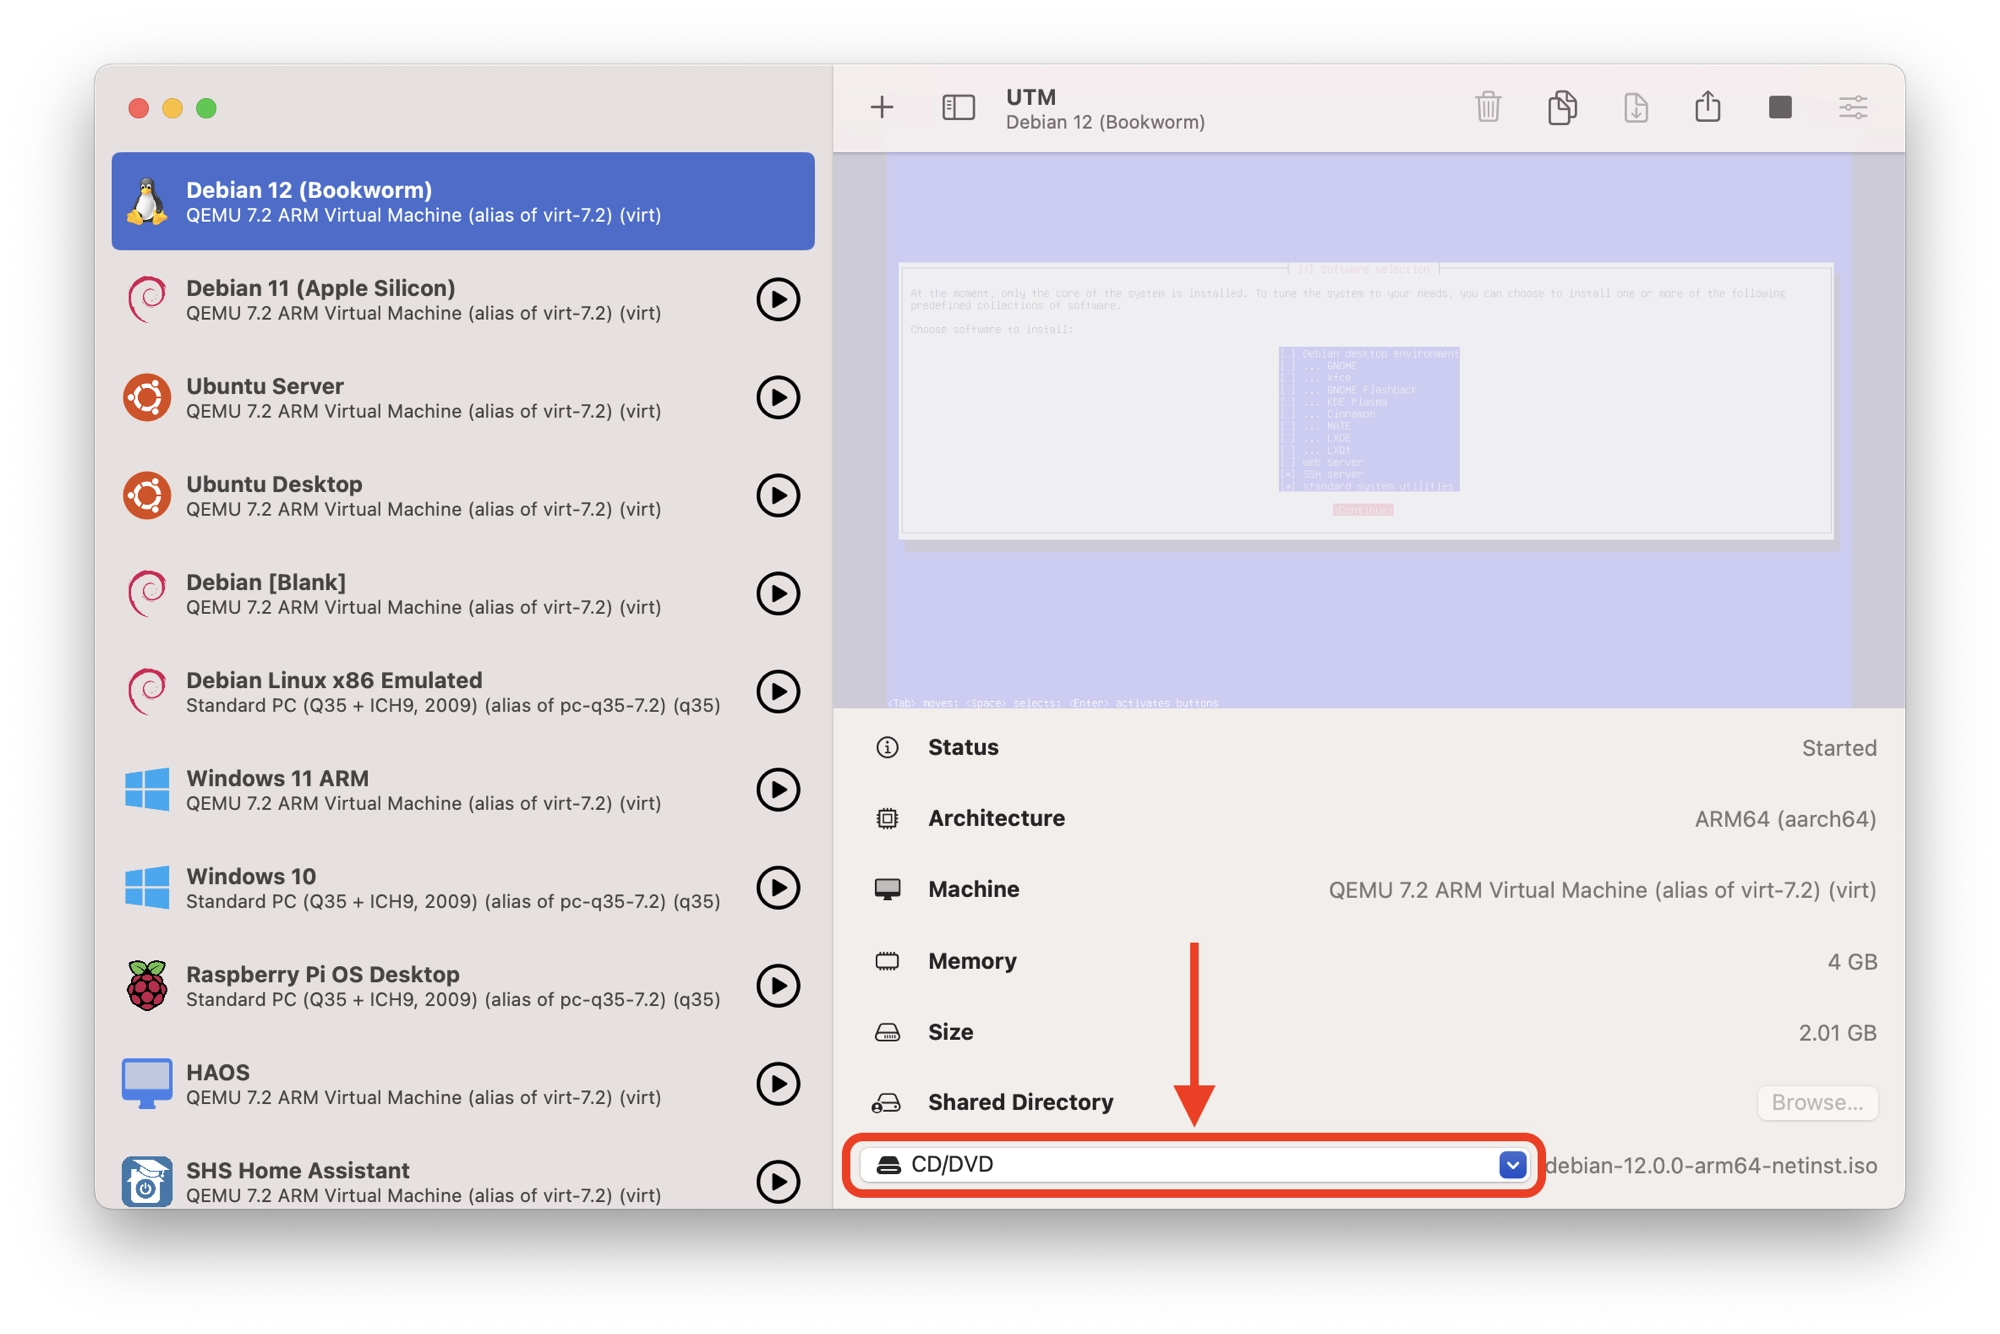
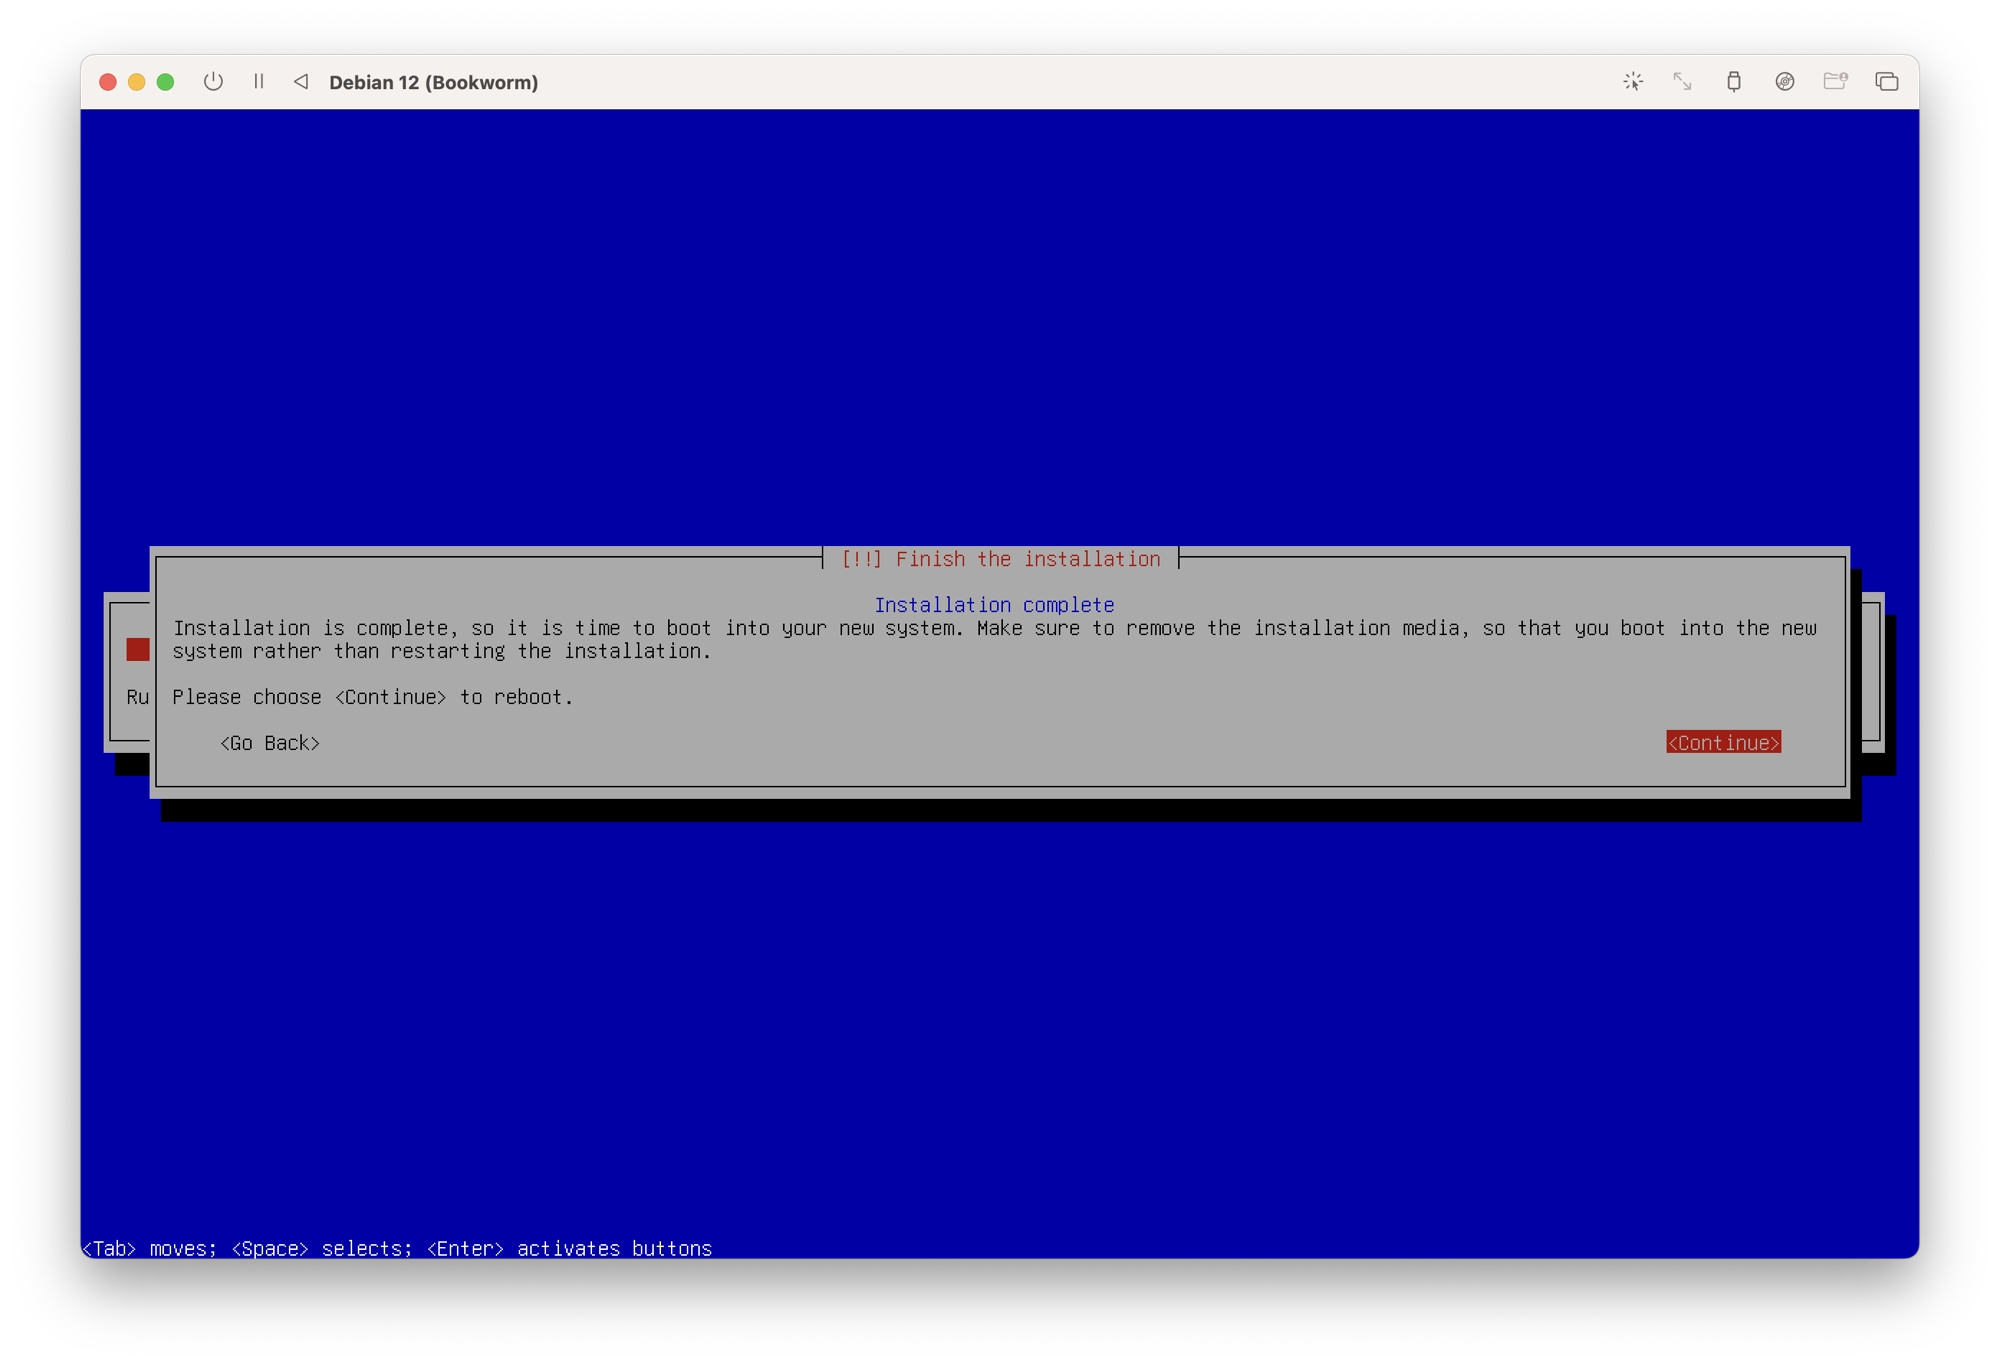
- Once the installation has completed you will be prompted to remove the installation media before continuing. Do not click continue yet. First you need to remove the installation media from UTM. From the main UTM window, click the CD/DVD dropdown and then click clear. This will remove the Debian installation
.isofile from the virtual CD drive.
- Once you have removed the installation media, click continue to complete the installation.
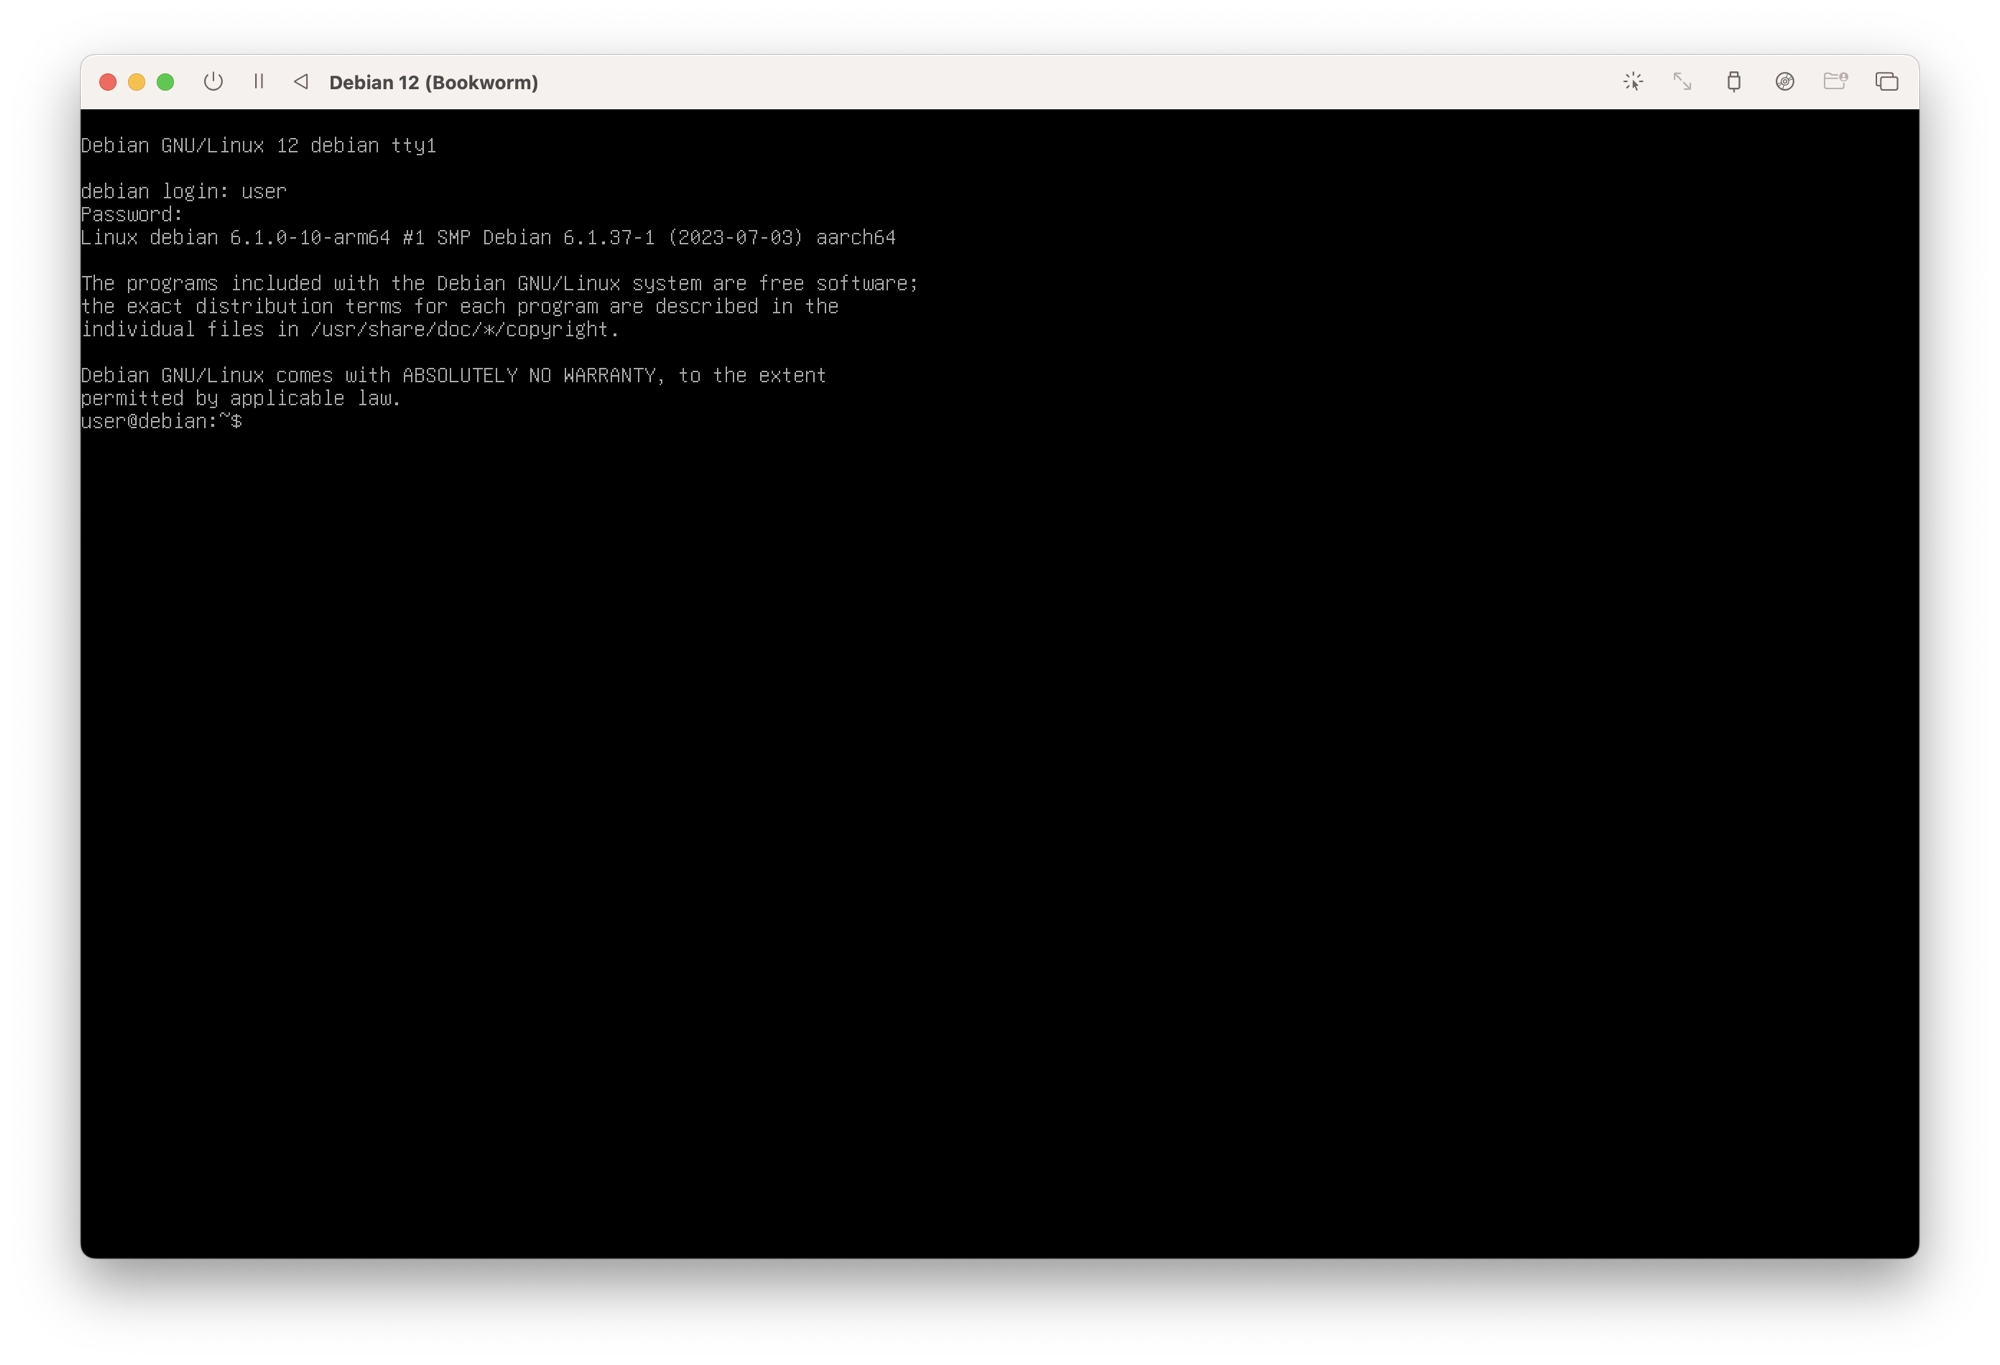
- The virtual machine will restart and take you to the Debian command prompt. Here you can log in with the credentials you created earlier in order to get to the command prompt.
Installing a Graphical User Interface
If you require a command line only installation of Debian then the process is now complete. However you may also want to install a graphical user interface (GUI).
There are many different GUI options available that are compatible with Debian. In this example we will install GNOME.
Installing GNOME is very easy, first log in as the superuser:
su -
Next, enter the following command to install GNOME:
apt-get install gnome
Once the files have been copied and you return to the command prompt, reboot the system.
reboot now
That’s it! Your Debian 12 virtual machine will reboot and take you to the graphical login screen.

Conclusion
Installing and running Debian on a Mac, whether it’s an M1, M2, or Intel-based model, opens up a world of possibilities for users seeking a stable and flexible operating system.
By following the appropriate installation procedures, users can experience the benefits of Debian’s reliability, security, and extensive software repository.
Debian’s compatibility with Mac hardware architectures, along with the availability of virtualization options, allows users to seamlessly integrate Debian into their Mac environment.
Whether you choose to install Debian natively or use a virtual machine, you can enjoy the power and versatility of Debian while still benefiting from the familiarity and ecosystem of your Mac.
Furthermore, Debian’s open-source nature and strong community support provide users with a wealth of resources and a vibrant community to seek assistance, share knowledge, and contribute to the development of the operating system.
Whether you’re a Linux enthusiast, a developer, or an organization looking for a robust and customizable OS, Debian on Mac offers a compelling solution. You can now explore the possibilities and unlock the potential of Debian on your Mac today!
Thanks so much for visiting my site! If this article helped you achieve your goal and you want to say thanks, you can now support my work by buying me a coffee. I promise I won't spend it on beer instead... 😏