If you have bricked your NodeMCU or just want to load NodeMCU on to a fresh ESP8266 device, you are going to want to flash new firmware to your board.
There are clear and concise instructions within the official documentation explaining how to flash the firmware but many may find this a little hard to follow.
Therefore I have prepared this simple and easy to follow step-by-step guide explaining how to flash NodeMCU firmware to ESP with Windows 11, Mac OS or Linux.
Prerequisite
You are going to need a compatible ESP8266 board in order to flash new firmware.
You are also going to need a serial to USB adapter in order to connect the board to the USB port of your computer.
Note that depending on which board you are trying to flash, there may already be a serial to USB adapter built into the board.
For example the ESP-01 module does not have a serial to USB adapter and therefore requires one.
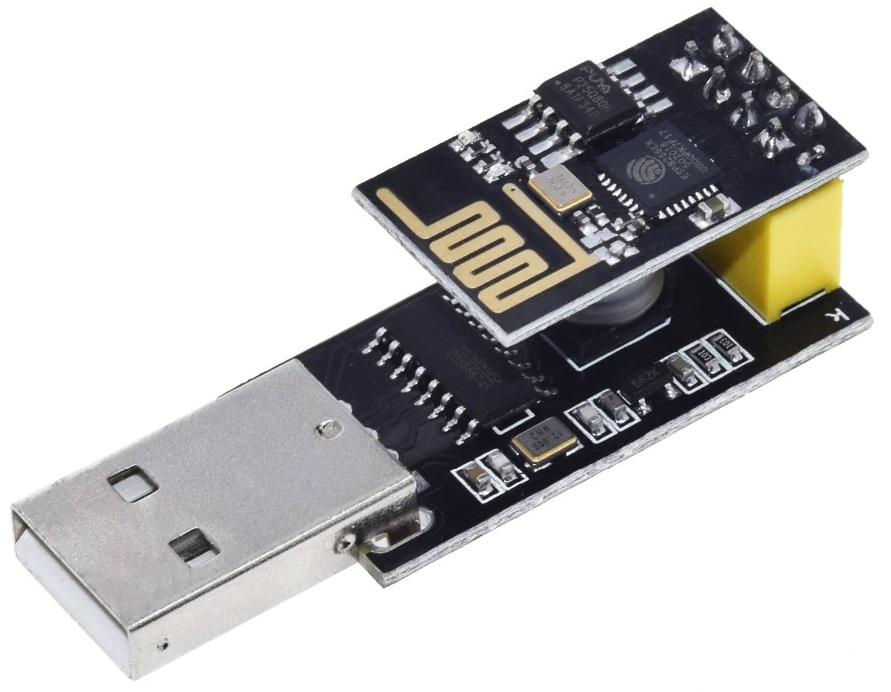
If you have an ESP-01 module that you want to flash but you don’t have an adapter, you can get one here from Amazon.
If however you want to flash a module such as the Wemos D1 Mini, there is already a serial to USB chip built in and you can just connect it directly to the computer.
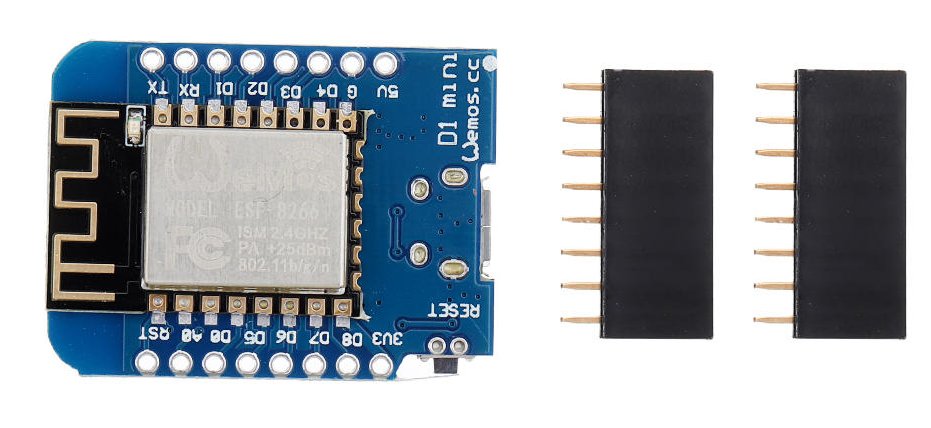
If you do not yet have a board and are unsure what to buy, I would recommend checking out the Wemos D1 Mini. I have a detailed guide about the Wemos D1 Mini that you can read here.
You can also check the latest prices on Amazon here, they are a very inexpensive module and great for beginners.
How To Download NodeMCU Firmware
Downloading the firmware can be a little confusing at first. This is because of the size of NodeMCU compared with the relatively small memory available on the ESP8266.
It is not possible to simply provide a binary file (.bin) that can be flashed straight to the device, as it would not be economic due to the size of all of the libraries included in NodeMCU.
You must first decide what libraries are necessary for your project and then you can build a custom binary with those libraries to flash on to your device.
Using the Basic Firmware
Although it is necessary to compile NodeMCU from source in many cases, there is a basic firmware version that will run on all ESP modules, which includes the following libraries:
If you are just getting started with NodeMCU then this firmware will be a good starting point as it bypasses the need to compile the firmware from source.
If you are unsure what modules you need then this firmware would be ideal to begin with. Simply download it using the button below and then skip to the flashing section.
Compiling the Firmware
For those wishing to customise their firmware with different libraries, there are several ways that this can be done. The easiest of these methods is to use the online build tool found at https://nodemcu-build.com/.
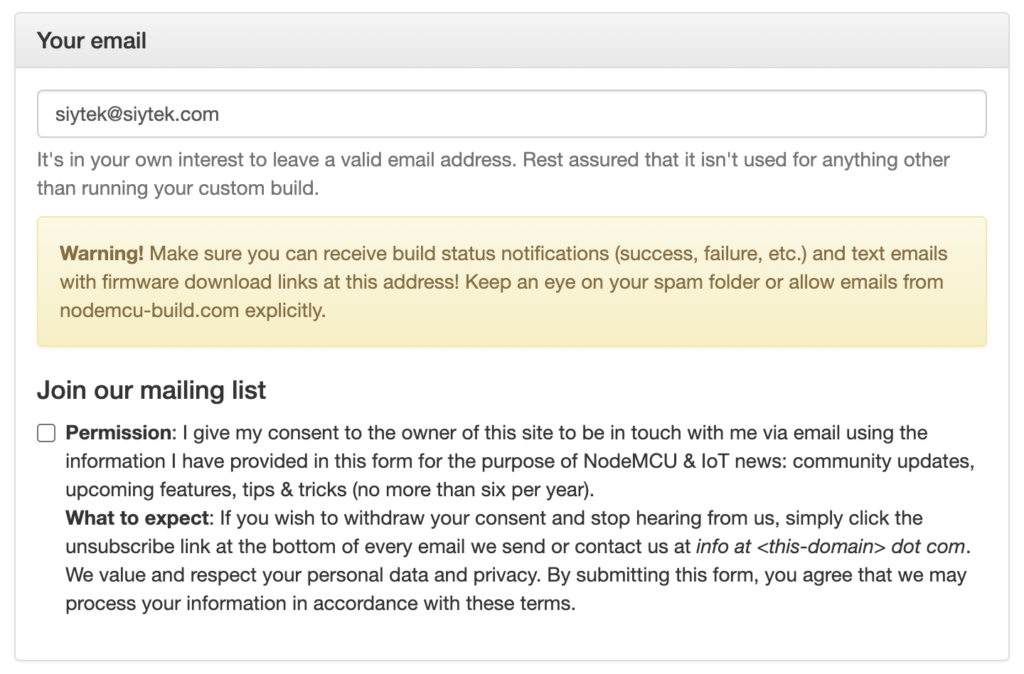
First go ahead and enter your email address. You must enter a correct address as this is where the firmware download link will be sent.
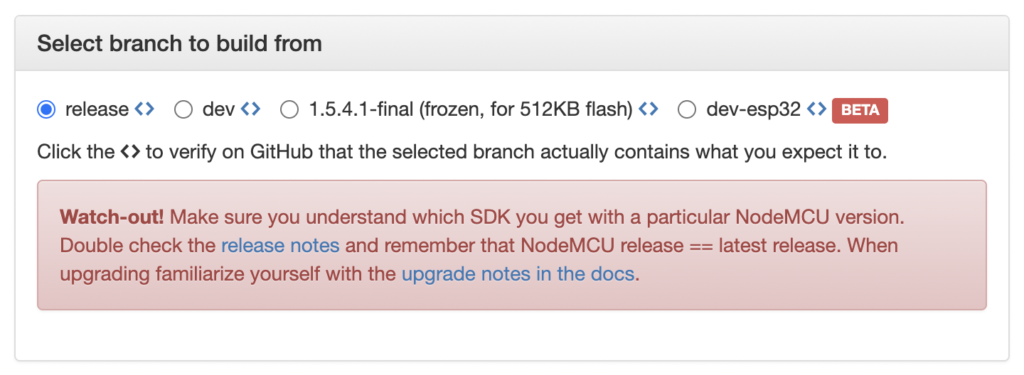
Next select the branch that you wish to build the firmware from. If in doubt just choose the release branch.
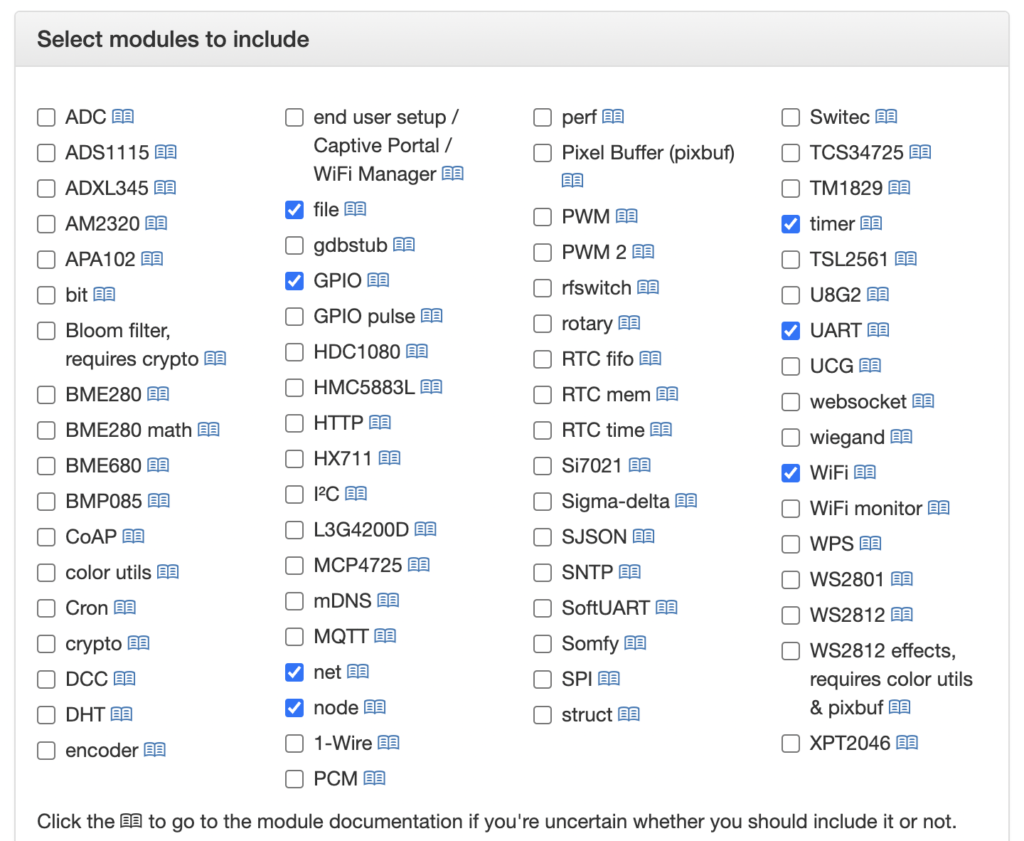
Next choose the modules that you would like to include. The modules that are selected by default make up the ‘basic’ version of the firmware, which should run on all ESP devices.
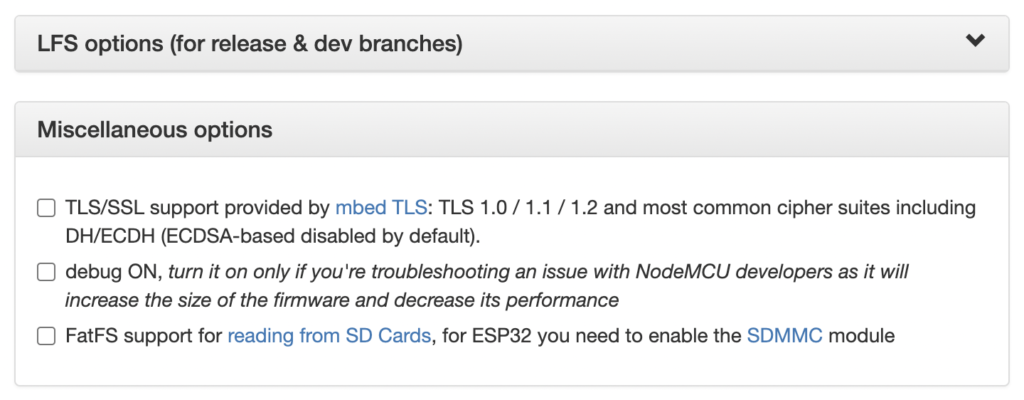
Lastly choose from any final build options in the final section. If you are unsure, just leave these set to their defaults.
Once ready, click the Start Your Build Button. The builder does not run in the browser, it is something that runs remotely. You will receive an email once the download is ready.
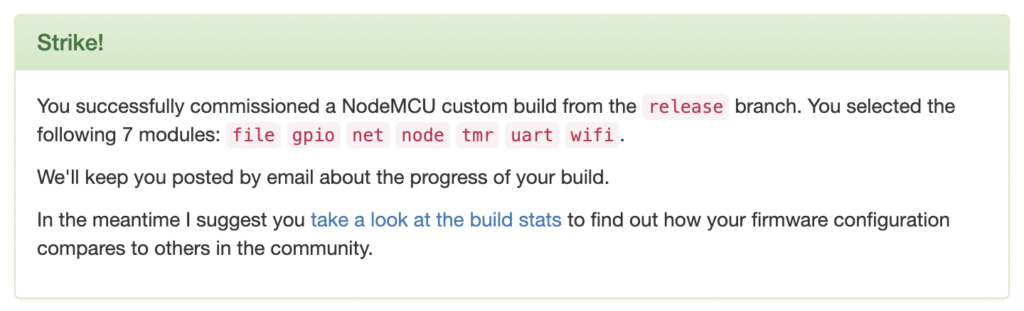
When you receive the email, you will notice that there are two .bin files that you can download, one for float and one for integer.
Float includes the ability to deal with floats, whilst integer does not. The latter however requires less memory. It is totally up to you which version you use. If in doubt then go with the float version.
How To Flash NodeMCU
At this stage you should now have a binary file (.bin) ready to flash to your device. You should also have your device connected to the USB port, either directly or with an adapter.
If you are au fait with the terminal then you might want to use esptool directly to flash the binary. Take a look here for further information on how to use esptool.py.
For everyone else I would recommend using NodeMCU PyFlasher, which you can download here. Simply download and install the application for Windows, Linux or Mac.
I can confirm that the Mac OS Catalina release worked successfully on my M1 Mac running Monterey, should that be relevant to you.
When you run the tool, you will arrive at the following screen:
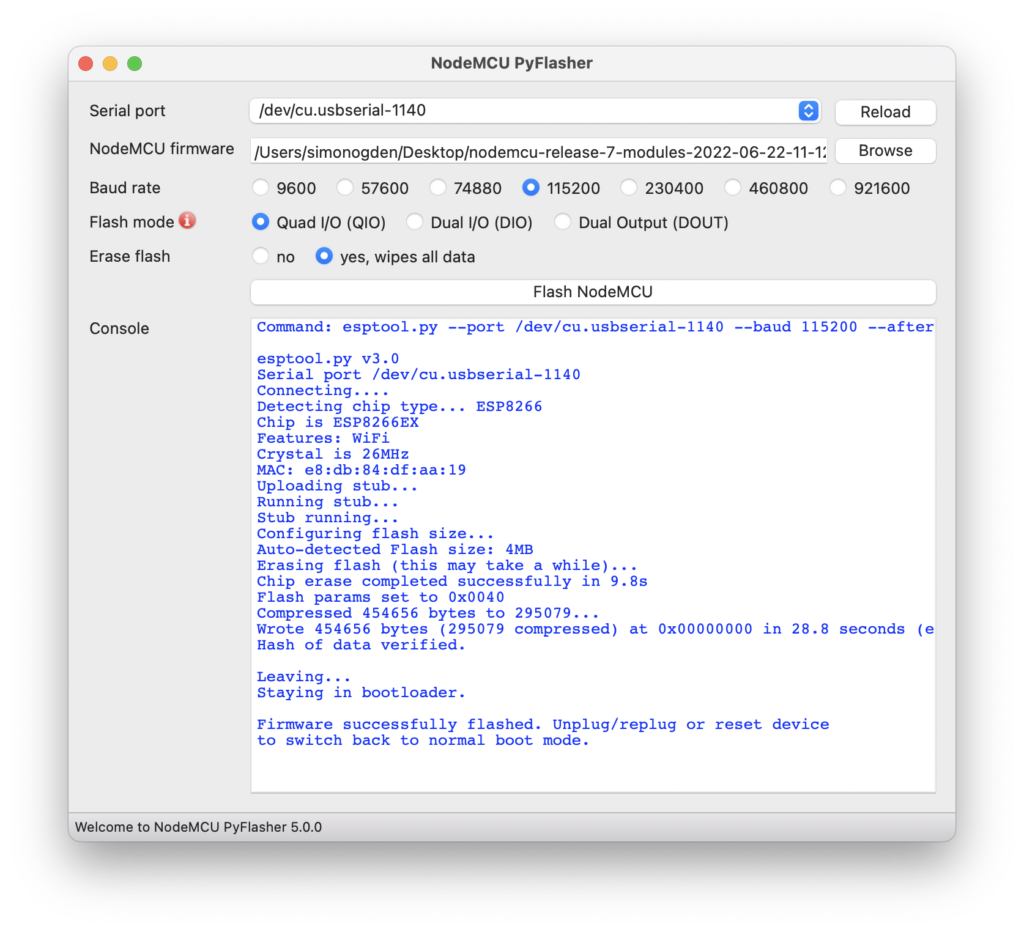
Serial Port
The easiest setting is to use the auto-select option. This will choose the correct port automatically.
However for me this did not work and I needed to select the correct port. For windows users it should be something like COM3 and for Mac/Linux users /dev/cu.usbserial…
NodeMCU Firmware
The path to the binary .bin file that you want to flash. This should be the .bin file you downloaded in the previous section.
Click the browse button to the right-hand side in order to browse for the location of the file.
Baud Rate
I would recommend leaving the baud rate set to the default of 115200. However you can try reducing it if you have problems flashing.
Flash Mode
There are three flash modes to choose from; QIO, DIO or DOUT.
ESP8266 devices tend to need the QIO setting.
Erase Flash
This allows you to decide whether or not to erase the flash prior to uploading new firmware. Unless you have a reason to retain the flash I would recommend choosing yes here.
Flash NodeMCU
Once you have set up PyFlasher as described here, go ahead and hit the Flash NodeMCU button. Congratulations, you just flashed NodeMCU to your ESP8266!
Conclusion
Flashing NodeMCU to your ESP board is certainly a fairly easy task to complete today. Thanks to tools such as PyFlasher and NodeMCU-build.com it is very easy to flash NodeMCU.
Thanks for taking the time to read this article and don’t forget to check out some other awesome ESP8266 tutorials!
Thanks so much for visiting my site! If this article helped you achieve your goal and you want to say thanks, you can now support my work by buying me a coffee. I promise I won't spend it on beer instead... 😏

Hallo,
habe versucht die Firmware auf den ESP 8266 zu laden. Ohne Erfolg.
Ich glaube, das der NodeMCU PyFlasher das ESP 8266 gar nicht erkennt.
Wie kann ich testen, ob das ESP 8266 am Computer angeschlossen ist.
Vielen Dank.
mit freundlichen Grüßen
Rainer Geyer