Using the MacOS terminal can be a quicker and more efficient way to change settings on your Mac. However it is also possible to access settings that cannot be accessed by the GUI, and that is what this article is about!
The Terminal and its commands may be intimidating to some MacOS users. When using Terminal on a Mac, it may appear as if you’re attempting to enter the Matrix!
Terminal can be a more efficient approach to navigate the operating system if you’re comfortable with some easy to learn commands. Once you’ve mastered the basics, you may move on to more sophisticated jobs, and utilizing the Terminal can be a lot of fun.
The next 10 commands are ones that can be entered in to the terminal to help make your MacOS life easier, which are otherwise not accessible from the GUI!
1. Disable Gatekeeper
MacOS includes a technology called Gatekeeper, which is designed to ensure that only trusted software runs on your Mac.
This is a great feature for protecting the average user from malware attacks and stopping my Mom’s online banking getting hacked. However for more advanced users it can be a nuisance.
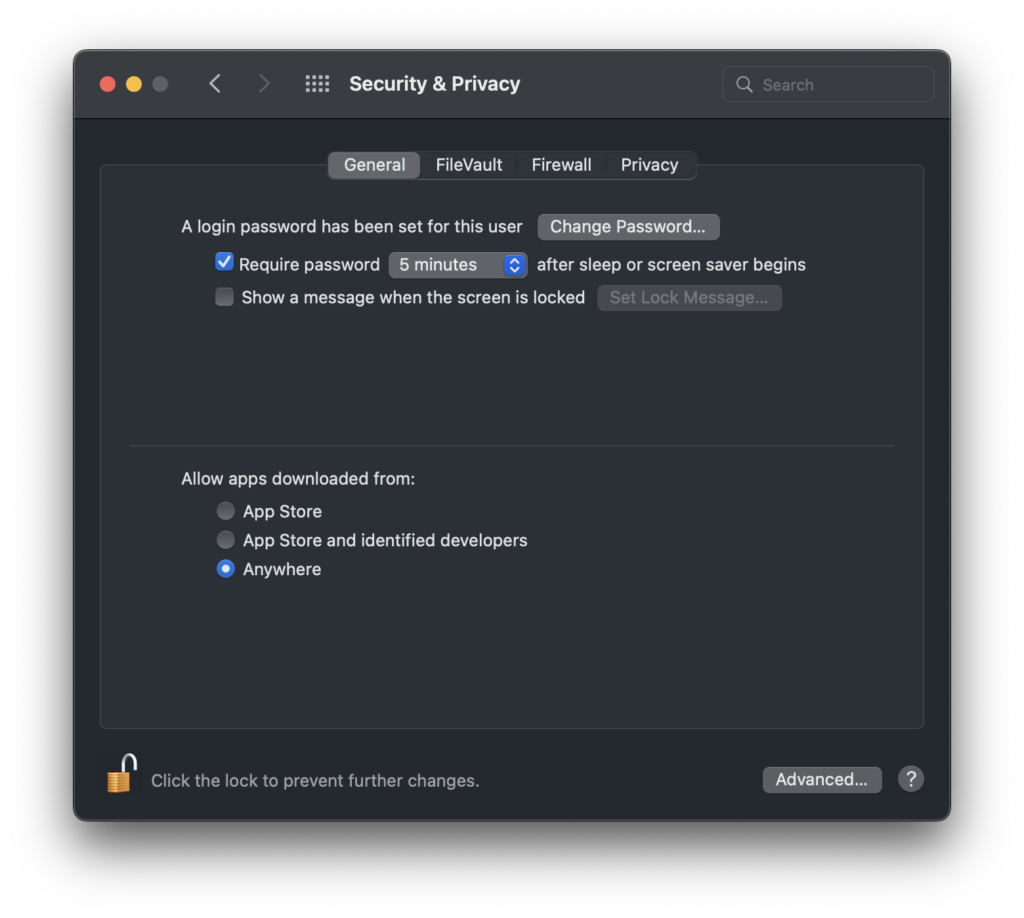
Under System Preferences > Security & Privacy > General Tab you will see that only apps from the app store or trusted sources can be installed.
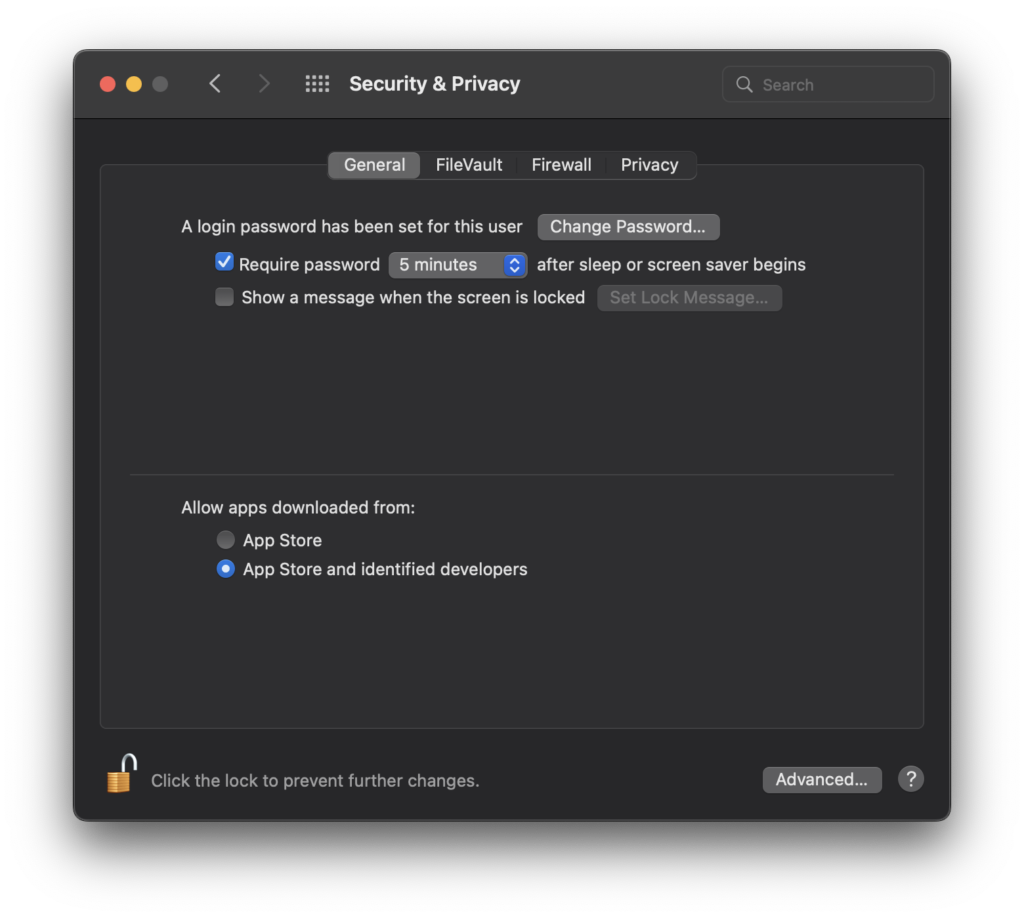
More advanced users (anyone reading here about the Terminal!) will have tried to install software by smaller developers and will have had to visit this screen to authorise the installation.
However it is possible to disable Gatekeeper and prevent the nuisance security checking, allowing all software to be installed directly. Simply enter the following command:
sudo spctl --master-disable
Now you will have a third option that allows downloads from all sources. Awesome! A must-know hack for all advanced MacOS users!
2. Add Space In The Dock
This is a very cool little hidden hack for those who are meticulous when it comes to organising things. It is possible to put spaces in the dock so that you can group programs into neat little groups!

In order to add a spacer, first enter the following command into the terminal:
defaults write com.apple.dock persistent-apps -array-add '{"tile-type"="spacer-tile";}'
After executing this command you will need to kill the dock. It will automatically reload and should now contain a spacer that you can drag as if it were any other icon, awesome!
killall Dock
Note that you should execute these two commands separately. For some reason I was unable to add anymore than one blank spacer when chaining them together with a semicolon.
You can also remove a space in the same way as any other icon, just right-click it and click remove from dock.
3. Hide Folders in Finder
If you have something that you want to hide, such as your embarrassing collection of rom com movies, you will for sure be interested to hear this.
You can hide a folder in finder, so that it vanishes completely! It will still be accessible in terminal and you can unhide should you decide to share your secrets with the world.
To hide a folder, enter the following command:
chflags hidden <folder path/name>
Then to unhide the folder, enter the following command:
chflags nohidden <folder path/name>
Awesome! Now you can keep those prying eyes away from your shady movies. Sadly however I can’t help you with the sticky keyboard problem…
4. Schedule a Shutdown
You may already know it is possible to shutdown and restart your Mac from the terminal. This by itself could make things a tiny bit more convenient if you are working with terminal.
sudo shutdown
However the terminal offers something in addition, which could prove very useful. Perhaps you want to leave your Mac to complete some task, but you want it to automatically shut down after some time has elapsed.
You can shutdown your Mac after a specified amount of time by using the -h flag and specifying the number of minutes:
sudo shutdown -h +120
If you wish to cancel a shutdown event, simply use the following command:
sudo killall shutdown
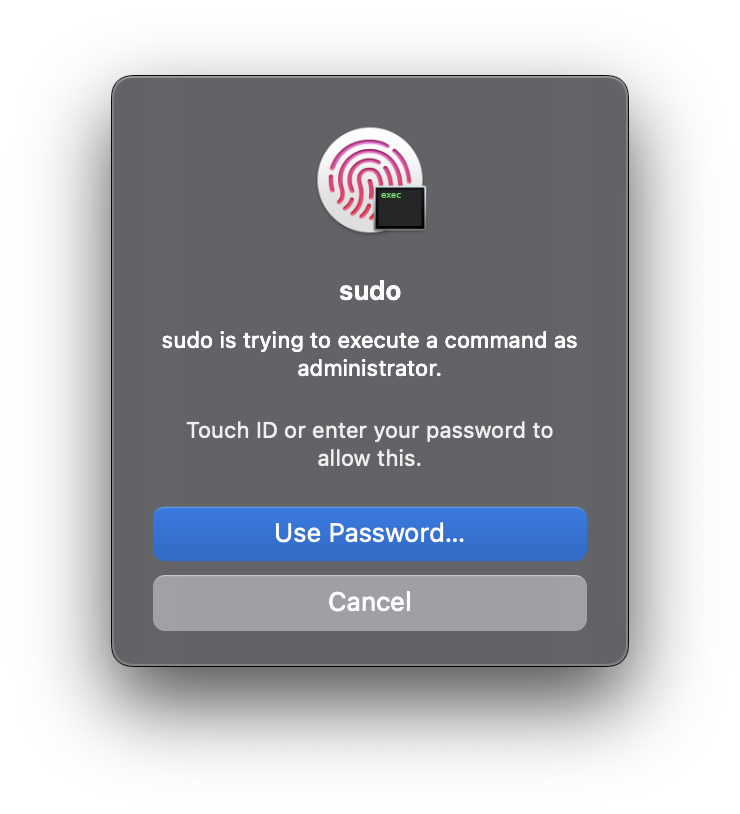
5. Use Touch ID for Sudo Password
If you have a Mac with a Touch ID facility and you use your fingerprint for login, you can also use this authentication method for your terminal sudo password.
In order to do this you will need to edit a configuration file using nano with sudo privileges using the following command.
sudo nano /etc/pam.d/sudo
Next you need to add the following line to the top of the file:
auth sufficient pam_tid.so
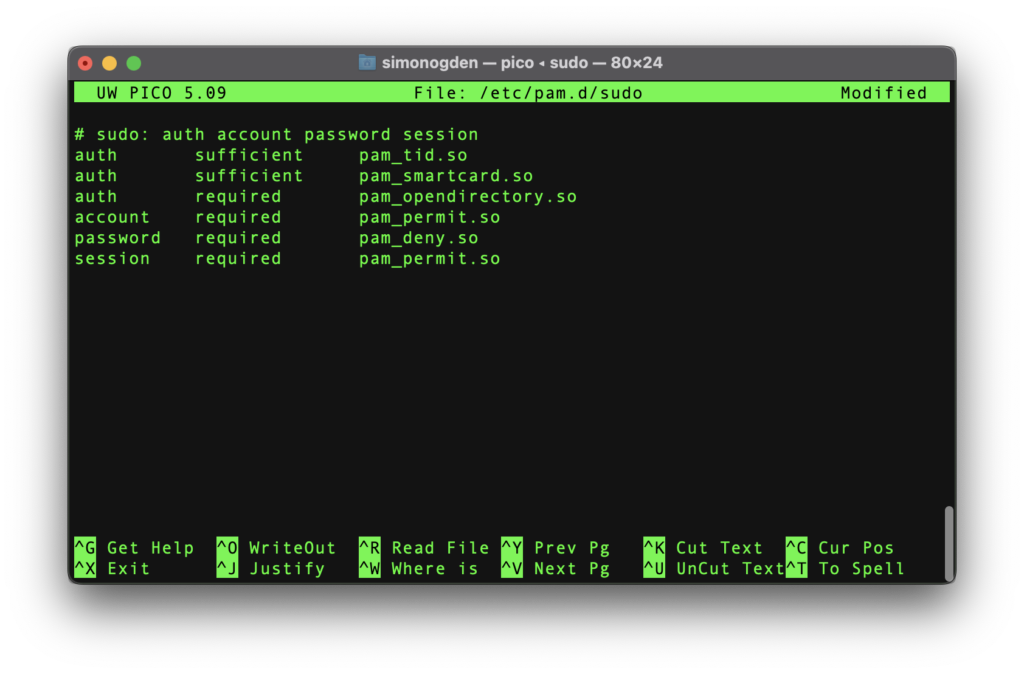
Then simply save and close the file. Now when you need to enter your sudo password, you will be presented with touch strip authentication, awesome!
6. Booyakasha On Completion
Previously I have mentioned the say command, which uses the text to speech facility to say whatever you like.
say <some text>
There is one awesome use for this command that is so awesome, it deserves its own writeup!
You can add the following command on to the end of any other command and your Mac will say “booyakasha!” when it has completed that command!
; say boo yaka sha!
For example let’s say you want to update Homebrew, you can write the following command and your Mac will say “booyakasha!” on completion.
brew update ; say boo yaka sha!
You can of course get your Mac to say whatever you like, but I recommend you get it to say something funny! 😆
7. Remove The Shadow From A Screenshot
You may already be using the screenshot tool that comes with MacOS. You can find it by going to Spotlight and typing screenshot.
There are a couple of additional settings that are not accessible by the GUI, which you can control via the terminal!
When you take a screenshot of a Window, rather than the whole screen, you will notice that there is a shadow. It is possible to turn off the shadow with the following two commands:
defaults write com.apple.screencapture disable-shadow -bool TRUE
killall SystemUIServer
If you want to enable the shadow again, you can reverse the boolean:
defaults write com.apple.screencapture disable-shadow -bool FALSE
killall SystemUIServer
8. Change Screenshot File Format
When you take a screenshot, by default it is saved in the PNG file format. However it is possible to change the format using terminal!
Simply enter the following command to save screenshots in JPG format!
defaults write com.apple.screencapture type JPG
If you want to revert this back to PNG, simply enter the following:
defaults write com.apple.screencapture type JPG
9. Change The Dock Animation Speed
You may have already played around with some of the settings for the dock, such as how much magnification occurs when you hover the mouse over it.
However there are some further options that are not accessible by the GUI.
Firstly if you set the dock to hide when your mouse pointer is not hovering over it, you will notice a delay between when your pointer touches the bottom of the screen and when to dock actually appears.
You can change or remove this delay with the following command. The number on the end is the number of seconds you wish to delay the dock appearing with zero causing no delay.
defaults write com.apple.dock autohide-delay -float 0
killall Dock
To remove this parameter and reset back to normal, you can use the following command:
defaults delete com.apple.dock autohide-delay
killall Dock
It is also possible to change the speed in which the dock slides out from the edge of the screen. The number on the end represents the speed, where 0 is instant and 1 is the original speed:
defaults write com.apple.dock autohide-delay -float 0
killall Dock
Personally I really like being able to change these options and have my dock slide out faster and without the delay! I have no idea why Apple do not make these options available in the GUI!
10. Create A File Of Any Size
Sometimes it can be useful to have a large file for testing purposes, or a file of a very specific size. With this command it is possible to create an empty file with a specified size.
mkfile <size> <file name>
You can substitute the placeholder for size with bytes [b], kilobytes [k], megabytes [m] or gigabytes [g].
For example we can create a file called text.txt that is exactly 1 gigabyte in size with the following command:
mkfile 1g text.txt
This could be useful for anyone who wishes to test a network connection. It could also be useful for developers in software or electronics who need sample data.
Thanks so much for visiting my site! If this article helped you achieve your goal and you want to say thanks, you can now support my work by buying me a coffee. I promise I won't spend it on beer instead... 😏