
For those of you who are passionate about Apple devices, I completely understand. I made the transition to Apple well over a decade ago and never looked back.
Apple Home like most things Apple provides a slick and relatively minimalistic interface for controlling smart home products.
It has seamless integration with Siri, making it attractive to Home Assistant users in order to leverage Siri for controlling Home Assistant.
Does Apple “lock” you in to premium products?
Apple has a reputation of “locking” users into their ecosphere, giving users no choice but to invest heavily in the services they provide, albeit very good services.
In the case of Apple Home, one might assume that you must purchase HomeKit ready devices at a premium price in order to use it. It seems like the masses mostly believe this and buy in to the Apple premium offering because it just works, it is slick, minimalistic and a joy to use.
However for the more tech-savvy user it becomes evident that Apple tend to leave open a few “back doors” without ever really advertising it. They want to maintain their clean cut brand image, therefore it is up to you to discover the hidden easter eggs.
Apple have quietly allowed third party developers to add non-certified devices to Apple Home. Of course there is a scary warning to Joe public when the Home app is presented with a non-certified product, but those of us in the know are aware that this is just smoke and mirrors, designed to “protect the common end user.”
So aside from my personal thoughts about Apple, what does it actually mean? It means that we can use Home Assistant with HomeKit! This is achieved by making Home Assistant appear as a 3rd party bridge to HomeKit.
So why would we want to do this? There are already some superb apps available for Home Assistant!
Siri of course!
Hey Siri! How do I setup HomeKit in Home Assistant?
If you just read my ramblings about Apple, I talked about HomeKit being able to support 3rd party devices. Developers can integrate their smart device offerings with HomeKit without being forced to get certification.
Add Home Assistant bridge
The clever folks at Home Assistant have integrated a piece of software that appears to HomeKit as a bridge. This software translates messages between HomeKit and Home Assistant.
Once you have Home Assistant setup, you will be given a code to enter into HomeKit, just like adding any other device.
Adding the Integration to Home Assistant
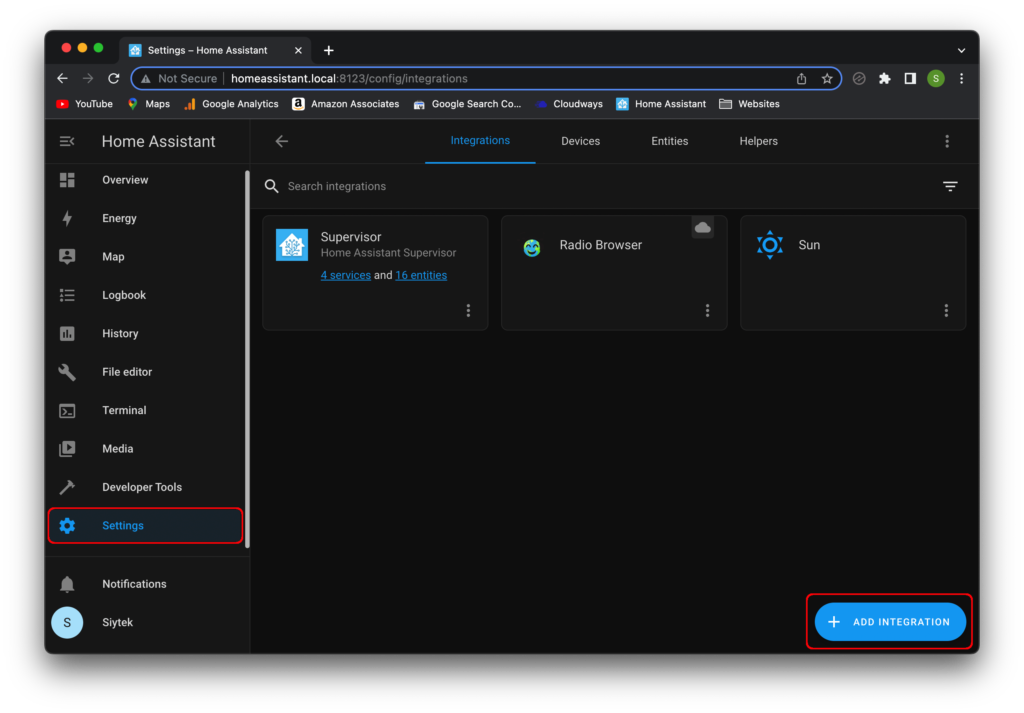
First we need to add the HomeKit integration to Home Assistant. First click on settings on the left hand sidebar and then click Devices and Services.
Alternatively you can just click the following button:

In order to add an integration, you simply need to click add integration in the bottom right-hand corner of the screen.
The add integration dialog box will open, where you can search for the HomeKit integration.
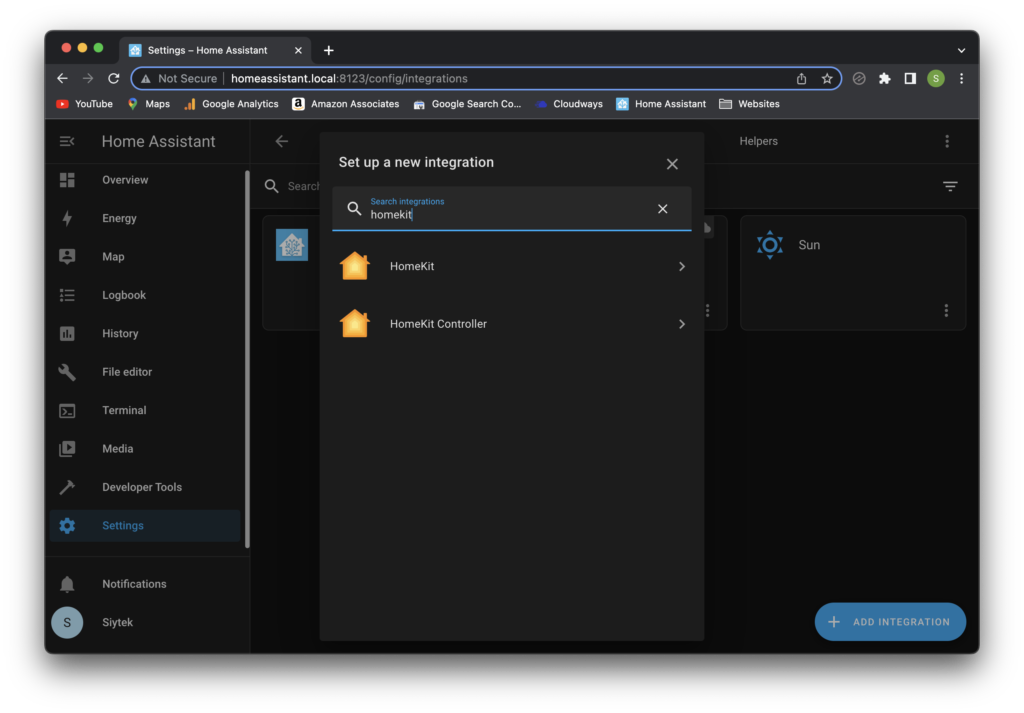
You will see two integrations for HomeKit:
- HomeKit – allows HomeKit to control Home Assistant
- HomeKit Controller – allows Home Assistant to control HomeKit compatible devices.
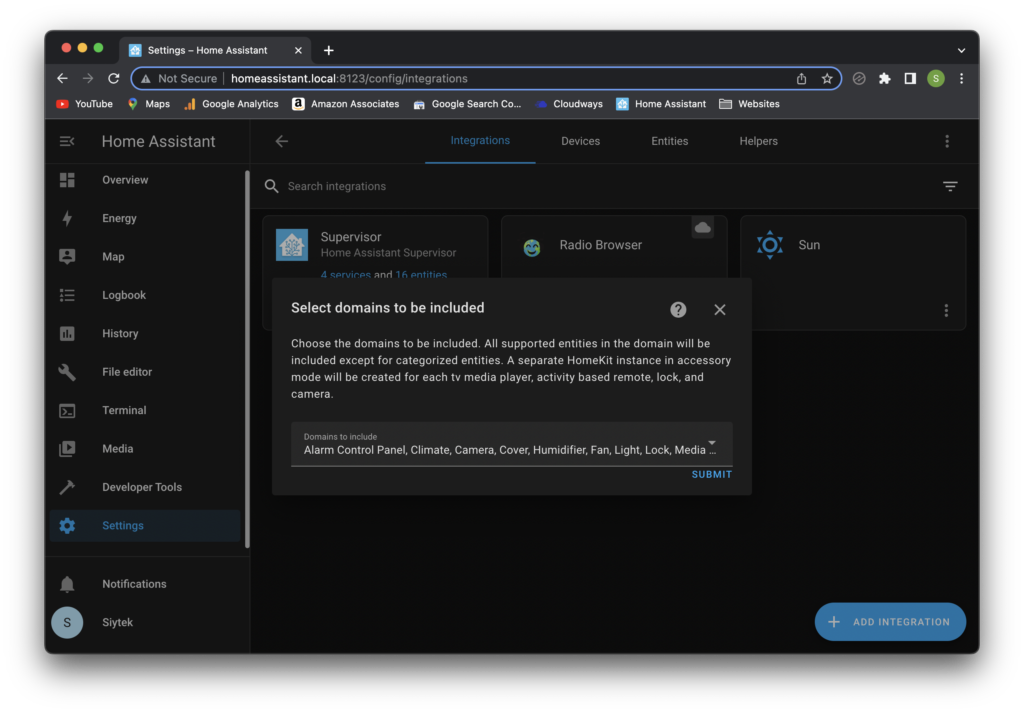
We will be using the HomeKit integration, so go ahead and select it. You will then be given the option to select which domains you wish to expose to Home Assistant.
For now you can leave this set to default if you are not sure what to choose. Then go ahead and click submit.
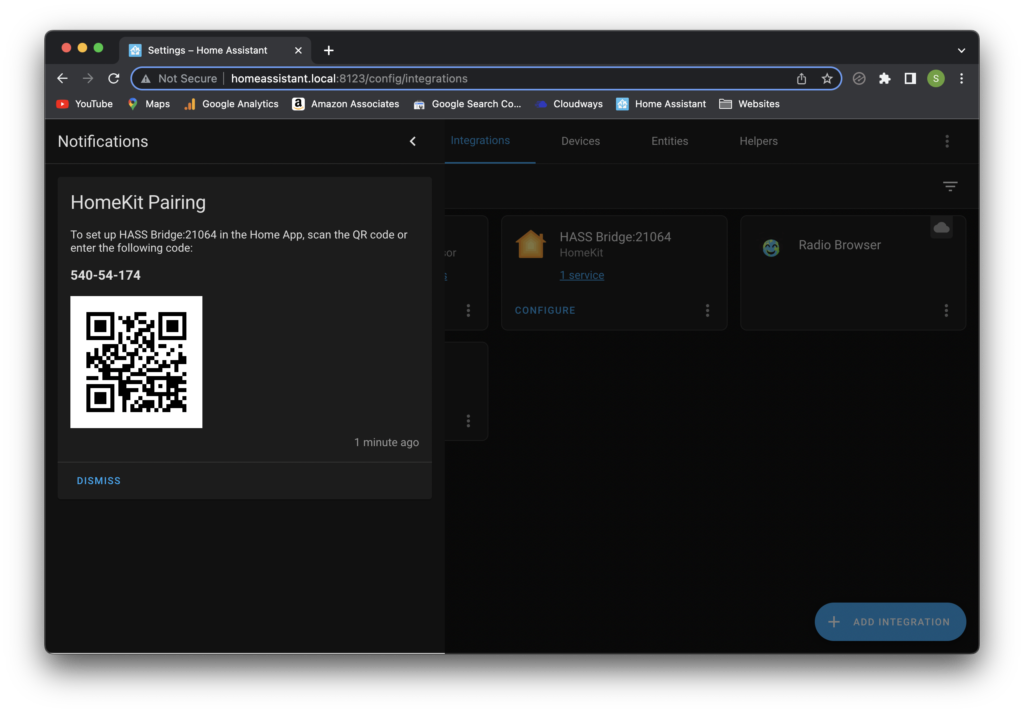
Lastly you will shown a message that instructs you to follow the instructions in “Notifications” under “HomeKitPairing.” Go ahead and click submit to close it.
Success! You should now have created the HASS bridge for HomeKit and you can click finish.
Grab you HomeKit QR Code
Click on “Notifications” on the bottom of the left-hand sidebar and you should see a notification containing a QR code that can be used with HomeKit.
Add Home Assistant bridge to the Home app
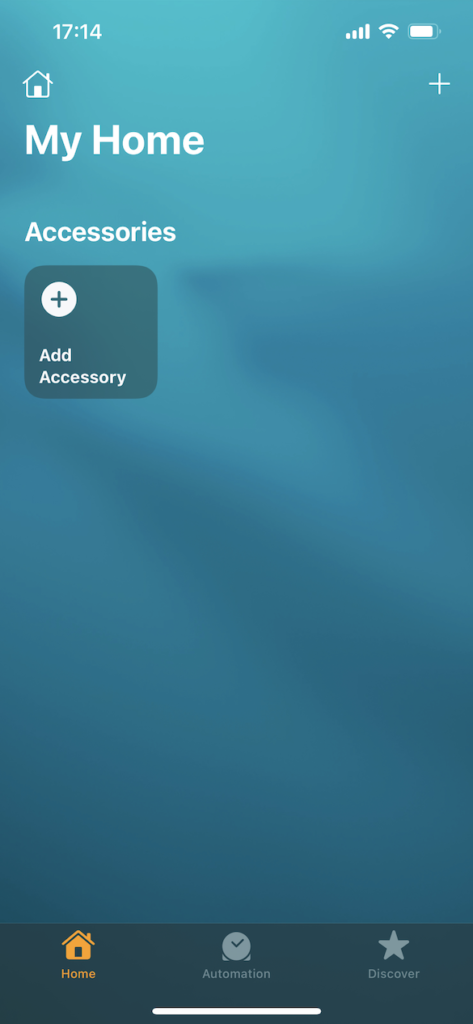
You will need the Apple Home app on your phone. Alternatively there is also a desktop version available for Mac.
We will be using the iPhone app for this tutorial. Go ahead and open then app, then tap the add accessory button.
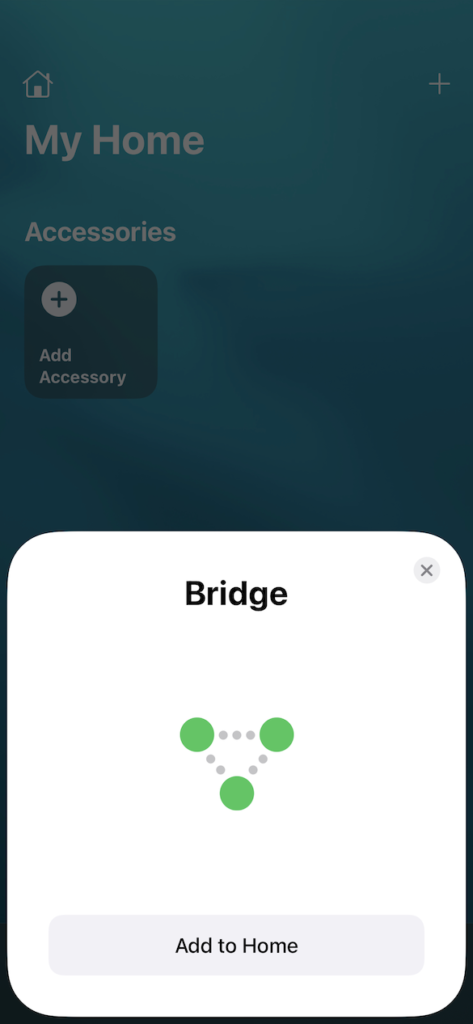
Next, simply point the camera at the QR code and the app will draw a white box around it when it recognises the code.
The bridge should be found and then simply tap add to Home. You may be warned about the accessory being uncertified, just click to continue.


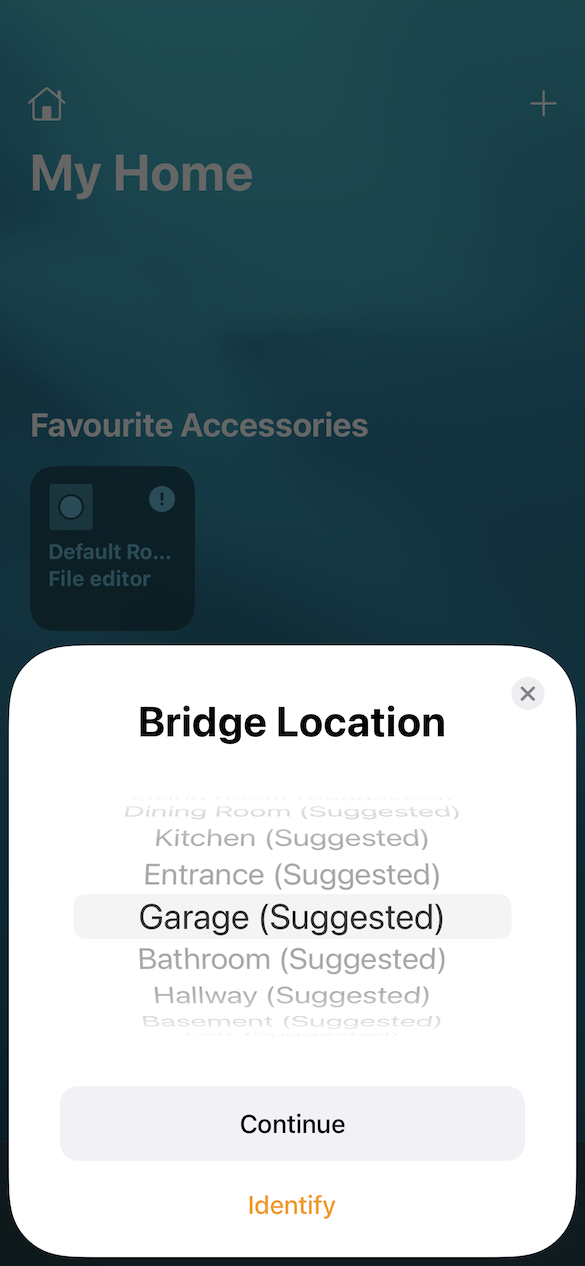
Next you need to select a location, this doesn’t really matter as the bridge is technically a virtual bridge. You can just choose the same location as your router if you like.
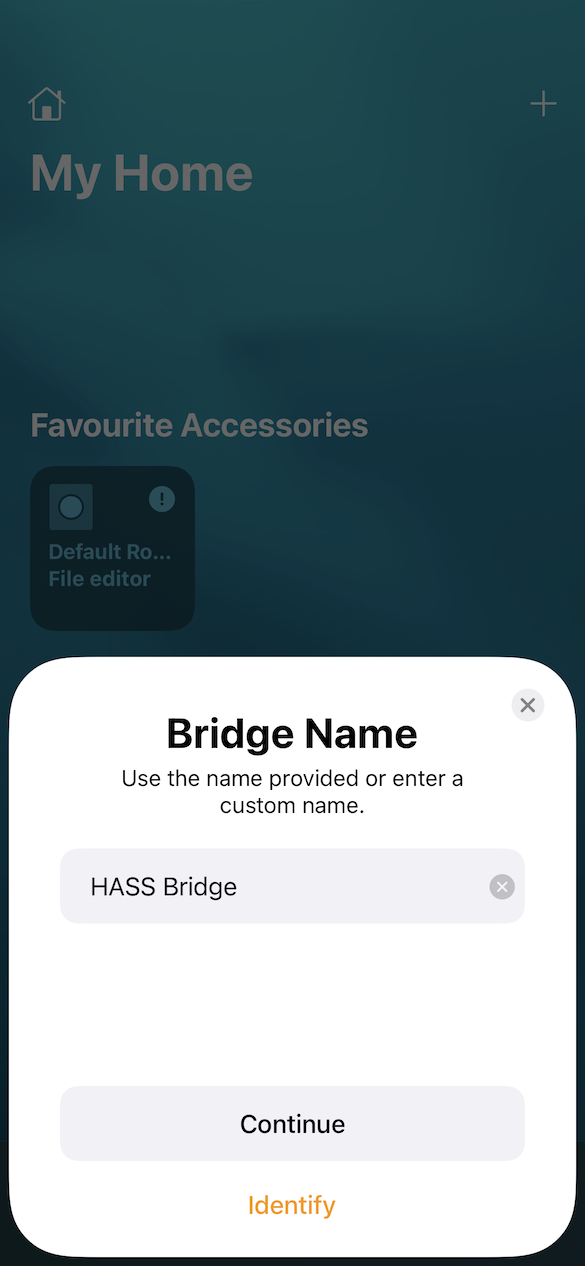
Click continue and then continue again on the next screen. You can change the name to something prettier if you wish.
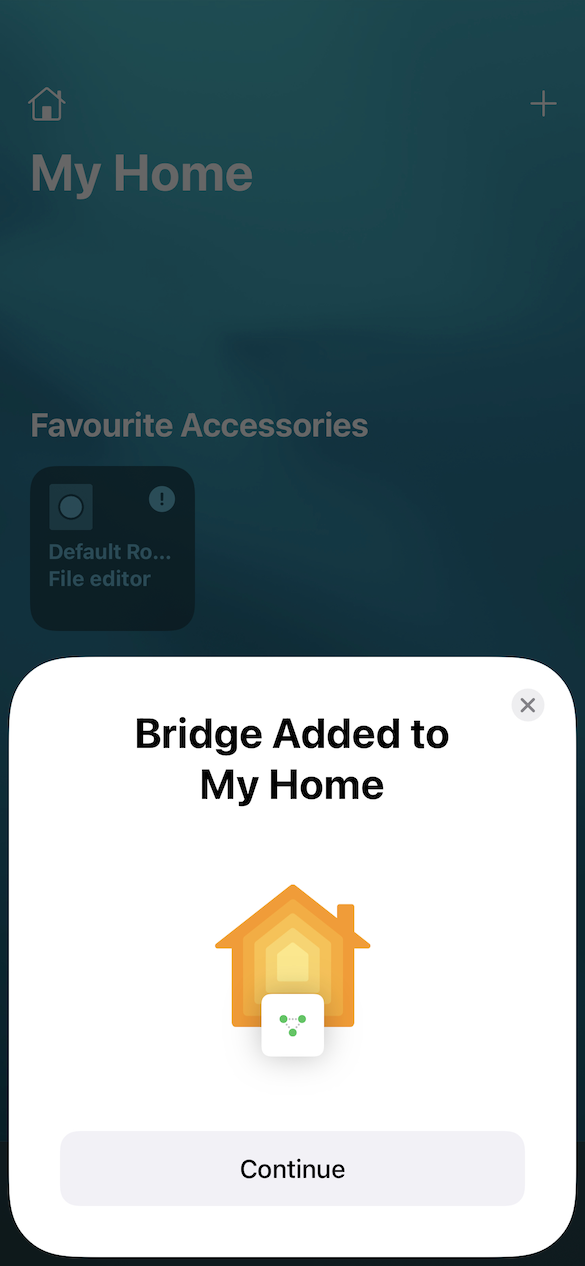
This will complete the process of adding the bridge to the Home App. Next you need to go through the process of configuring each of your chosen Home Assistant entities in HomeKit.
Congratulations! You have successfully connected Home Assistant with Apple Home.
Exposing Devices as Accessories
Most of our devices can be exposed to HomeKit by using a bridge, as we have just seen.
HomeKit thinks that it has a compatible device hub connected with an array of physical devices connected to the hub.
In practice the devices connected to this simulated hub are virtual. They are the entities within Home Assistant and the integration serves as the bridge between the two.
However this method does not work for all devices in Home Assistant.
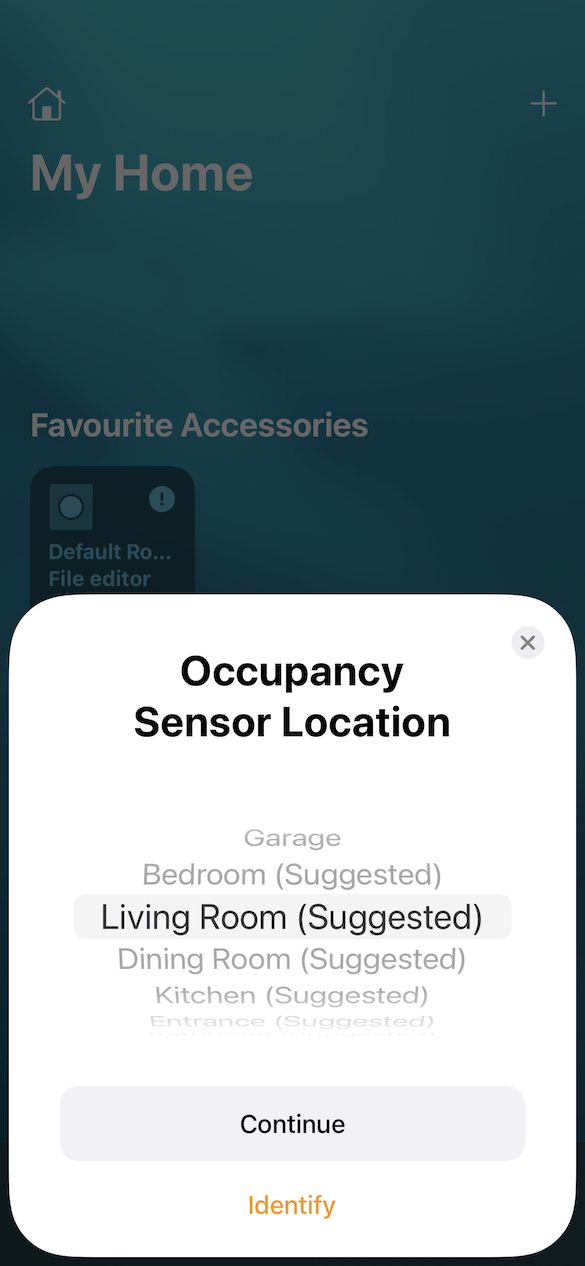
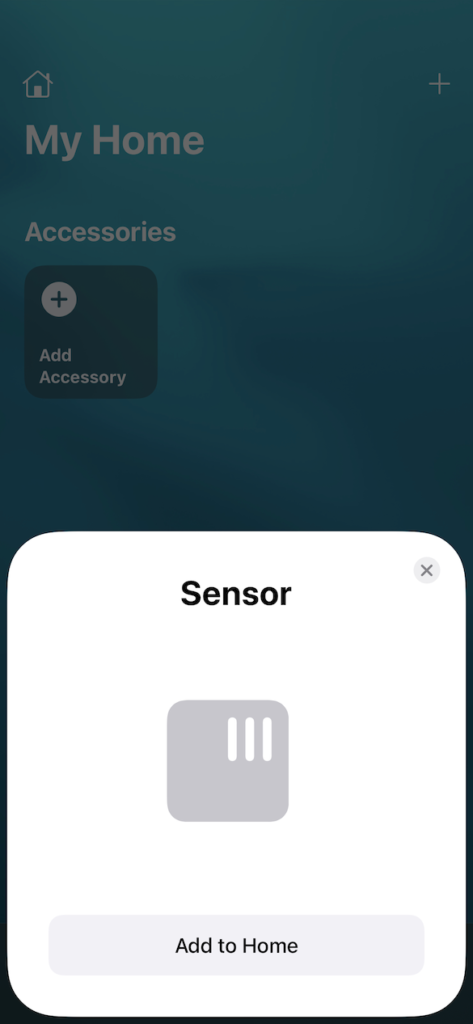
Other devices such as TV media players, cameras or locks need to be set up in accessory mode.
To change the mode to accessory mode, click the HomeKit integration and then click configure, you will be able to change it to an accessory. You should also choose the domain at the bottom of the menu.
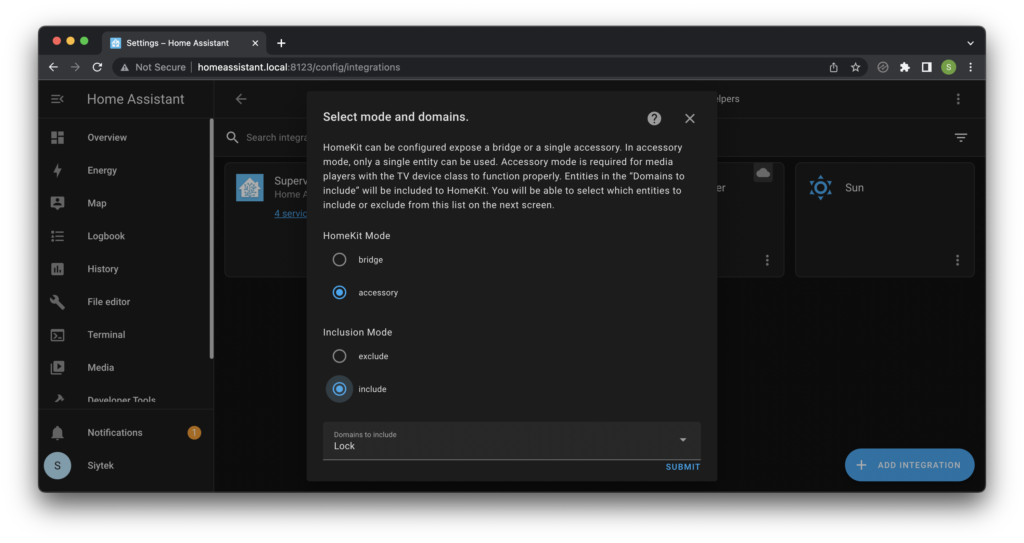
Clicking submit will then allow you to choose the entity.
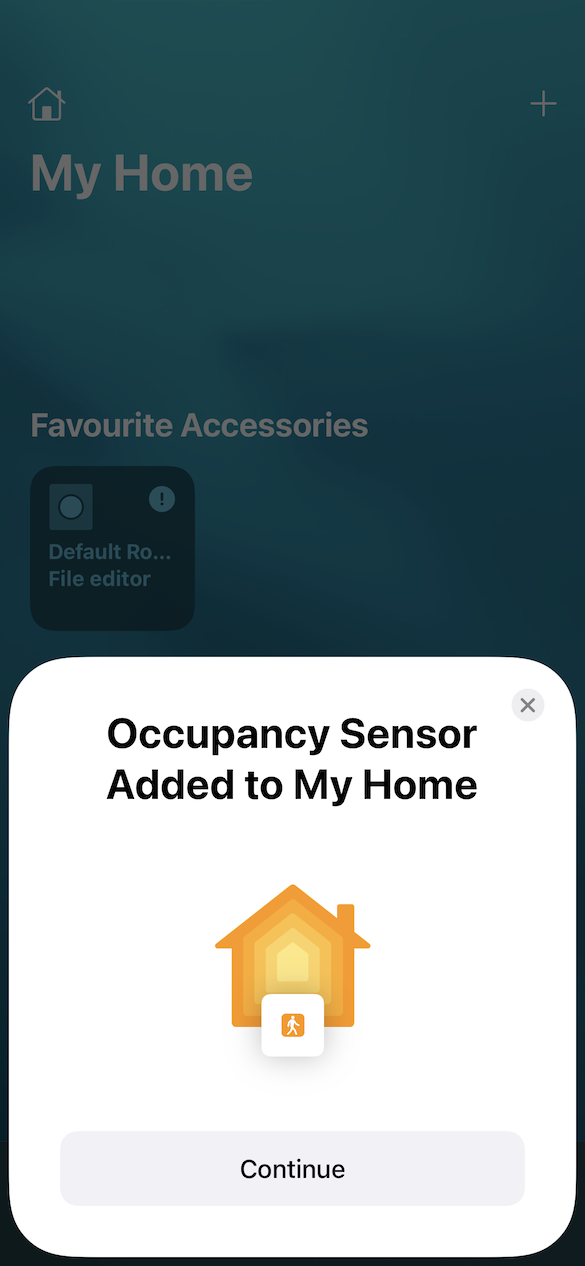
Now when you add the device to HomeKit, it will appear as a sensor instead of a brdige.
Filter your devices with YAML
You may find that there are a whole load of devices added to HomeKit. The Home Assistant integration allows you to filter these devices so that you can choose which ones appear in the Home app.
In my configuration I filter out the devices so that only those that I wish to control with Siri appear in the Home app.
In order to add a filter, we simply add another line of code to our configuration.yaml file. This will allow us to choose which devices we share with the Home app.
homekit:
   filter:
Under the filter section we can choose to add either an individual entity or all of the entities within a particular domain.
The term ‘entity’ in Home Assistant is used to describe an object within your Home Assistant configuration. All of the devices you have connected such as lights, sensors and switches are entities.
Entities are grouped by type, for example ‘light‘ is the entity group for all lights. For example a lamp would be named light.MyLamp
In order to add single entities, we can use the statement include_entities followed by a list of the entities we wish to include.
For now we will add a single lamp, which is called treelamp in my Home Assistant configuration. You should of course choose a lamp from your own configuration. As this is a light entity, we will write light.<entity_id> where entity_id is the name of the entity.
homekit:
   filter:
      include_entities:
         - light.treelamp
Take extra care that you write the code with the correct tabs/spacing in order to avoid syntax errors as YAML is very sensitive to the formatting.
In most cases where it does not work as expected, it will be because the formatting is incorrect, so check several times if you have a problem.
Now we will save the configuration.yaml file and restart Home Assistant. Once it has restarted we will see only the entity treelamp in our Home app.

Add device configurations
Next we can add a configuration for our entities. A full list of options for the various configuration variables for different entities can be found on the Home Assistant HomeKit page.
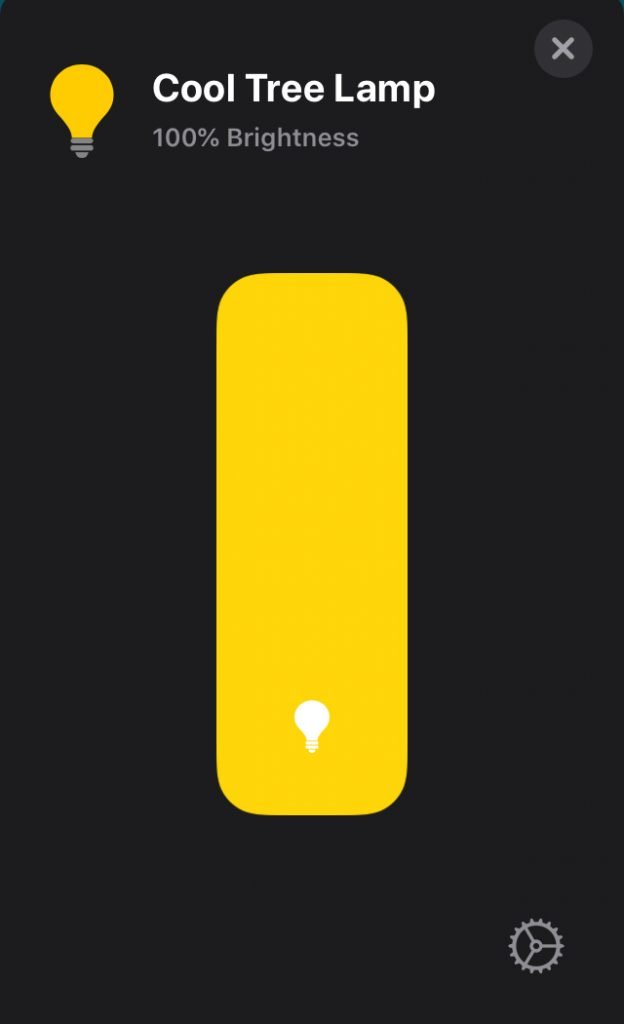
In the case of our lamp, it is a light entity so we only have the option to change the name. Lets go ahead and give it the more interesting name “cool tree lamp.” Make sure that entity_config has the same tab/spacing as filter.
homekit:
   filter:
      include_entities:
         - light.treelamp
   entity_config:
      light.treelamp:
         name: Cool Tree Lamp
Note that if you have already configured the HomeKit integration in Home Assistant, the names will cache during the initial installation and the name will not update.
To fix this you can either delete the Home Assistant bridge in the Home app and add it again as we did earlier in this tutorial, or follow this information from the Home Assistant website that explains how to reset the device.
Add an entity domain
If you would like to add all entities from a particular group, you can use the include_domains statement. The following will add all of the entities in the light group.
homekit:
   filter:
      include_domains:
         - light
It is still possible to configure individual entities using the entity_config statement as before.
homekit:
   filter:
      include_entities:
   entity_config:
      light.treelamp:
         name: Cool Tree Lamp
Conclusion
As we have seen in this tutorial it is very simply to add HomeKit support to Home Assistant. Once your devices show in the Home app you can use Siri to control them as you would with any Apple Home device, very cool!
I hope you found this tutorial useful, don’t forget to check out some of my other cool Home Assistant tutorials, such as this guide that explains how to integrate Spotify. Awesome!
Article Updates
July 2022 : Adding integration process revised to reflect Home Assistant 2022.7.6. Process no longer requires YAML to integrate and changed to using the GUI.
Article first published February 18th 2019.
Thanks so much for visiting my site! If this article helped you achieve your goal and you want to say thanks, you can now support my work by buying me a coffee. I promise I won't spend it on beer instead... 😏


