
Home Assistant offers a binary sensor integration that allows a ping to be sent to any device on your network. This provides us with a few useful applications, for example a really great way to monitor the presence of a particular device on our network.
In this guide, we will explore how to leverage the Ping integration in Home Assistant to check the presence, health, and connectivity status of your network devices, enabling you to create seamless automations and enhance your home’s overall smart experience.
Get ready to unlock a new level of control and convenience as we dive into the exciting possibilities of the Ping integration in Home Assistant. Let’s get started!
What Can I Use the Ping Integration for in Home Assistant?
The “ping” integration in Home Assistant is used to check the availability or status of devices on your local network using the ICMP (Internet Control Message Protocol) ping command.
Here are some common use cases for the ping integration in Home Assistant:
- Device Presence Detection: You can use the ping integration to determine whether specific devices (e.g., smartphones, computers, smart TVs) are connected to your home network. This can be helpful for automations and notifications based on the presence or absence of certain users or devices.
- Network Health Monitoring: You can use ping to check the connectivity status of your network devices, such as routers, switches, or access points. This allows you to be alerted if any of these critical devices become unreachable or experience connection issues.
- Automated Rebooting: In case certain devices on your network become unresponsive, you can set up automations to trigger a reboot of those devices. For example, if your smart TV stops responding, Home Assistant can automatically send a command to restart it by power-cycling.
- Motion Detection Confirmation: If you have motion sensors in your home, you can use the ping integration to confirm whether a specific device (e.g., a smartphone) is actually home or if the motion detected is from another source.
- Power Monitoring: If you have smart plugs or switches connected to network-enabled devices, you can use ping to check if those devices are turned on or off and use this information in your automation routines.
- Home/Away Status: Combining device presence detection with other factors (e.g., time of day, location, other sensor data), you can create more advanced automation scenarios for setting your home to “Away” mode when specific devices are not detected on the network.
What is Ping?
Before we dive into the ping integration, let’s take a quick look at what “ping” actually is.
Ping is a network utility that allows a type of message to be sent across a computer network from one device to another with the intention of checking reachability.
A ping message is always bounced back to the device sending the message. Both the reachability and delay time can be measured. If the sending device does not receive a response within a specified timeout period, the device is considered to be offline or unreachable.
All major operating systems have a simple ping function build in. From either the Mac/Linux Terminal or Windows command line, you can ping a device on your network.
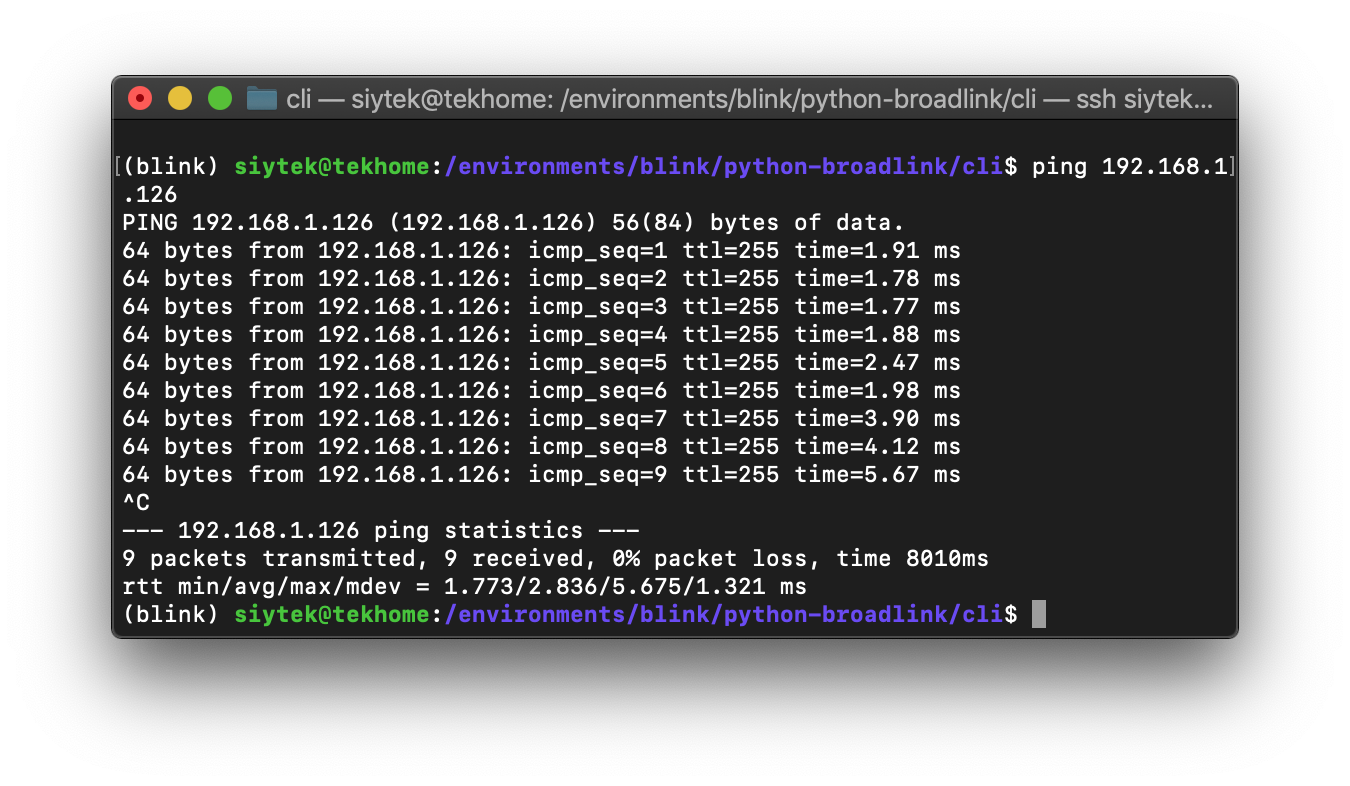
ping 192.168.1.88
This will send a series of ping messages to the specified IP address and print the round trip time of the message. The following image shows the output from pinging a smart light bulb directly from my Home Assistant server terminal.
If we try to ping a device that is offline, the ping application will allow a certain time for the return message. If it is not received then the device is deemed to be unreachable.
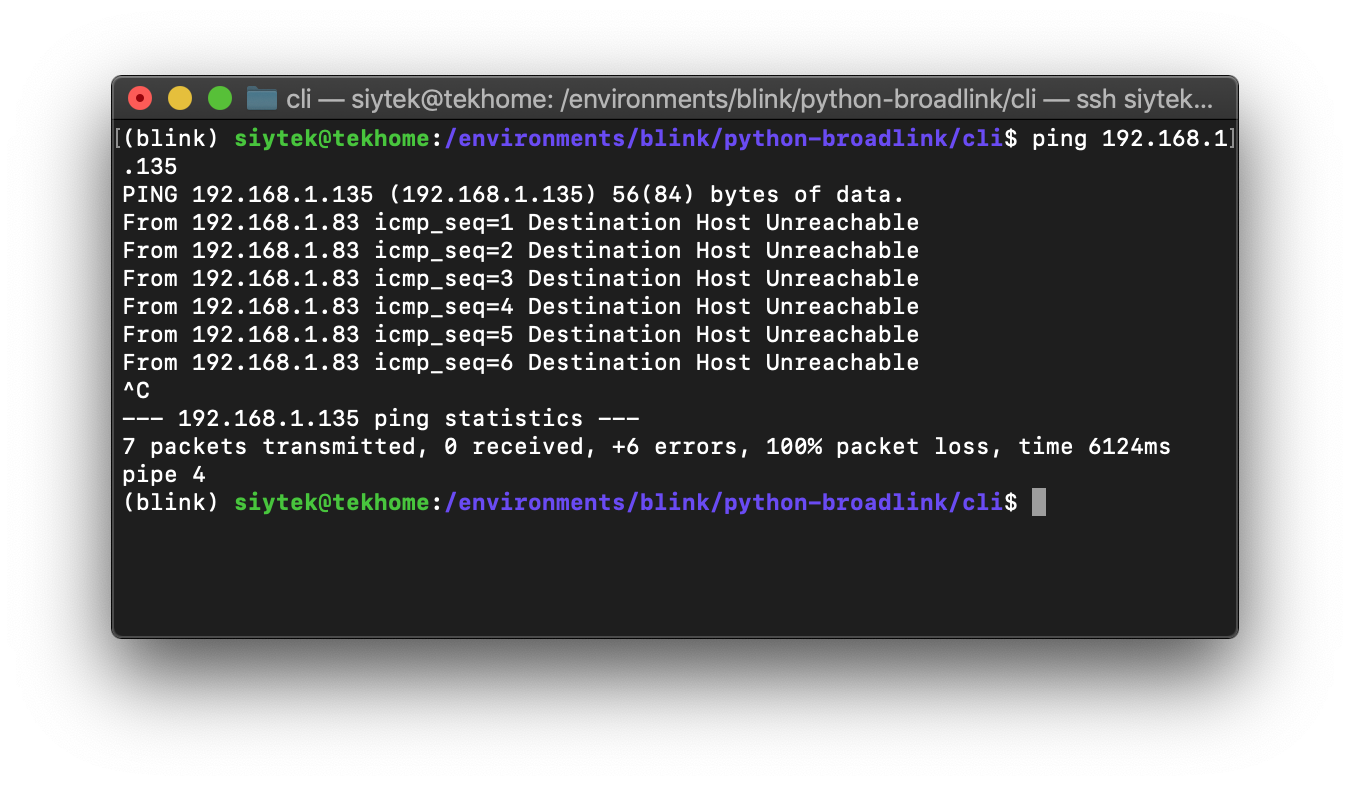
One of the main advantages to using ping is that it can be very quick to determine whether or not a device is unreachable. With regards to Home Assistant, this can enable us to quickly detect the presence of a device.
Home Assistant Ping Integration Usage Example
Once interesting way that the ping integration can be used in Home Assistant is to monitor the state of a smart bulb, which is connected to a traditional light switch.
First, let’s remember that a traditional light switch has no smart capability.
When the traditional light switch is turned on and the smart bulb is turned on, the ping integration can detect that the smart bulb is powered up by “pinging” it and listening for a response.
When the traditional light switch is turned off, the smart bulb is powered off and thus will not return the ping requests.
With this technique, it is possible to detect whether or not a non-smart switch is turned on or off. We can then create a state for this switch, effectively making a “dumb switch” into a smart switch!
Some smart bulbs do report their on/off status directly to Home Assistant and you could use this to achieve the same thing, however the reporting can often be much slower, causing a delay between the switch press and the state change.
Using the ping integration provides a reliable way to detect the state change, which can have a considerably quicker response time than using other methods to achieve the same thing.
So how does this actually work in Home Assistant?
When the switch is turned off and the power is cut to the smart bulb being monitored by the ping integration, Home Assistant can react when it senses that the state of the bulb becomes unavailable.
We can use this state change to fire an automation which performs some desired actions, such as turning the lamps and TV off in the room. This gives our dumb light switch pseudo-smart switch capability!
Using The Home Assistant Ping Integration
So now that you have a good idea of what the ping integration is and what it can be used for, let’s take a closer look at how to configure it in Home Assistant.
A way to speed this up considerably is by using the ping integration. We simply check if the device is present by pinging it. If the device is powered down by the dumb switch, Home Assistant can detect it quicker by the absence of the return ping.
Adding Ping to Home Assistant
Ping is implemented in Home Assistant as a binary sensor integration and therefore should be added to the binary_sensor portion of the configuration.yaml file.
If you are not sure how to edit the configuration.yaml file, or you have never used YAML before, be sure to check out the beginners guide to YAML for Home Assistant.
Ping and the Binary Sensor Integration
If you do not already have binary sensors in your YAML configuration, first you should go ahead and add it.
binary_sensor:
Otherwise just add the code beneath the existing binary sensor integration code. Don’t forget that YAML is very sensitive to formatting, therefore you need to maintain the correct spacing.
The Home Assistant website gives a detailed explanation of what is required for ping. As a minimum you must specify the platform for the binary sensor as ping.
You must also specify an IP address for the host, which is the address for the device that you wish to monitor. In my case I would like to monitor a smart bulb in a light fixture that has the IP address 192.168.1.126.
binary_sensor:
  - platform: ping
    host: 192.168.1.126
We can also optionally specify a name for this instance, making it easier to identify what the ping is actually doing.
binary_sensor:
  - platform: ping
    host: 192.168.1.126
    name: ping_livingroom_lamp
Next we can specify the interval time using the scan_interval attribute. The interval time is the time in seconds that we wish to elapse between sending ping commands to our chosen device.
Setting a scan_interval time of 1 seconds means that Home Assistant will ping the device every second and listen for a reply.
binary_sensor:
  - platform: ping
    host: 192.168.1.126
    name: ping_livingroom_lamp
    scan_interval: 1
Note that you should be careful not to overwhelm your network with too many instances of ping. You can avoid excess network traffic by setting the scan_interval to as long of a delay as possible, therefore keeping network traffic to a minimum.
It is also possible to specify the number of data packets that are sent for each iteration of the ping command. By default the ping integration sends 5 data packets and listens for their responses.
We can reduce the number of data packets that are sent, thus reducing the amount of traffic on the network.
I would recommend sending a single packet and if you encounter problems whereby the packet is dropped and Home Assistant fails to detect a state change, increase the number of packets until the integration works reliably.
You can specify the number of packets sent using count.
binary_sensor:
  - platform: ping
    host: 192.168.1.126
    name: ping_livingroom_lamp
    scan_interval: 1
    count: 1
Monitoring the Ping Binary Sensor State
Now that we have our instance of ping configured using the binary sensor integration, we will be able to monitor its state.
Go ahead and click on developer tools, then click the states tab and enter “binary” into the filter entity search box. You should see your new ping sensor in the list.
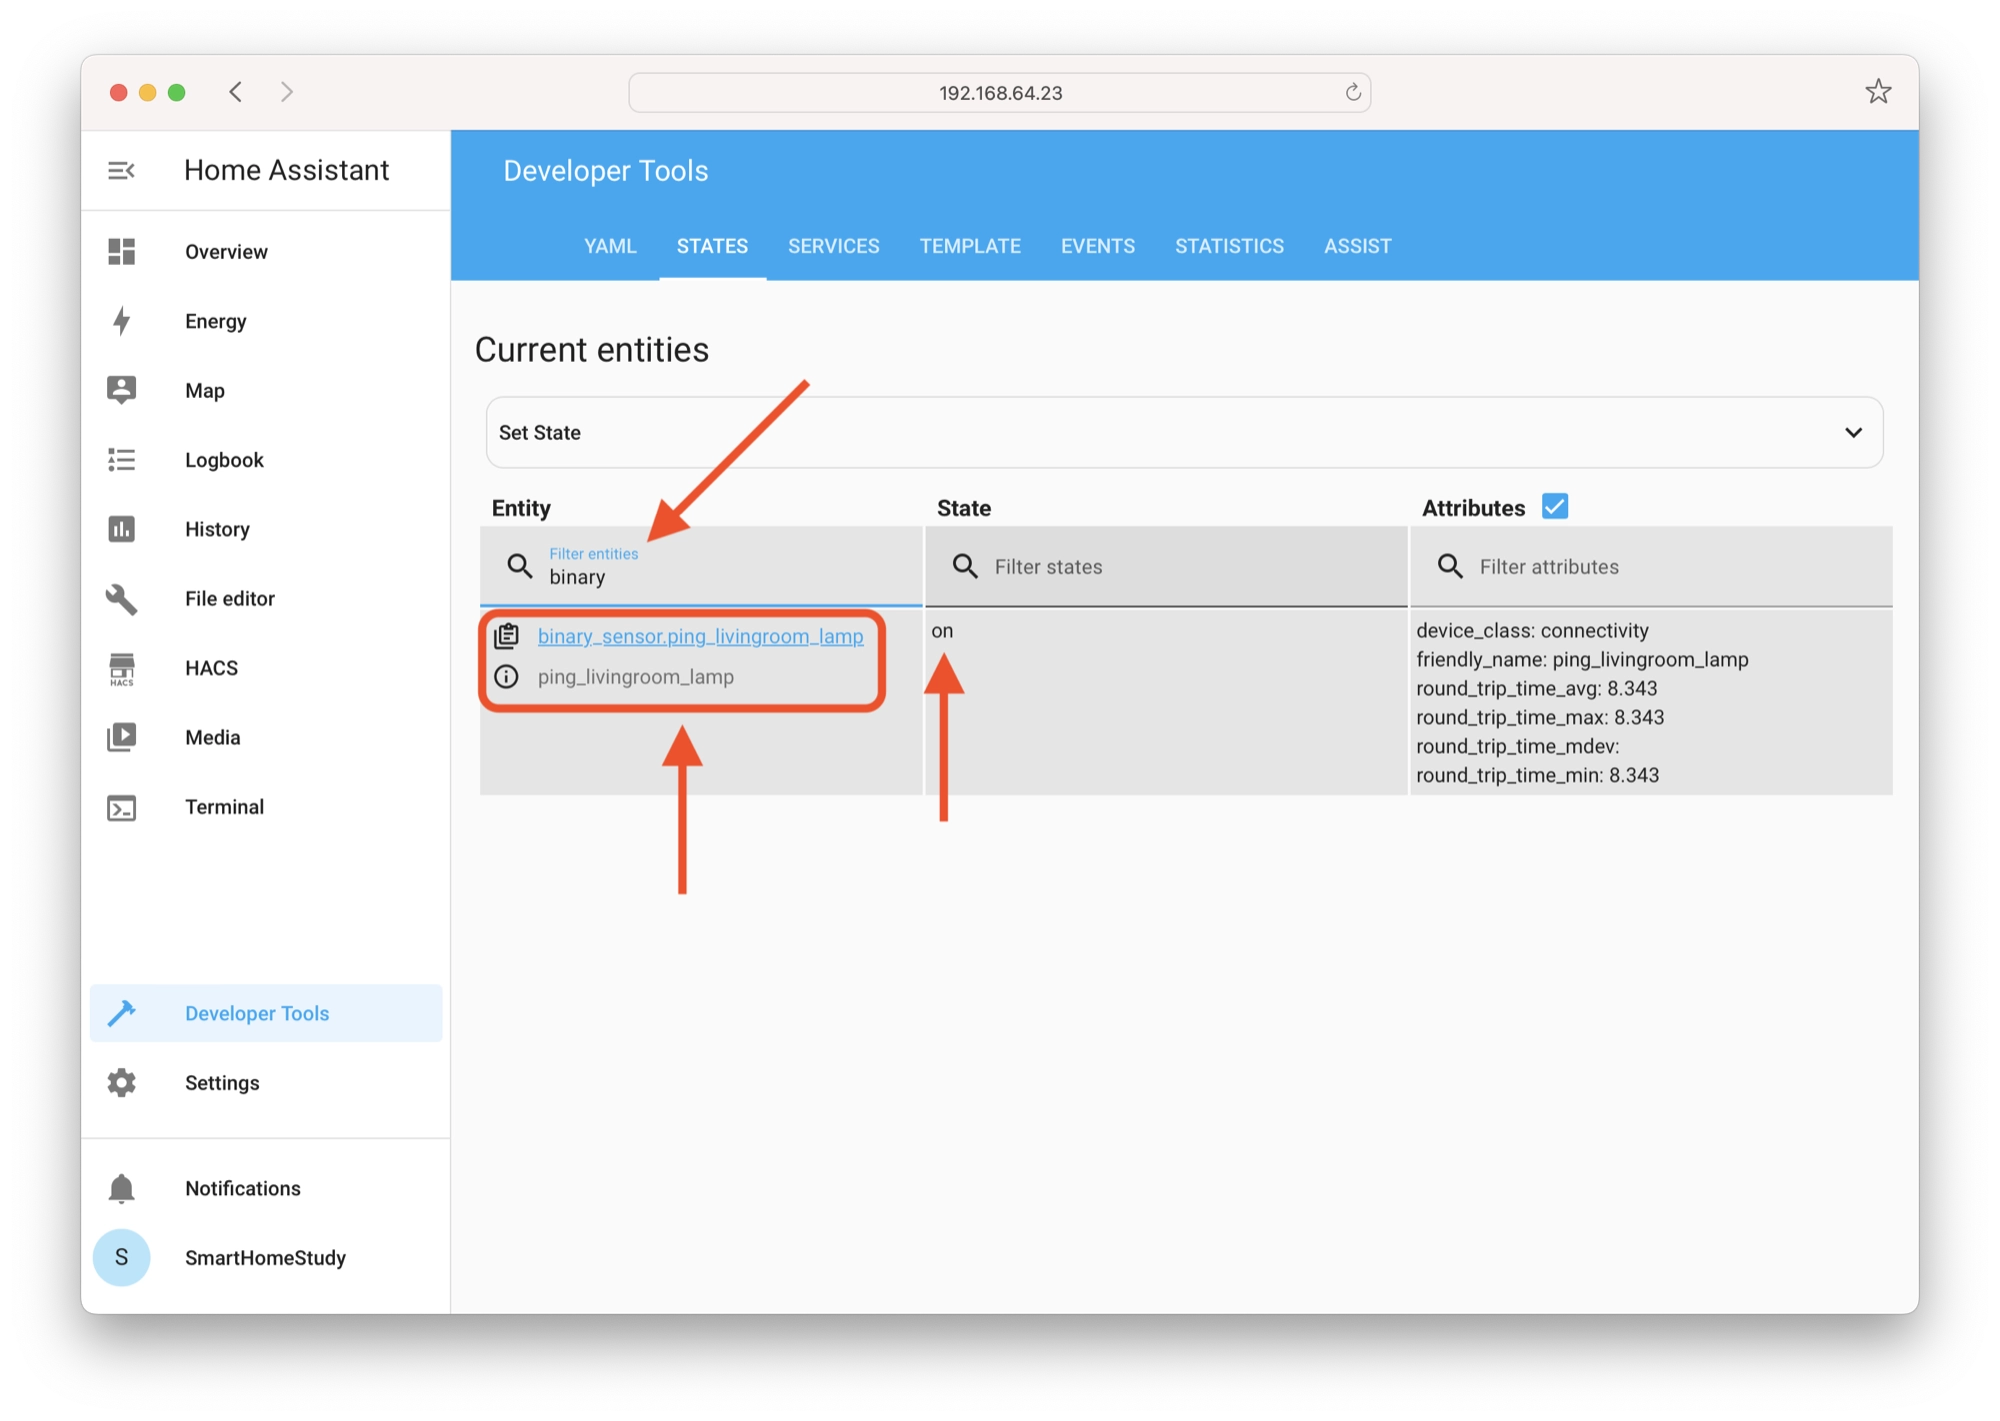
The ping instance will either have the state “off” or “on” depending on whether Home Assistant is receiving the ping messages within the timeout period.
In this example the state of this ping instance will mirror the state of the smart bulb in the main light fixture, which is connected to the “dumb” switch.
This means that our binary sensor will effectively give us the state of our traditional light switch, despite it not being a smart switch!
Now we can create a script or an automation that responds based upon the state of our ping instance. For example, we can use our “dumb” switch to not only turn off the smart bulb, but also all of the lamps in the room!
Creating a Home Assistant Automation using Ping
Now that we have added ping to our Home Assistant configuration as a binary sensor, let’s take a look at a simple example of an automation.
The easiest way to create an automation that is triggered by the ping sensor is to use the automation editor. If you have not created an automation before, you can check out the beginners guide to Home Assistant automations first to learn how.
Click Settings > Automation & Scenes and then click Create automation in order to create a new automation.
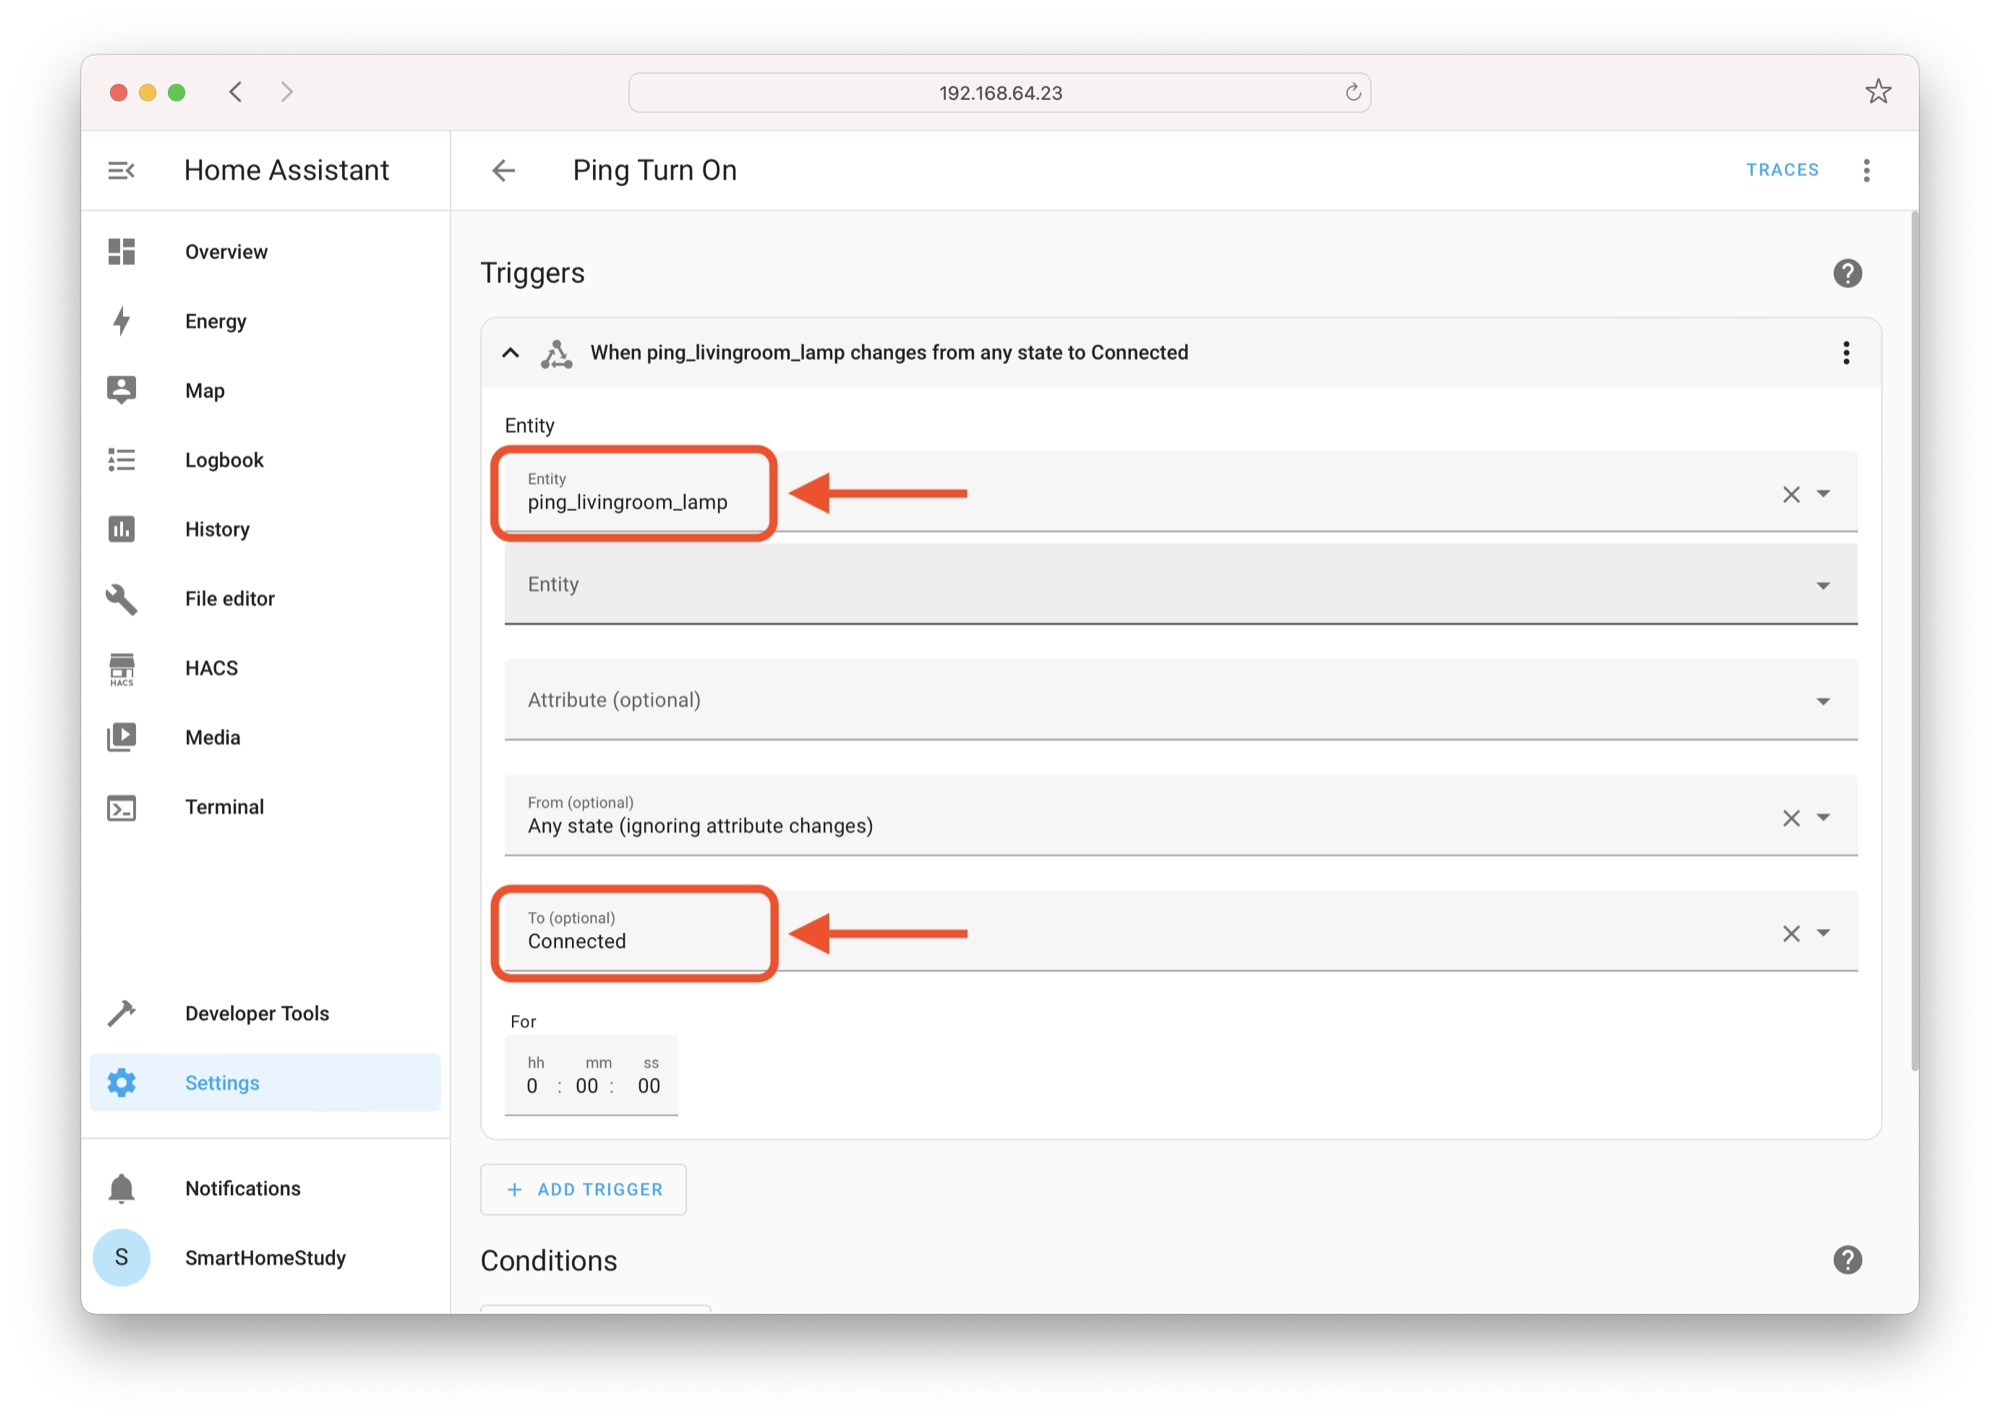
To use the ping sensor, create a new trigger using state and then set the entity to the ping binary sensor.
In order to trigger the automation when the ping is detected, click the To field and choose Connected from the list of options. This will fire the automation when ping detects a connection.
If you wish to create an automation that fires when ping is not sensing a connection, you can choose Disconnect instead.
Let’s take a quick look at the YAML for the automation above, including a light.turn_on service for the automation action.
- id: '1691244911592'
  alias: Ping Turn On
  description: ''
  trigger:
  - platform: state
    entity_id:
    - binary_sensor.ping_livingroom_lamp
    from:
    to: 'on'
  condition: []
  action:
  - service: light.turn_on
    data: {}
    target:
      entity_id: light.main_light
  mode: single
Conclusion
In this article we have covered the basics of setting up a Home Assistant binary sensor that makes use of the ping command.
By leveraging this feature, you can effortlessly monitor the online status of network devices, such as computers, smartphones, or IoT devices, ensuring they are always aware of their connectivity status.
With just a few simple lines of YAML, the Ping integration provides a seamless way to keep track of device availability and enables users to automate actions based on their online/offline status. Happy automating!
Article Updates
August 5th 2023 : Article improvements and updated to latest Home Assistant. Featured image updated. TOC added.
Article first published February 28th 2020.
Thanks so much for visiting my site! If this article helped you achieve your goal and you want to say thanks, you can now support my work by buying me a coffee. I promise I won't spend it on beer instead... 😏


Thank you for this well written articel!
Due to the lack of IP adresses when using Zigbee devices i’m wondering if there is a different way to archive the same result?