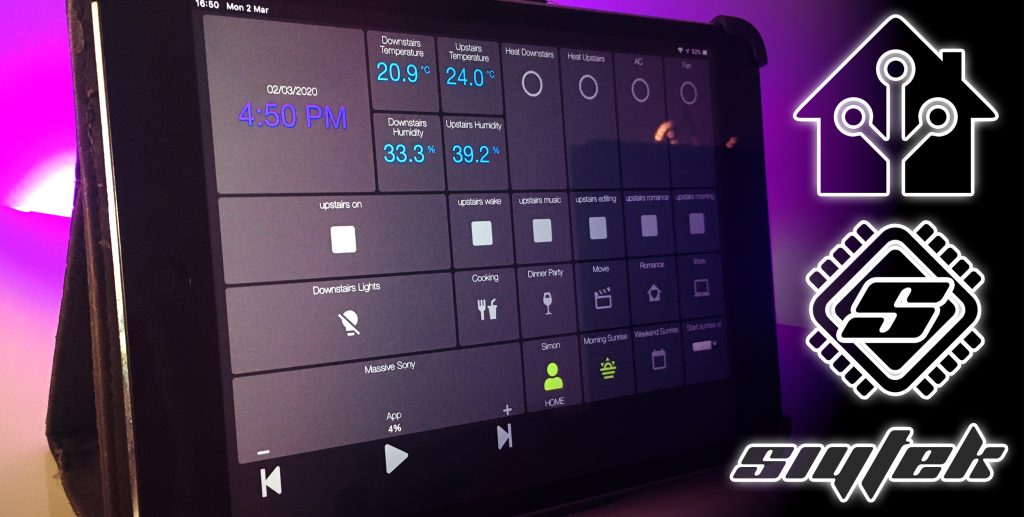
If you are looking to convert a tablet or Raspberry Pi into a super-cool dashboard controller for Home Assistant then you have come to the right place!
In this tutorial we will cover all of the steps necessary to get HADashboard up and running. Once installed you can convert any device with a web browser into a Home Assistant dashboard, although it works best with touch display devices. If you don’t already have hardware, perhaps check out the Raspberry Pi and official touch screen display.
Table of Contents
Prerequisite
You will need Home Assistant setup and running as well as your devices configured. I would also recommend that you have some scenes, automations and/or scripts functioning as preferred.
If you are new to Home Assistant or you are not yet familiar with editing YAML files then you should definitely check out my tutorials on automation and scripts first.
You will also need to have the file editor installed and be familiar with editing YAML files. Alternatively you can use a text editor of your choice if you are familiar with this method. I prefer to use Sublime on the Mac, but for Windows users you want to check out Notepad++.
Appdaemon
The Home Assistant Dashboard is part of the Appdaemon add-on, therefore we must first install it. At the time of writing the latest version is Appdaemon 4 but you can go ahead and install the latest version.
Installation
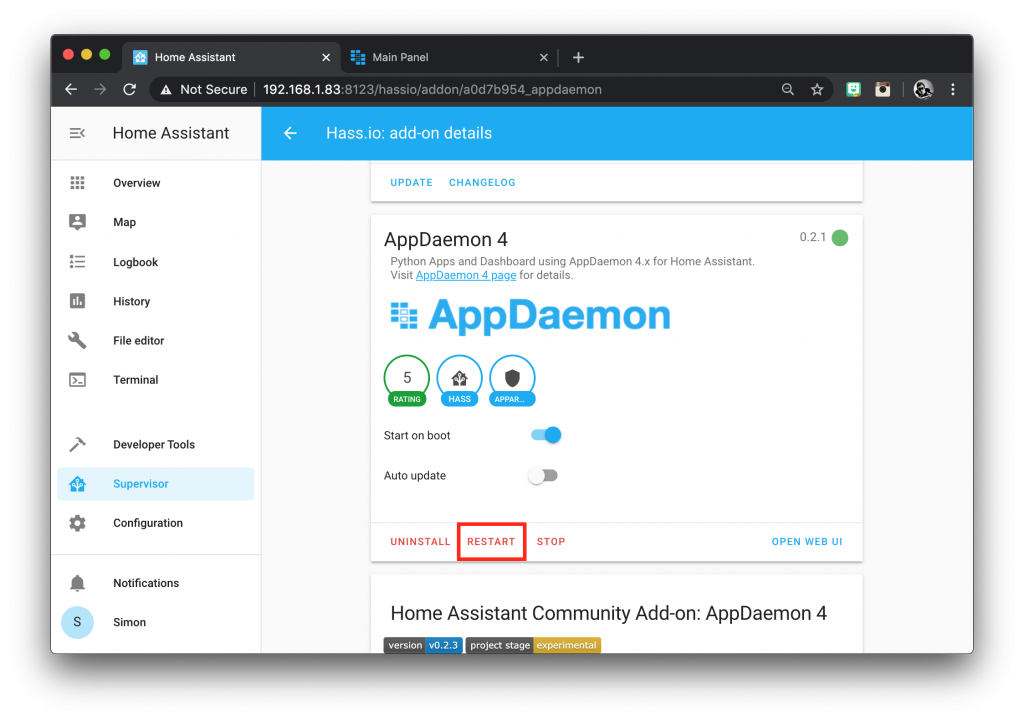
Go ahead and click the supervisor (or hass.io on older systems) option on the sidebar. Then from the add-on store, search for appdaemon and click the add-on.
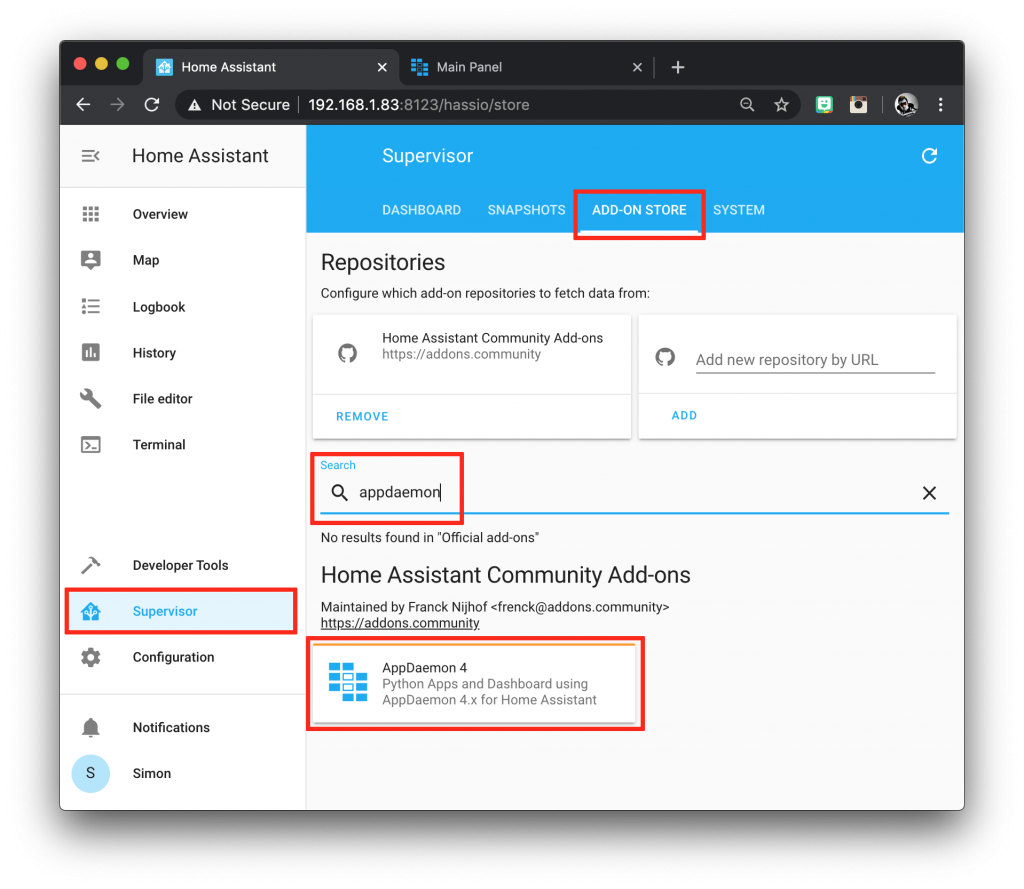
From the Appdaemon 4 page click install to install the add-on. Once installed click on start to run the add-on.
Create access token
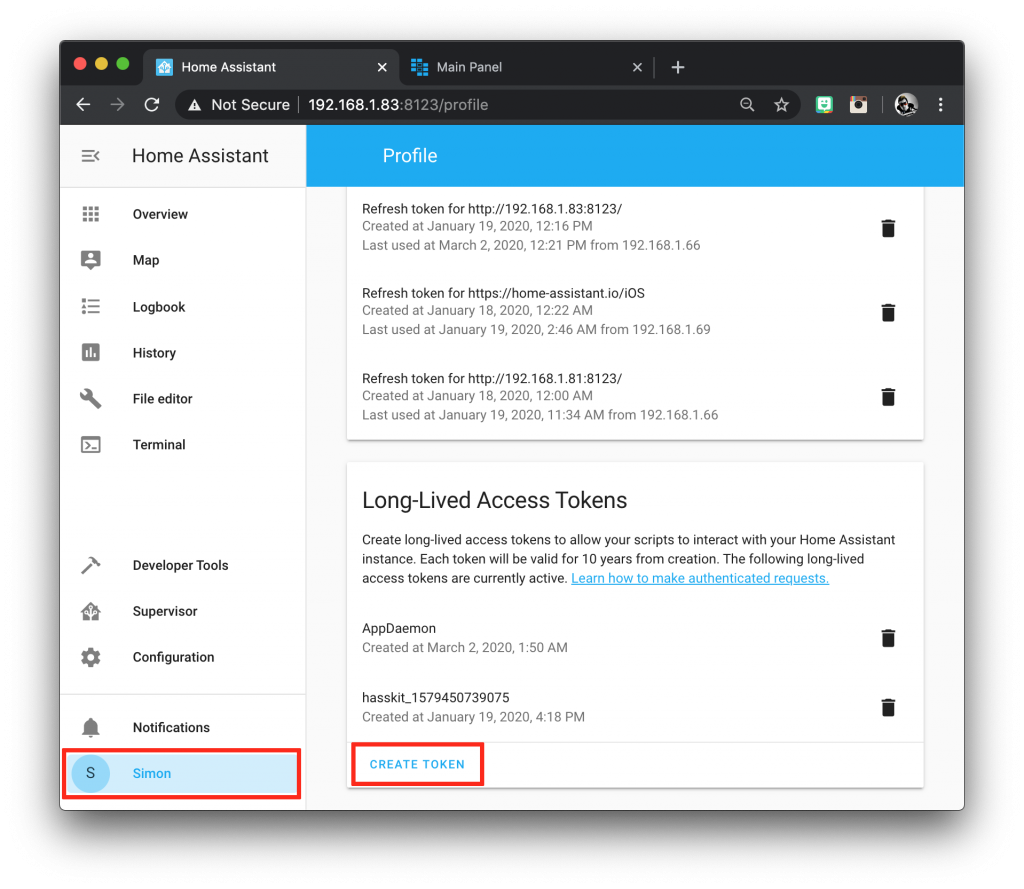
In order to connect Appdaemon to Home Assistant we will need to create a long-lived access token. This is a key that we create with Home Assistant and then give to Appdaemon so that it can gain access to Home Assistant.
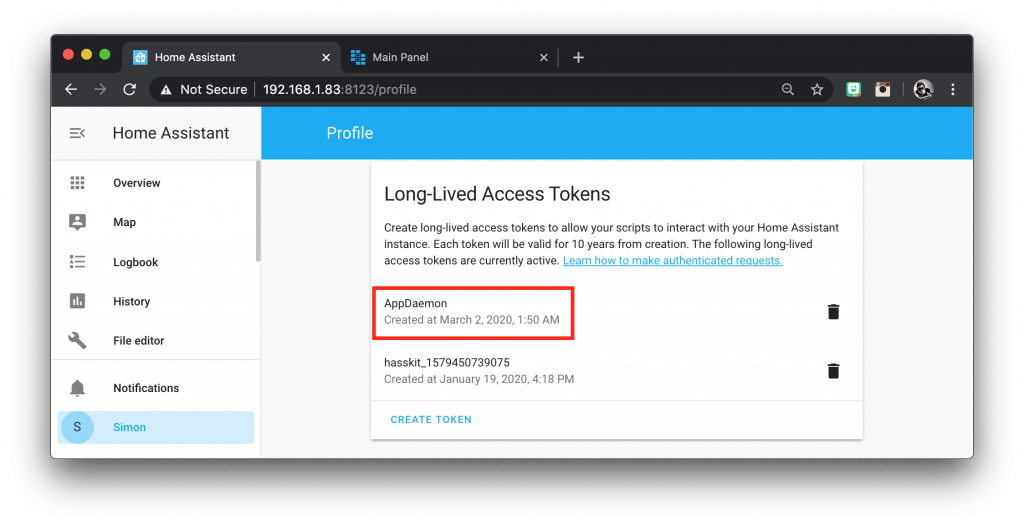
Click on your user account in the sidebar and scroll to the bottom of the page. Under the long-lived access tokens section click on create token.
You will be presented with a pop-up box where you can enter the name of the token. Call it something like “Appdaemon.”
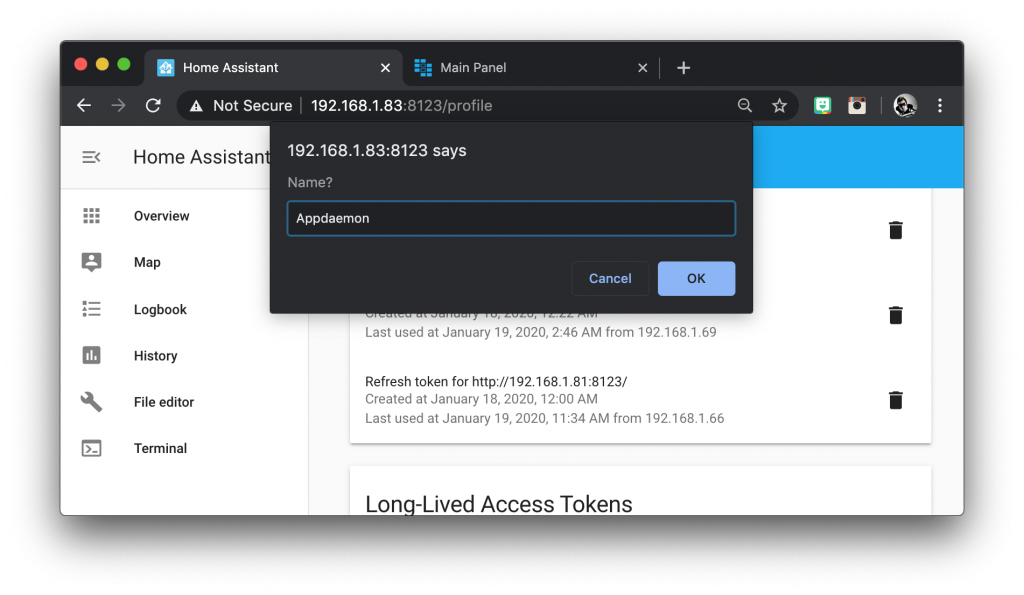
Once you have entered a name click ok. You will be presented with another pop-up box containing the key.
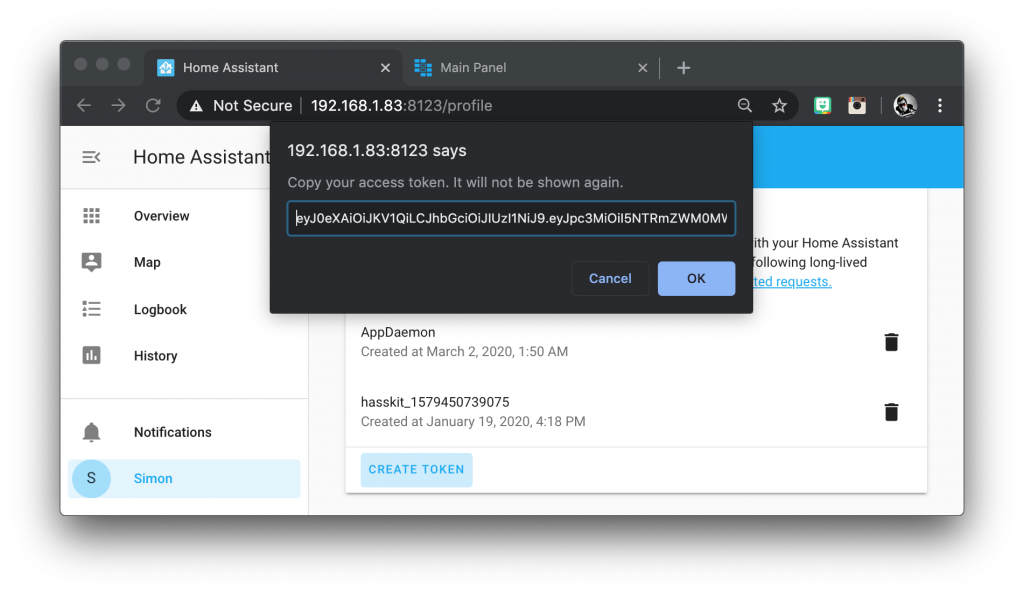
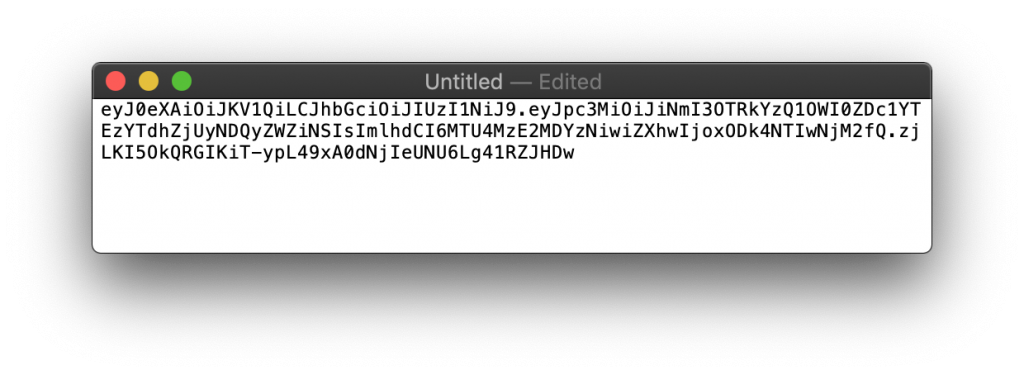
Copy and paste it from here into a new text file or notepad file just to temporarily store it. You will only be shown the key once in Home Assistant.
Once you have your key copied into a text file, you can click ok to close the pop-up. You should now see your new token in the list.
Edit appdaemon.yaml
Now that we have created our token we can add it to the Appdaemon configuration. This will allow Appdaemon to connect to our Home Assistant configuration.
We need to edit the appdaemon.yaml file found in the appdaemon folder, which was created when we installed Appdaemon.
/config/appdaemon
Navigate to this location using the file editor and and open the appdaemon.yaml file.
Under the plugins section we need to enter the URL for our Home Assistant server and the token that we just created.
Add the token
Add the ha_url property and specify the address of your Home Assistant server. Add the token property and then copy and paste the token from the text file.
  plugins:
    HASS:
      type: hass
      ha_url: http://192.168.1.83:8123
      token: eyJ0eXAiOiJKV1QiLCJhbGciOiJIUzI1NiJ9.eyJpc3MiOiJiNmI3OTRkYzQ1OWI0ZDc1YTEzYTdhZjUyNDQyZWZiNSIsImlhdCI6MTU4MzE2MDYzNiwiZXhwIjoxODk4NTIwNjM2fQ.zjLKI5OkQRGIKiT-ypL49xA0dNjIeUNU6Lg41RZJHDw
Add HADashboard
We also need to add the server address to the hadashboard section of the file. If you do not have hadashboard in the file already, just add it to the end of the file.
hadashboard:
  dash_url: http://192.168.1.83:5050
The completed configuration file should look something like this. Go ahead and save the file.
appdaemon:
  latitude: xx.xxxxxx
  longitude: xx.xxxxxx
  elevation: 2
  time_zone: Europe/Amsterdam
  plugins:
    HASS:
      type: hass
      ha_url: http://192.168.1.83:8123
      token: eyJ0eXAiOiJKV1QiLCJhbGciOiJIUzI1NiJ9.eyJpc3MiOiIyNTgwNWNmZGY1Mjc0OTYyOWMwNTFkODc2MjViZDczMSIsImlhdCI6MTU4MzExMzgzNiwiZXhwIjoxODk4NDczODM2fQ.knlFc4l5ztxDm5ZOPSgGH0S5rm7Ah4HhyohDjZBZ1VE

http:
  url: http://127.0.0.1:5050
admin:
api:
hadashboard:
  dash_url: http://192.168.1.83:5050
Once you have saved the file, go back to the appdaemon page in the add-ons store and restart Appdaemon. Look out for any notifications at the bottom of the sidebar, as any authentication errors will be reported during the restart.
HADashboard
Now that we have Appdaemon installed we can create our dashboard! First we need to navigate to the dashboard folder in the file editor.
/config/appdaemon/dashboards
In this folder we can create a .dash file for each dashboard we wish to create.
Hello world example
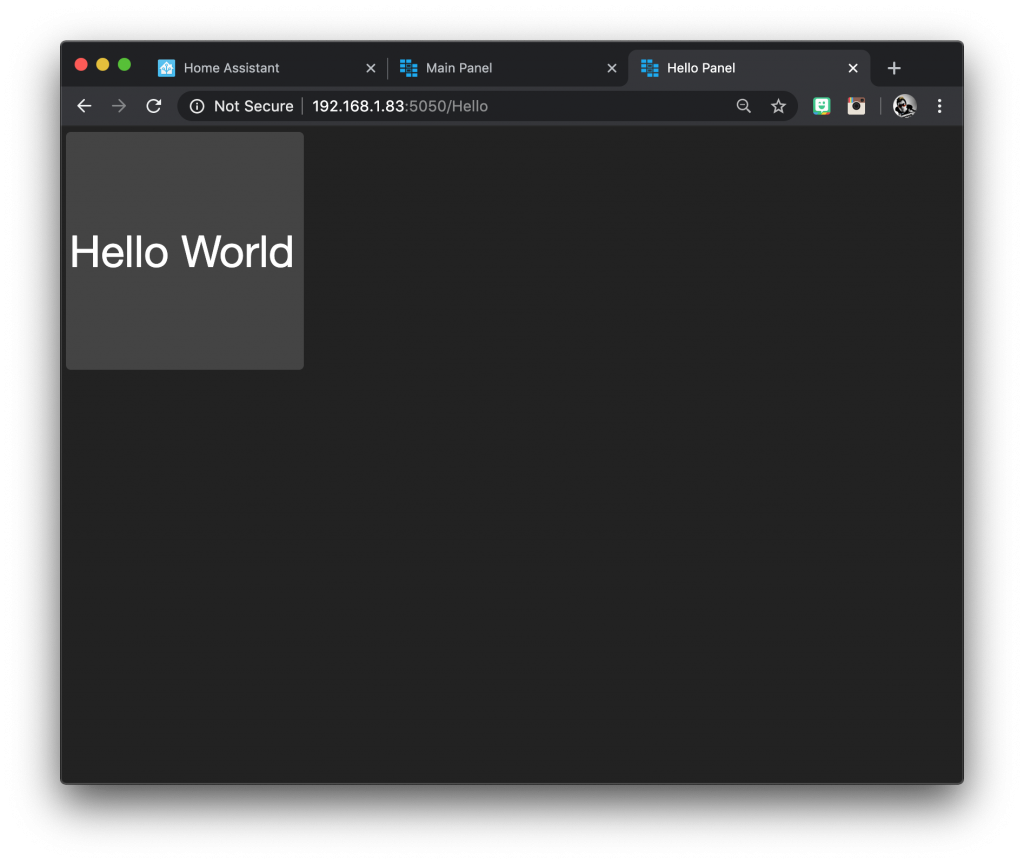
There should already be a Hello.dash file here so we can go ahead and test this file by navigating to the following address in our browser.
http://<your-home-assistant-server>:5050/Hello
Note that the address and filenames are case sensitive.
Creating a new dashboard
Now we have confirmed that the hello world example is working, lets create our own!
Create a new file
In the dashboard folder, create a new file with a name of your preference. I will call mine tekhouse.dash.
Add the main arguments
At the start of the file we can specify the main arguments, all of which are optional. First we should specify a name for our dash.
title: Main Panel
Next we can specify some global parameters for the widgets. The widget_dimensions attribute specifies the default size in pixels.
The widget_size attribute specifies the number of grid spaces a default widget occupies. The columns parameter specifies the number of columns in the dash matrix.
title: Main Panel
widget_dimensions: [120, 120]
widget_size: [1, 1]
widget_margins: [5, 5]
columns: 8
Lastly we can specify the global parameters. These parameters will be applied to all entities that we add to the dash. If an entity does not support the particular parameter, it will just be ignored.
title: Main Panel
widget_dimensions: [120, 120]
widget_size: [1, 1]
widget_margins: [5, 5]
columns: 8
global_parameters:
    use_comma: 0
    precision: 1
    use_hass_icon: 1
    namespace: default
    devices:
      media_player:
        step: 5
For more information about the parameters, you can check out the official documentation.
Add the layout
In order to create a layout we need to add the layout section to our file underneath the global attributes that we just added.
layout:
Within this section we will use the “-” operator to denote a list item. Each subsequent line will represent a line of the dash matrix. So we can go ahead and start by adding a simple clock to the dash.
Add a clock
layout:
    - clock.clock
Go ahead and save the changes to the file. We can take a look at our new dash by pointing our browser at the new file.
http://<your-home-assistant-server>:5050/<your-.dash-file>
In my case the actual address I will navigate to is as follows.
http://192.168.1.83:5050/tekhouse
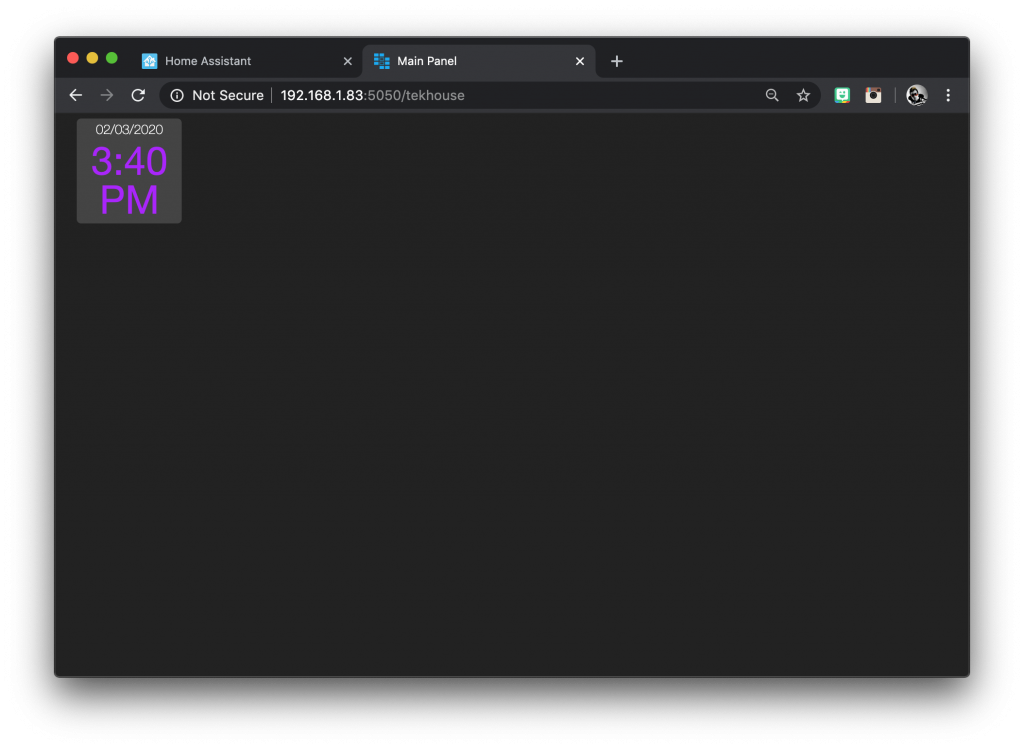
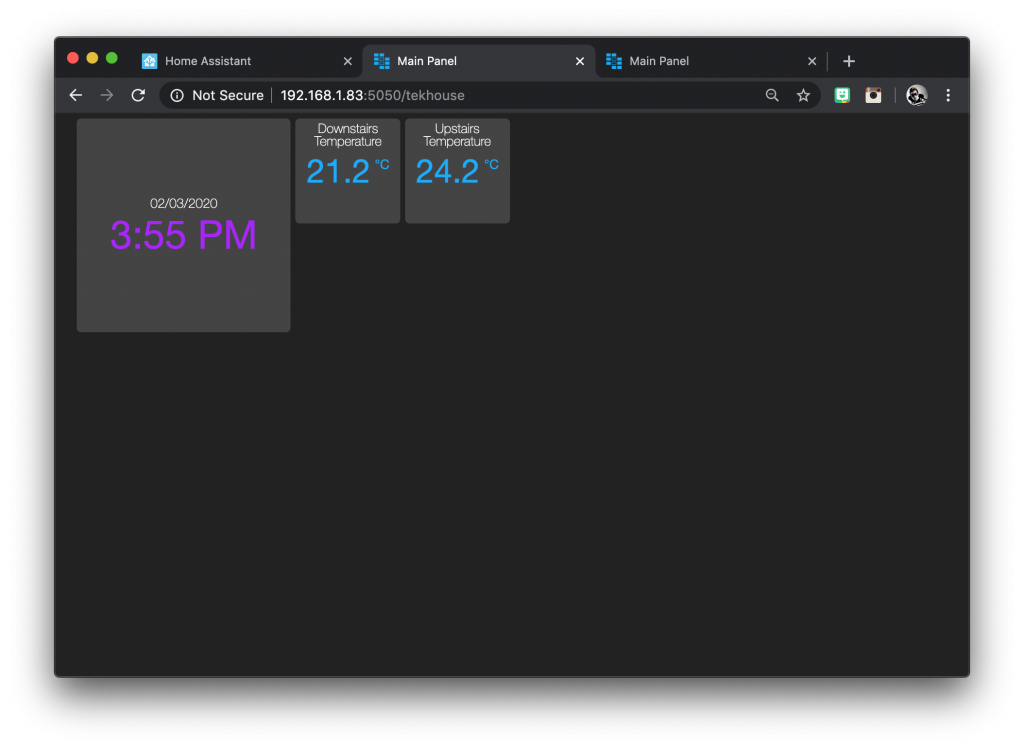
Our newly added clock widget adopts a 1×1 size in the matrix as this is the default that we specified in the global attributes.
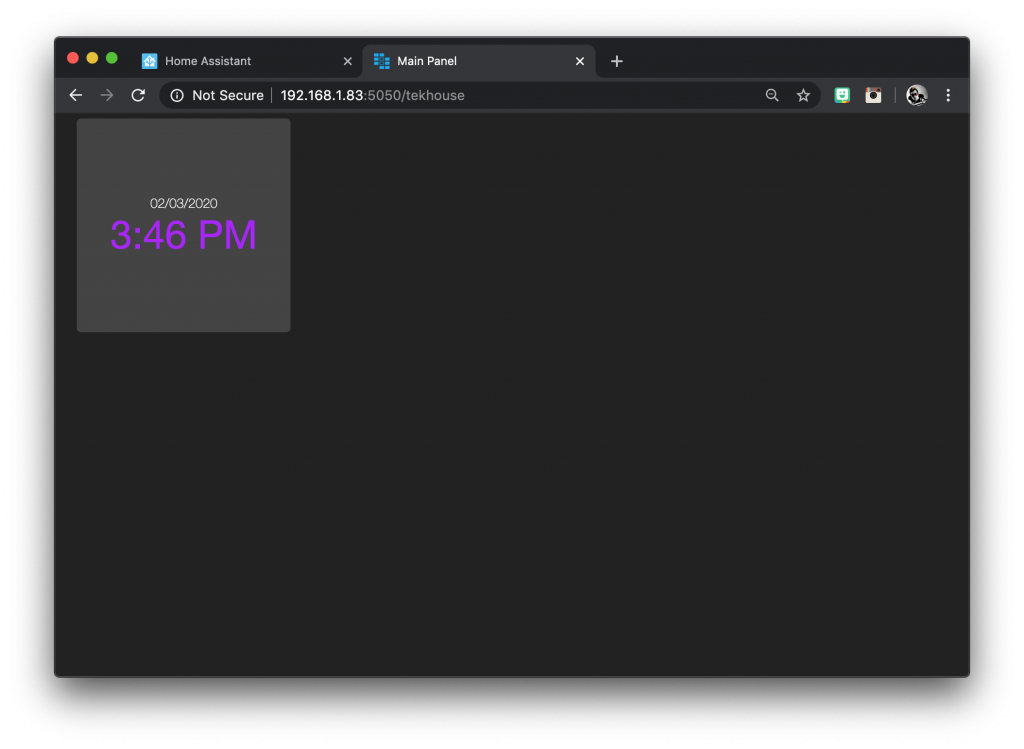
However we can change this by adding a specific size in blocks. We can go ahead and add this after the entity.
layout:
    - clock.clock (2x2)
Save the changes to the file and hit refresh on the browser. We can see that the clock widget is now 2 by 2 squares in the dash matrix.
Add some sensors
Next we will add some sensors from Home Assistant. For this example we will add the HVAC controls first.
If you have not yet automated your HVAC system, I have a very detailed tutorial here that is definitely worth checking out!
First we need to navigate to developer tools from the sidebar and click the states tab.
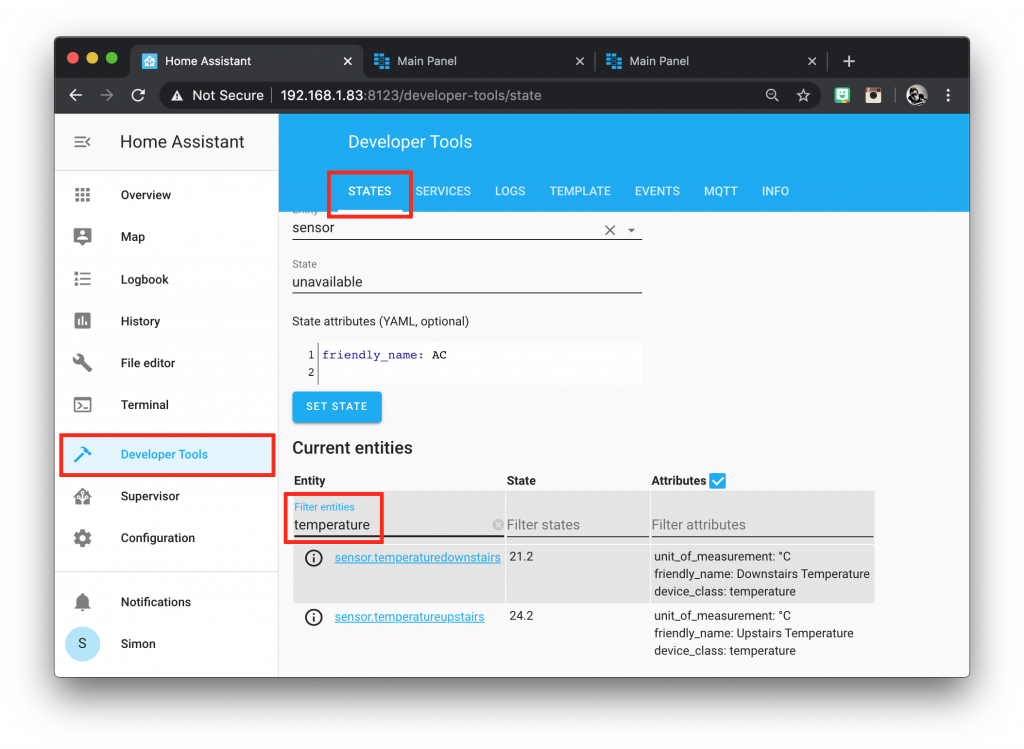
I will be adding the temperature sensors that I use for the upstairs and downstairs thermostats. This is of course only an example and you can configure your entities however you like.
You can use the filter entities text box to quickly locate the entity you wish to add.
Now we can add this to our code after the clock. Each entity should be separated by a comma.
layout:
    - clock.clock (2x2), sensor.temperaturedownstairs, sensor.temperatureupstairs
Note that on this page it is possible to scroll the code left and right to see more.
Now if we save the file and refresh the browser, we can see that that both of the temperature sensors have been added.
Next I will add the humidity readings from each of these sensors below the temperature readings. These will need to go on the second line of the list using the “-” operator.
layout:
    - clock.clock (2x2), sensor.temperaturedownstairs, sensor.temperatureupstairs
    - sensor.humiditydownstairs, sensor.humidityupstairs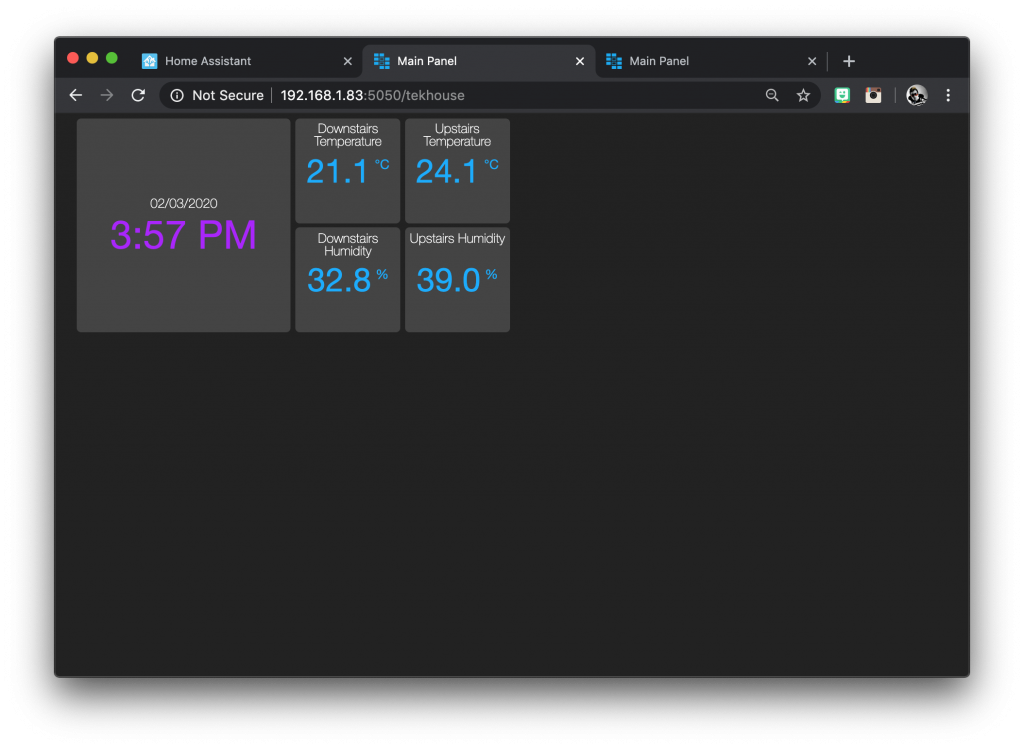
Awesome! Now we can add the switches for the HVAC system to complete the first two rows of our dashboard matrix. I will add these to the first row but make the widgets 2 rows tall.
layout:
    - clock.clock(2x2), sensor.temperaturedownstairs, sensor.temperatureupstairs,switch.heatdownstairs(1x2), switch.heatupstairs(1x2), switch.ac(1x2), switch.fan(1x2)
    - sensor.humiditydownstairs, sensor.humidityupstairs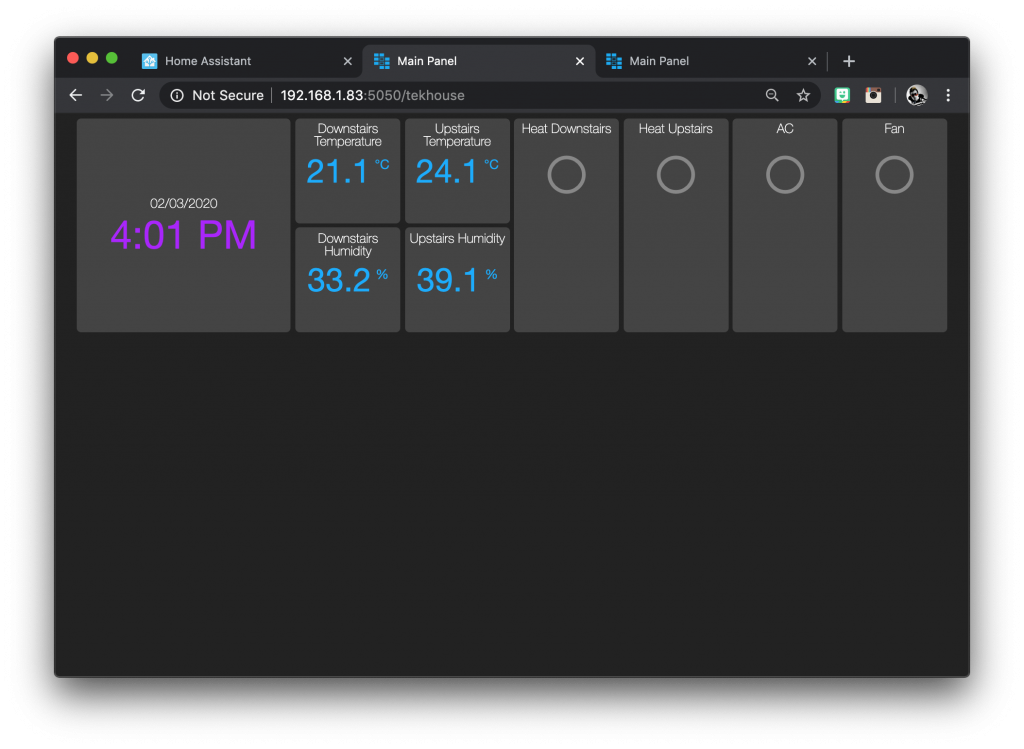
Add some lighting
Now our dashboard is starting to look awesome! Next we can add some lighting.
It is possible to add light entities directly, however if you have many lights it may be better to add scenes or scripts that tie the lighting together into a simple button press.
On the next row we will add a row of buttons to control different scenes on the upstairs floor. As before we simply copy and paste the entity names from Home Assistant.
layout:
    - clock.clock(2x2), sensor.temperaturedownstairs, sensor.temperatureupstairs,switch.heatdownstairs(1x2), switch.heatupstairs(1x2), switch.ac(1x2), switch.fan(1x2)
    - sensor.humiditydownstairs, sensor.humidityupstairs
    - scene.upstairs_on(3x1), scene.upstairs_wake, scene.upstairs_music, scene.upstairs_editing, scene.upstairs_romance, scene.upstairs_morning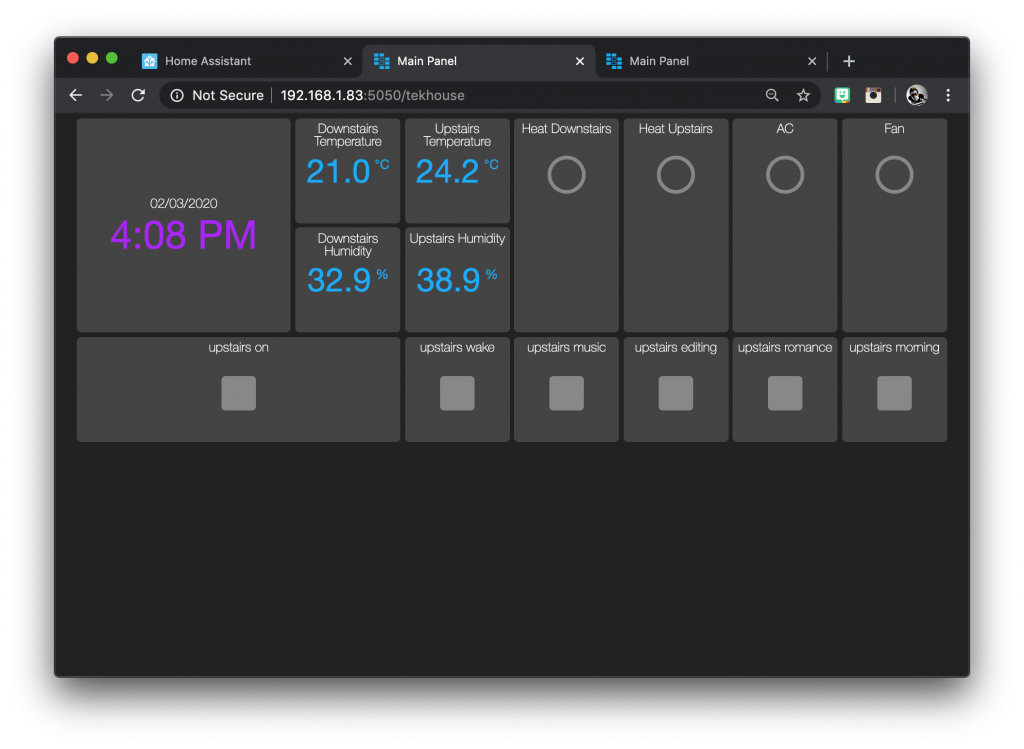
Adding the entities directly is definitely quickest and easiest, however the names and icons are pulled directly from Home Assistant. In some cases this is perfectly acceptable but in other cases we may want to customise the look of the button.
Custom widgets
In order to create a custom widget we need to add a section named after the widget we wish to create.
Create a widget
For this example we will create custom widgets for the downstairs lighting on the third row, starting with a switch to turn on all of the lights. First we need to add a section, which we will name scene_downstairs_on.
scene_downstairs_on:
Next we need to specify the widget_type as switch and give the switch a name. This is the name that will appear on the switch.
We will also specify the entity scene.downstairs_on from Home Assistant that we wish the widget to control.
scene_downstairs_on:
    widget_type: switch
    title: Downstairs Lights
    entity: scene.downstairs_on
We can also specify a custom icon from the Material Design Icons library. You need to specify the icon name in the following format.
mdi-<icon name>
We can specify a different icon for on and off states, however the button will still illuminate when on so it is optional.
scene_downstairs_on:
    widget_type: switch
    title: Downstairs Lights
    entity: scene.downstairs_on
    icon_on: mdi-lightbulb-on
    icon_off: mdi-lightbulb-off
Add to the layout
Now we can add this widget to our layout section simply by specifying the widget name scene_downstairs_on instead of using the entity name from Home Assistant.
layout:
    - clock.clock(2x2), sensor.temperaturedownstairs, sensor.temperatureupstairs,switch.heatdownstairs(1x2), switch.heatupstairs(1x2), switch.ac(1x2), switch.fan(1x2)
    - sensor.humiditydownstairs, sensor.humidityupstairs
    - scene.upstairs_on(3x1), scene.upstairs_wake, scene.upstairs_music, scene.upstairs_editing, scene.upstairs_romance, scene.upstairs_morning
    - scene_downstairs_on(3x1)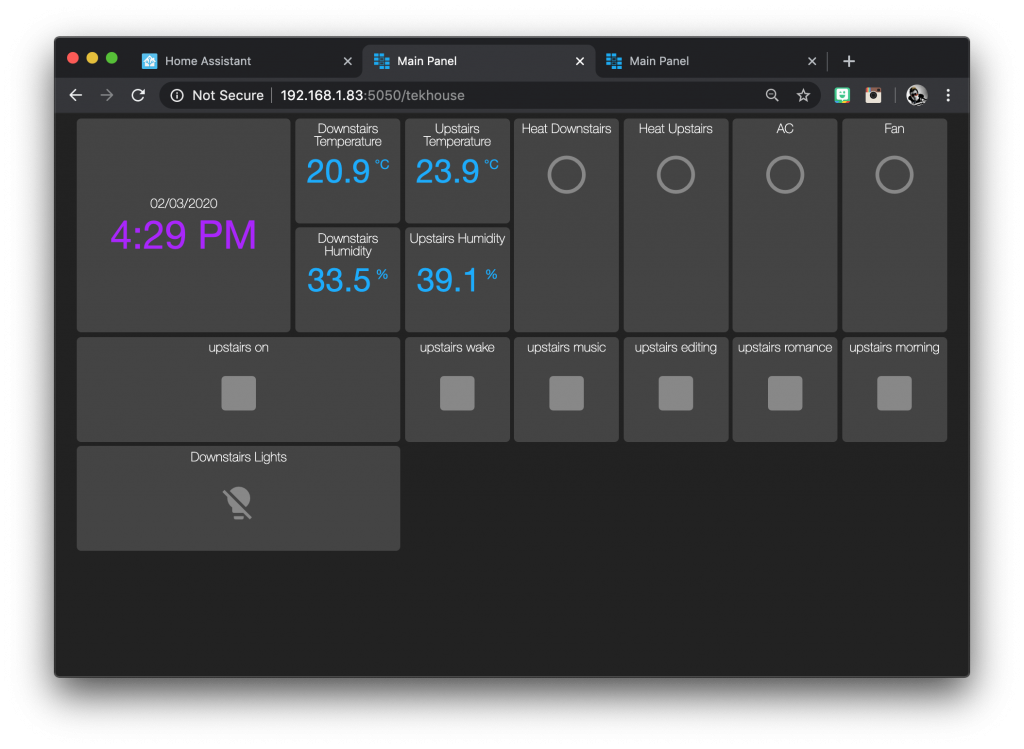
Now we can go ahead and create some more custom widgets for the lighting scenes downstairs, which will fill the bottom row.
scene_downstairs_cooking:
    widget_type: switch
    title: Cooking
    entity: scene.downstairs_cooking
    icon_on: mdi-food-fork-drink
    icon_off: mdi-food-fork-drink
scene_downstairs_dinner_party:
    widget_type: switch
    title: Dinner Party
    entity: scene.downstairs_dinner_party
    icon_on: mdi-glass-wine
    icon_off: mdi-glass-wine
scene_downstairs_movie:
    widget_type: switch
    title: Movie
    entity: scene.downstairs_movie
    icon_on: mdi-movie-open
    icon_off: mdi-movie-open-outline
scene_downstairs_romance:
    widget_type: switch
    title: Romance
    entity: scene.downstairs_romance
    icon_on: mdi-home-heart
    icon_off: mdi-home-heart
scene_downstairs_work:
    widget_type: switch
    title: Work
    entity: scene.downstairs_work
    icon_on: mdi-laptop-mac
    icon_off: mdi-laptop-mac
Then we will add each of these widgets to the layout, separated by commas.
layout:
    - clock.clock(2x2), sensor.temperaturedownstairs, sensor.temperatureupstairs,switch.heatdownstairs(1x2), switch.heatupstairs(1x2), switch.ac(1x2), switch.fan(1x2)
    - sensor.humiditydownstairs, sensor.humidityupstairs
    - scene.upstairs_on(3x1), scene.upstairs_wake, scene.upstairs_music, scene.upstairs_editing, scene.upstairs_romance, scene.upstairs_morning
    - scene_downstairs_on(3x1), scene_downstairs_cooking, scene_downstairs_dinner_party, scene_downstairs_movie, scene_downstairs_romance, scene_downstairs_work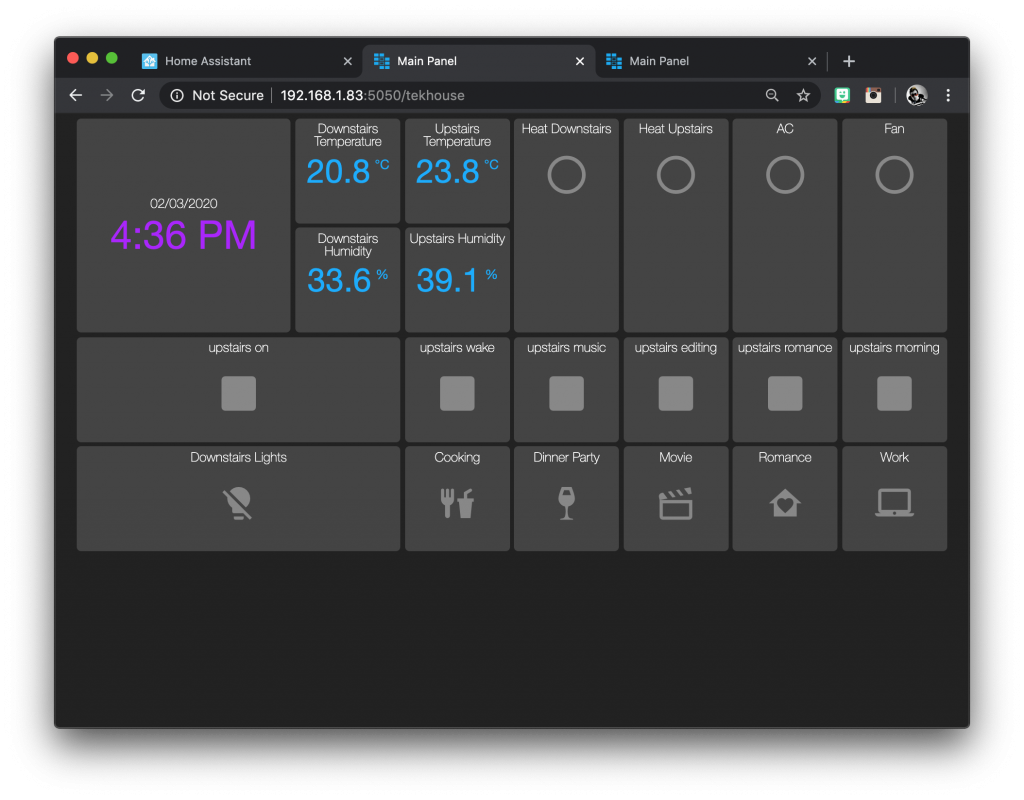
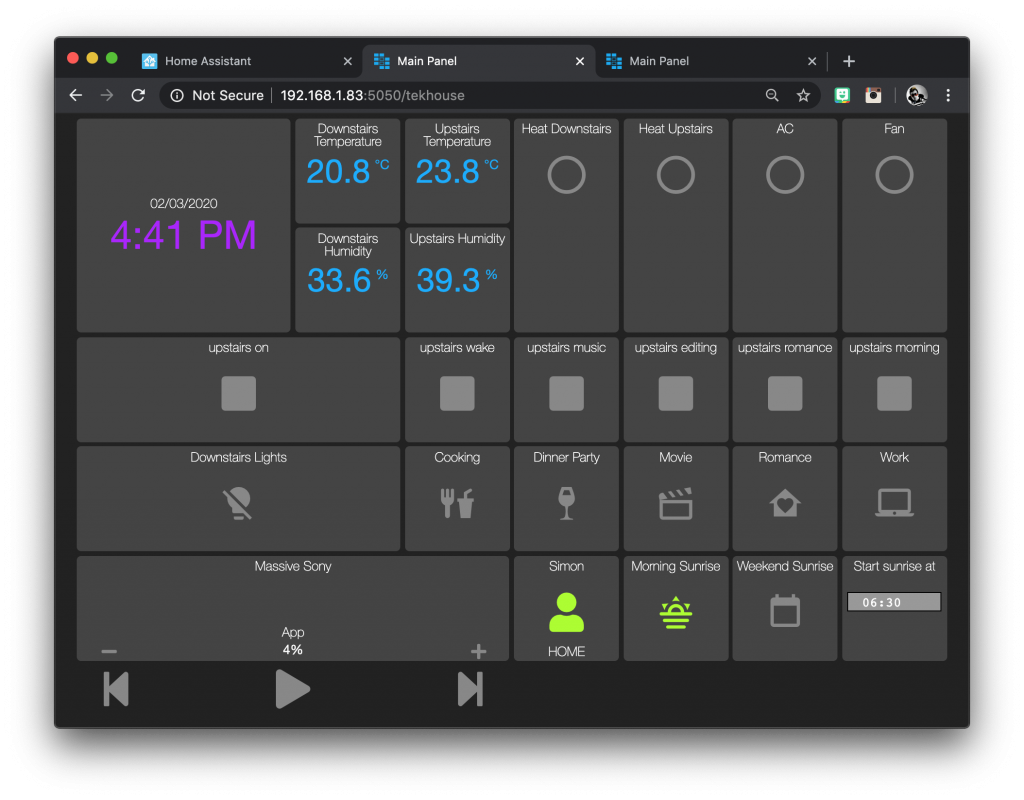
Other entities
It is also possible to add other types of entities such as media player or person.
I even added the input booleans and input datetime entities from the Home Assistant artificial sunrise, which even allows the time to be inputted on the dashboard!\
layout:
    - clock.clock(2x2), sensor.temperaturedownstairs, sensor.temperatureupstairs,switch.heatdownstairs(1x2), switch.heatupstairs(1x2), switch.ac(1x2), switch.fan(1x2)
    - sensor.humiditydownstairs, sensor.humidityupstairs
    - scene.upstairs_on(3x1), scene.upstairs_wake, scene.upstairs_music, scene.upstairs_editing, scene.upstairs_romance, scene.upstairs_morning
    - scene_downstairs_on(3x1), scene_downstairs_cooking, scene_downstairs_dinner_party, scene_downstairs_movie, scene_downstairs_romance, scene_downstairs_work
    - media_player.massive_sony (4x1), person.simon, input_boolean.sunrise_enabled, input_boolean.sunrise_weekend, input_datetime.sunrise_time
So that’s it! The example dashboard is now completed and we can go ahead and navigate to it on our tablet browser in order to use it.
Completed code
We have dealt with a fair amount of YAML in this tutorial, therefore as the example dashboard is now complete lets take a look at the completed code. Feel free to copy this code and use it as a template.
title: Main Panel
widget_dimensions: [120, 120]
widget_size: [1, 1]
widget_margins: [5, 5]
columns: 8
global_parameters:
    use_comma: 0
    precision: 1
    use_hass_icon: 1
    namespace: default
    devices:
      media_player:
        step: 5
layout:
    - clock.clock(2x2), sensor.temperaturedownstairs, sensor.temperatureupstairs,switch.heatdownstairs(1x2), switch.heatupstairs(1x2), switch.ac(1x2), switch.fan(1x2)
    - sensor.humiditydownstairs, sensor.humidityupstairs
    - scene.upstairs_on(3x1), scene.upstairs_wake, scene.upstairs_music, scene.upstairs_editing, scene.upstairs_romance, scene.upstairs_morning
    - scene_downstairs_on(3x1), scene_downstairs_cooking, scene_downstairs_dinner_party, scene_downstairs_movie, scene_downstairs_romance, scene_downstairs_work
    - media_player.massive_sony (4x1), person.simon, input_boolean.sunrise_enabled, input_boolean.sunrise_weekend, input_datetime.sunrise_time
scene_downstairs_on:
    widget_type: switch
    title: Downstairs Lights
    entity: scene.downstairs_on
    icon_on: mdi-lightbulb-on
    icon_off: mdi-lightbulb-off
scene_downstairs_cooking:
    widget_type: switch
    title: Cooking
    entity: scene.downstairs_cooking
    icon_on: mdi-food-fork-drink
    icon_off: mdi-food-fork-drink
scene_downstairs_dinner_party:
    widget_type: switch
    title: Dinner Party
    entity: scene.downstairs_dinner_party
    icon_on: mdi-glass-wine
    icon_off: mdi-glass-wine
scene_downstairs_movie:
    widget_type: switch
    title: Movie
    entity: scene.downstairs_movie
    icon_on: mdi-movie-open
    icon_off: mdi-movie-open-outline
scene_downstairs_romance:
    widget_type: switch
    title: Romance
    entity: scene.downstairs_romance
    icon_on: mdi-home-heart
    icon_off: mdi-home-heart
scene_downstairs_work:
    widget_type: switch
    title: Work
    entity: scene.downstairs_work
    icon_on: mdi-laptop-mac
    icon_off: mdi-laptop-mac
Conclusion
As we have seen in this tutorial, it is possible to create a beautiful and functional dashboard for Home Assistant, ideal for use on tablets, phones or the Raspberry Pi.
This tutorial has covered all of the basics required to make a functional dashboard. However there are many configuration options so you may want to check out the official documentation.
Next go ahead and check out my tutorial for automated movie lights or artificial sunrise for some cool ideas to add to your new dashboard!
I hope that you found this tutorial useful! Please take a moment to tell me what you thought in the comments below. Also don’t forget to check out some of my other awesome Home Assistant tutorials!
Thanks so much for visiting my site! If this article helped you achieve your goal and you want to say thanks, you can now support my work by buying me a coffee. I promise I won't spend it on beer instead... 😏


Hello,
thank you for this very nice documentation, I have just few questions, on your tablet you used some launcher or some full-screen web browser ? – how did you auto referesh this page? And how to prevent turn the tablet display to sleep / off.
Thanks!
Hi Michal, thanks for visiting! You didn’t mention which tablet you are using but on an iOS device you can follow this guide. You can also turn off the passcode from Settings > Touch ID & Passcodes. You can also disable auto-lock from the Settings > Display & Brightness menu. Hopefully that will help you set up your tablet to function as desired.
Hello, Siytek!
Thank you very much for this step-by-step tutorial. I’m very new to this, and I was able to create a genuinely nice wall-mounted panel! I’m using it on an iPad 4 on my living room wall.
Thank you!
Awesome, very glad to hear it Mario! 🙂