In this article you can choose from two different ways to turn any series of MacOS Terminal commands into a neat and tidy shortcut icon on the desktop, dock or wherever you prefer!
The MacOS Terminal is a powerful tool that is often overlooked by mostly all users who are not developers.
However the Terminal can be great way to speed up productivity, even for average users, and it is not as difficult to learn as someone might first assume.
Saving Terminal commands as a shortcut means you do not have to keep opening up terminal in order to perform commands that you use regularly.
You may also be interested to check out this list of 50 top MacOS terminal commands that may give you some further inspiration!
Table of Contents
- How To Save A MacOS Terminal Command as a Shortcut Using a Text Editor
- How To Save A MacOS Terminal Command as a Shortcut Using Automator
- How To Save A MacOS Terminal Command as a Shortcut Using AppleScript
- Conclusion
How To Save A MacOS Terminal Command as a Shortcut Using a Text Editor
A very quick and simple way to create a shortcut to a Terminal command is by using a text editor. There is even several text editors built into the Terminal that you can already use!
1. Open up a new Terminal window
I find the quickest way to open a new Terminal window is just to type terminal into spotlight. However you can also put a shortcut on the dock or use launchpad.
2. Create a new shortcut
Next we will create a new file that will become our Terminal command shortcut. In this example we will place it on the desktop.
Enter the following command into terminal in order to create a new file called myshortcut on the desktop and open it with Nano text editor.
cd ~/Desktop
nano myshortcut
3. Add desired commands to the shortcut
Next we should add our desired commands to the shortcut in the form of a short shell script.
In this example we will create a shortcut that opens the Siytek website in our default browser.
#!/bin/bash

open "https://siytek.com"
Once you have entered the desired Terminal commands, go ahead and save the file and exit by pressing control + X and then typing Y.
4. Make the shortcut an executable file
Once we have created the shortcut, we need to make it executable with the following command.
chmod u+x myshortcut
That’s it! Now when you double-click the file, it will execute the commands in the script.
Using a text editor is not the only way to create a shortcut using Terminal commands. It is also possible to use the Automator program, which gives you more flexibility when creating shortcuts.
How To Save A MacOS Terminal Command as a Shortcut Using Automator
You may not know this already but you have a really cool little program called Automator that comes built into the Mac OS operating system.
As the name suggests, it can be used to automate many different tasks. We will use it to turn a shell script into an application that we can load on boot.
1. Open the Automator application
Navigate to the Applications folder and double click the Automator application.
2. Create a new application file
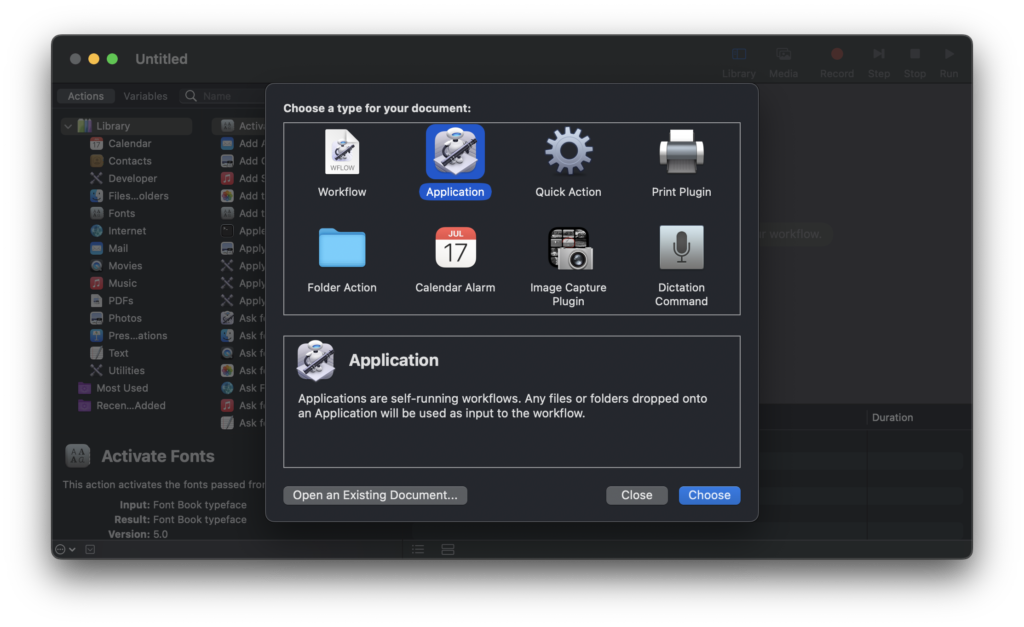
When Automator opens you will be greeted with menu that allows you to select the type of document that you wish to create.
Go ahead and select Application and then click choose.
3. Add a new action
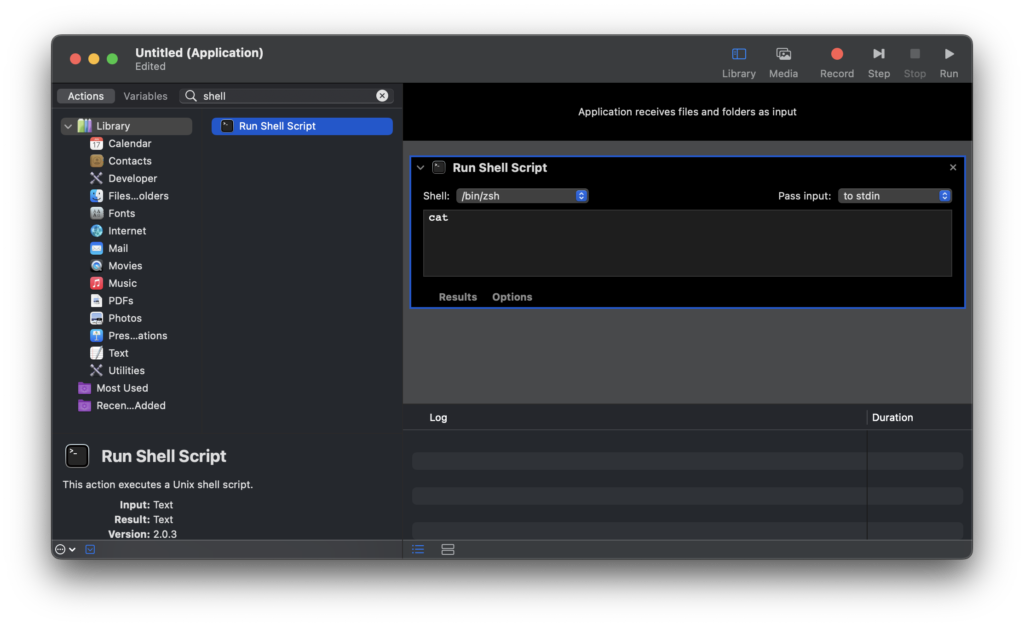
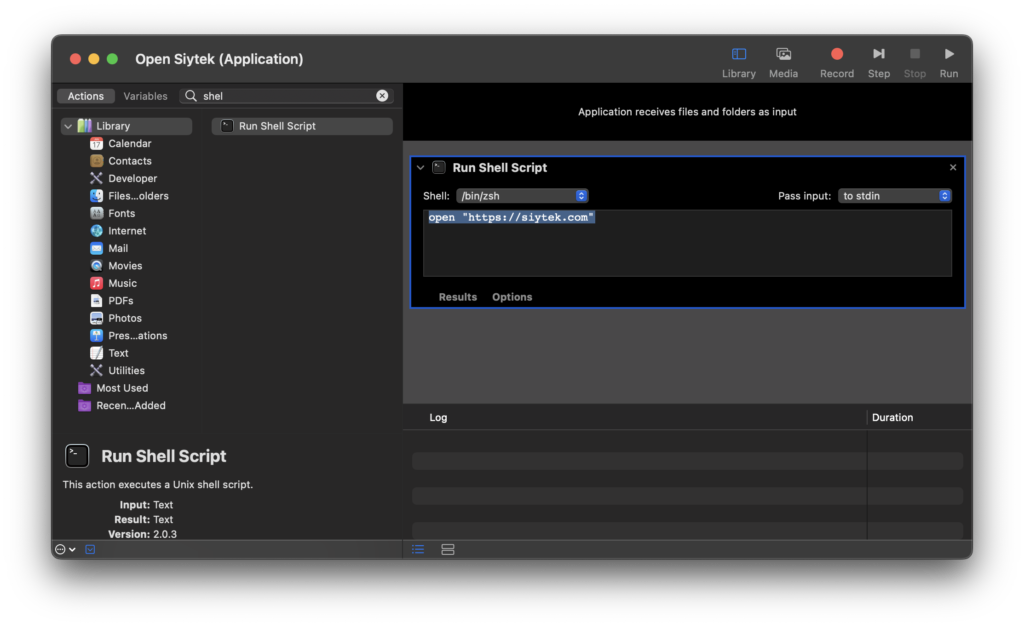
From the left-hand sidebar select library and then select run shell script. You can use the search box to locate it quicker if you prefer.
4. Add the terminal commands
Now we can add the Terminal command or a series of Terminal commands, which we would like to launch when clicking our shortcut.
Note that it is possible to enter multiple commands here in the same way that you might write a bash script.
For this example we can add a shortcut to open the Siytek homepage:
open "https://siytek.com"
5. Save the automation
Once you have finished entering the commands, click file > save and save the automation to your prefered location.
This will create an app with your chosen name that will execute the Terminal commands that you entered. Awesome!
There is one caveat to using shell scripts in Automator, which is you will notice that the Terminal window does not remain open.
This is ok for some applications, however if you wish to execute programs in the Terminal whereby the Terminal window should remain open, you can use AppleScript instead.
How To Save A MacOS Terminal Command as a Shortcut Using AppleScript
In the previous section we learned how to create a shortcut to a Terminal command using Automator.
It is also possible to use AppleScript in Automator to execute Terminal commands, therefore we can use it to create a shortcut in the same way.
The benefit of using AppleScript is that we can get the Terminal window to remain open.
Firstly you should completes step 1 and step 2 from the previous section.
When adding the Terminal commands during step 3, we can use AppleScript instead.
From the left-hand sidebar select library and then select Run AppleScript. You can use the search box to locate it quicker if you prefer.
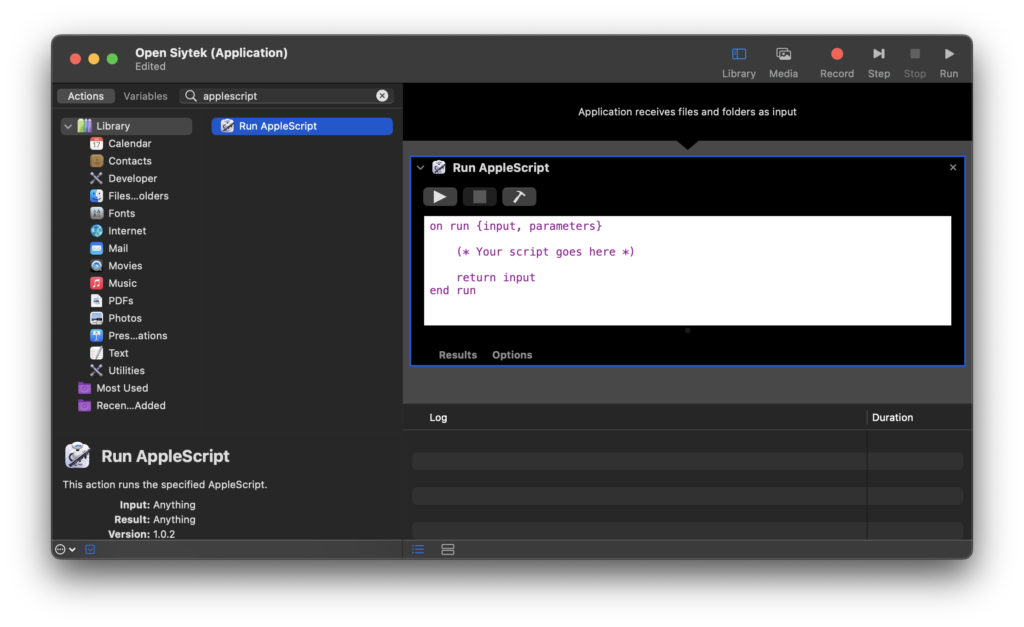
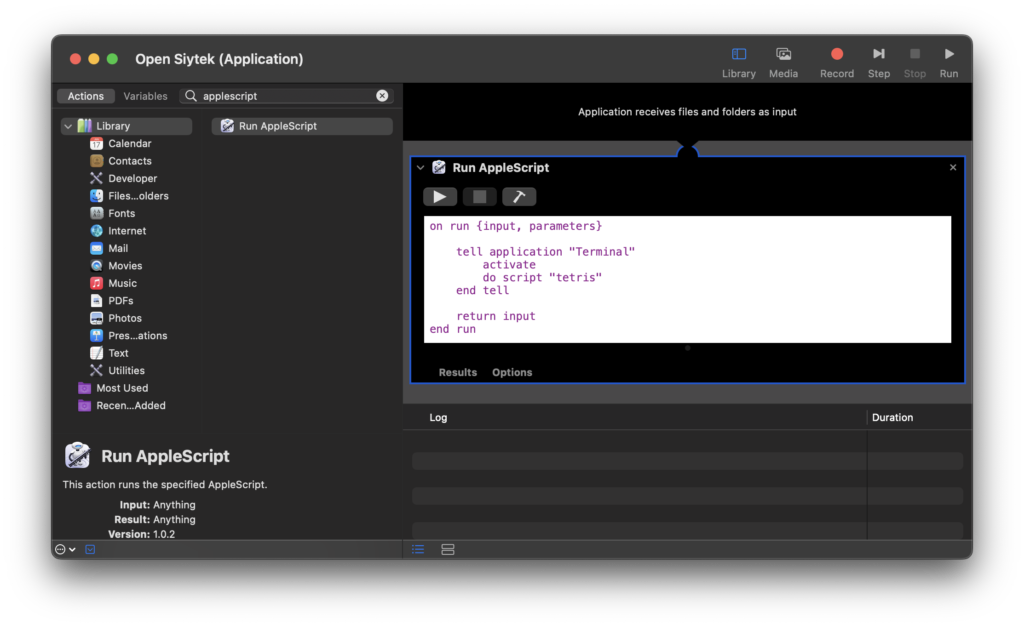
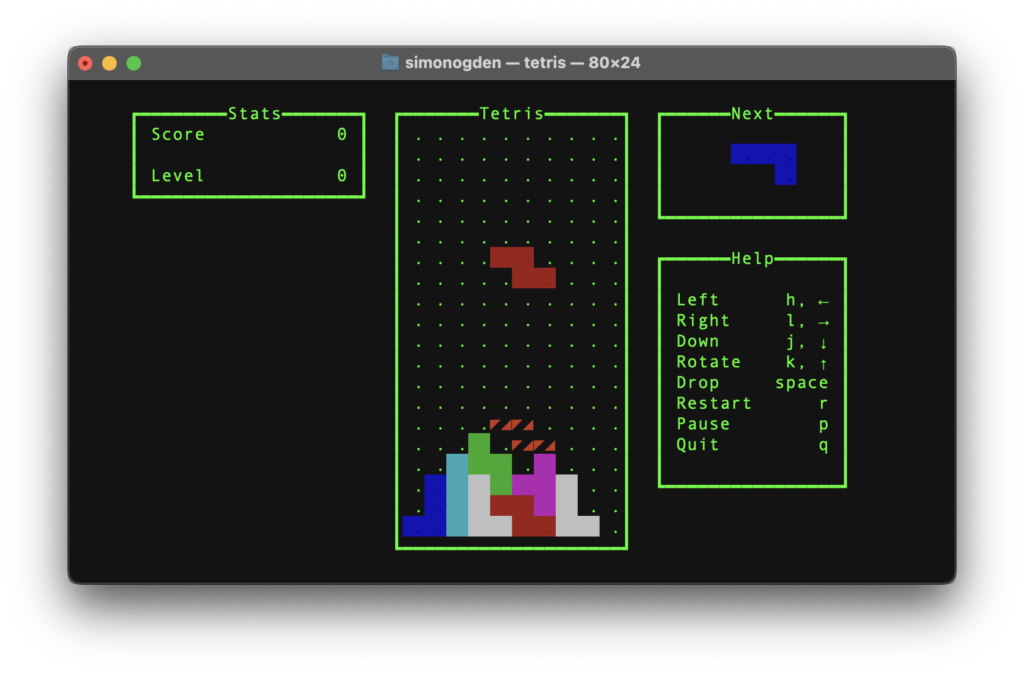
In this example we will use AppleScript to launch Terminal Tetris, which is played in the command line. The following script will open a new Terminal window and launch it.
on run {input, parameters}

	tell application "Terminal"
		activate
		do script "tetris"
	end tell

	return input
end run
Conclusion
In this article we have learned that there are several different methods for creating shortcuts from Terminal commands in MacOS.
It is quick and easy to use a text editor such as Nano in order to create simple scripts that can be used as a shortcut to a Terminal command.
Apple also provide a more sophisticated tool for Automating processes in MacOS that can also be used for creating a shortcut from a Terminal command, which is my own preferred method.
Next, why not check out my big list of 50 MacOS terminal commands to see what else you might want to add to your shortcuts!
Thanks so much for visiting my site! If this article helped you achieve your goal and you want to say thanks, you can now support my work by buying me a coffee. I promise I won't spend it on beer instead... 😏


