Looking to get into FPGA programming?
Quartus can run surprisingly well on Mac when paired with Virtualbox and Ubuntu.
Unlike other solutions using Windows and Parallels, all of the software used in this method is completely free!
There are a few hurdles to overcome in order to get everything running correctly, however this guide will walk you through all of the necessary steps.
Prerequisite
You will of course need a Mac running a recent version of OS X. At the time of writing I am running Mojave, however this tutorial should work just fine with all fairly recent versions of OS X so long as Virtualbox runs without issues.
You will also need an installation of Ubuntu Desktop running in Virtualbox.
At the time of writing I am running Ubuntu 20.04 and Virtualbox 6.1.6. If you do not yet have Virtualbox running with Ubuntu installed, go ahead and follow my tutorial on how to get this up and running first.
If you plan to install a fresh copy of Ubuntu, I would recommend downloading Quartus in the background as the file is large and may take a while.
It is also perfectly acceptable to run Ubuntu on your Mac as a dual boot setup and it may even be preferable for performance gains.
This tutorial will focus on the Virtualbox installation, however it should also apply if you wish to run a dual boot setup and you can skip over the Virtualbox portions.
With regards to the programmer, this tutorial will cover the necessary steps involved in order to get the USB-Blaster compatible programmer to work in Linux.
You can of course use other methods of programming, however you may need to search for additional information if your particular programmer will not work out of the box.
Why Linux and Virtualbox?
I have tested Quartus under both Ubuntu and Windows 10 running on virtual machines and without surprise, I found Ubuntu to yield slightly higher performance in terms of compile times.
I found Windows to be typically unpredictable, with the usual frustration of “program not responding” and of course some .dll file was missing.
Ubuntu was not straightforward either and although it was stable and without the buggy behaviour, it required some Googling and terminal-ninja skills to get the programmer to work. Thankfully I already did the hard work so you don’t have to!
I usually try to avoid Windows at all costs but with Quartus I wanted to choose the method that gave best results.
In summary and once past the teething problems of the installation on both systems, the benefits of this method are that both Ubuntu and Virtualbox are completely free and Ubuntu slightly outperformed Windows 10.
Ok, perhaps I could tune the settings and get Windows 10 to perform better but the fact still remains, I just don’t like Windows.
Virtualbox disk space
The first thing we need to do is ensure that we have enough disk space to download the file, unpack it and install it. The default 10GB size specified at the time of creating a virtual machine with Virtualbox will not be enough.
Recommended virtual disk space
I would recommend that you allow around 20GB of free space or around 30GB of total space for an installation meant only for running Quartus. You can check the size of your virtual disk in the Virtualbox manager.
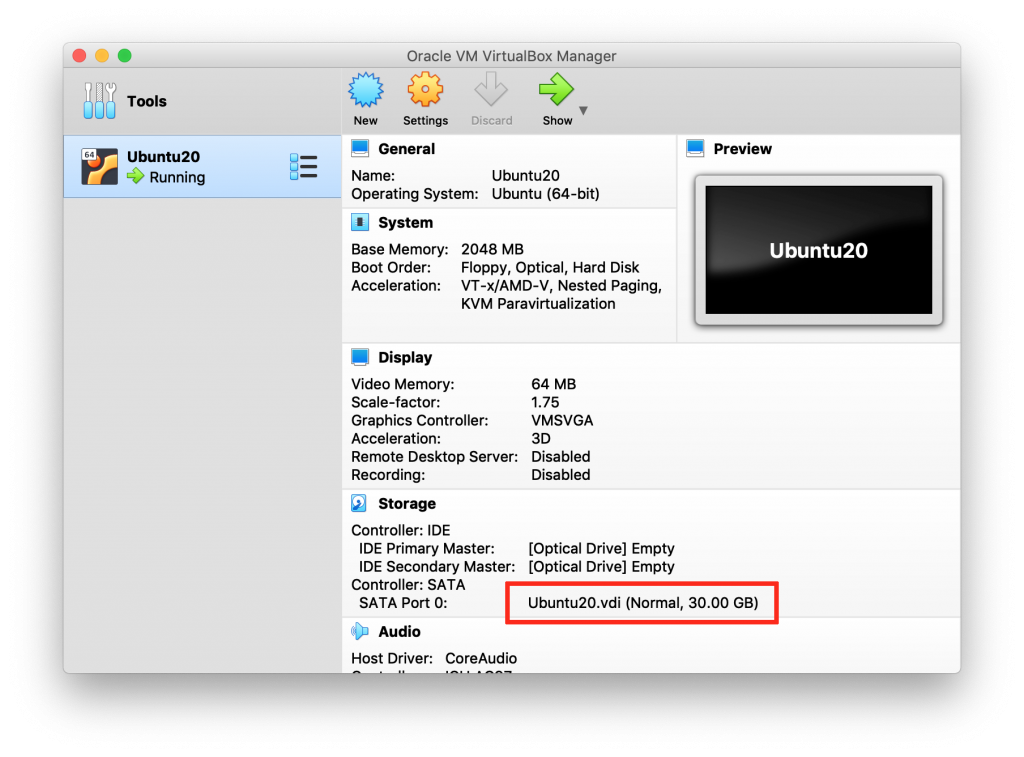
Note that a dynamically sized disk in Virtualbox still has an upper limit, it is just that it does not actually consume the physical disk space until it is required. We still need to ensure that the maximum size is adequate.
Increasing disk space
If your Virtualbox disk is too small, it is possible to increase the size but it must be done using the terminal. If your disk is sized adequately then you can skip over this section.
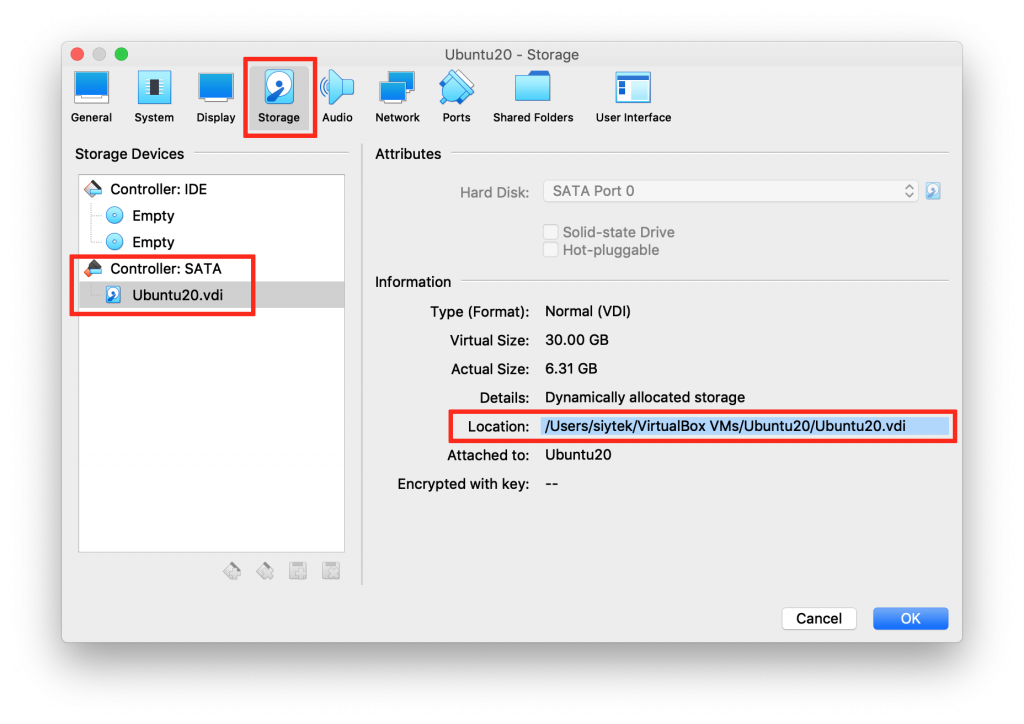
You will need the path of the .vdi file for your Ubuntu virtual machine. This can be found by clicking on settings from the Virtualbox manager and then navigating to storage.
Next go ahead and open the terminal and change to the following directory within the Virtualbox application.
cd /Applications/VirtualBox.app/Contents/Resources/VirtualBoxVM.app/Contents/MacOS/
From this location you can execute a command that will increase the size of the .vdi virtual disk file.
Simply replace [size in MB] with the new size of the drive and [/path/to/vdi] with the path to the .vdi file.
VBoxManage modifyhd --resize [size in MB] [/path/to/vdi]
Once the command has executed you should see the size of the drive change to the new size in the Virtualbox manager.
Install Quartus
First we need to download the latest version of Quartus Prime.
You can either do this directly from within Ubuntu or you can download it in OS X and use Virtualbox file sharing to transfer it. The latter being favourable if you have already downloaded it.
Download Quartus
Go ahead and visit the download page, choose the edition and desired version you wish to download.
The “Lite” version of Quartus is almost fully featured and is completely free to download, however you will need to jump through a few hoops signing up for a free account at Intel.
Download Quartus Lite (free version)
Unpack Quartus
In order to unpack Quartus we will need to create a new folder. You can locate this anywhere but I will use the desktop for simplicity. You can create it manually or use the terminal.
mkdir ~/Desktop/Quartus
Once Quartus has downloaded, go ahead and copy it into this new folder. Double click to open it and click extract to unpack it.
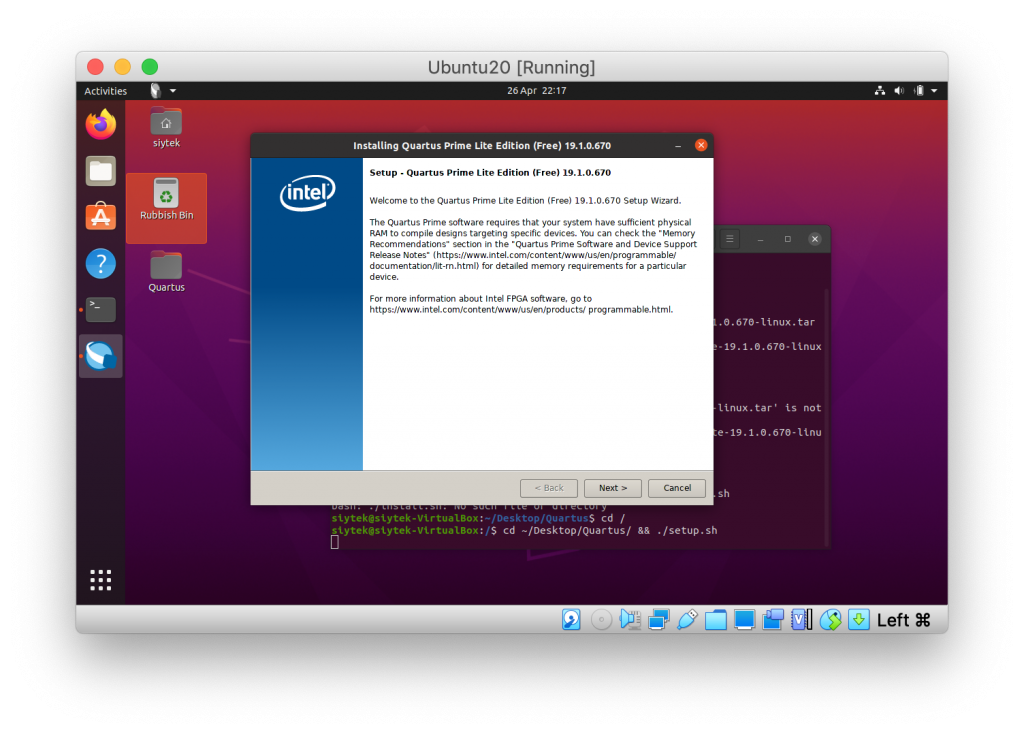
Launch the installation
In order to install Quartus we will need to execute the setup.sh script from the terminal. Go ahead and open a new terminal window and run the following commands to ensure that everything is up to date.
sudo apt-get update && sudo apt-get upgrade -y
Now we can launch the setup script. Don’t forget to change the path if you extracted the file in a different location.
cd ~/Desktop/Quartus/ && ./setup.sh
Now simply follow the installation Wizard as usual. You will be prompted to agree to the licencing and given some options for the various parts of the suite that you wish to install. Nothing too complex to worry about.
Running Quartus
If you opt to create a desktop icon at the end of the installation, you may need to right-click it and select allow launching in order for it to work. Once you have done this the icon should change to the correct graphic.
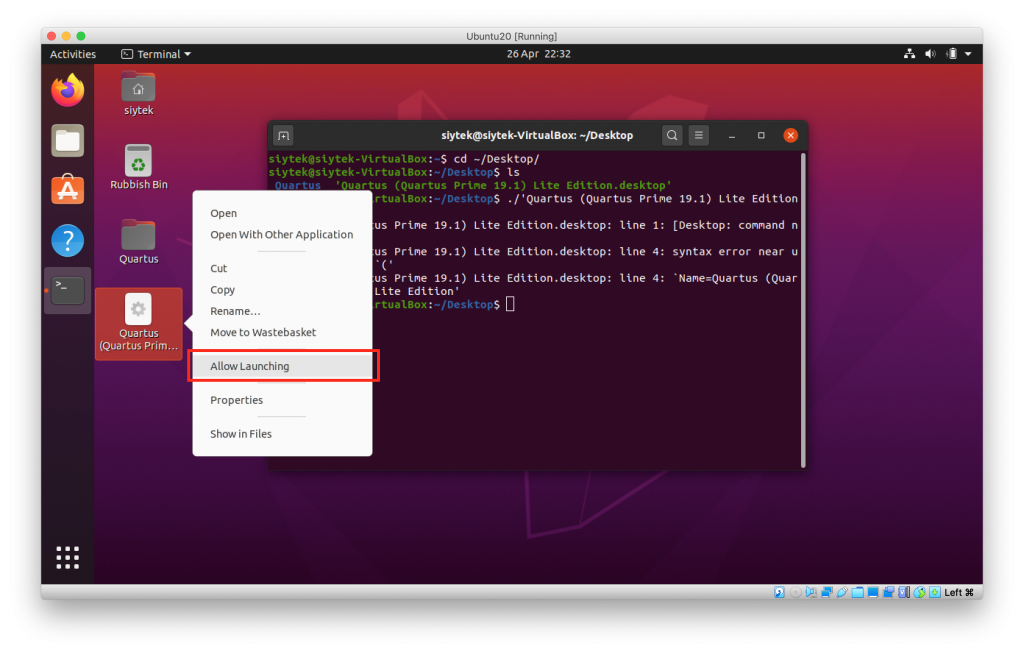
Now should should be able to double-click the desktop icon to launch Quartus.
Alternatively you can launch it from the terminal with the following command. You may need to change the version number if you are not using 19.1.
~/intelFPGA_lite/19.1/quartus/bin/quartus --64bit
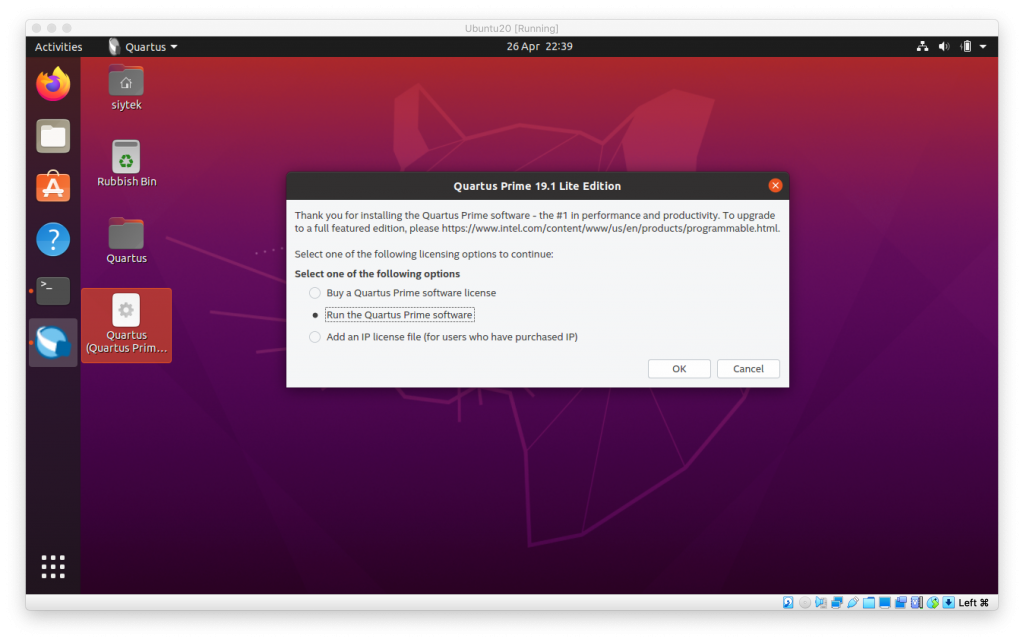
Once Quartus loads, go ahead and select the option run Quartus Prime Software unless you wanted to licence the software.
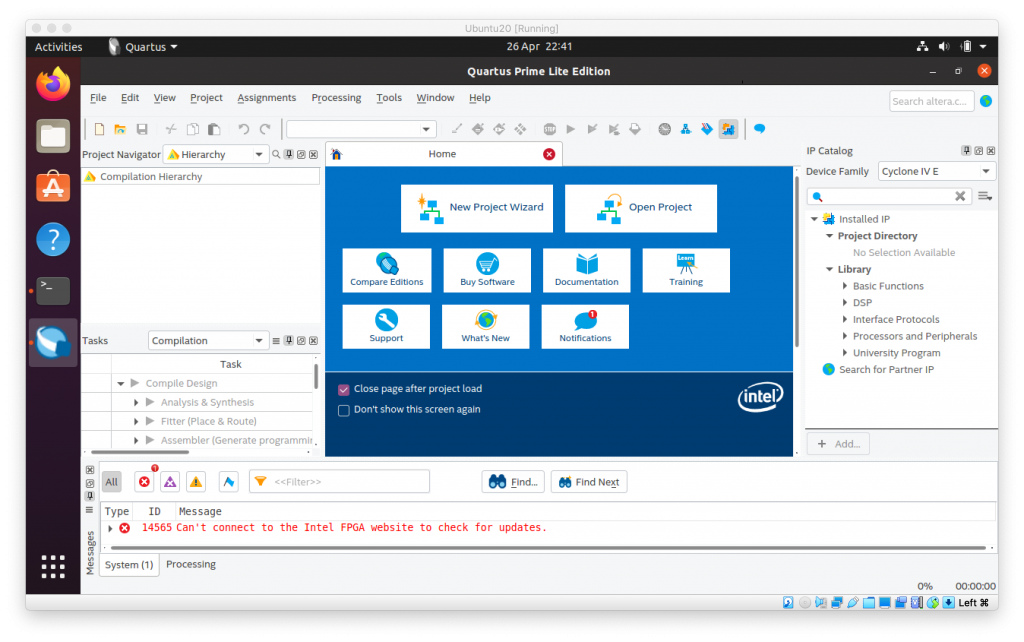
We should now be taken to the main Quartus window. Awesome!
We have now successfully installed Quartus, however some further configuration is required for the programmer.
Configuring USB-Blaster
There are a few steps required in order for us to use a USB-Blaster compatible programmer to program our FPGA board.
First we need to allow the USB connection to pass through from OS X to Ubuntu, then we need to configure a few things in Ubuntu.
Set up Virtualbox
First go ahead and click devices > USB Settings… from the menu bar at the top of the screen in OS X.
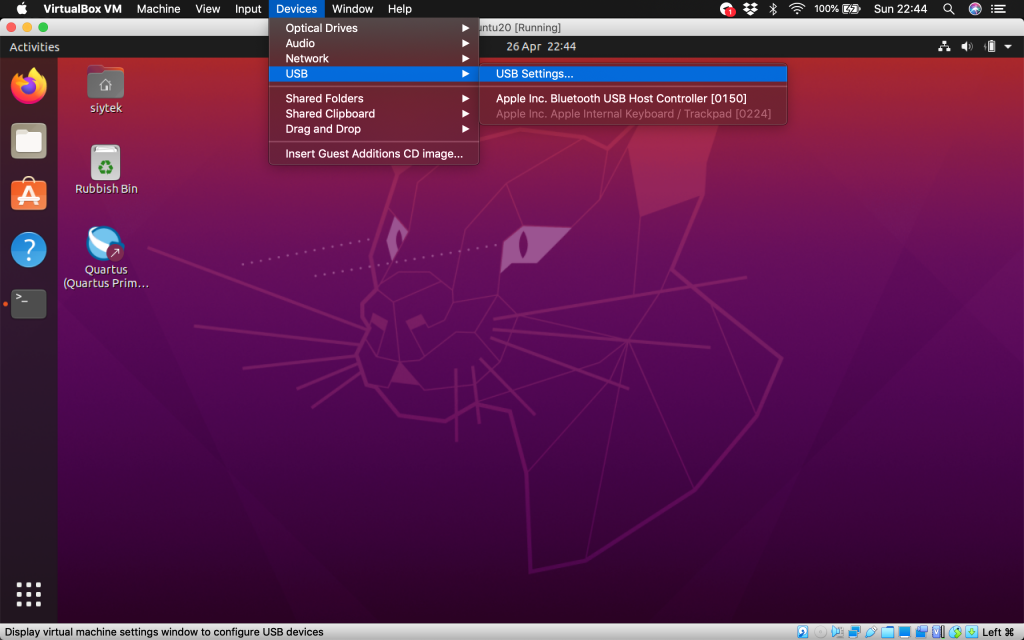
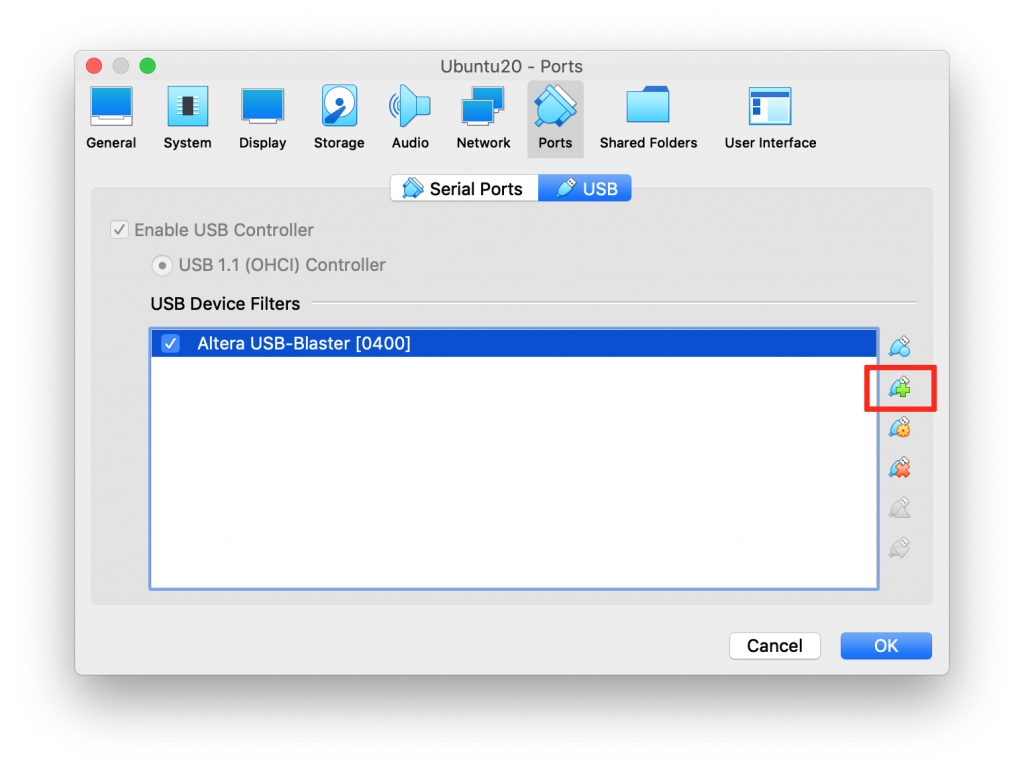
Next connect your USB-Blaster to the USB port of your OS X host machine and then add it to the USB Device Filters list and then click ok.
This will ensure that the device always connects to Ubuntu when the virtual machine is running.
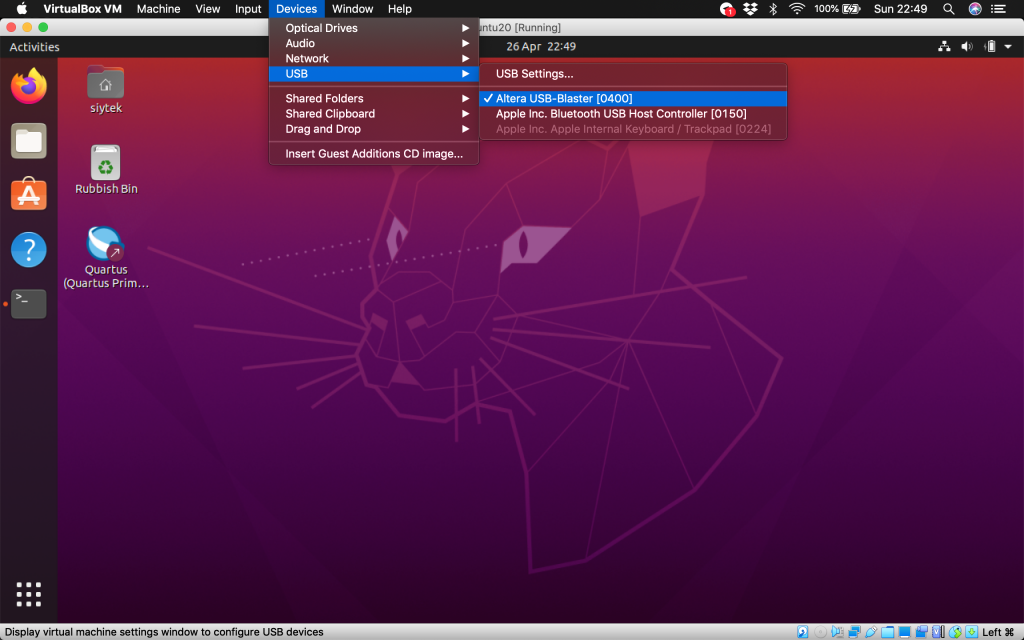
Now we can pass the data from the USB device through to Linux. Go ahead and click devices > USB from the menu bar at the top of the screen in OS X and ensure that your USB-Blaster device has a tick next to it.
Configure Ubuntu
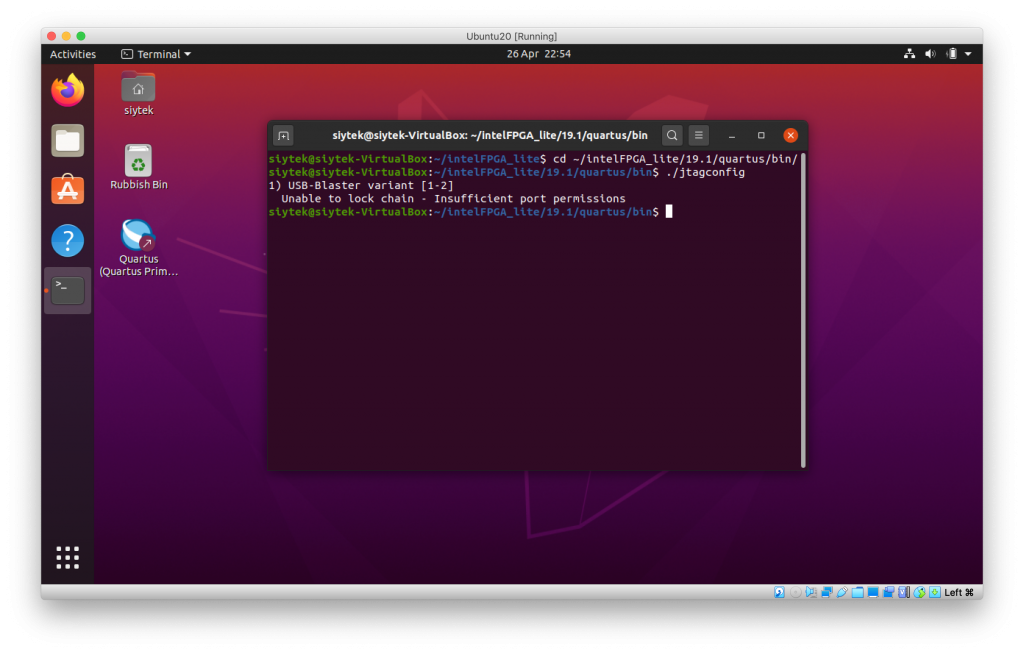
Next we need to make a few changes to the configuration in Ubuntu. First we need to open a terminal and change to the Quartus bin directory. You may need to amend the path if you are running a different version.
cd ~/intelFPGA_lite/19.1/quartus/bin/
Next go ahead and run the following command.
./jtagconfig
You will probably receive the following permissions error: unable to lock chain – Insufficient port permissions.
Fix the port permissions
This is due to the JTAG module requiring root permissions.
In order to rectify this issue we need to create a rules file. Go ahead and enter the following command to open up a new rules file with nano.
sudo nano /etc/udev/rules.d/51-usbblaster.rules
Once nano opens with a blank file, copy and paste the following into the file and then press ctrl + X to save and close the file.
# USB Blaster
SUBSYSTEM=="usb", ENV{DEVTYPE}=="usb_device", ATTR{idVendor}=="09fb", ATTR{idProduct}=="6001", MODE="0666", NAME="bus/usb/$env{BUSNUM}/$env{DEVNUM}", RUN+="/bin/chmod 0666 %c"
SUBSYSTEM=="usb", ENV{DEVTYPE}=="usb_device", ATTR{idVendor}=="09fb", ATTR{idProduct}=="6002", MODE="0666", NAME="bus/usb/$env{BUSNUM}/$env{DEVNUM}", RUN+="/bin/chmod 0666 %c"
SUBSYSTEM=="usb", ENV{DEVTYPE}=="usb_device", ATTR{idVendor}=="09fb", ATTR{idProduct}=="6003", MODE="0666", NAME="bus/usb/$env{BUSNUM}/$env{DEVNUM}", RUN+="/bin/chmod 0666 %c"

# USB Blaster II
SUBSYSTEM=="usb", ENV{DEVTYPE}=="usb_device", ATTR{idVendor}=="09fb", ATTR{idProduct}=="6010", MODE="0666", NAME="bus/usb/$env{BUSNUM}/$env{DEVNUM}", RUN+="/bin/chmod 0666 %c"
SUBSYSTEM=="usb", ENV{DEVTYPE}=="usb_device", ATTR{idVendor}=="09fb", ATTR{idProduct}=="6810", MODE="0666", NAME="bus/usb/$env{BUSNUM}/$env{DEVNUM}", RUN+="/bin/chmod 0666 %c"
Fixing libudev
Now go ahead and disconnect your programmer, then reconnect it and run the JTAG config again.
./jtagconfig
This time you should see a new error message: Unable to read device chain – JTAG chain broken.
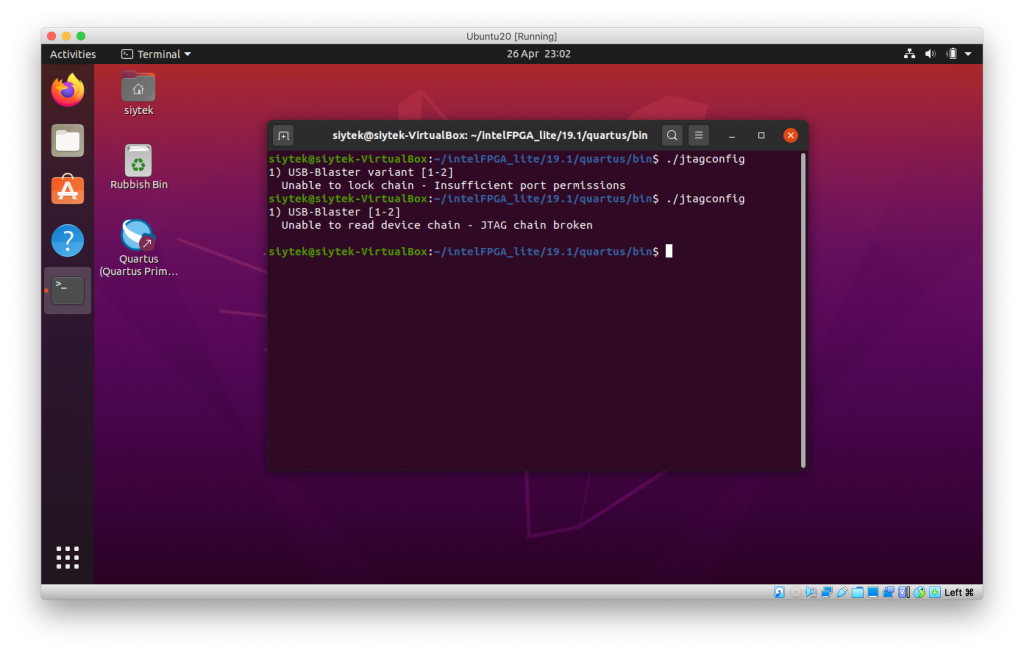
This issue is caused by the JTAG module looking for an older version of libudev.
This version of the package has been removed in newer versions of Ubuntu, therefore we must create a symlink in the place of the older package which points to the newer one.
sudo ln -s /lib/x86_64-linux-gnu/libudev.so.1 /lib/x86_64-linux-gnu/libudev.so.0
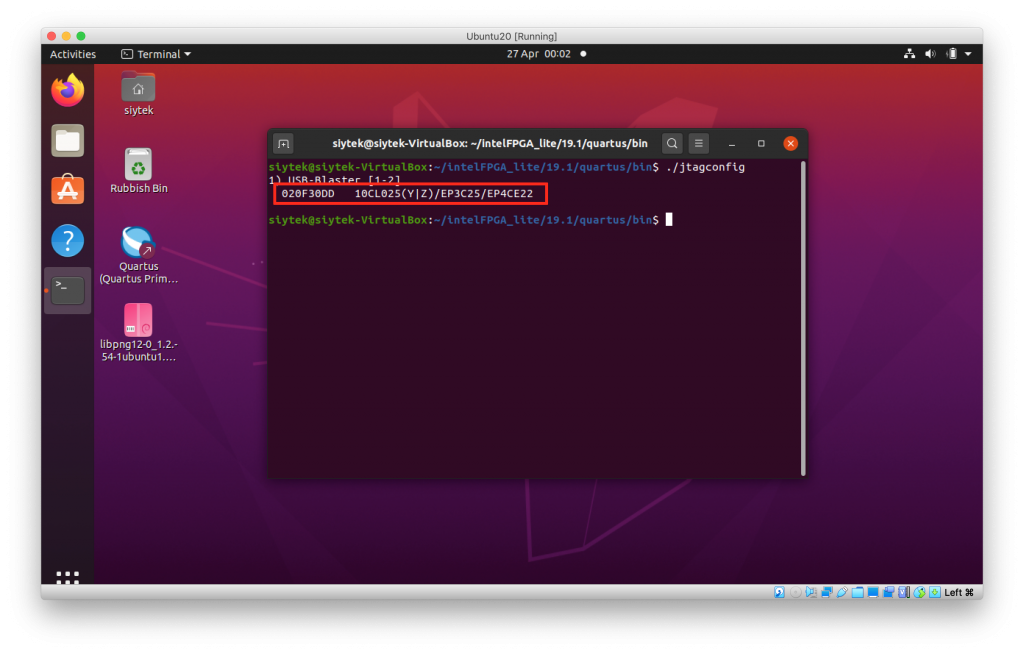
This command will point the JTAG module to the correct location and should correct the error. Go ahead and try the JTAG config command again.
./jtagconfig
The error message should have cleared and we should now we able to see the programmer details. This means that Quartus will successfully be able to access the programmer. Awesome!
Thanks so much for visiting my site! If this article helped you achieve your goal and you want to say thanks, you can now support my work by buying me a coffee. I promise I won't spend it on beer instead... 😏