If you are looking to run Betaflight Configurator on Raspberry Pi then I can show you how to do it in just 6 steps!
It can be quite a challenge to get Betaflight Configurator working on Raspberry Pi if you have never attempted it before. This article makes it possible for anyone with easy step by step instructions to follow.
You will need a Raspberry Pi to complete this tutorial, although I am sure you knew that if you ended up here! I would highly recommend a Pi 4 due to demands on the system.
If you do need a Pi 4 (shameless affiliate link alert), you can check the latest price at Amazon.
Everything can be done directly on the Pi so you technically don’t need another computer if you have a keyboard, mouse and screen connected to your Pi.
However you can also opt to access your Pi via remote desktop, see here for information on how to do that.
I also prefer to use SSH to connect to the Pi with the Mac terminal, rather than use the terminal on the Pi itself. If you want to do that, you can find information on how to do it here.
Step 1: Install The Latest Raspberry Pi OS
You may already have a Raspberry Pi up and running with the Raspberry Pi OS. I have only tested this process on a clean install of the latest Raspberry Pi OS so I would recommend doing the same if possible.
Install Raspberry Pi OS
Installing the Raspberry Pi OS is now very easy, simply download the Raspberry Pi Imager from the official site and follow the instructions for installation.
If you need further help setting up your Pi and installing the Raspberry Pi OS, I would recommend reading through this article.
Update the system
Whether you are starting from fresh or have an existing system, prior to beginning you should make sure everything is up to date. In order to do this, go to the Raspberry Pi terminal and enter the following commands.
sudo apt update
sudo apt upgrade
Step 2: Install NodeJS
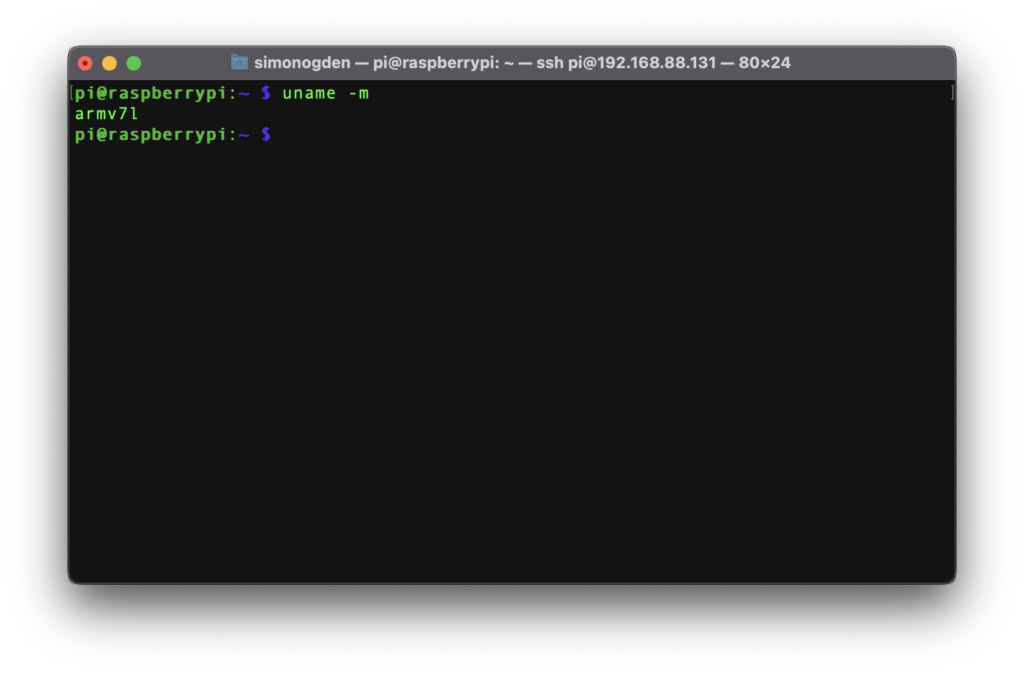
Next we are going to need to install something called NodeJS. The version that we need depends on which Pi you are using. In order to find out, enter the following command.
uname -m
This will return the architecture version that you need to download. In my case I am using a Pi 4, so it is arm7 that I need.
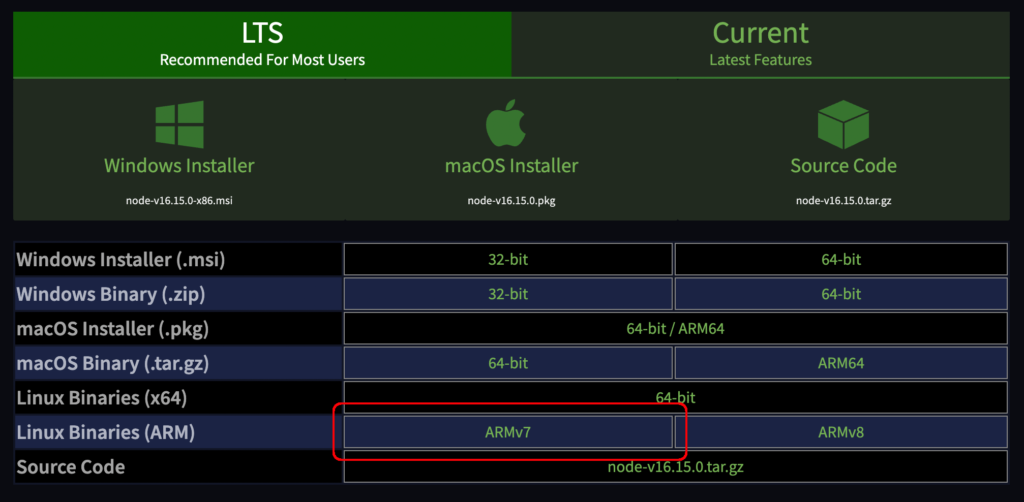
Next, head over to the NodeJS download page and locate the correct download based upon the architecture that you need. In my case I will be downloading ARMv7 as the uname command returned ARM7 as the version.
Next you need to copy the download link by right-clicking and copying the link address the the clipboard. Then back in the terminal window, change directory to the user directory
cd ~
You may use a different directory if you wish, but you will need to change the path accordingly throughout the tutorial.
Next we will use the terminal to download NodeJS. Enter the wget command and then paste in the download URL that you copied from the website.
wget <paste download link here>
So in my case the command entered will be as follows. This will download NodeJS to the user directory.
wget https://nodejs.org/dist/v16.15.0/node-v16.15.0-linux-armv7l.tar.xz
Once the download has completed, we can extract the files using the tar command. Don’t forget to modify the filename accordingly. If you type the first few letters (“node”) and then press tab it will autocomplete for you.
tar -xf node-v16.15.0-linux-armv7l.tar.xz
Next we need to copy the NodeJS files to the /usr/local directory using the following commands.
cd node-v16.15.0-linux-armv7l/
sudo cp -R * /usr/local/
Finally we can test to see if everything has installed correctly. Enter the following commands to check the version of Node and NPM.
node -v
npm -v

Step 3: Install NW.js
Next we will need to install a version of NW.js that is compatible with ARM architecture. This is not something that is officially supported, however some very bright individual has come up with a solution!
First head over to the LeonardLaszlo/nw.js-armv7-binaries GitHub page and then on the right-hand side, click the latest release under releases.
At the time of writing it is nw60_2022-01-07.
Under assets, locate the .tar.gz archive and like before, right-click and copy the download link to the clipboard. First let’s make sure we are in the user directory
cd ~
Then we can use wget to download the .tar file.
wget https://github.com/LeonardLaszlo/nw.js-armv7-binaries/releases/download/nw60_2022-01-07/nw60_2022-01-07.tar.gz
Once the file has downloaded, use the following commands to unpack it.
mkdir nw
tar -xvf nw60_2022-01-07.tar.gz -C ./nw
Step 4: Download Betaflight Configurator Source Code
Next we need to download the latest Betaflight Configurator source code from GitHub.
If you don’t have a GitHub account, you will need to head over to GitHub.com and sign up for a free account.
You also need to make sure that you have an SSH key on your Raspberry Pi, which is registered at GitHub. It is important that do complete this, otherwise the build will fail. The following steps need to be completed.
- Check for existing SSH keys
- Generate a new SSH key and add to the ssh-agent
- Add the new SSH key to your GitHub account
- Testing your SSH connection to GitHub
Once you have completed this, go back to the user directory in terminal.
cd ~
Next you can use the git command to download the latest Betaflight source code.
git clone https://github.com/betaflight/betaflight-configurator
Now we need to use NPM to execute installation with the following command.
npm install
It can take a while so sit tight! Once it has completed we will install the latest version of run-script-os with the following command.
npm install --save-dev run-script-os
Lastly we need to run the start command to start the script.
npm start
Once this is completed we need to copy some files from the NW.js package into the Betaflight Configurator folder.
First switch to the directory we created earlier to unzip the files.
cd ~/nw
Unfortunately with the latest version of NW.js it appears as if they have been packed with literal file paths, therefore the location of files is quite odd.
We basically need to get into the directory nwjs-chromium-ffmpeg-branding and copy all of the files from here to Betaflight.
The following command is what I used, but you may need to adjust the file path. Ultimately so long as we are in the folder nwjs-chromium-ffmpeg-branding it shouldn’t matter.
cd ~/nw/usr/docker/dist/nwjs-chromium-ffmpeg-branding
Once in this folder, copy all of the files from here to the newly created dist folder in Betaflight.
sudo cp -R * ~/betaflight-configurator/dist
Step 5: Create Udev Rules
Almost there now! The last thing we need to do is create the Udev rules. This will allow a flight controller to properly enumerate when connected to the Pi USB ports.
In order to do this, copy and paste the following commands into the terminal and press enter.
(echo '# DFU (Internal bootloader for STM32 MCUs)' > echo 'ACTION=="add", SUBSYSTEM=="usb", ATTRS{idVendor}=="0483", ATTRS{idProduct}=="df11", MODE="0664", GROUP="plugdev"') | sudo tee /etc/udev/rules.d/45-stdfu-permissions.rules > /dev/null
sudo usermod -a -G dialout pi
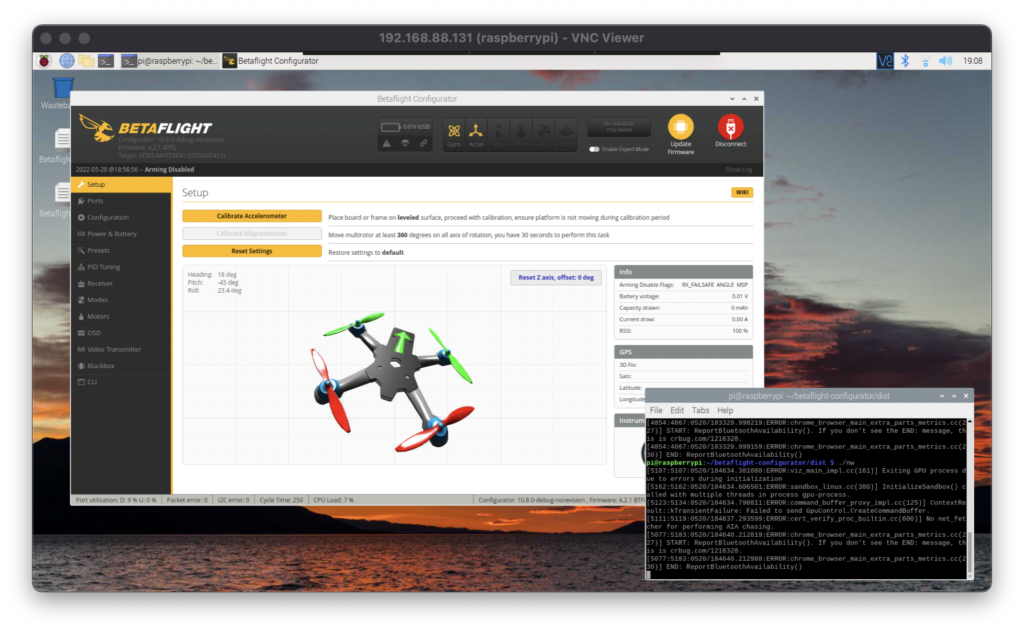
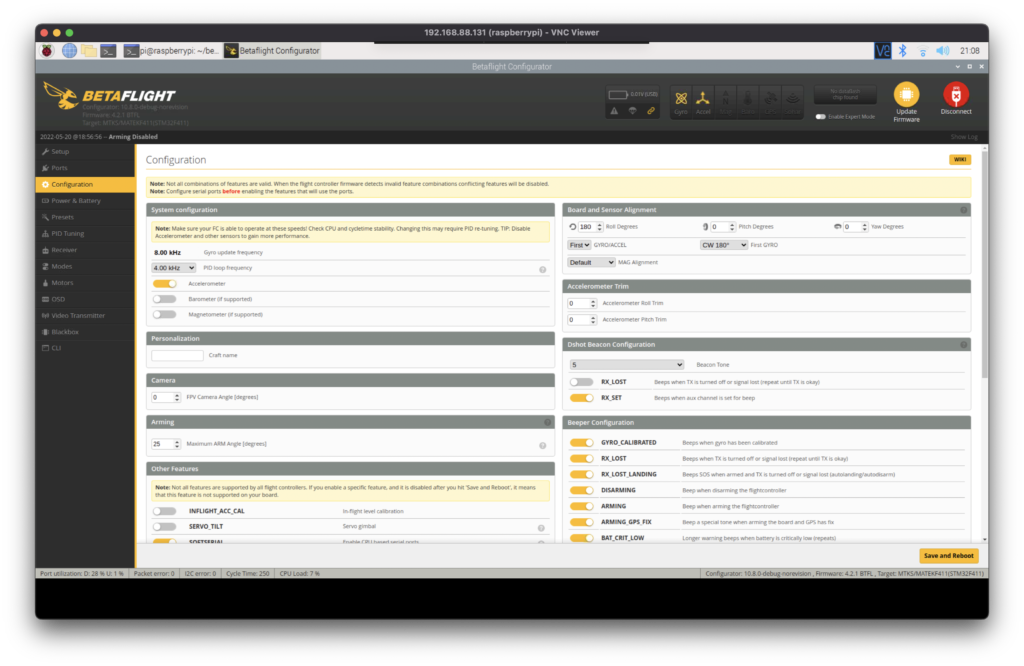
Step 6: Run Betaflight Configurator on the Pi
If you have made it this far then well done! Everything is ready and we should be able to run Betaflight on the Pi.
From the Pi desktop, open up a terminal window and navigate to the Betaflight dist directory.
cd ~/betaflight-configurator/dist
To run Betaflight, simply enter the following command.
./nw
That’s it! You should now have Betaflight up and running on your Pi!
Conclusion
It is quite challenging to get Betaflight Configurator up and running on the Raspberry Pi. However with a little time and patience it is certainly possible!
Now you can design a really cool ground station, or use the Pi as a tool to configure your drone in the field… VNC client on your mobile phone perhaps? 🙂
If you have enjoyed this project, I would certainly recommend checking out my other Pi related articles!
Thanks so much for visiting my site! If this article helped you achieve your goal and you want to say thanks, you can now support my work by buying me a coffee. I promise I won't spend it on beer instead... 😏


First of all, thank you very much for the tutorial for this very niche kind of requirement 🙂
Eslint doesn’t seem to have the right version:
npm ERR! code ERESOLVE
npm ERR! ERESOLVE unable to resolve dependency tree
npm ERR!
npm ERR! While resolving: [email protected]
npm ERR! Found: [email protected].0
npm ERR! node_modules/eslint
npm ERR! dev eslint@”^8.24.0″ from the root project
npm ERR!
npm ERR! Could not resolve dependency:
npm ERR! peer eslint@”^6.2.0 || ^7.0.0″ from [email protected]
npm ERR! node_modules/eslint-plugin-vue
npm ERR! dev eslint-plugin-vue@”^7.3.0″ from the root project
npm ERR!
npm ERR! Fix the upstream dependency conflict, or retry
npm ERR! this command with –force or –legacy-peer-deps
npm ERR! to accept an incorrect (and potentially broken) dependency resolution.
From what I understand it requires either 6.2.0 or 7.3.0, right? And I’m providing it 8.24.0. It’s not clear from the text.
Did you get this problem?
Hi Carlos, it seems this problem surfaces elsewhere and others are saying it is something to do with eslint since V8.6.
I found this discussion: https://github.com/npm/cli/issues/4664#issuecomment-1086096726
And here was the solution there: https://github.com/npm/cli/issues/4664#issuecomment-1086096726
Perhaps try the solution given there? :
In your project folder, run:
npm config set legacy-peer-deps=true --location=project