
If This Then That is a powerful cloud-based service that allows you to connect many different services. It allows the use of applets, which are a basic IF THEN conditional statement.
If this occurs, then that occurs.
In this tutorial we will go through the process of setting up a link between IFTTT and Home Assistant. This will allow us to link a whole world of internet services to our Home Assistant setup. Awesome!
Table of Contents
Prerequisite
You should have Home Assistant installed and running and a basic understanding of YAML including how to edit configuration.yaml.
You should also understand how to use a service and entity within Home Assistant.
If you are not yet familiar with automation or YAML then I would recommend reading the tutorials about automation and scripts first.
You will of course need an account on IFTTT, so head on over to the website and sign up for an account, it’s totally free.
You will also need your Home Assistant to be accessible over the web. In order to do this you will need to use the DuckDNS add-on and setup port forwarding on your router.
How does IFTTT work?
IFTTT is a cloud based service that acts a ‘middleman’ between different services. To date there are many different companies included in the list of available services.
For example you could use IFTTT to connect Instagram and Pinterest so that when you post an image to Instagram, it is automatically shared to Pinterest.
All that is required is to allow IFTTT access to the services that you wish to include. It is very easy to setup different triggers and actions within the IFTTT online interface or mobile app.

Receiving to Home Assistant
In this example the two services we will use in IFTTT will be WordPress and Webhooks. We will look at how to receive a webhook in Home Assistant, so that external services can trigger automation.
We will use the WordPress service as an example, however you can use any service you like within IFTTT to generate your webhook. Therefore you should find and add the service that you want to use, along with the Webhooks service.
Configure Home Assistant
As previously mentioned you will need to have your Home Assistant server setup so that it can be accessed externally from the internet.
The easiest way to do this is with DuckDNS and I have a tutorial on how to set it up. First we need to add the external URL to the http integration in the configuration.yaml file.
You will need to replace <your-user-name> in the URL with your DuckDNS user name.
http:
    base_url: http://<your-user-name>.duckdns.org:8123
Add the IFTTT integration
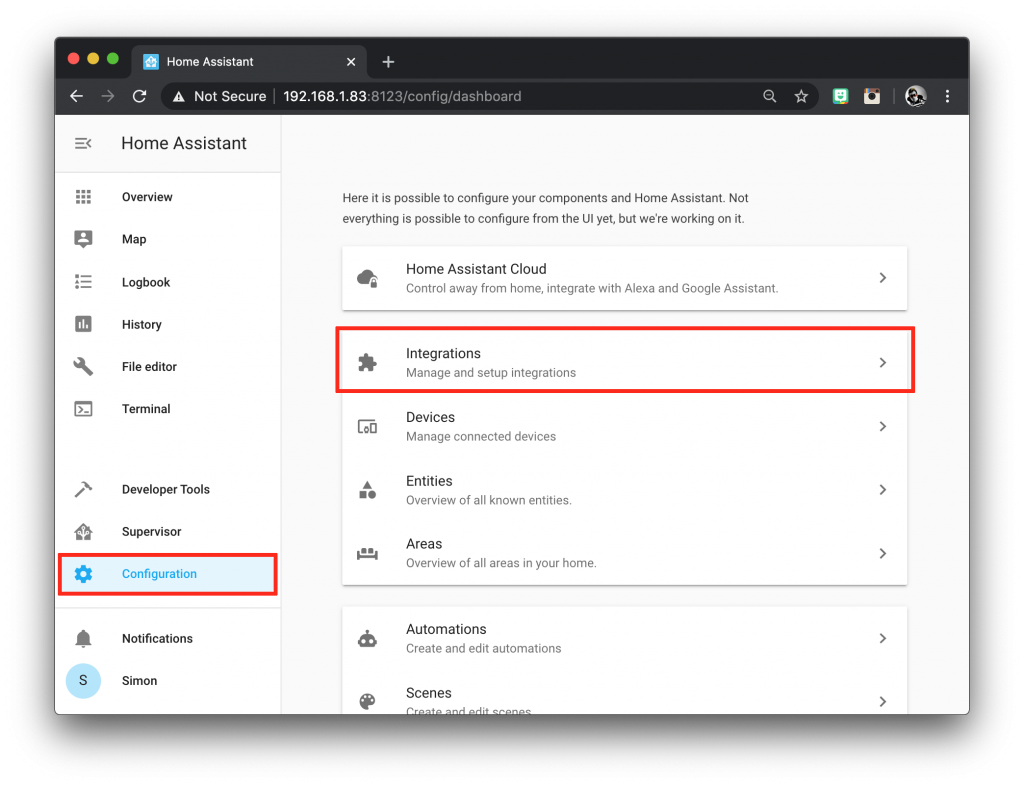
Next we will add the IFTTT integration using the integrations page within the configuration menu. First select configuration from the sidebar and then click integrations.
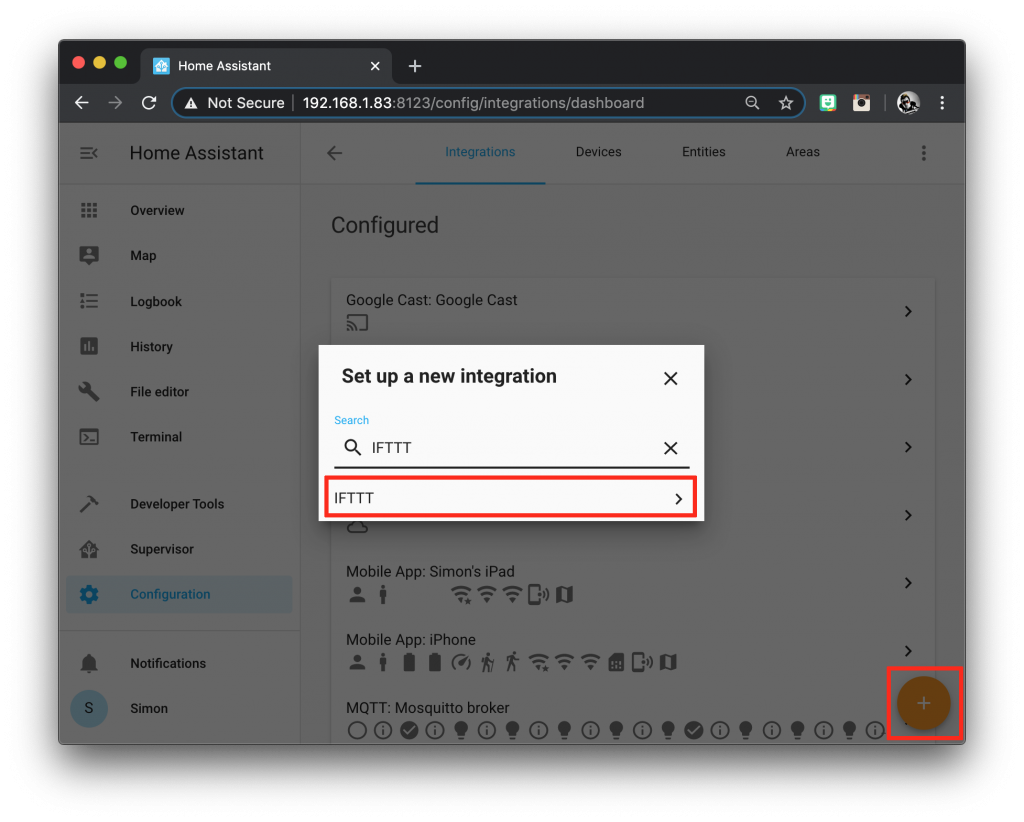
Next we need to click on the orange circle with the plus symbol to add a new integration.
Once you add the integration you will be presented with the following screen. Make a note of the URL, method and command type in your prefered text editor.

Add the automation
When data is received via the webhook to Home Assistant from IFTTT, an event called ifttt_webhook_received is fired. We need to create an automation to handle this event.
It is possible to specify the service and entity_id within the IFTTT applet, therefore we only need to create a single automation to handle the incoming webhook.
If you want to set up many applets to control different things, you simply specify the service and entity_id when you create the applet in IFTTT. No need to create an automation in Home Assistant for each one.
We need to create the automation within the automation integration in our configuration.yaml file.
If you are splitting up your files or already have automations written, simply omit automation and write the rest of the code beneath the existing code.
automation:
 - alias: 'IFTTT webhook handler'
   trigger:
We will set the trigger to platform and specify the event as ifttt_webhook_received.
automation:
 - alias: 'IFTTT webhook handler'
   trigger:
    - platform: event
      event_type: ifttt_webhook_received
      event_data:
        action: call_service
We will then set the action to a service template. Within the template we can specify the service and entity_id.
This means that the action will occur whenever a webhook is received, and the service and entity_id will be passed from the Webhook in IFTTT. Very cool!
automation:
 - alias: 'IFTTT webhook handler'
   trigger:
    - platform: event
      event_type: ifttt_webhook_received
      event_data:
        action: call_service
   action:
   - service_template: '{{ trigger.event.data.service }}'
     data_template:
       entity_id: '{{ trigger.event.data.entity_id }}'
Once you have added the code, go ahead and save the file. Then you will need to restart Home Assistant.
Create an IFTTT applet
Now we can create an IFTTT applet that is capable of sending a service and entity_id to Home Assistant. For our example I will be turning on a smart plug switch.kettle connected to my kettle.
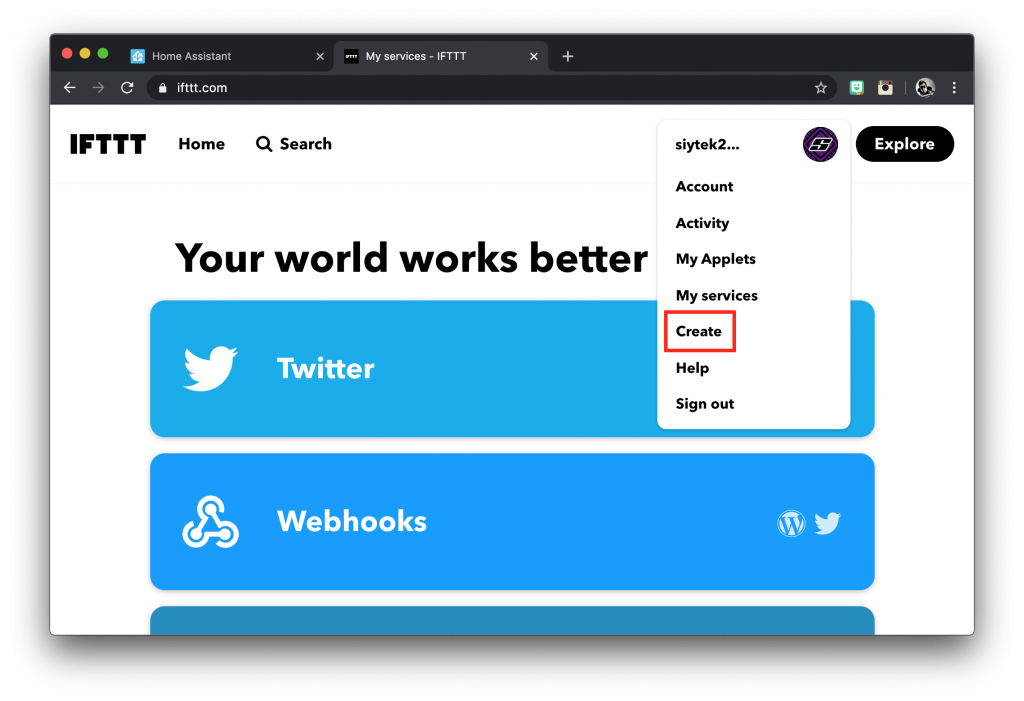
From the IFTTT website, click your profile picture and select create from the dropdown menu.
Setup WordPress
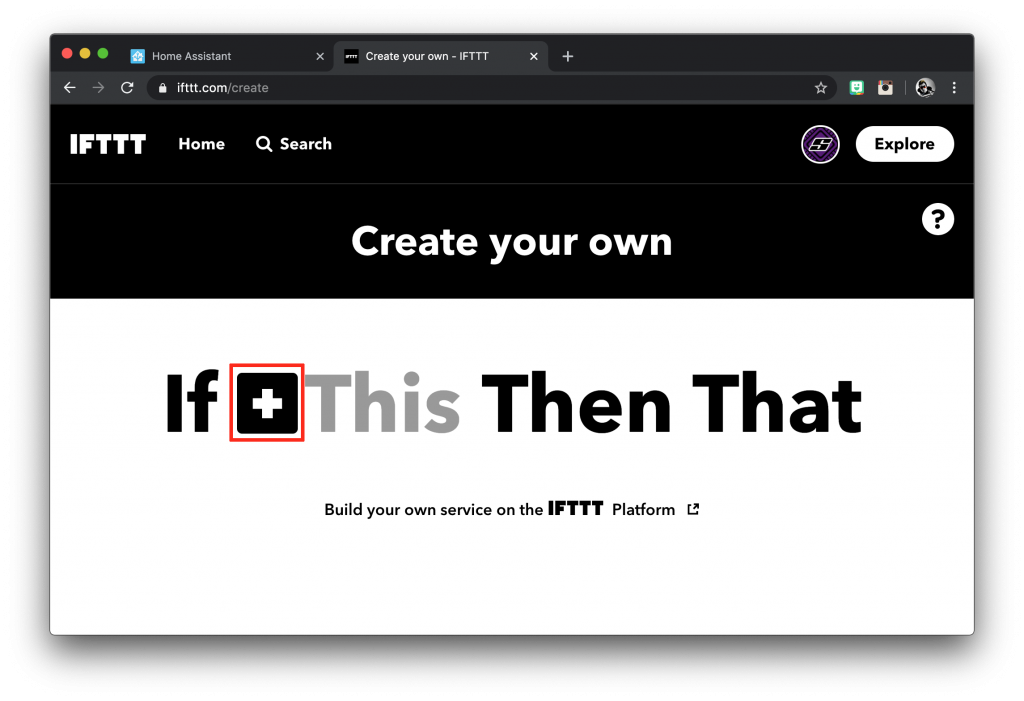
You will be presented with the If This Then That page. Click on the plus icon to add the service that will act as the event trigger.
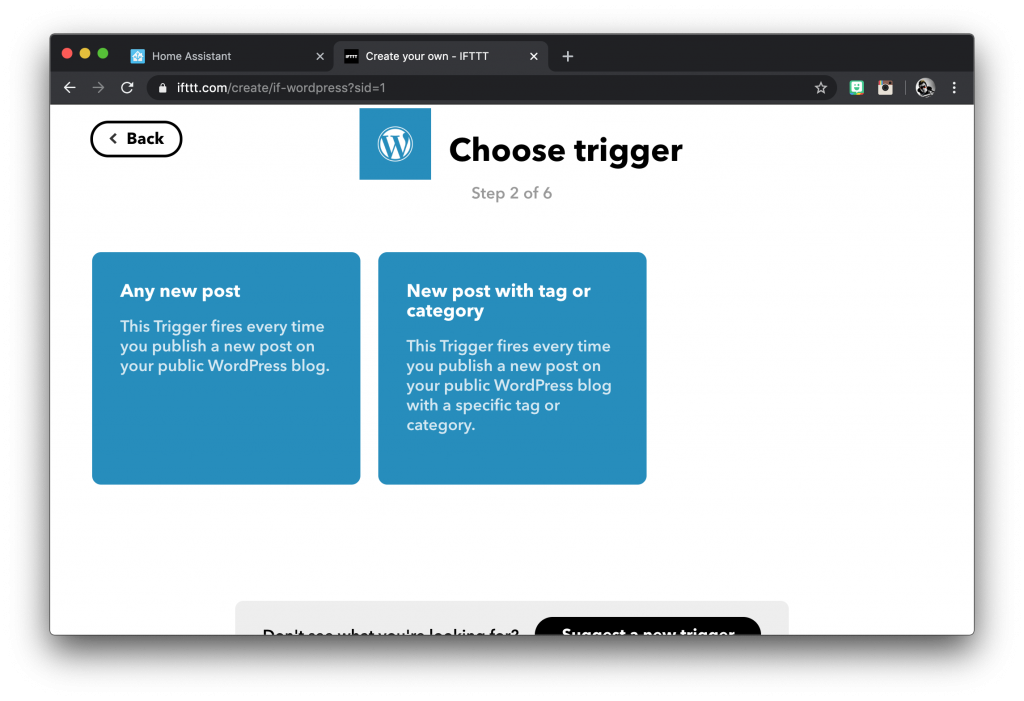
You will be given a list of services and also a search box, simply type in the name of the service you wish to use. For this example we will be using WordPress.
I want the trigger to occur when I publish any post, therefore we can go ahead and click the any new post option.
Setup Webhooks
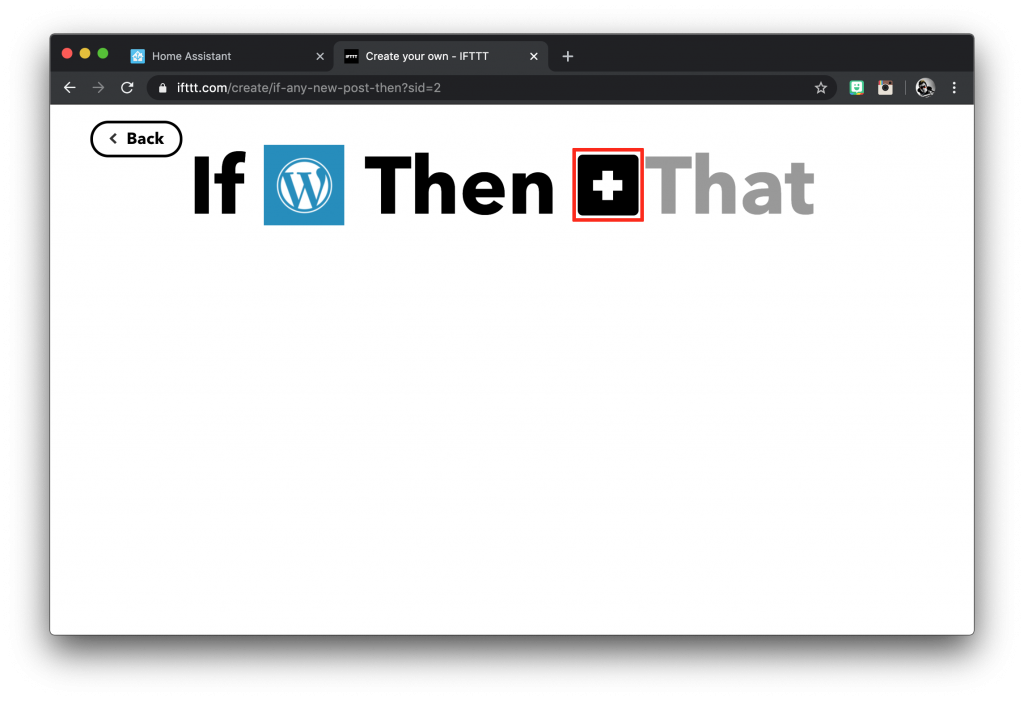
Now we can choose an option for the service we wish to use when the applet is triggered.
We will need to use Webhooks in order to interact with Home Assistant, simply search for Webhooks and use the make a web request option.
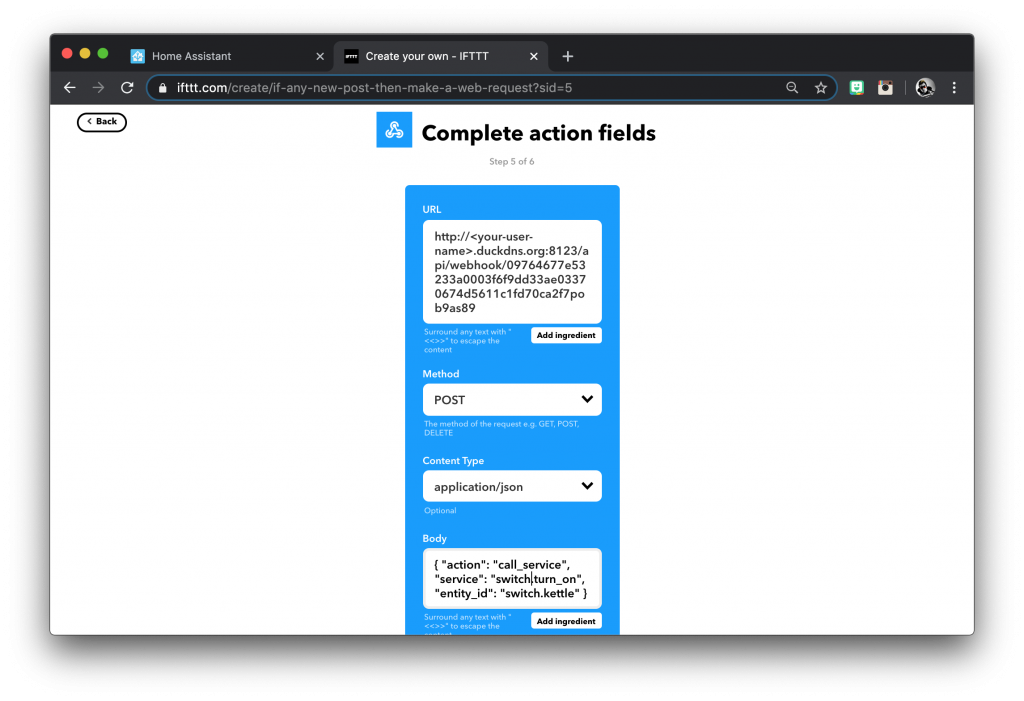
Now we need to complete the necessary fields in the webhook. Copy and paste the URL that you made a note of when adding the IFTTT integration in Home Assistant.
You also need to set the method to POST and the content type to application/json.
Now here’s the cool part, in the body we can specify the service and entity_id that we wish to control in Home Assistant.
In this example we want to turn on the kettle, therefore the service should be switch.turn_on and the entity_id will be switch.kettle. You should of course choose your own entities and desired service here.
The body needs to be specified in the following format, simply replace the service and entity_id as required.
{ "action": "call_service", "service": "switch.turn_on", "entity_id": "switch.kettle" }
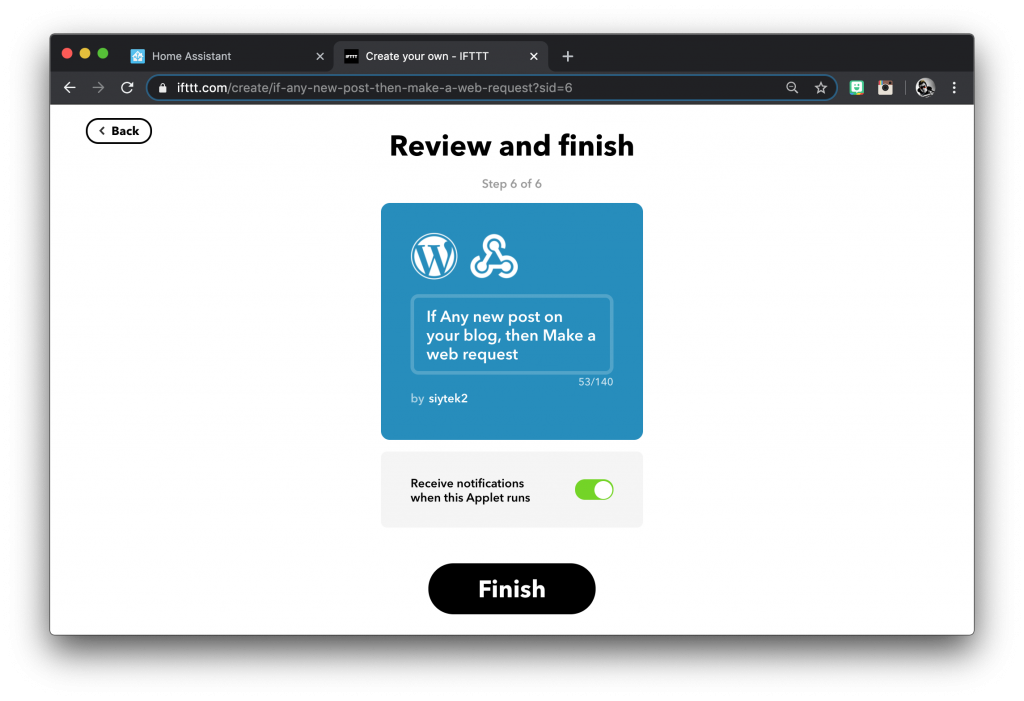
Once you have entered all of the information, click create action. You will be then be presented with the review screen. Choose whether or not you want to receive notifications in IFTTT and click finish.
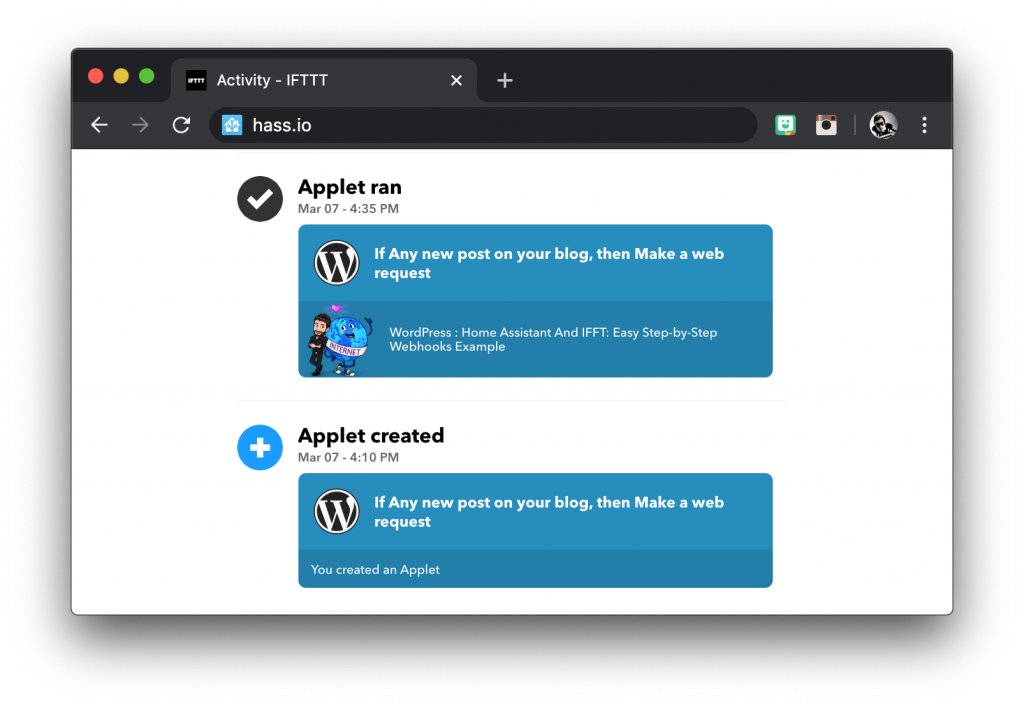
Testing the applet
Now everything is ready for testing! If you enabled notifications then you will see confirmation that the applet was created and run successfully in the activity menu.
Sending to IFTTT
It is also possible to send webhooks from Home Assistant to a service of our choice.
In this example we will create a somewhat pointless, but nevertheless very cool TwitterBot, which can report the status of things in the home to a Twitter account.
In this modern age of social media and the internet, everyone wants to know when I make a cup of coffee or open the bathroom door, right?!
Configure Home Assistant
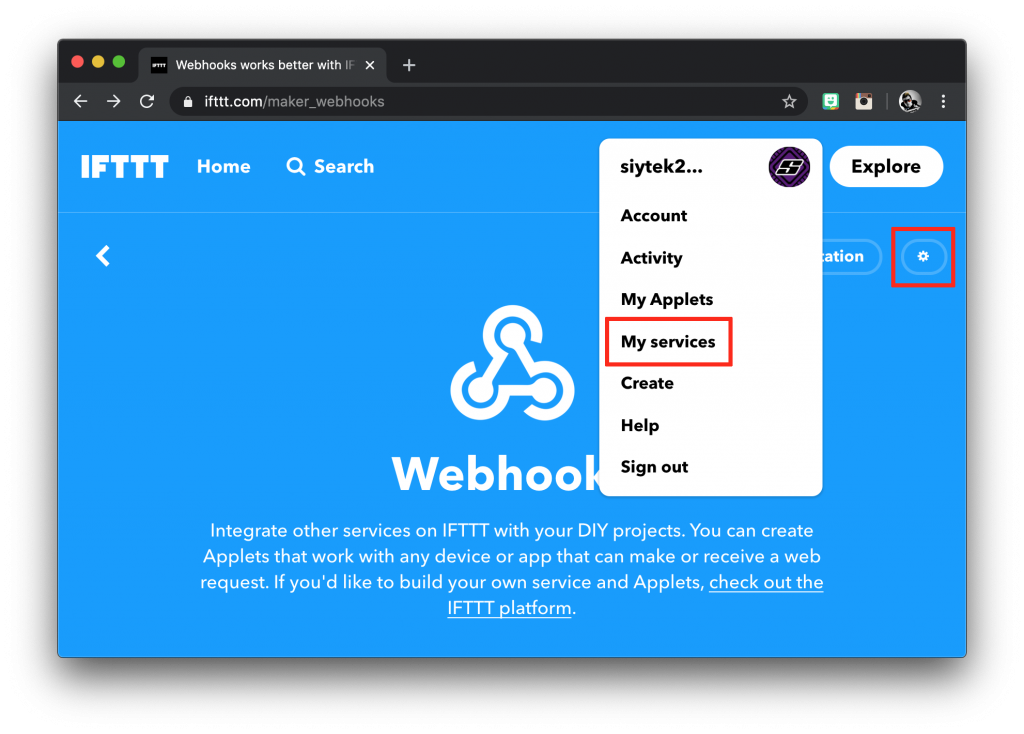
First we need to fetch the Webhooks key from IFTTT. Click on your profile picture and choose my services from the drop down menu.
Select Webhooks from the list of services and then click on the cog icon to bring up the settings.
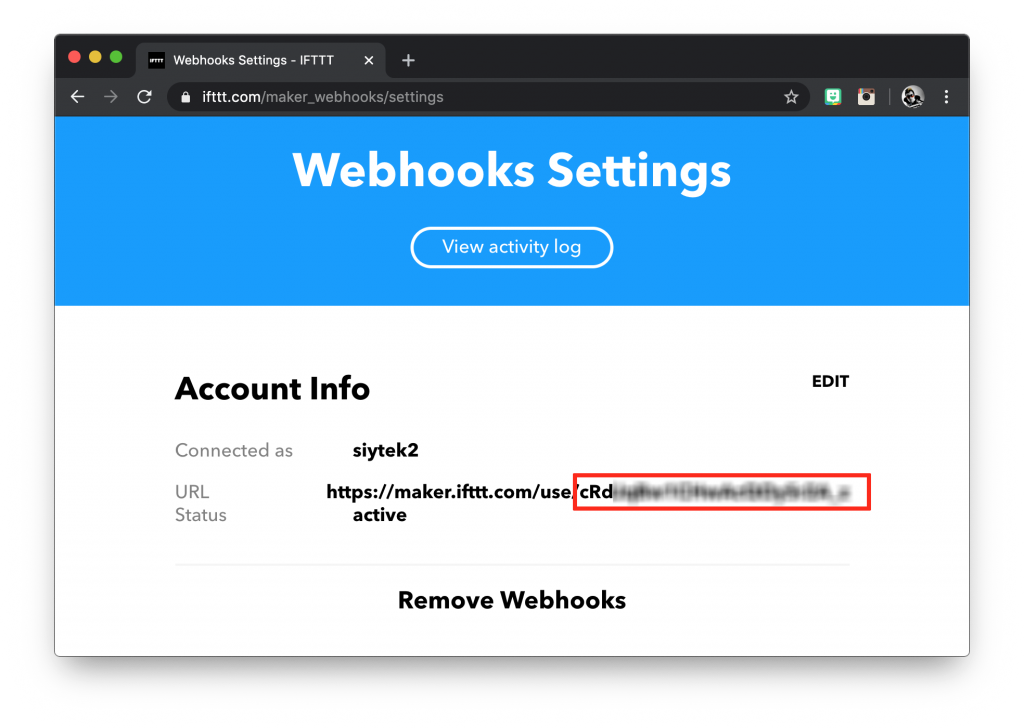
Under account info you will see your Webhooks URL. We will need to copy the key at the end of the address, not the whole URL but just the random characters after the forward slash.
Add the IFTTT integration
Then we need to add the ifttt integration to our configuration.yaml file. Paste your key from the Webhooks account info page into the integration.
ifttt:
  key:
    key: cRd*******************
Add the automation
We will create an automation the fires when a particular event occurs, in this case when the entity light.treelamp turns on and off. We will then setup a trigger that sends our desired message to Twitter when the automation is fired.
We need to create the automation within the automation integration in our configuration.yaml file.
If you are splitting up your files or already have automations written, simply omit automation and write the rest of the code beneath the existing code.
automation:
  - alias: 'Tree lamp on to TwitterBot'
    trigger:
Next we will add the platform as state and set it up to occur when light.treelamp turns on.
automation:
  - alias: 'Tree lamp on to TwitterBot'
    trigger:
      platform: state
      entity_id: light.treelamp
      to: 'on'
In order to send information to our Webhook we will use ifttt.trigger as the service in the action section of our automation.
automation:
  - alias: 'Tree lamp on to TwitterBot'
    trigger:
      platform: state
      entity_id: light.treelamp
      to: 'on'
    action:
      service: ifttt.trigger
Like with receiving Webhooks, we can also pass several attributes to our receiving service.
In this case we will pass an event called twitter_bot to identify the correct Webhook instance in IFTTT. We will also pass the message we wish to add to Twitter as value1. This will make more sense when we setup the webhook in IFTTT.
automation:
  - alias: 'Tree lamp on to TwitterBot'
    trigger:
      platform: state
      entity_id: light.treelamp
      to: 'on'
    action:
      service: ifttt.trigger
      data: {"event":"twitter_bot", "value1":"Tree lamp turned on!"}
Now that we have an automation for the lamp turning on, we can copy the code in order to create a tweet for the lamp turning off. Our final code should looks something like this.
automation:
  - alias: 'Tree lamp on to TwitterBot'
    trigger:
      platform: state
      entity_id: light.treelamp
      to: 'on'
    action:
      service: ifttt.trigger
      data: {"event":"twitter_bot", "value1":"Tree lamp turned on!"}

  - alias: 'Tree lamp off to TwitterBot'
    trigger:
      platform: state
      entity_id: light.treelamp
      to: 'off'
    action:
        service: ifttt.trigger
        data: {"event":"twitter_bot", "value1":"Tree lamp turned off!"}
Once you have added the code, go ahead and save the file. Then you will need to restart Home Assistant.
Create an IFTTT applet
Now we can create an IFTTT applet that is capable of receiving the variables event and value1 from Home Assistant. We will then pass these to the Twitter service in order to generate the tweet.
From the IFTTT website, click your profile picture and select create from the dropdown menu.
Setup Webhooks
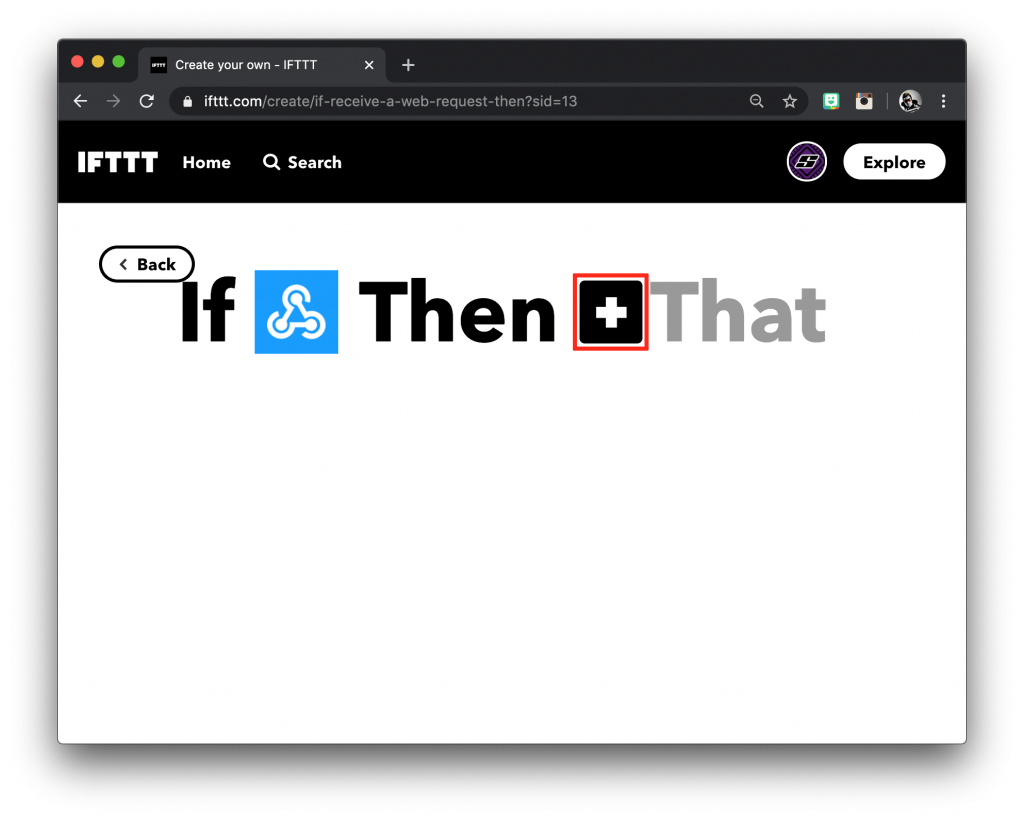
You will be presented with the If This Then That page. Click on the plus icon to add the service that will act as the event trigger.
You will then be presented with a list of services and a search box. Search for Webhooks and select it. Then choose receive a web request.
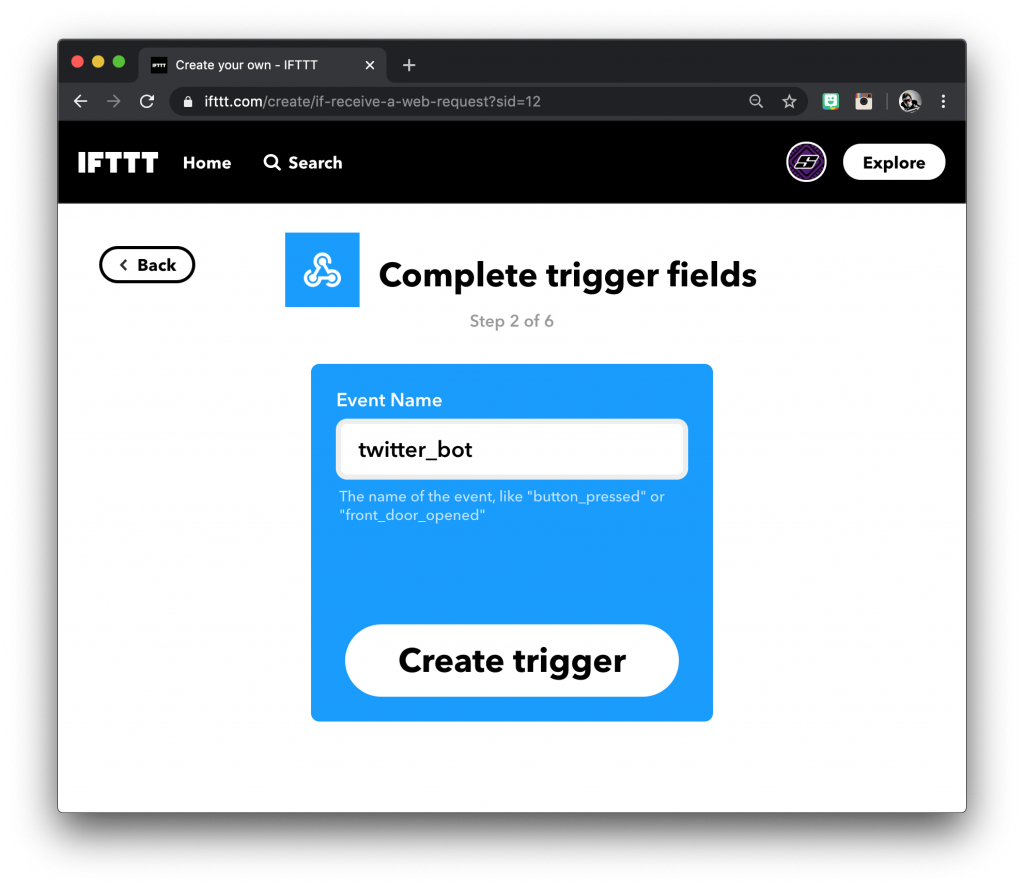
On the next screen we need to enter the event name as the event that we specified in the automation, in this case it will be twitter_bot. Then click on create trigger.
Setup Twitter
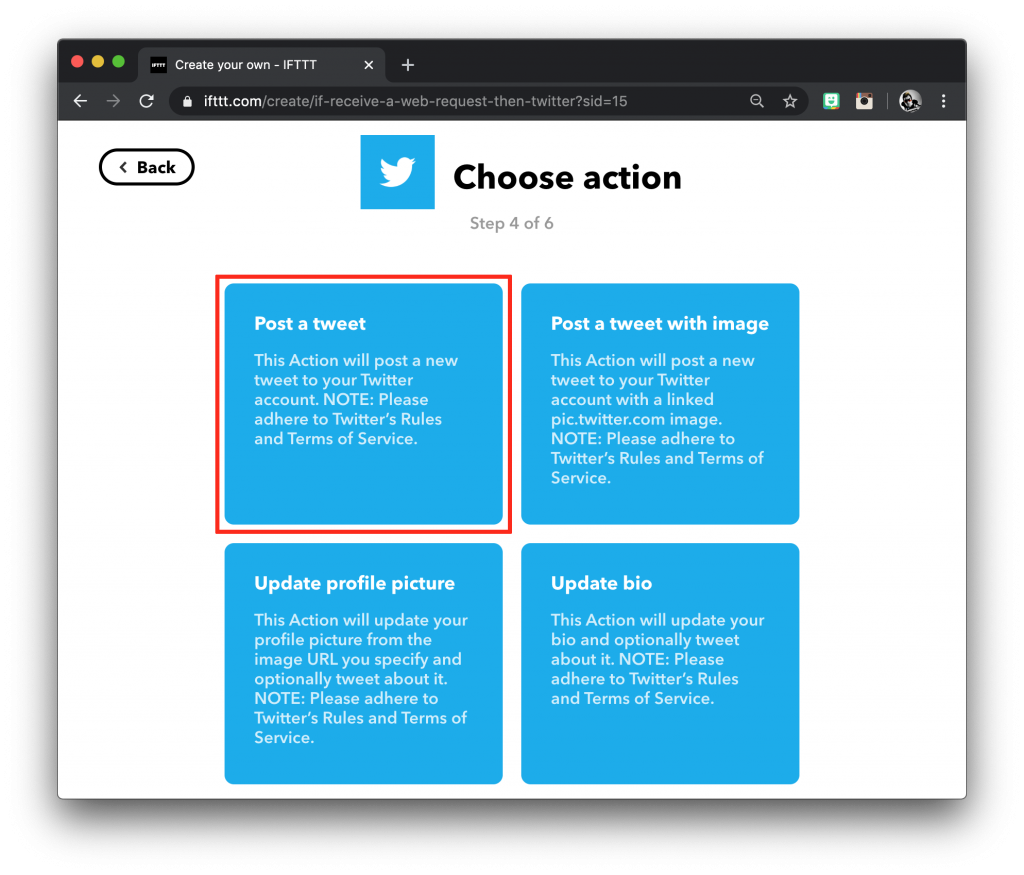
Now we can choose an option for the service we wish to use when the applet is triggered. For this example we will be using the Twitter service.
We have several actions to choose from, but for this example we will simply be using post a tweet.
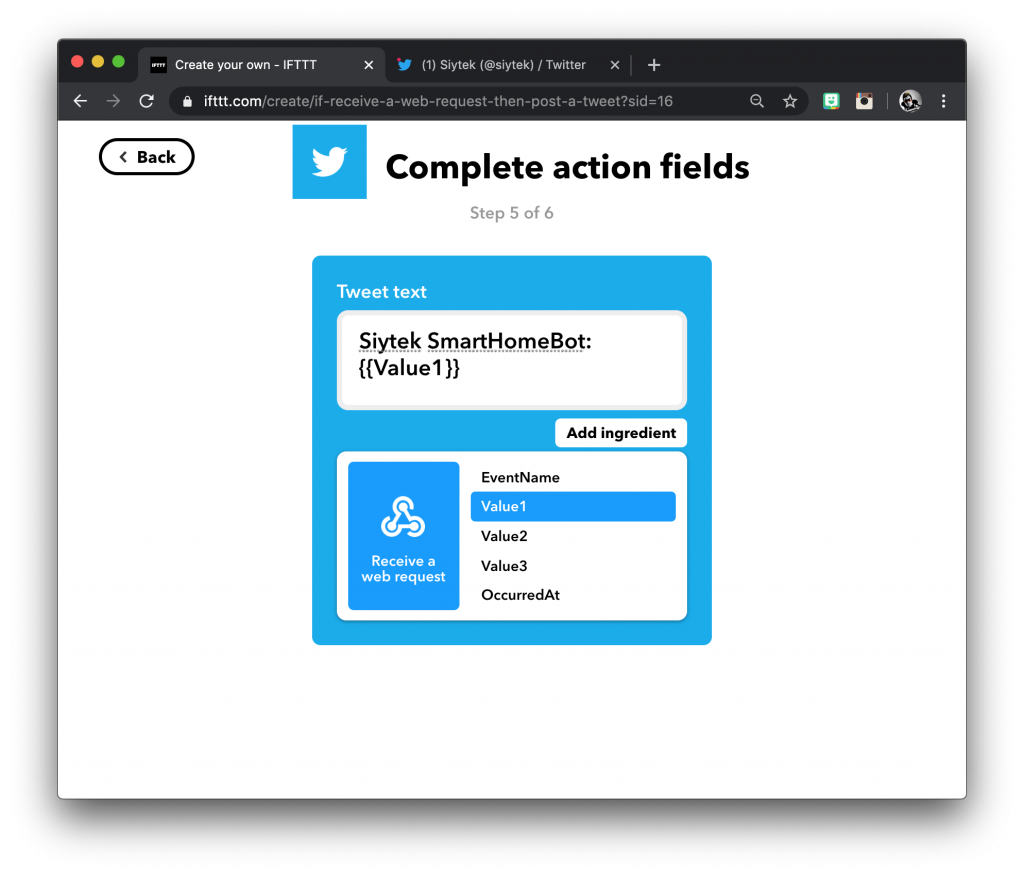
Next we can enter the text we wish to include in the tweet. We can also include the variable value1 by clicking add ingredient.
The placeholder {{Value 1}} will be replaced with the text that we pass from Home Assistant. Cool!
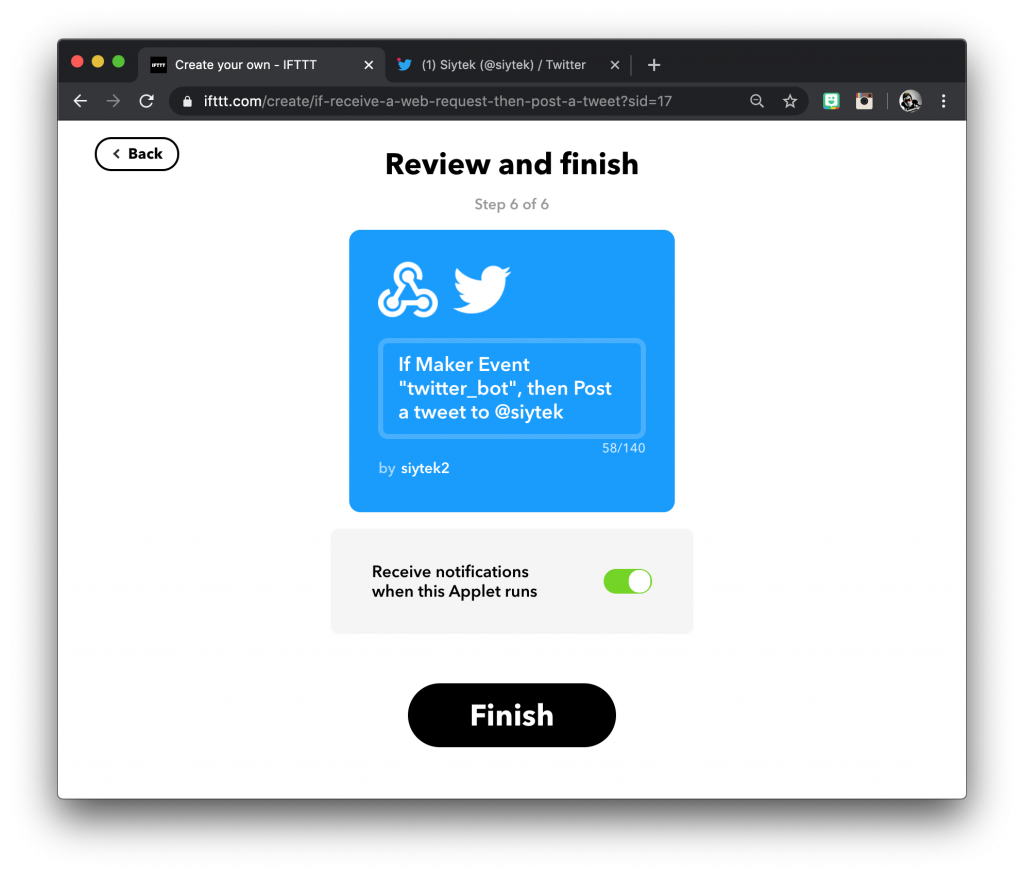
Once you have entered all of the information, click create action. You will be then be presented with the review screen. Choose whether or not you want to receive notifications in IFTTT and click finish.
Testing the applet
Now everything is ready for testing! If you enabled notifications then you will see confirmation that the applet was created and run successfully in the activity menu.
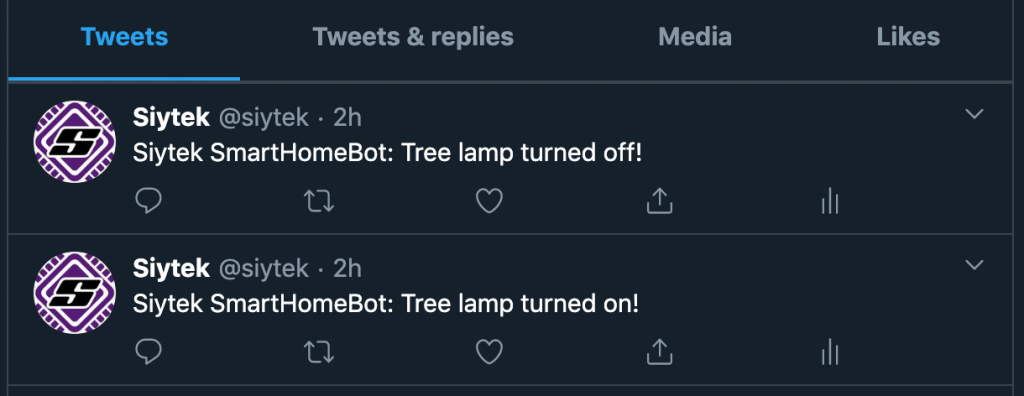
Let’s head over to Twitter and see what our Home Assistant TwitterBot is saying:
Conclusion
In this tutorial we learnt how to send and receive commands using Webhooks. It is certainly a very powerful tool with many uses!
The integration is slick and IFTTT is very simple to use. My only criticism is it can sometimes take quite a while for the action to occur, but this is to be expected from a cloud-based service.
Thanks for tuning in and be sure to check out some more awesome Home Assistant ideas here on my site!
Thanks so much for visiting my site! If this article helped you achieve your goal and you want to say thanks, you can now support my work by buying me a coffee. I promise I won't spend it on beer instead... 😏


