If you have a device without smart home functionality but with a common infrared remote control, it is possible to integrate it into Home Assistant using a clever little device called an IR blaster.
The IR blaster is able to learn standard remote control key presses and save them to a file on the computer.
Home Assistant can then instruct the IR blaster to emulate remote control key presses to control your device. Awesome!
In this tutorial we will learn how to integrate a Broadlink IR blaster into our Home Assistant setup.
I will use the common Broadlink RM Mini 3 for the example, but you can use any of the Broadlink devices.
Table of Contents
Prerequisite
You should have Home Assistant installed and running. A basic understanding of YAML would also be highly beneficial.
If you are not yet familiar with automation or YAML then I would recommend reading the tutorials about automation and scripts first.
You will also need a Broadlink IR blaster like the RM Mini 3. You will either need to connect it to the network using the Broadlink App or Broadlink Manager.
Add the RM Mini to the network
In order to add the RM Mini to the network you can follow the process in the official Broadlink App. However there are some instances where this has caused a problem, mainly with the newer version of the app.
If you have been successful in connecting your device to the network with the official app, you can skip to the next step.
Broadlink Manager
Alternatively you can use Broadlink Manager to setup your device. Unfortunately this program is only available in Windows. Firstly you need to put your device into AP mode.
Press and hold the reset button until the LED is flashing quickly. Release the button, then press and hold again until the LED is blinking slowly. The device is now in AP mode.
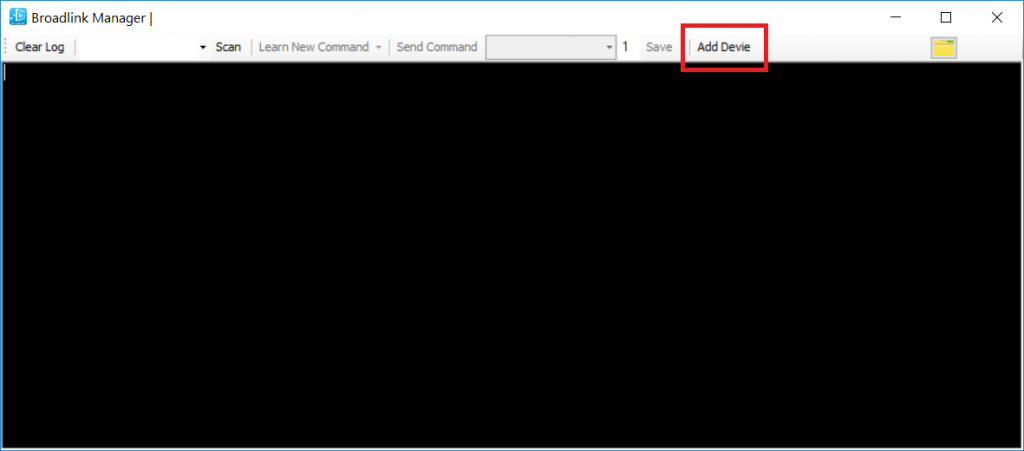
Firstly you will need to connect your WiFi to the BroadlinkProv network, this is a direct wireless connection to the RM Mini device. Then open up Broadlink Manager and click add device.
Click connect on the device pairing screen, the network status should show connected.
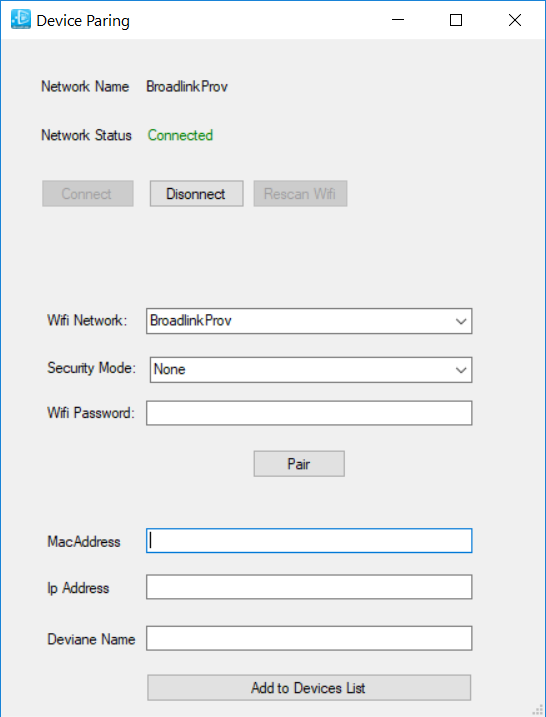
In the WiFi network drop down menu, select your router and choose the security mode. If in doubt it is most likely WPA2. Enter the WiFi password for your network and click pair.
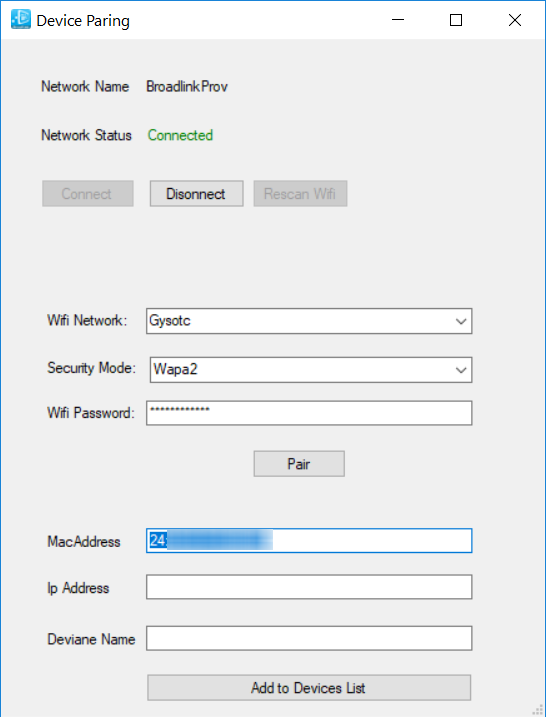
If everything was successful then you should see the MAC address appear.
Back on the main screen you can use scan to locate the device and find the IP address. If this does not work for you, then you can use the following method.
Find the IP address
If you are using the official app rather than Broadlink Manager, you can find your IP address on the configuration page of your router.
This will differ depending on the router so you will need to consult the guide for your specific router. However it is commonly accessed by navigating to http://192.168.1.1 in a browser.
In my case the router management page is accessed from http://192.168.1.254 and the device can be seen in the list of devices.
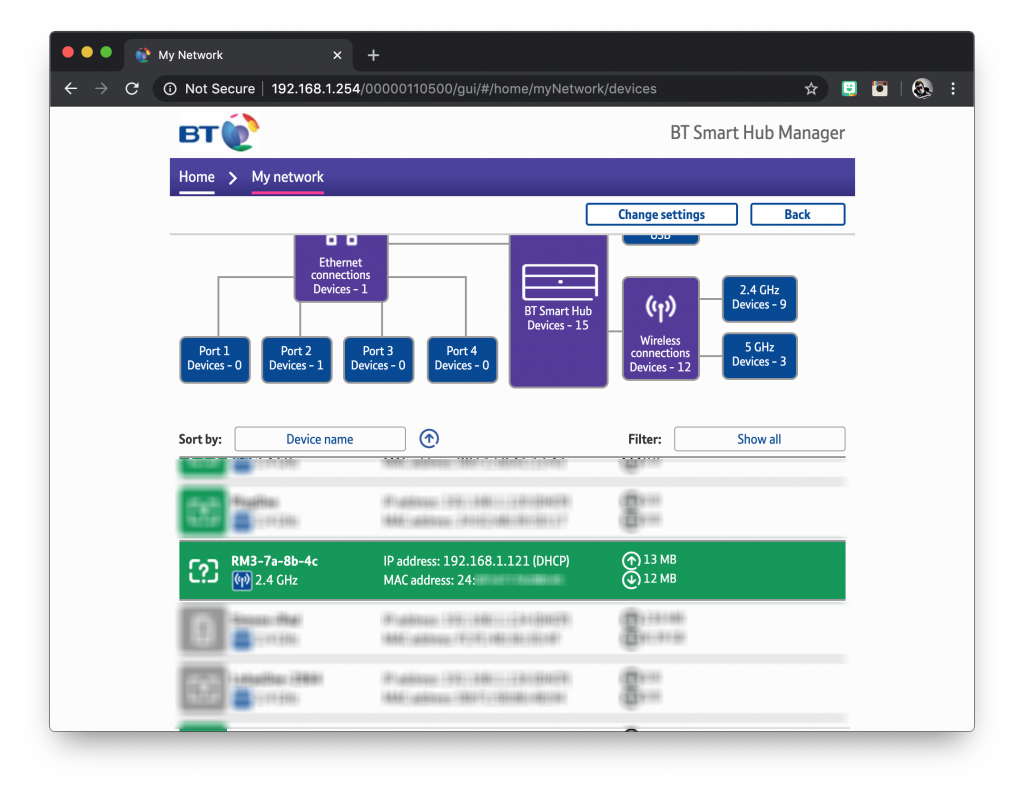
Alternatively you could use a third party service like the Fing app. Now we have our device connected to the network, make a note of the IP and MAC address as we will need it to configure Home Assistant.
Configure Home Assistant
Now that we have our RM Mini on the network we can configure Home Assistant. For editing YAML you will need the file editor add-on to be installed, or be familiar with editing files in your prefered text editor so that we can edit configuration.yaml.
Broadlink can be added to Home Assistant using the following button:

Alternatively you can configure Broadlink manually by taking the following steps:
- Open Home Assistant.
- In the sidebar menu click on settings.
- From the configuration menu select devices & Services.
- In the bottom right, click on the add Integration button.
- From the list, search and select “Broadlink.”
- Simply follow the instruction on screen to complete the set up.
Add the remote integration
Previously is was necessary to setup and configure a platform for the IR blaster. However as Home Assistant becomes more user-friendly, this is no longer necessary.
All entities will be automatically formed once the device has been configured. Except for customized IR/RF switches, platforms no longer need to be set up.
By default, the entities share the same name as the device. Click the entity on the frontend and select the settings icon in the upper right to alter the name, icon, or entity id.
If you don’t think the entity is beneficial, you can also disable it there. When finished, don’t forget to click Update to save your changes.
Learn commands
In order to learn commands we need to head over to the services tab, so go ahead and click developer tools from the sidebar.
Set the service to remote.learn_command and entity to remote.broadlink.

Next we need to add the attributes in the service data box. You can click fill example data at the bottom of the page to save having to type it all.
The device entry is the name of the device you wish to control. In this case I am setting up controls for the small TV in the kitchen, which I have appropriately named tinysamsung.
device: tinysamsung
The command is the name of the button you wish to learn from the remote. In this case I will be learning the function for volume up.
command: vol up
We can also set the alternative parameter depending on if the button has an alternative function. This should be set to true for buttons that toggle, such as the power button.
alternative: false
Our completed configuration should look something like this.
entity_id: remote.broadlink
device: tinysamsung
command: vol up
alternative: false
timeout: 30
Now we can click call service in order to learn the command. The LED on the RM Mini will illuminate and we can point the remote and press the button.
The LED will turn off once the command has been learnt and the code is saved into a JSON file in the config/.storage folder.
Send commands
We can test the commands that we have learnt in the same way. Simply change the service to remote.send_command and alter the service data to the following.
entity_id: remote.broadlink
device: tinysamsung
command: vol up
num_repeats: 1
delay_secs: 0.75
hold_secs: 2.5
Specify the device and command that you wish to use for sending. You can also specify the options for repeats if you wish.
It is also possible to use service to send the commands. We can then include them in scripts and automations. First we will create a new script under the script integration called tv_vol_up.
script:
  tv_vol_up:
Then we will create the sequence and set the service as remote.send_command.
script:
  tv_vol_up:
    sequence:
      - service: remote.send_command
Then we can enter the data using remote.broadlink as the entity_id. We will also specify the device we wish to control, in this case tinysamsung. Finally we can set the command we wish to send as vol up.
script:
  tv_vol_up:
    sequence:
      - service: remote.send_command
        data:
          entity_id: remote.broadlink
          device: tinysamsung
          command: vol up
Conclusion
The Broadlink IR blaster devices offer a superb way to integrate a dumb device into a smart home setup.
In this tutorial we learnt how to configure the remote integration for sending and receiving basic commands from a TV remote. However you can use this with any device that has an IR remote.
For example if you have an AC unit with IR remote, you could an IR blaster to integrate it with a Home Assistant thermostat solution.
I hope that you found this tutorial useful! Why not go check out some of my other awesome Home Assistant tutorials!
Thanks so much for visiting my site! If this article helped you achieve your goal and you want to say thanks, you can now support my work by buying me a coffee. I promise I won't spend it on beer instead... 😏


Great stuff. Is there a way, do you know if using the RM Mini to receive IR commands from your IR remote and then do something with them? for example i’m looking to control a nvidia shield from an IR universal remote. if i could receive a specific command into the RM mini, then get it to do something like send a command via adb to the shield then that would be great.