
Are you the type of person who would love to have a butler or servant to do all of your bidding?
Sure you can turn your lights on in the Home Assistant user interface, but it is far more fulfilling when you demand that your very own ServantBot-3000 does it for you!
Then once you have your own digital butler setup in Telegram, why not invite it to a group chat so your friends can demand things too!
Table of Contents
Prerequisite
You should have Home Assistant installed and running and a basic understanding of YAML including how to edit configuration.yaml.
You should also understand how to use a service and entity within Home Assistant.
If you are new to Home Assistant or you are not yet familiar with editing YAML files then you should definitely check out my beginners tutorial on YAML first.
I would also recommend taking a look at my other tutorials on automation and scripts.
You will also need an account with Telegram, you can set one up using any of their apps. You can also use Telegram in a browser if you do not want to install an app.
Create a new Telegram bot
Home Assistant has a very powerful Telegram integration that provides us with the ability to host a fully functioning bot.
The bot can respond to texts and commands, triggering any services in Home Assistant. It can also respond to messages, send pictures, videos and much more!
Your bot can act as alternative to the companion app for sending notifications whilst allowing you and your friends and family to control your smart home gadgets. Awesome!
Visit the BotFather
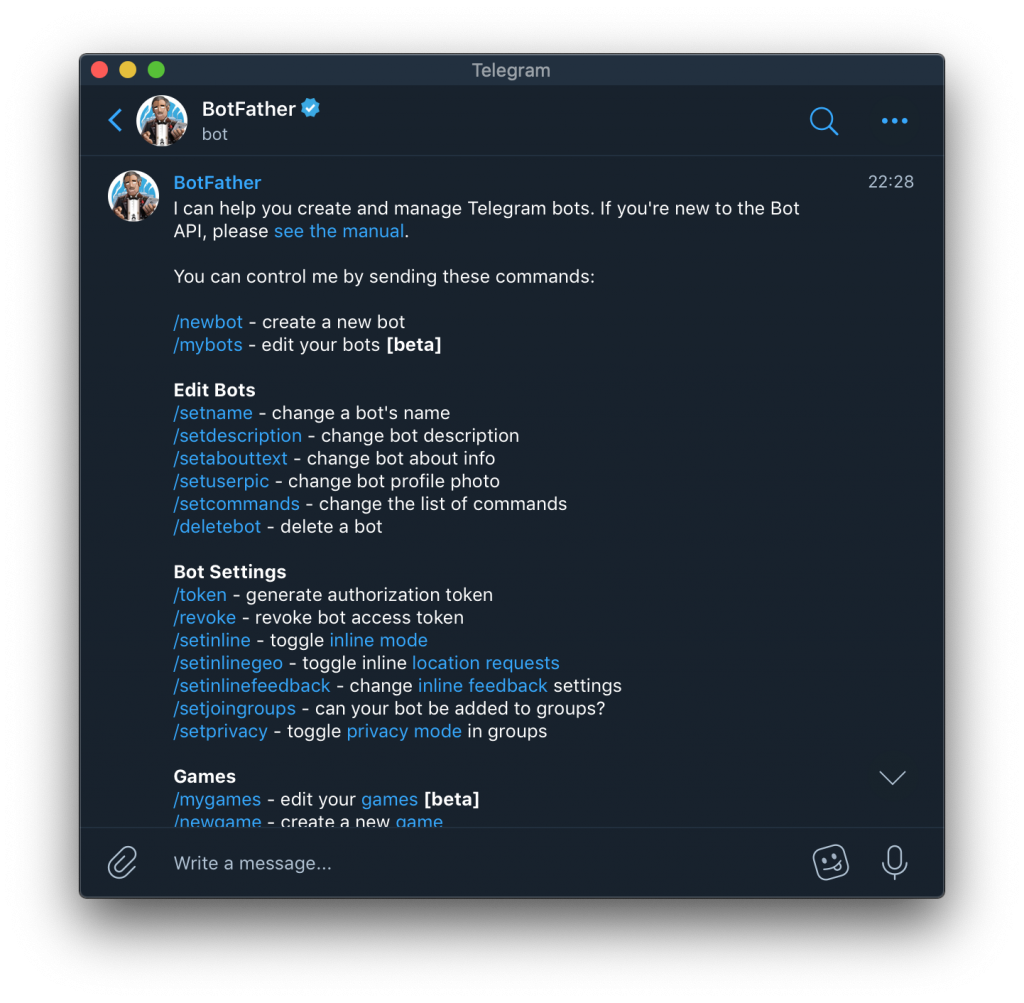
In order to create your own Telegram bot you need to visit the BotFather, a bot whose sole purpose is to create new bots. You can either visit the BotFather page or just add @botfather.
Once you have added @botfather in Telegram, send the message /start and you will be presented with the available commands. Go ahead and send the message “/newbot” and follow the instructions to create a new bot.
Get an access token
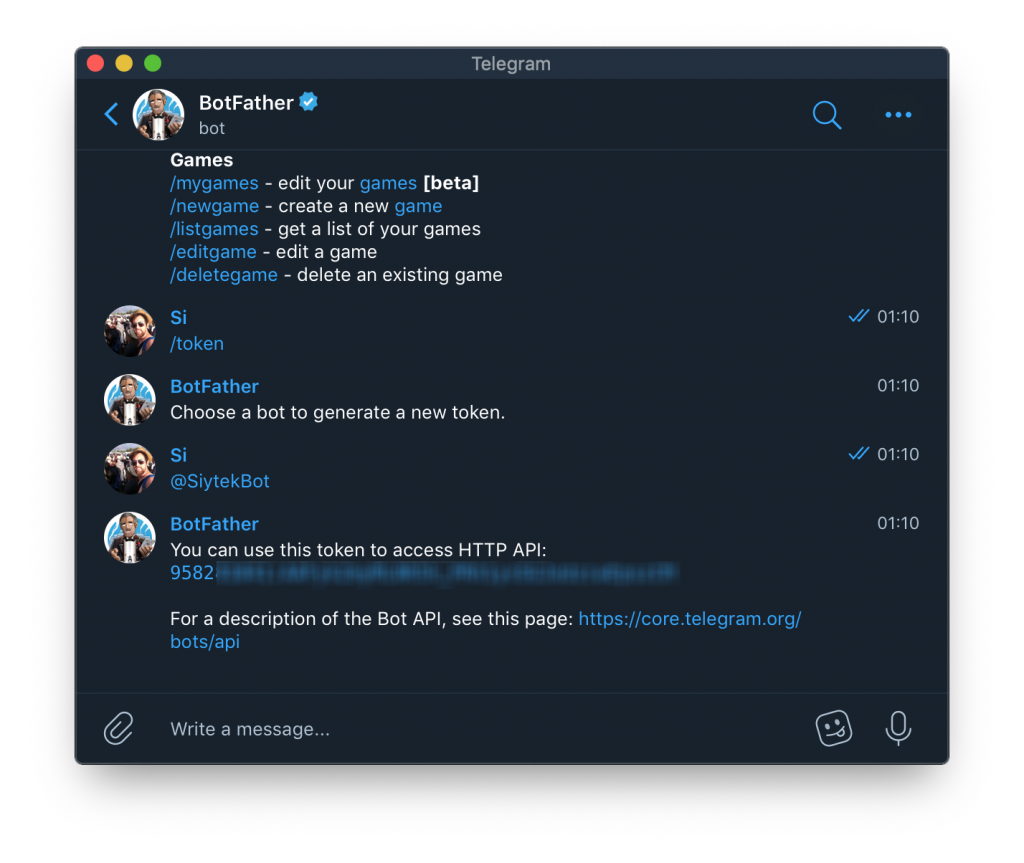
Once you have created your new bot, you will be given an access token. Alternatively you can type the /token command to show the token.
Once you have your token, temporarily copy and paste it into a text document as we will need it later for setting up webhooks and Home Assistant.
Setup webhooks
Using webhooks is the prefered way to connect Telegram to Home Assistant. It also allows two way communication between the bot and Home Assistant, meaning the bot can respond to commands and also reply with messages.
Setup DNS
In order for this to work your Home Assistant setup must be exposed to the internet. You can follow my easy setup guide for DuckDNS if you don’t yet have a public address for your Home Assistant server.
Port forwarding
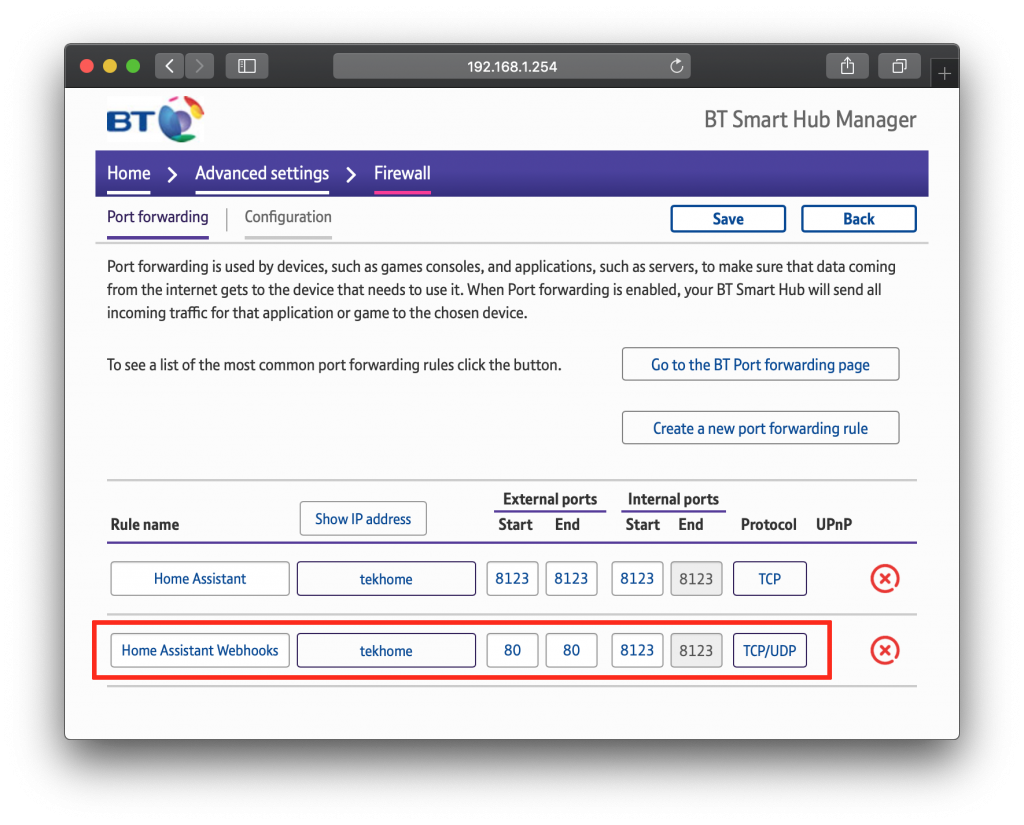
We will also need to create a port forwarding rule to forward traffic from port 80 to port 8123 of the Home Assistant server. This is due to a port restriction enforced by Telegram when using webhooks. It is not possible to send data from the bot to port 8123.
If you already have port forwarding set up, you can either change the external port from 8123 to 80 in your existing rule (leave the internal port set as 8123) or just create another rule that points port 80 to port 8123.
The way in which you create a port forwarding rule differs depending on your router. For more information, see the port forwarding section of my DuckDNS tutorial.
Setting setWebhook
A webhook is a method of communicating over the internet, which two software applications can use. It makes use of the HTTP or HTTPS protocol so it is usually easy to implement on any machine with internet access.
Home Assistant has build-in support for sending and receiving webhooks but we need to tell our Telegram bot to use our Home Assistant server address. Your webhook URL will be as follows, just replace <your-URL> with your own domain name.
Note that you should either use HTTP or HTTPS depending on whether or not you have set your Home Assistant up for SSL connection. See this post for further information.
https://<your-URL>/api/telegram_webhooks
To set the webhook URL we need to use the Telegram bot API. I know that when someone usually says ‘API’ it means that there is some super-complex code involved. However no need to fear! For this purpose it is really quite easy.
All we need to do to use the Telegram bot API is type one URL into the address bar of our browser. You need to replace <YOUR-BOT-TOKEN> with the token that you obtained earlier, and also replace <YOUR-WEBHOOK-URL> with your webhook URL from above.
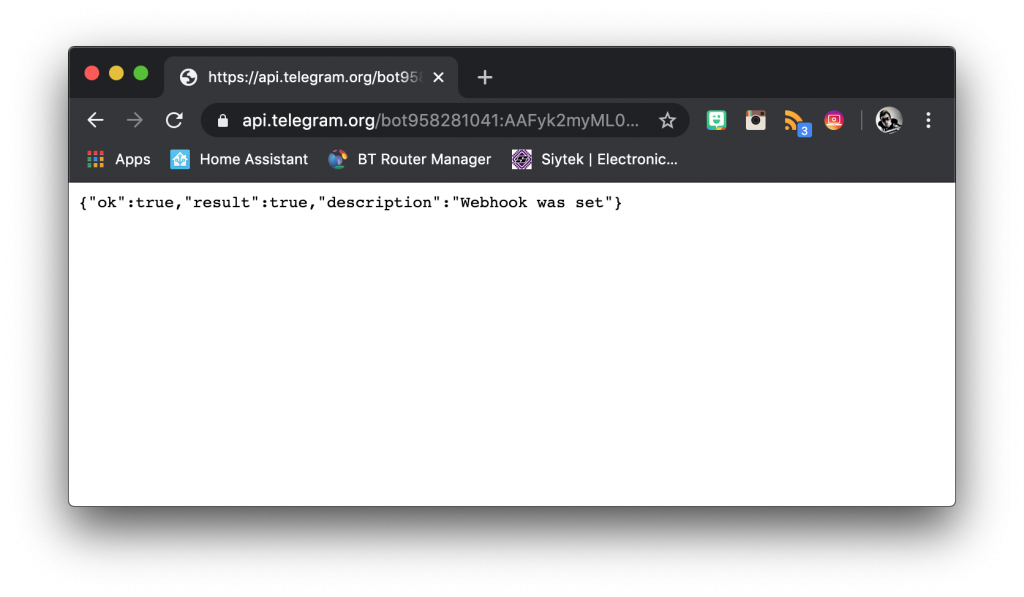
https://api.telegram.org/bot<YOUR-BOT-TOKEN>/setWebhook?url=<YOUR-WEBHOOK-URL>
If you typed everything correctly, you will be shown the webhook was set confirmation message.
Note that if you want to change your webhook address, you must first delete it. You can do this by sending the command with no URL.
Getting chat & user IDs
The final information that we need for our setup Home Assistant is the chat_id and group_id for any people or groups that we want to allow our bot to communicate with. Note that if you are using groups, you should still add the individual user IDs to the list too.
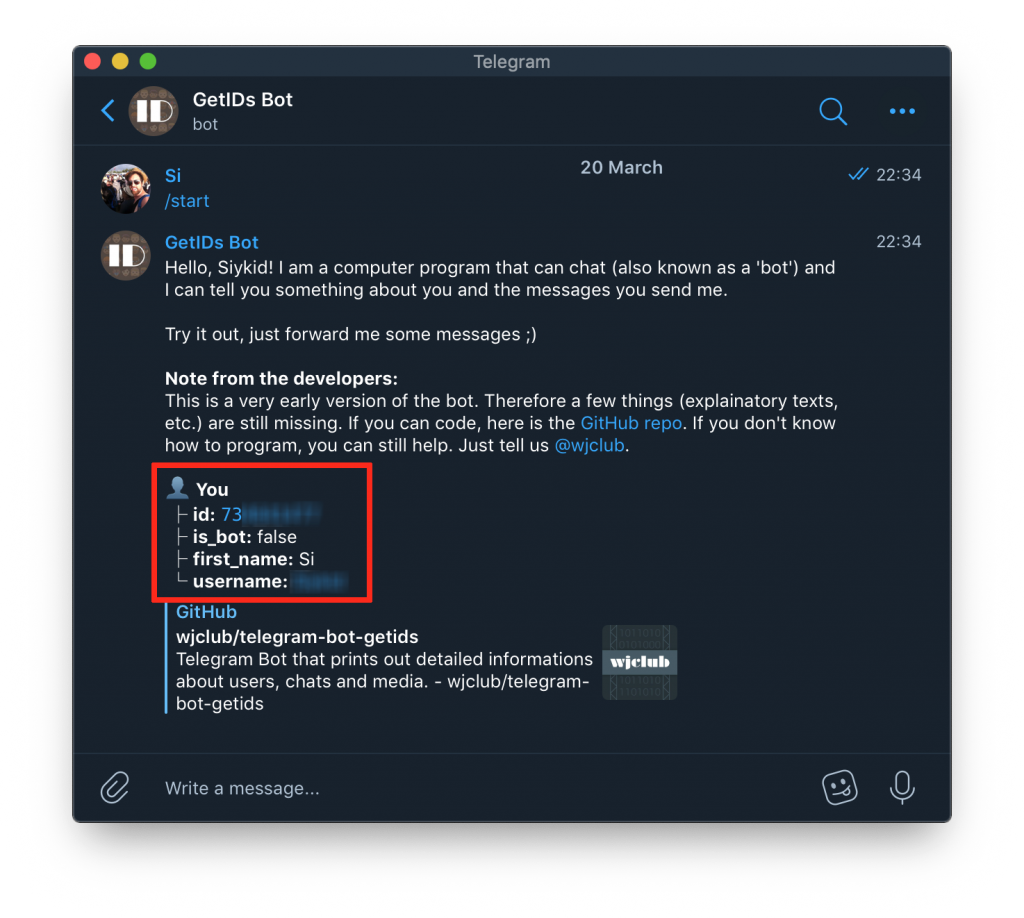
To get the ID of a user or group, you can use the @getIDs bot. Simply add the bot and issue the /start command to get your user ID. You need to get the user ID for any other user you wish to include in your Home Assistant setup, just ask them to also add the GetIDs bot and send you their ID.
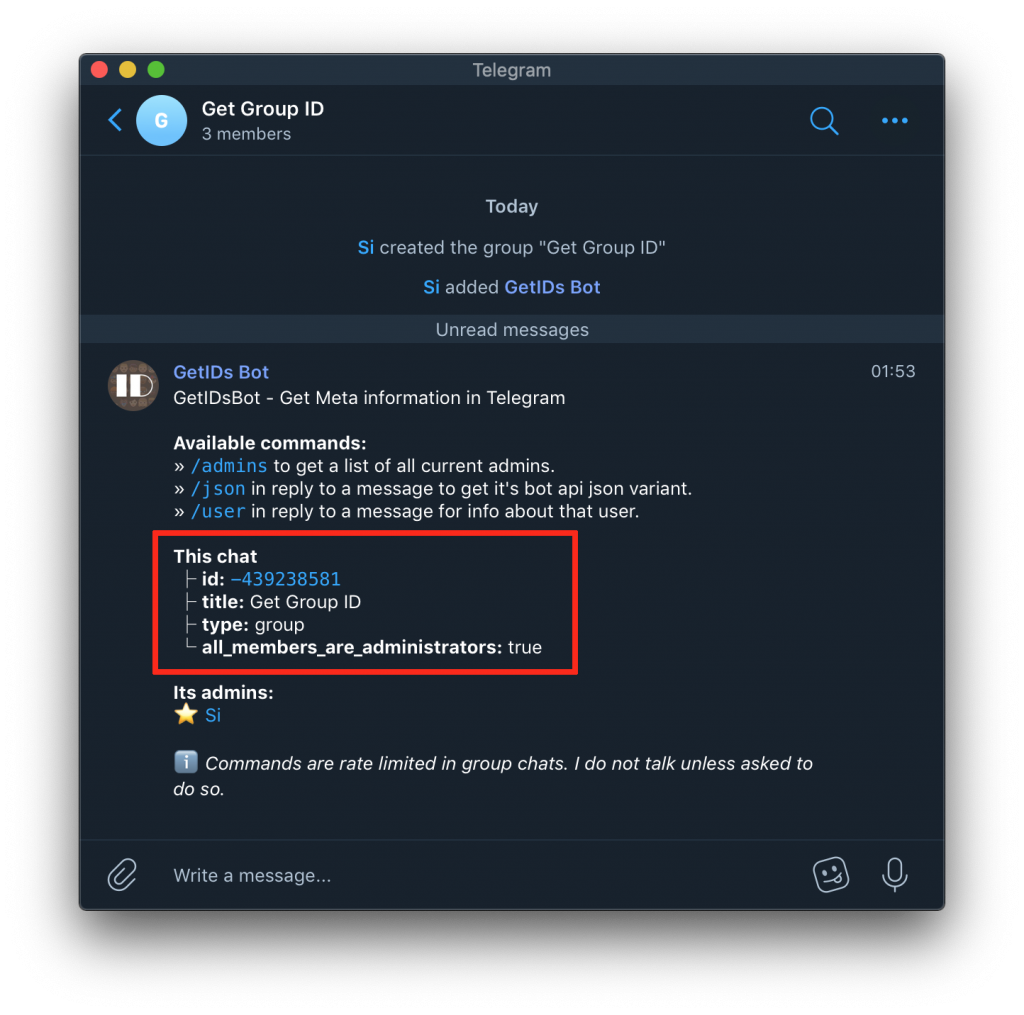
You can also add the @GetIDs bot to a group in order to get the group ID, but note that the bot will only respond if there is at least one other person in the group.
Also note that a group ID begins with a negative (-) symbol, it is important to include this when adding a group ID to Home Assistant.
Adding the bot
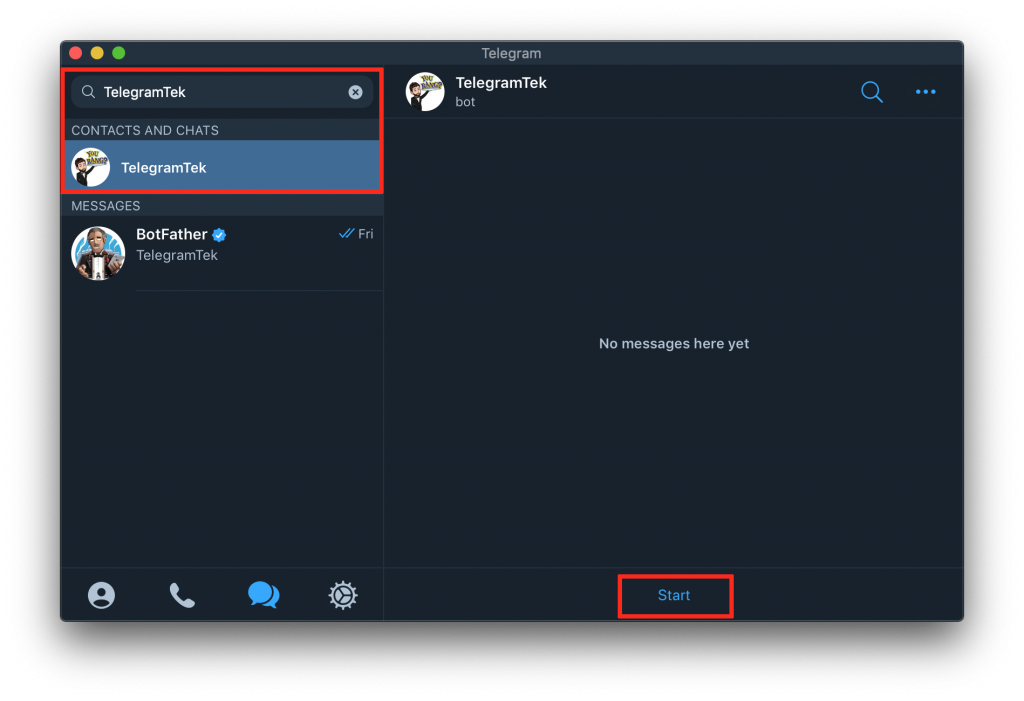
The last thing we need to do before we setup Home Assistant is to add our bot to Telegram. This is important as the integration will not work until we initiate the first conversation with the bot.
Simply search for your bot in Telegram and open up a conversation with it. Then just issue the /start command. Remember that although the bot can be found publically, only users and groups that we authorise in Home Assistant will be able to communicate with it.
Setup Home Assistant
At this stage you should have your very own Telegram bot set up, the token for the bot and a list of user IDs and group IDs that you wish to include in your Home Assistant integration.
You should also have an external URL set up for your Home Assistant server and a port forwarding rule that forwards traffic from the external port 80 to the Home Assistant port (8123 by default).
Add the Telegram integration
First we need to open up configuration.yaml and add the Home Assistant integration. We will also specify the platform as webhooks.
telegram_bot:
  - platform: webhooks
Then we will add the external URL for our Home Assistant server, don’t forget that we must specify port 80 and not the default port 8123.
We will also add the Telegram bot token that we obtained earlier. Replace <YOUR-API-KEY> with the key you obtained earlier.
telegram_bot:
  - platform: webhooks
    api_key: <YOUR-API-KEY>
Finally we need to specify the user and group IDs that we wish to authorise. All of these fall under the same attribute allowed_chat_ids.
telegram_bot:
  - platform: webhooks
    api_key: <YOUR-API-KEY>
    url: https://<your-URL>:80
    allowed_chat_ids:
      - 123456789  # this is a user
      - -123456789 # this is a group (with the "-" symbol)
Create command automation example
Now that we have set up the Telegram integration, we can write some automations that will give functionality to our bot.
When you issue a command to the bot, it fires an event in Home Assistant called telegram_command.
We can write an automation to handle this command and generate a desired response.
First we need to create a new automation under the automations integration. We will add a trigger using the platform event which responds to the event type telegram_command.
  - alias: 'Telegram bot turn on lamp'
    trigger:
      platform: event
      event_type: telegram_command
      event_data:
        command: '/lamp-on'
Now we can add a standard action, this can be whatever you like. For example we can turn on a lamp.
We can use the service light.turn_on to switch on the light entity light.treelamp. Of course you should use your own entity for entity_id.
  - alias: 'Telegram bot turn on lamp'
    trigger:
      platform: event
      event_type: telegram_command
      event_data:
        command: '/lamp-on'
    action:
      service: light.turn_on
      entity_id: light.treelamp
Awesome! Now when we issue the command /lamp-on command, our Telegram bot will turn on the lamp!
Create text automation example
Let’s look at another example, this time using text as the trigger. This automation will trigger when the bot reads the specified text in a chat or group.
We will get the bot to boil the kettle and also acknowledge the request in the chat or group where the message was received. We will create an automation as before but this time using the telegram_text event.
  - alias: 'Telegram bot boil kettle'
    trigger:
      platform: event
      event_type: telegram_text
      event_data:
        text: 'boil the kettle'
This time we will create a response from the bot using the telegram_bot.send_message service in the action section of our automation.
We will use data_template to specify the target of the message to be the chat_id. This means the bot will reply to the group or chat where it received the text.
We can also include a data template in the message attribute which inserts the name of the person from the chat or group who made the request. This is optional as you can just specify a generic message here if you prefer.
  - alias: 'Telegram bot boil kettle'
    trigger:
      platform: event
      event_type: telegram_text
      event_data:
        text: 'boil the kettle'
    action:
    - service: telegram_bot.send_message
      data_template:
        target: '{{ trigger.event.data.chat_id }}'
        message: 'Ok {{ trigger.event.data["from_first"] }}, boiling the kettle!'
Finally we can add a second action to the automation that will turn on the switch for the kettle. This is a standard switch.turn_on service that specifies the desired entity_id.
- alias: 'Telegram bot boil kettle'
trigger:
platform: event
event_type: telegram_text
event_data:
text: 'boil the kettle'
action:
- service: telegram_bot.send_message
data_template:
target: '{{ trigger.event.data.chat_id }}'
message: 'Ok {{ trigger.event.data["from_first"] }}, boiling the kettle!'
- service: switch.turn_on
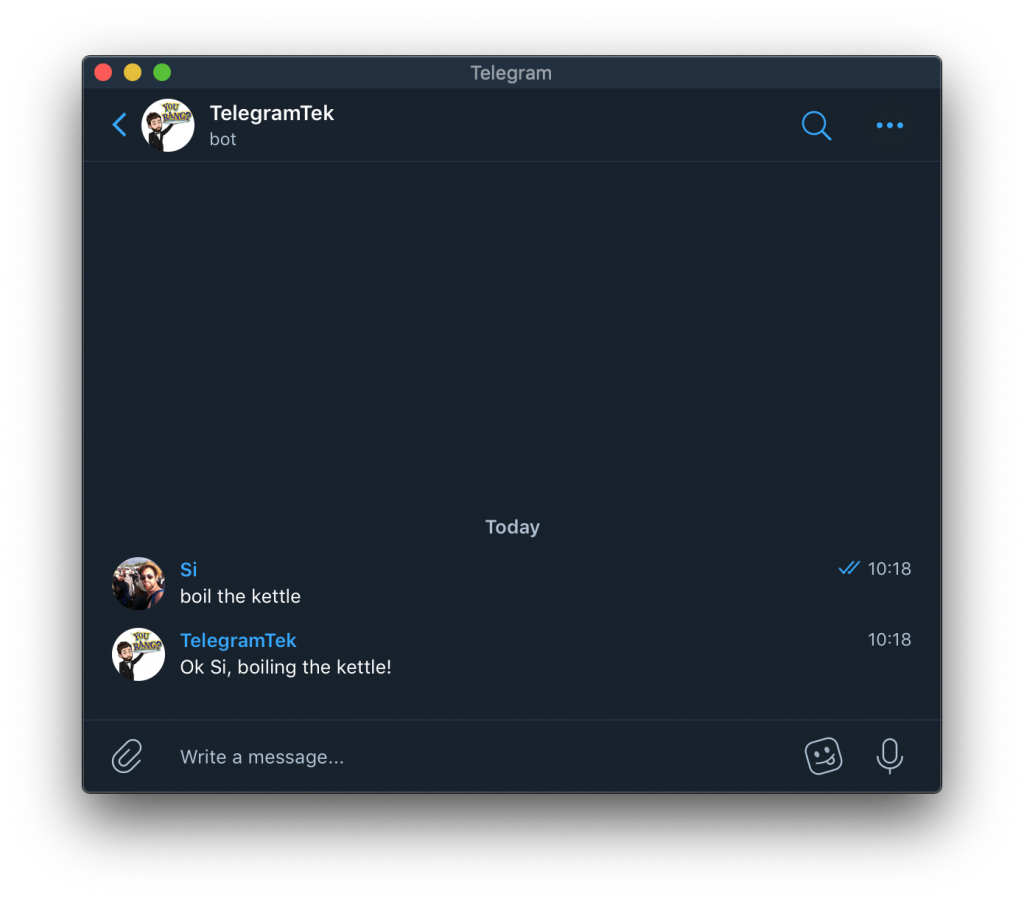
entity_id: switch.kettleAwesome! Now when we send the message “boil the kettle” to a group or chat with the bot, it will turn on the kettle and respond with a message confirming the action.
Conclusion
The Telegram bot is really awesome! We can use this integration to create an entirely Telegram-based system to control an entire smarthome. Furthermore the control can be extended to friends and family over the telegram platform.
Why not go ahead and check out some of my other Home Assistant tutorials to get some ideas for the kind of things you could link to your new Telegram bot!
Thanks so much for visiting my site! If this article helped you achieve your goal and you want to say thanks, you can now support my work by buying me a coffee. I promise I won't spend it on beer instead... 😏


Hello,
Thanks for your tuto!
Do you know if it’s possible to add IFTTT bot ?
I have that :
a group with “my name” + “my bot”
If I write /lights_on, all is ok, Home assistant turns all lights on.
But know I want to press a widget button in IFTTT (and IFTTT write /light_on in telegram group)
So I put in the same groupe : “my name”, “my bot” (this one speak with home assistant and a “new bot” (he comes from IFTTT).
Now when I press the widget button, the “IFTTT bot” write /light_on in the group. But nothing turn on…
If I manuall write /light_on, it’s ok… but not if it’s this bot… don’t know were I need to authorize this bot…
Thanks a lot!!!
Best regards
Hi LaBarbe! I am not sure if this is possible in the way that you describe, I do not think it is possible to get the ID of the IFTTT bot, unless you can find it with Google?
I think the best way to use IFTTT would be to control Home Assistant directly, you can learn how to do this in this article: https://siytek.com/home-assistant-and-ifft-webhooks-example/
So you can link your widget button directly to Home Assistant in order to turn on the lights. You could then write an extra automation in Home Assistant to get your Telegram Bot “my bot” to tell your group/chat that the lights have been turned on when Home Assistant turns on the lights. This way you have control with IFTTT and you get a report in Telegram via your own bot. Hope it helps!