The Wemos D1 Mini is an incredible little device and you can pick one up for less than the cost of a beer.
There is a wealth of documentation online and it is very easy configure. Best of all it has a USB port so it is very easy to flash.
However if you want to flash an ESP8266 based device without a USB port, this tutorial will show you how. Alternatively some devices can be flashed over the air, without any soldering required!
Tasmota is an awesome concept and adds great cloud-free functionality to your smart home devices. It’s lightweight and versatile firmware designed to run on ESP devices.
It has support for many smart home functions, including many of the more commonly used sensors.
Best of all it’s absolutely free!
Prerequisite
In order to complete this tutorial, you will need the following:
- A computer with a Linux/OSX
- A Wemos D1 Mini or compatible ESP8266 device
- USB cable
- Python 3.4 or newer
- Git command line tool
- Sensor/Switch/LEDs (optional)
In terms of hardware it is very simple to flash the D1 Mini. There is a USB to serial chip built into the D1 Mini, so when you connect it to the USB port the computer sees it as a serial device. Simply connect your D1 Mini to an available USB port.
In order to flash the Tasmota firmware on to the D1 Mini we will use a software tool called ESPTool. This tool is Python based and therefore you should first install Python and pip if you don’t already have it.
Installing Python
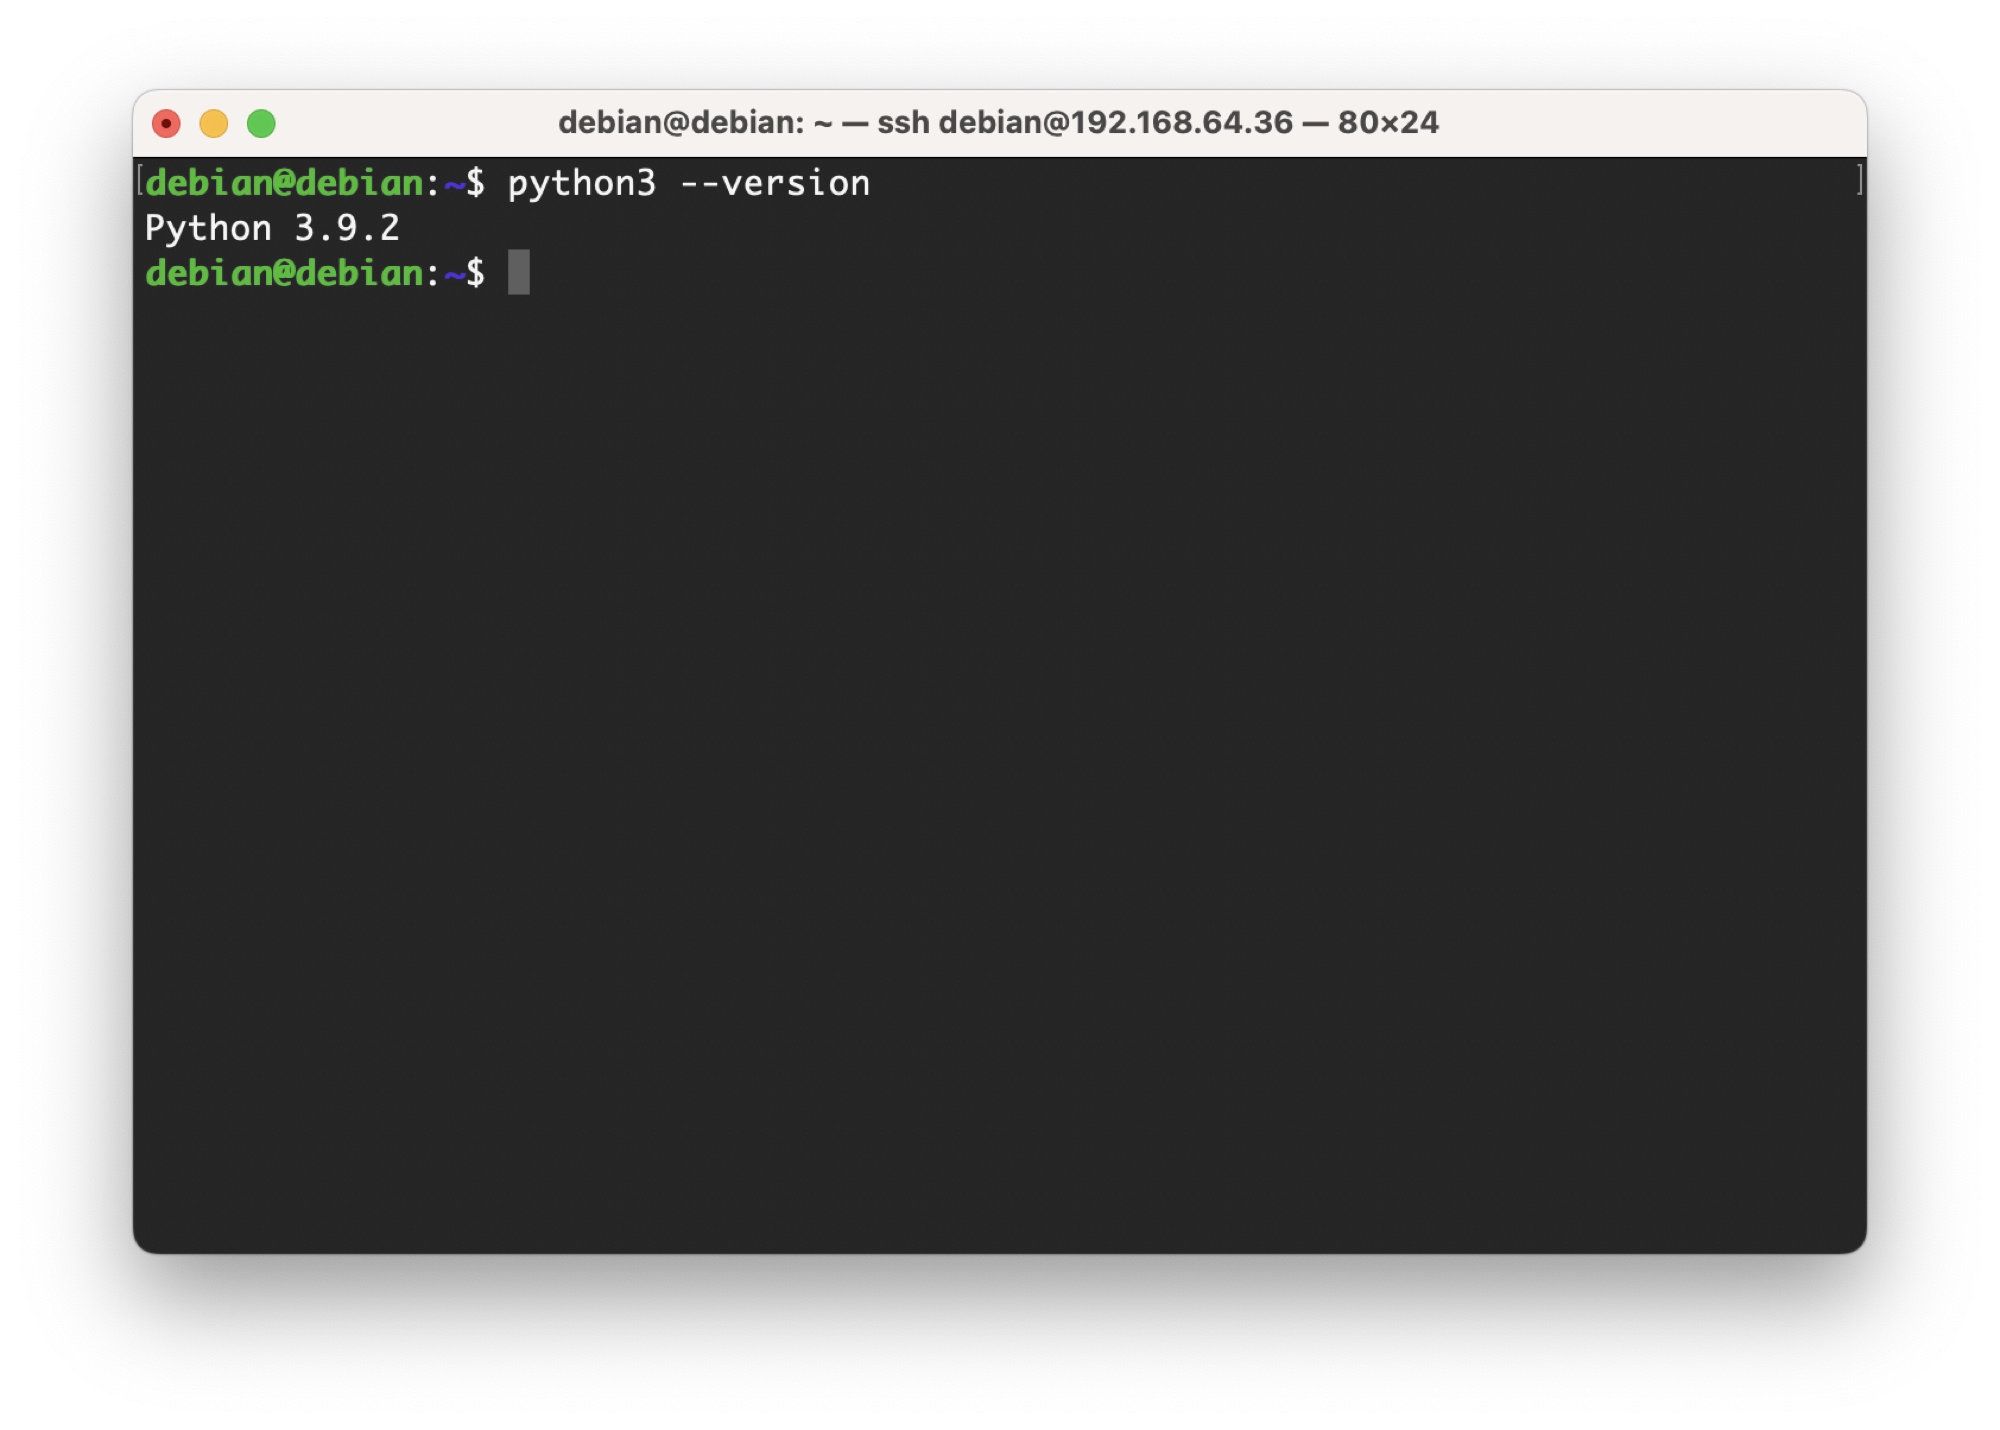
You may already have the correct version of Python installed, in which case you won’t need to follow the installation steps. Enter the following command to check your default Python version:
python --version

# or

python3 --version
If Python is installed, the Python version should be printed in the command line output:
However if you don’t already have Python installed, it can easily be installed from the command line:
Installing Python on macOS
Here’s how you can install Python on macOS using Homebrew:
- Open a terminal. You can do this by navigating to Applications > Utilities > Terminal or by using Spotlight search and typing “Terminal”.
- Install Homebrew if you haven’t already. Copy and paste the following command into the terminal and press Enter:
/bin/bash -c "$(curl -fsSL https://raw.githubusercontent.com/Homebrew/install/HEAD/install.sh)"
- Follow the prompts to complete the installation of Homebrew.
- Once Homebrew is installed, run the following command in the terminal to update Homebrew and ensure that it is up to date:
brew update
- Next, install Python 3 by running the following command:
brew install python3
- Homebrew will download and install Python 3 and its dependencies.
- After the installation is complete, you can verify the installation by running the following command:
python3 --version
- It should display the version number of Python that you installed.
Installing Python on Linux
The installation of Python on Linux will depend on which version of Linux you wish to install Python on:
Debian / Ubuntu
To install Python on Ubuntu or Debian, you can follow these steps:
- Open a terminal (Ctrl + Alt + T or search for “Terminal” in the Applications menu).
- Optional: Update system packages using the command
sudo apt update. - Optional: Check the Python version with the command
python3 --version. - Install Python using the
aptpackage manager:sudo apt install python3. - Verify the installation by running
python3 --version. It should display the version number of Python that you installed.
Fedora
To install Python on Fedora, you can follow these steps:
- Open a terminal (Ctrl + Alt + T or search for “Terminal” in the Activities menu).
- Optional: Update system packages using the command
sudo dnf update. - Optional: Check the Python version with the command
python3 --version. - Install Python using the
dnfpackage manager:sudo dnf install python3. - Verify the installation by running
python3 --version. It should display the version number of Python that you installed.
CentOS/RHEL
To install Python on CentOS or Red Hat Enterprise Linux (RHEL), you can follow these steps:
- Open a terminal (navigate to Applications > System Tools > Terminal).
- Optional: Update system packages using the command
sudo yum update. - Optional: Check the Python version with the command
python3 --version. - Enable the EPEL repository by running the command
sudo yum install epel-release. - Install Python using the
yumpackage manager:sudo yum install python3. - Verify the installation by running
python3 --version. It should display the version number of Python that you installed.
Installing the Git Command Line Tools
In order to download ESPTool we will be using the Git command line tools, so you will also need to have them installed if you don’t have them already.
Installing Git on macOS
The easiest way to use install Git on macOS is by using Homebrew:
- Open a terminal.
- Install Homebrew if you haven’t already. Run the following command:
/bin/bash -c "$(curl -fsSL https://raw.githubusercontent.com/Homebrew/install/HEAD/install.sh)" - Once Homebrew is installed, run the following command to install Git:
brew install git
Installing Git on Linux
The method of installing Git in Linux will depend on the Linux distribution that you are using.
Ubuntu/Debian-based distributions
- Open a terminal.
- Run the following command to install Git:
sudo apt update sudo apt install git - After the installation is complete, you can verify it by running:
git --version
Fedora
- Open a terminal.
- Run the following command to install Git:
sudo dnf install git - After the installation is complete, you can verify it by running:
git --version
CentOS/RHEL
- Open a terminal.
- Run the following command to install Git:
sudo yum install git - After the installation is complete, you can verify it by running:
git --version
How to Install ESPTool using the Command Line
The easiest way to install ESPTool is to use pip, the Python package manager. First we need to install the dependencies.
Installing the ESPTool Dependencies
Simply enter the following command to install ESPTool from the command line:
pip3 install esptool
Alternatively, depending on your system, you may need to use the following command instead:
pip install esptool
If you still receive an error, there is another option given on the ESPTool Github page that you can try.
python -m pip install esptool
Installing the ESPTool Script
Once ESPTool dependencies have been installed, we can install the ESPTool script. This script is the actual business end of ESPTool and executing it will allow you to flash an ESP device.
In order to install the ESPTool script, navigate to the directory where we would like to install it. For this example we will install it to ~/Documents for simplicity, but you can choose any location on your system that you prefer.
cd ~/Documents
Next, we need to clone the Git repository so go ahead and enter the following command.
git clone https://github.com/espressif/esptool.git
This will install the script in to your chosen directory.
<your-directory>/esptool/
So in the case of this example, the ESPTool script is now installed in the Documents folder.
~/Documents/esptool/
Download the latest Tasmota binary
Now that we have ESPTool installed, we need a copy of the latest Tasmota binary. Use the following command to download the latest Tasmota binary file:
curl -s https://api.github.com/repos/arendst/Tasmota/releases/latest | jq -r '.assets[] | select(.name | endswith("tasmota.bin")) | .browser_download_url'| xargs wgetAlternatively you can download the tasmota.bin file manually from the Tasmota Github page.
Scroll down until you locate the releases. Binaries are supplied in various languages, indicated by the two-character suffix. The standard english version of Tasmota is simply called tasmota.bin, which is the file we will use in this example.
You can save the file to any location of your choice, but I would recommend placing it in the same folder as the esptool.py script.
This command should work so long as the link isn’t broken! In which case you will need to amend the link in this command.
How to Flash the Wemos D1 Mini with Tasmota
Now we are ready to flash the Wemos D1 Mini using ESPTool. First, connect your D1 Mini board to your computer with a USB cable.
Finding the Serial Port Name of the Wemos D1 Mini
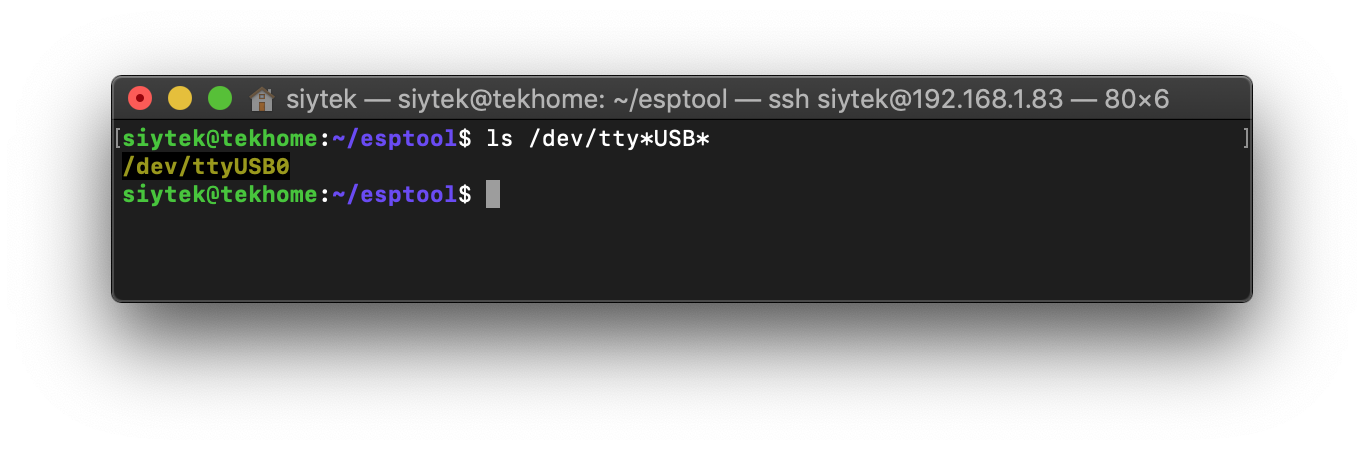
The D1 Mini will appear as a serial USB device, therefore we must first locate it. Enter the following command to list serial USB devices:
ls /dev/tty*usb*
You should see the D1 Mini board listed in the terminal output. Make a note of the name, for example /dev/tty/usbserial-1410.
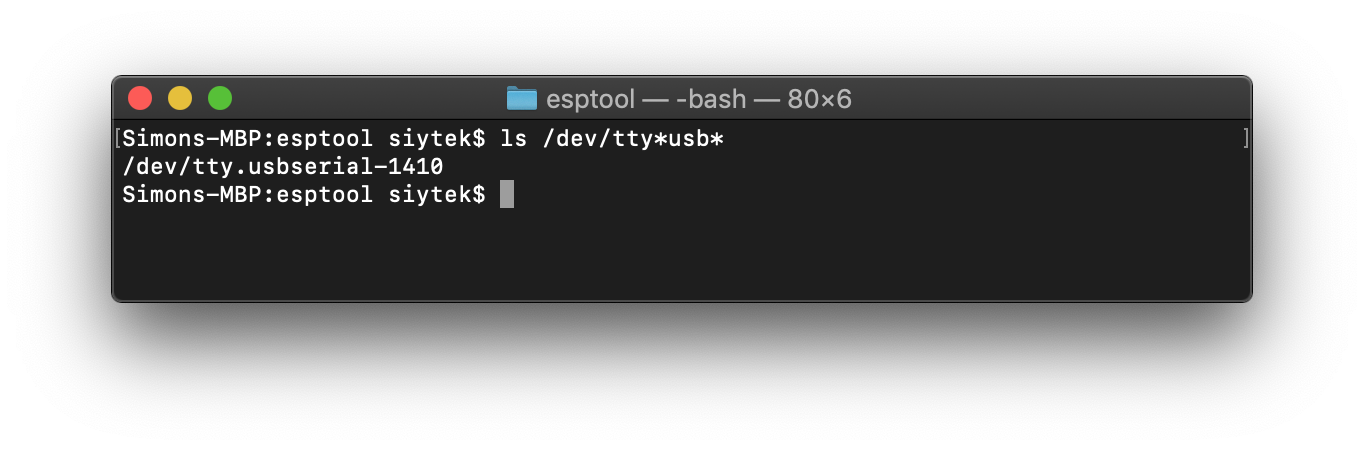
macOS Terminal
If you have several devices and you are not sure which is the D1 Mini, you can first run the command without the D1 Mini connected, then run it with the D1 Mini connected.
When running the command with the D1 Mini connected, you should see an extra device in the list. This extra device will be your D1 Mini.
Flashing the Wemos D1 Mini with ESPTool
Now that we have the device name, we are ready to start flashing. The first step is to erase the flash memory in order to prevent any problems.
Firstly, make sure you are in the ESPTool directory, for example:
cd esptool
Next we can run the ESPTool script and erase the flash memory, go ahead and enter the following command.
python3 esptool.py --port <your-device-port> erase_flash
For this example using the serial port above, the command looks as follows:
python3 esptool.py --port /dev/ttyUSB0 erase_flash
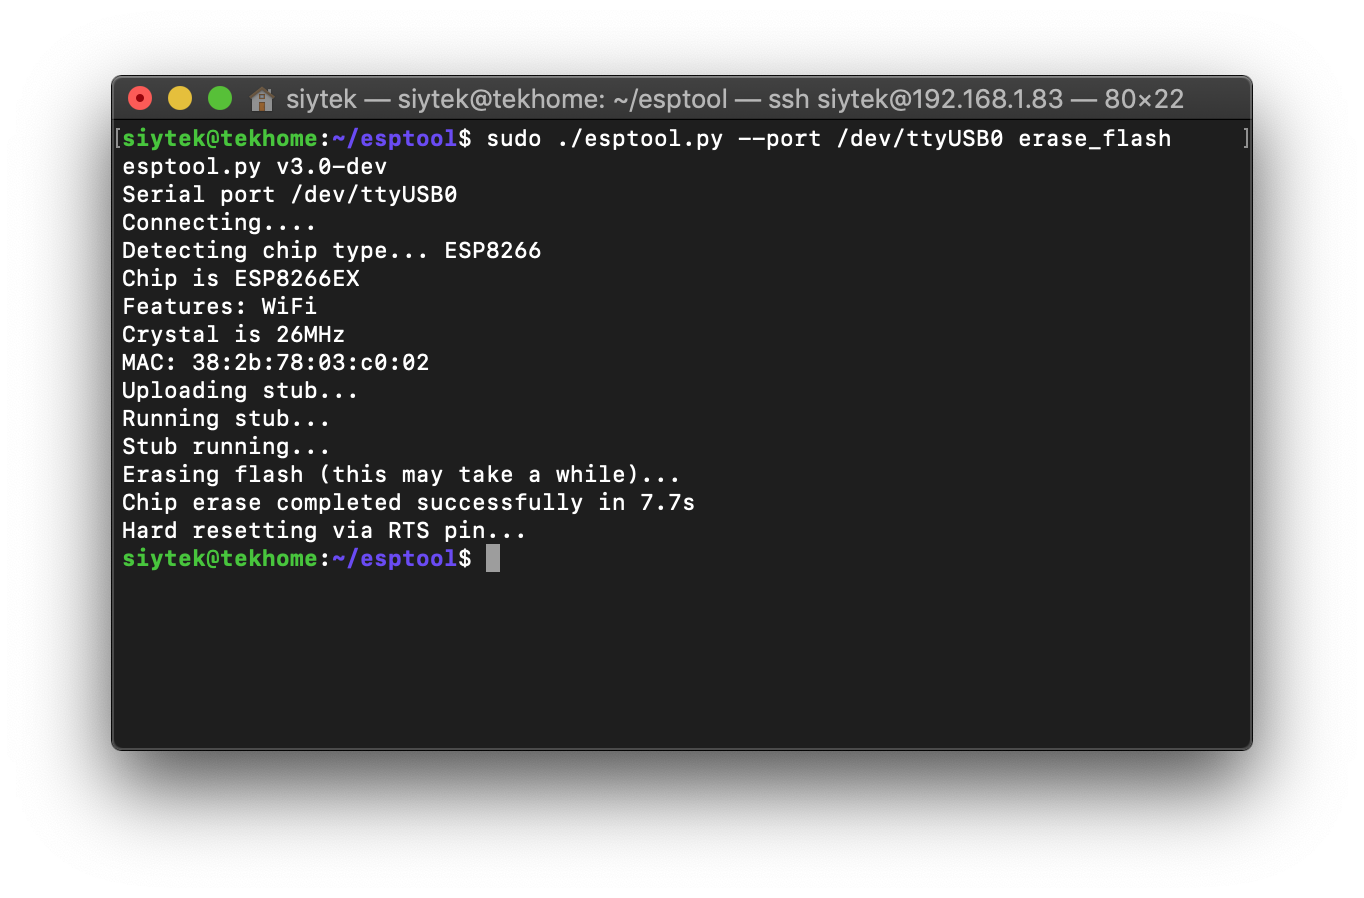
The script will confirm once the erase operation has completed successfully. The D1 Mini is now ready to be flashed with Tasmota.
The command that we will use to flash Tasmota is as follows.
python3 esptool.py --port <your-device-port> write_flash 0x00000 <path-to-tasmota>.bin
As Linux is used in this example, the device will be ttyUSB0 and my tasmota.bin file is in the same directory as esptool.py. If your .bin file is in a different location, you should enter the complete file path.
For this example, the command is as follows:
python3 esptool.py --port /dev/ttyUSB0 write_flash 0x00000 tasmota.bin
Note that flashing can take a minute or two and the script will verify that the data has successfully been transferred. Once complete, you will be returned to the command prompt:
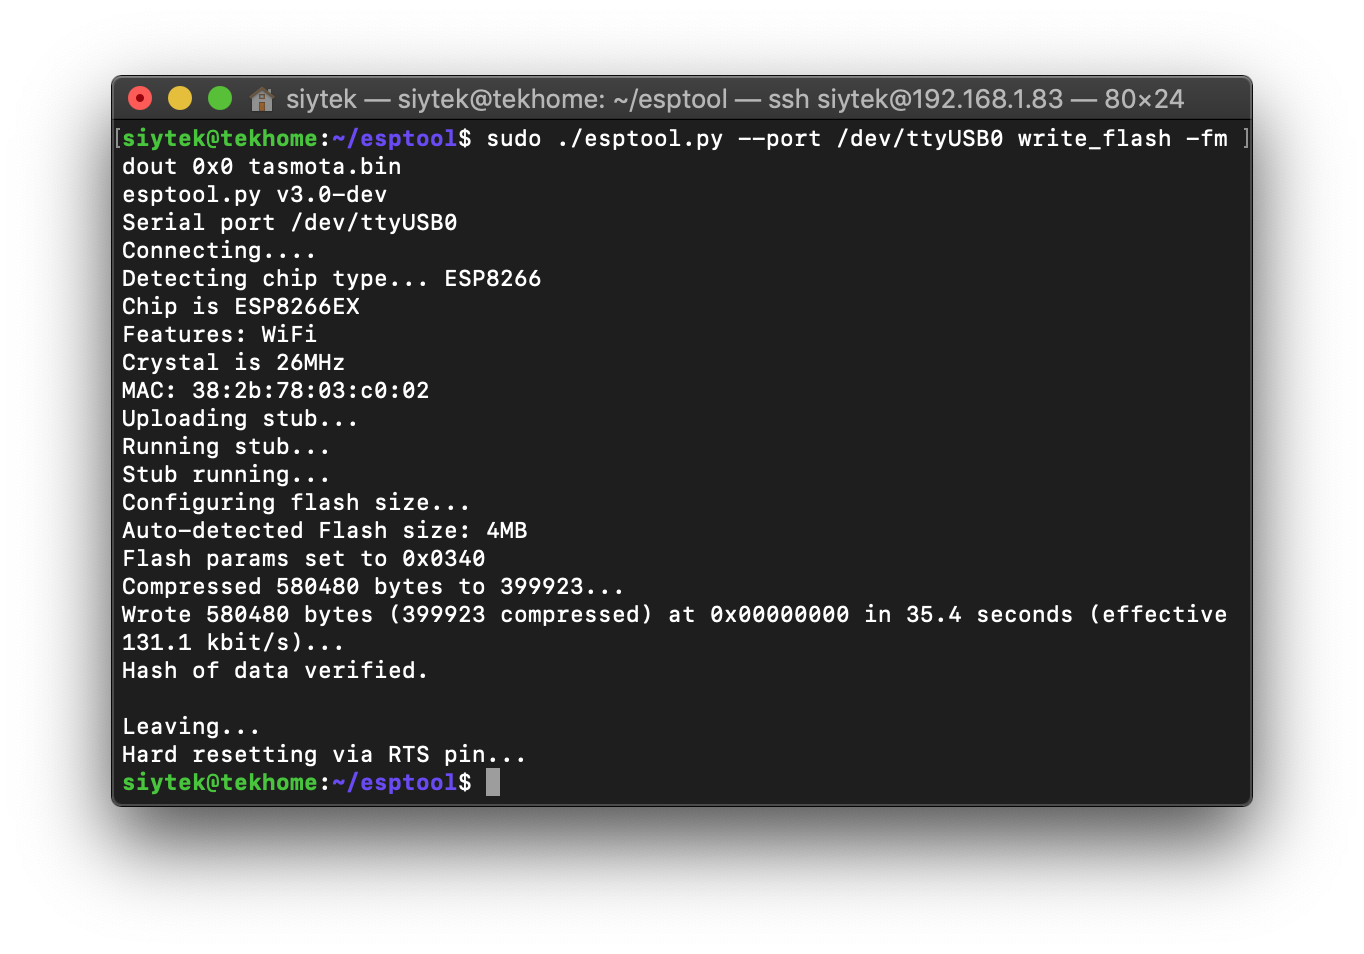
Congratulations! You have now flashed your D1 Mini with Tasmota and your new Tasmota device should be showing as a WiFi device.
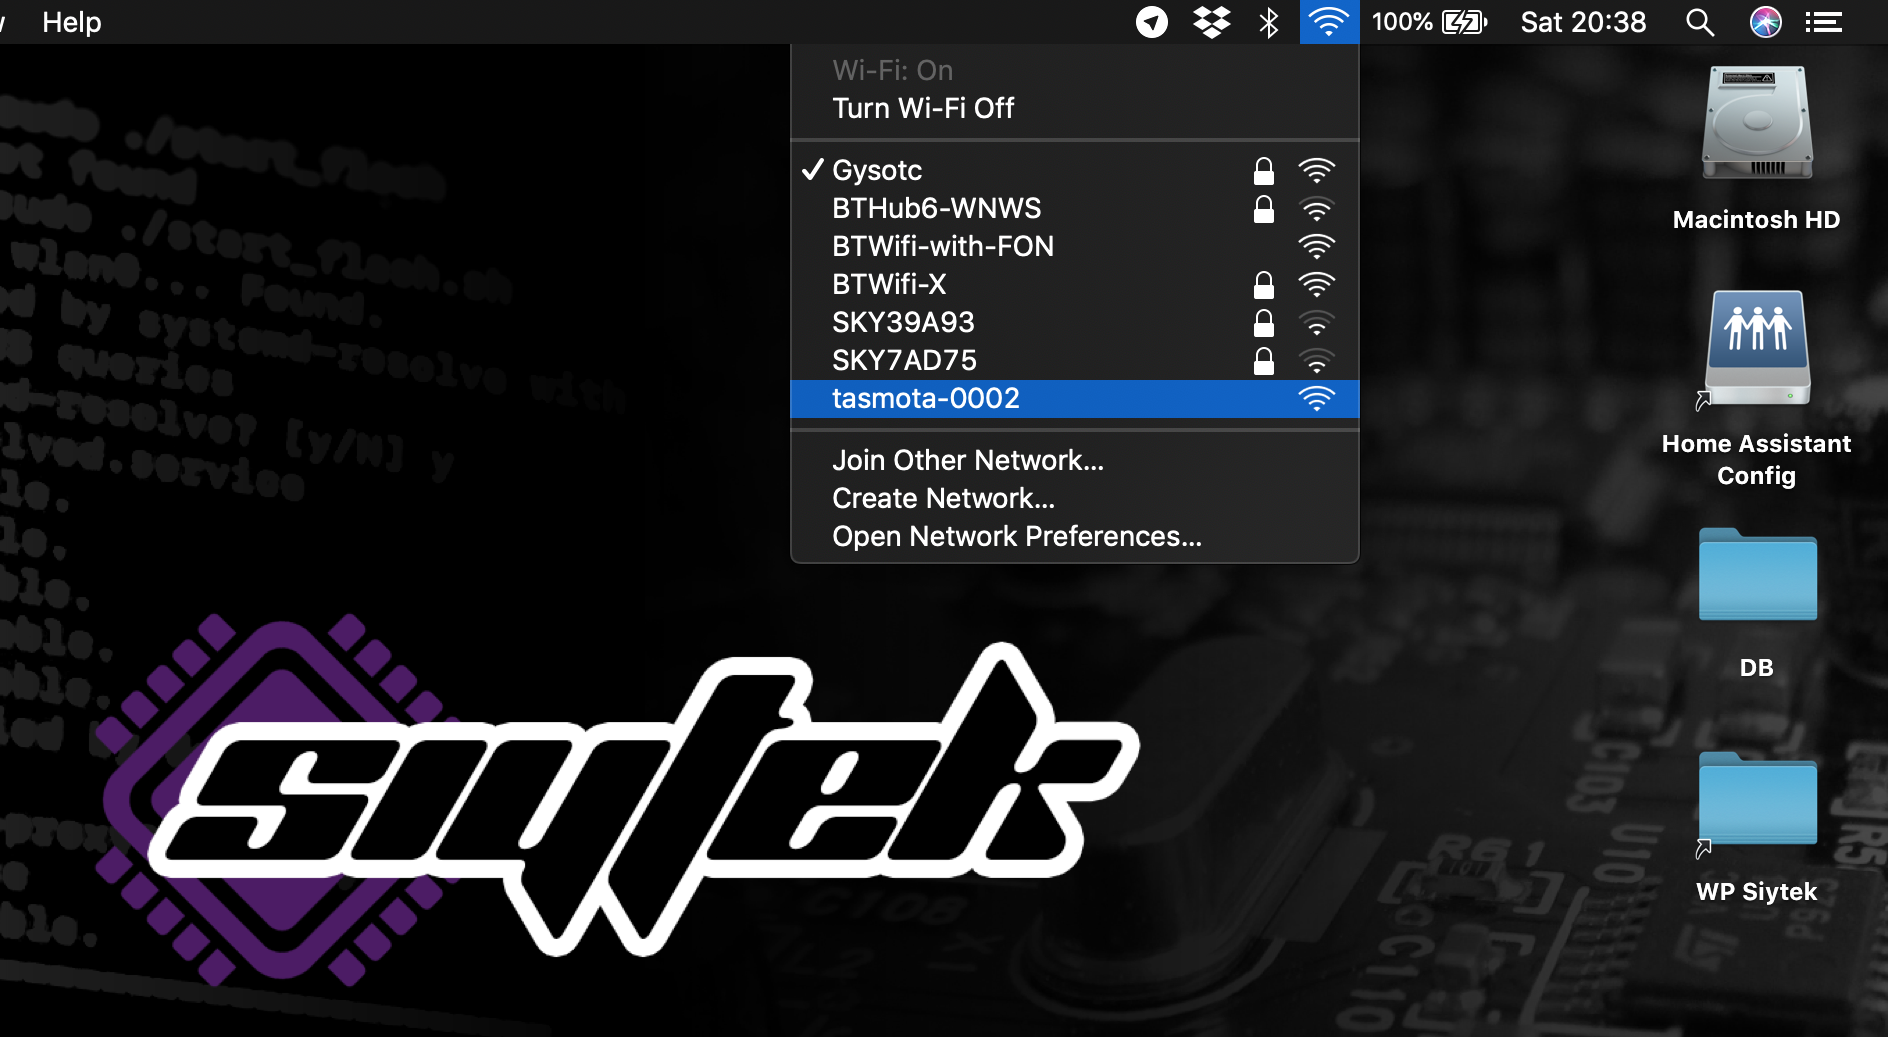
Configure Tasmota
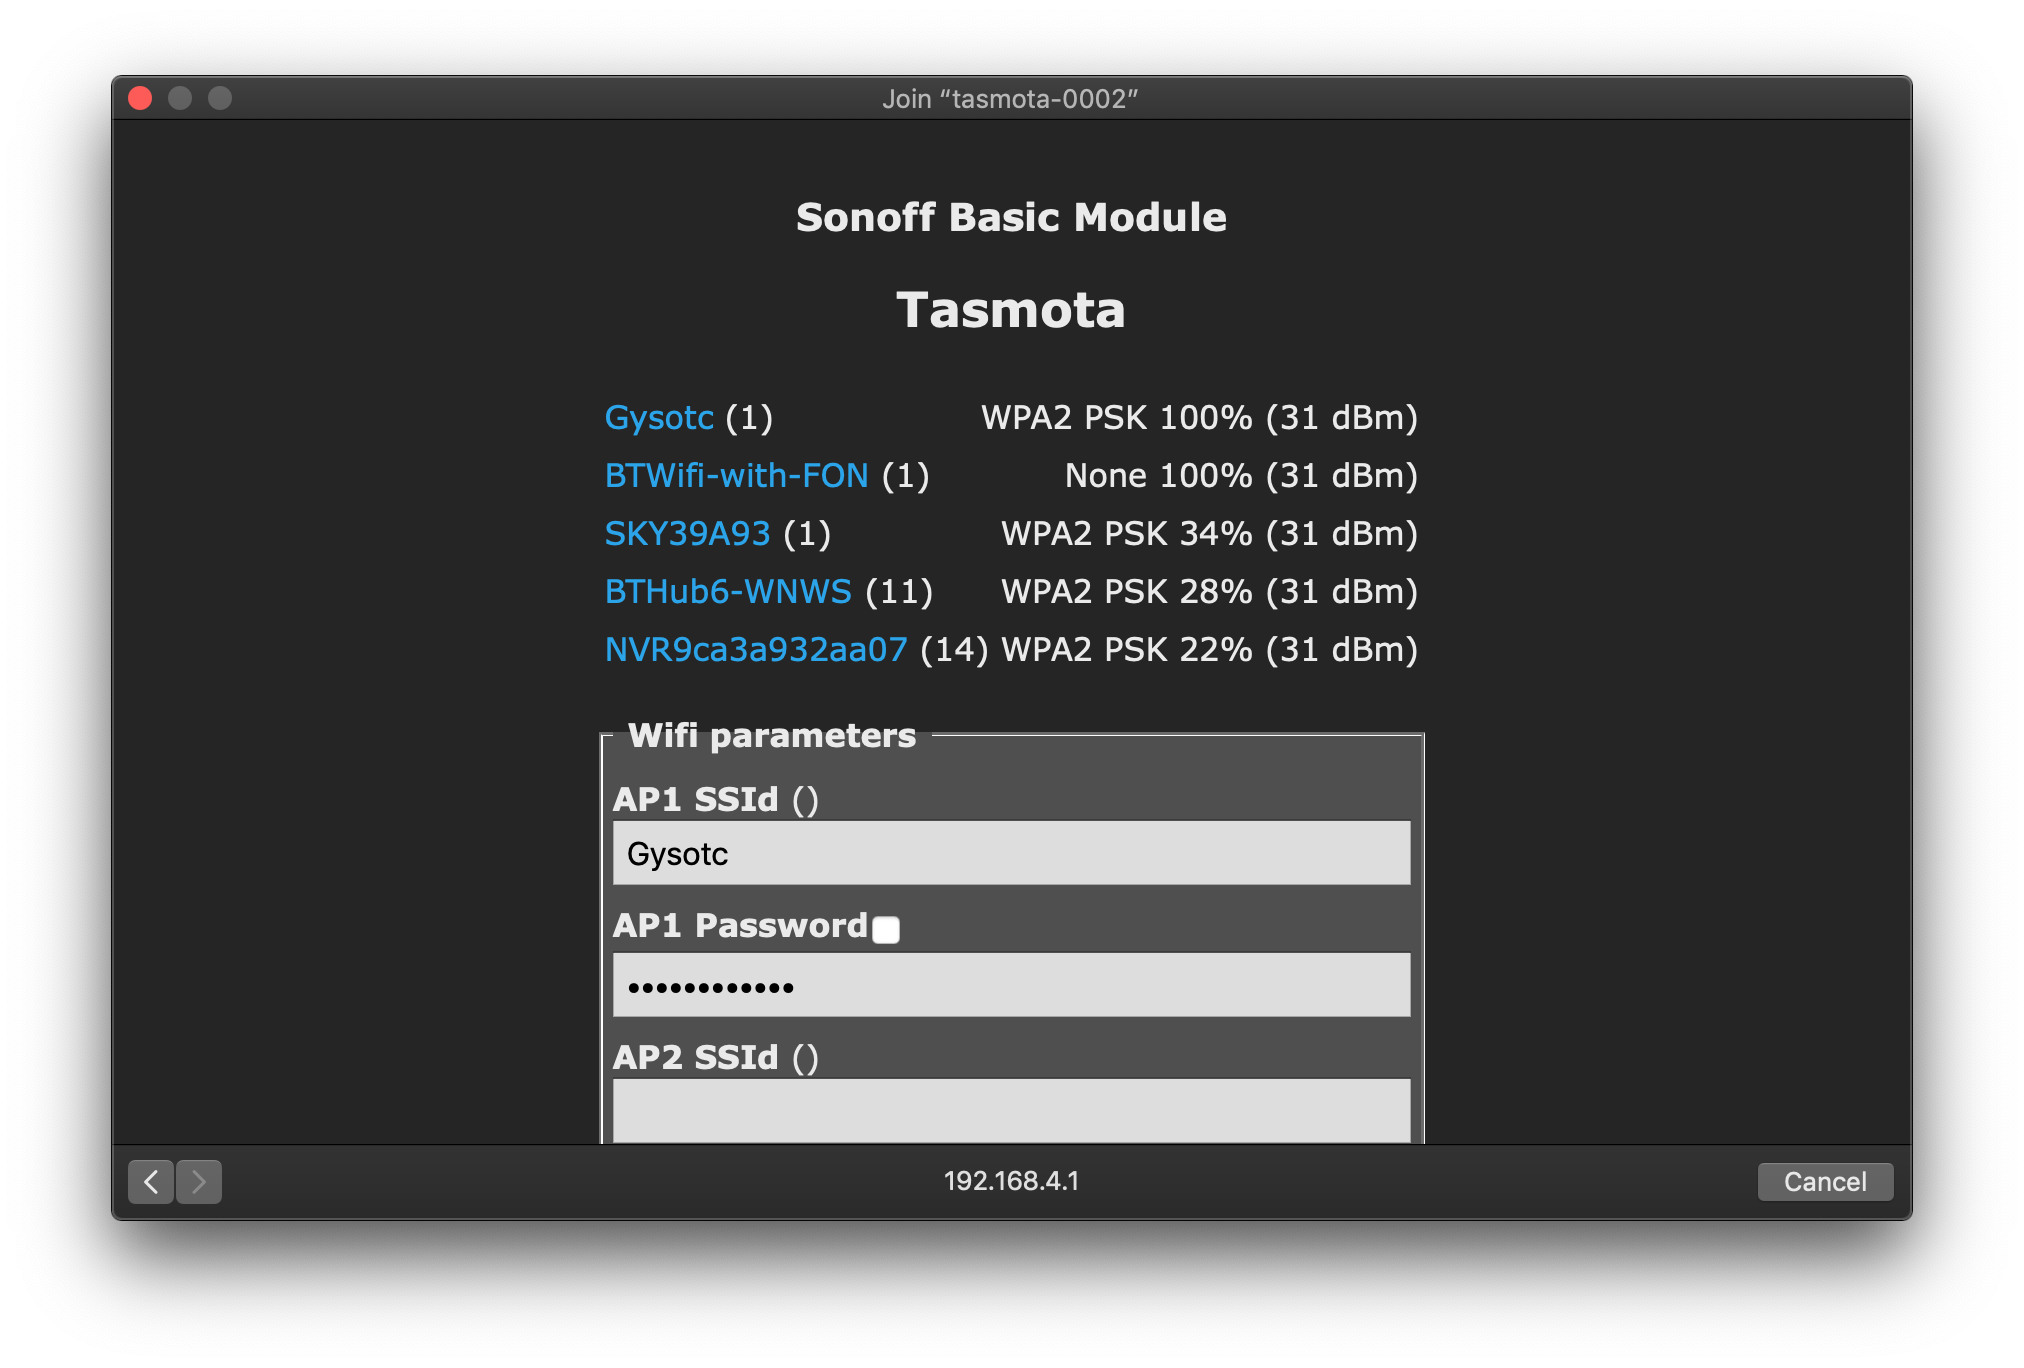
Now that our Tasmota device is showing as a WiFi access point, we can connect to it. Once connected a pop-up will appear that will allow us to choose our router and enter the password for our network.
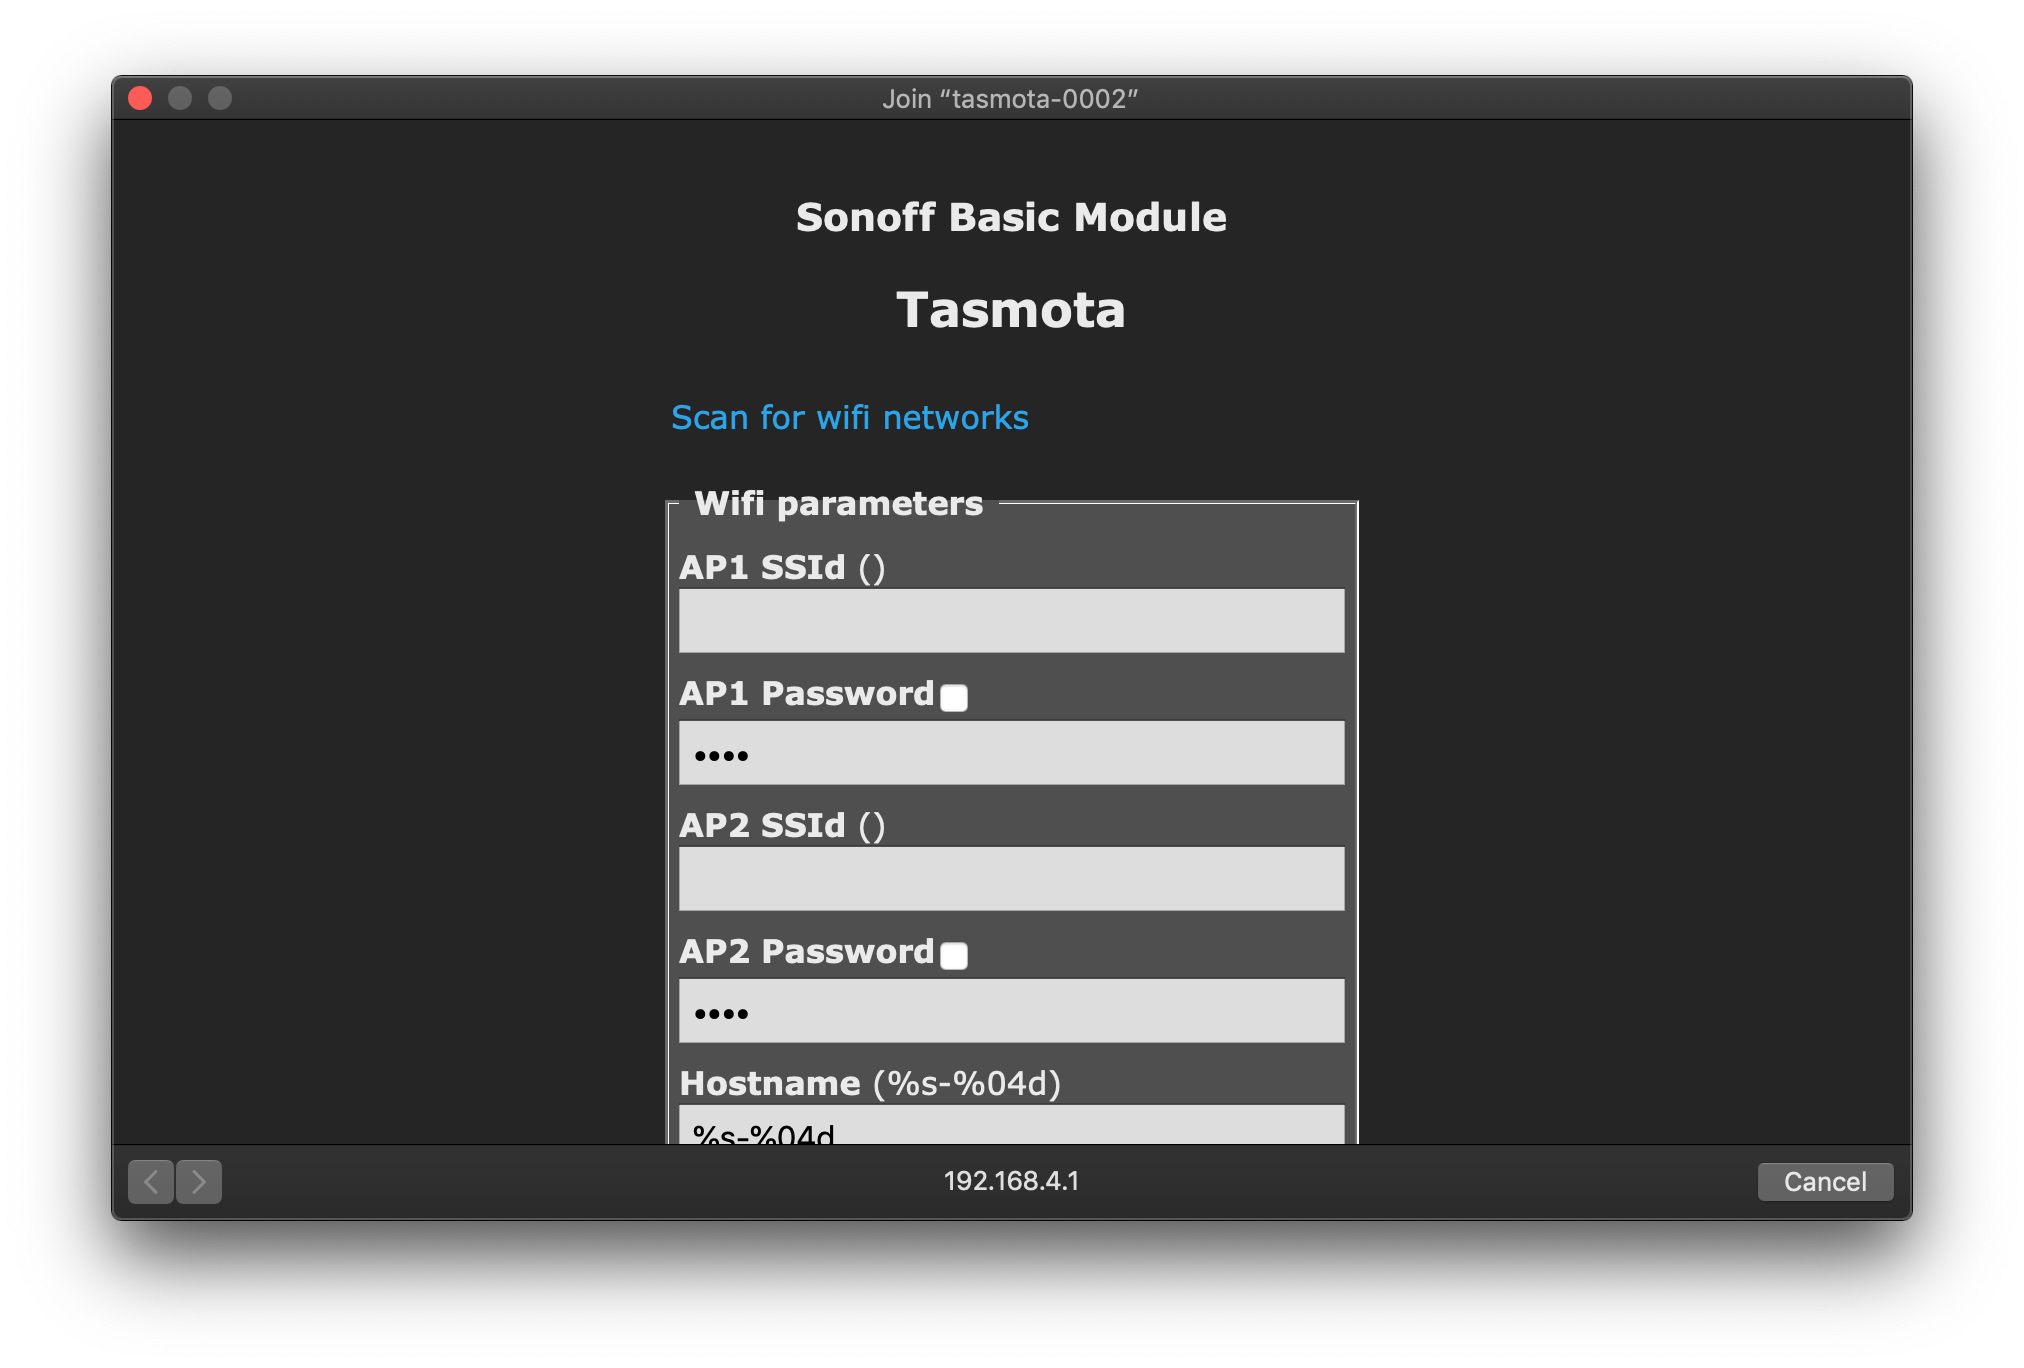
Click on Scan for wifi networks, select your network, enter your password and click save.
After a few moments your Tasmota device will disconnect from WiFi. If your computer does not automatically reconnect to your router, you can now reconnect.
Tasmota should now be connected to your router and we can access it in the web browser to complete the configuration.
Find the Tasmota device IP address
The easiest way to to find the IP address of your new Tasmota device is to look for it in your router management page.
You can usually access this page by navigating to some local IP address like http://192.168.1.1 but it is device specific, therefore you should consult the manual for your device.
In my case I am currently using the stock router supplied by my ISP and navigating to http://192.168.1.254 brings me to the management page. Here I am able to see the new Tasmota device and its IP address, 192.168.1.129.
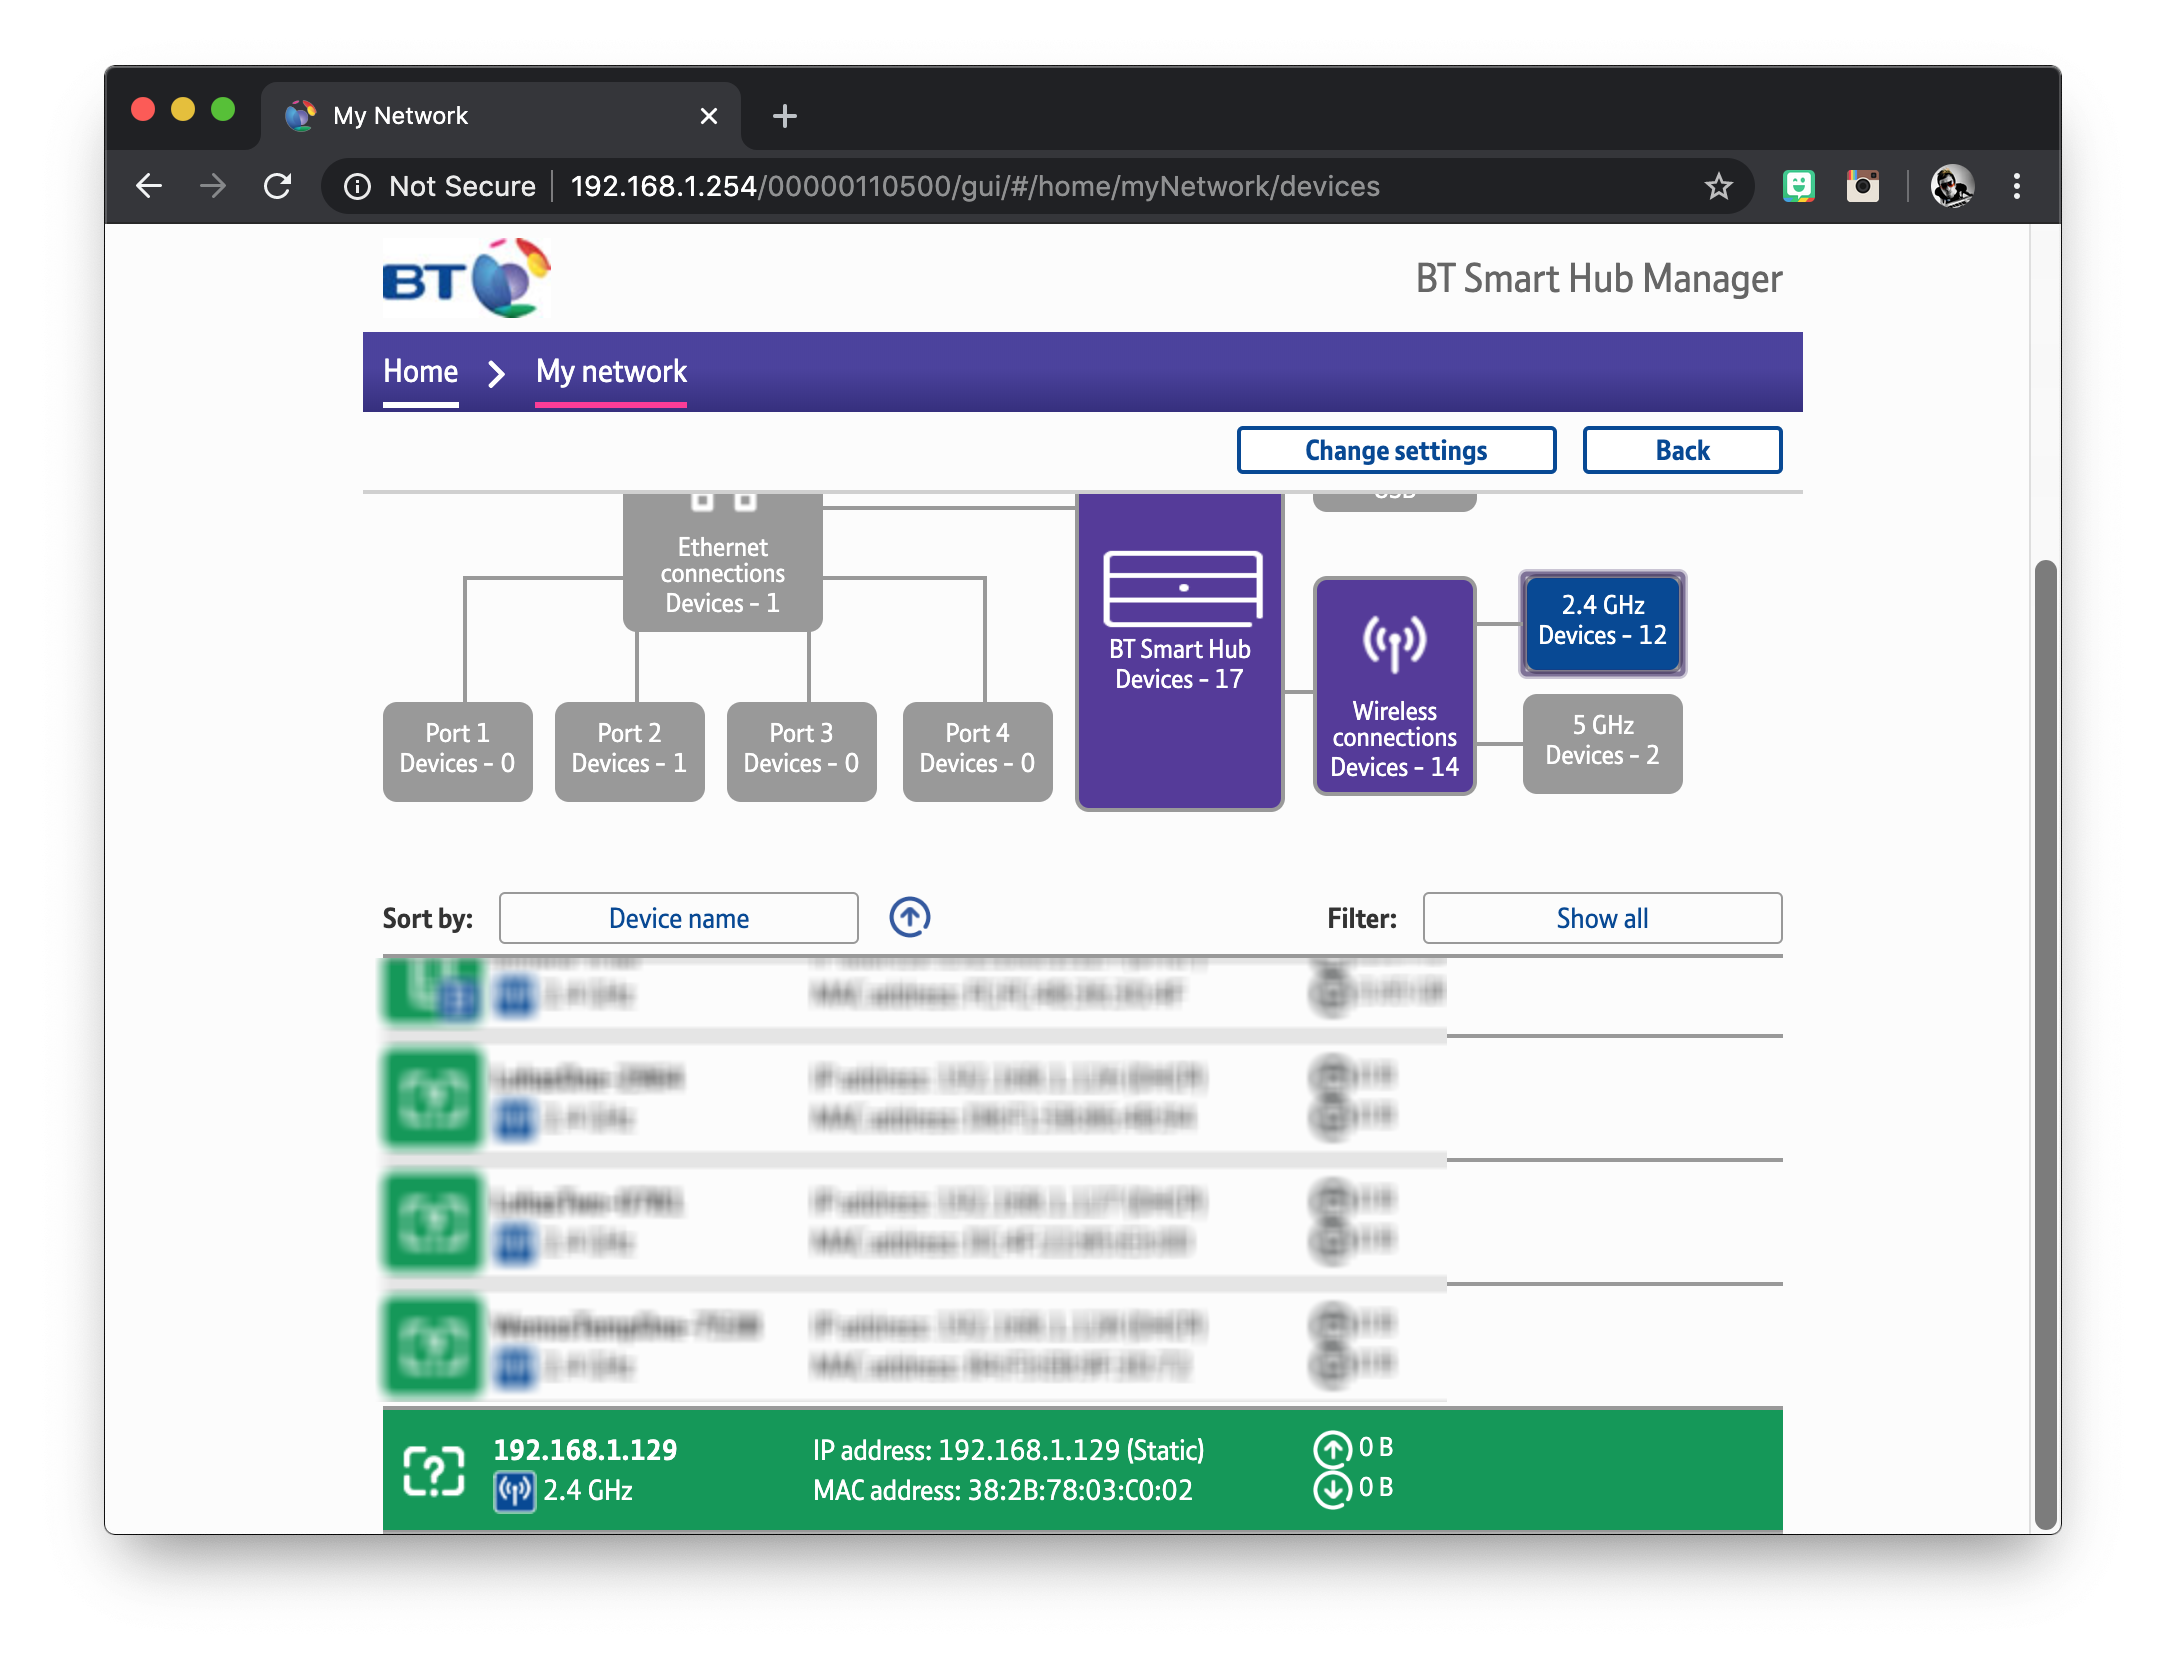
In my case it is not always obvious which is the new Tasmota device, but usually the first time the device is visible on the management page it has no name. All of the other devices have names, therefore I know this is the new Tasmota device.
Alternatively you can use a third party application like Angry IP Scanner or Fing to find the IP address if you don’t have the facility on your router.
Access the Tasmota configuration menu
Now that we know the IP address of the new Tasmota device, we can navigate to it in a browser in order to access the configuration menu. In my case it will be http://192.168.1.129 but you should use your own IP address here.
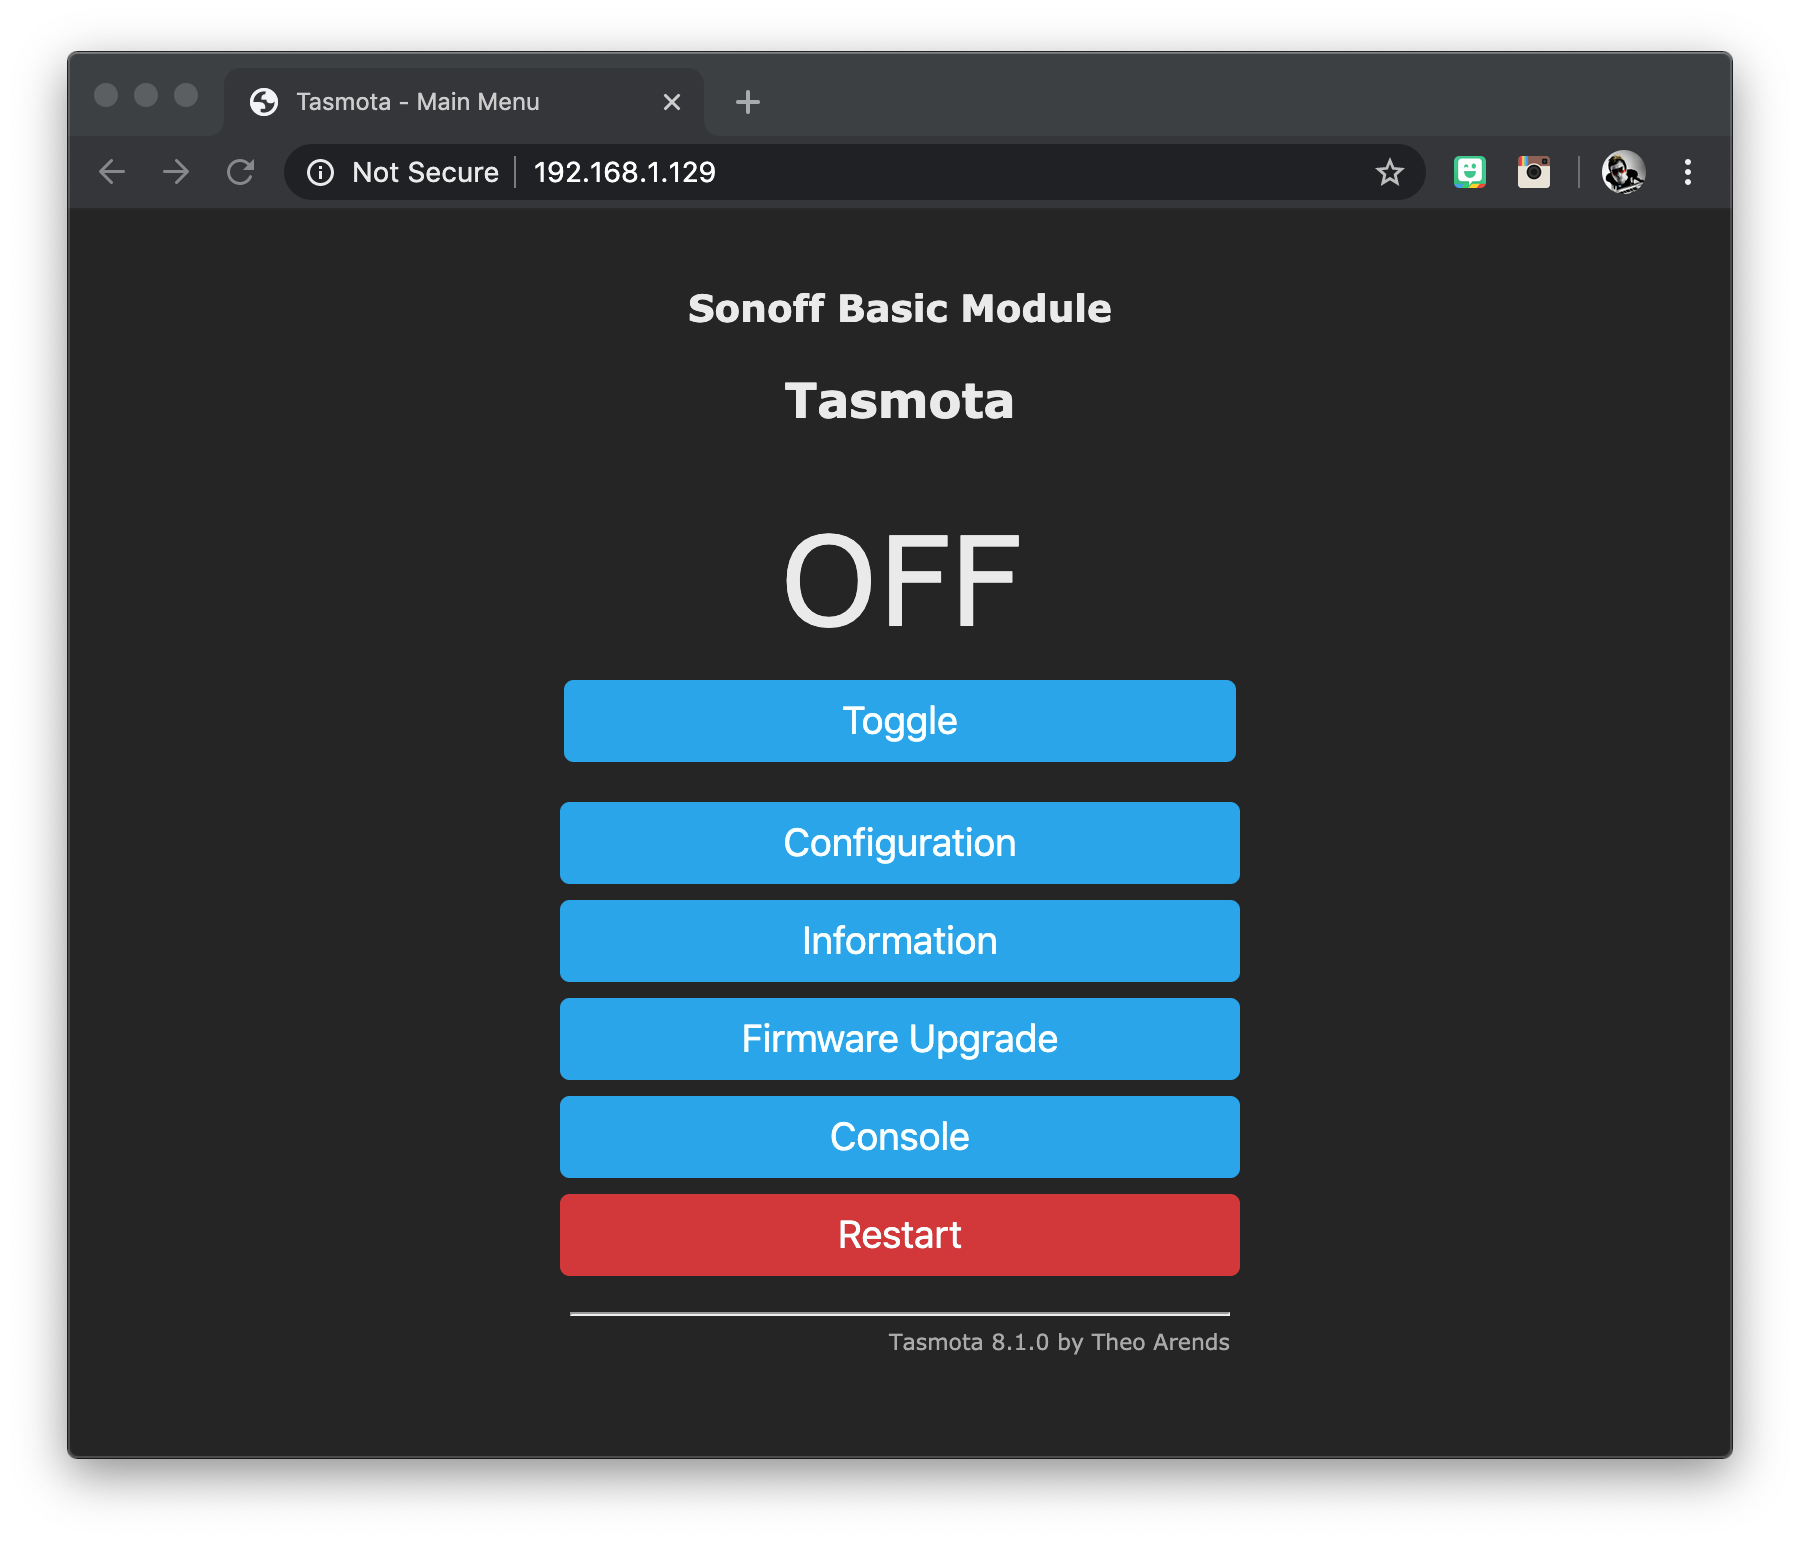
Firstly click Configuration to access the main configuration menu.
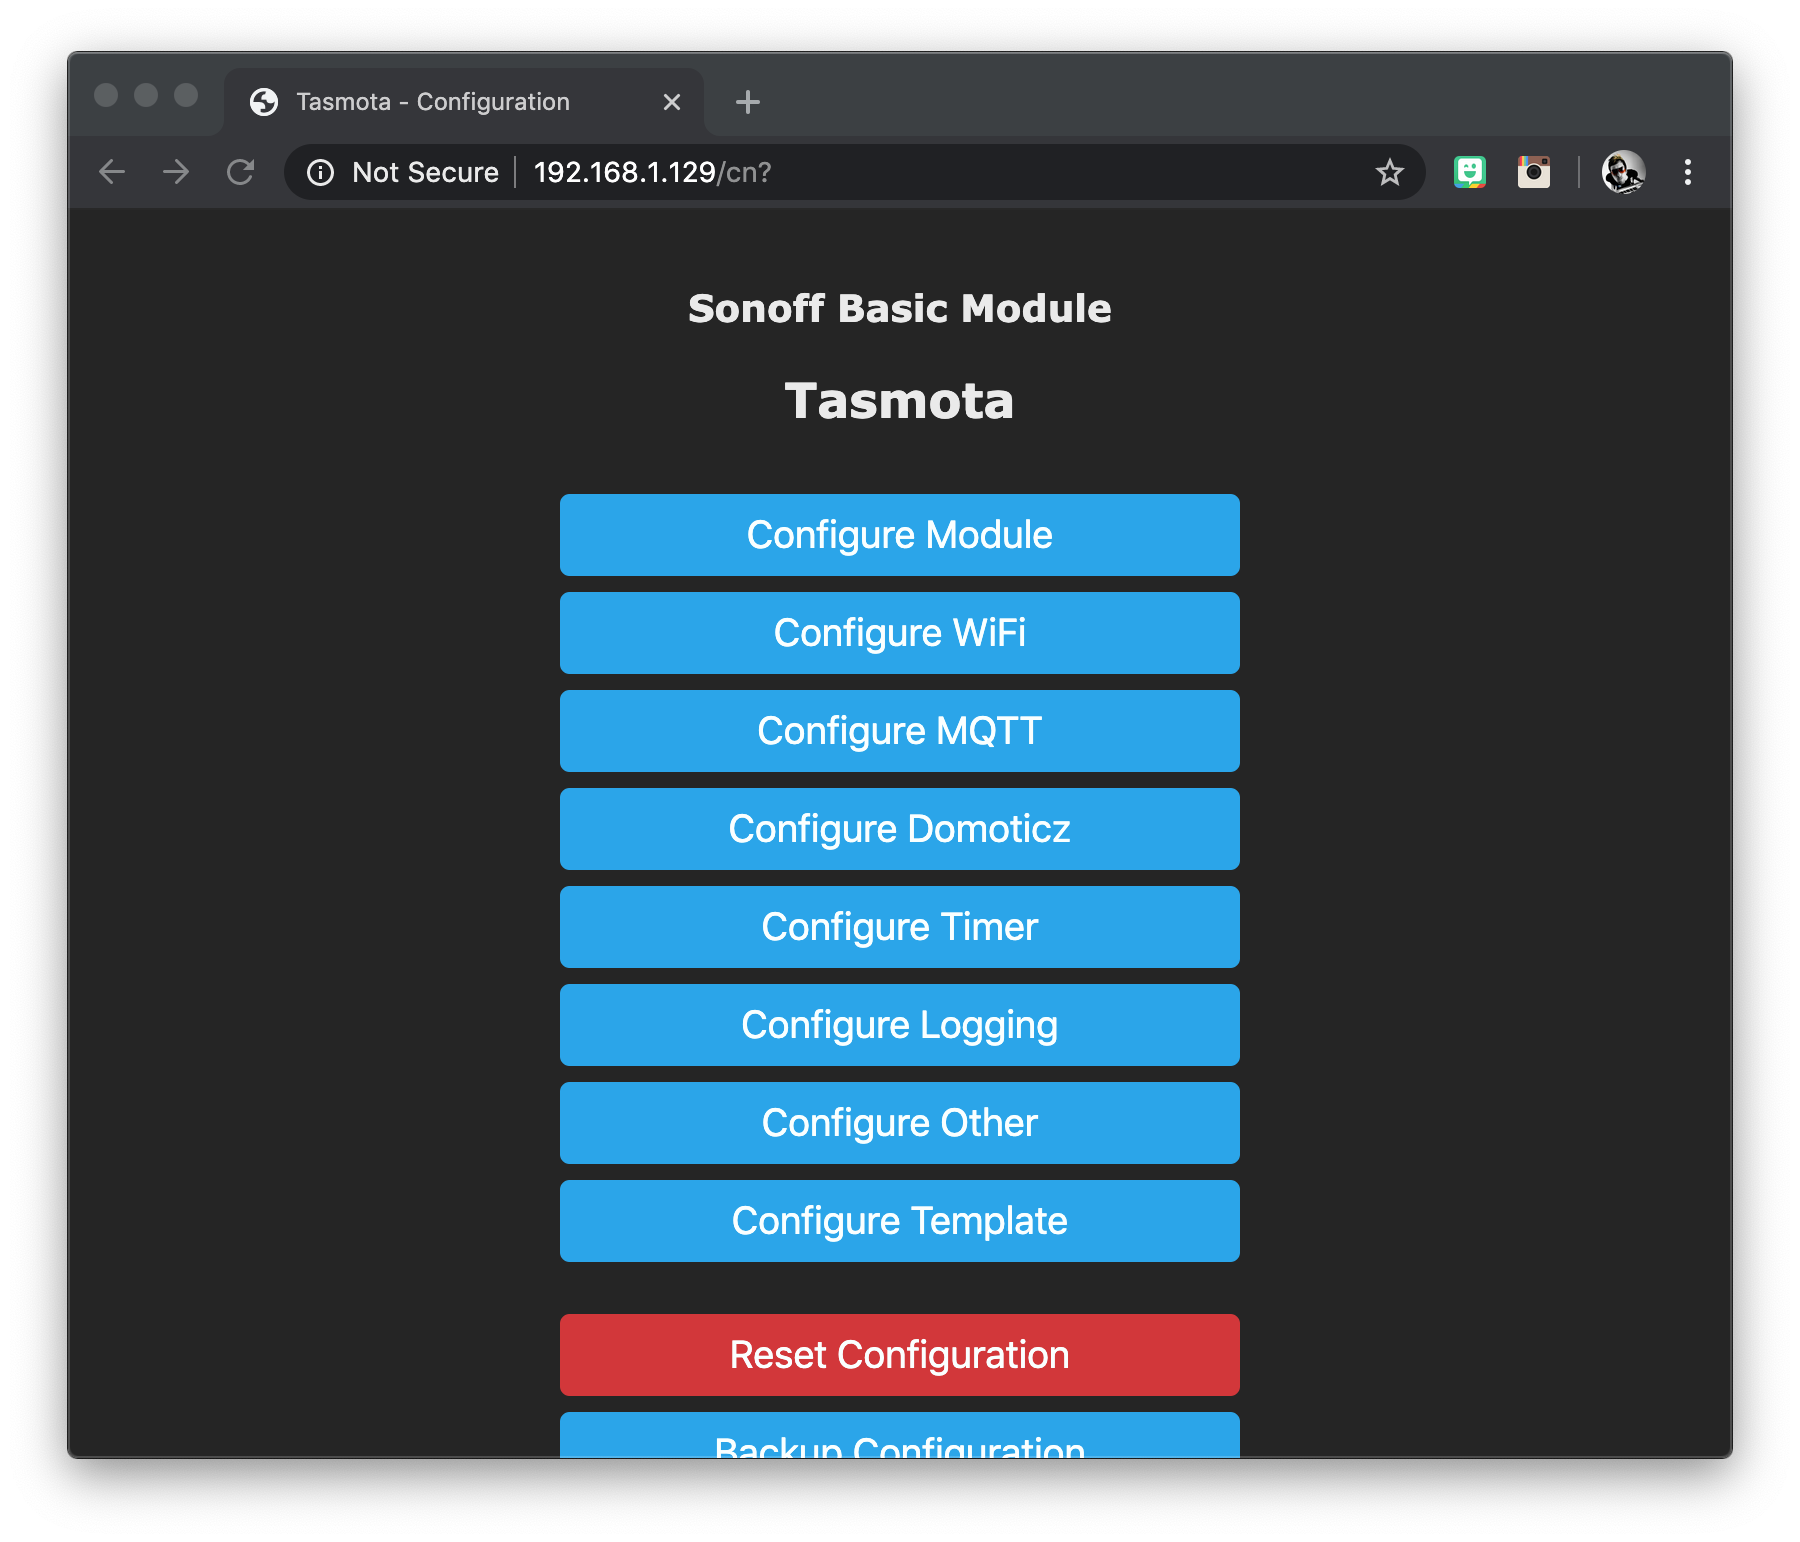
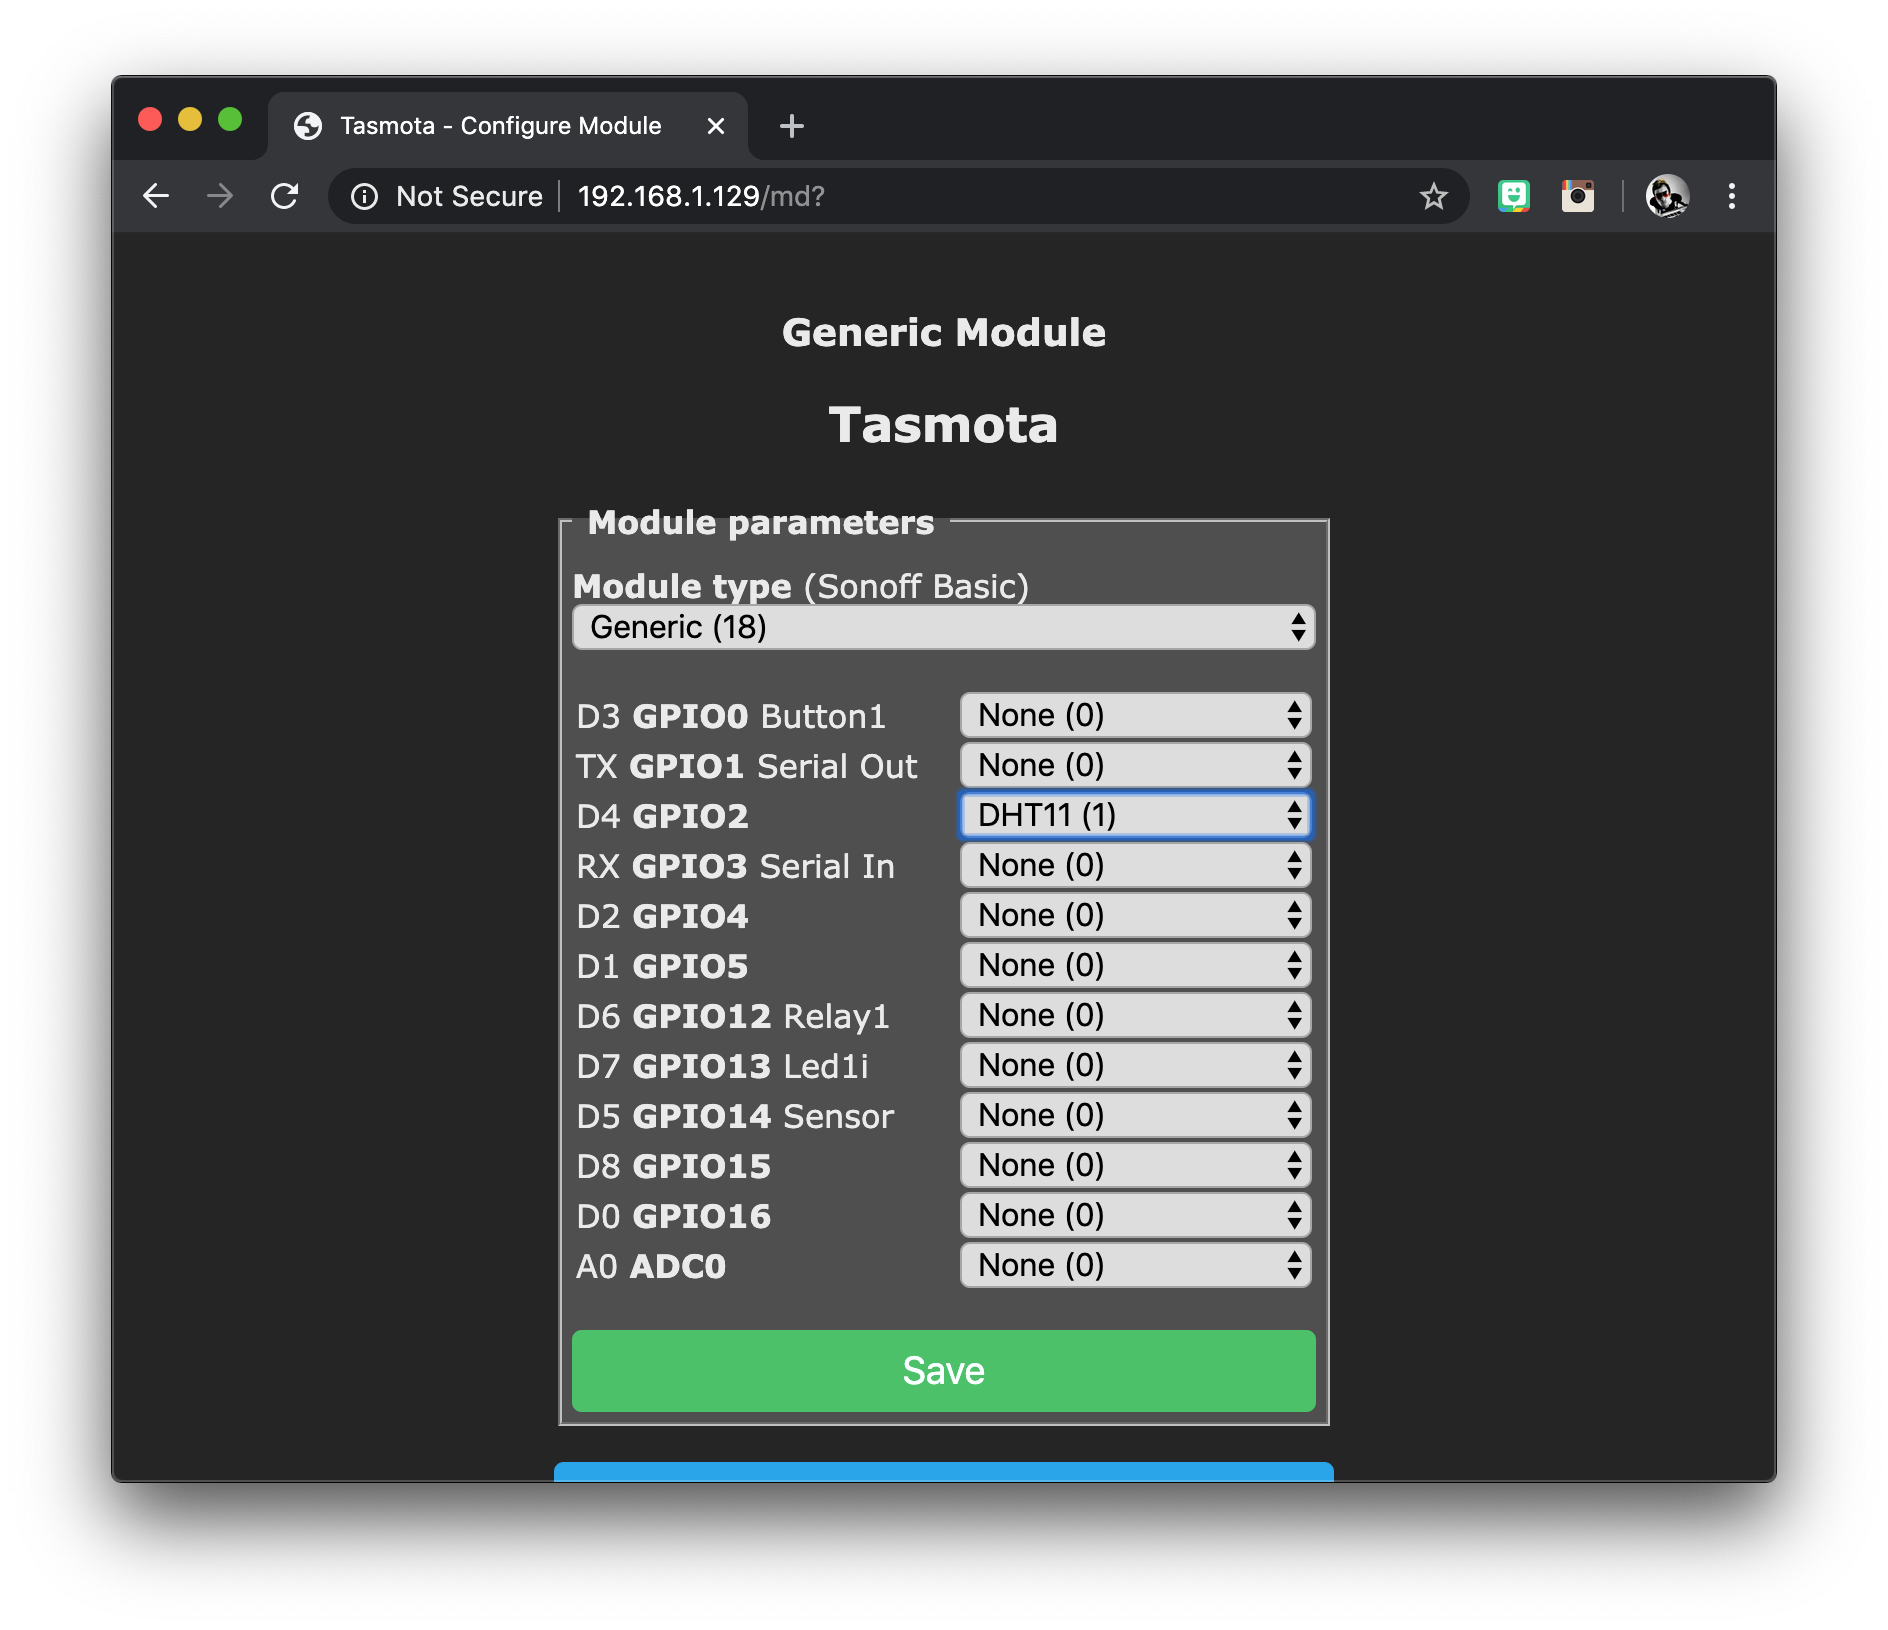
Next we need to click Configure Module to tell Tasmota how we want it to control our D1 Mini. Select Generic (18) as the module type and click save.
You will need to wait for Tasmota to restart before you observe the changes.

The options that you select for the IO ports are application specific so it really depends what you would like to do with your D1 Mini.
The module that I am using to create this tutorial is actually going to be used as a temperature sensor in my Home Assistant setup. I have the DHT11 sensor connected to D4, therefore I can select this sensor in the dropdown box for D4.
Note that Tasmota is also compatible with the DHT22 sensor, but you need to select SI7021 (3) as it uses the same protocol.
Configure MQTT
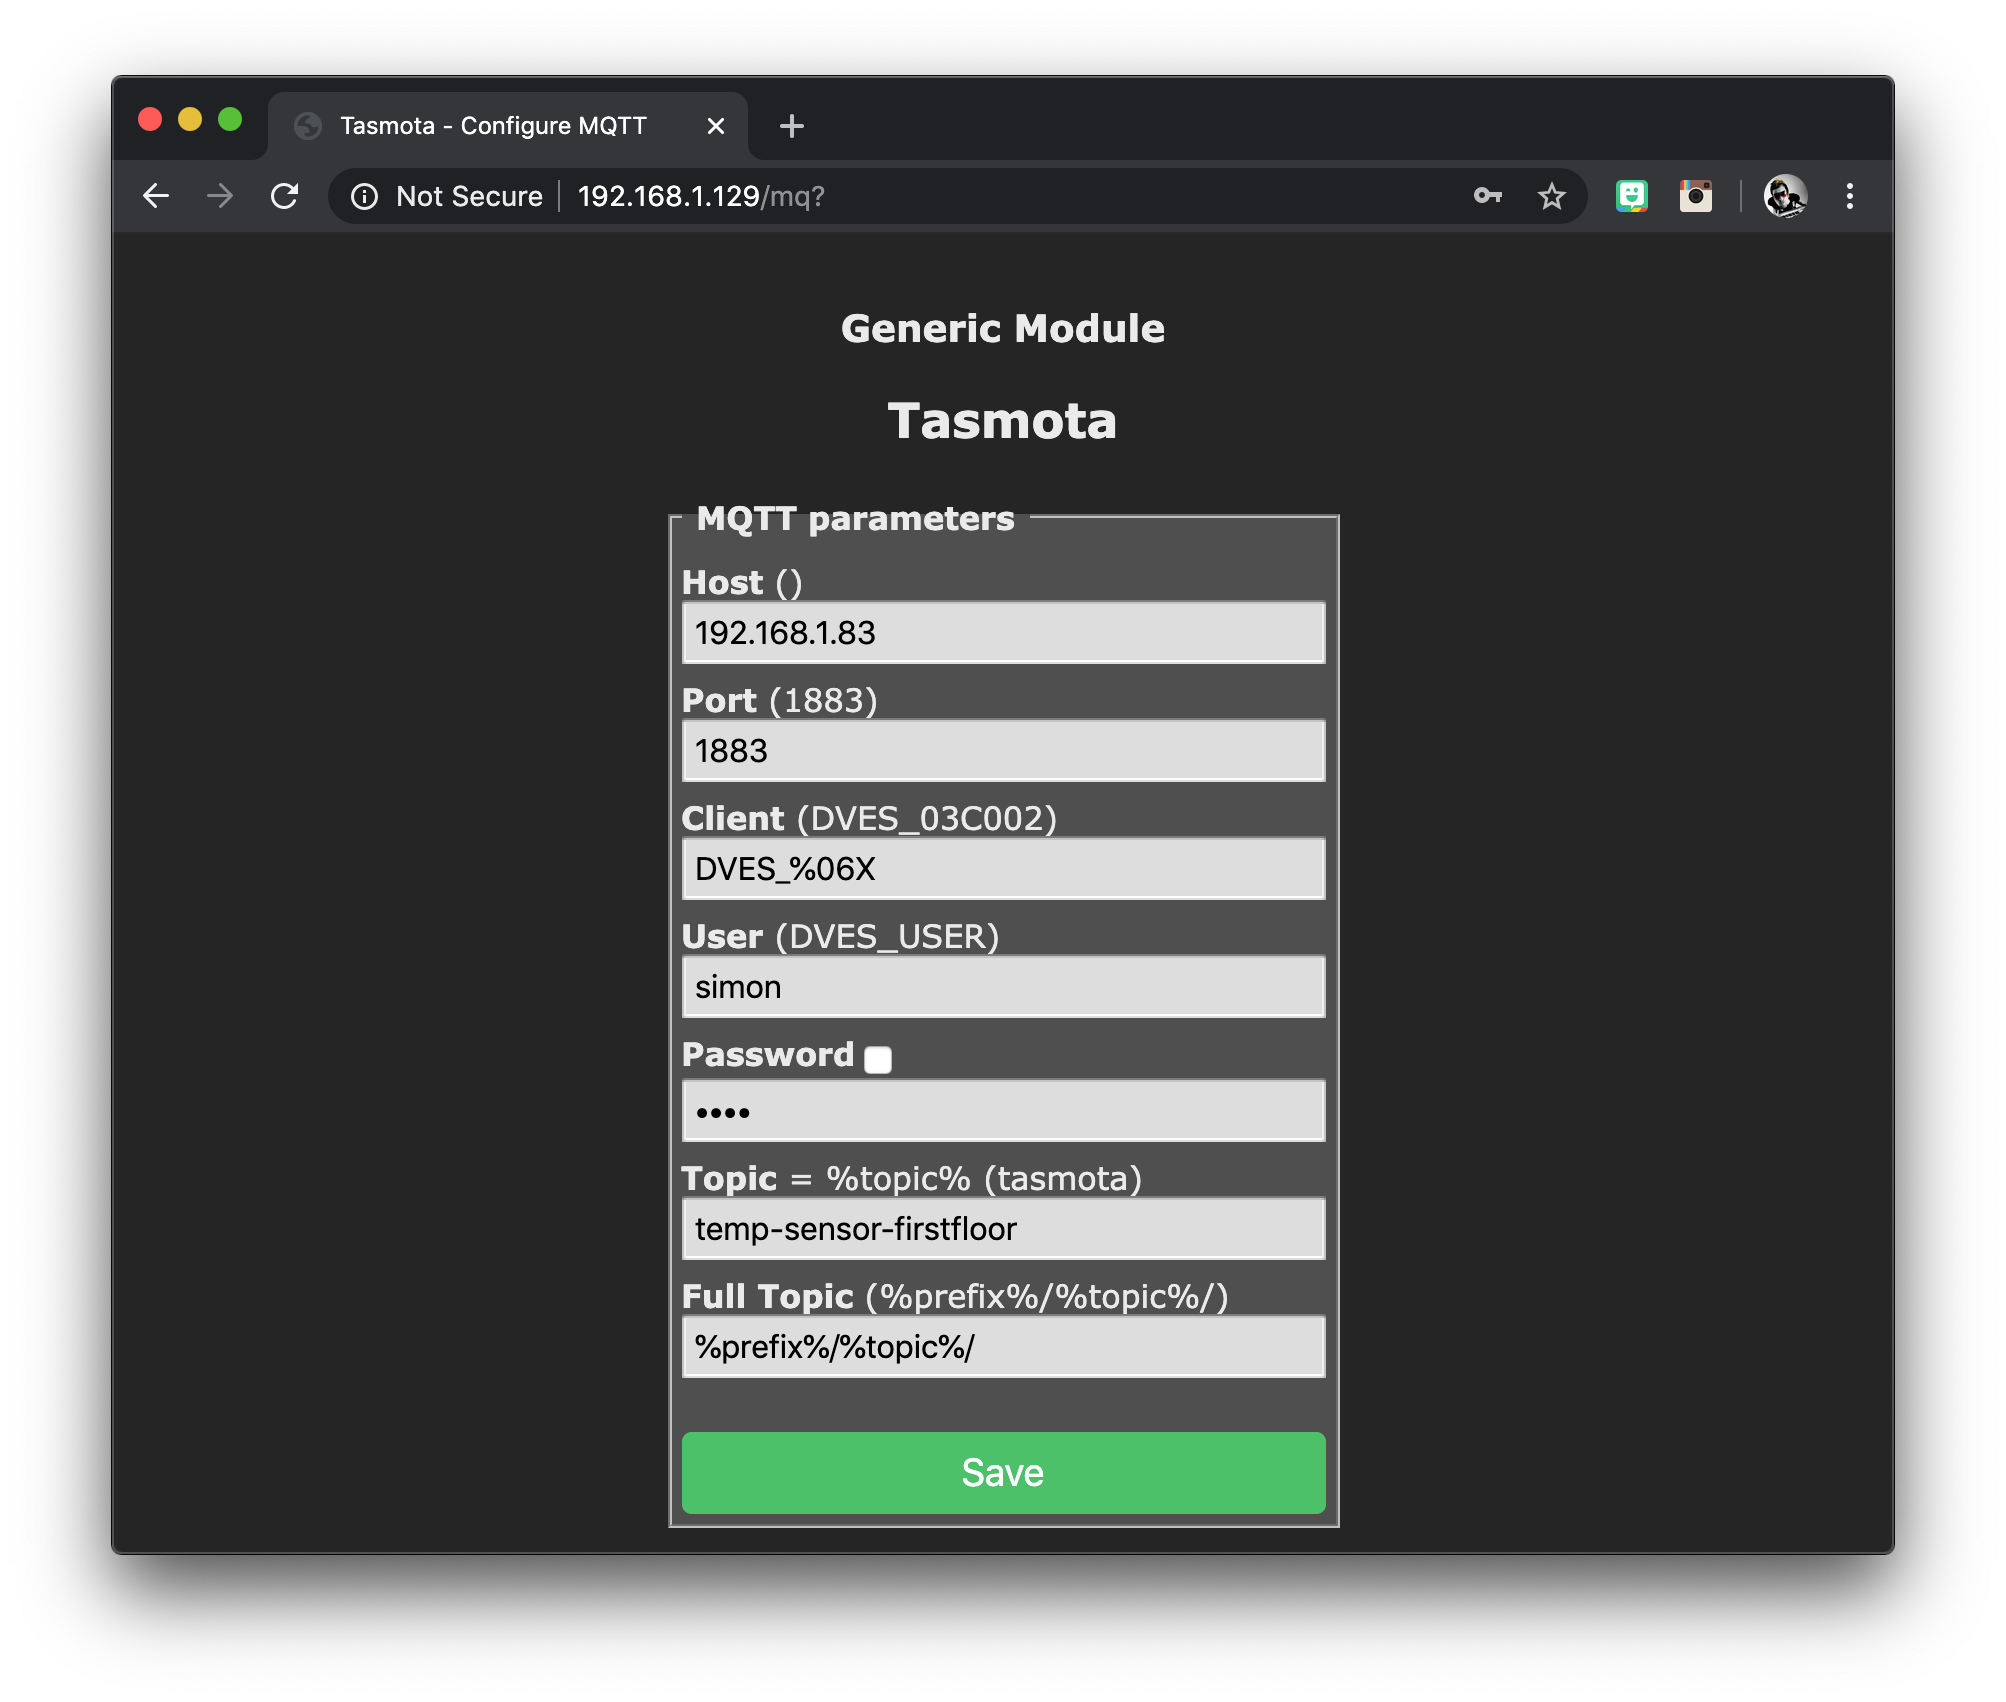
Finally we need to configure MQTT so that the device can communicate with the outside world. This really needs a tutorial of its own and I plan to write one. For the moment we will just cover the basic setup.
Enter the IP address and port for your MQTT broker. In my case this is the IP address of my Home Assistant server.
Enter the user name and password for your MQTT broker. If you are using Home Assistant and its MQTT plug-in, it will be the same as your admin login.
Enter a name for the device under topic, without spaces. Then click save and allow Tasmota to restart.
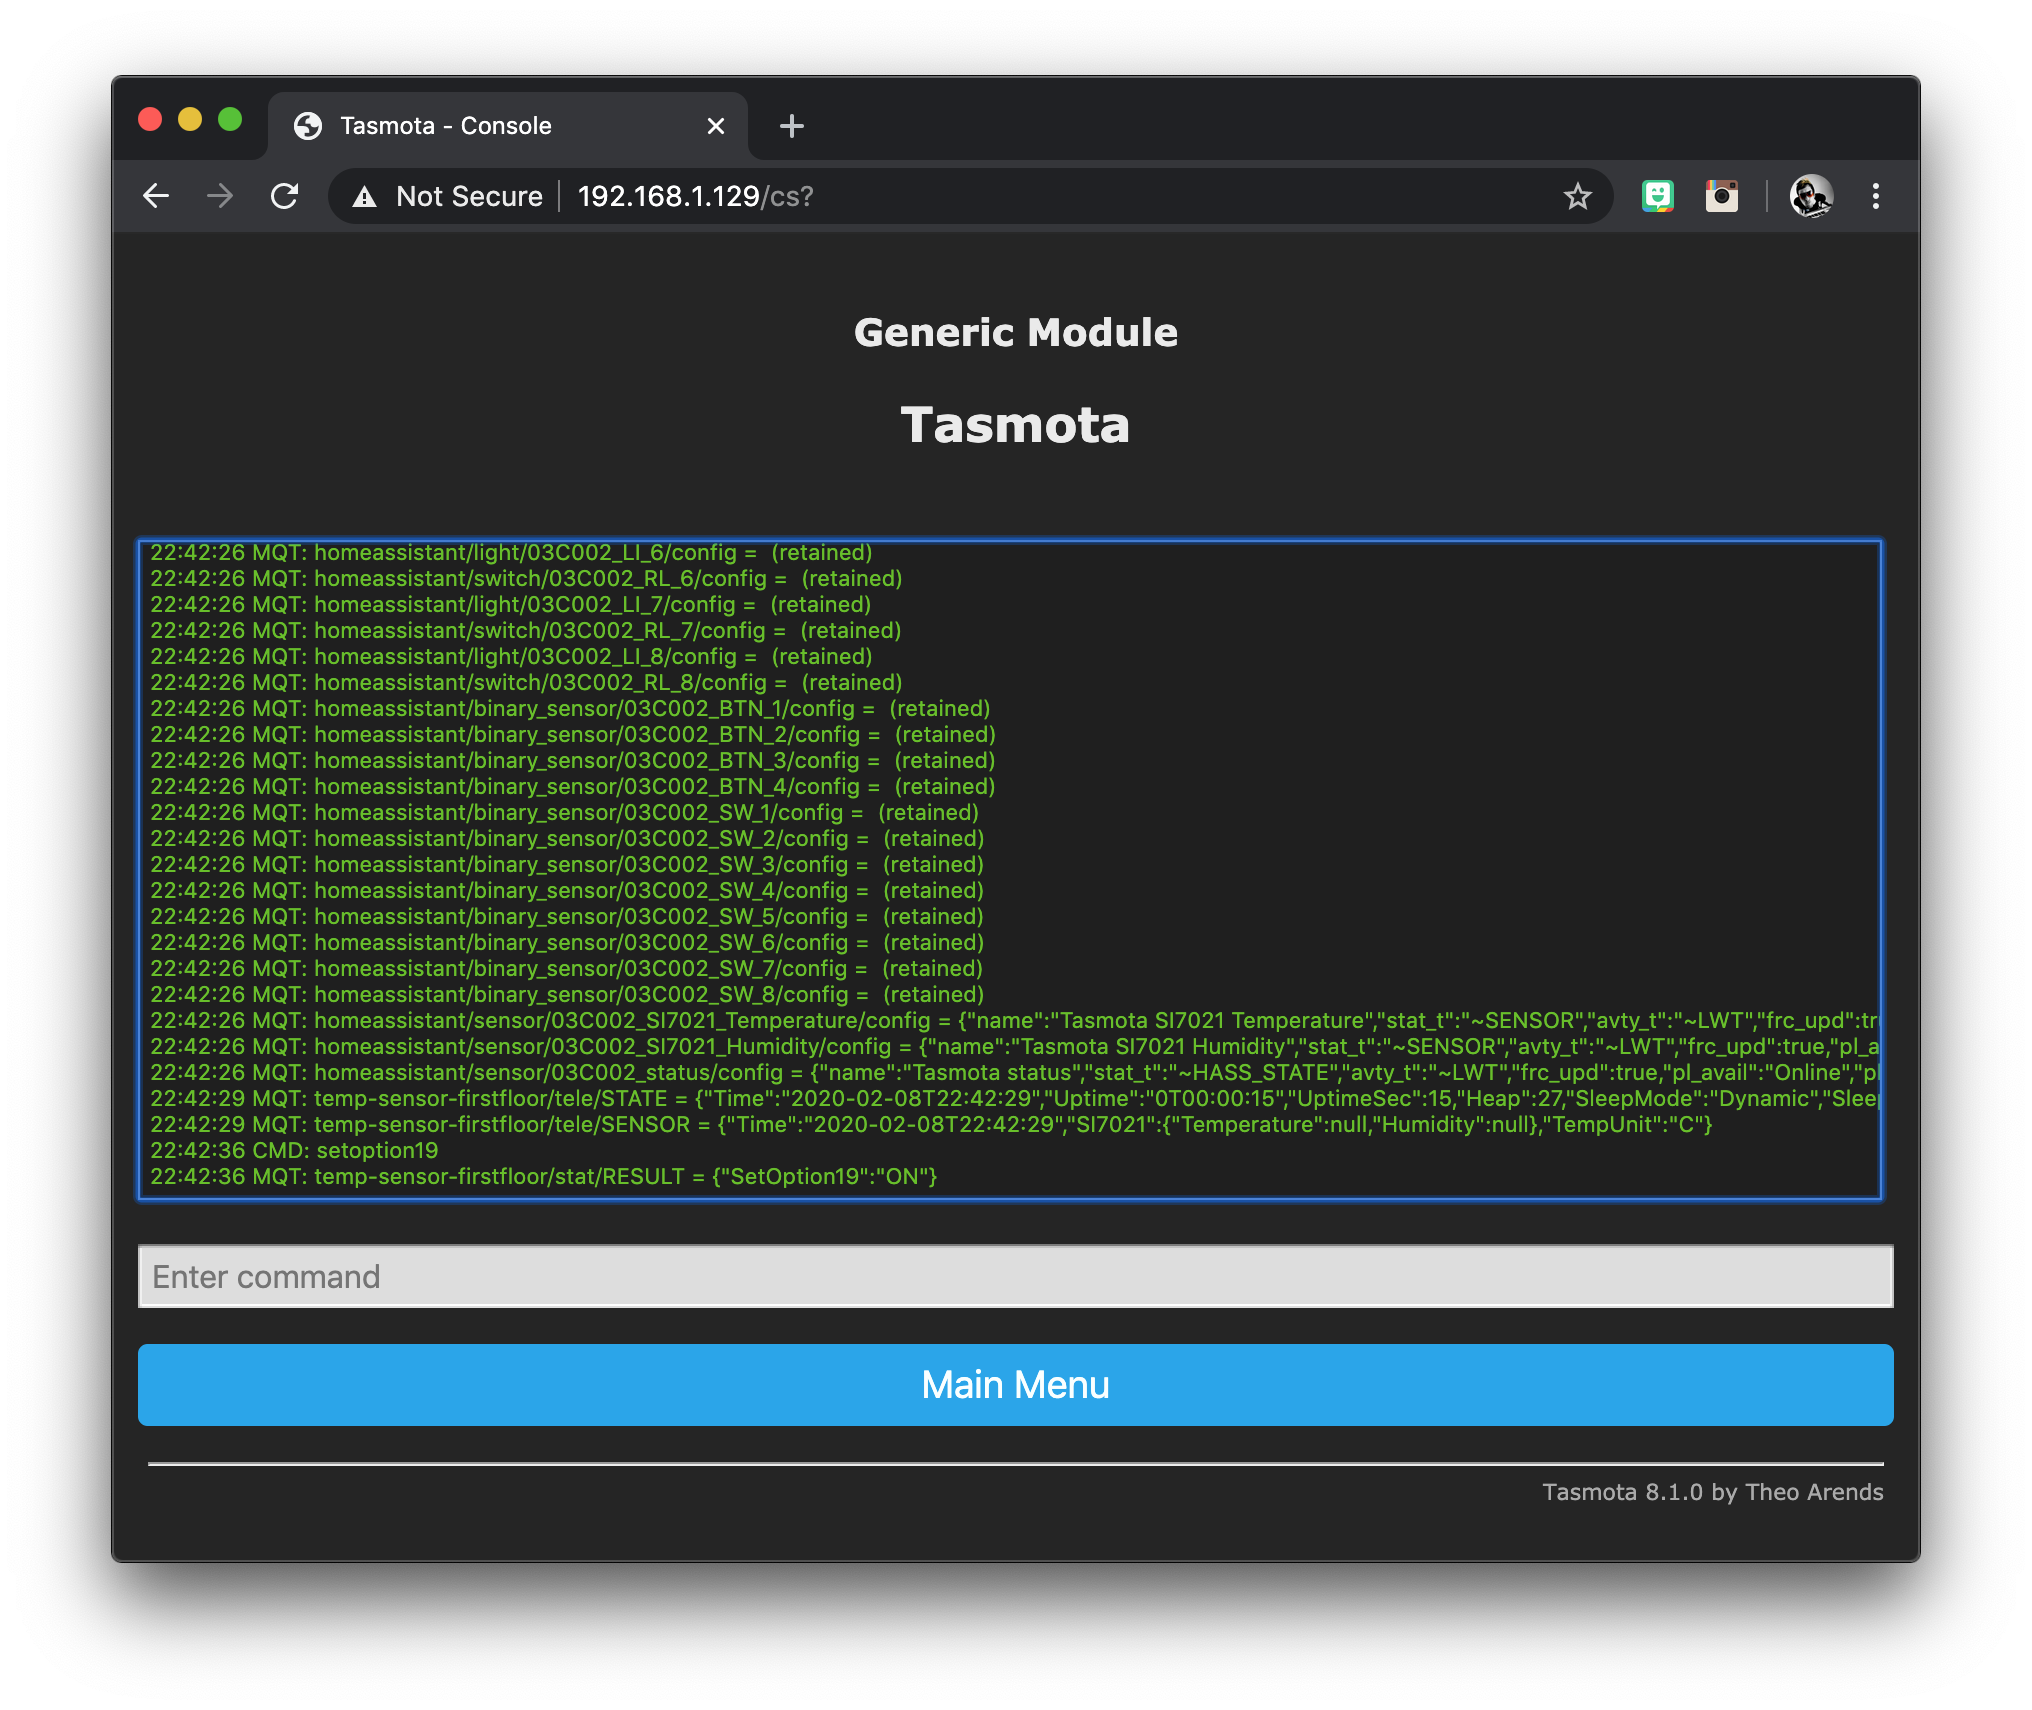
If you are configuring your device for Home Assistant and you want the device to be discoverable, you can enable this in the console.
From the main menu, click on console to bring up the Tasmota console for the device. Enter the following command and wait for the device to publish the information.
SetOption19 1
You may need to wait a moment as Tasmota publishes a series of messages. Once complete you will be able to discover your D1 Mini in Home Assistant.
Conclusion
Congratulations for making it to the end of this tutorial! I hope that it helped you get Tasmota up and running on your D1 Mini. For further information check out the Tasmota setup guide, and please check out some of my other cool tutorials!
Article Updates
July 11th 2023 : Additional clarity added to the prerequisites, Python and Git installation added. Featu
Article first published February 8th 2020.
Thanks so much for visiting my site! If this article helped you achieve your goal and you want to say thanks, you can now support my work by buying me a coffee. I promise I won't spend it on beer instead... 😏


First timer….working toward your WiFi Temperature Sensor. Everything above worked perfectly until “Access the Tasmota configuration menu”. I type in the IP address in Chrome and get “This site can’t be reached 192.168.0.4 took too long to respond.”
Alternate steps:
– no luck on Edge, Firefox
– tried HTTP & HTTPS
– Confirmed IP address by plugging/unplugging the device
– Turned off MS Windows Defender Firewall on private and public networks
– Said Abracadabra in hopes of summoning my magical powers
Open to any suggestions.
Backtracking…I have not confirmed the IP address…just realized nothing is different in the list of IPs when the D1 mini is and is not connected. That’s the problem.