
The easiest way to flash Tasmota using the operating system of your choice is to download and run the Tasmotizier. Under the hood it uses the mighty ESPTool, but it is operated with a slick graphical user interface instead of the terminal or command line.
Tasmotizer is every bit as cool looking as it sounds! It is written with Python and is therefore cross platform compatible.
If you are using Windows then using Tasmotizer would definitely be my recommendation.
If you are using a Mac or Linux box then you are still going to need to install it from the terminal, although it is very easy and everything you need is right here, just cut and paste into your terminal window.
You may also be interested in my other guides that cover how to flash your device using ESPTool from the Mac/Linux terminal, Raspberry Pi and even a guide on how to flash it over the air without the need for soldering.
Table of Contents
Requirements
- Mac/Linux/Windows
- A device to Tasmotize
- A serial programmer (your device may have one built in)
Installation
One of the best things about the Tasmotizer is that it is cross compatible. So Mac, Windows and Linux users alike and make use of this awesome tool. I will cover all operating systems, so pick your favorite flavour.
Windows
If you are using Windows then you can just download and run the executable binary from the releases page.
Mac
Mac users now have the option to download and install the Mac Tasmota app, without the need for the terminal!
However if you are a terminal-ninja or just want to feel like a hacker, feel free to go ahead and use the terminal.
Linux
If you are using Linux, go ahead and open up a terminal window. It is usually a good idea to start by making sure all of the packages are up to date.
sudo apt-get update
Once all of the packages have been updated we can install the dependencies for Tasmotizer using pip.
pip3 install PyQt5 pyserial
Next you need to change directory to the location that you wish to install Tasmotizer. For this example I will use ~/Documents but you can choose a different location if you prefer.
cd ~/documents
Now we can clone the Tasmotizer repository in to our chosen location with the following command.
git clone https://github.com/tasmota/tasmotizer.git
Once the repository has been cloned, Tasmotizer will have been put into the folder tasmotizer, so go ahead and change to that directory.
cd tasmotizer
Now its time to Tasmotize! We can launch Tasmotizer with the following command.
python3 tasmotizer.py
Time to Tasmotize!
Now that we have the Tasmotizer installed we are ready to flash our device.
Connect your device
Firstly you need to make sure your device is connected and powered up.
If your device has a built in serial programmer (such as the Wemos D1 Mini), simply connect the USB cable.
If your device requires a serial programmer, wire the programmer to the device you wish to flash and then connect the USB cable. If you are unsure about this step, you can find some further information in the latter part of this tutorial.
Note that your ESP device will require GPIO0 to be grounded in order to enter flashing mode. Depending on your device there may be a button connected to this pin that you need to press. Alternatively you can solder a wire between GPIO and GND. There is some more information in the latter part of this tutorial.
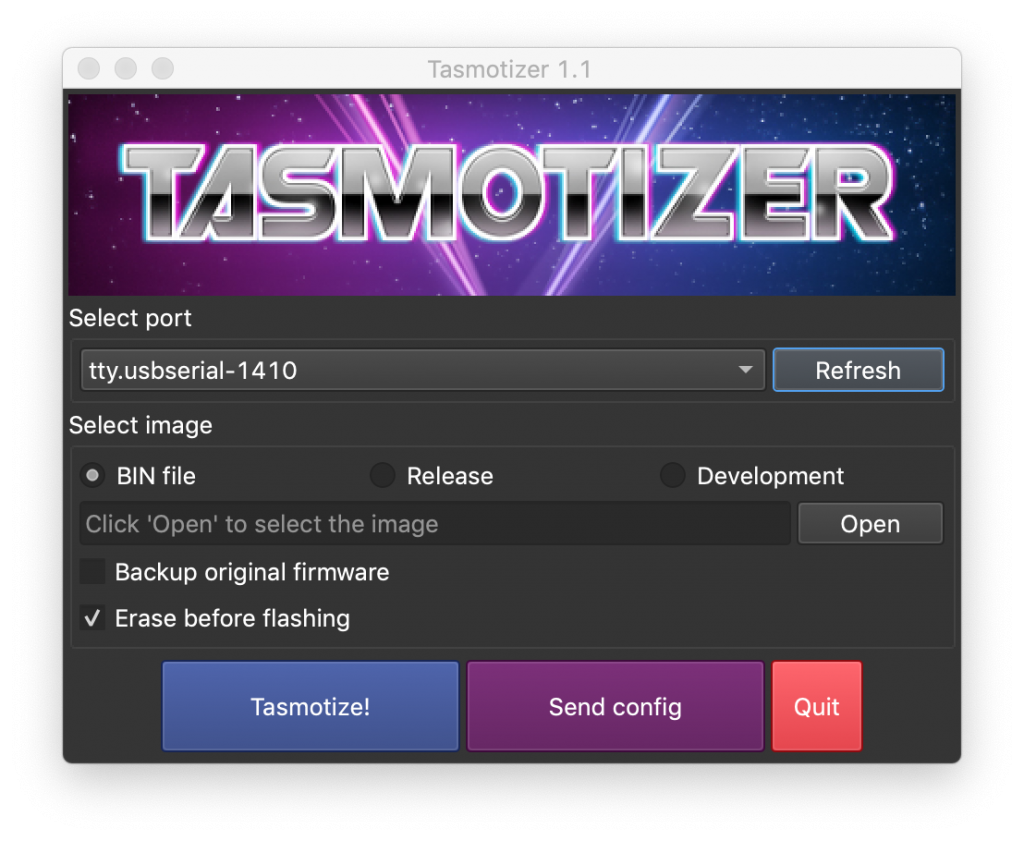
Select your device
In the select port drop down menu, select the serial port that your device is connect to. If you are unsure which device to select you can disconnect your device and click refresh, then see which device disappears from the list.
Afterwards, reconnect your device and click refresh again and select your device.
Mac and Linux devices will begin with cu or tty, therefore the serial port will be something like tty.usbserial-1410. If you are using Windows, your port will be called something like COM1.

Select the image
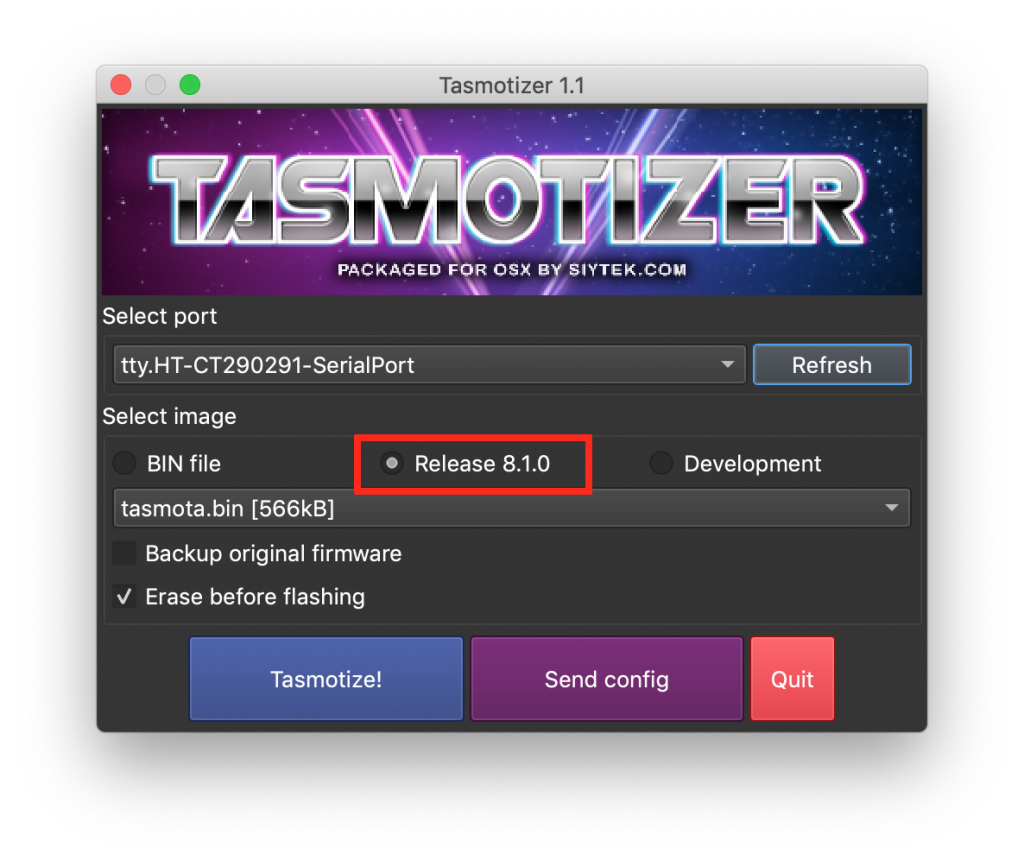
If you wish to flash the latest Tasmota release, simply select the release x.y.z option. You can choose the release from the drop down list below but if you are unsure, you can just stick with tasmota.bin.
If you wish to flash a .bin file from a different location, select the BIN file option and click the open button to choose the file you wish to flash.

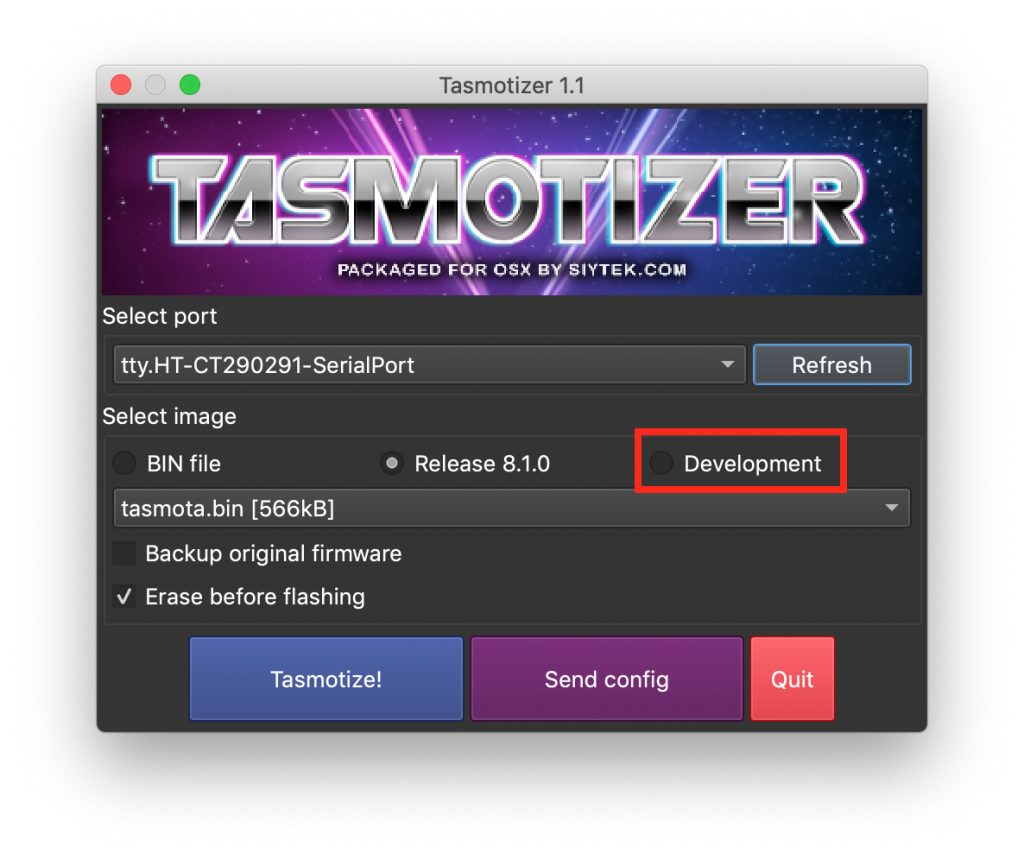
You can also opt to flash a development version by selecting the development option.
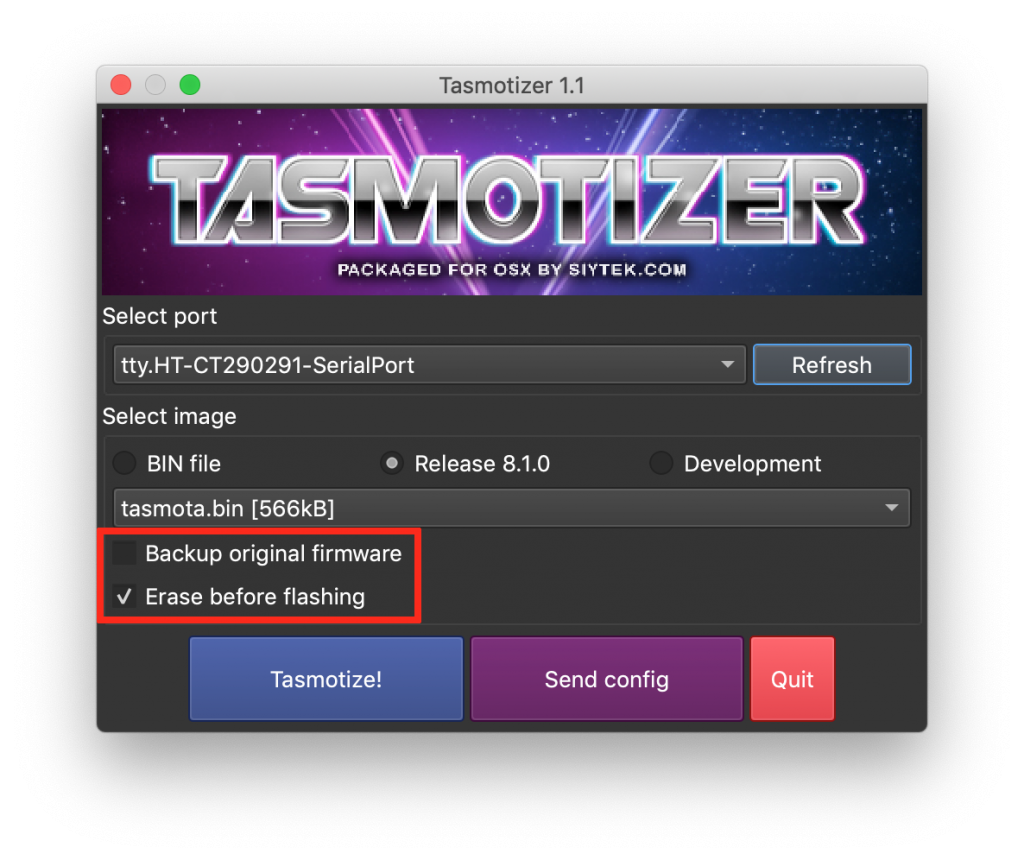
Choose whether or not you wish to backup the firmware already on the device by clicking the checkbox accordingly.
I would also recommend that you erase the flash prior to flashing to prevent any errors. Tick the checkbox next to erase before flashing.
Now we are ready to flash! Go ahead and hit the Tasmotize button!
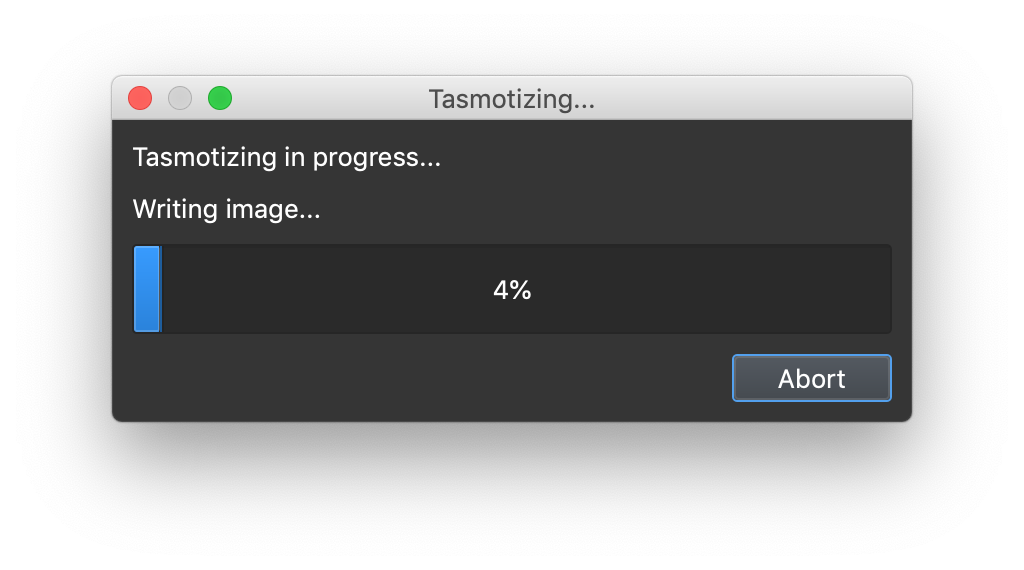
Once the flashing has completed it will prompt you to power cycle the device so go ahead and disconnect, then reconnect the power.
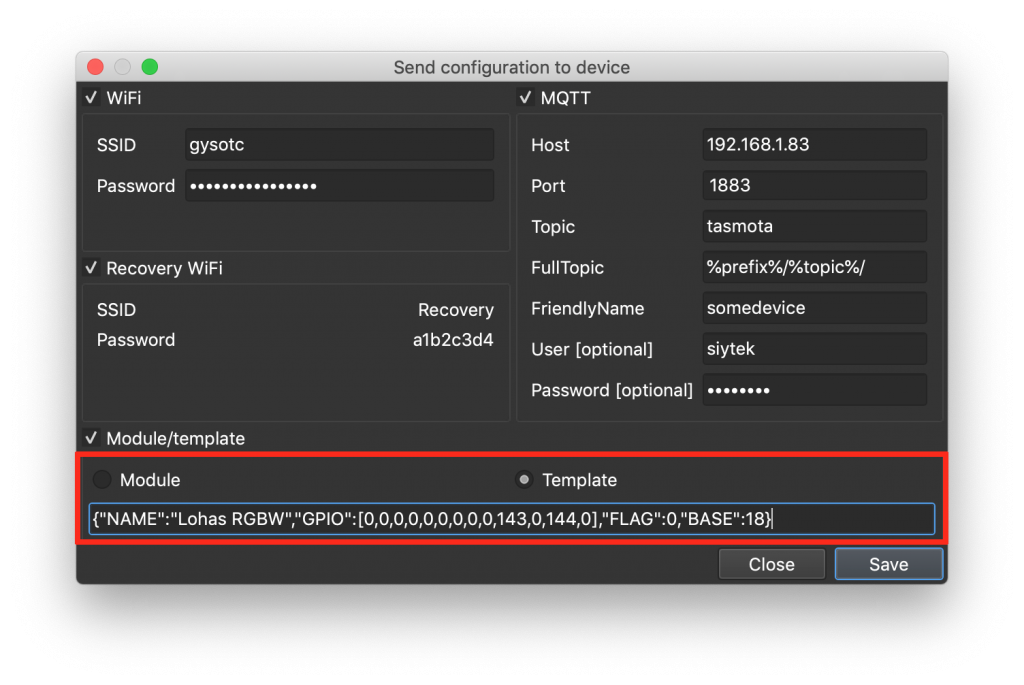
Sending configuration to device
One feature I really like about the Tazmotiser is the Send config button. It allows you to configure Tasmota easily within the Tasmotiser GUI. This bypsases the need to connect to the Tasmota AP and gets your device straight on to your network.
You can also set up the device by choosing a module or template as well as entering your MQTT details. In many cases this is enough to configure a device completely without having to use the web interface!
If you wish to send the configuration data with Tasmotizer, first enter your WiFi network and password.
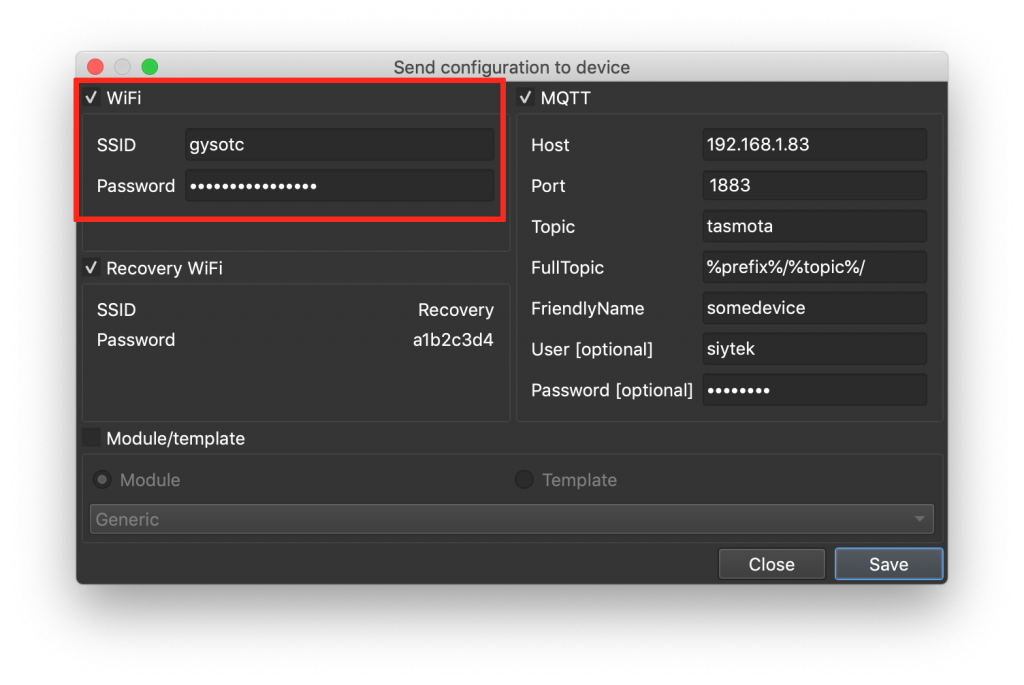
You can also enter a recovery SSID and password. If something goes wrong during the initial connection to your network, Tasmota will give up and revert back to AP mode. This means you can reconnect and try again, although it might be easier just to flash the device again.

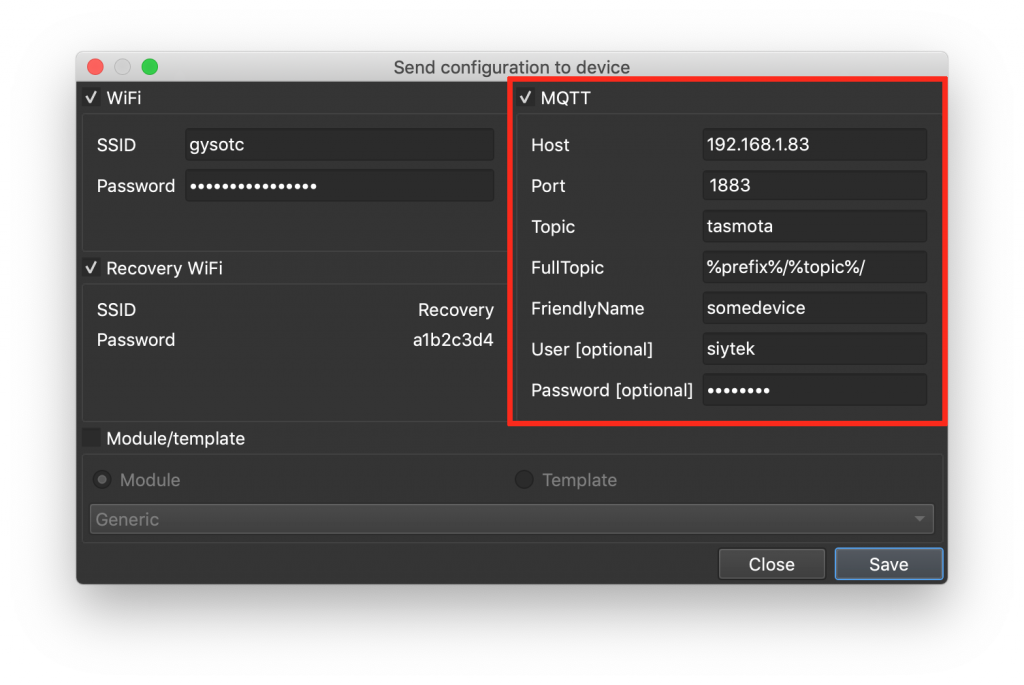
You can also enter all of your MQTT details. If you are unsure about these settings, you can check out my full tutorial on configuringing MQTT.
If you wish to configure your device you have two options, module and template. The easiest way is to select your device from the module drop down menu.
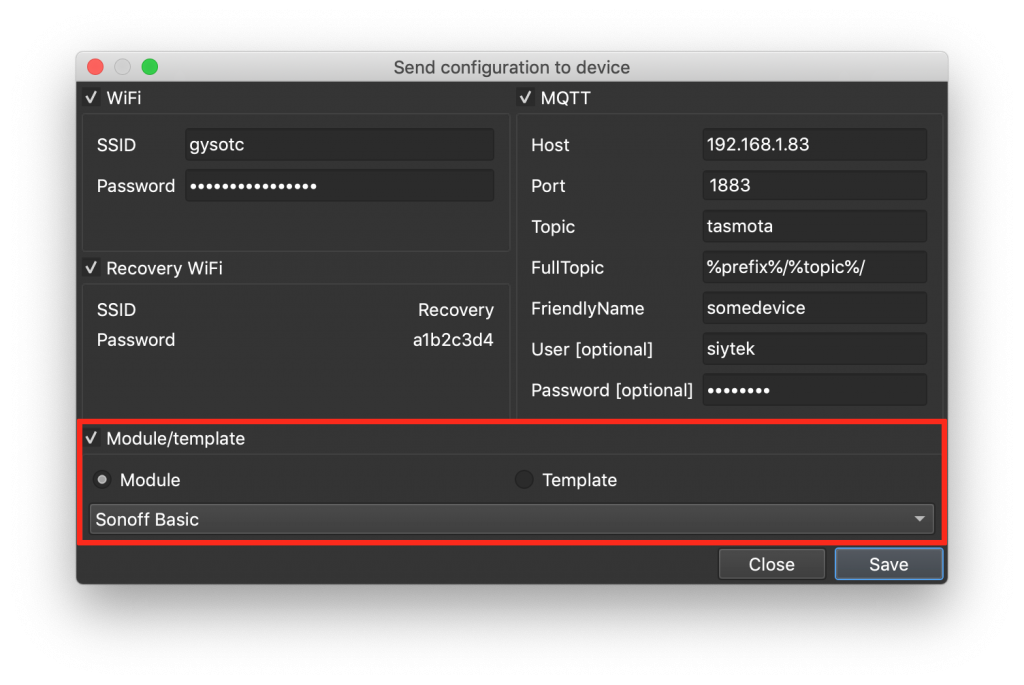
Alternatively if your device is not in the list you can configure it using a template. You can either grab one from the Blakadder Template Repository or you can check out my complete guide which explains how to make one.
For further reading check out my in depth guide for configuring Tasmota and getting your device to auto discover in Home Assistant.
Alternatively you can check out my other guides that cover how to flash your device using ESPTool from the Mac/Linux terminal, Raspberry Pi and even a guide on how to flash it over the air without the need for soldering.
I hope you found this tutorial useful. Now go Tasmotize some devices, and happy flashing!
Thanks so much for visiting my site! If this article helped you achieve your goal and you want to say thanks, you can now support my work by buying me a coffee. I promise I won't spend it on beer instead... 😏


Nor getip or send config are working in tasmota 1.2.1, do you know why? Flashing goes ok and the unit is accessible through web interface