
This article explains how to install Home Assistant Core on Ubuntu, probably the most commonly used version of Linux for desktop computers.
This installation method is best for those who specifically want to run Home Assistant Core on Ubuntu. The method is a container installation, which must be self-managed and therefore is suited to more advanced users.
Note that the add-ons store is not included with a Home Assistant Core only installation and add-ons must be managed manually. If you want the add-ons store or if you are unsure, use one of the following tutorials instead:
- Home Assistant Supervised on Ubuntu Desktop – this tutorial is best for those wishing to simply run Home Assistant on their Ubuntu desktop computer.
- Home Assistant Supervised on Debian Linux (headless) – for those wishing to build a dedicated Home Assistant server, Debian is a much better choice as it is one of the officially supported operating systems, which can run Home Assistant natively.
Can Home Assistant Run On Ubuntu?
Home Assistant can be run on Ubuntu by using a Docker container or by using a virtual machine. This article will cover the installation method using a Docker container and can be broken down into the following 5 simple steps:
- Step 1: Installing Ubuntu for Home Assistant
- Step 2: Installing Docker
- Step 3: Installing Home Assistant on Linux Using a Docker Image
- Step 4: Configuring Home Assistant
- Step 5: Setup SSH Access in Ubuntu
Why run Home Assistant on Linux?
There are several reasons you might want Home Assistant running on Linux. At the time of my first Home Assistant setup I only had an old Raspberry Pi 2 lying around. I built my initial setup on the Pi but shortly after I wanted more power.
I happened to have an old MacBook Pro gathering dust in a draw.
I had been on many emotional journeys with this machine in the 10 years of ownership and I didn’t have the heart to throw it in the trash, plus I hate to contribute towards electrical waste.
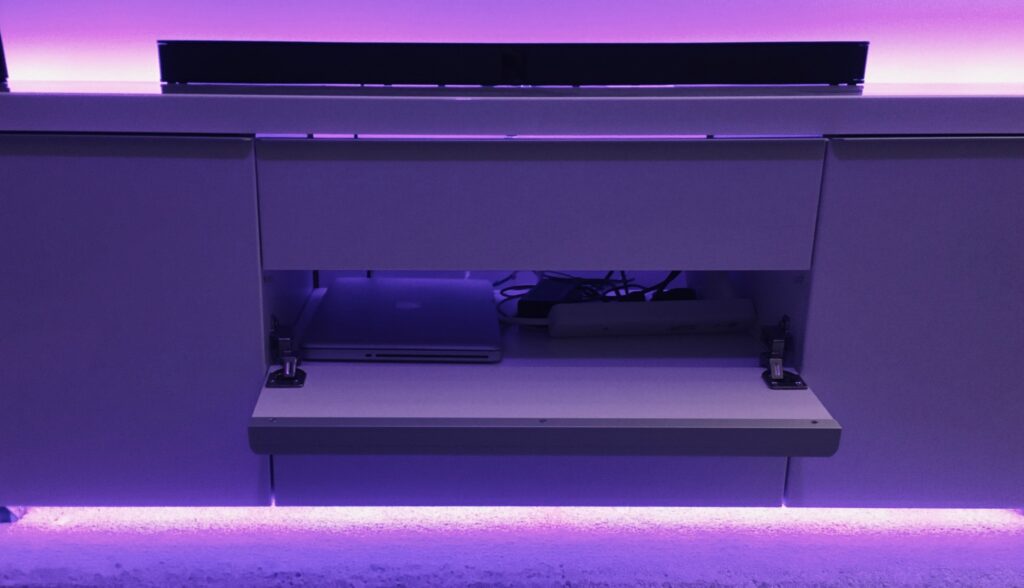
I decided that this machine would be perfect for my Home Assistant server, it had 8GB of RAM, a Core Duo 2 processor and an SSD drive so would outperform the Pi.
Best of all it was not going to cost me anything and at the same time I could do something for the environment. It was a little dented, scratched and beaten up but that didn’t matter because I was planning to hide it in the TV cabinet anyway.
As the only purpose of this machine is to run Home Assistant, I decided to make the machine headless and install Ubuntu server.
However this setup guide will work just fine with the standard desktop release too. I am sure it will also work with other versions of Linux so if you are using a different distro, let us know the results in the comments!
Prerequisites
You will need a copy of Ubuntu or Ubuntu Server and some hardware to run it on.
This tutorial is aimed at installation using Ubuntu. If you would prefer to use Debian, go ahead and check out this tutorial instead.
Installing Home Assistant will be carried out using the terminal command line, therefore you can use either Ubuntu or Ubuntu Server (without graphical user interface).
Also… are you looking to master all of the Home Assistant basics? I have an excellent beginner course available that will help you understand the Home Assistant fundamentals.
All of the information that you need to make beautiful lighting automations, add new devices and understand jargon terminology such as entity and integration can be found bundled in an easy-to-follow lesson structure.
Step 1: Installing Ubuntu for Home Assistant
If you do not yet have Ubuntu up and running and intend on installing it, the process is very straightforward. It is completely free to download from the official website:
If you plan to install Ubuntu Server, it is worth knowing that there is also an ARM binary available.
If you need help installing Ubuntu, go ahead and check out these instructions.
Update Ubuntu
The first thing to do prior to setting up Home Assistant is to make sure Ubuntu is up to date.
Open up the terminal, then simply enter the following commands and allow any updates to install.
sudo apt-get update
sudo apt-get upgrade
Step 2: Installing Docker Engine
Docker is a clever little program that allows you to install and run applications within a ‘container.’
All of the dependencies required by the application can be packaged up into the container and are kept separate from the rest of the system.
This allows specific versions of libraries and other dependencies to be contained with their application and it prevents version conflicts in the system.
In order to install Docker Engine, we will follow the guide found on the official Docker site.
- From the terminal, go ahead and enter the following commands:
sudo apt-get install ca-certificates curl gnupg lsb-release
- Next we need to add the GPG key for Docker to our system. The purpose of this is for ensuring the validity of the download.
sudo mkdir -p /etc/apt/keyrings
curl -fsSL https://download.docker.com/linux/ubuntu/gpg | sudo gpg --dearmor -o /etc/apt/keyrings/docker.gpg
3. Use the following command to set up the repository.
echo "deb [arch=$(dpkg --print-architecture) signed-by=/etc/apt/keyrings/docker.gpg] https://download.docker.com/linux/ubuntu $(lsb_release -cs) stable" | sudo tee /etc/apt/sources.list.d/docker.list > /dev/null
- We are now ready to install docker, so go ahead and enter the following commands.
sudo apt-get update
sudo apt-get install docker-ce docker-ce-cli containerd.io docker-compose-plugin
- Once Docker has finished installing we need to ensure that it will start when the system boots, so go ahead and enter this command.
sudo systemctl enable docker
- Next, we need to add our user to the docker group and log in to the group.
sudo usermod -aG docker <your user name>
newgrp docker
- Finally we can test that Docker has been successfully installed by running the hello world command.
sudo docker run hello-world
If the installation was successful, you will receive the hello message from Docker:
“Hello from Docker! This message shows that your installation appears to be working correctly.“
If you run into any permission denied errors, reboot the system and try again.
Step 3: Installing Home Assistant on Linux Using a Docker Image
At this stage you should have Ubuntu up and running with Docker Engine installed.
Next we can install a container that has everything needed to run Home Assistant.
Home Assistant will be run from within this container, managed by the Docker Engine. This allows Home Assistant to be kept separate from the main system, preventing conflicts or other problems.
In order to install Home Assistant Container, we will use the guidance from the Linux installation guide on the official site.
- Go ahead and run the following command to install Home Assistant Container. Don’t let the complexity worry you too much, you can go ahead and copy & paste it directly into the terminal, then press enter.
/PATH_TO_YOUR_CONFIGpoints at the folder where you want to store your configuration and run it.MY_TIME_ZONEis a tz database name, likeTZ=America/Los_Angeles.
sudo docker run -d --name homeassistant --privileged --restart=unless-stopped -e TZ=MY_TIME_ZONE-v /PATH_TO_YOUR_CONFIG:/config --network=host ghcr.io/home-assistant/home-assistant:stable
If the PATH_TO_YOUR_CONFIG folder does not exist, it will be created on your hard drive and Home Assistant will operate from that folder.
Here is an example of a complete command that you can use:
sudo docker run -d --name homeassistant --privileged --restart=unless-stopped -e TZ=UTC-v /homeassistant/config:/config --network=host ghcr.io/home-assistant/home-assistant:stable
Step 4: Configuring Home Assistant
Firstly we need to know the IP address of our new Home Assistant server. There are several ways that we can do this.
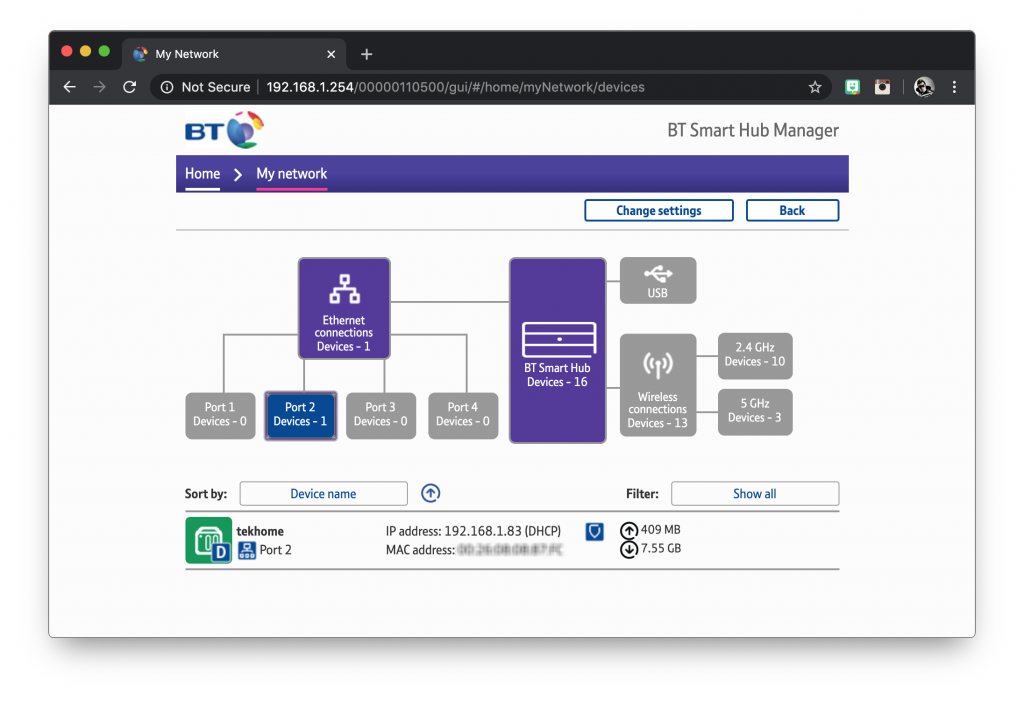
Find Your IP Address Using the Router Management Page
If you have access to your router management page, you should easily be able to see the IP address for your machine here. In my case it’s 192.168.1.83.
Alternatively you can use a third party application like Fing.
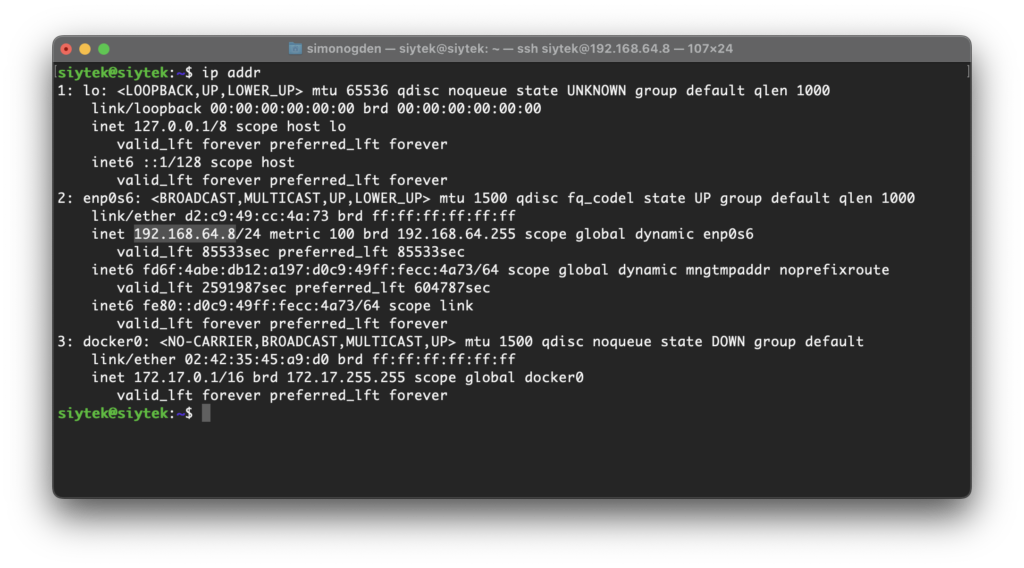
Find Your IP Address Using the IP Terminal Command
The quickest and easiest way to find your IP address is by typing the following command into your terminal.
ip addr
Depending on whether you are connected by Ethernet or Wifi, look for a device named something like ‘enp0sxx‘ or ‘wlanx‘ and you should see your local IP address.
For example, here I am connected through Ethernet and my local IP address is 192.168.64.8.
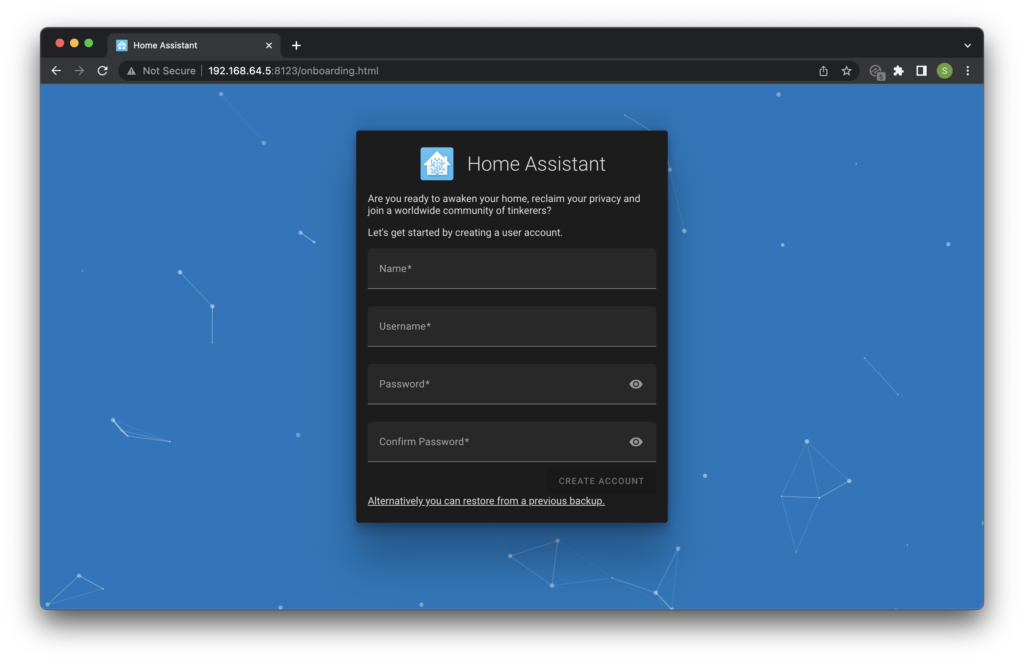
Home Assistant Onboarding
Once we know the IP address of the Home Assistant server, we are able to connect and begin the onboarding process.
In order to connect to Home Assistant, navigate to your IP address and port 8123 in the browser:
http://192.168.64.8:8123
You will need to replace the address above with your own IP address. Depending on your network, you may also be able to use the generic address to access Home Assistant:
http://homeassistant.local:8123/
If all has been successful you will be greeted with the Home Assistant login page. Go ahead and create a username and password to log in to Home Assistant.
Conclusion
It is certainly possible to run Home Assistant directly on Ubuntu, although it is not really officially supported nor a recommended way.
If you do not need specifically Ubuntu on your Home Assistant server then it would be better to use Debian instead.
If you really must run Ubuntu as your primary operating system, it would probably be better to run Home Assistant Supervised under Debian in a virtual machine.
Article Updates
8th August 2022: Tested installation with Home Assistant 2022.8.2 and Ubuntu Server Ubuntu 22.04.1. Screenshots updated to Home Assistant 2022.8.2.
Article first published February 7th 2020.
Thanks so much for visiting my site! If this article helped you achieve your goal and you want to say thanks, you can now support my work by buying me a coffee. I promise I won't spend it on beer instead... 😏


Hello, i followed your step and when i reached Install Hass.io and Home Assistant it failed. I read github https://github.com/home-assistant/supervised-installer, and think that the line should be replaced by curl -sL https://raw.githubusercontent.com/home-assistant/supervised-installer/master/installer.sh | bash -s. Is it correct? Thanks
Hey Maulana, thanks for the comment! You are correct, looks like HA changed the path since they rebranded Hassio to Supervisor. I will update the tutorial, thanks again for pointing it out 🙂
Its not working for me !!
What do I do wrong ??
Best regards
Peter (Denmark)
peter@Medion:~$ sudo curl -sL https://raw.githubusercontent.com/home-assistant/supervised-installer/master/installer.sh | bash -s
[Warning] This installer is no longer supported.
[Warning]
[Warning] Home Assistant might work today, tomorrow maybe not.
[Warning]
[Warning] If you want more control over your own system, run
[Warning] Home Assistant as a VM or run Home Assistant Core
[Warning] via a Docker container.
[Warning]
ModemManager.service enabled enabled
[Warning] ModemManager service is enabled. This might cause issue when using serial devices.
mkdir: kan ikke oprette katalog “/root”: Adgang nægtet
Hi Peter, looks like Home Assistant just depreciated this installation script, although it may still work just fine. Did you have any success completing the installation? I will investigate the changes, but for now I have changed the link in this command so perhaps give it another try 🙂
Hi, I followed your instructions and just installed on an old Mac Mini (2007) via the minimal install of Ubuntu 20.04 from a live USB.
Many thanks
Glad to hear Zaq! Thanks for visiting 🙂
Hey I can’t get the app to install. I keep getting all kinds of permission errors with the bash installer, despite running sudo infront of the command.
Hi Robbie, could you give some more details? What version of Ubuntu are you running? Home Assistant is always evolving at a very quick pace, so over the weekend I will check to see if this method is still working correctly.
Hi, I followed your instructions and installed on an ubuntu 20.04.
I had no errors and the docker container ist started but i can’t get access to the hassio interface on port 8123.
hassio_supervisor has no published ports on docker.
Do you have any idea what could be the Problem?
Hi Ingo, thanks for visiting! To get a better understanding I would need to see more detail of your error, maybe paste the log file/terminal output here or send me a screen grab [email protected]
I’m trying to wrap my head around what all the installation script does, everything is up and running…if I wanted to start using Docker Compose after running this script is that a problem?
Failed to restart NetworkManager.service: Connection timed out
See system logs and ‘systemctl status NetworkManager.service’ for details.
Worked Great!
Thanks!
Great news Bart, thanks for the comment! 🙂
Hello! I have successfully installed Homeassistant with docker, and everything is running in the docker container. However, I cannot access the Homeassistant web interface when I type in my server IP and port number. When I do a Fing search of my network, port 8123 is unavailable on my server. Is this a firewall issue, or is the home assistant not starting up properly?
Were you able to figure this out? I’m having the same issue currently.
Hi, thanks for easy guide! Though I do have same issue as Seth and Joe2w1. 404 on browsing the URL. With APP there is a connection timed out error.
I just solved it my self by adding port to firewall.
sudo ufw allow 8123/tcp
Установилось все и работает, находит устройства. Только такой вопрос, а дополнения в нем как поставить? Кнопки дополнений в настройках нет.
I have installed everything according to the instructions and it works, but there is no add-ons button in the settings. How to fix it?
Hi,
It looks like everything went fine, which is rare in Linux.
Thanks a lot for the tutorial!!!
The only problem it is not supervised! So the whole thing is useless for me…
Thanks anyway.
Hello Siytek,
The installation of Docker & Home Assistant on my freshly installed Ubuntu 22.04.1 LTS Medion laptop went fine without any problem. However, when I try to add Picture-elements to a dashboard, the system can’t find the image files at the in the Picture-element indicated location (http://192.168?1.55:8123/image.png in my case). I tried as well with png- as jpg-images but the problem remains. In order to be sure that it isn’t a permission problem i changed all the permissions, but that didn’t help either.
Any idea what could be wrong?
Thank you in advance for your reaction and greetings from Belgium!
Hi Siytek
Thank you for your excellent tutorial.
I followed your the guide and installed Home assistant core and it works perfectly but it looks like it is not possible to restore a HAOS backup on home assistant docker.
My question: Is it possible to restore a HAOS on HA docker?
if not could you please give me the instructions to remove HA docker.
I will then install HAOS on VS.
best regards,
Rui Reis