Python is one of the most popular and versatile programming languages that is accessible on a whole host of different platforms.
The ESP8266 is also an incredibly versatile microcontroller originally intended as a cost effective solution for IoT applications.
Therefore it comes as no surprise that it is possible to program the ESP8266 in the Python programming language.
MicroPython is an optimised version of Python designed to run on microcontrollers, which contains a portion of the Python standard library.
MicroPython is a lean and efficient implementation of the Python 3 programming language that includes a small subset of the Python standard library and is optimised to run on microcontrollers and in constrained environments.
Micropython.org
Does the ESP8266 support MicroPython?
Yes the ESP8266 does support MicroPython and it can be installed in just 5 simple steps:
- Download the MicroPython firmware
- Connect the ESP8266 to USB
- Flash the MicroPython firmware to the ESP8266
- Connect to the MicroPython serial prompt
- Run the MicroPython hello world example
In this article we will learn how to install and run MicroPython on the ESP8266 chip, a great alternative to using Arduino, especially for those with a little familiarity to Python.
Prerequisite
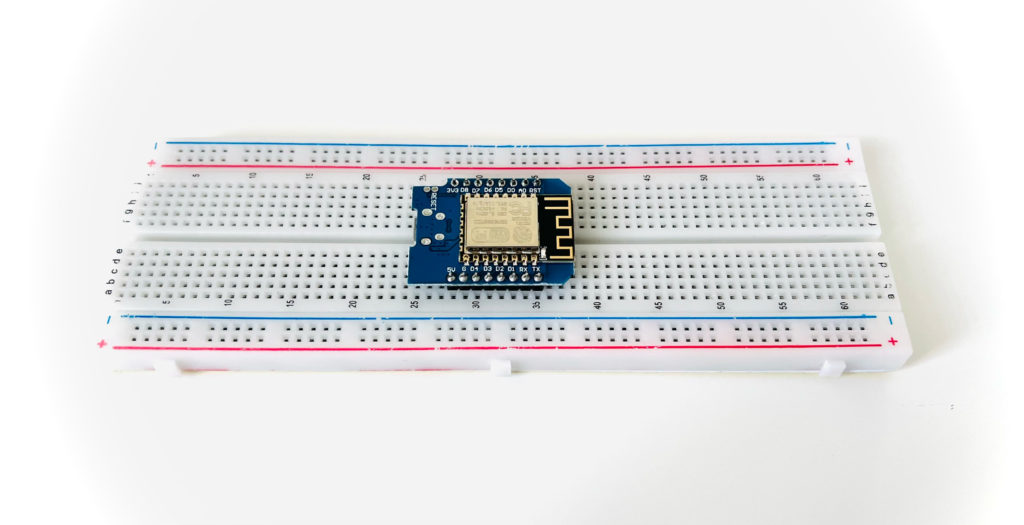
It is very easy to begin using MicroPython on the ESP8266 platform. We just need an ESP8266 development board and the means to connect it to the USB port on our computer.
You can use any low cost ESP8266 development board to get started so long as it has at least 1MB of flash memory.
My recommendation would be the Wemos D1 Mini as it is low cost, widely available (e.g. from Amazon), has an onboard USB to serial adapter and usually comes with plenty of flash memory, commonly 4MB.
You will also need a micro USB to USB cable such as this one.
Download the MicroPython Firmware
In order to run MicroPython on our ESP8266, we first need to download the MicroPython firmware.
Once downloaded we will ‘flash’ this firmware on to the ESP8266 chip, which will allow us to use MicroPython.
You will need to download the binary for ESP8266 that matches your available memory.
You can check the memory size of your ESP8266 using ESPTool, see here for further information.
Use the following command to report the details of your ESP8266, replacing <port> with the port that the board is connected to.
esptool.py -p <port> -c esp8266 flash_id
You can download the various versions of Micropython for ESP8266 from the following sources:
- ESP8266 boards with 512KB flash memory download page.
- ESP8266 boards with 1MB of flash memory download page.
- ESP8266 boards with 2MB or more flash memory download page.
For those of you have familiar with GitHub, you can also download the releases and source code from the official MicroPython page.
The source code is also available to download from the MicroPython downloads page, along with binaries for many other different types of board/microcontroller.
Connect the ESP8266 to USB and Power The Board
The next thing that we need to do is connect the ESP8266 to the computer and power it up.
The easiest scenario here is to use a board that has a built in serial to USB adapter, which can be used for both communication and for powering the board from USB power.
For example when using the Wemos D1 Mini, you can simply connect the board to a USB port on the computer and you are good to go!
There are however some other options for powering the Wemos D1 Mini discussed in this tutorial.
A majority of boards tend to have the USB to serial converter built in and can be powered from USB, so the same should also apply and you can skip to flashing the firmware.
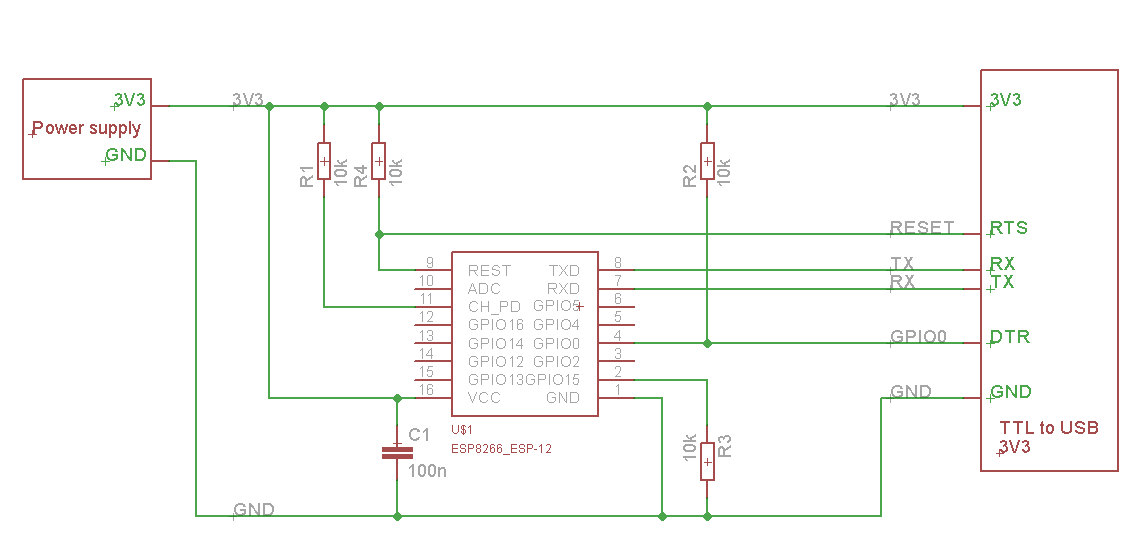
However there are some boards that require a seperate USB to serial adapter.
Usually these adapters can also be used to power the board so long as there are no requirements for current that exceed that of their onboard voltage regulator or the USB power supply.
There is a wealth of information in this article about wiring a USB to serial adapter to an ESP8266 if you need some further assistance.
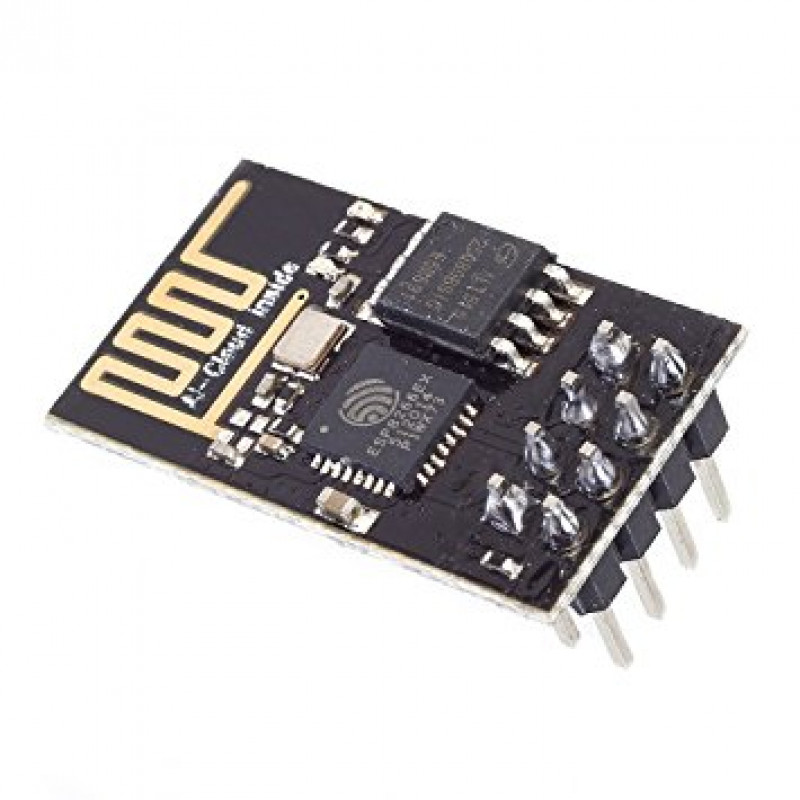
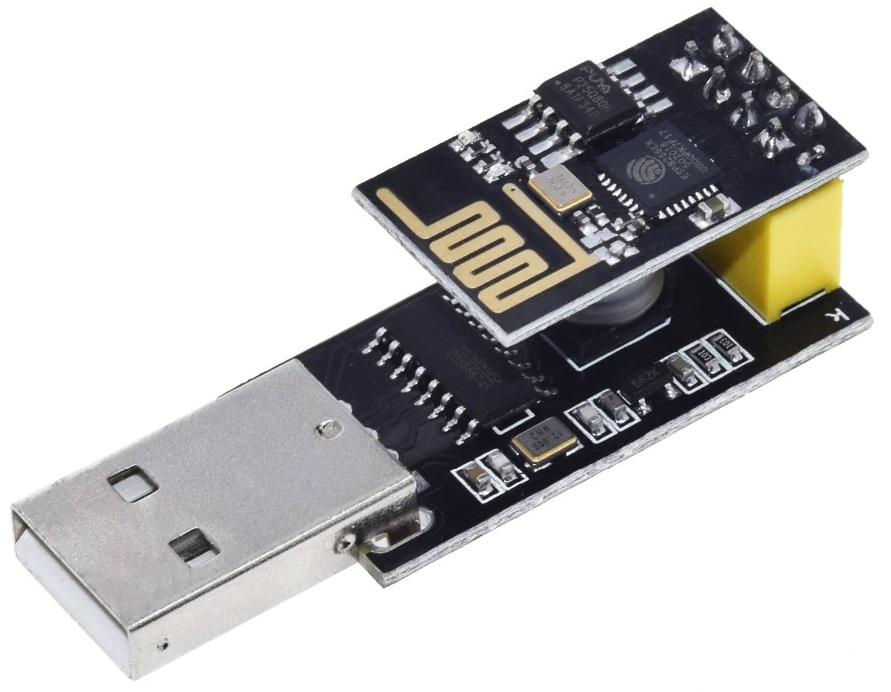
You might be using one of the ubiquitous ESP-01 modules that don’t have an onboard USB to serial adapter and need to be connected to one in order to be connected to a USB port.
These boards have their own adapters designed specifically for this board. Adapters for the ESP-01 are widely available (see Amazon).
Flash the MicroPython Firmware to the ESP8266
At this stage you should now have your ESP8266 connected to the USB port on your computer, the board powered up and the firmware downloaded and ready to go.
If you are au fait with the terminal then you might want to use esptool directly to flash the binary. Take a look here for further information on how to use esptool.py.
However I would recommend using NodeMCU PyFlasher, which is a GUI tool that you can download here. Simply download and install the application for Windows, Linux or Mac.
Note that this tool is actually for flashing NodeMCU to ESP8266. However it is perfectly capable of flashing any .bin file to an ESP8266 target, including the one for MicroPython.
Regarding MacOS releases of PyFlasher, I can confirm that the Mac OS Catalina release worked successfully on my M1 Mac running Monterey, should that be relevant to you.
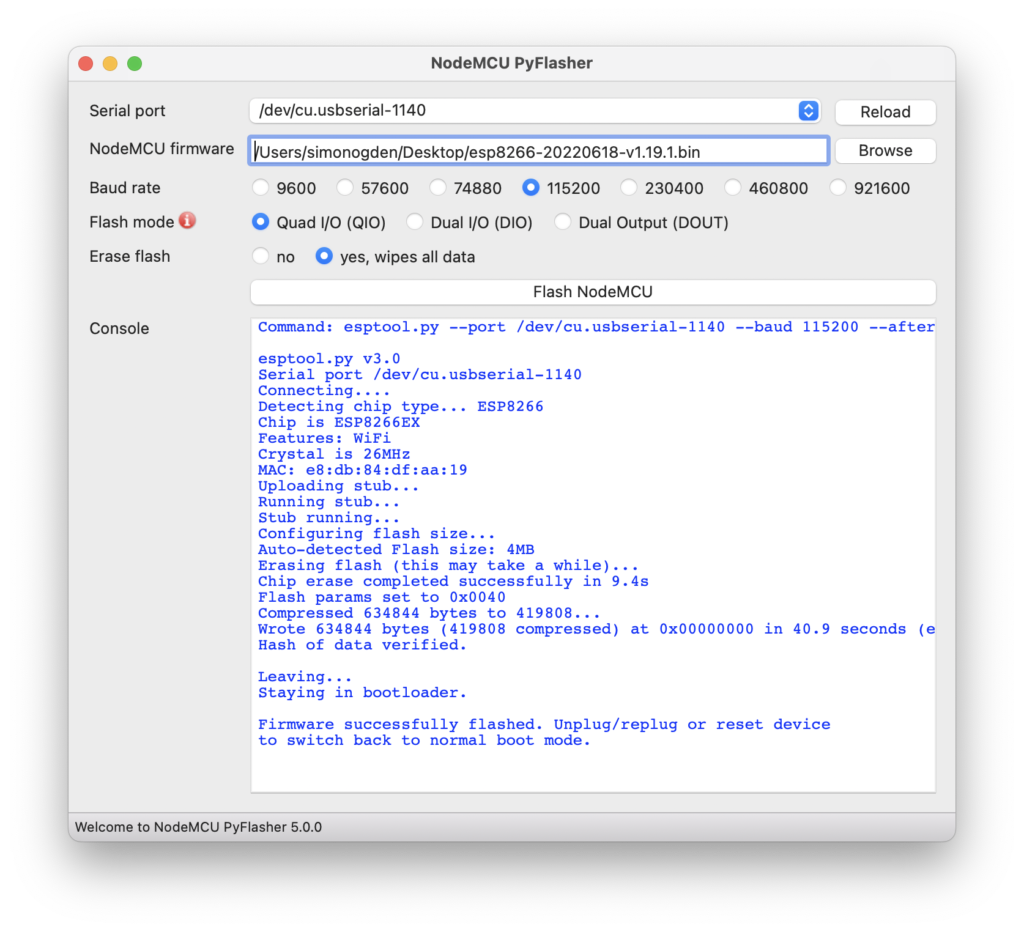
When you run the tool, you will arrive at the following screen:

First you will need to choose the correct serial port for your ESP8266 board. There is an auto-select option that you could use if you are unsure.
Next browse for the firmware (.bin file) that you downloaded earlier. You can leave all of the other options set to the default value.
There should be no issues flashing with the default baud rate of 115200.
Most ESP8266 should support QIO flash mode but if you encounter difficulties, you could also try on DIO mode.
Setting erase flash to yes would also be recommended.
When you are ready, go ahead and click Flash NodeMCU to flash the MicroPython .bin file.
Connect to the MicroPython Serial Prompt
Now that we have successfully flashed the MicroPython firmware to our ESP8266, we should be able to access the MicroPython prompt, also known as REPL.
REPL stands for Read Evaluate Print Loop and it is the name given to the interactive prompt that can be accessed on the ESP8266.
REPL can be accessed via the serial port on the ESP8266:
- GPIO1 = Tx
- GPIO3 = Rx
This very likely corresponds to the USB to serial interface that you just used to flash the firmware. In order words you do not have to do anything with the hardware.
Simply load up a suitable terminal and connect to the USB to serial adapter that you just used to flash the firmware.
There are several methods that you can use to connect to the MicroPython prompt:
- Using an Online Serial Terminal to Connect to MicroPython
- Using the Arduino Serial Console to Connect to MicroPython
- How to Connect to MicroPython Using Windows
- How to Connect to MicroPython Using Linux or Mac
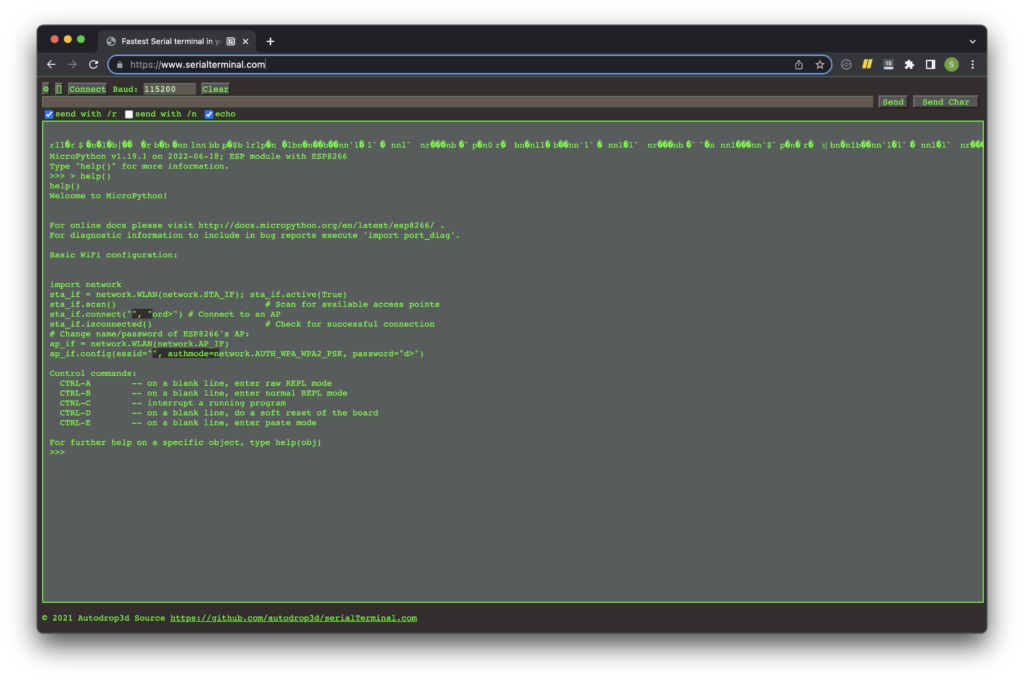
Using an Online Serial Terminal to Connect to MicroPython
If you are using Chrome browser, the quickest and easiest way to connect to the MicroPython prompt is by using an online serial terminal.
Simply enter the baud rate as 115200 to match that of MicroPython and click connect.
To enter commands, type them into the box at the top and click send.
Using the Arduino Serial Console to Connect to MicroPython
Another easy way to do this is just open the Arduino serial console and set the baud rate to 115200:
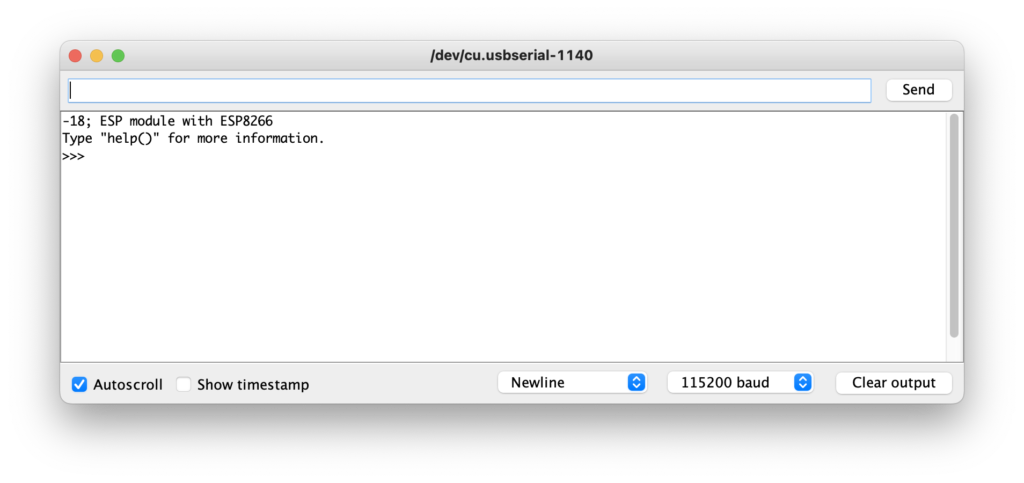
The Arduino environment is however not likely to be the optimum solution. What would work better would be to use a serial terminal program.
How to Connect to MicroPython Using Windows
Unfortunately Windows does not have an out-of-the-box solution for connecting to a serial terminal. There are however plenty of free third party solutions.
The most popular solution is to download PuTTY, which is a completely free and open source.
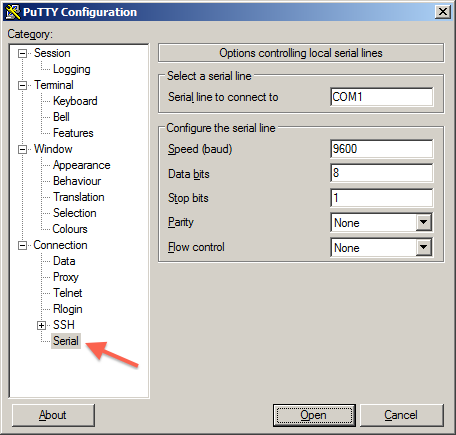
It is very straightforward to connect to a serial terminal with PuTTY. There is a quick and easy guide here that shows how to connect to a serial port:
First, open the serial configuration in PuTTY and change the baud from 9600 to 115200. Choose your ESP8266 port in the select a serial line section.
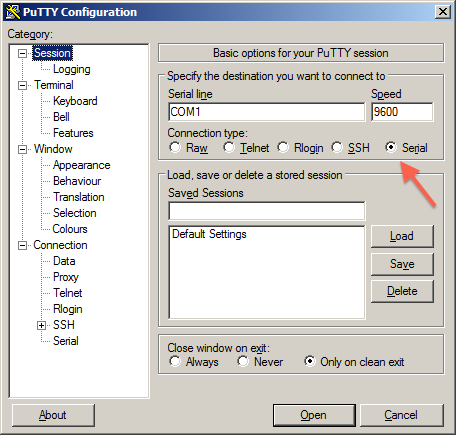
Next click on session and choose serial. Click open to connect to your ESP8266.
How to Connect to MicroPython Using Linux or Mac
Linux and Mac users can use the native terminal to connect to MicroPython, which is the quickest and most simple way.
This is done using screen, a terminal utility program that is capable of connecting to the serial port.
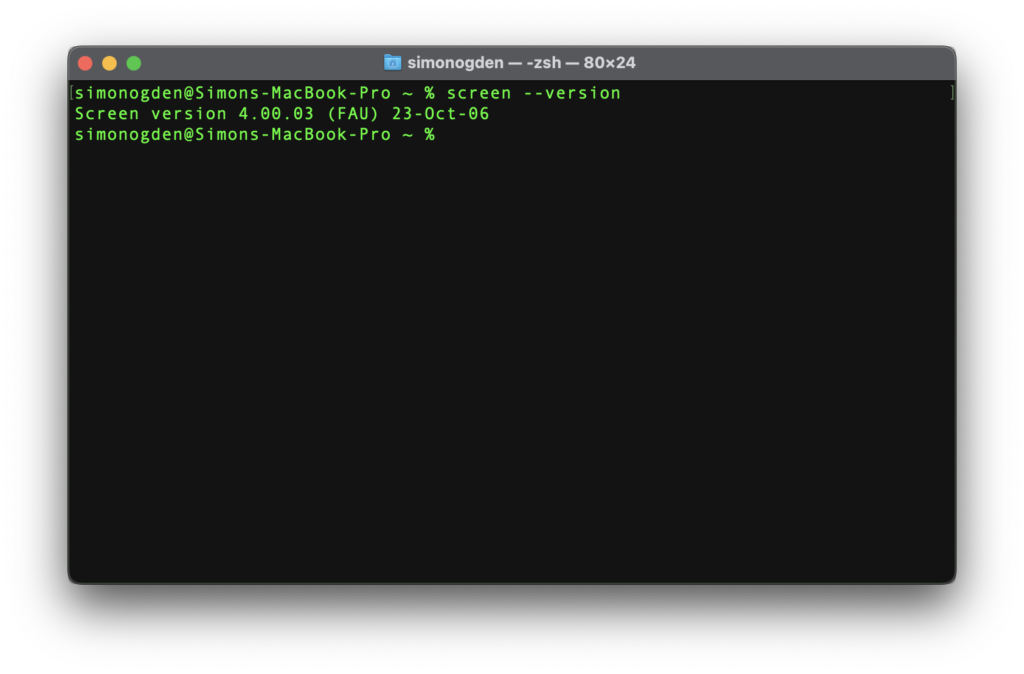
You will very likely already have screen installed, you can check by confirming the response from the following command:
screen --version
If you need to install screen, you can do so using the package manager:
Install screen with Linux with Apt
sudo apt update
sudo apt install screen
Install screen with Mac with Homebrew
Mac users may first need to install the Homebrew package manager. You will then be able to install screen using the following command:
brew install screen
Connecting to the MicroPython Prompt using Screen
In order to connect to the ESP8266 we will first list the available ports with the following command:
ls /dev/tty.*

Here we can see /dev/tty.usbserial-1140 which is the connected ESP8266 board. Note that the board must be connected in order for it to show in the list.
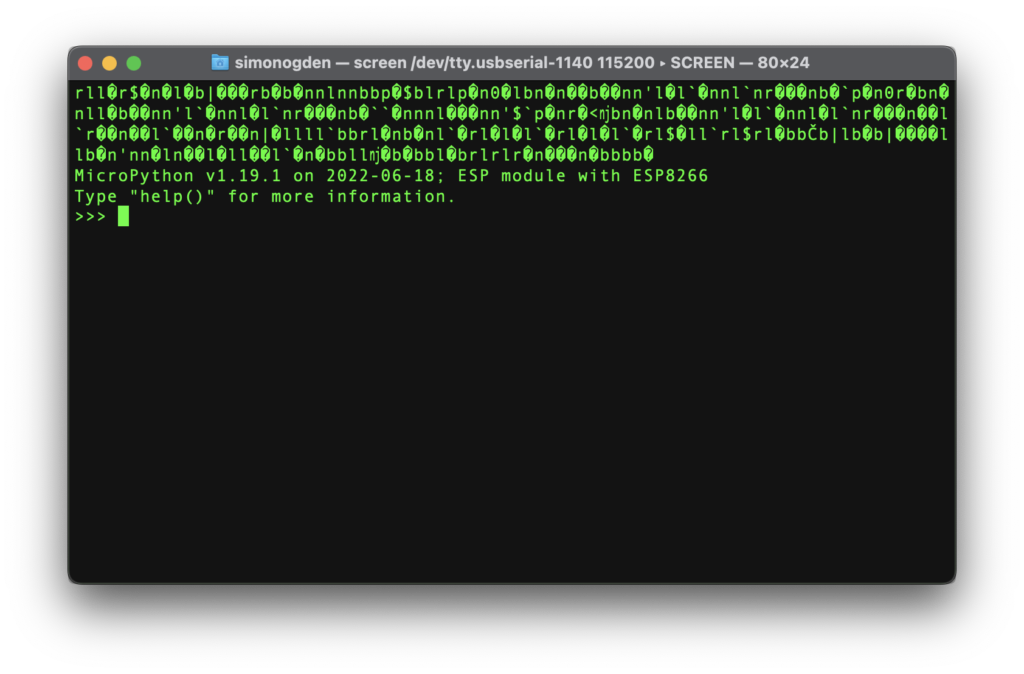
Now we can use screen to connect to MicroPython on the ESP8266.
Note that you may need to reset the board in order to see the initial prompt. Alternatively you can just press the enter key to display the >>> prompt.
If you wish to exit screen without killing the terminal, you can press control + A and then K to exit screen.
Run the MicroPython “Hello World” Example
Now that we have MicroPython up and running on our ESP8266, we can start entering some commands!
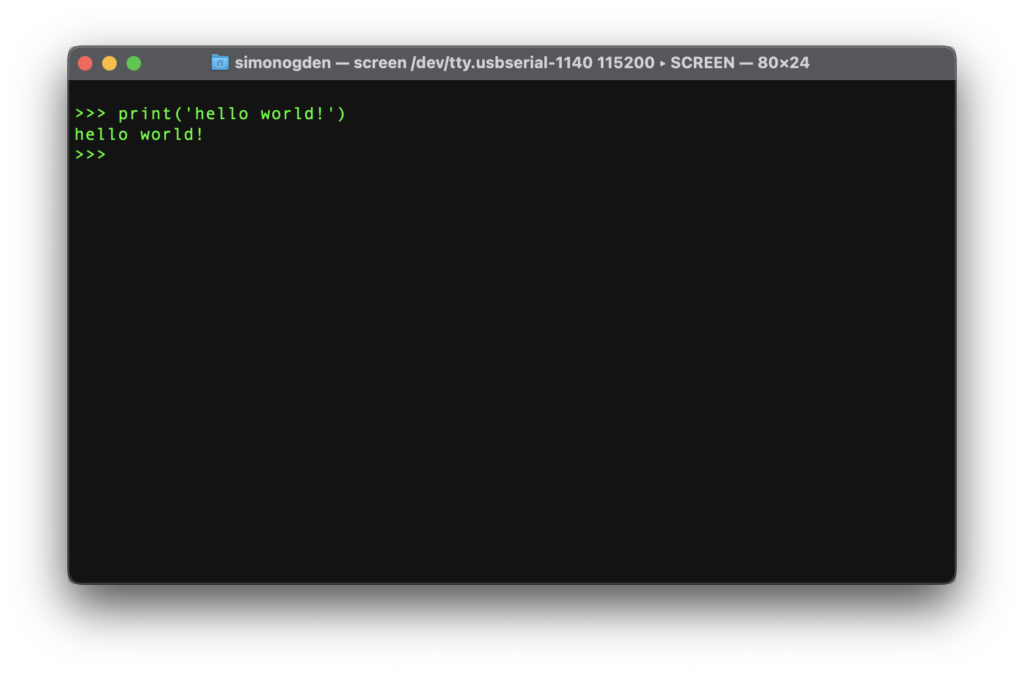
Of course the first thing to try is the hello world example. Enter the following at the MicroPython prompt:
print('hello world!')
This command will echo “hello world” in the console.
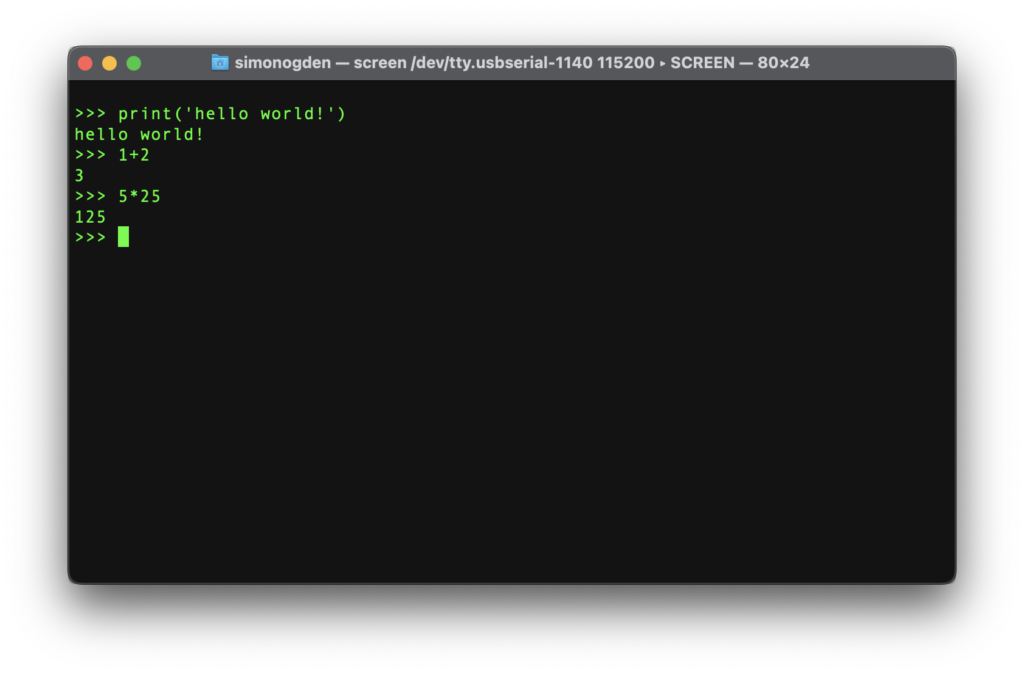
You can also try some calculations, such as 1+2 or 5*25. MicroPython will perform these calculations and output the results. Awesome!
Whats Next?
You should now have successfully downloaded and flashed MicroPython to your ESP8266 and executed some basic commands!
In the next tutorial we will cover the following topics as well as expand on what we have learned here:
- Learn how to access the REPL prompt with a web browser using WiFi.
- Learn how to manage files and directories in the ESP8266 flash memory.
- Learn how to import and use the
osstandard library. - I reveal what is the best IDE for beginners to use for programming MicroPython!
Be sure to check out the next totally free lesson in my MicroPython training series, click the button below to get started!
Thanks so much for visiting my site! If this article helped you achieve your goal and you want to say thanks, you can now support my work by buying me a coffee. I promise I won't spend it on beer instead... 😏


