In this article you will learn how to run a supervised Home Assistant installation on Ubuntu Desktop Linux. The supervised installation of Home Assistant is fully managed and includes the add-ons store.
This tutorial will suit those who have Ubuntu Desktop and wish to run Home Assistant Supervised right from the desktop.
For those of you who are looking to build a dedicated server for Home Assistant (for example without a monitor, or “headless”), you should use Debian Linux instead. Check out this tutorial for a supervised installation on Debian, suitable for headless or GUI machines.
Can Home Assistant Run on Ubuntu Linux?
Home Assistant Supervised cannot be run natively on Ubuntu, however it is possible to run the Home Assistant OS using VirtualBox. This will give you a fully functioning Home Assistant Supervised that will run in Ubuntu in a virtualized environment.
The only operating systems that natively support Home Assistant Supervised are Debian and the Home Assistant OS.
It is technically possible to run the Home Assistant Core container directly on Ubuntu using Docker, but this will exclude the add-ons store and leave you to manage add-ons and updates yourself.
You can find out how to do this kind of installation in this tutorial, however it is only recommended for Linux experts.
Prerequisite
In order to run Home Assistant Supervised on Ubuntu, we will use a pre-installed disk image containing the Home Assistant Operating System (OS). This is a stripped down version of Linux designed specifically for running Home Assistant.
Your main Ubuntu operating system will therefore be known as the host OS and Home Assistant will be known as the guest OS.
You will need a computer with Ubuntu Desktop installed. In this tutorial we will be using Ubuntu Desktop LTS 22.04, which you can download here.
Your system should meet the following minimum requirements:
- 4GB or more RAM – 2GB are recommended as a minimum for the Home Assistant virtual machine and you would be advised to have at least double that amount to serve both the host and guest operating systems.
- 32GB or more disk storage space.
- At least 2 processor cores.
If you are using a fairly modern computer from the last 10 years or so, it is very likely you will have no problems with the system requirements.
They only really become more of a consideration when running Home Assistant on hardware such as a single board computer (SBC).
Installing VirtualBox on Ubuntu
The first thing we need to do is download and install VirtualBox.
You can download VirtualBox for Ubuntu directly from the official site. Make sure you choose the correct version, for example Ubuntu 22.04.
Once VirtualBox has downloaded:
- Open the folder containing the downloaded file and locate the file.
- Right-click the file and choose open with another application > Software Install.
- Click the install button to install VirtualBox.
Create a New VirtualBox Virtual Machine for Home Assistant
Before we can create a new virtual machine to run Home Assistant, we need to download the Home Assistant OS disk image.
Download Home Assistant OS
- Navigate to the latest releases page for Home Assistant OS: https://github.com/home-assistant/operating-system/releases/latest
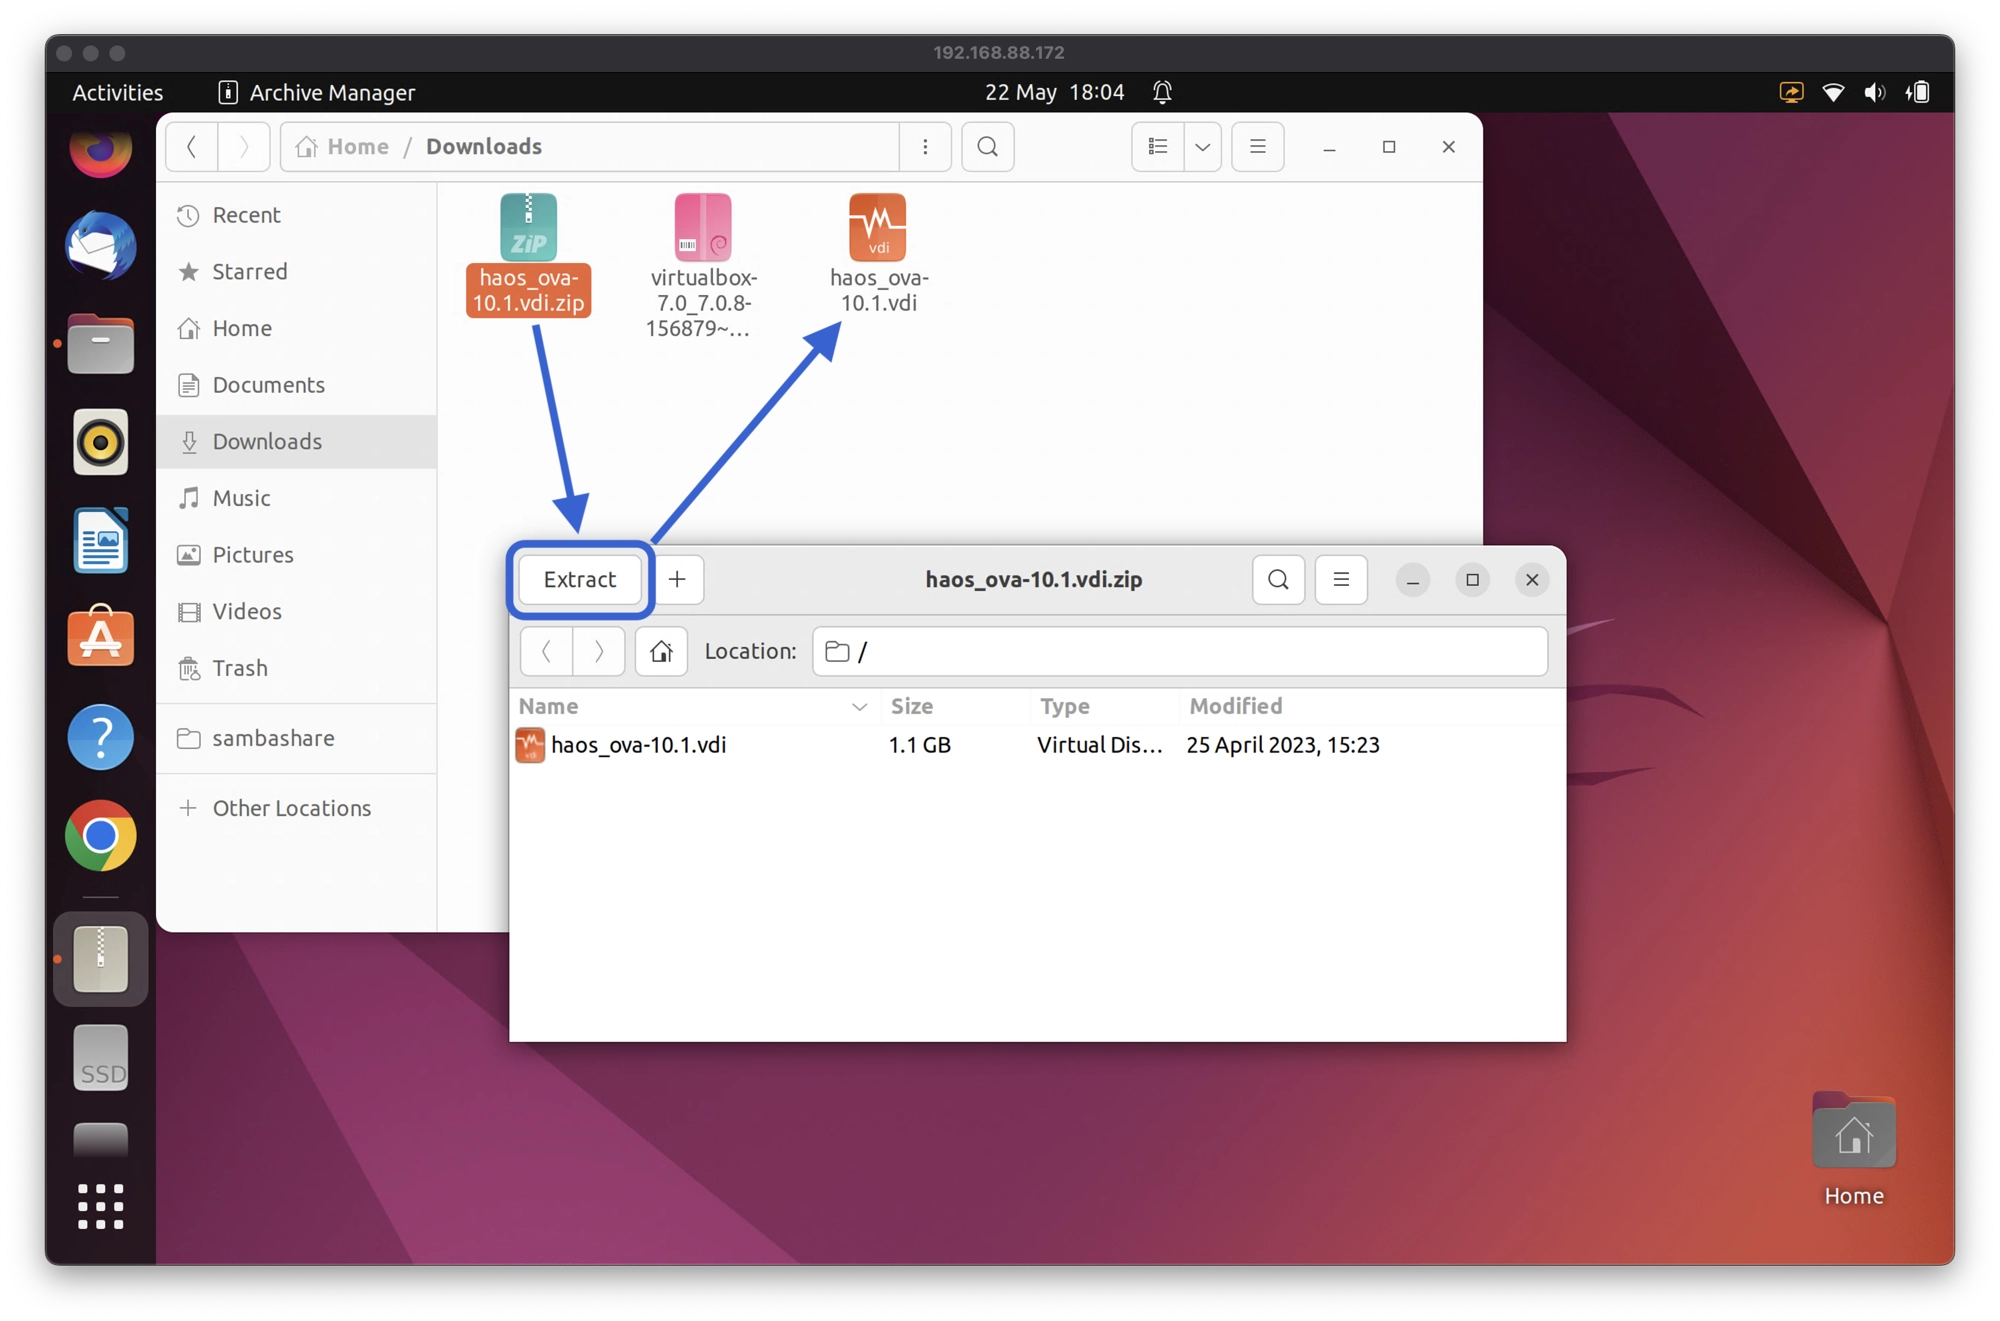
- Scroll down and locate the file haos_ova-x.x.vdi.zip, where x.x is the number of the current latest release. Click the file to download it.
- Once downloaded, navigate to the download folder and double-click the file to extract the disk image haos_ova-x.x.vdi.
Create a new VirtualBox VM
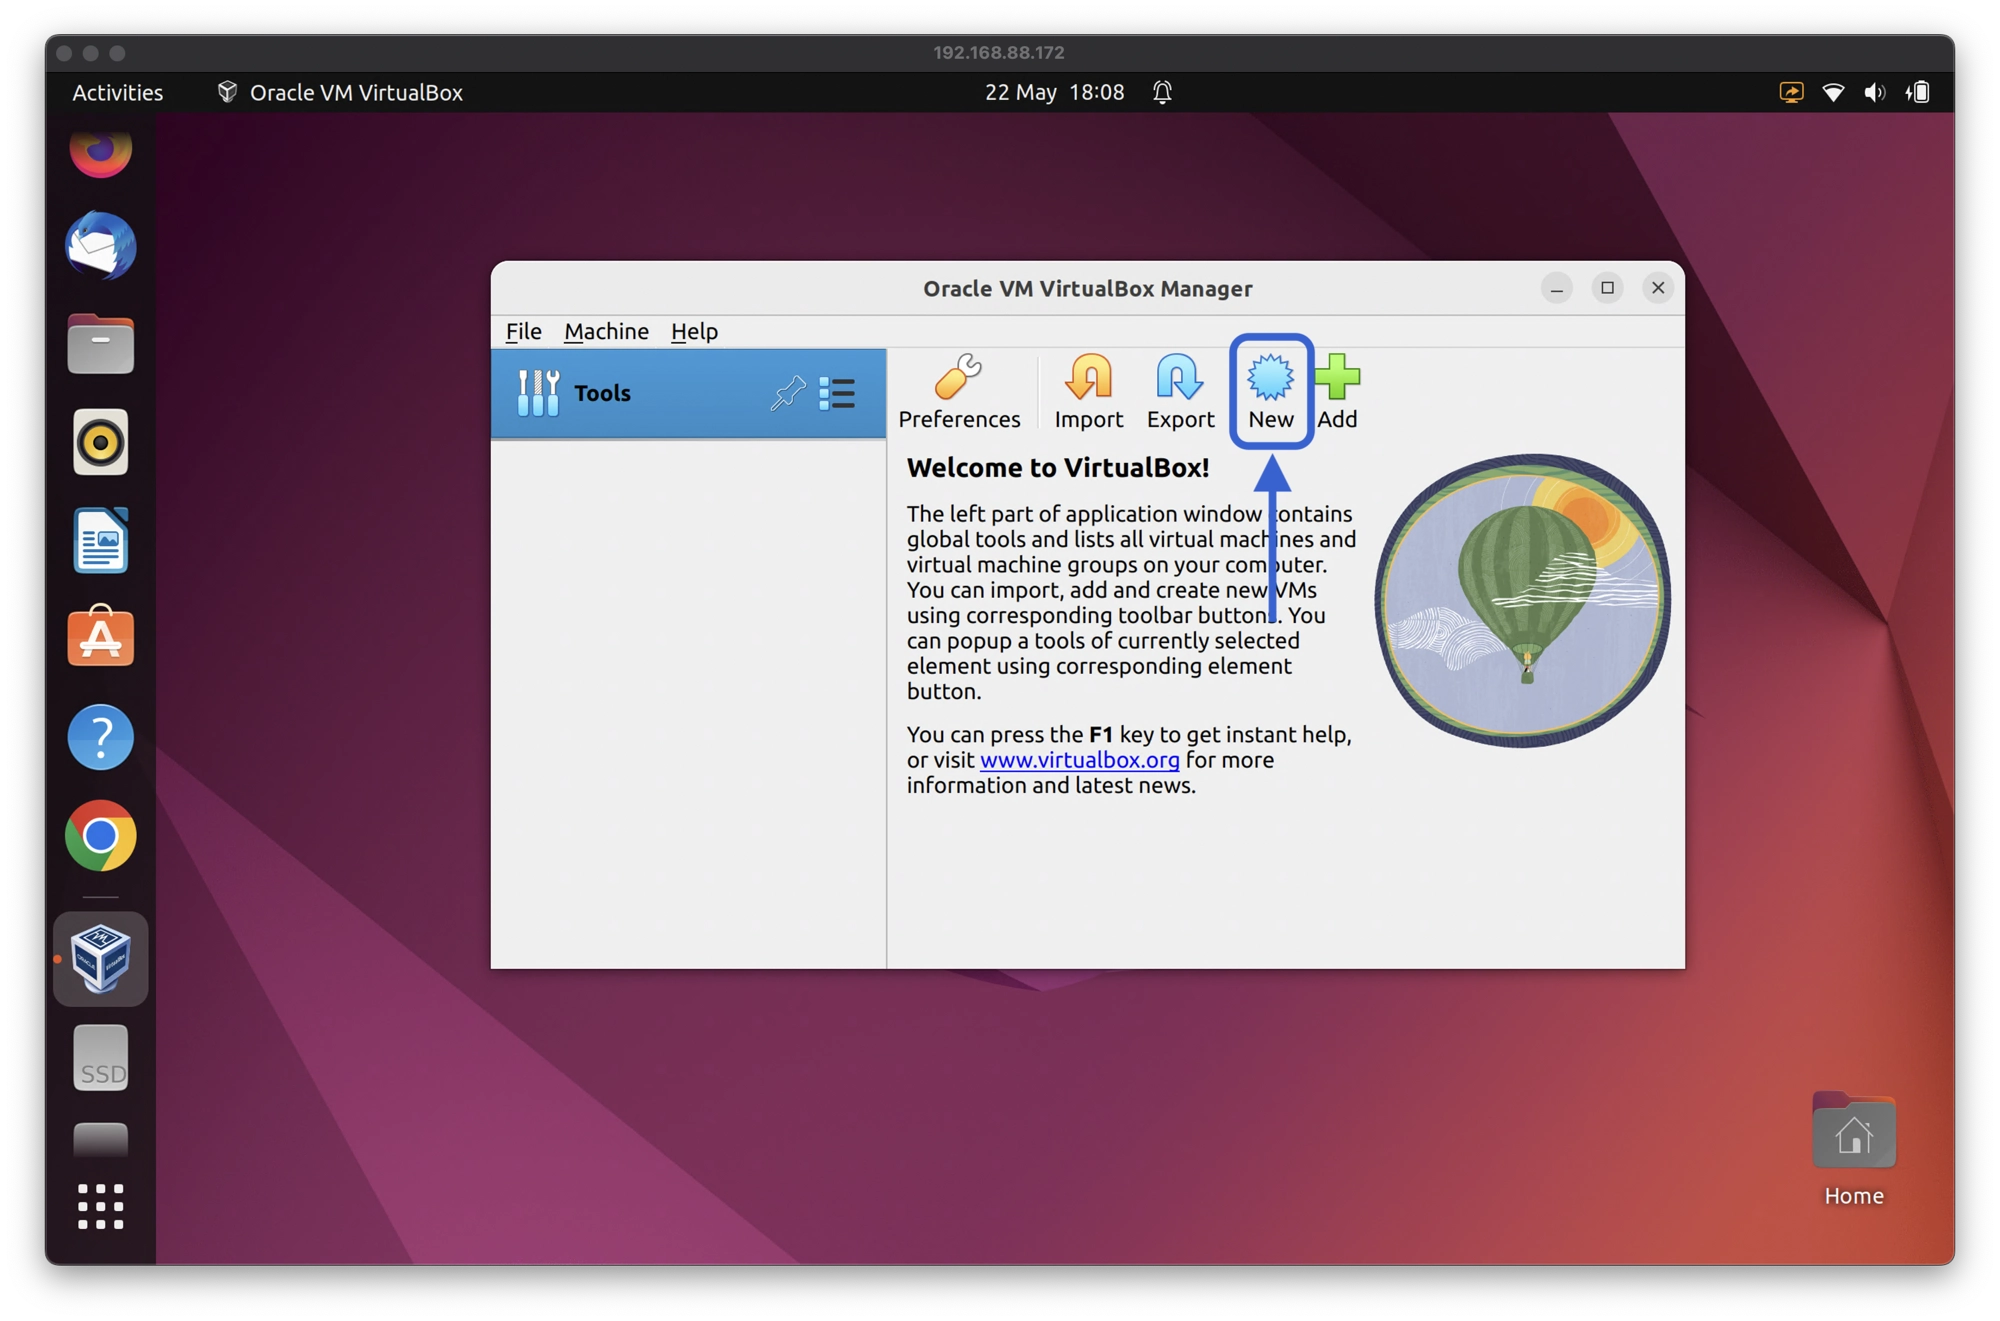
Next, we can create a new virtual machine for running Home Assistant:
- Click the new button in order to create a new virtual machine
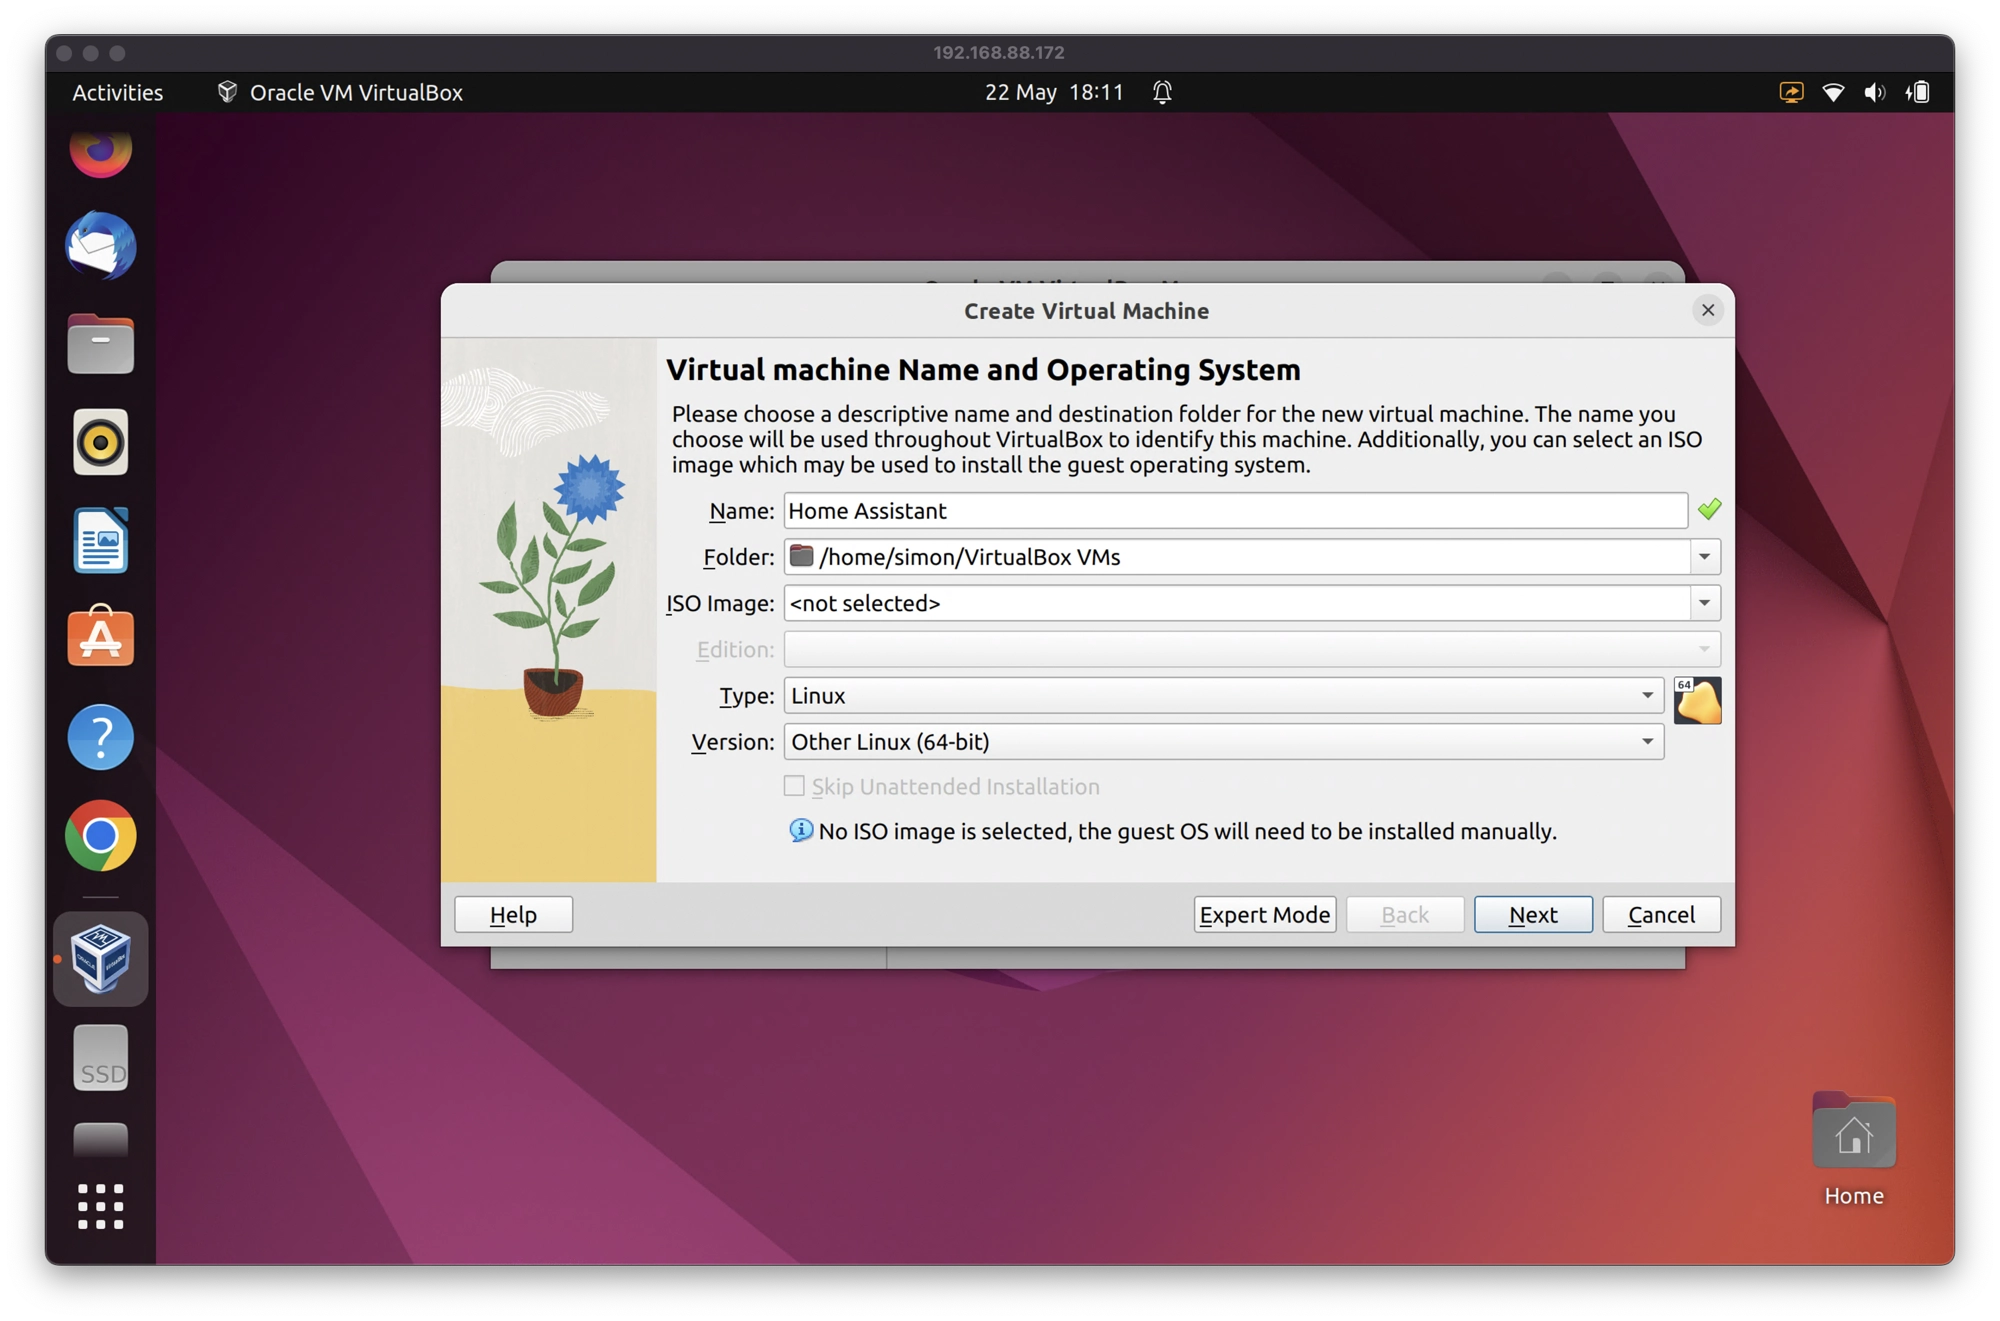
- Name the new VM something like Home Assistant.
- Choose Other Linux (64-bit) for the version.
- Click Next to continue.
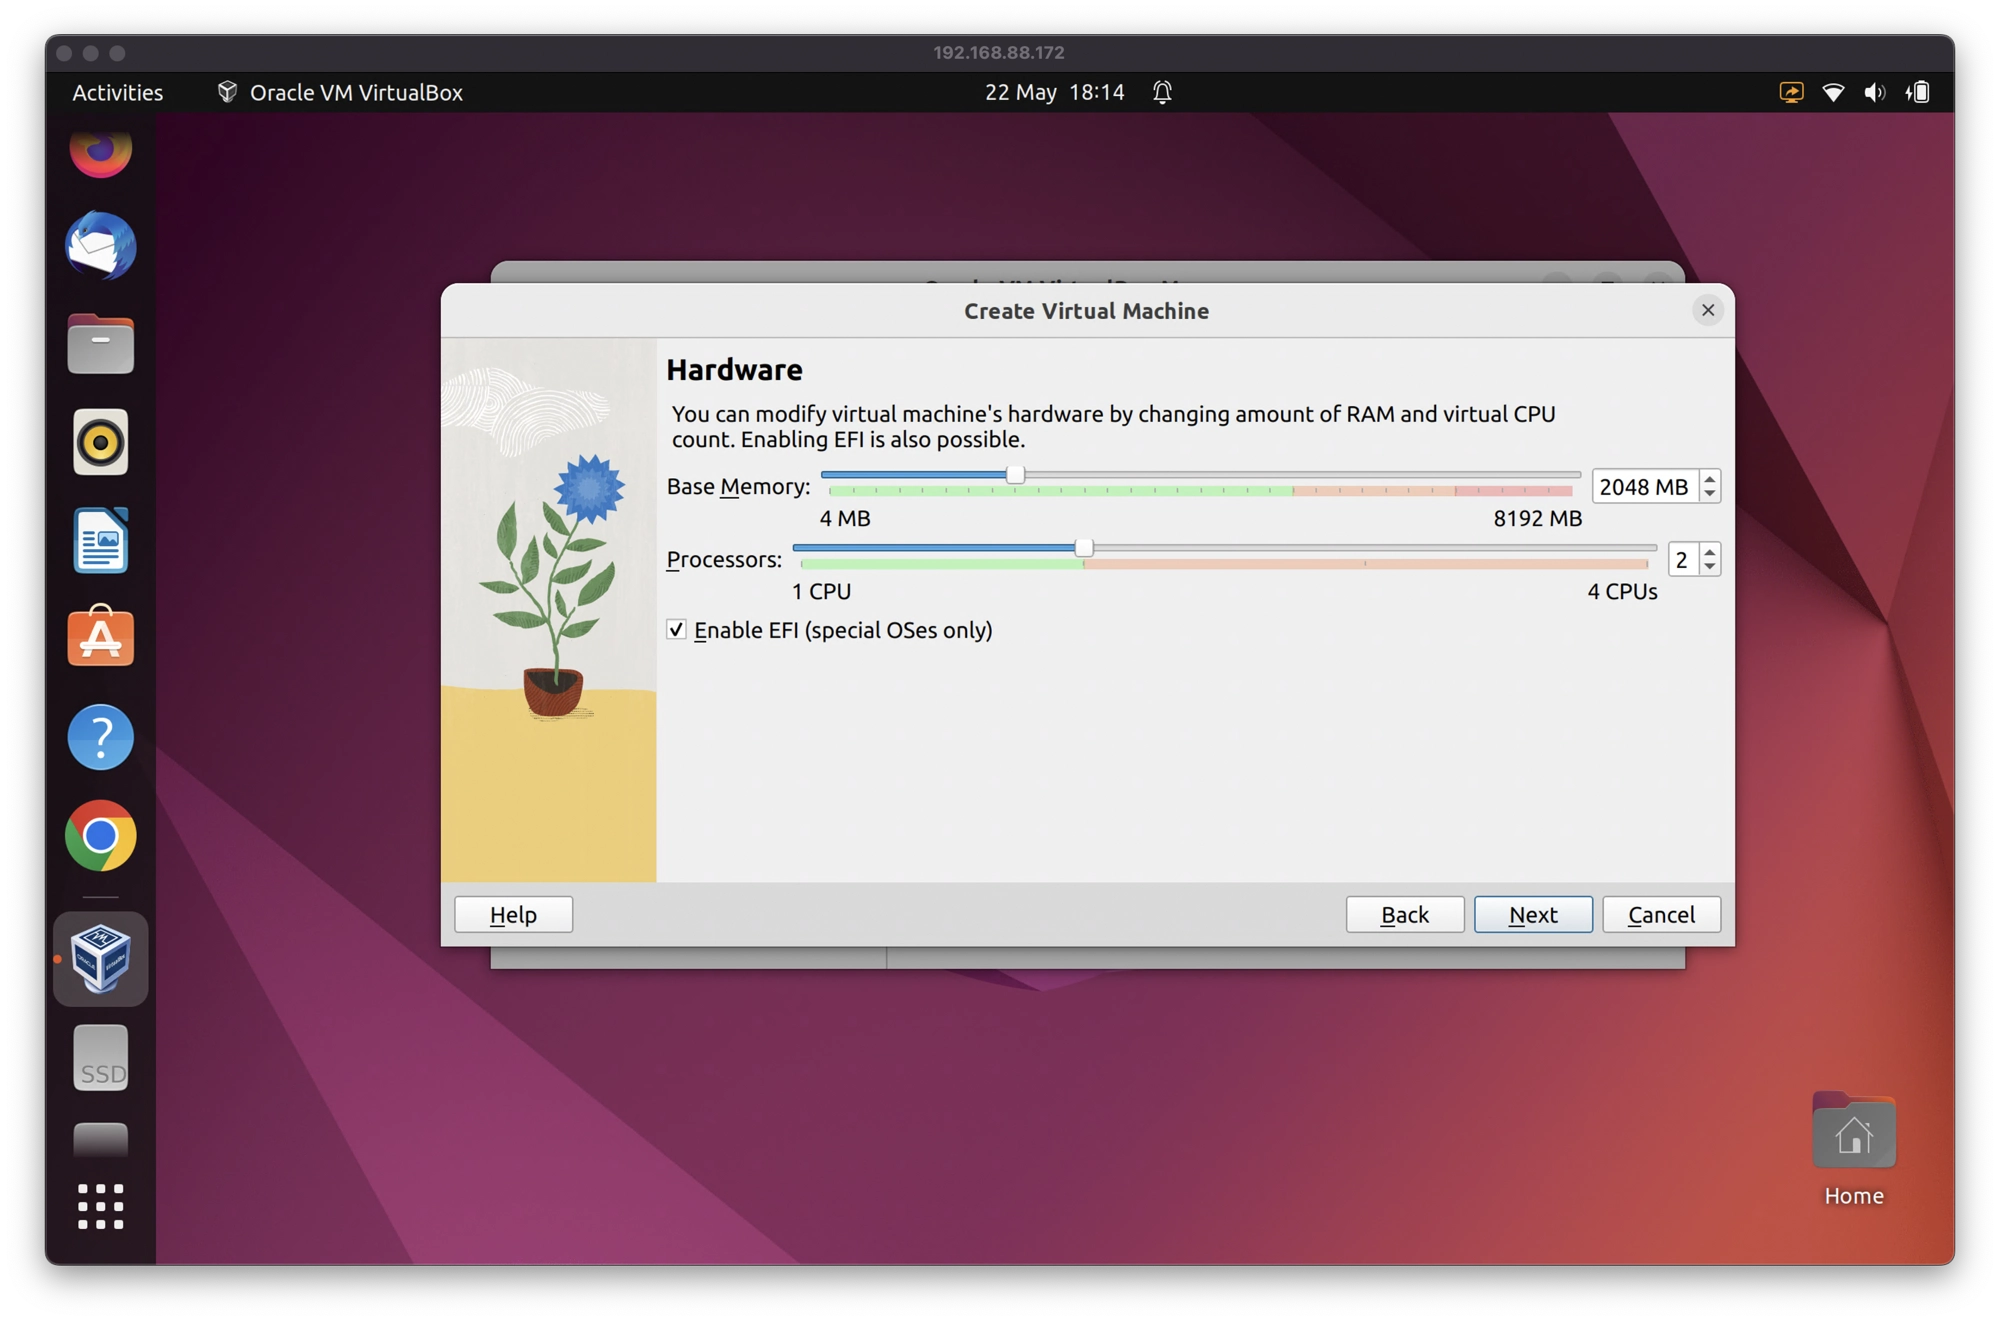
- Choose a minimum of 2GB RAM to meet the Home Assistant OS minimum requirement.
- Choose a minimum of 2 processor cores to meet the Home Assistant OS minimum requirement.
- Make sure Enable EFI (special OSes only) is checked.
- Click Next to continue.
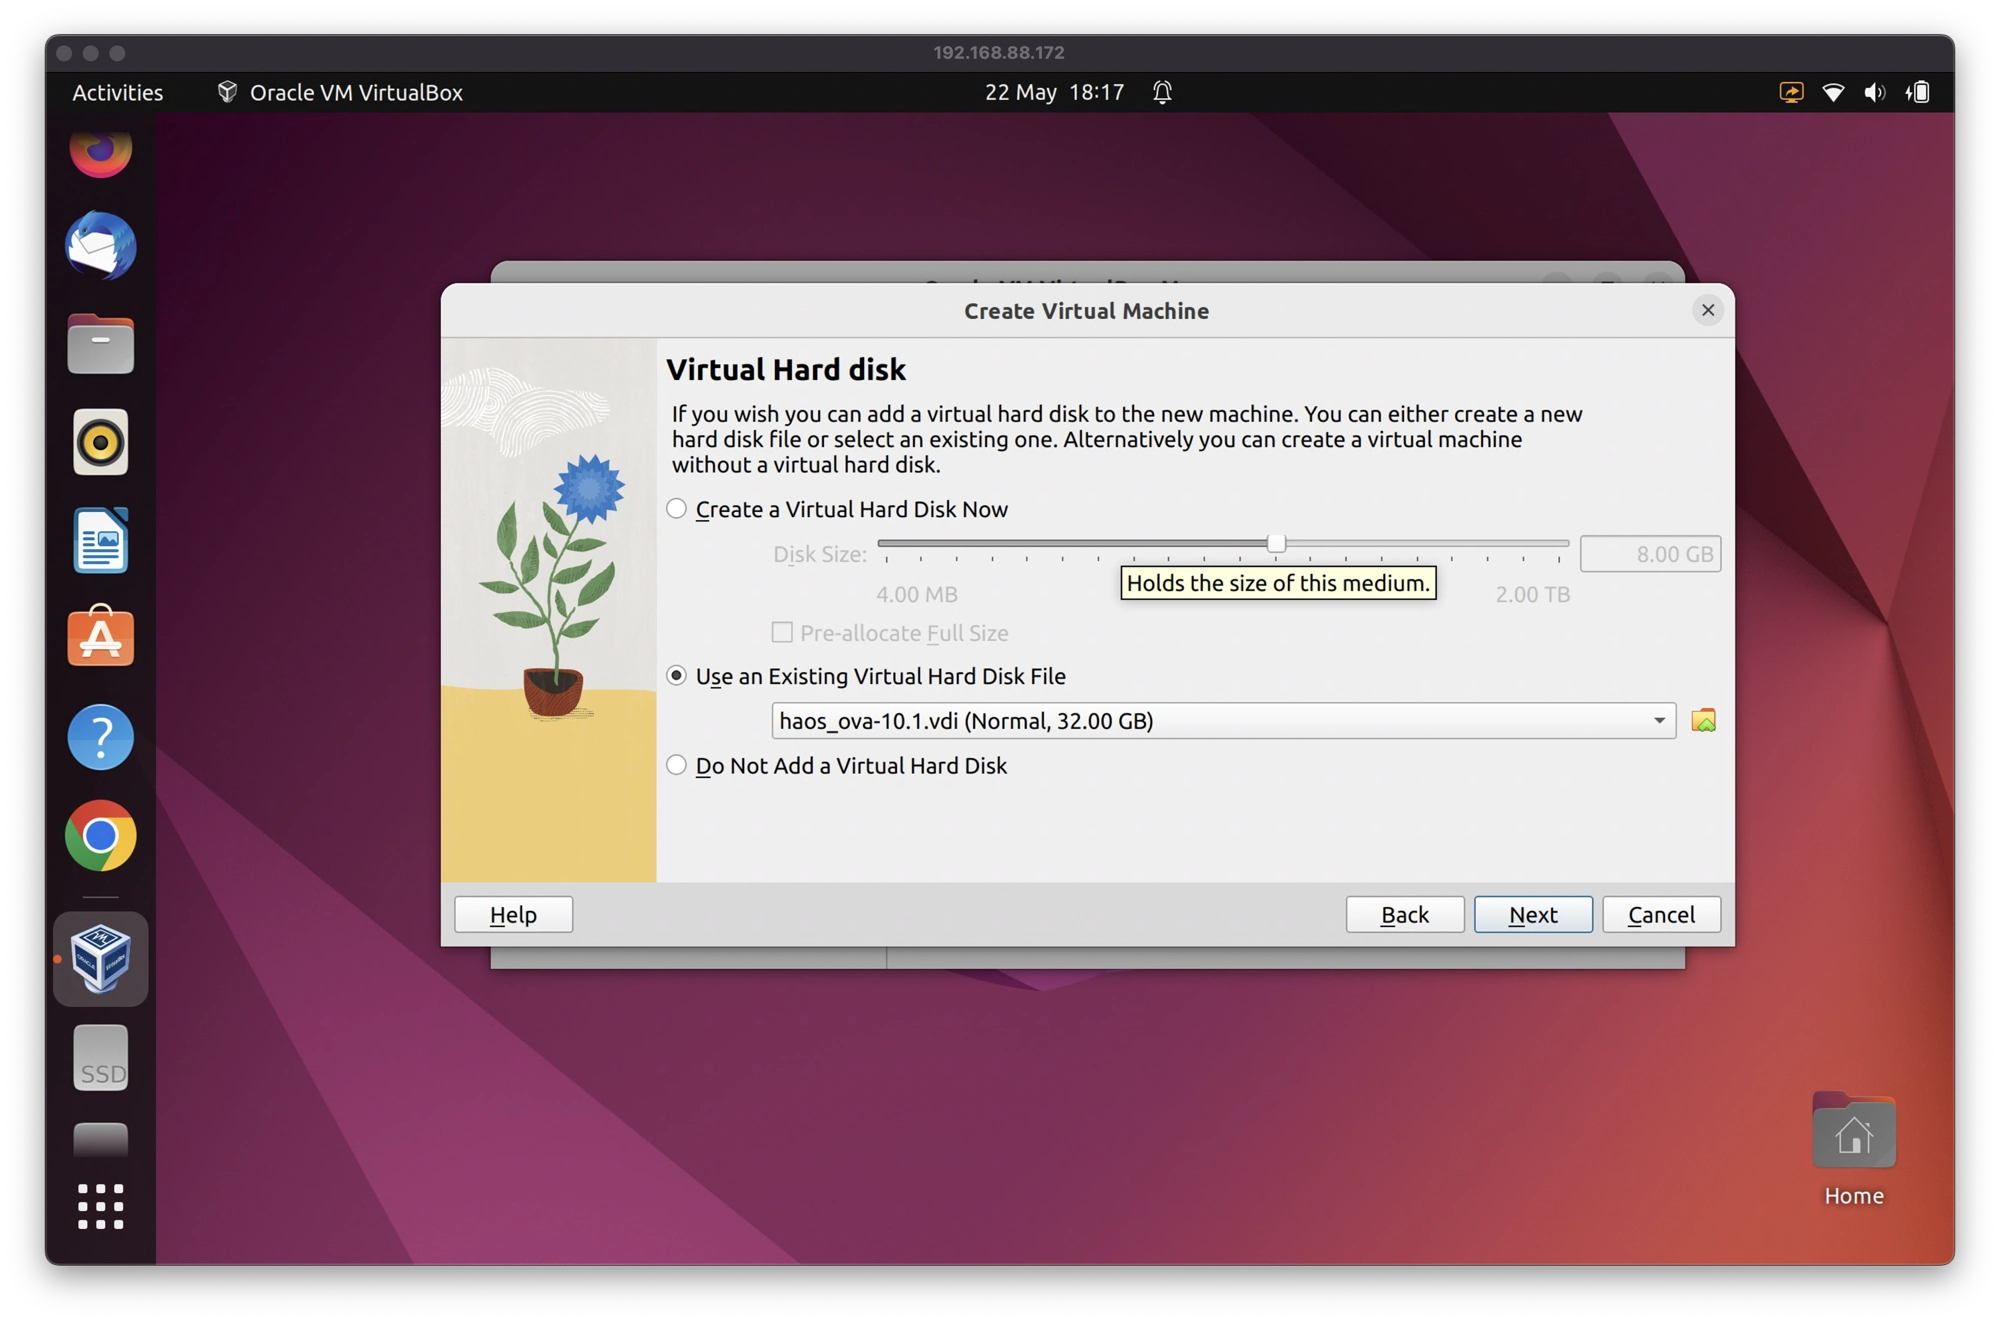
- Choose the option to Use an Existing Virtual Hard Disk File.
- Select the haos_ova-x.x.vdi file that you downloaded and extracted earlier.
- Click Next to continue.
- On the summary page, click Finish to complete the setup.
Configure the VirtualBox VM
Once you have finished the setup wizard, you should see a new VM in the left-hand sidebar. Next, we need to complete some further configuration:
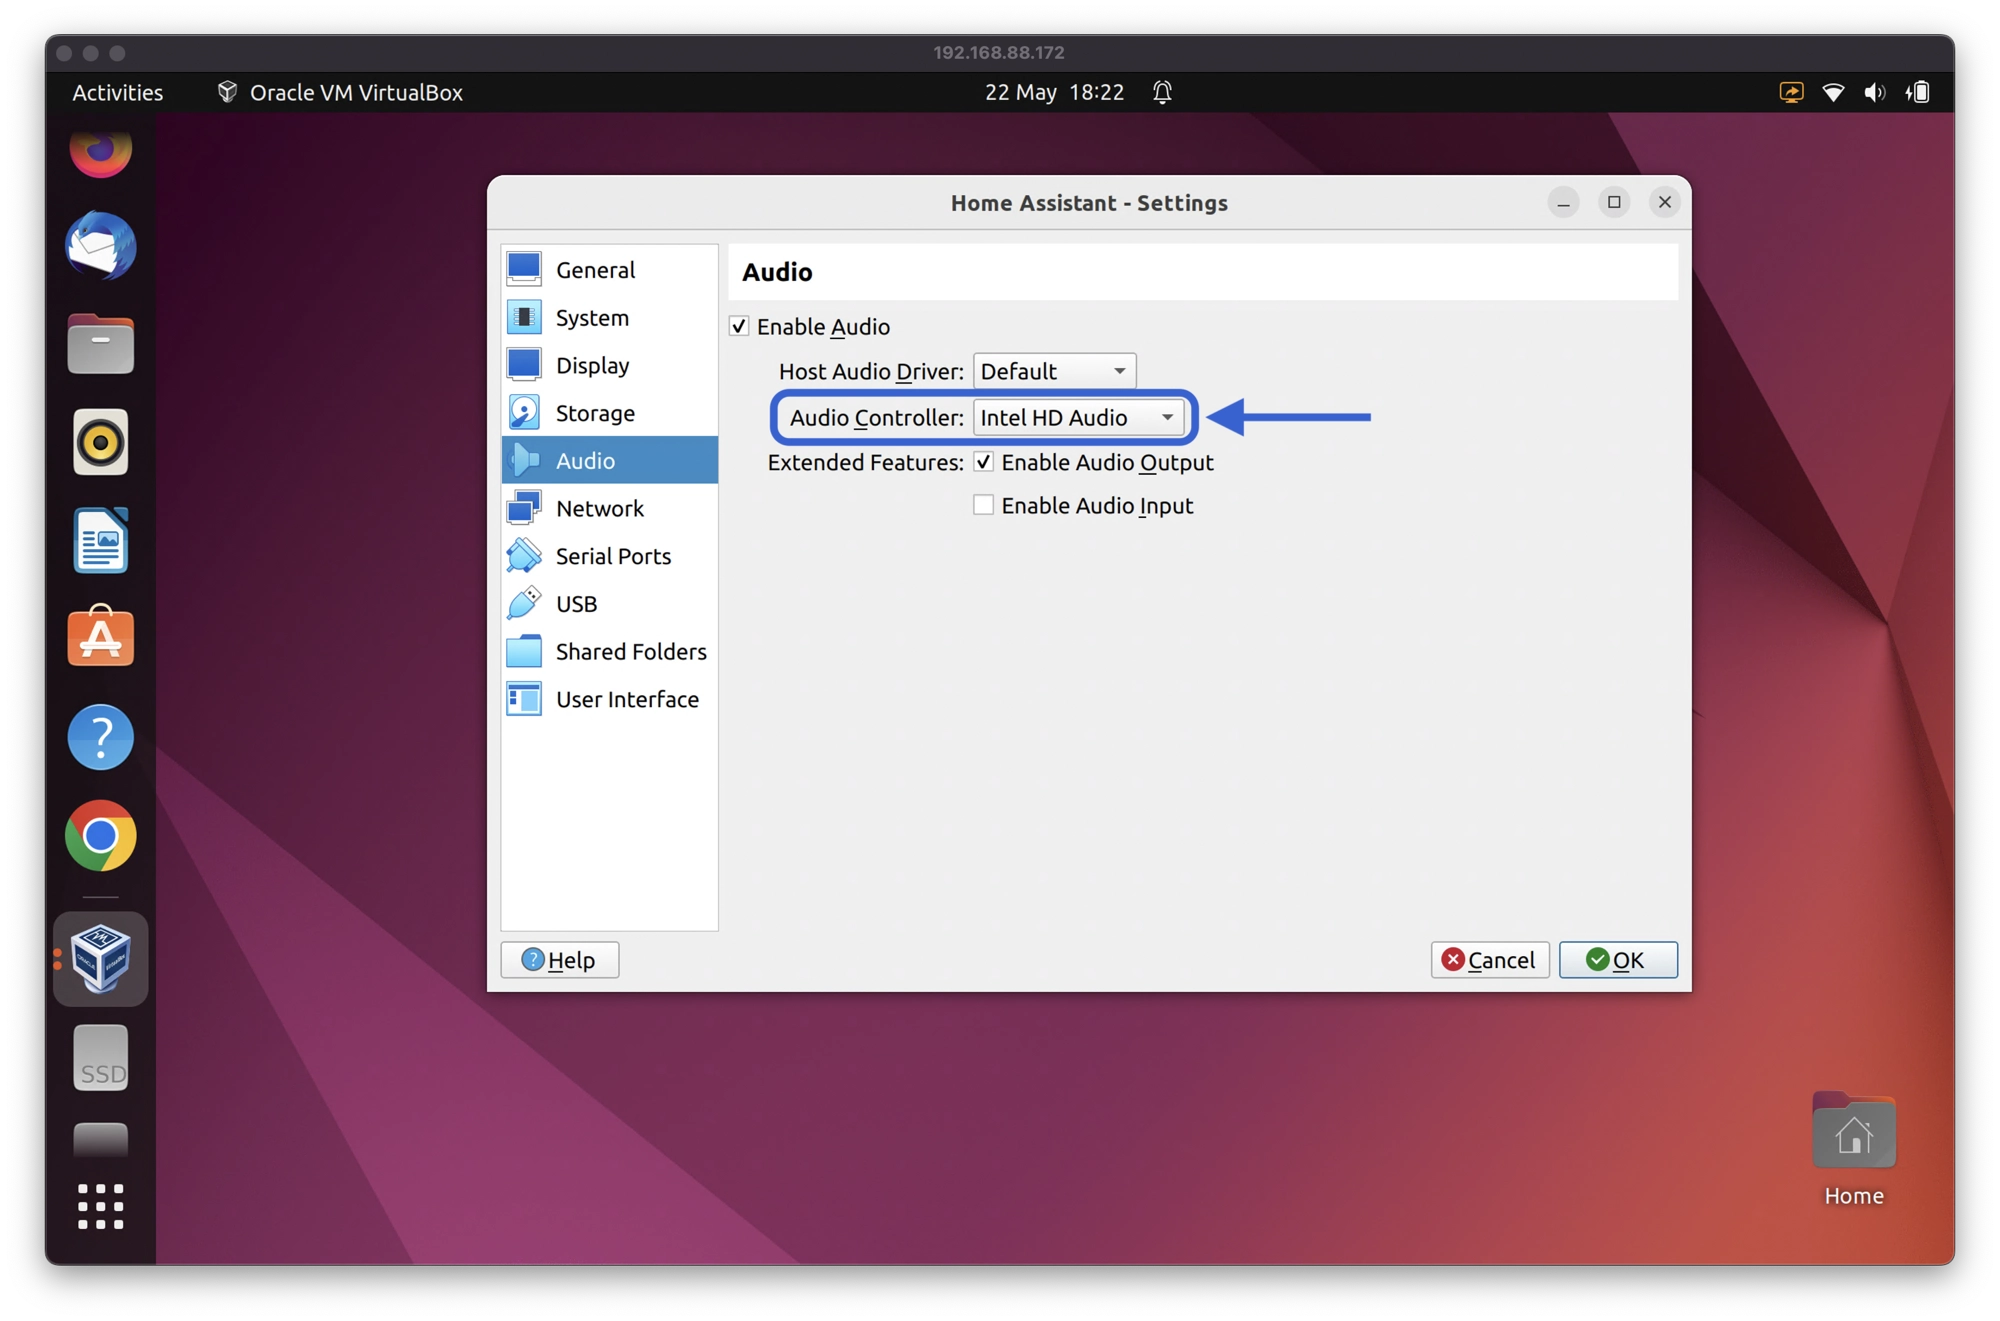
- Right-click the new VM and click settings.
- In the Audio section, change the Audio Controller to Intel HD Audio.
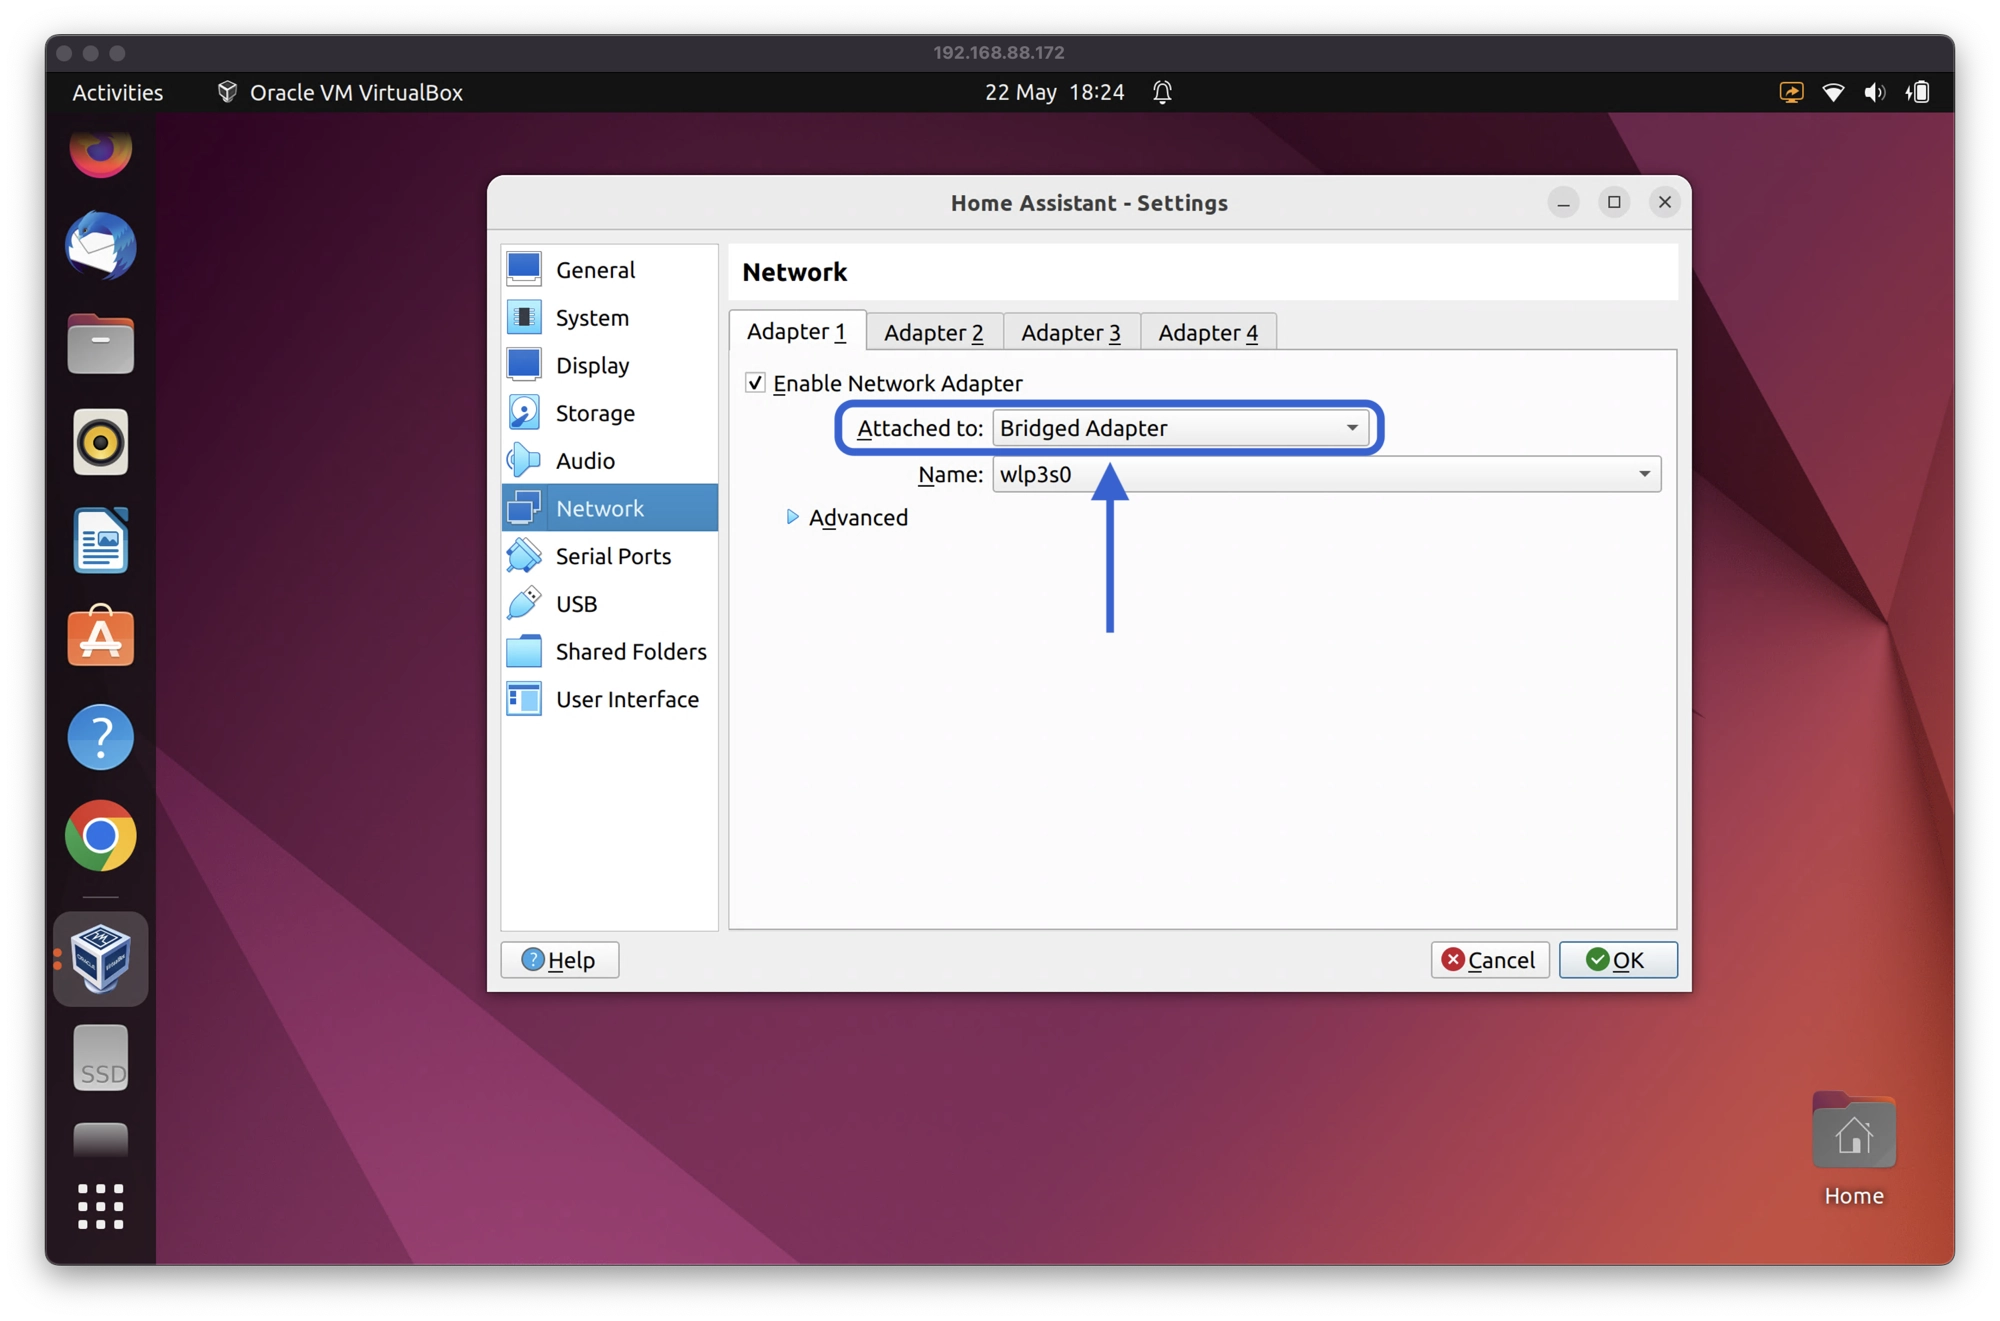
- In the Network section, change the attachment to Bridged Adapter.
- Click OK to accept the changes.
How to Use the Home Assistant Virtual Machine
Now that we have completed the virtual machine configuration, we are ready to launch the virtual machine.
- With the Home Assistant VM selected in the left-hand sidebar, click the Start button.
- A new window will open and Home Assistant OS will begin the boot process. Once complete, you will arrive at the
ha>command prompt.
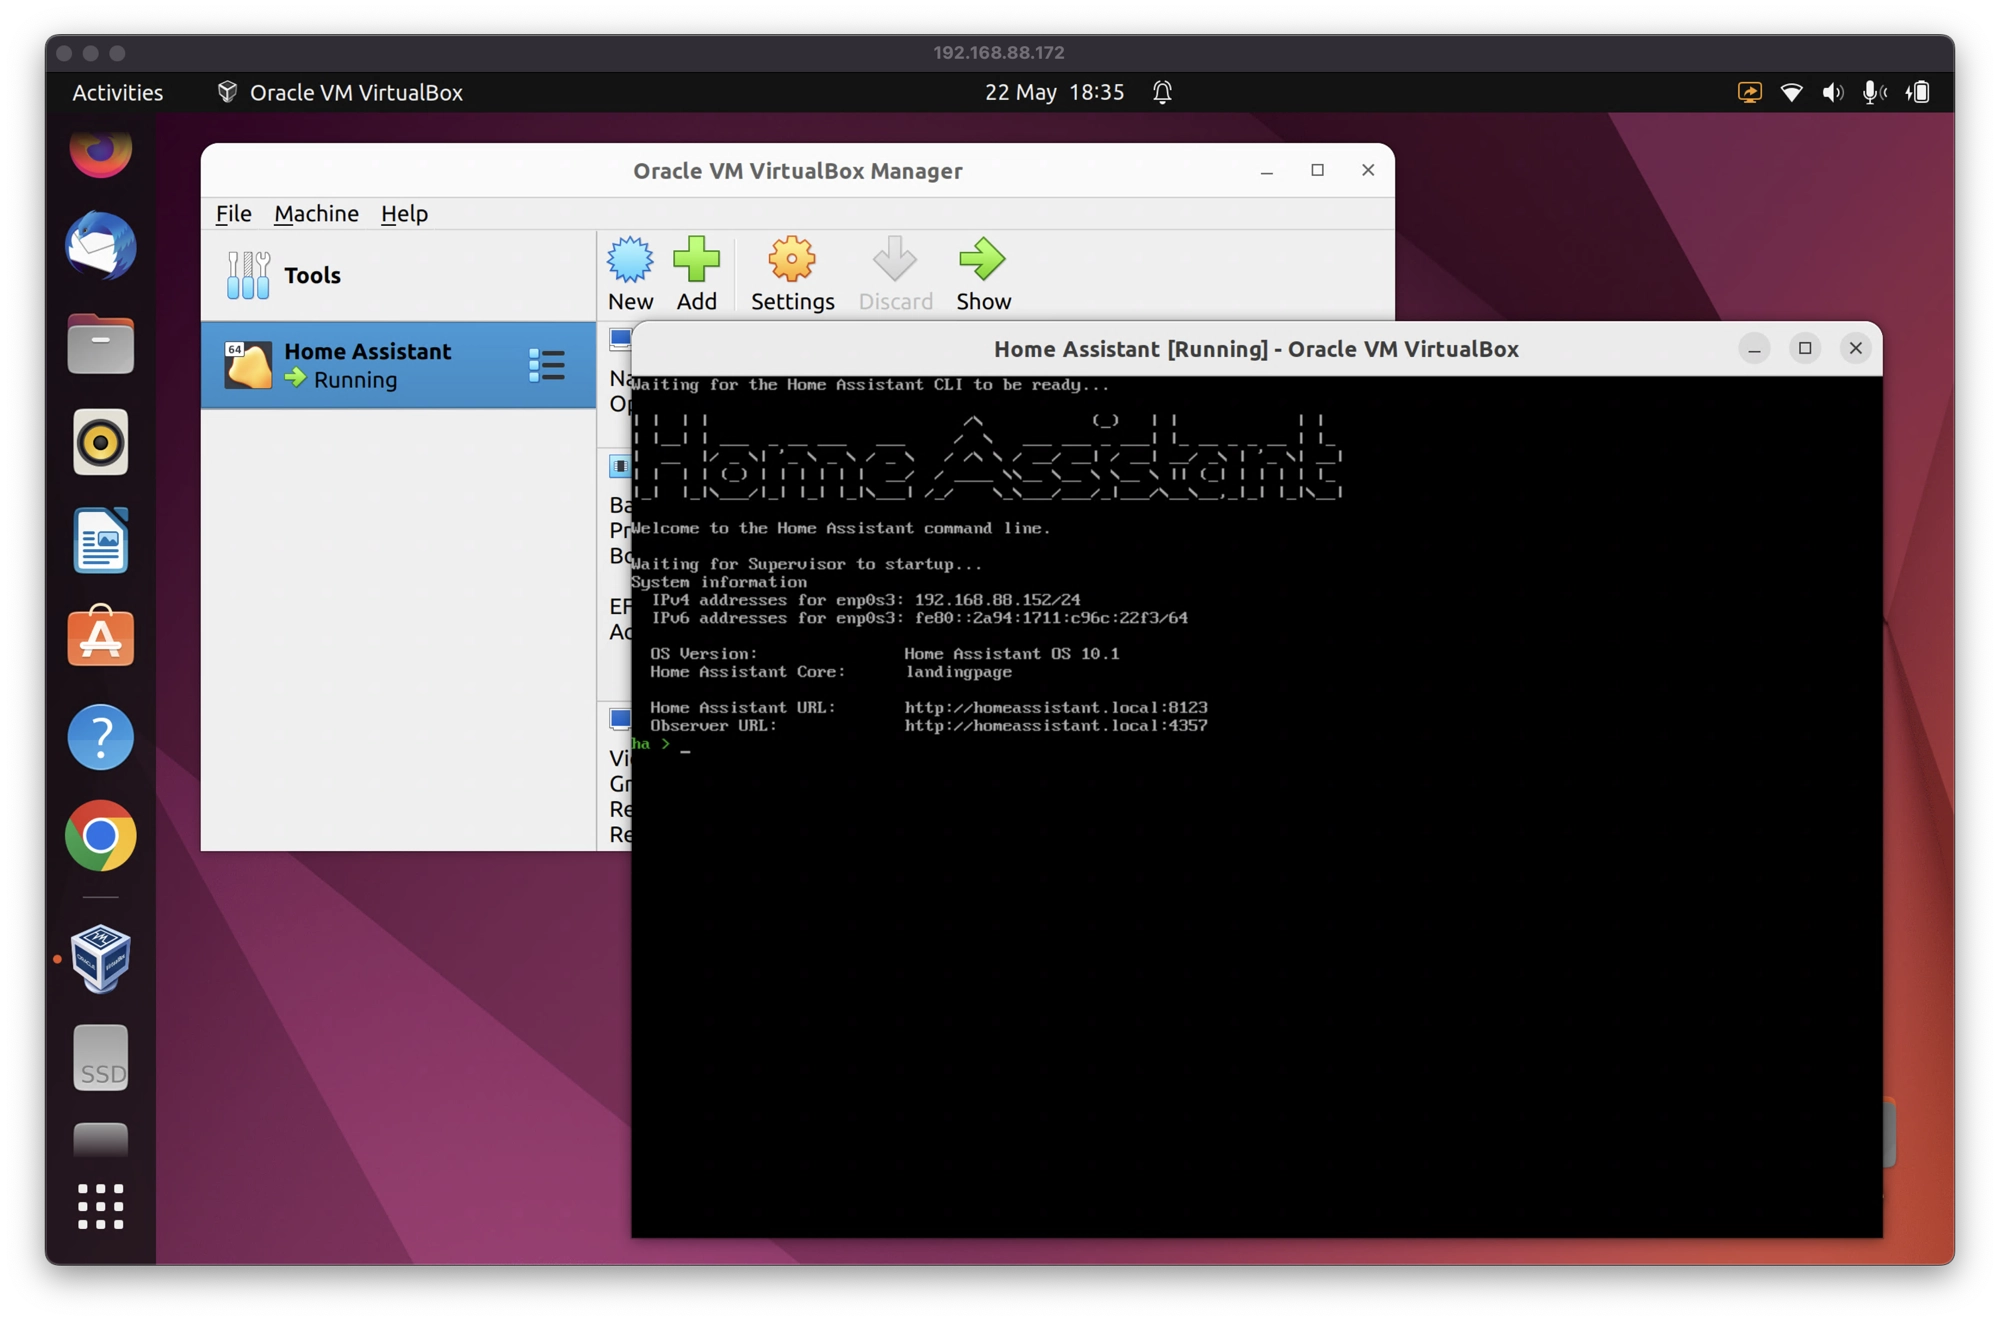
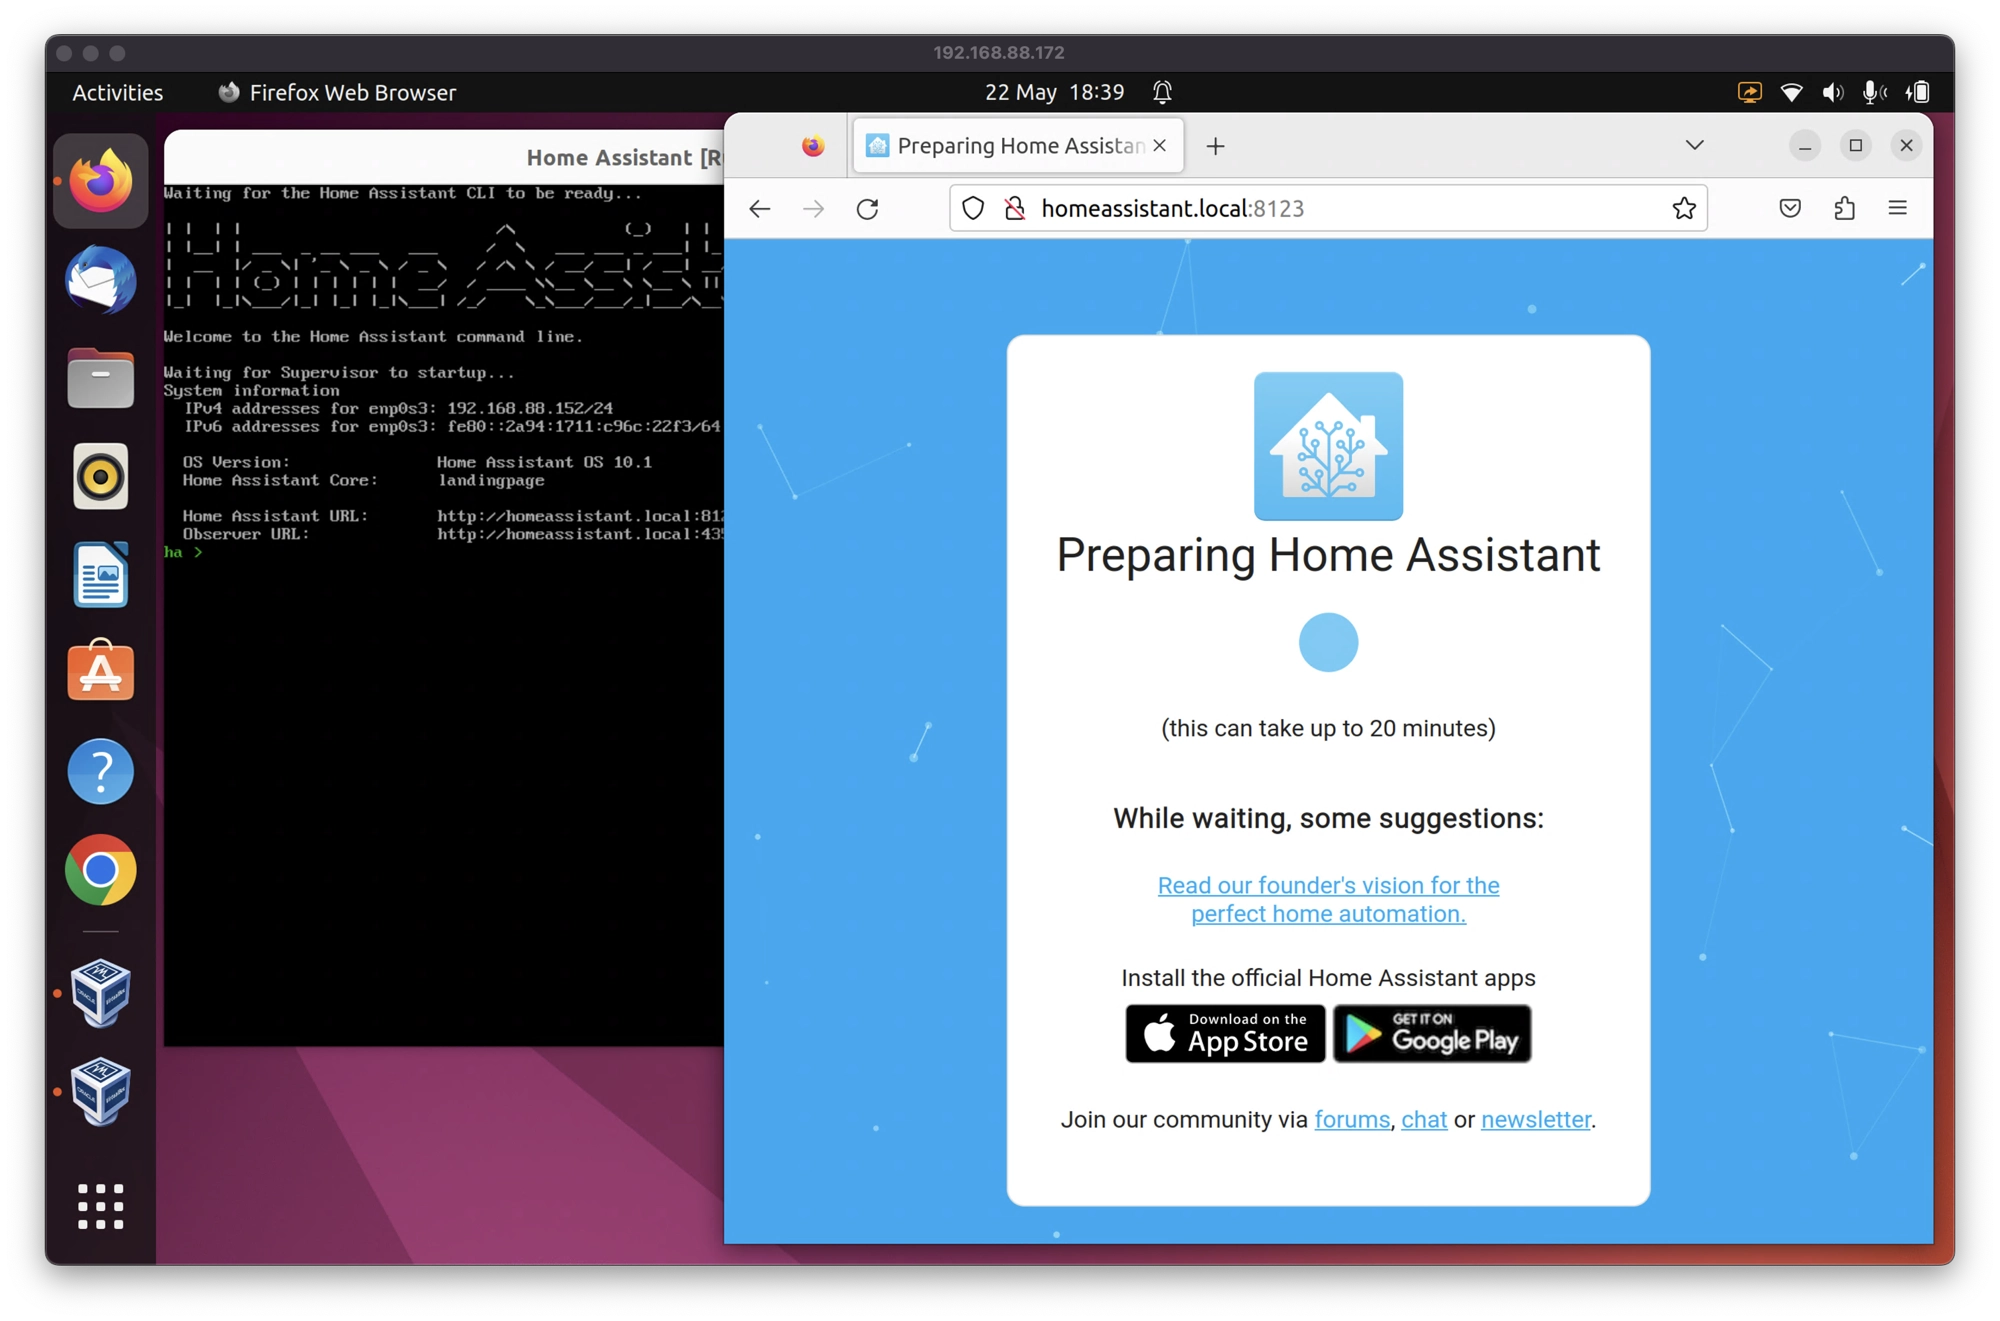
- In order to access Home Assistant, open a new browser window and navigate to http://homeassistant.local:8123
- In some cases this does not work, so you can use the IP address given instead. Your IP address is given in the system information, for example http://192.168.88.152:8123 for my system shown here.
Note that you must use HTTP and not HTTPS as Home Assistant does not support SSL out of the box. You can learn more about how to set securely access Home Assistant in this tutorial.
Conclusion
The Home Assistant Operating System disk image makes setting up Home Assistant on different systems really straight-forward. In this tutorial we have configured VirtualBox in order to run Home Assistant Supervised on Ubuntu Desktop Linux.
Note that Ubuntu is not the best choice of operating system to use for system dedicated to running Home Assistant. If you wish to build a Home Assistant server, I would advise using Debian Linux instead.
Thanks so much for visiting my site! If this article helped you achieve your goal and you want to say thanks, you can now support my work by buying me a coffee. I promise I won't spend it on beer instead... 😏


