This article will teach you how to install Home Assistant on Raspberry Pi using the method that is correct for 99% of people:
This is the same installation method that is documented in the official guide, however I have added all of the detail missing from the official site that often causes newcomers to get stuck.
- No “missing add-on store“
- Forget about “dependency not found” errors
- ZERO command line experience required
By the end of the article you will have installed the Home Assistant Operating System, Home Assistant Core and Home Assistant Supervisor on your Raspberry Pi.
This installation method is the recommended way to install Home Assistant on Raspberry Pi, and is suitable for mostly all people who want to install Home Assistant on Raspberry Pi.
Note that in order to install a fully featured and supervised Home Assistant (with the add-ons store), we will need to install the Home Assistant OS for Raspberry Pi.
This means that that we will not be installing Raspberry Pi OS and you will not have access to the usual Raspberry Pi desktop. Your Raspberry Pi will become a dedicated Home Assistant server.
It is possible to install Home Assistant Core under the Raspberry Pi operating system, but this method is recommended only for advanced users.
Prerequisite
The Raspberry Pi is an excellent choice for beginners who are starting out with Home Assistant. Before you get started, go ahead and check that you have the necessary hardware:
- To complete this lesson you will need the following:
- A Raspberry Pi single board computer, ideally the Raspberry Pi 4 but the Raspberry Pi 3 will also suffice.
- A suitable power supply for the Raspberry Pi. The official power supply is recommend.
- An ethernet cable for connecting the Raspberry Pi to your network.
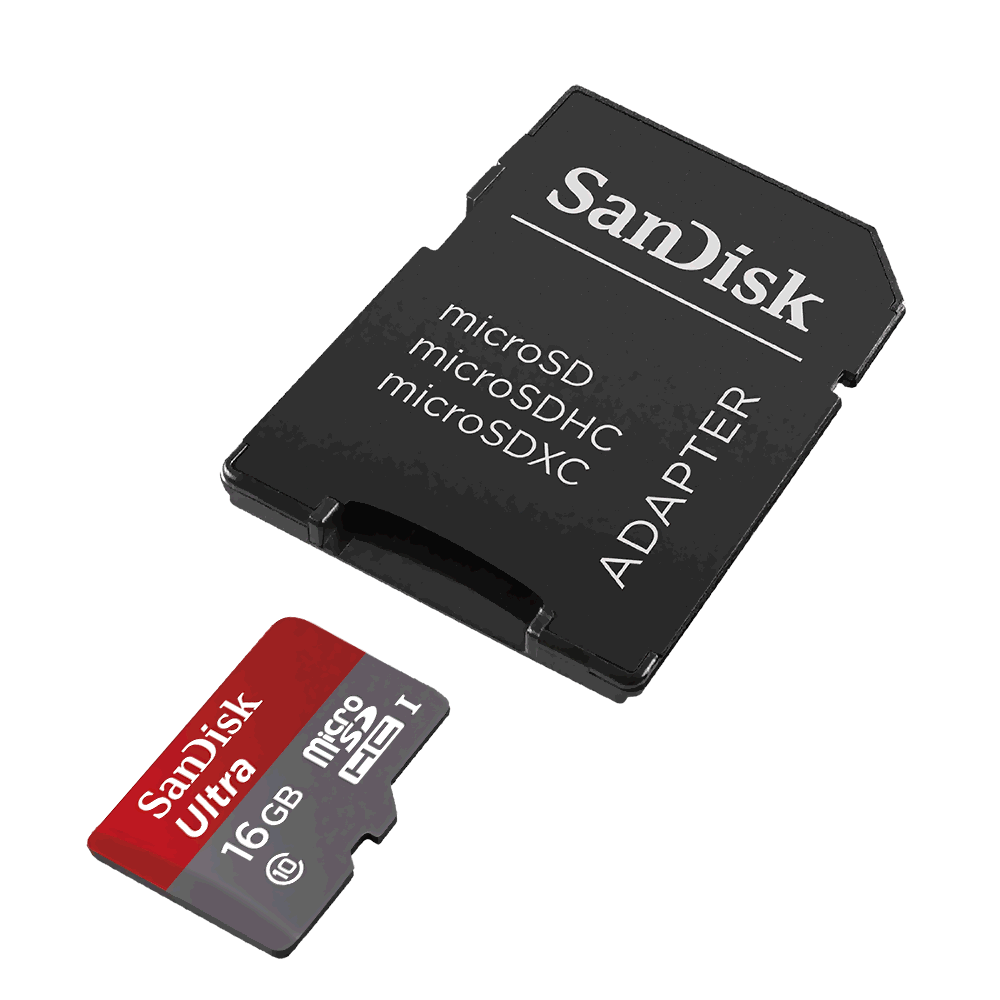
- A blank MicroSD card, 32GB or larger. An application class 2 (A2) card is recommended
- Your Windows, Mac OS or Linux computer equipped with a MicroSD card reader, or an SD card reader and a MicroSD to SD card adapter (usually provided when purchasing a MicroSD card).
- A case for your Raspberry Pi (optional). I would recommend the FLIRC case.
Once you have acquired the necessary hardware, click the mark complete button below to complete the topic and move on to the installation process.
One more thing before we begin, i’ll let you in to a little secret…
This article is available without adverts as part of our free Home Assistant beginners course. Learn how to install Home Assistant and much more!
Click here for the FREE Home Assistant beginners course.
Download The Home Assistant Image For Raspberry Pi
In order to install Home Assistant on Raspberry Pi, we must first download the latest image file on our computer. The latest Home Assistant image files can be downloaded from a website called Github.
Click the button below to open the Home Assistant releases page in a new window. You will need to follow the rest of the tutorial here in order to understand which is the correct file to download:
This will open a Github releases page, which will feature the latest release at the top of the page. You should see the Home Assistant title at the top of the page which also mentions the version number, for example in the image below the latest version is Home Assistant OS 9.5.
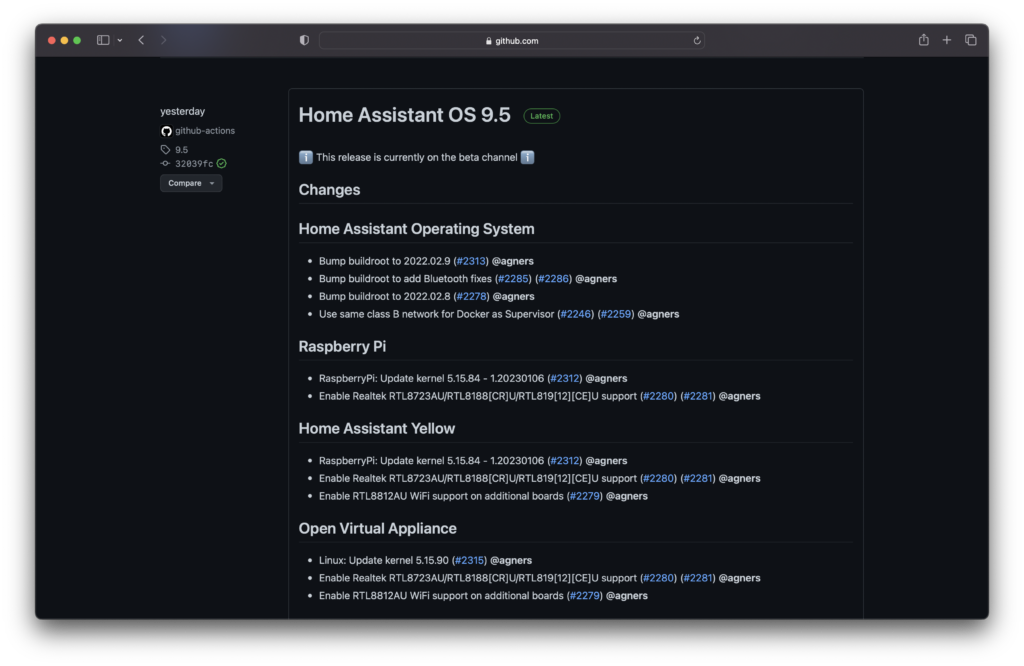
Notice the small green tag to the right of the title that signifies that this is the latest release. If you don’t see this label next to the title at the top of the page, scroll further down the page until you locate the version number that is labelled as the latest release.
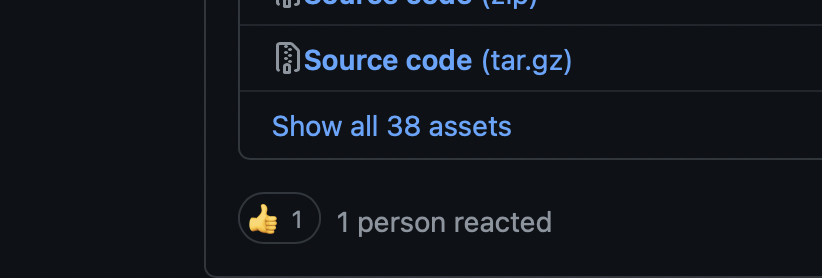
Scroll down past the given information until you see the assets section. You will need to click show all assets at the bottom of the list in order to reveal the complete list.
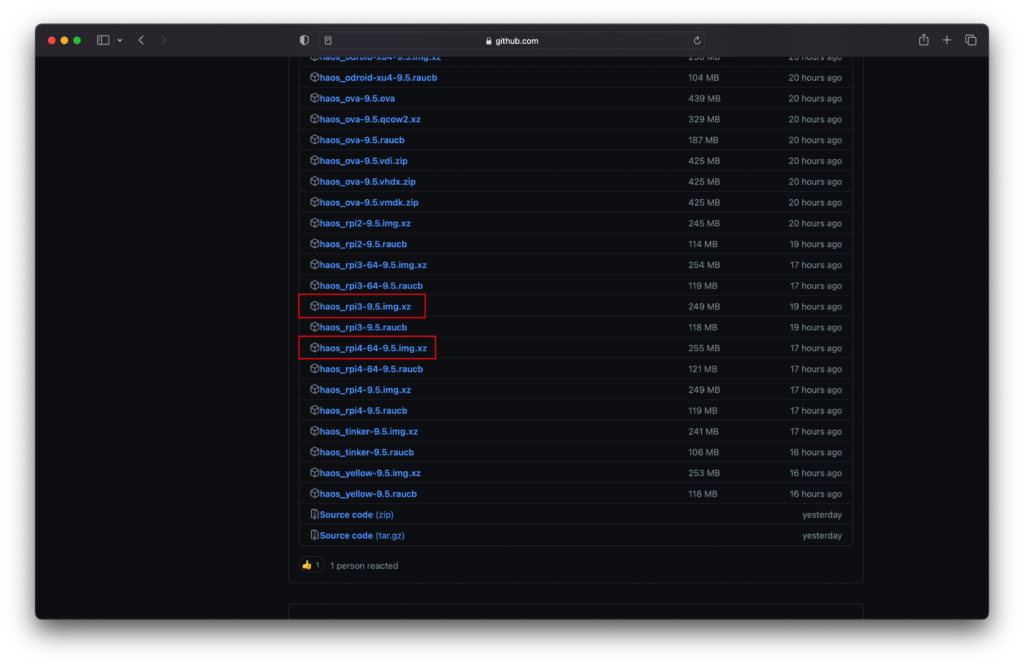
Click on the correct file in order to download it to your computer. Note that the version number before the .img.xz file extension may differ from what you see in this tutorial.
- If you have a Raspberry Pi 3, download haos_rpi3-64-….img.xz
- If you have a Raspberry Pi 4, download haos_rpi4-64-….img.xz
Write The Image To The Boot Media
We need to put the Home Assistant Raspberry Pi image on to our MicroSD card in order to boot up the Raspberry Pi and run Home Assistant. In order to do this you will need a MicroSD card reader connected to your computer.
You can also use a full-sized SD card reader if you have one already simply by using an SD to MicroSD card adapter that is usually supplied when purchasing a MicroSD card.
Do I need to ‘lock’ my SD card?
Some SD card adapters feature a ‘lock’ that can be physically closed. When in the lock position the SD card becomes read only and cannot be written. It is important that you do not lock your SD card adapter so as not to prevent your computer from writing the new image to the card.
Some models of computer already have an SD card reader built in, such as in higher end laptops like the MacBook Pro. However if you do not have a built in SD card reader, you can purchase one very cheaply and connect it to a spare USB port.
You can find them at your local computer hardware store, or check the latest prices on Amazon here.
Flashing The Home Assistant OS Image
Once we have the MicroSD card and card reading hardware, we just need to install software that can ‘burn’ or ‘etch’ the image to the card. This process is called flashing.
For this we will be using a program called Balena Etcher, which is completely free to download and use. Click the button below to open the Balena Etcher website in a new window, then download and install the latest version of Balena Etcher.
Which version of Balena Etcher do I need?
Windows users are presented with several download options. If you are unsure which version to download, you can check your Windows version by following this guide. If you are still in doubt, choose the full installer (not the portable version) for X86/X64 architecture.
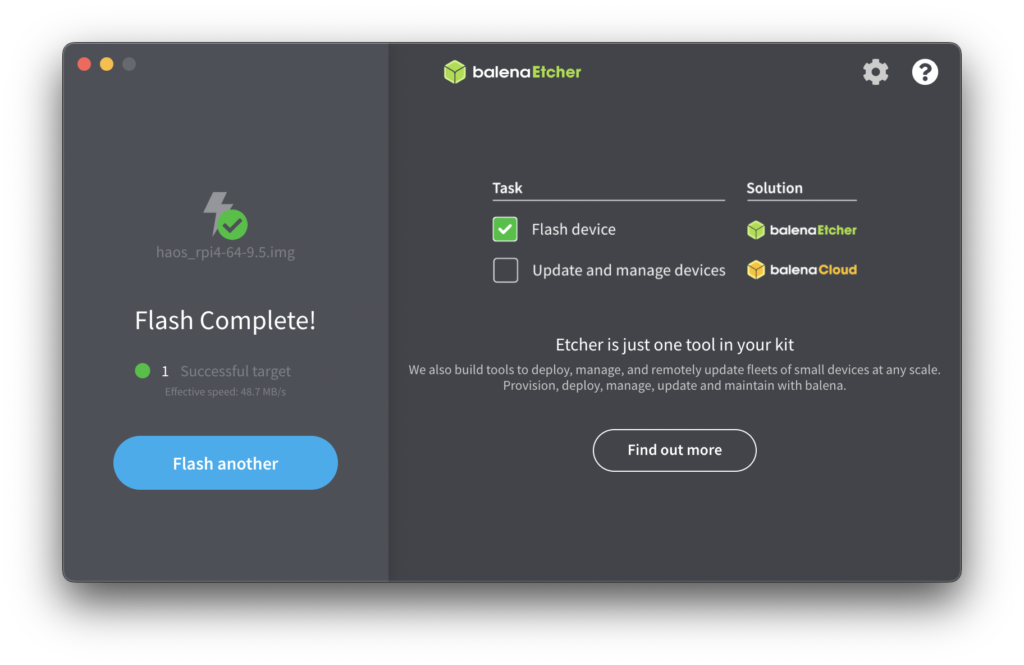
Go ahead and open Balena Etcher once you have downloaded and installed it. You will be presented with the following window.
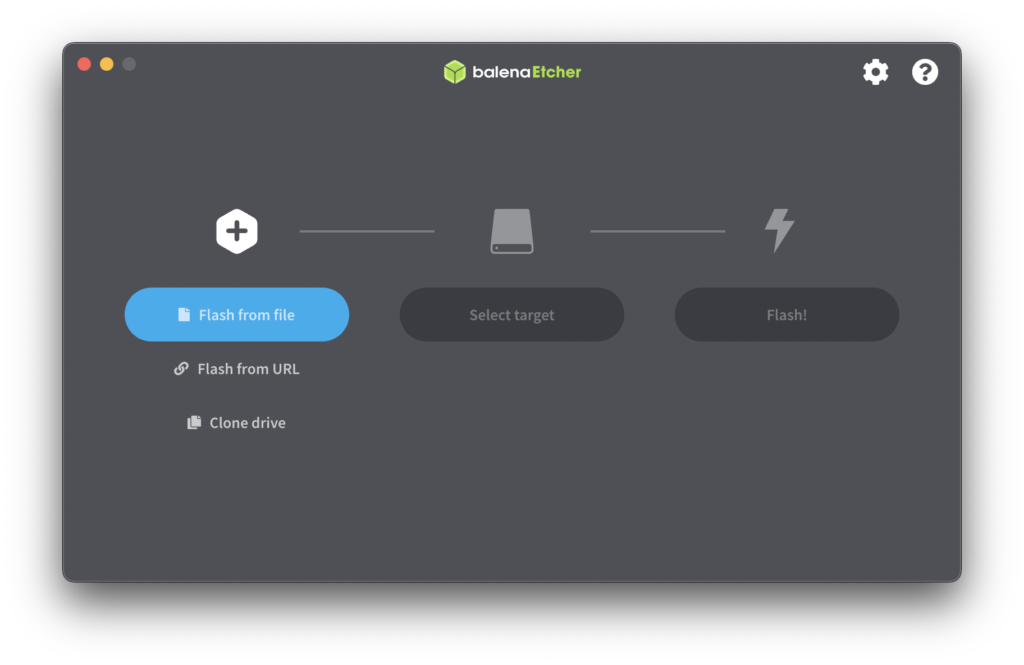
First we need to select the Raspberry Pi image file that we downloaded earlier, which has the .img.xz file extension. Click the flash from file button and select the Raspberry Pi image file.
Once you have selected the image file you wish to flash, the file name and option to remove the file will be displayed.
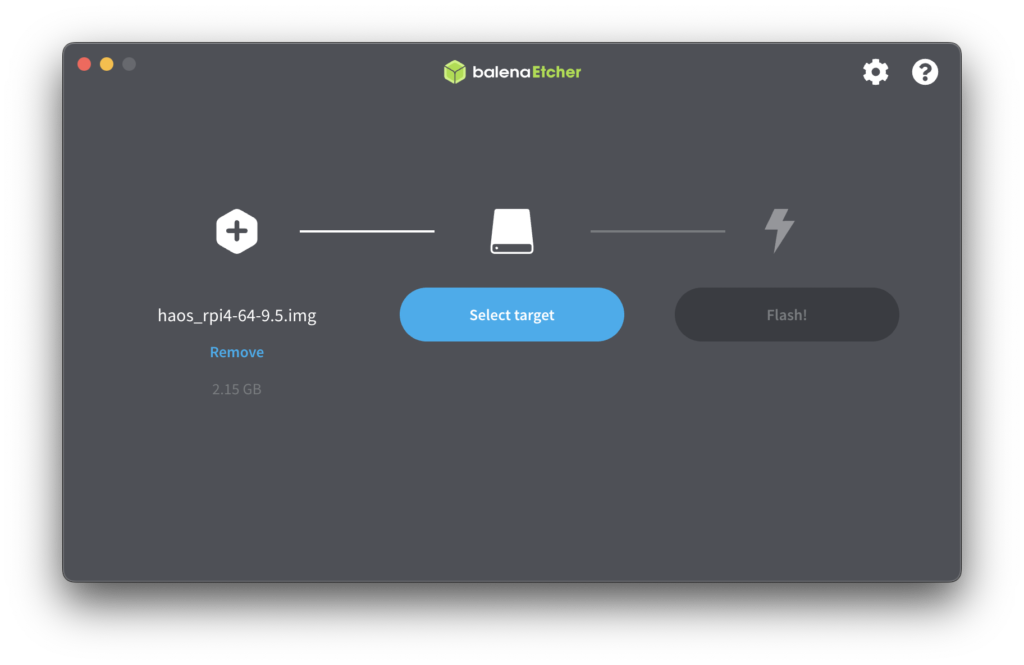
Next we need to click the select target button in order to choose where we will flash the file to. The target that we wish to select will be our Raspberry Pi MicroSD card, so if you have not yet inserted the card into your card reader, you should do this now.
If you do not see your MicroSD card in the list of targets, it means that your computer has not recognised the card. First make sure that the terminals on the MicroSD card are free of any dirt and ensure that the card is inserted correctly.
MicroSD Card Not Detected?
If you do not see your MicroSD card in the list of targets, it means that your computer has not recognised the card.
First make sure that the terminals on the MicroSD card are free of any dirt and ensure that the card is inserted correctly. If your card still fails to show up, check one of the following topics: Windows 10 / Windows 11 / Mac OS.

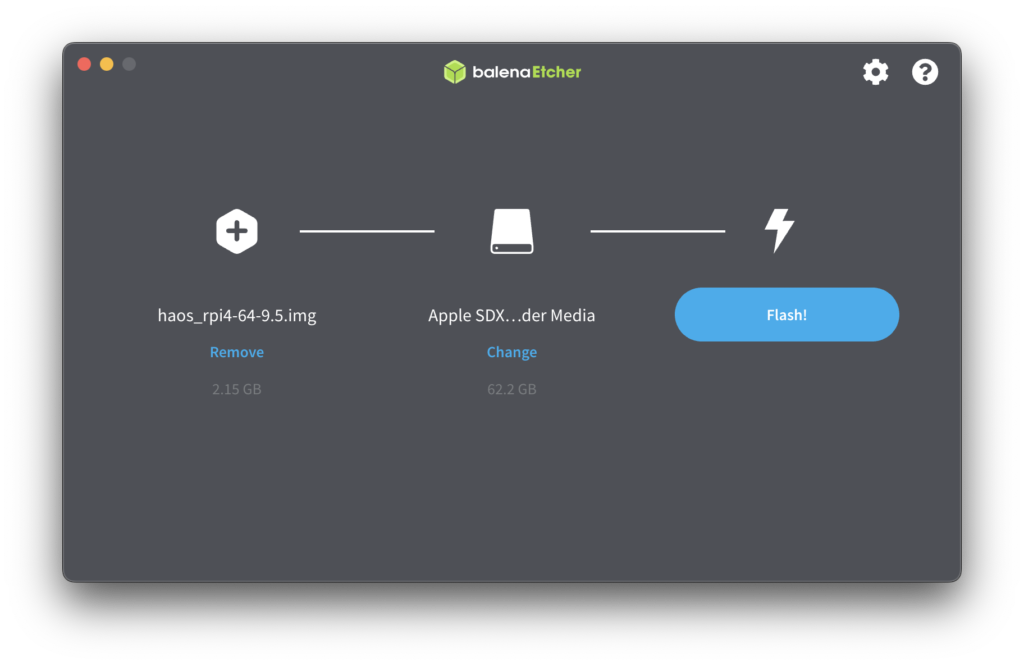
Now that we have selected the image that we wish to use and the location whereby we wish to flash it, we can go ahead and click the flash button. Note that you may need to grant privileges to Balena Etcher by entering your system password.
Once the process has completed you can close Balena Etcher, however you should leave the MicroSD card in the computer for the moment.
MicroSD Card Not Readable By System After Flashing?
If the flashing process completes with an error stating that the card cannot be read by the system, you can ignore this error. The card format will be readable by the Raspberry Pi.
Setting Up The Network
In order to access our Home Assistant dashboard using our web browser, we will need to give our Raspberry Pi access to our network. It is also necessary for Home Assistant to have access to our network for many of its functions to work.
There are two ways that we can connect our Raspberry Pi to our network; either by using an Ethernet cable, or by using WiFi.
Connect The Pi To The Network via Ethernet
It is generally recommended to use an Ethernet cable to connect Home Assistant to your network. Ethernet is more reliable, more secure and faster than WiFi.
It is very simple to connect your Raspberry Pi to your network using an Ethernet cable. Simply connect one end of an ethernet cable to the ethernet port on your Raspberry Pi. Connect the other end to a spare Ethernet port on your router.
Connect The Pi To The Network via WiFi
Connecting a Raspberry Pi to your network using WiFi when installing the Home Assistant is not a straightforward task. This is because we need to specify the network credentials, but we don’t yet have access to Home Assistant in order to do so.
The recommended way to set up WiFi is to first connect Home Assistant using an ethernet cable. This can be a temporary connection and the cable can be removed once a WiFi connection has been established, allowing you to locate your Raspberry Pi anywhere within the range of your WiFi network.
The easiest way to connect Home Assistant to WiFi is by using the Home Assistant dashboard. This topic will be covered in a later lesson, as we do not yet have access to the Home Assistant dashboard.
It is also possible to configure WiFi during the installation of the Home Assistant image, however this is an advanced process and not recommended for beginners. This process is therefore considered to be beyond the scope of this tutorial.
If you do wish to view this process then it can be found here. Mac users should also be aware that a third party application, which allows EXT4 formatted memory cards to be written to, is necessary in order to complete this process.
Starting Up Your Raspberry Pi
If you reached this stage then congratulations! The Raspberry Pi Home Assistant OS has been completed and we just need to insert the MicroSD card into the Raspberry Pi in order to boot Home Assistant for the first time.
If you have not yet removed your MicroSD card from your computer, ensure that you eject it prior to physically removing it.
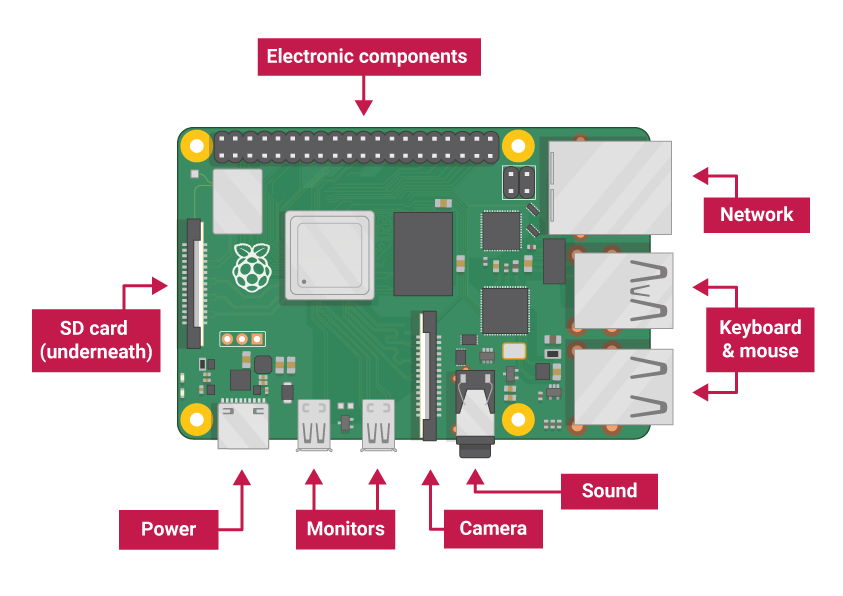
Connecting Your Raspberry Pi
If you would like further information about the peripheral connections on Raspberry Pi, I would recommend reading this guide on the official Raspberry Pi website.
The MicroSD card slot is on the underside of the Raspberry Pi. Take care when inserting the card and ensure that the small terminals on the card are facing towards the Raspberry Pi circuit board. For clarification, see the following diagrams.
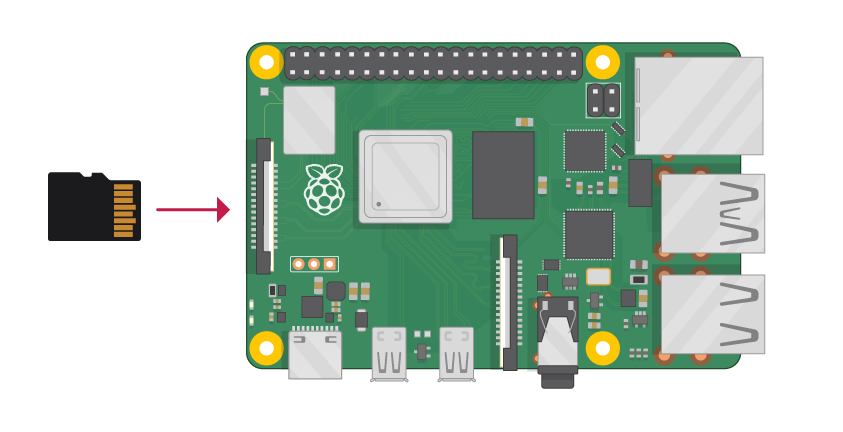
Once you have inserted the MicroSD card, you can power up your Raspberry Pi. The Raspberry Pi does not have a power switch, so as soon as you connect the power supply it will boot up.
Accessing Home Assistant
In order to access the Home Assistant dashboard on your Raspberry Pi, it will need to be connected to your network. In the previous topic we looked at how this can be done either by using an ethernet cable, or by configuring WiFi.
Once the Raspberry Pi has been connected to the network, you can access Home Assistant from the web browser of any computer or mobile device connected to the same network.
The easiest way is to simply open a web browser and navigate to the following address, however it should be noted that this does not work on all networks: http://homeassistant.local:8123/
If the link above works correctly then you will arrive at the Home Assistant onboarding process and you can now skip ahead to the next lesson.
However in some cases, such as if your network has tighter security, the link above might not work.
In this case you will need to connect to your Raspberry Pi using the IP address that has been assigned to it. This is very easy to do, but you will need to complete an extra step in order to find out what IP address has been assigned to your Raspberry Pi.
How To Find The IP Address Of Your Raspberry Pi
There are several ways that you can find the IP address of your Raspberry Pi:
- Use a third-party program to list your network devices.
- Connect a computer keyboard and monitor to your Raspberry Pi
- Check your router settings page.
Use a third-party application like Fing
The quickest and easiest way to find the IP address of your Raspberry Pi is use a third-party application like Fing.
Fing is a reputable network tool that is safe to use and completely free to download. You will see that there is a premium version available, but you do not need the premium version of Fing to find the IP address of your Raspberry Pi.
If you would prefer not to download and install a third party program to find your Raspberry Pi email address, skip this section and take a look at one of the other methods below.
Fing is available as a desktop app for both Mac OS and Windows, and it is also available as a mobile app for Android and iOS. To get a free copy just head over to the Fing website, then download and install your preferred version of Fing.
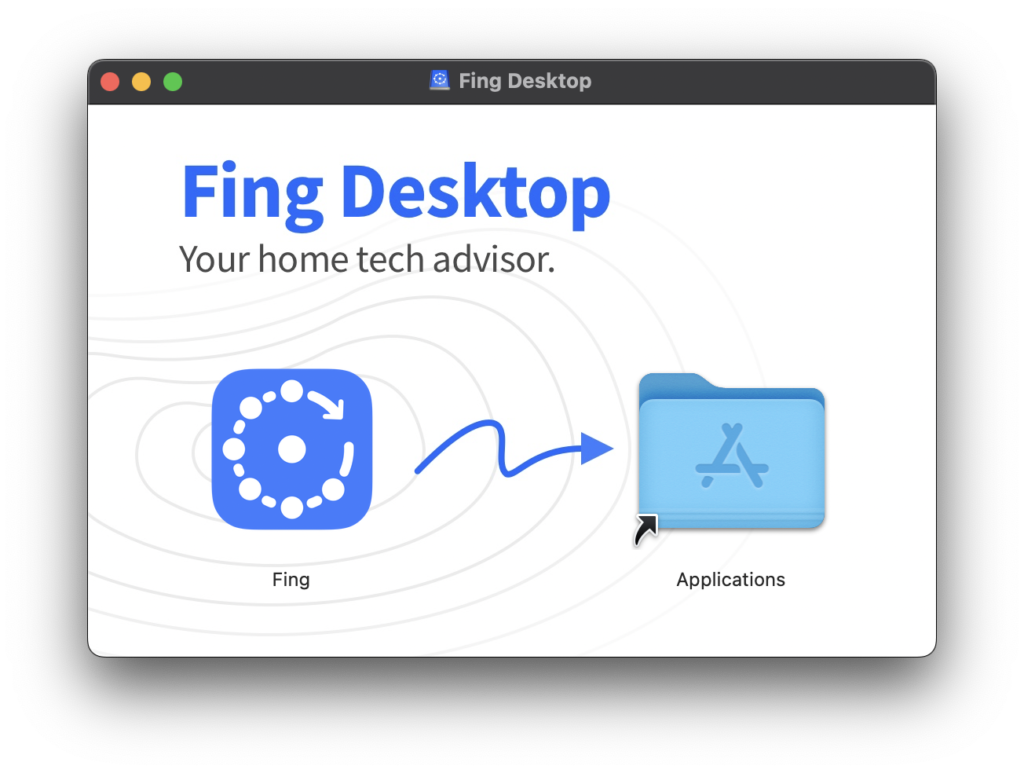
Next, launch Fing and grant any necessary privileges so that Fing can access your network. You should only need to do this the first time your run Fing.
You will be taken to a sign-in screen where you will need to create a new account if your didn’t do so already. This is very quick and easy, you can do it with one click if you already have a Google, Apple or Facebook account.
Finally you will be taken to the main screen. From here click devices and you will be show a list of the devices discovered on your network.
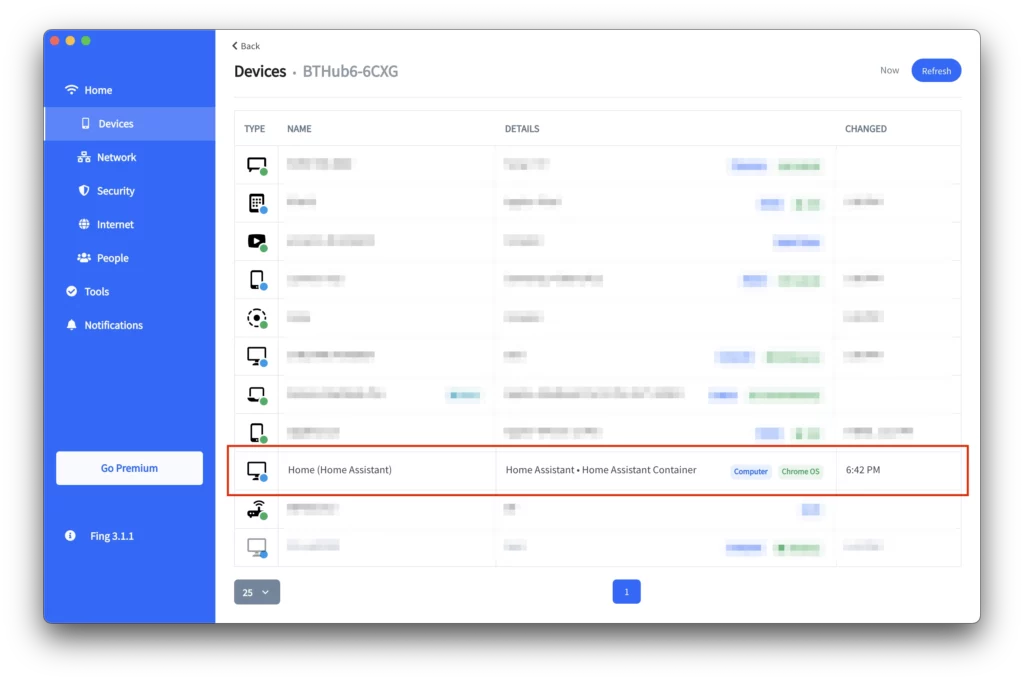
You will find your Raspberry Pi in the list so long as it has successfully connected to your network. Make a note of the corresponding IP address.
Connect a monitor to your Raspberry Pi
If you have a spare computer computer monitor that you can connect to your Raspberry Pi, it is possible to see the IP address at the Raspberry Pi command line.
It is very easy to do this, simply connect a monitor to the HDMI port (note that on the Raspberry Pi 4 you will need a mini-HDMI adapter). Then power up your Raspberry Pi and allow it to boot up.
When the Raspberry Pi finishes loading, you will arrive at the command line prompt. Here you can see the IP address of your Raspberry Pi on your network, as highlighted in the following screenshot.
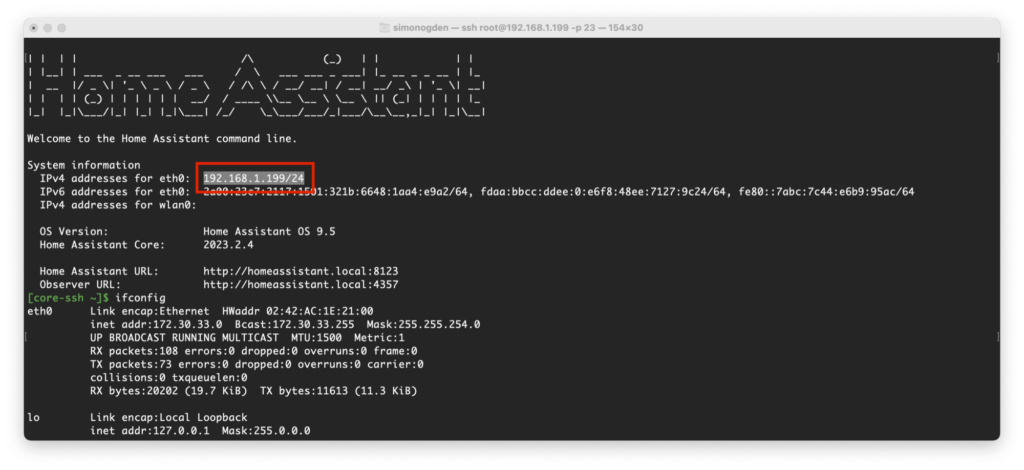
Note that the forward slash character “/” and number following is not part of your IP address and should be ignored. In the example here the IP address is 192.168.1.199.
Check your router settings page
It is also possible to access your router settings page in order to see all of the devices that are connected to your network. Here you will find your Raspberry Pi and the IP address associated with it.
However the process can differ depending on the manufacturer of your router, therefore you will need to consult the manual for your particular router.
In each case your will need to access the settings dashboard for your router, which can be done using the web browser on any machine connected to your router.
Generally you can access this page by entering the IP of your router into the address bar of your browser, for example: http://192.168.1.1
However the router IP address can be different depending on the manufacturer, so you may need to enter an address different to the one above. This information should be given in the manual of your router.
You are also likely to need the administration username and password, which are often printed on a label on the back of the router.
Once you have access to the router dashboard, you will need to locate the page that lists the connected devices. The screenshot below gives an example.

Connect To Your Raspberry Pi Using The IP Address
Once you have found out what the IP address of your Raspberry Pi is, you can use it to connect to Home Assistant with your browser.
Enter the following into your browser address bar, substituting <ip-address> for the IP address of your Raspberry Pi.
http://<ip-address>:8123
In the screenshot above we can see that the Raspberry Pi IP address is 192.168.1.199, therefore we should enter the following in to our browser in order to access it:
http://192.168.1.199:8123
However it is likely that your address will be different, so ensure that you enter the address relevant to your own Raspberry Pi. If everything is working correctly, you should be taken to the Home Assistant onboarding process.
Home Assistant Onboarding
The Home Assistant onboarding process consists of a series of screens whereby you can enter the necessary information in order to get a new copy of Home Assistant up and running.
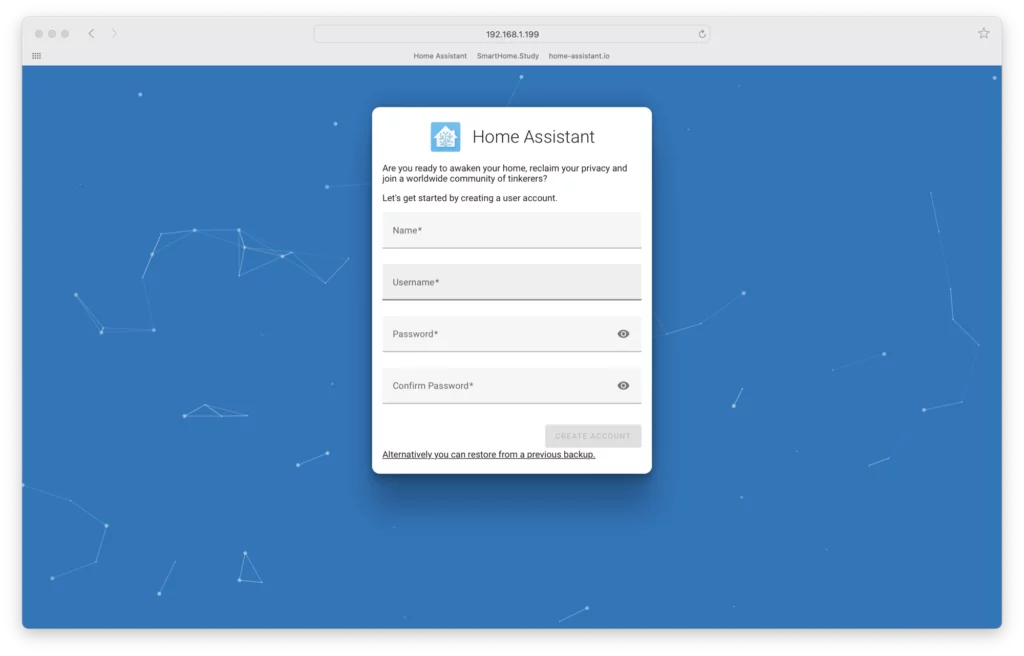
The first screen will request your name and your chosen username and password.
If you a building a new Home Assistant setup, simply enter your desired name, username and password and click the create account button.
What Happens If I Forget My Home Assistant Username Or Password?
If you forget your username or password, the easiest way to recover Home Assistant is by repeating the installation process and selecting a backup of your Home Assistant configuration on the first onboarding screen using the link at the bottom of the dialog box.
If you don’t have a backup available, there are some other ways to recover Home Assistant, although they are more involved. Take a look at this guide on the official Home Assistant website.
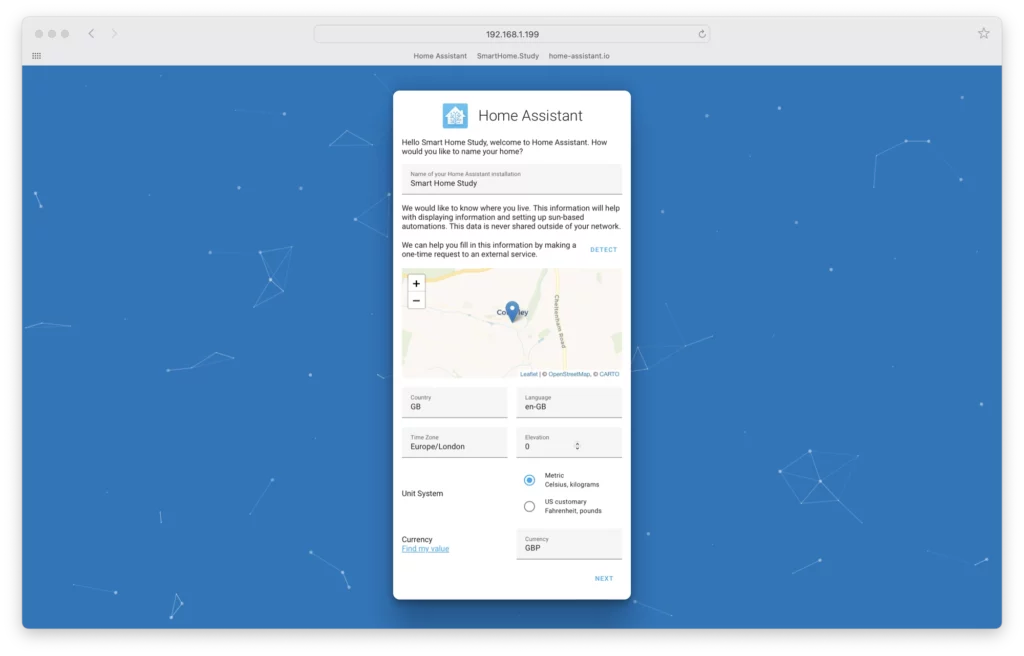
Setting Up Your Home
On the next screen you can give your home a name (or just leave the default value of ‘home’ if you prefer). You can also enter the location of your home, which is useful for certain applications.
Click the detect button in order to detect your location and autofill the details.
For example if Home Assistant knows the location of your home, it will have access to data such as the time which the sun rises and sets in your location. This is useful for certain automations, for example you can turn the living room lights on automatically at sunset.
Once you have entered your details, click the next button.
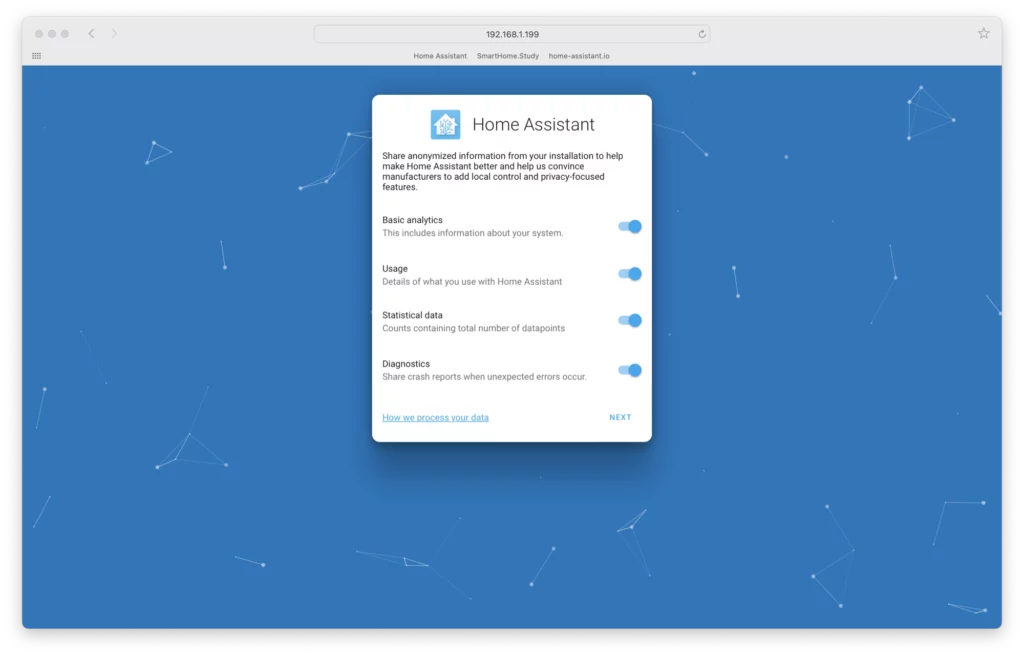
On the next screen you can opt in to sharing various information with the Home Assistant developers, in order to help them improve the software. It is completely optional and if you would prefer not to share any data, you can opt out by leaving each switch turned off.
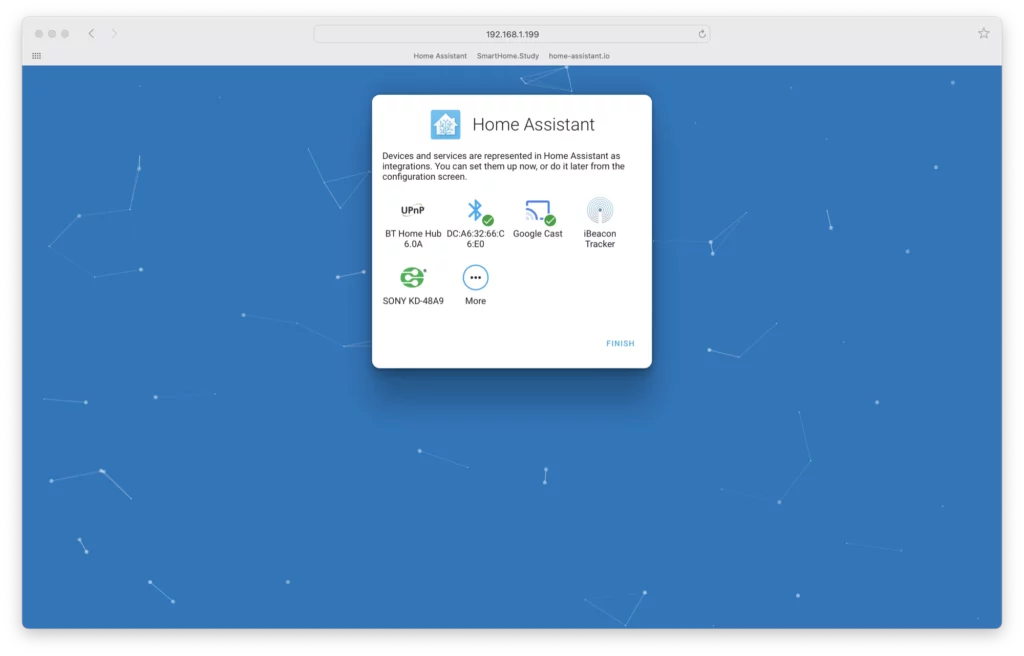
Lastly you will be presented with a screen that gives you the option to add any devices that are detected. You may or may not see devices on this screen, depending on whether or not you have any compatible devices already connected to your system.
Click finish in order to complete the onboarding process.
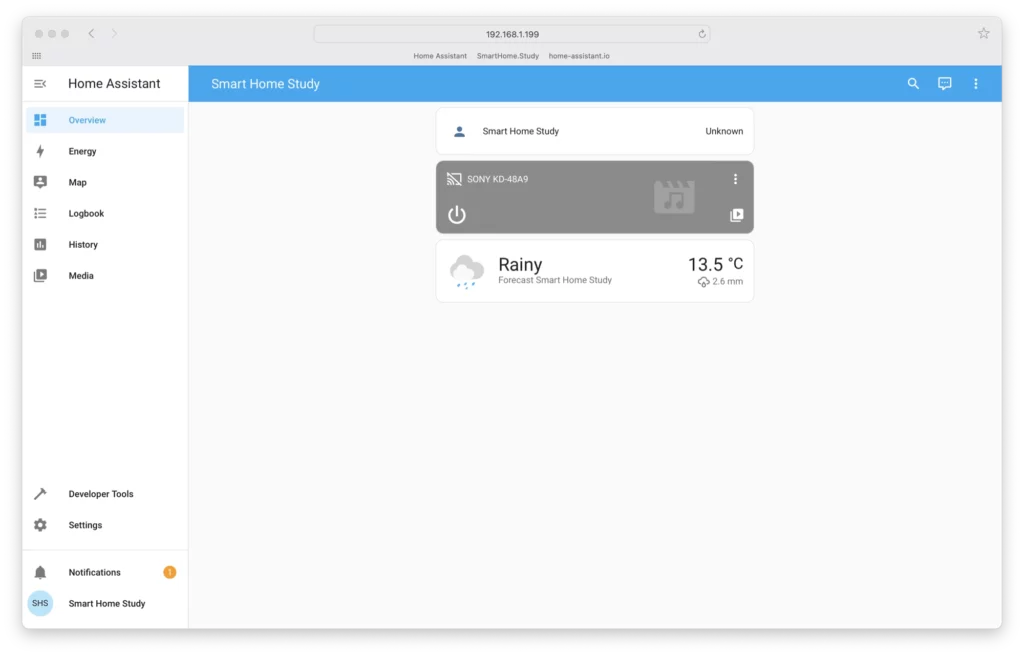
Congratulations! You have completed the Home Assistant installation and onboarding process! Once onboarding has been completed, you will be taken to a brand new Home Assistant dashboard.
What’s Next?
Congratulations for getting to the end of this guide! I hope you have managed to get Home Assistant up and running on your Raspberry Pi. If you had any problems, please go ahead and let us know in the comments.
Next, go ahead and check out the Level 1 Home Assistant Course, it features everything that you need to get from onboarding right the way through to creating beautiful automations in your home. All of the information is in one place and presented in easy-to-follow lesson structure.
Thanks so much for visiting my site! If this article helped you achieve your goal and you want to say thanks, you can now support my work by buying me a coffee. I promise I won't spend it on beer instead... 😏


