In this article you will learn how to quickly and easily install the File Editor add-on for Home Assistant.
The file editor is one of the most useful add-ons available for Home Assistant. It allows text files within the Home Assistant configuration directory to be edited directly from the Home Assistant environment.
Using the file editor add-on is the easiest way to edit Home Assistant files and it has the added bonus of a including a syntax checker and syntax highlighting, which is very useful for preventing mistakes in the configuration that can cause Home Assistant to crash.
The file editor is an essential part of building a Home Assistant configuration, therefore we will install it using the add-ons store.
Enable Advanced Mode
The first thing that we need to do is enabled advanced mode. It is important to note that enabling advanced mode is not going to make Home Assistant unnecessarily complex.
Advanced mode serves more as a means to simplify the interface for users who are not the administrator, and who do not need to make configuration changes.
This means that you can create user accounts for other members of the household which hide the tools that are unnecessary for normal users, such as the file editor.
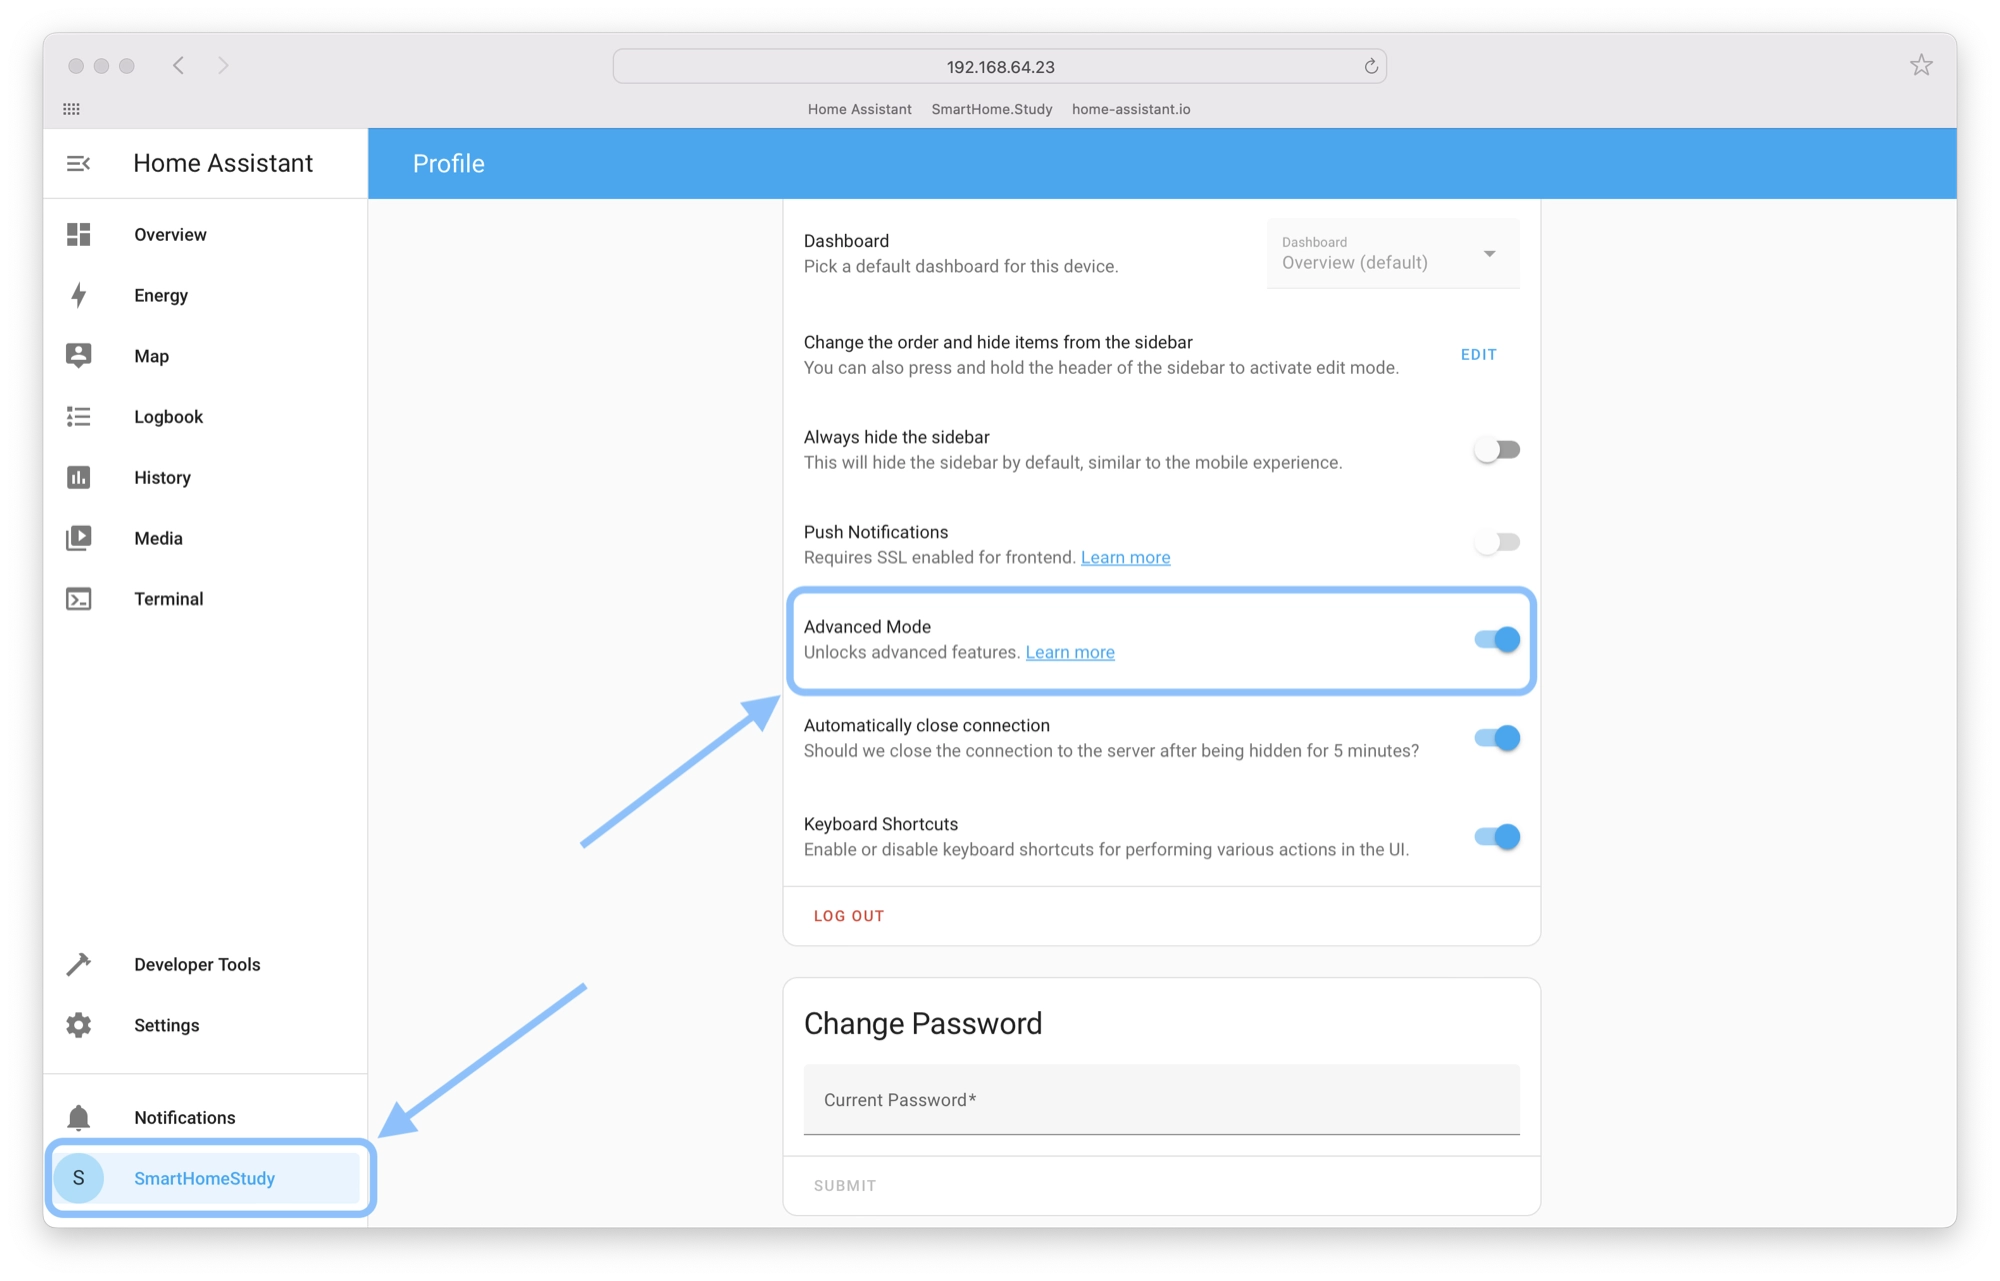
As the administrator, we should have advanced mode enabled. To enable advanced mode, click your profile at the bottom of the left-hand sidebar.
In the main window, scroll down until you see advanced mode. Ensure that the advanced mode switch is set to the on position, as shown below:
Adding the File Editor add-on
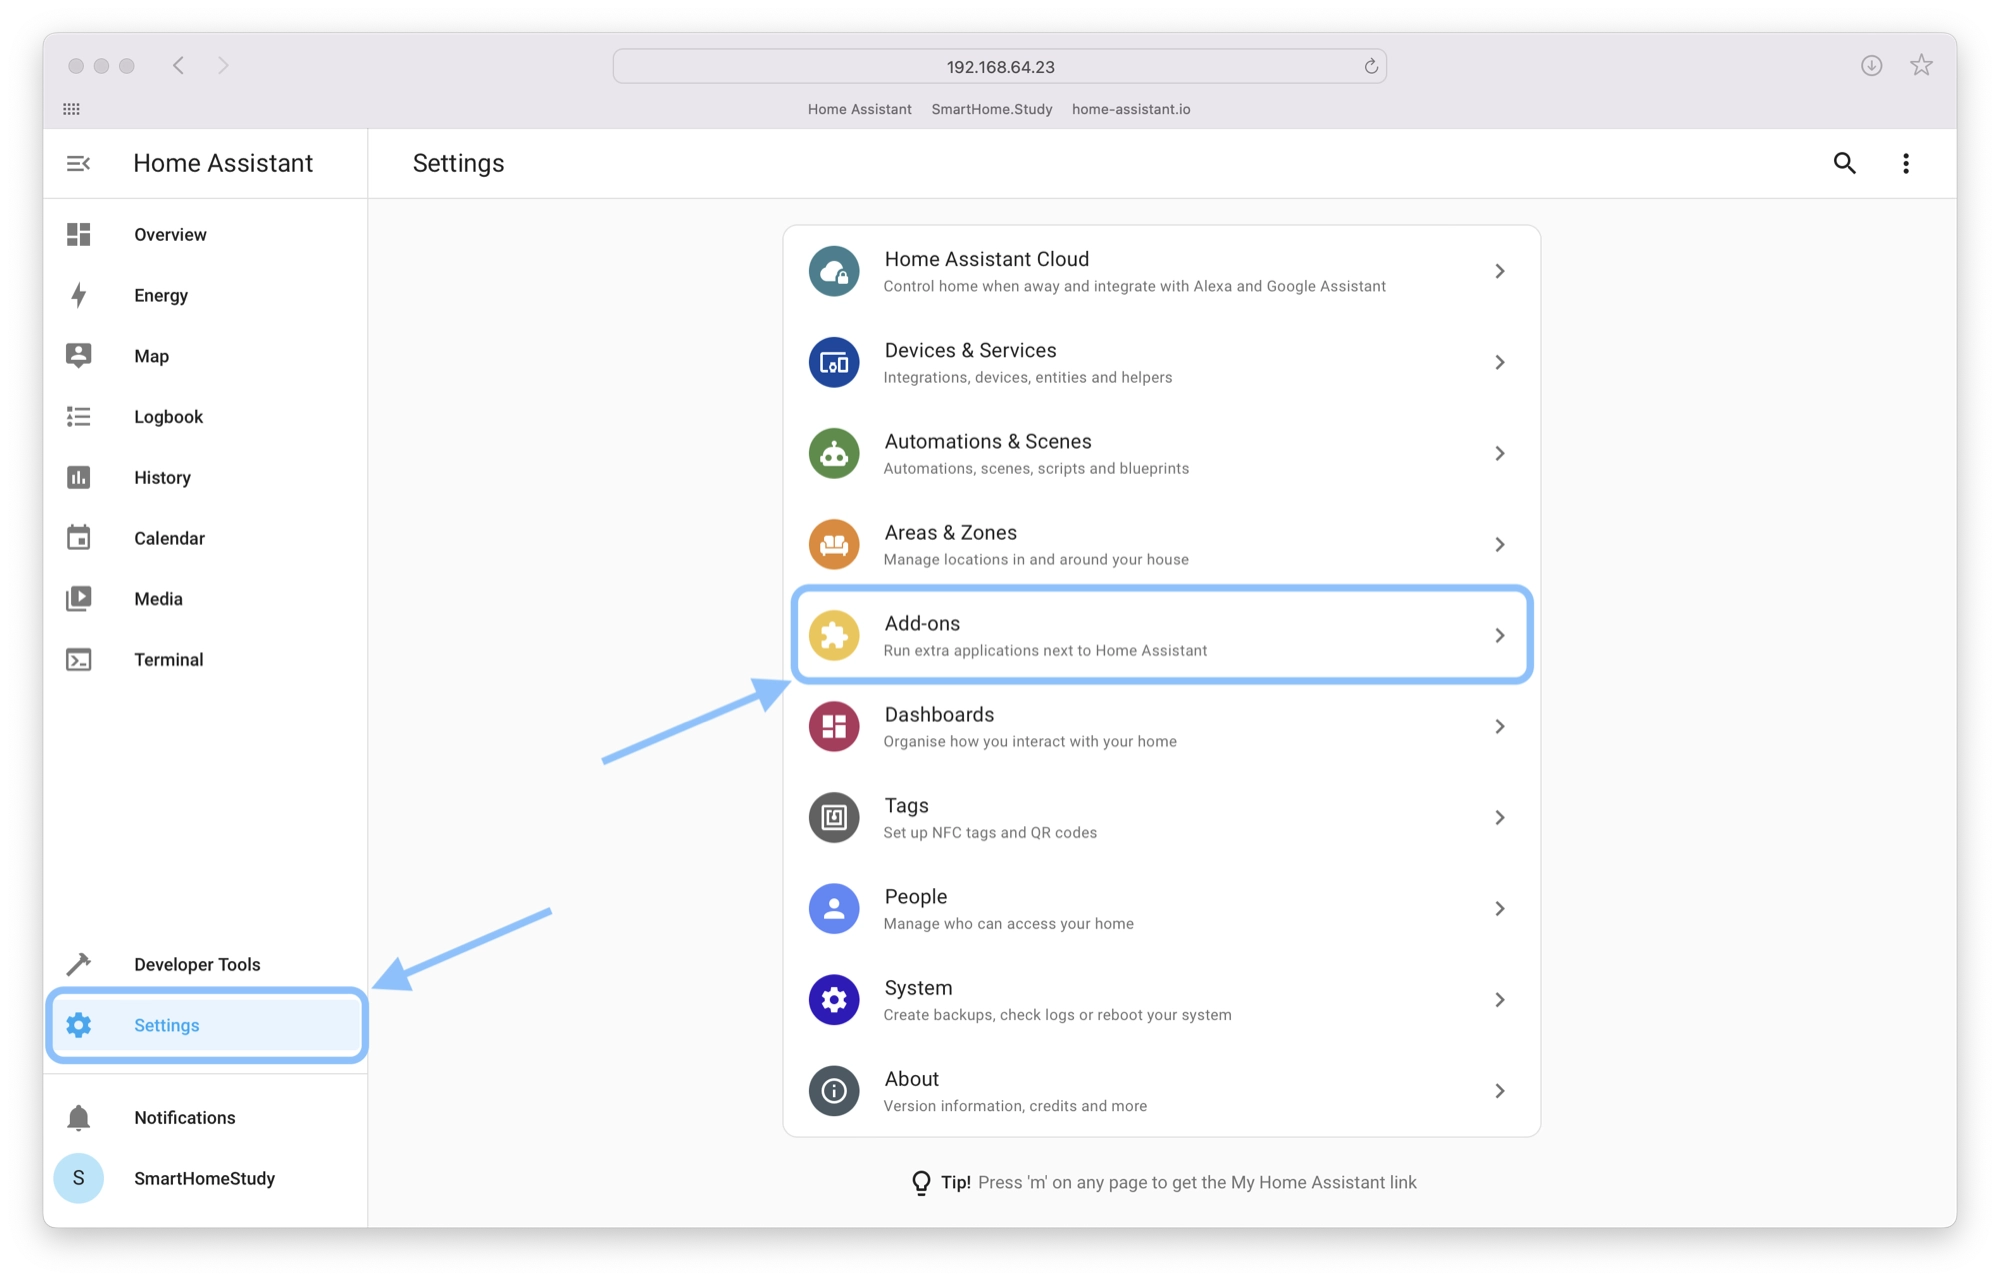
Once you have enabled advanced mode you will have access to the File Editor in the add-ons store. Click settings in the left-hand sidebar and then click add-ons.
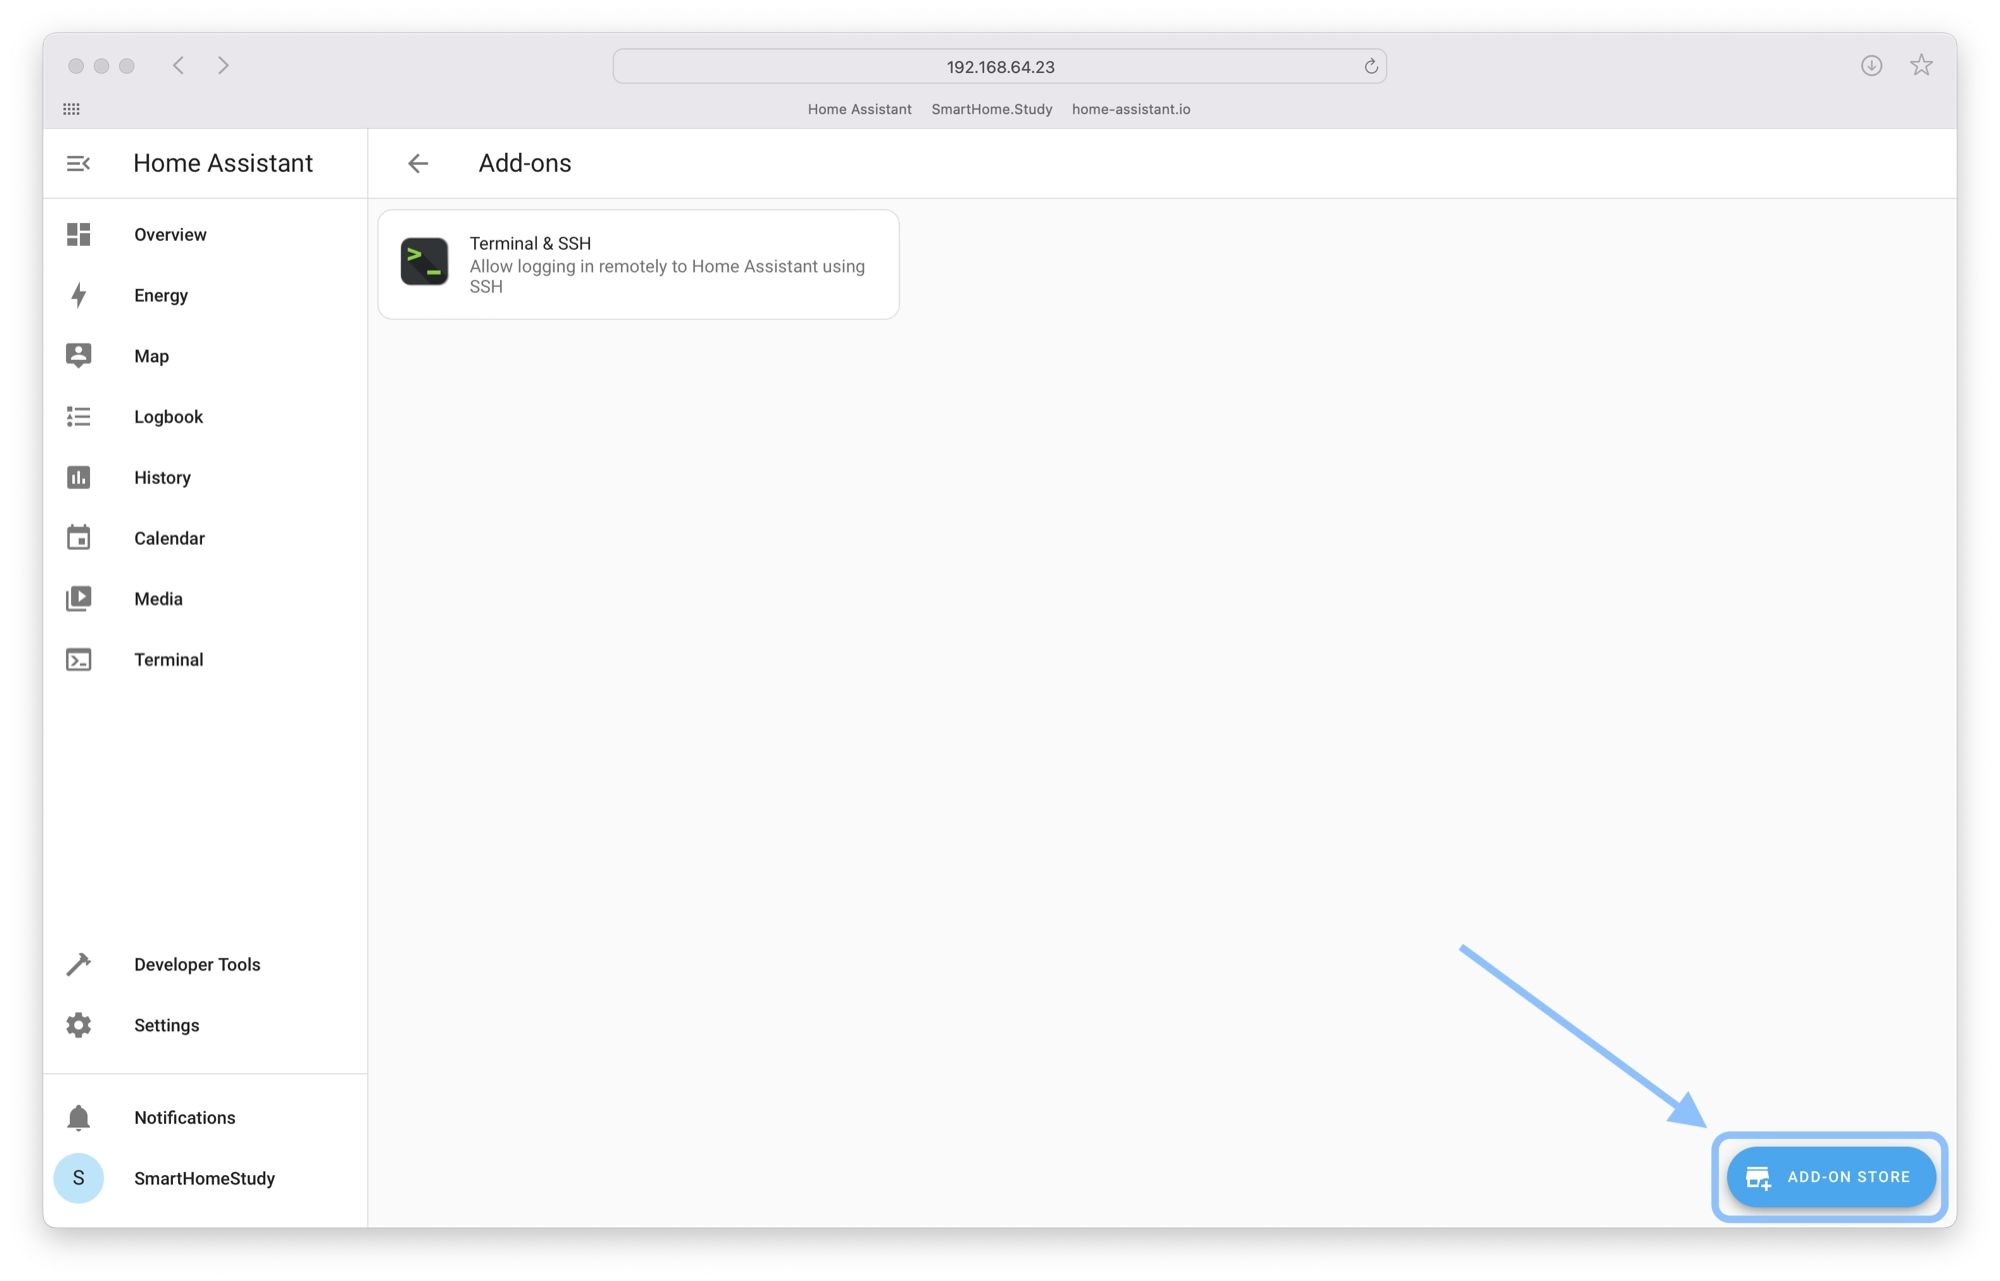
Next, click the add-ons store button in the bottom right-hand corner of the screen.
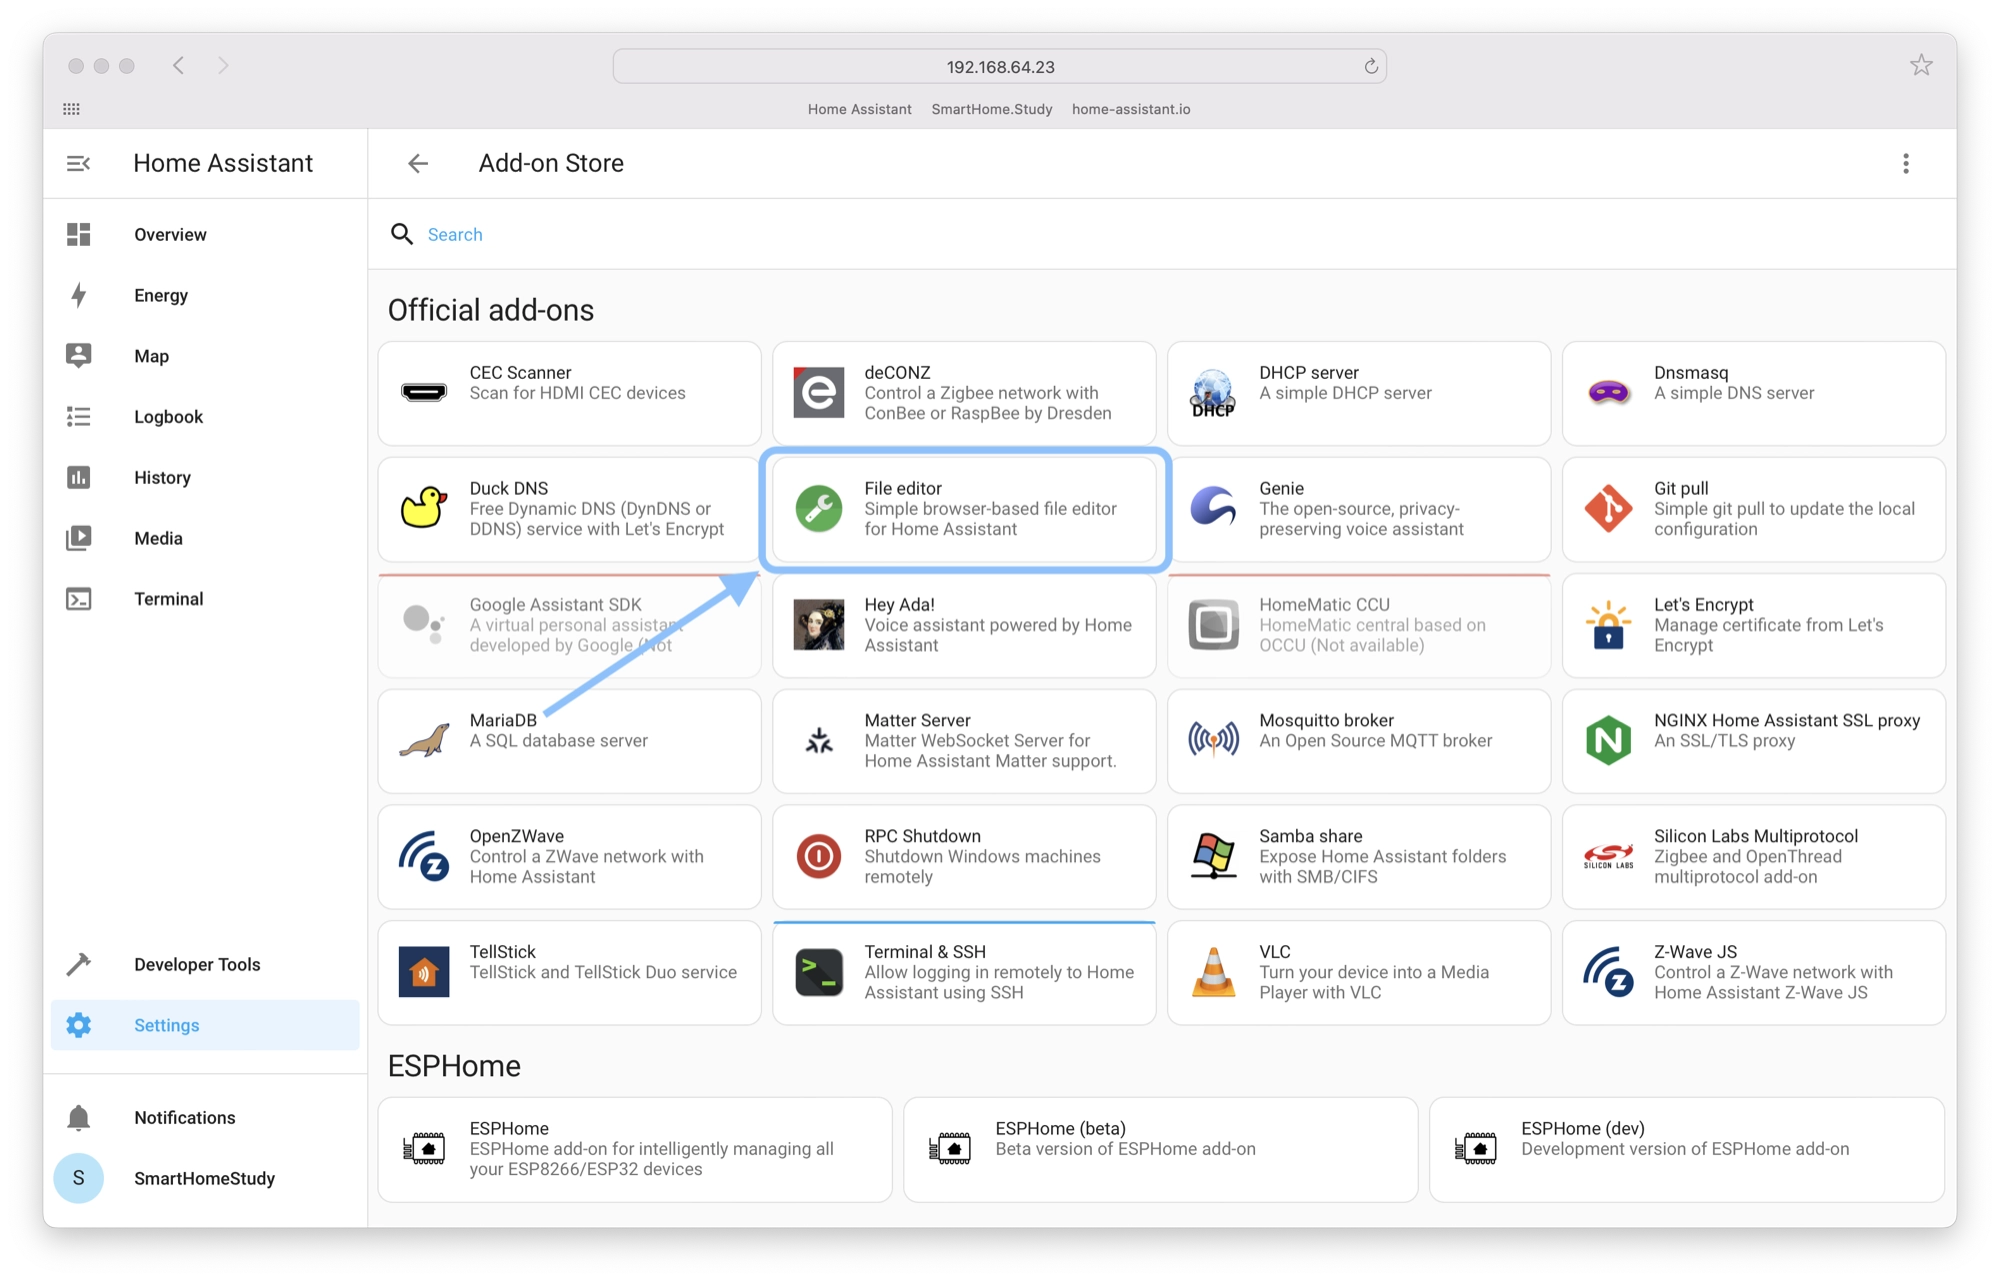
Click the File Editor in the add-ons store under official add-ons. You can also use the search bar at the top to search for specific add-ons.
Click install in order to install the file editor.
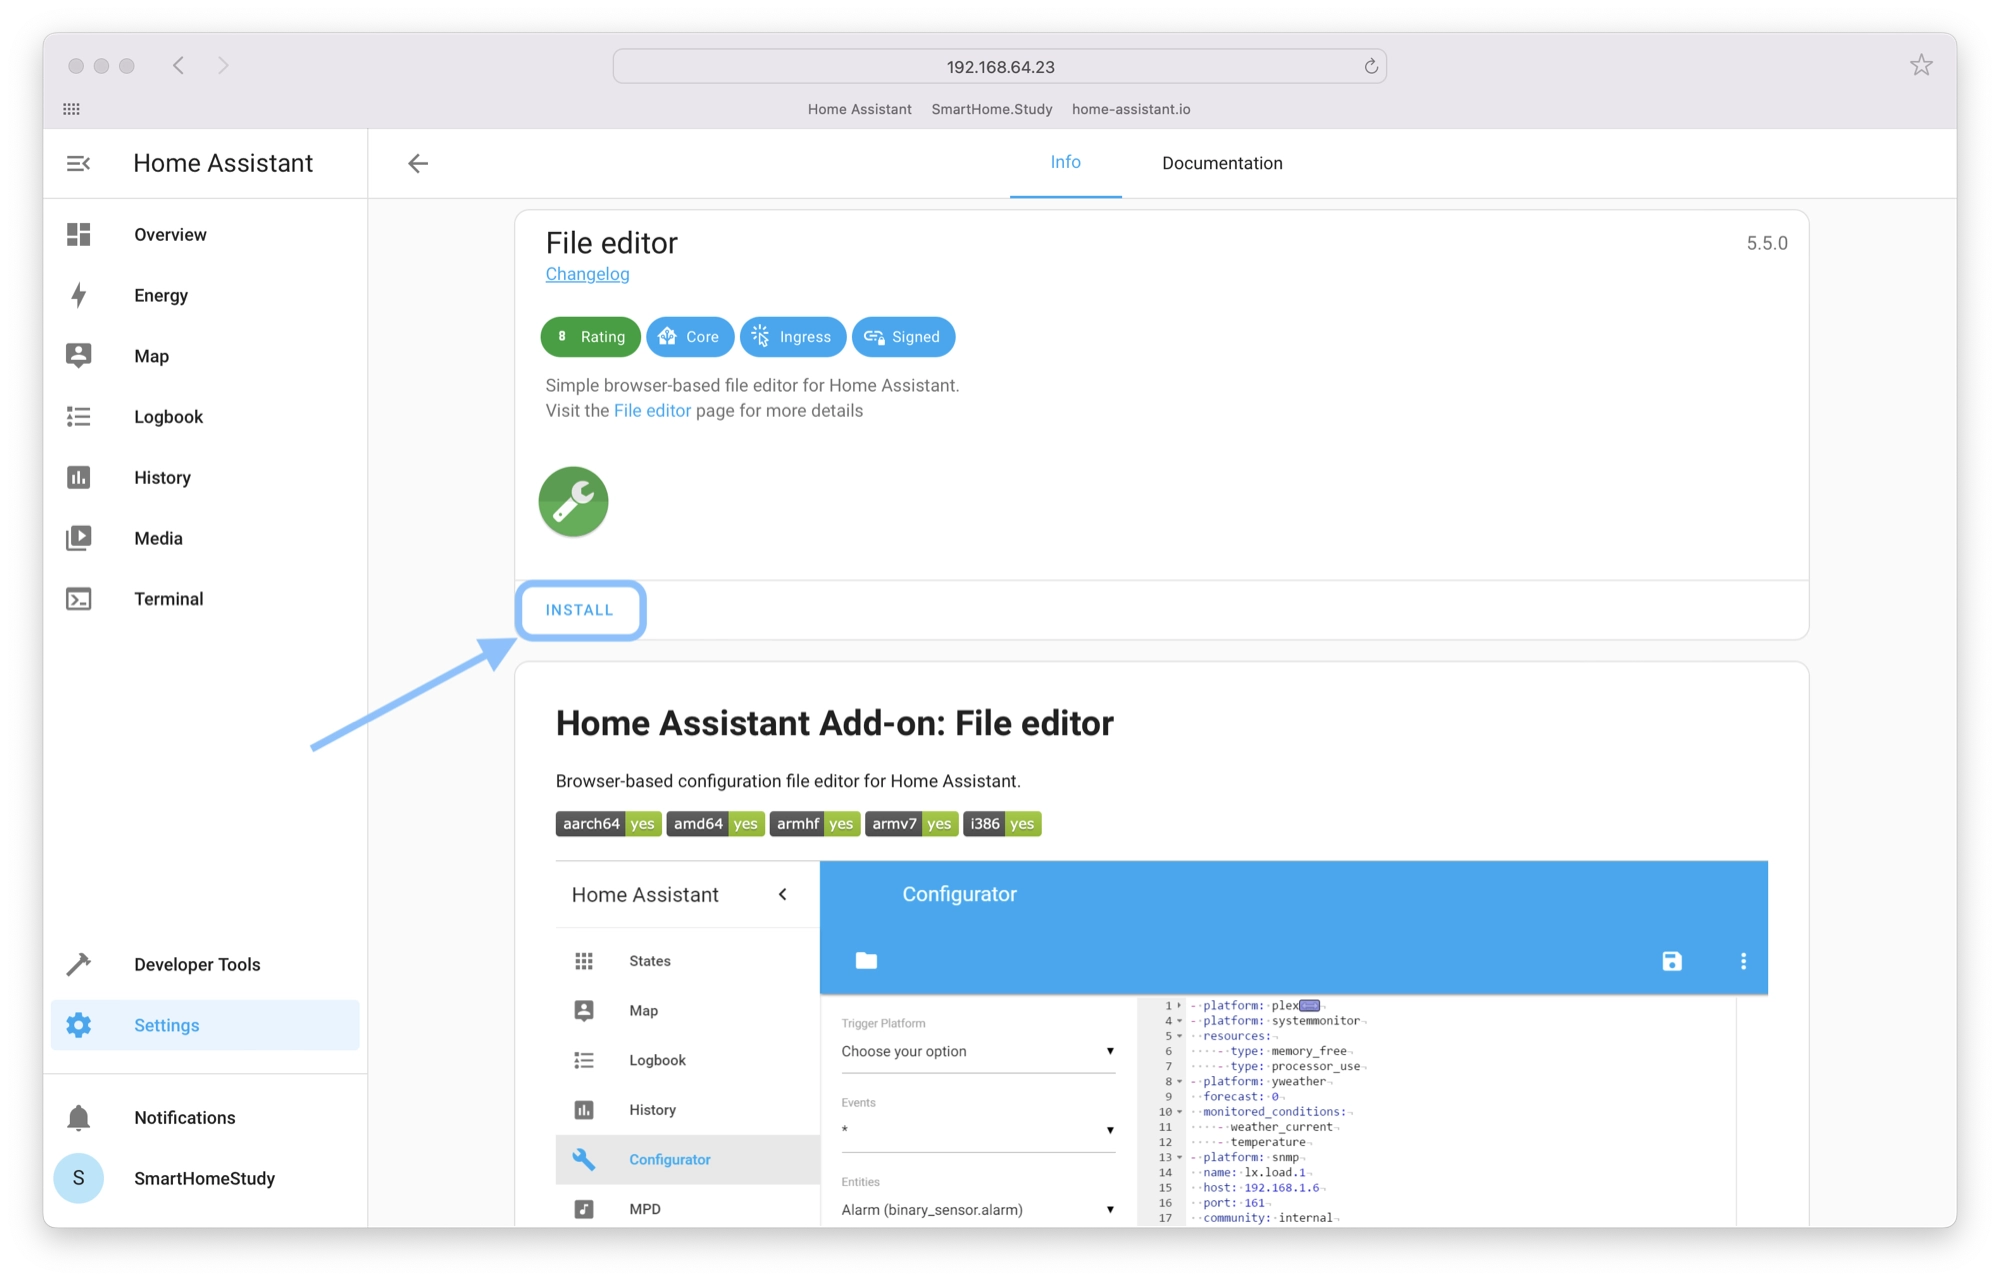
Once the installation has completed, click start in order to start the file editor.
It would also be recommended to turn on the show in sidebar option, which will add a navigation link to the left-hand sidebar so that the file editor can be accessed quickly and easily.
You can do this by clicking the corresponding switch to put it into the on position.

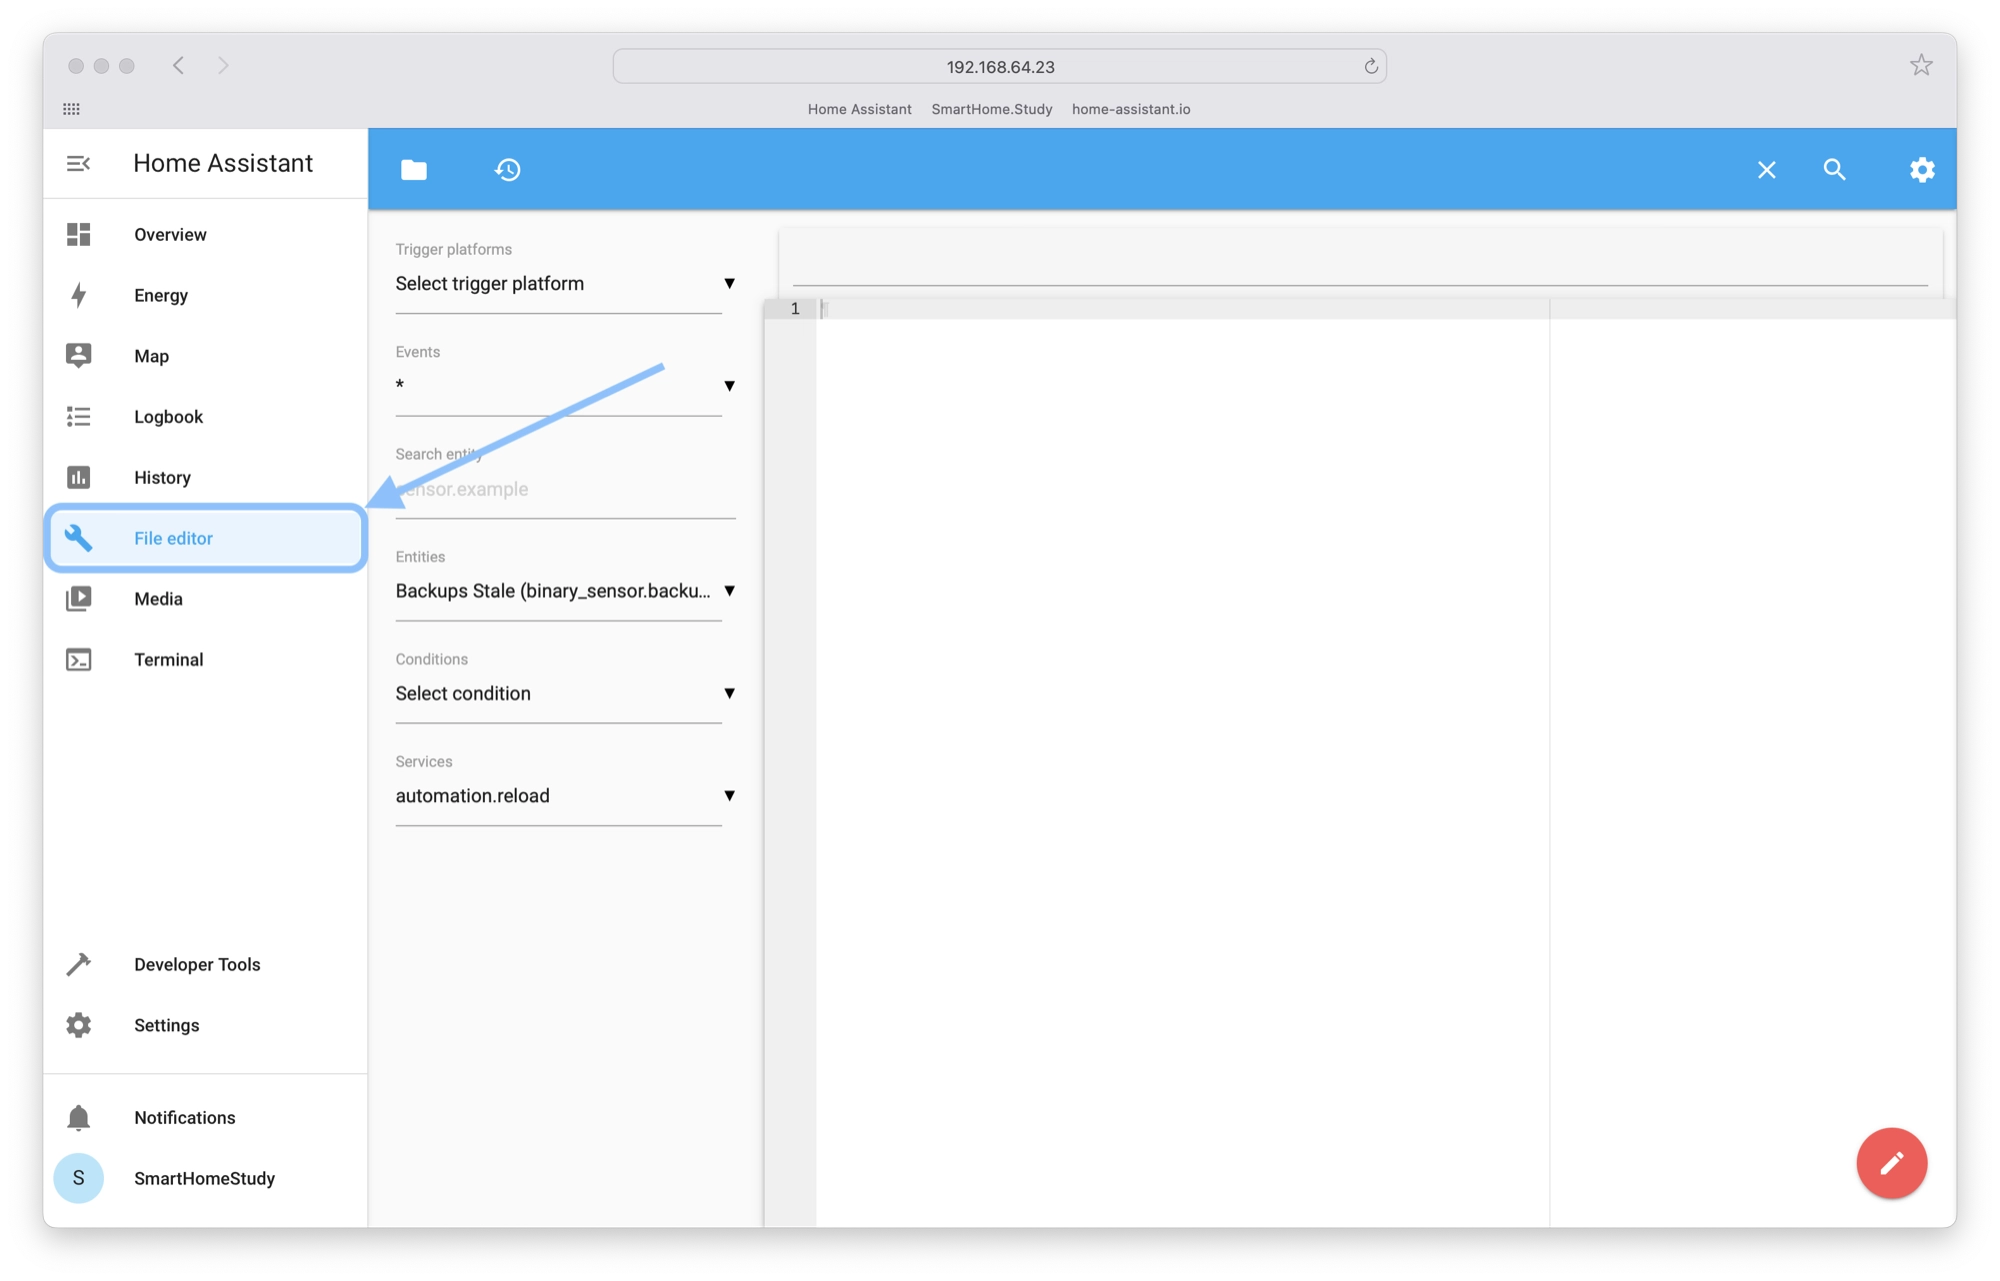
Once the file editor has started, you can open it using the file editor link in the left-hand sidebar.
At this stage we won’t complicate things too much, the features of File Editor will be covered when needed later in the course.
That’s it! You can now access the file editor. Next, go ahead and check out this article in order to begin learning YAML.
Thanks so much for visiting my site! If this article helped you achieve your goal and you want to say thanks, you can now support my work by buying me a coffee. I promise I won't spend it on beer instead... 😏


