Looking for an easy way to stream smooth high quality video from a remote Raspberry Pi to Home Assistant?
It took me a while to refine this method, however I eventually collated a variety of information together to make this super-simple for you. This method works great with the official Raspberry Pi camera!
In this tutorial we will learn how to set up a headless lightweight RTSP server on a Raspberry Pi and then add the stream source to Home Assistant. We will do this keeping the complexity of the terminal commands to a minimum.
I will be using a Raspberry Pi 4 running Raspbian Lite for maximum performance. However as this method is headless, it requires fewer resources and is ideal for your Raspberry Pi Zero W.
Table of Contents
Prerequisite
You will need a Raspberry Pi and a camera connected, like the official Pi camera.
This should be separate from your Home Assistant server as this tutorial is for configuring a remote Raspberry Pi camera.
If you are looking to add a Raspberry Pi camera connected to the same Pi that you use for your Home Assistant server, see this page on the Home Assistant website.
For this tutorial I will be using a Raspberry Pi 4 and the official Pi camera.
You can also use a USB or other camera connected to your Pi. If you need to install the latest version of Raspbian, go check out my Raspbian installation tutorial.
You can also learn how to access your Pi over SSH if you want to build a headless system.
If you plan to add the RTSP feed to Home Assistant, You should also have it installed and running. A basic understanding of YAML, including how to edit configuration.yaml would be beneficial.
If you are new to Home Assistant or you are not yet familiar with editing YAML files then you should definitely check out my beginners tutorial on YAML first. I would also recommend taking a look at my other tutorials on automation and scripts.
Configure Raspberry Pi
In order to stream the video from a Raspberry Pi to a remote location, in this case our Home Assistant server (a second Raspberry Pi or computer), we will use RTSP. In order to do this we will be using v4l2rtspserver.
If you are using the official Pi camera, you will first need to enable it. From the terminal, go ahead and enter the following command.
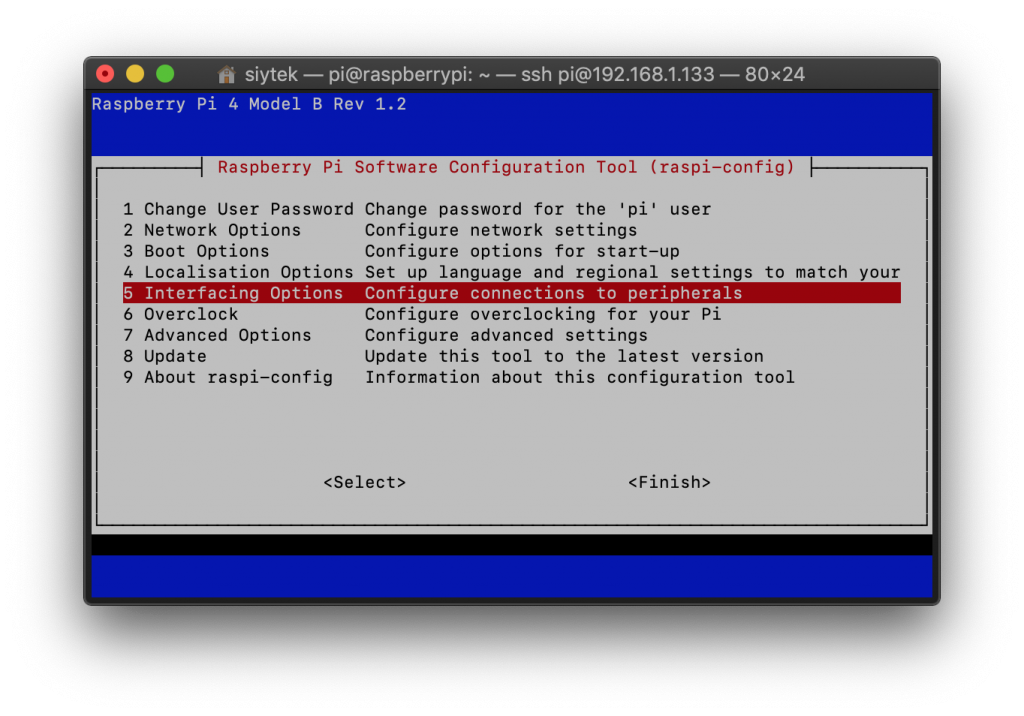
sudo raspi-config
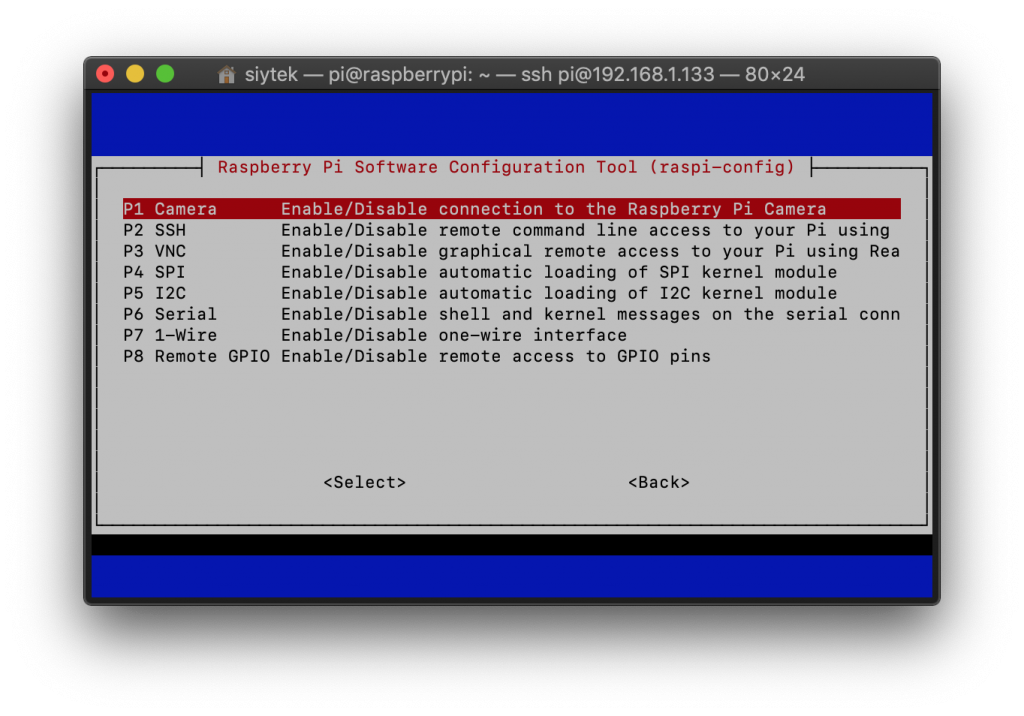
This will take you to the Raspberry Pi configuration menu. Goto interfacing options and select camera. Enable the camera and then goto finish.

Test the camera
Once you have enabled the camera, you can test it by entering the following command to take a still picture.
raspistill -v -o test.jpg
If you are running a headless machine, you can still view the image in low resolution using terminal.
sudo apt-get install caca-utils -y
Once caca-utils has installed you can view the image with the following command.
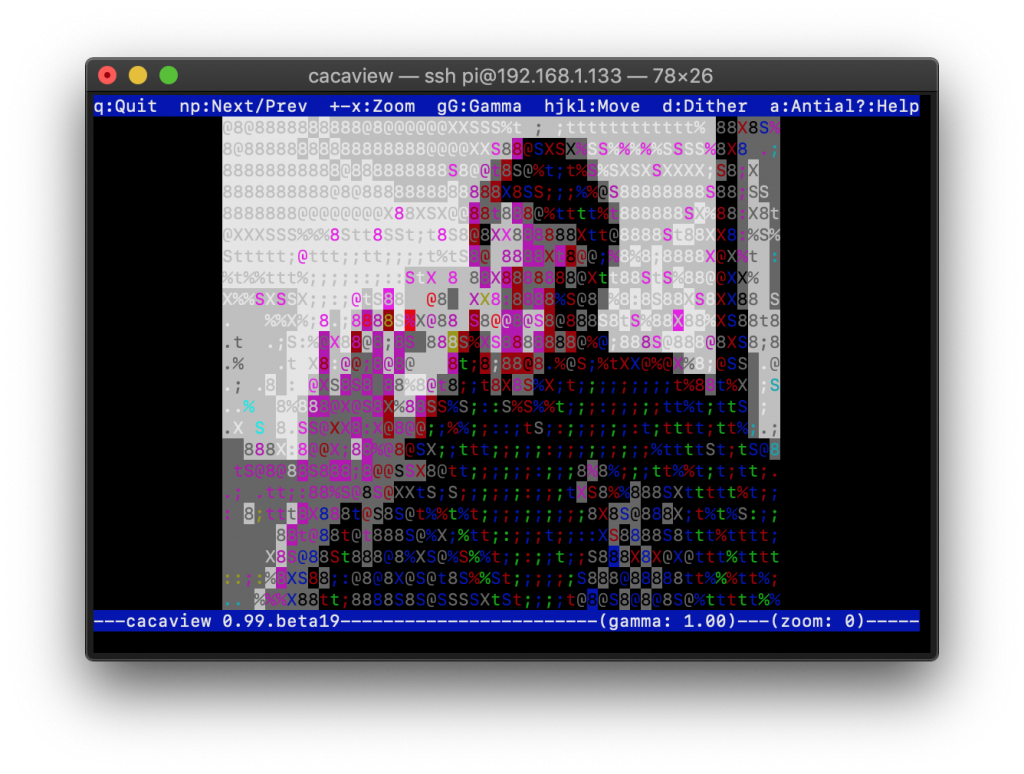
cacaview test.jpg
Of course the resolution is very poor in the terminal! But at least we can see that the camera is functioning correctly.
Correct orientation
If you find that the orientation is incorrect, you can flip the image in either the horizontal or vertical axis.
v4l2-ctl --set-ctrl vertical_flip=1

v4l2-ctl --set-ctrl horizontal_flip=1
Install v4l2rtspserver
Now that we have configured the camera, we can install v4l2rtspserver. This will allow us to take the live feed from the camera and stream it over RTSP. First we need to install the necessary packages.
sudo apt-get install cmake liblog4cpp5-dev libv4l-dev git -y
Once the packages are installed we can download the repository and build the source.
git clone https://github.com/mpromonet/v4l2rtspserver.git ;cd v4l2rtspserver/;cmake .;make;sudo make install
Start video stream
Once the installation has completed, we can start the video stream with the following command. You can adjust the height (-H), width (-W) and frame rate (-F) properties as you prefer.
v4l2rtspserver -W 640 -H 480 -F 15 -P 8554 /dev/video0
If you are using a secondary camera such as a webcam connected to USB, you can change video0 as you prefer.
Test video stream
Once you have the stream up and running you can test to see if it can be received using VLC media player. In VLC go ahead and click file > open network. Then point VLC to your RTSP stream replacing <raspberry-pi-ip> with the IP address of your Pi.
rtsp://<raspberry-pi-ip>:8554/unicast
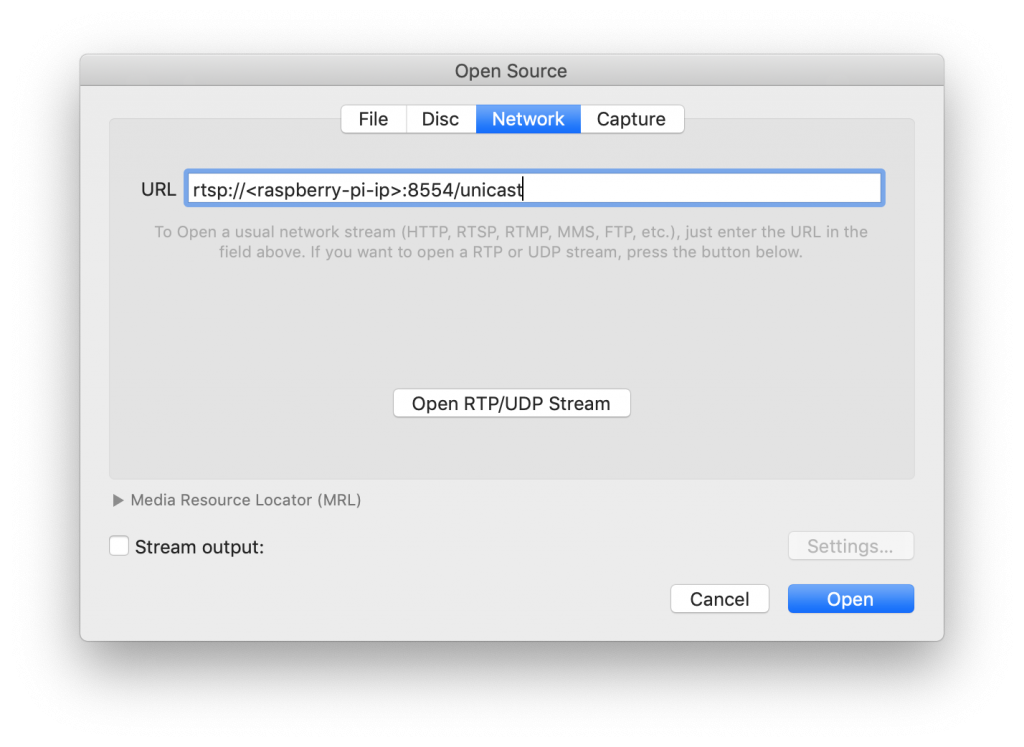
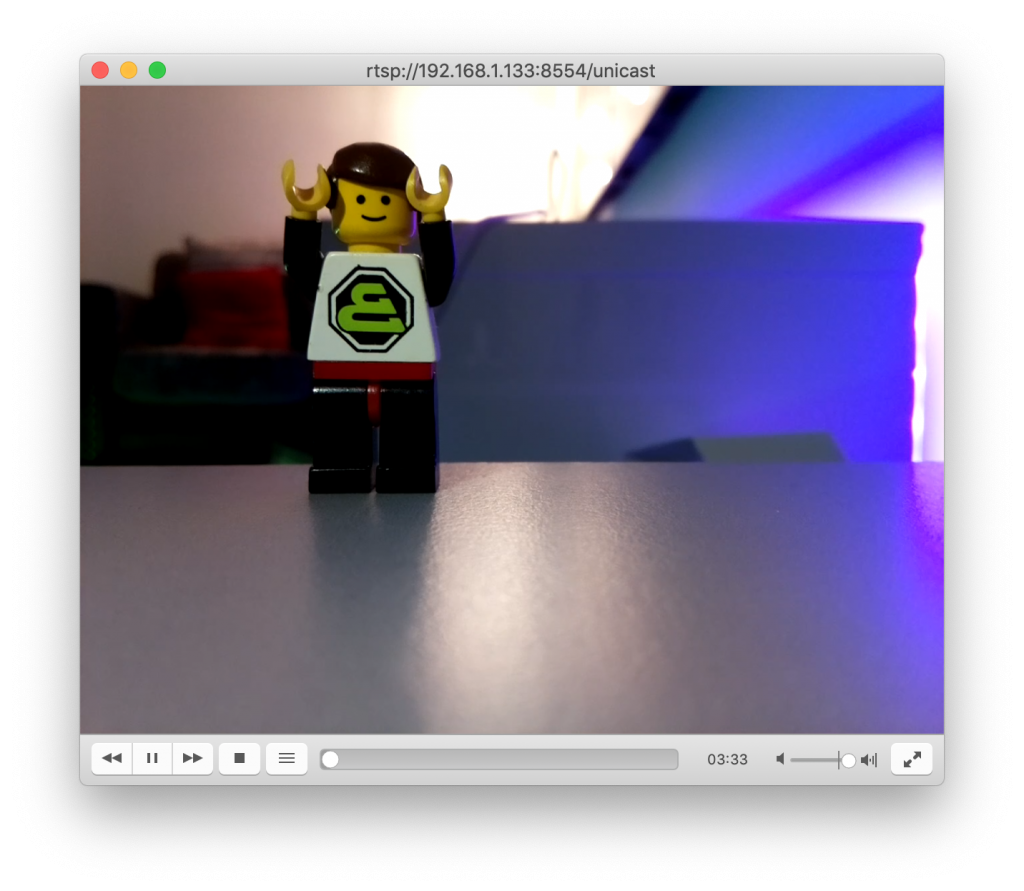
Click on open and you should be able to see a live stream of your Raspberry Pi camera!
Launch on boot
Finally we can configure v4l2rtspserver to launch when the Pi boots up. First we need to edit the v4l2rtspserver.service file.
sudo nano /lib/systemd/system/v4l2rtspserver.service
We need to edit the ExecStart line, replacing the exiting startup command with the one from above. After editing the line should look something like this.
ExecStart=v4l2rtspserver -W 640 -H 480 -F 15 -P 8554 /dev/video0
Once you have amended the file, press ctrl + X to save and quit. Finally we need to enable the service on boot with the following command.
sudo systemctl enable v4l2rtspserver
Now go ahead and reboot your Pi, the streaming server should now be running in the background and you can check by connecting again with VLC.
sudo reboot
Configure Home Assistant
Now that we have our remote Raspberry Pi camera configured, we can add it to Home Assistant using the camera integration. Go ahead and open up your configuration.yaml file in the file editor.
Add camera configuration
We need to add an ffmpeg compatible camera to the camera integration. Set the platform to ffmpeg and choose a prefered name, in this case RasPi4.
We will then be able the reference the camera with the entity ID camera.raspi4. Set the input attribute to the RTSP address we used earlier to test the stream in VLC.
camera:
  - platform: ffmpeg
    name: RasPi4
    input: rtsp://<raspberry-pi-ip>:8554/unicast
Once you have added the instance to your configuration, go ahead and restart Home Assistant.
Add picture card
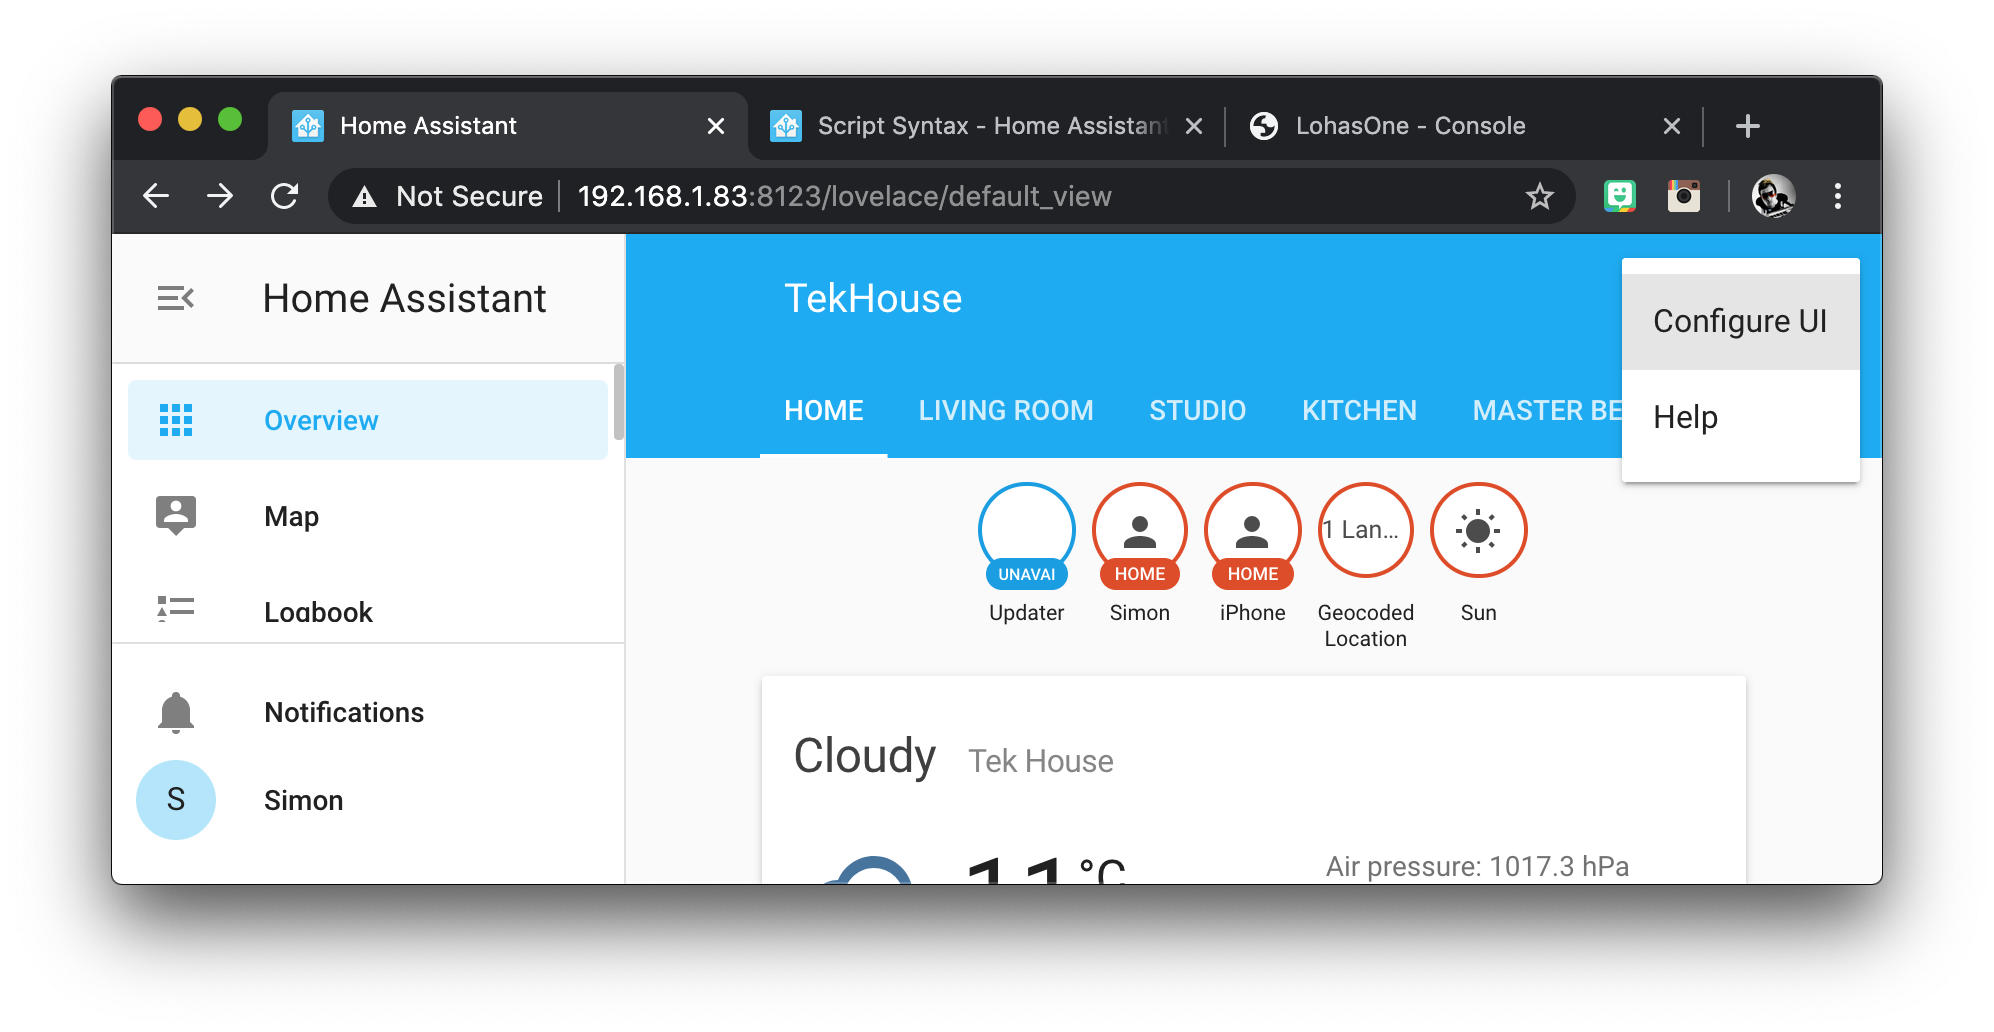
Now that we have the camera entity configured, lets add a preview to the UI in Home Assistant. We will add the camera feed using a glance card. From the overview page, click on the three dots and then configure UI in the top right-hand corner of the page.
This will switch on the UI editor mode. I will create a new tab called cameras for the cards but you can put them anywhere you like.
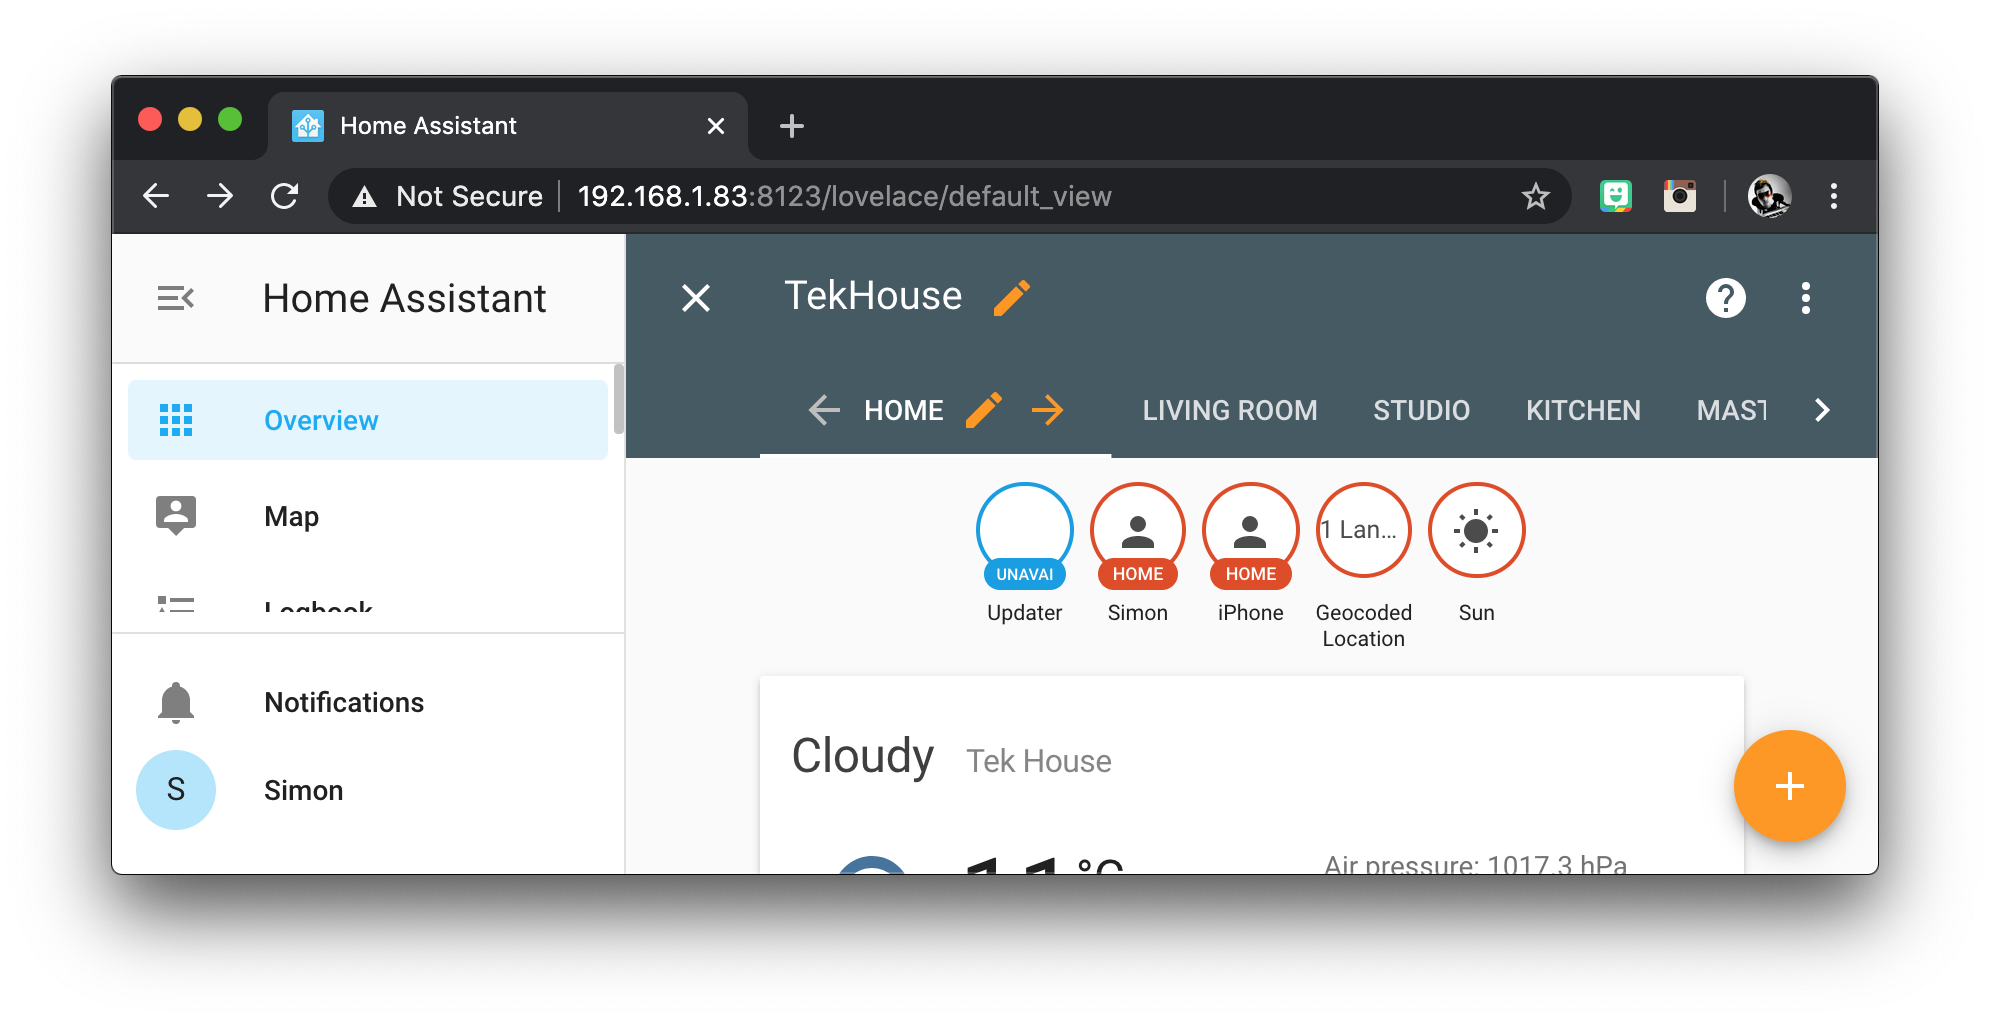
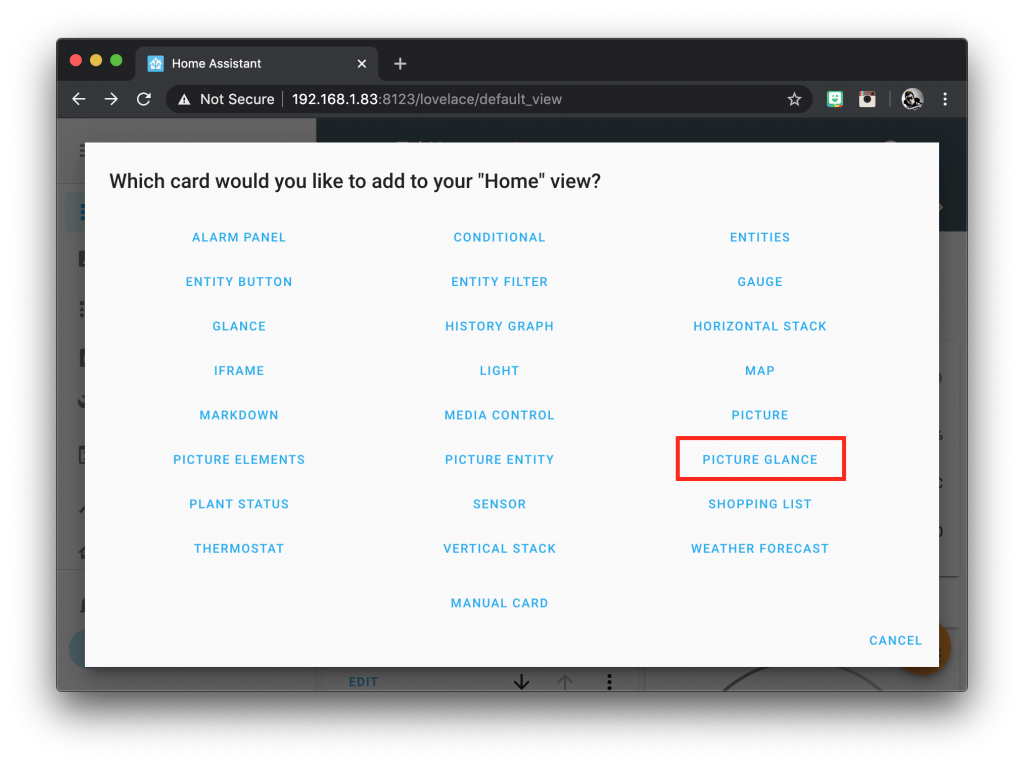
Once on the desired tab, click the orange circle with the plus towards the bottom left of the screen and then choose the picture glance card.
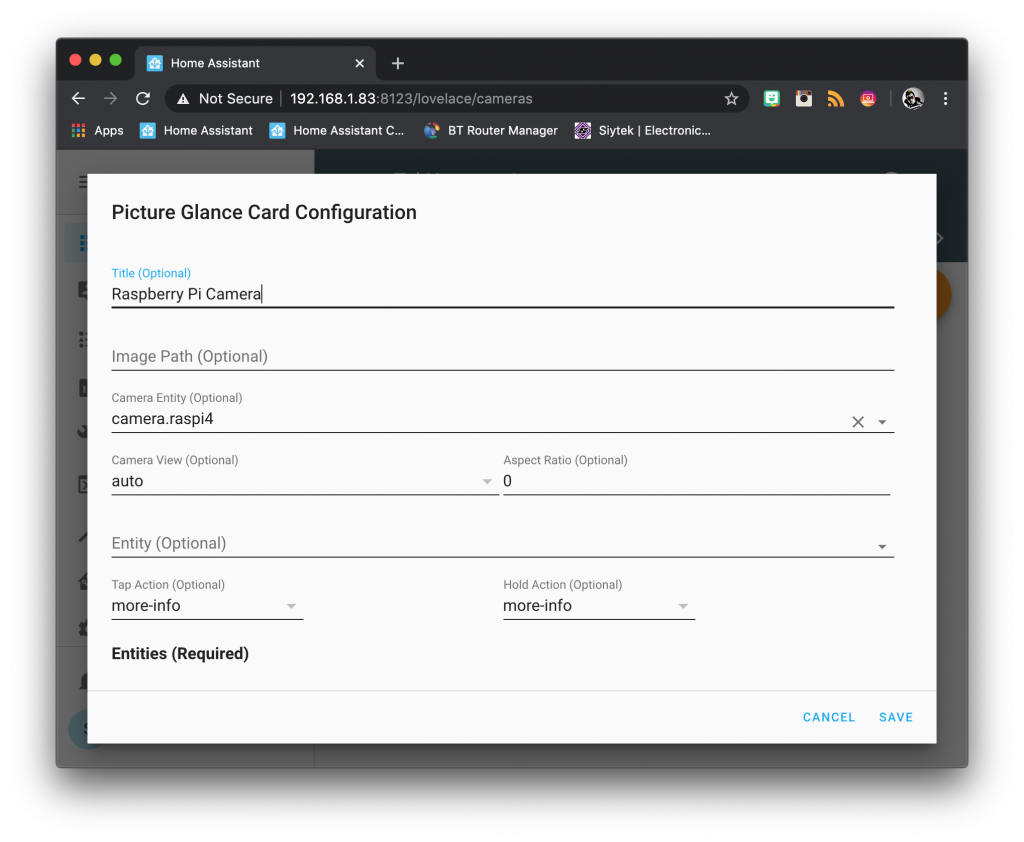
In the configuration window enter a desired name for the card, such as Raspberry Pi Camera. Choose the camera entity camera.<your-camera-name> in the camera entity box. The click save to add the card to the user interface.
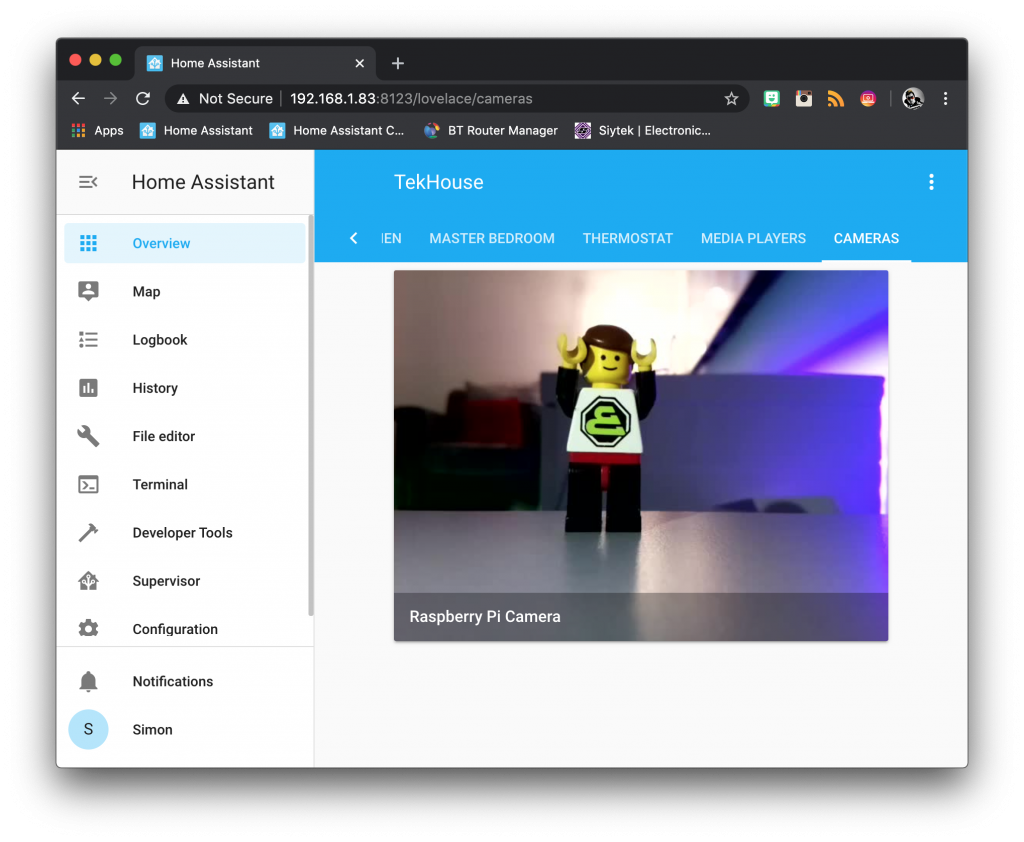
You should now have your camera feed displayed in your Home Assistant user interface. Awesome!
Conclusion
The camera integration is a powerful part of Home Assistant and this tutorial has provided an introduction in to how you can stream video from a Raspberry Pi.
This is a great way to learn how to configure the Raspberry Pi for RTSP streaming and also how to add a simple camera setup to Home Assistant.
It may be of further benefit for anyone wanting to install a Pi in a room for a different purpose, but that can also serve video.
Why not go ahead and check out some of my other Home Assistant tutorials to get some ideas for the kind of things you can do with the awesome Home Assistant!
Thanks so much for visiting my site! If this article helped you achieve your goal and you want to say thanks, you can now support my work by buying me a coffee. I promise I won't spend it on beer instead... 😏


Hey, greate tutorial, thank you! 🙂
I had issues with the picture quality and solved this by adding the command line argument -c to v4l2rtspserver, which prevents re-sending the config.
The issue I saw was a mostly grey image, the cause was the loss of I-Frames.
Thanks for the additional info Salbeiwurzel!
Pingback: Live Video Streaming Using Raspberry Pi Camera
Nice write-up. Any idea how to rotate the video stream?
/facepalm answered my own question by re-reading the post. Thanks!
Hi,
Thank you for a very nice tutorial
I have a question
How to use multiple cameras connected on the Raspberry at the same time
Thank you
Nice tutorial. All works as advertised when using VLC but: only on “localhost” (the PI itself)
Command used: “v4l2rtspserver -W 1920 -H 1080 -F 15 -P 8554 /dev/video0” and the picture is perfect.
In VLC Ii have: “rtsp://localhost:8554/unicast”, this however works nowhere else (not even chromium on localhost). What am I missing?
Thanks for any tips
Ron
Ok, browsers do not support rtsp, i know that now. Adding the camera to MotionEye worked. Should have tried that first.
Sorry about the noise. Great tutorial like I said and I should haver stopped there
Regard
Ron