Whether you have a shiny new Apple Silicon Mac with the coveted ‘M’ chip inside, or a trusty old and faithful Intel Mac, it is now possible to run Windows 11 right from your macOS desktop using an awesome free tool called UTM.
UTM is a free and open source app that can be used to create virtual machines on Mac, available for both Apple Silicon and Intel machines.
In this article you will learn how to create a virtual machine using UTM and install Windows 11 as the guest operating system (OS).
- Is it Possible to Run Windows For Free on macOS?
- Prerequisite
- How to Download the Windows Installation Disk Image
- How to Create a New UTM Virtual Machine to Run Windows 11
- How to Install Windows 11 on a UTM Virtual Machine
- How to Install the SPICE Guest Tools in Windows 11 on a UTM Virtual Machine
- Conclusion
Is it Possible to Run Windows For Free on macOS?
Yes, the process of running Windows on macOS is free, so long as you have a licence for the copy of Windows that you are running.
With that said, Microsoft don’t actually prevent you from installing and running Windows 11 on your Mac, even if you don’t enter a licence during the installation.
Windows will boot to the desktop and will periodically remind you to add a licence, which you can do at your convenience.
Disclaimer: you are responsible for ensuring that you run Windows 11 with the correct licence. This article is provided for educational purposes only and I do not accept any responsibility for any copyright related infringement caused from running Windows 11 using this method.
With that out of the way, let’s begin!
Prerequisite
In order to complete this tutorial, you will first need to download and install the latest version of UTM. You can download UTM for free from GitHub.
You can also download UTM from the official Apple App store for a small fee, if you wish to support the project.
- Scroll to the bottom of the latest release page and download the UTM.dmg file.
- Double click the UTM.dmg file to mount it and then drag the UTM app to your applications directly.
- Launch UTM by double clicking the icon in your applications directory.
You will also need the Windows 11 installation disk image, which can be downloaded for free from Microsoft. You will need to download the correct disk image for your machine, depending on whether you have an Apple Silicon or an Intel Mac.
How to Download the Windows Installation Disk Image
If you are unsure whether your Mac is an Intel or Apple Silicon machine, you can check by clicking the Apple logo in the top left-hand corner of the screen and then click About This Mac.
In the dialog box that opens, check the chip version of your machine. Once you have established the architecture of your machine, use either of the following to download the correct version of Windows 11:
- Apple ‘M’ type processor – your Mac is an Apple Silicon machine (ARM architecture)
- Intel type processor – your Mac is an Intel machine (x86_64 architecture)
Download Window 11 for Intel Mac
Downloading the Windows 11 installation disk image for Intel machines is straightforward:
- Goto the Windows 11 download page on the official Microsoft site
- Scroll down to the Download Windows 11 Disk Image (ISO) for x64 devices section of the page.
- Choose Windows 11 (multi-edition ISO for x64 devices).
- Click Download Now.
Download Windows 11 for Apple Silicon Mac
If you have an Apple Silicon process then you will need the version of Windows that is compatible with ARM processors.
At the time of writing this version is not available from the main download page, although you may want to check first in case this has changed since the article was published.
Windows 11 for ARM is officially only available to developers, however there is a way that you can download it without a Developer account. First we need to install some prerequisites:
- Open the Terminal app located in the applications/utilities folder (or use Spotlight search).
- Enter the following command to install Homebrew:
/bin/bash -c "$(curl -fsSL https://raw.githubusercontent.com/Homebrew/install/HEAD/install.sh)"
- Once the installation script has completed, enter the following command:
brew tap sidneys/homebrew && brew install cabextract wimlib cdrtools sidneys/homebrew/chntpw
Once you have finished installing the prerequisites you can close the terminal window. Next, complete the following steps to download Windows 11 for ARM:
- Head over to the website https://uupdump.net/
- Under Quick Options, locate the Latest Public Release Build and then click the arm64 option.
- Click the Windows 11 link in the search results.
- Choose your desired language and then click Next.
- Under Edition, check the edition that you wish to download, either Windows Home or Windows Pro, and then click Next.
- Ensure that the Download and convert to ISO option is selected.
- Click Create download package to download the installation script
.zipfile. - If the downloaded
.zipfile does not automatically extract, double-click it to extract the files. You should see a folder with the same name. - Right-click the newly created folder and click New Terminal at Folder.
- A terminal window will open, enter the following command and enter your user account password if prompted:
chmod +x uup_download_macos.sh && sudo ./uup_download_macos.sh
Upon execution of this command the terminal should download the Windows 11 .iso disk image and save it into the folder created in step 8. This is the file that you will need during the next stage.
If you encounter any problems, open the readme.unix.md file using TextEdit, located in the folder created in step 8 and complete the instructions listed under macOS. Once done, repeat steps 9 and 10.
How to Create a New UTM Virtual Machine to Run Windows 11
In this section you will learn how to create a new virtual machine in UTM that can run Windows 11.
Before beginning you should make sure that you have the Windows 11 installation disk image .iso file saved somewhere on your Mac. If you don’t it yet, complete the previous steps in in the guide.
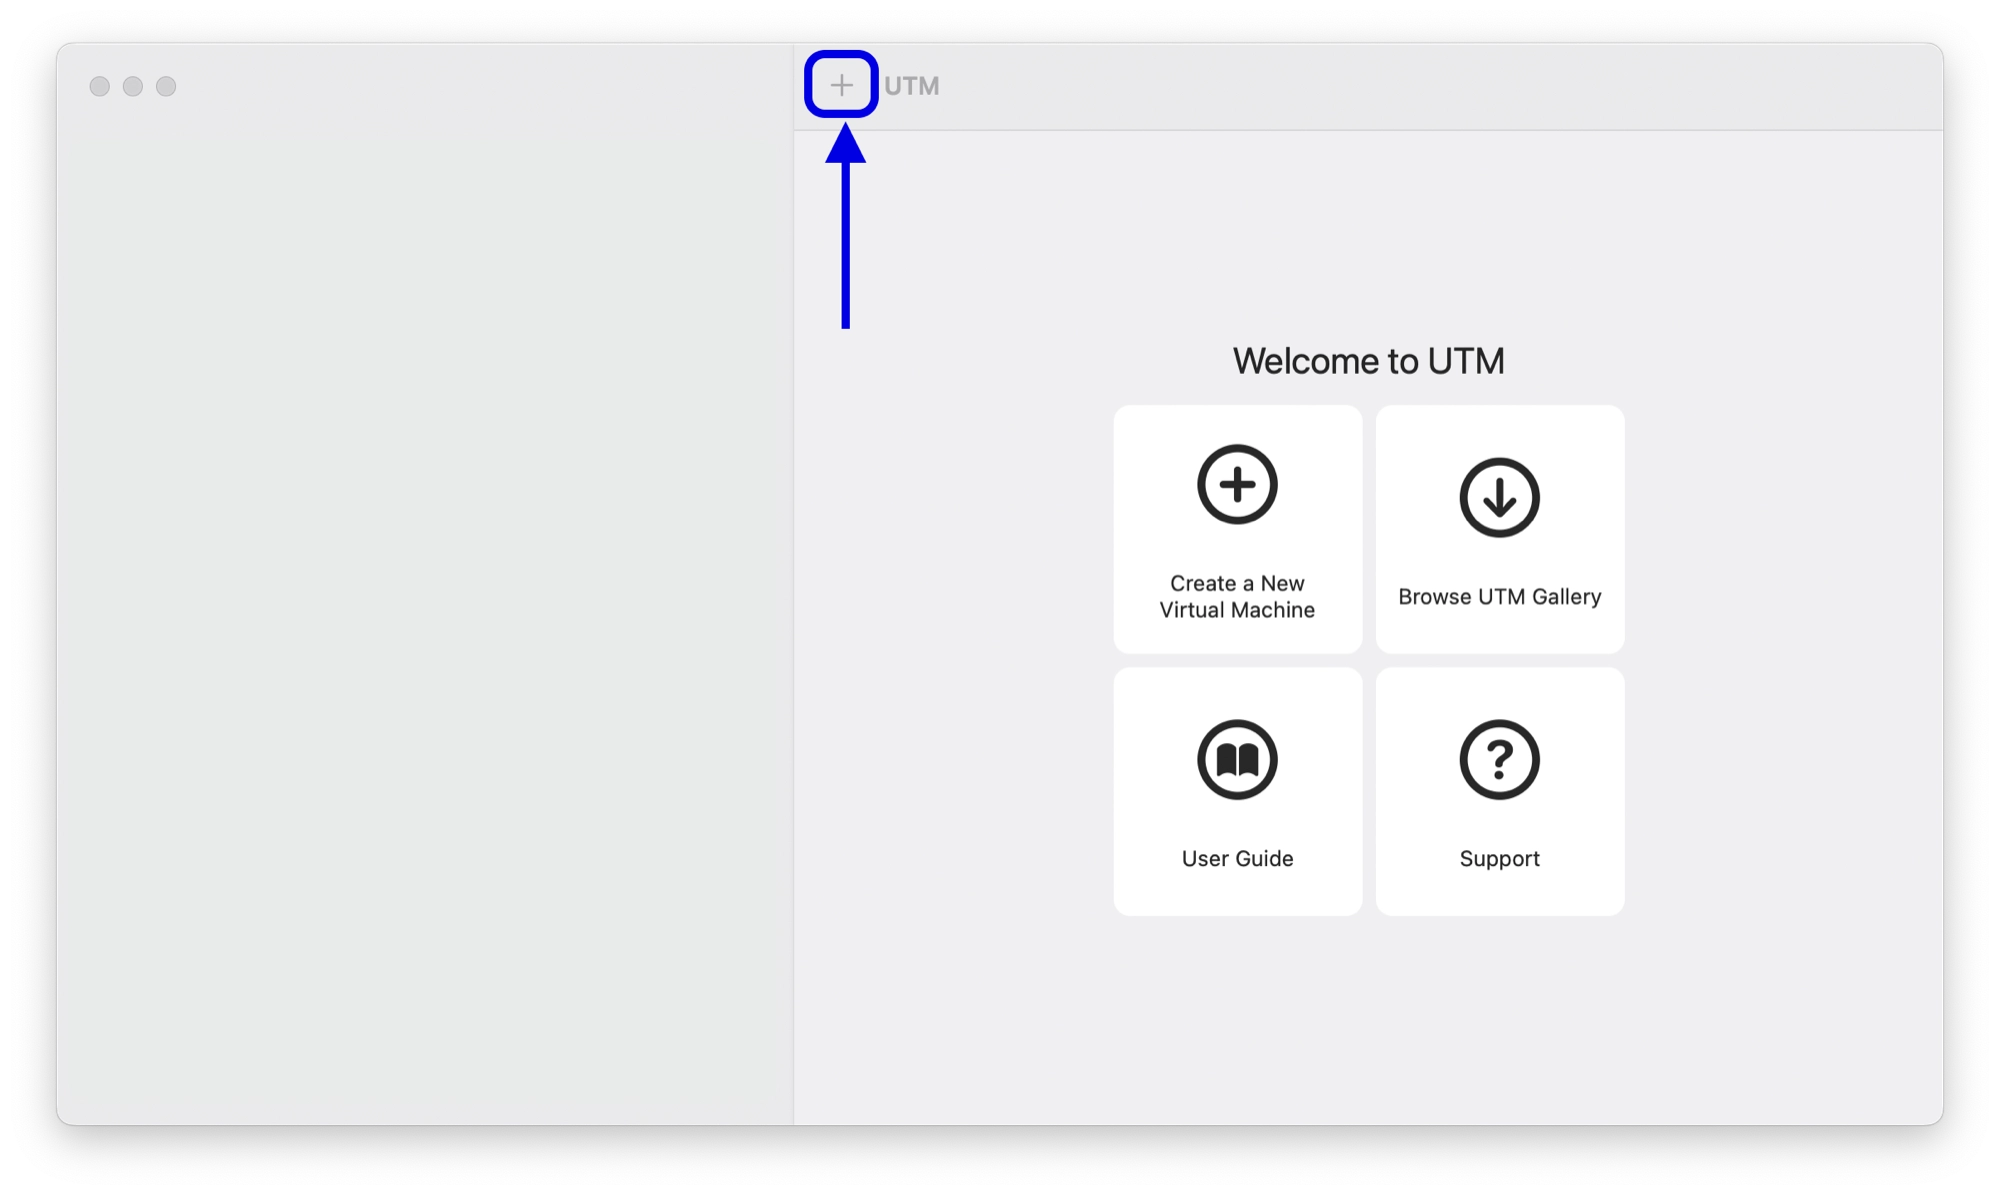
Create a New Virtual Machine in UTM
First, goto your applications folder and double-click the UTM icon to launch the UTM application. This will open the main UTM window.
In order to add a new virtual machine in UTM, click the ‘+’ button at the top of the main window:
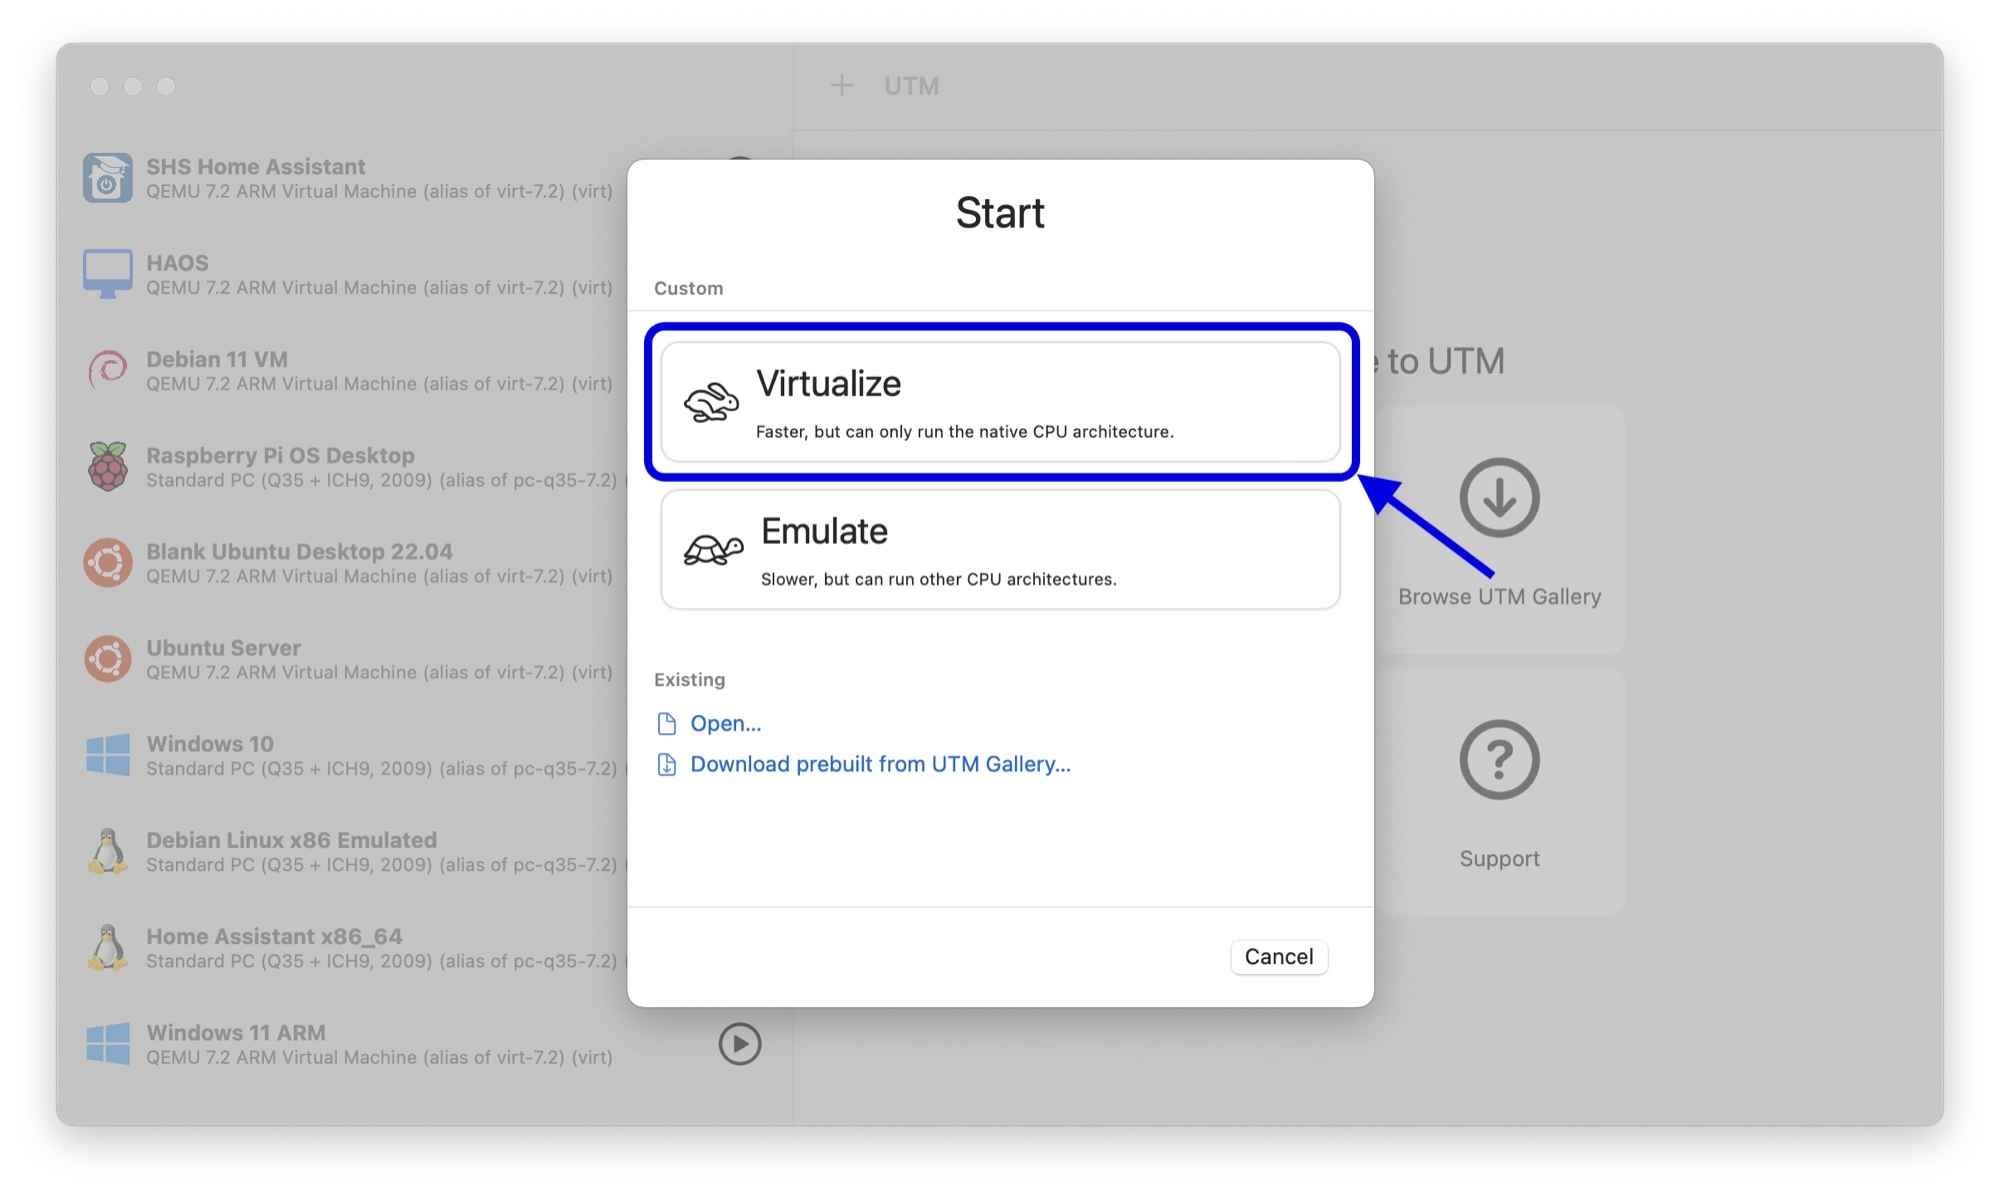
Creating a virtualized VM for Windows 11
On the first screen you will be given a choice of whether to use virtualization or emulation. Select the virtualization option by clicking the large button. This will give the virtual machine the best performance:
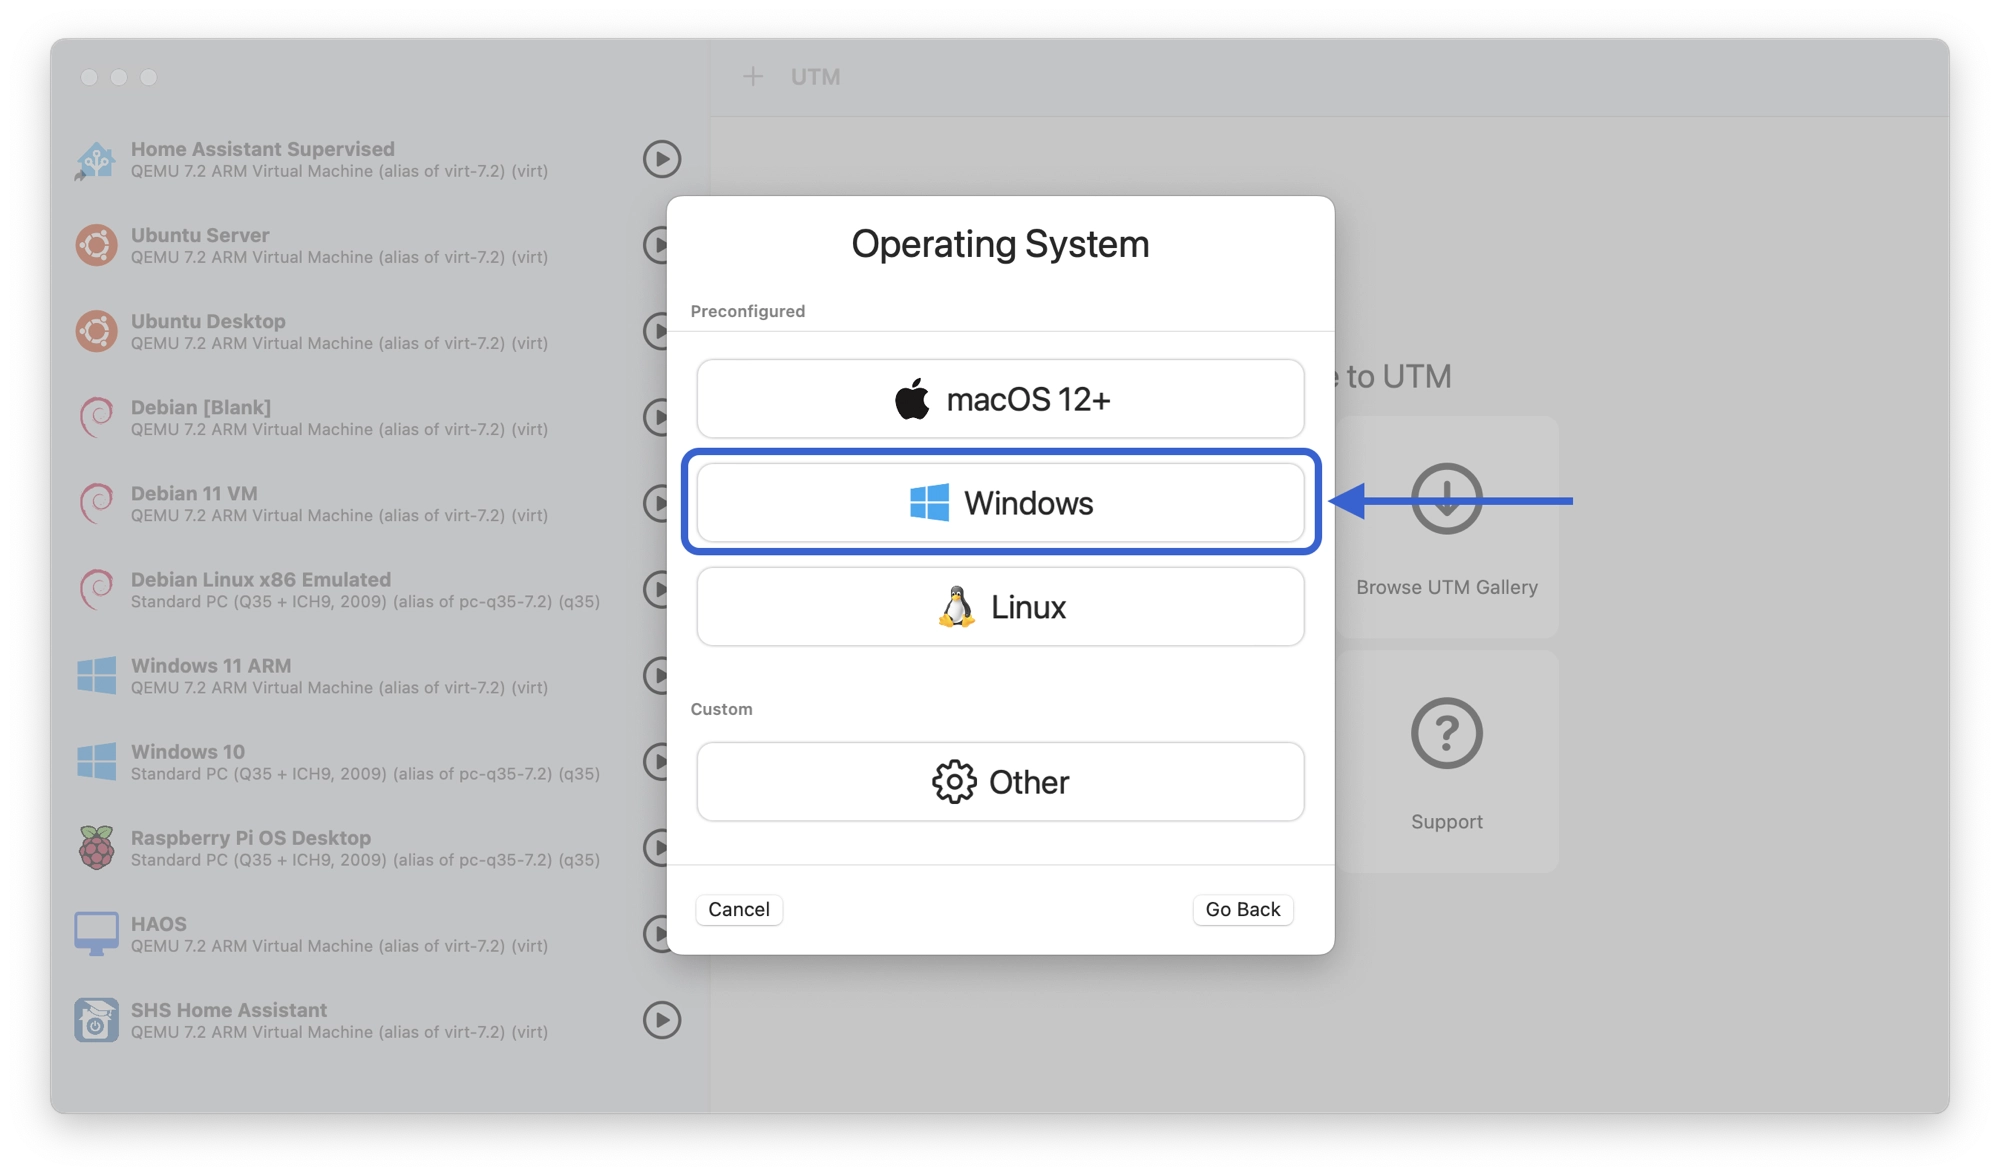
Choose an operating system
On the next screen we are given the option to choose the type of operating system, which can simplify the configuration. Choose Windows.
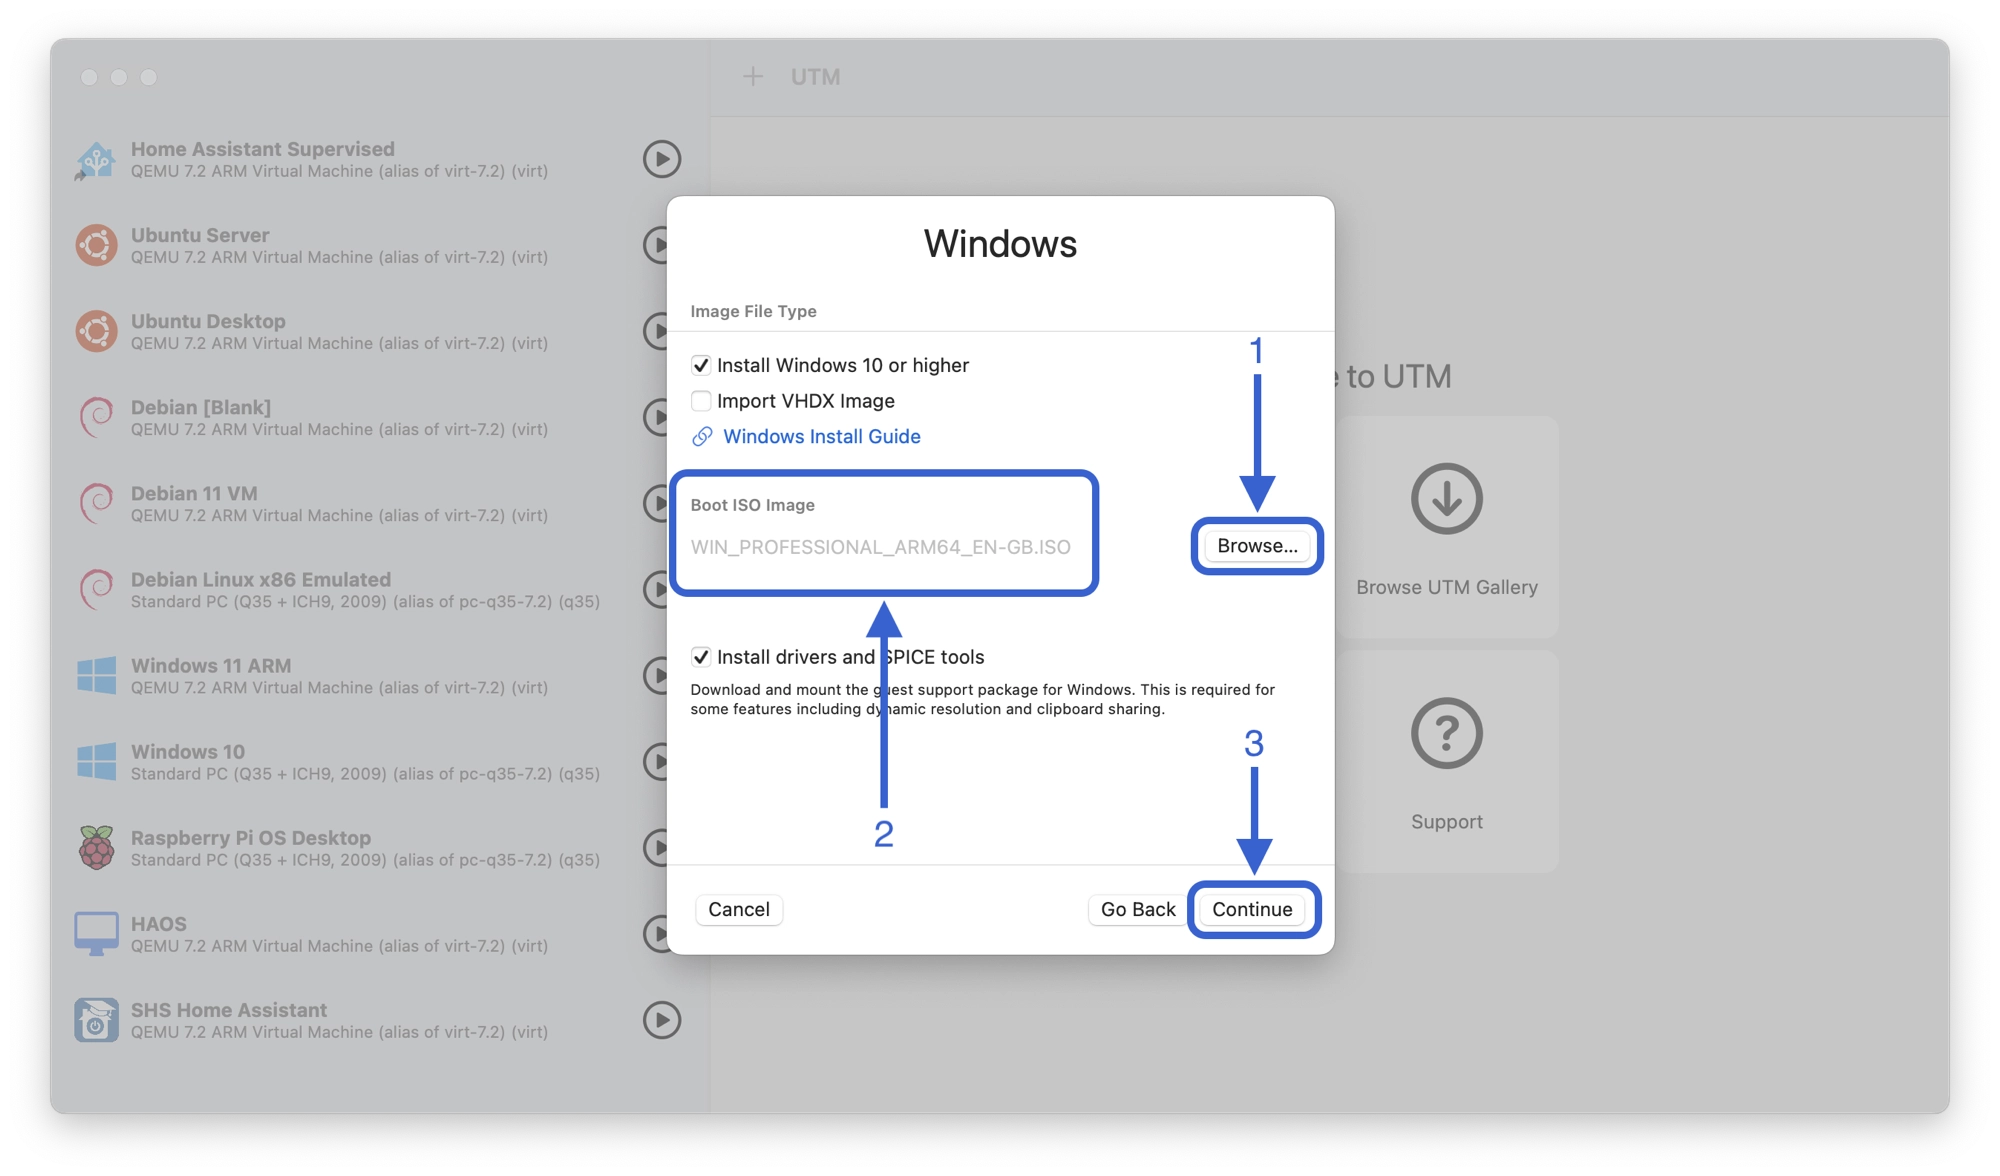
Choose the boot image
Next we need to supply UTM with a disk image that contains the Windows 11 installer that you downloaded earlier.
We need to point our virtual machine to this disk image. Under the boot ISO image section, (1) click browse and select the Windows .iso file that you downloaded earlier.
Once selected, (2) you will see the path to the .iso file. Note that your filename might vary, depending on the version of Windows 11 that you downloaded. (3) Click continue to move to the next step.
Choosing the hardware settings
Next, we can choose the hardware settings for our virtual machine.
For choosing the amount of RAM, a good rule of thumb is to choose somewhere between the Windows 11 minimum requirement and half of the amount of RAM that you have available on your Mac.
You can see how much RAM your Mac has by clicking the Apple logo in the top left-hand corner and then click About This Mac.
- If your Mac has 8 GB of RAM, choose 4 GB for the virtual machine.
- If your Mac has 16 GB of RAM, choose 8 GB for the virtual machine.
- If your Mac has more than 16 GB of RAM, choose a value that is half the amount of RAM that your Mac has.
For optimum performance you should leave at least half of your RAM available for macOS to use.
The number of cores can also be specified, but for a virtualized Windows system we can leave this set to default and let UTM manage it.
If you are unsure of the best settings to use, most likely the default settings will work just fine.
Click Continue to progress to the next step.
Choosing the disk size
On the next screen you can specify the size of the virtual hard disk. This is the size of disk that will be ‘seen’ by Windows.
You can choose any size that you like with a minimum size as specified by the Windows 11 minimum requirement, which is 64 GB.
It is worth noting that although Windows will see a disk of the size that you choose here, the space will not be used on your host system’s physical disk until you actually use the space in Windows.
Although it is possible to change the actual size of the disk after creating the virtual machine, the process can be quite complex so I would recommend choosing the required disk size at this stage, during the creation of the virtual machine.
Click Continue to progress to the next step.
Choosing a shared location
If you wish to share files between Windows and your Mac, you can choose a shared folder.
So long as you install the guest support (more on that later), you will be able to access this folder from both the guest and host operating systems, allowing you to easily transfer files.
Click browse and navigate to a folder that you want to share between the two operating systems, then click open to select it. Once selected, you will see the path appear under the shared directory path.
You can also check the share is read only box if you wish to prevent Windows from writing to the directory.
Click Continue to progress to the next step.
Finalizing and starting the VM
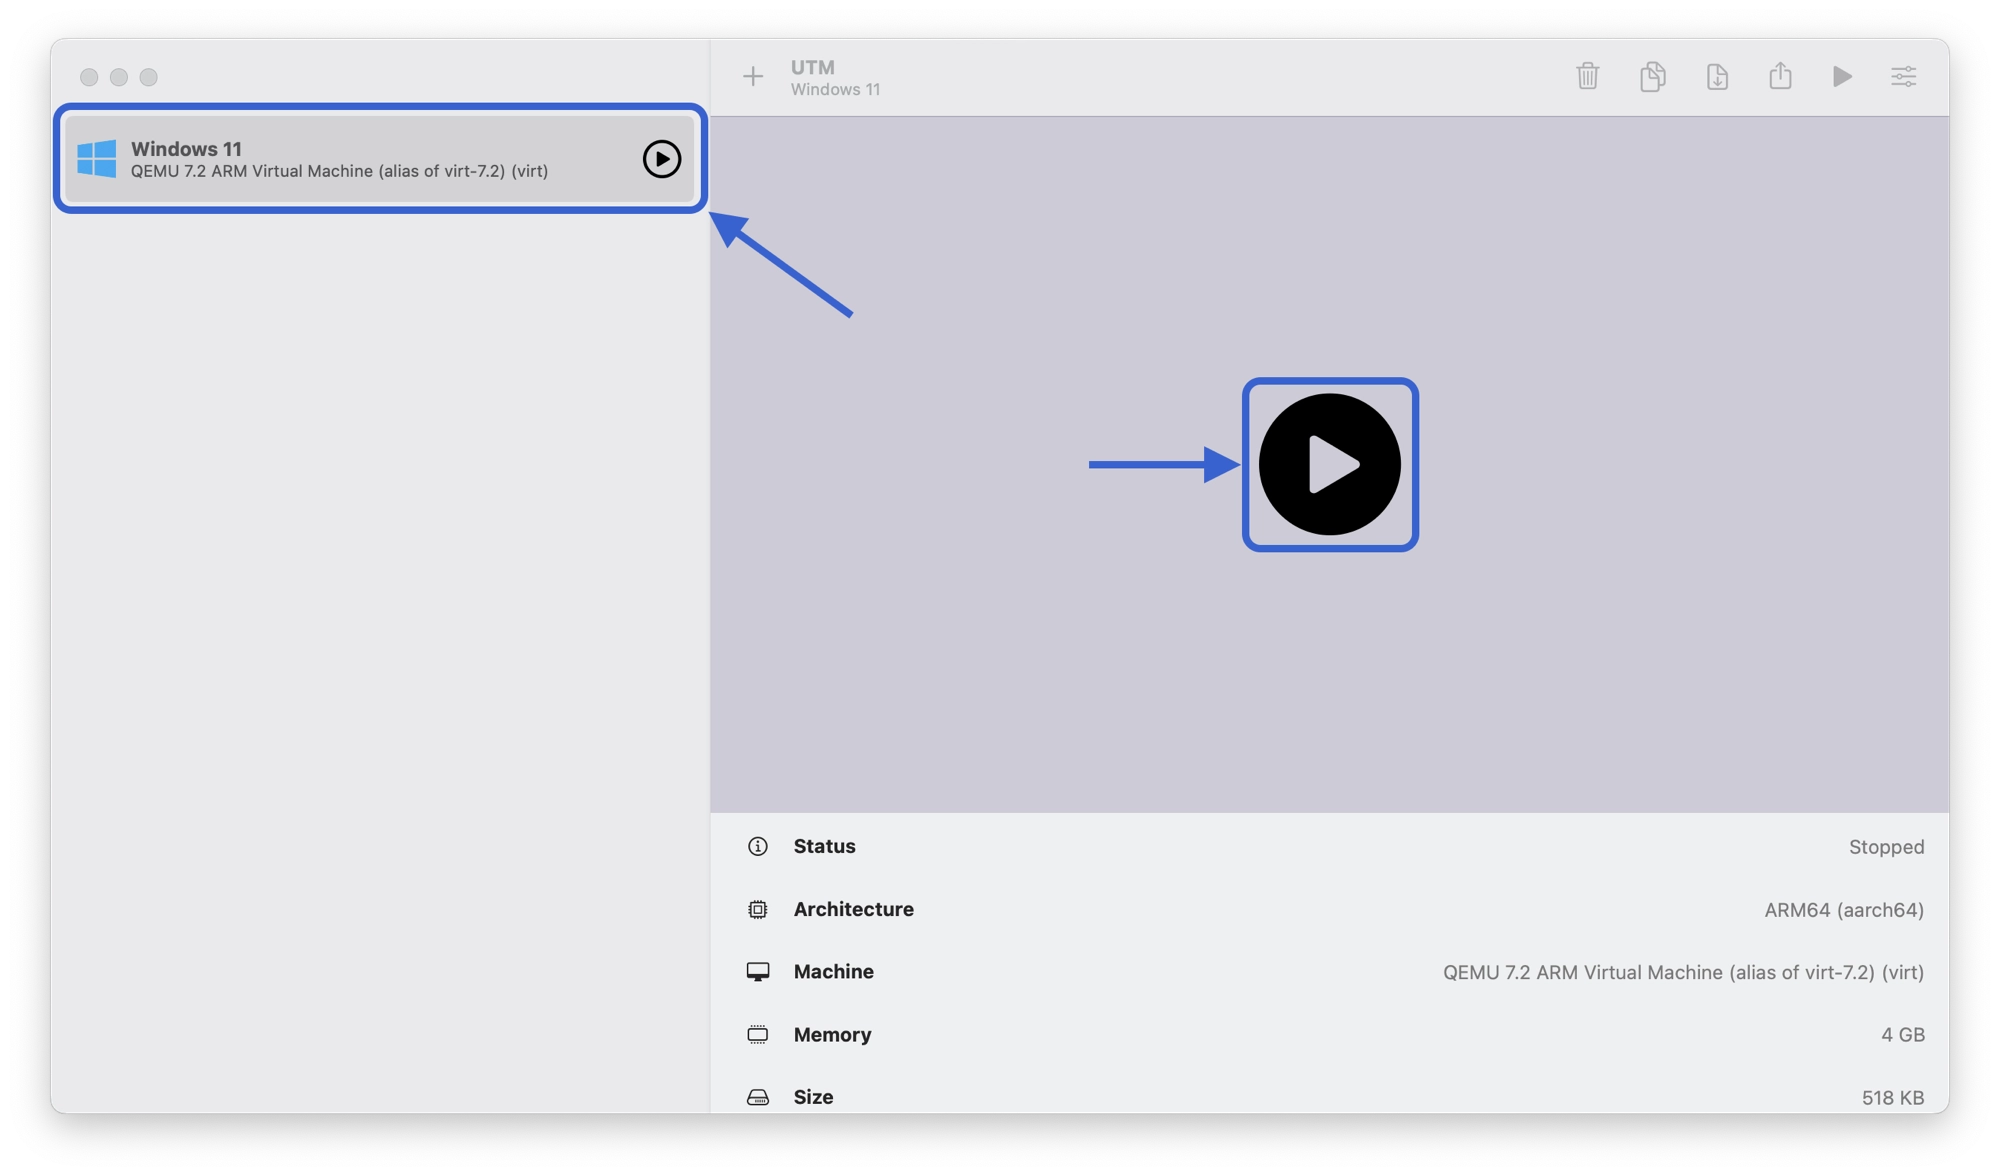
On the final screen you have the opportunity to give your new VM a name, such as Windows 11.
You can review the settings and then click Save to add the new virtual machine to UTM.
Now we can start the virtual machine and begin the Windows installation process. Select your new VM from the left-hand sidebar menu and then click the large play button to boot up the virtual machine.
How to Install Windows 11 on a UTM Virtual Machine
Installing Windows 11 on a UTM virtual machine is fairly straightforward and for most part it simply involves following the standard Windows 11 installation wizard.
When you see the press any key to boot from CD/DVD, ensure that you press any key to begin the installation, otherwise the installation will not start. In this case, reset the virtual machine and repeat this step.
When the installation starts sucesfully a basic windows GUI will load, presenting you with the options to choose language.
However before you begin we need to make some modifications in order to bypass the minimum system requirements.
Disable Windows 11 TPM and CPU Checking
There is one small nuance whereby the Windows 11 installation will complain that the minimum system requirements are not met, even if you configured the virtual machine to meet or exceed the minimum requirements.
The solution is to bypass the minimum requirements check with the following steps:
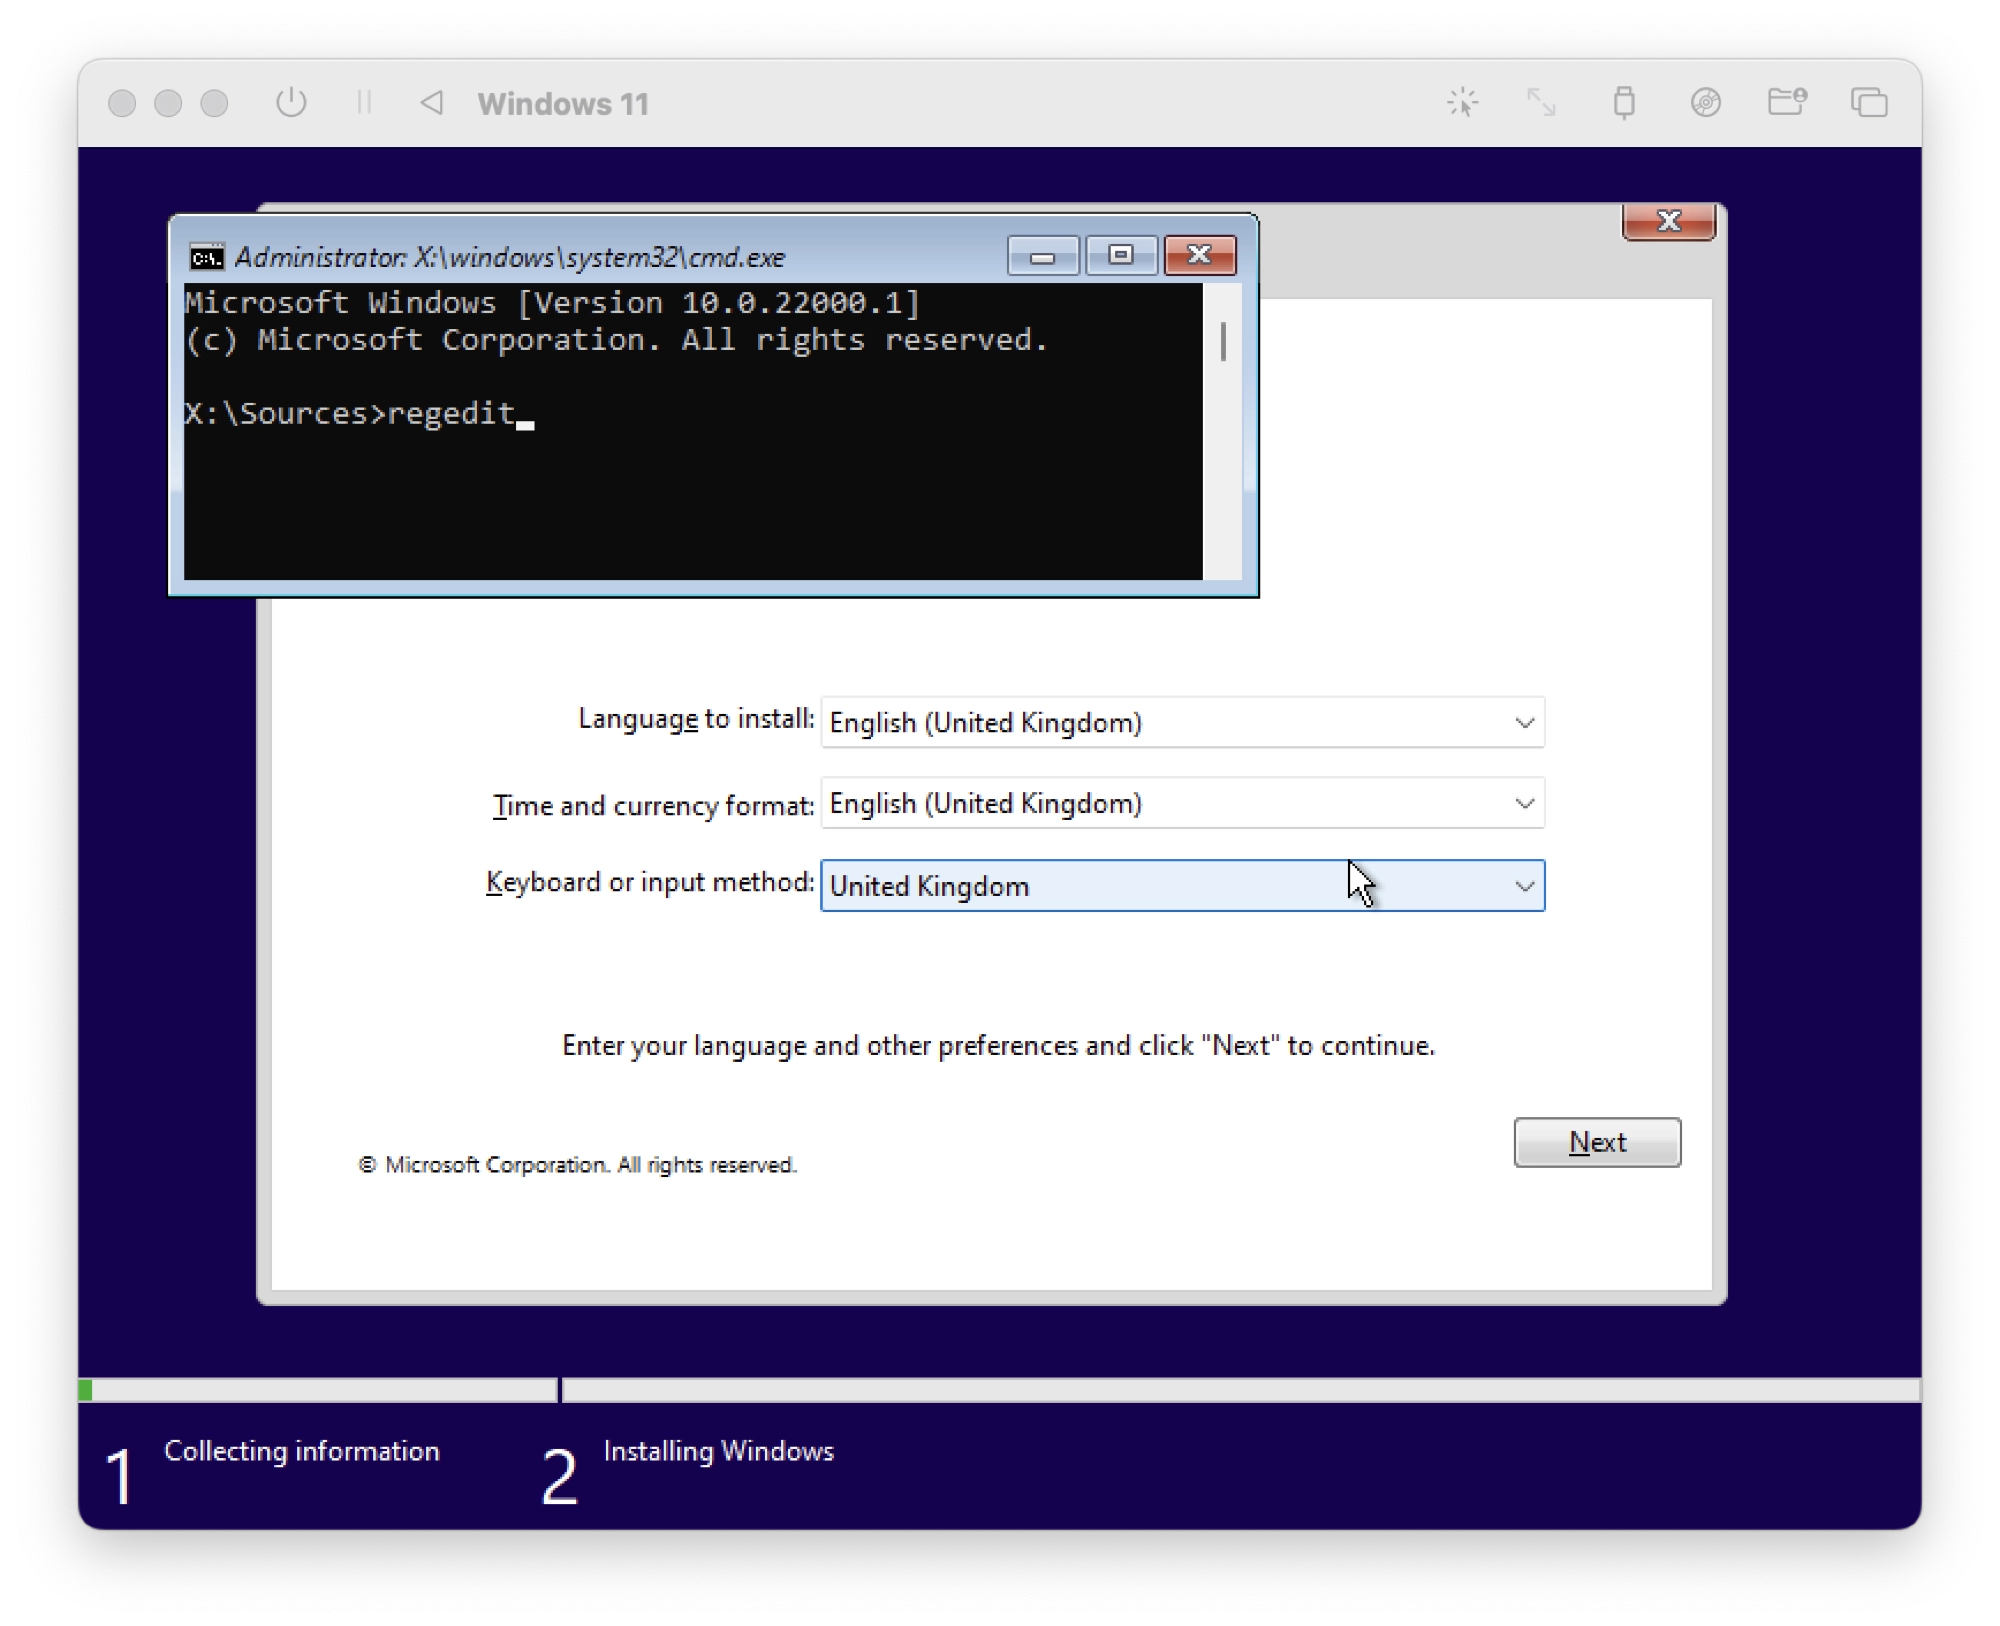
- Whilst on the language selection screen, press shift + fn + 10 to open the command line.
- At the command line, enter the command regedit and press enter.
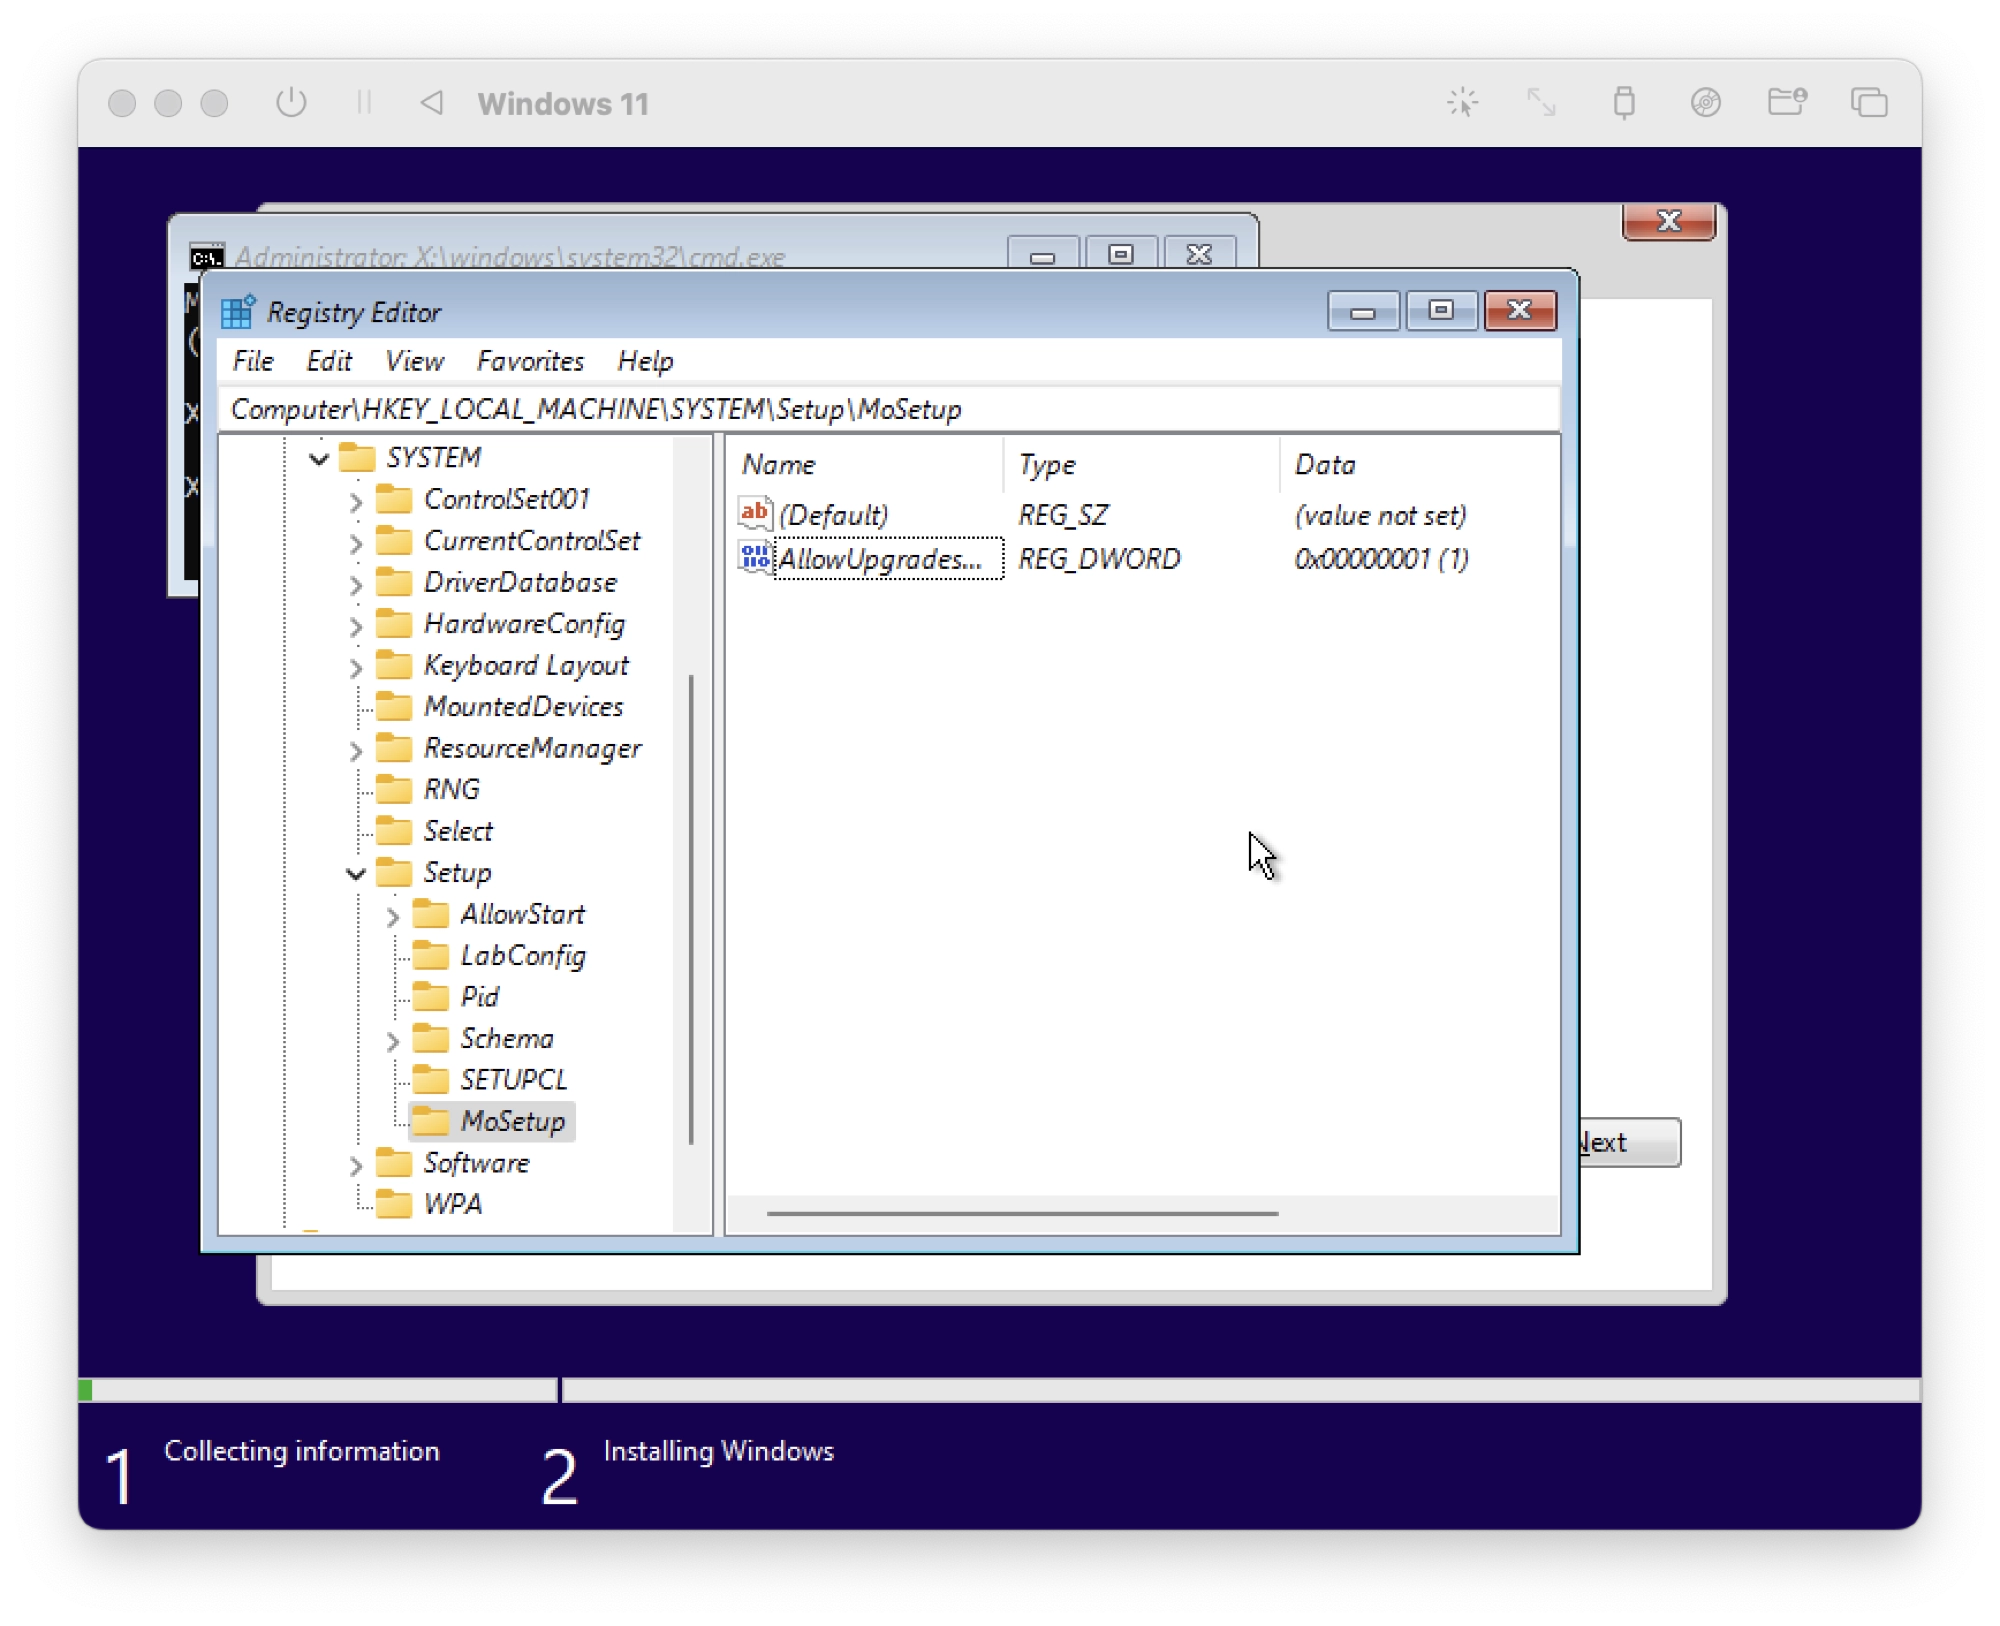
- In the folder tree on the left-hand sidebar, check if the folder HKEY_LOCAL_MACHINE\System\Setup\MoSetup is present.
- If the MoSetup folder does not exist you will need to create it, right-click the Setup folder, click New > Key and name the key MoSetup.
- Click the MoSetup folder to display the key in the right-hand window.
- Click View > New > DWORD (32-bit), name it AllowUpgradesWithUnsupportedTPMOrCPU and press enter to set the name.
- Double click the newly created AllowUpgradesWithUnsupportedTPMOrCPU to open its settings.
- Change the Value Data to the value 1 and press OK.
- Close the registry editor window and command line windows.
Install Windows 11
With TPM and CPU checking disabled, it should now be possible to install Windows 11 on the virtual machine. You can now continue with the installation process as normal.
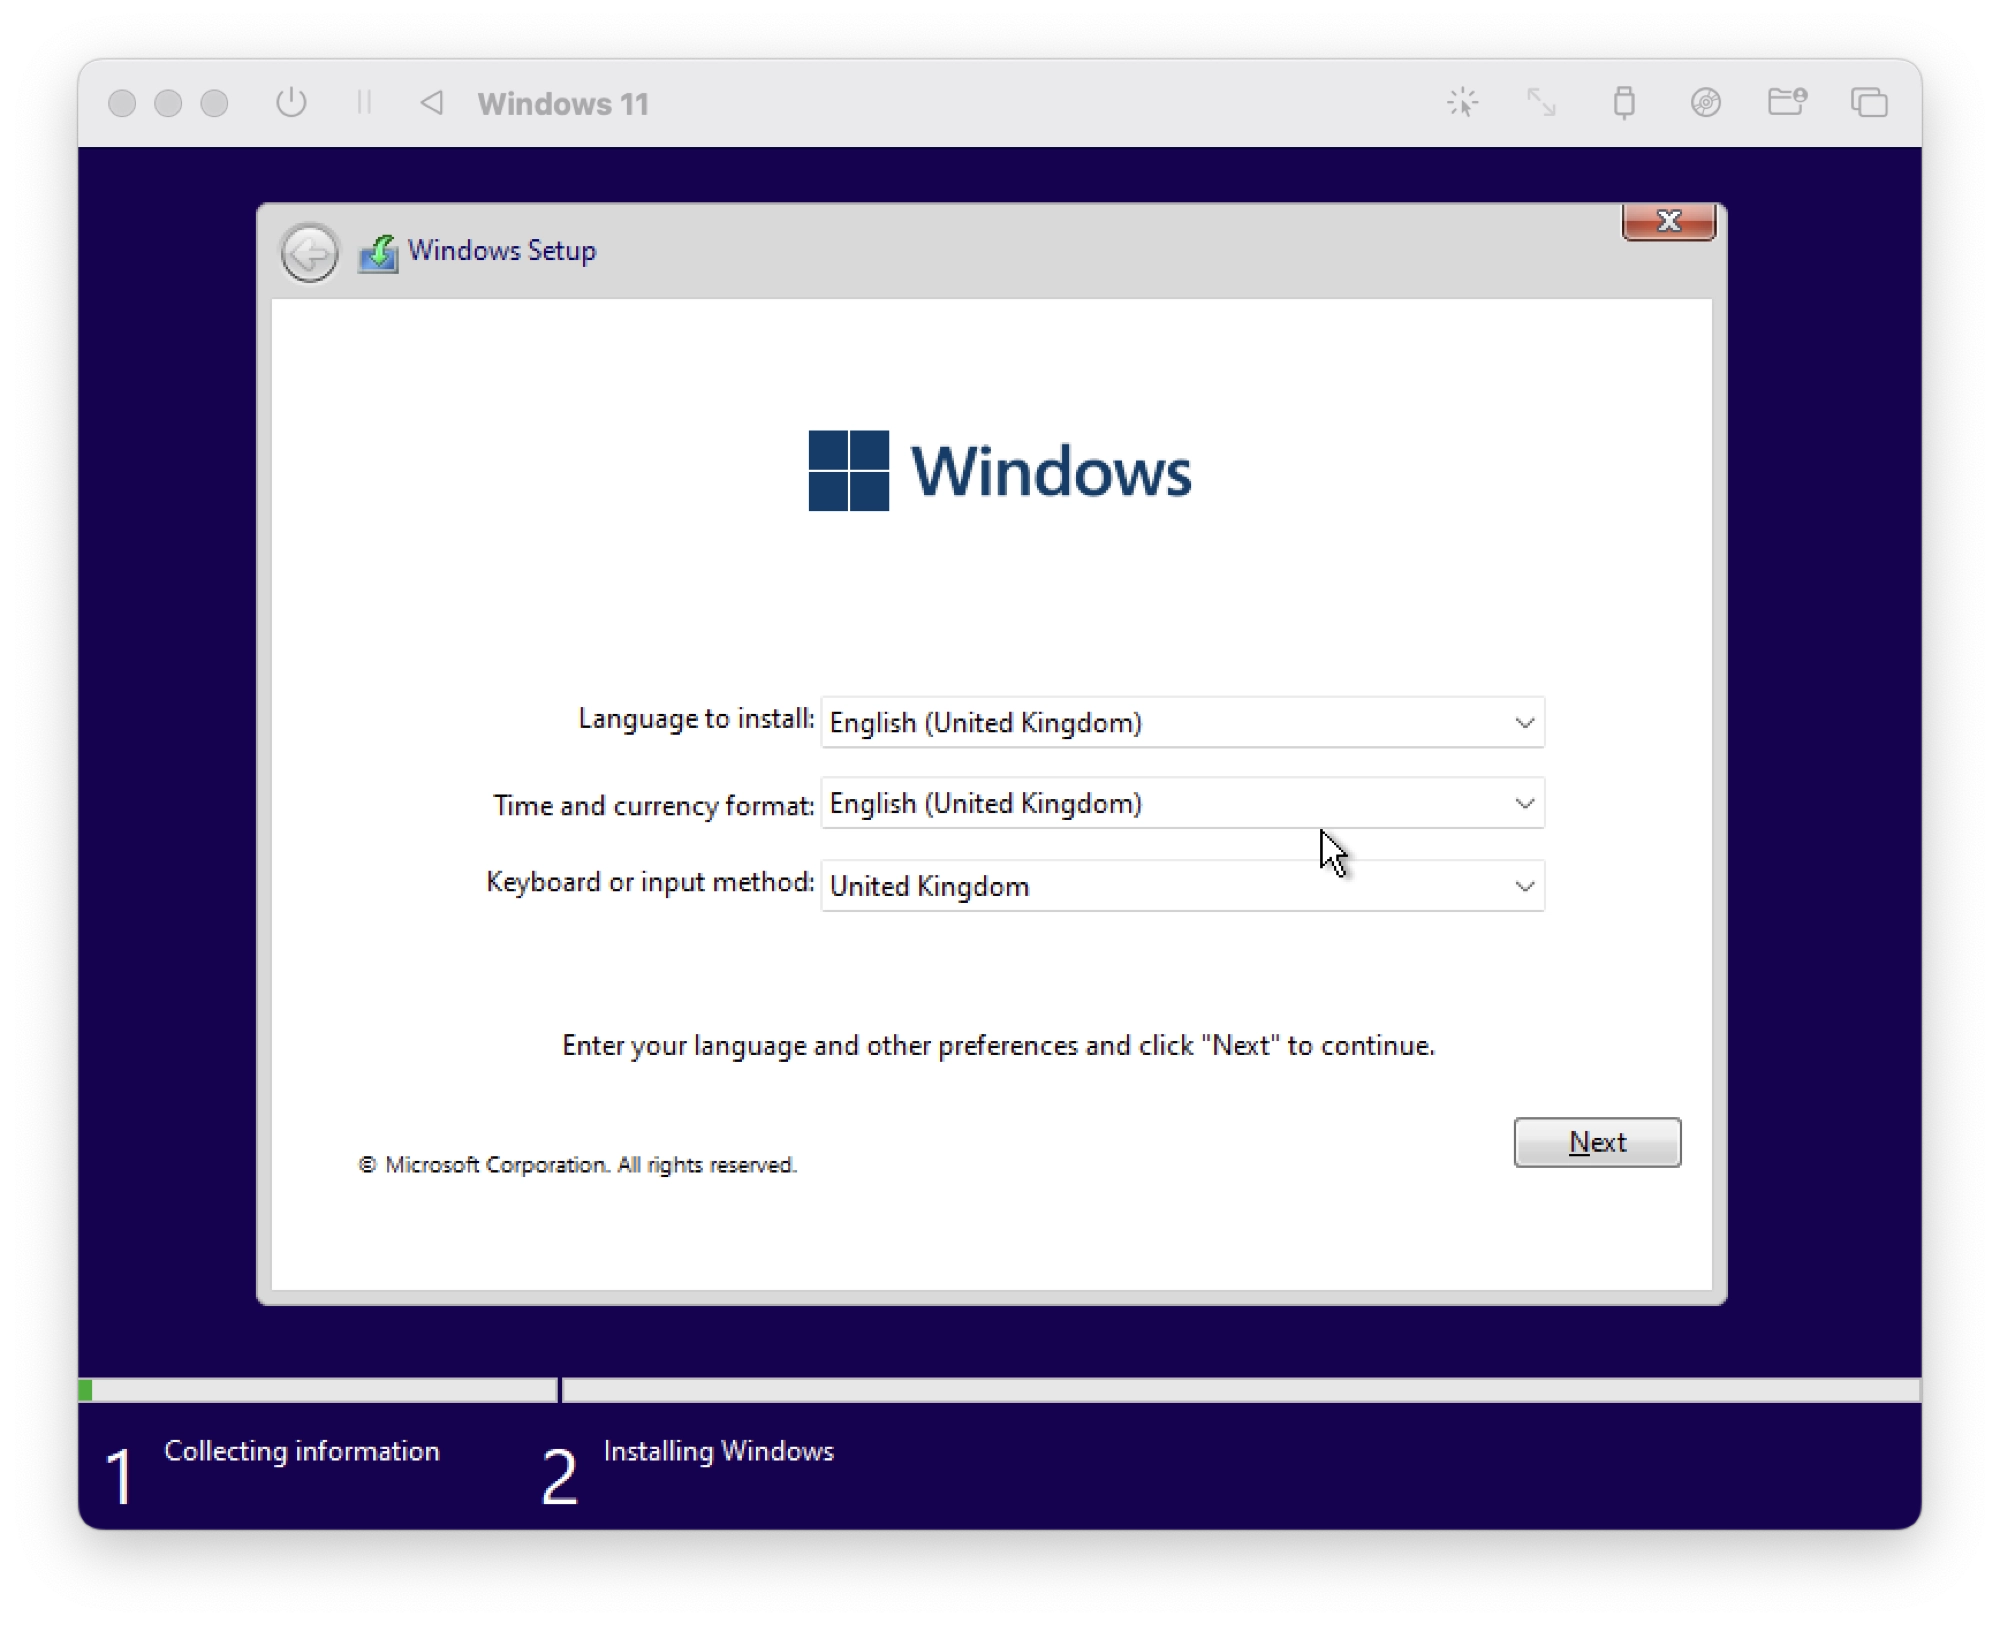
- On the first screen, input your desired language and keyboard settings:
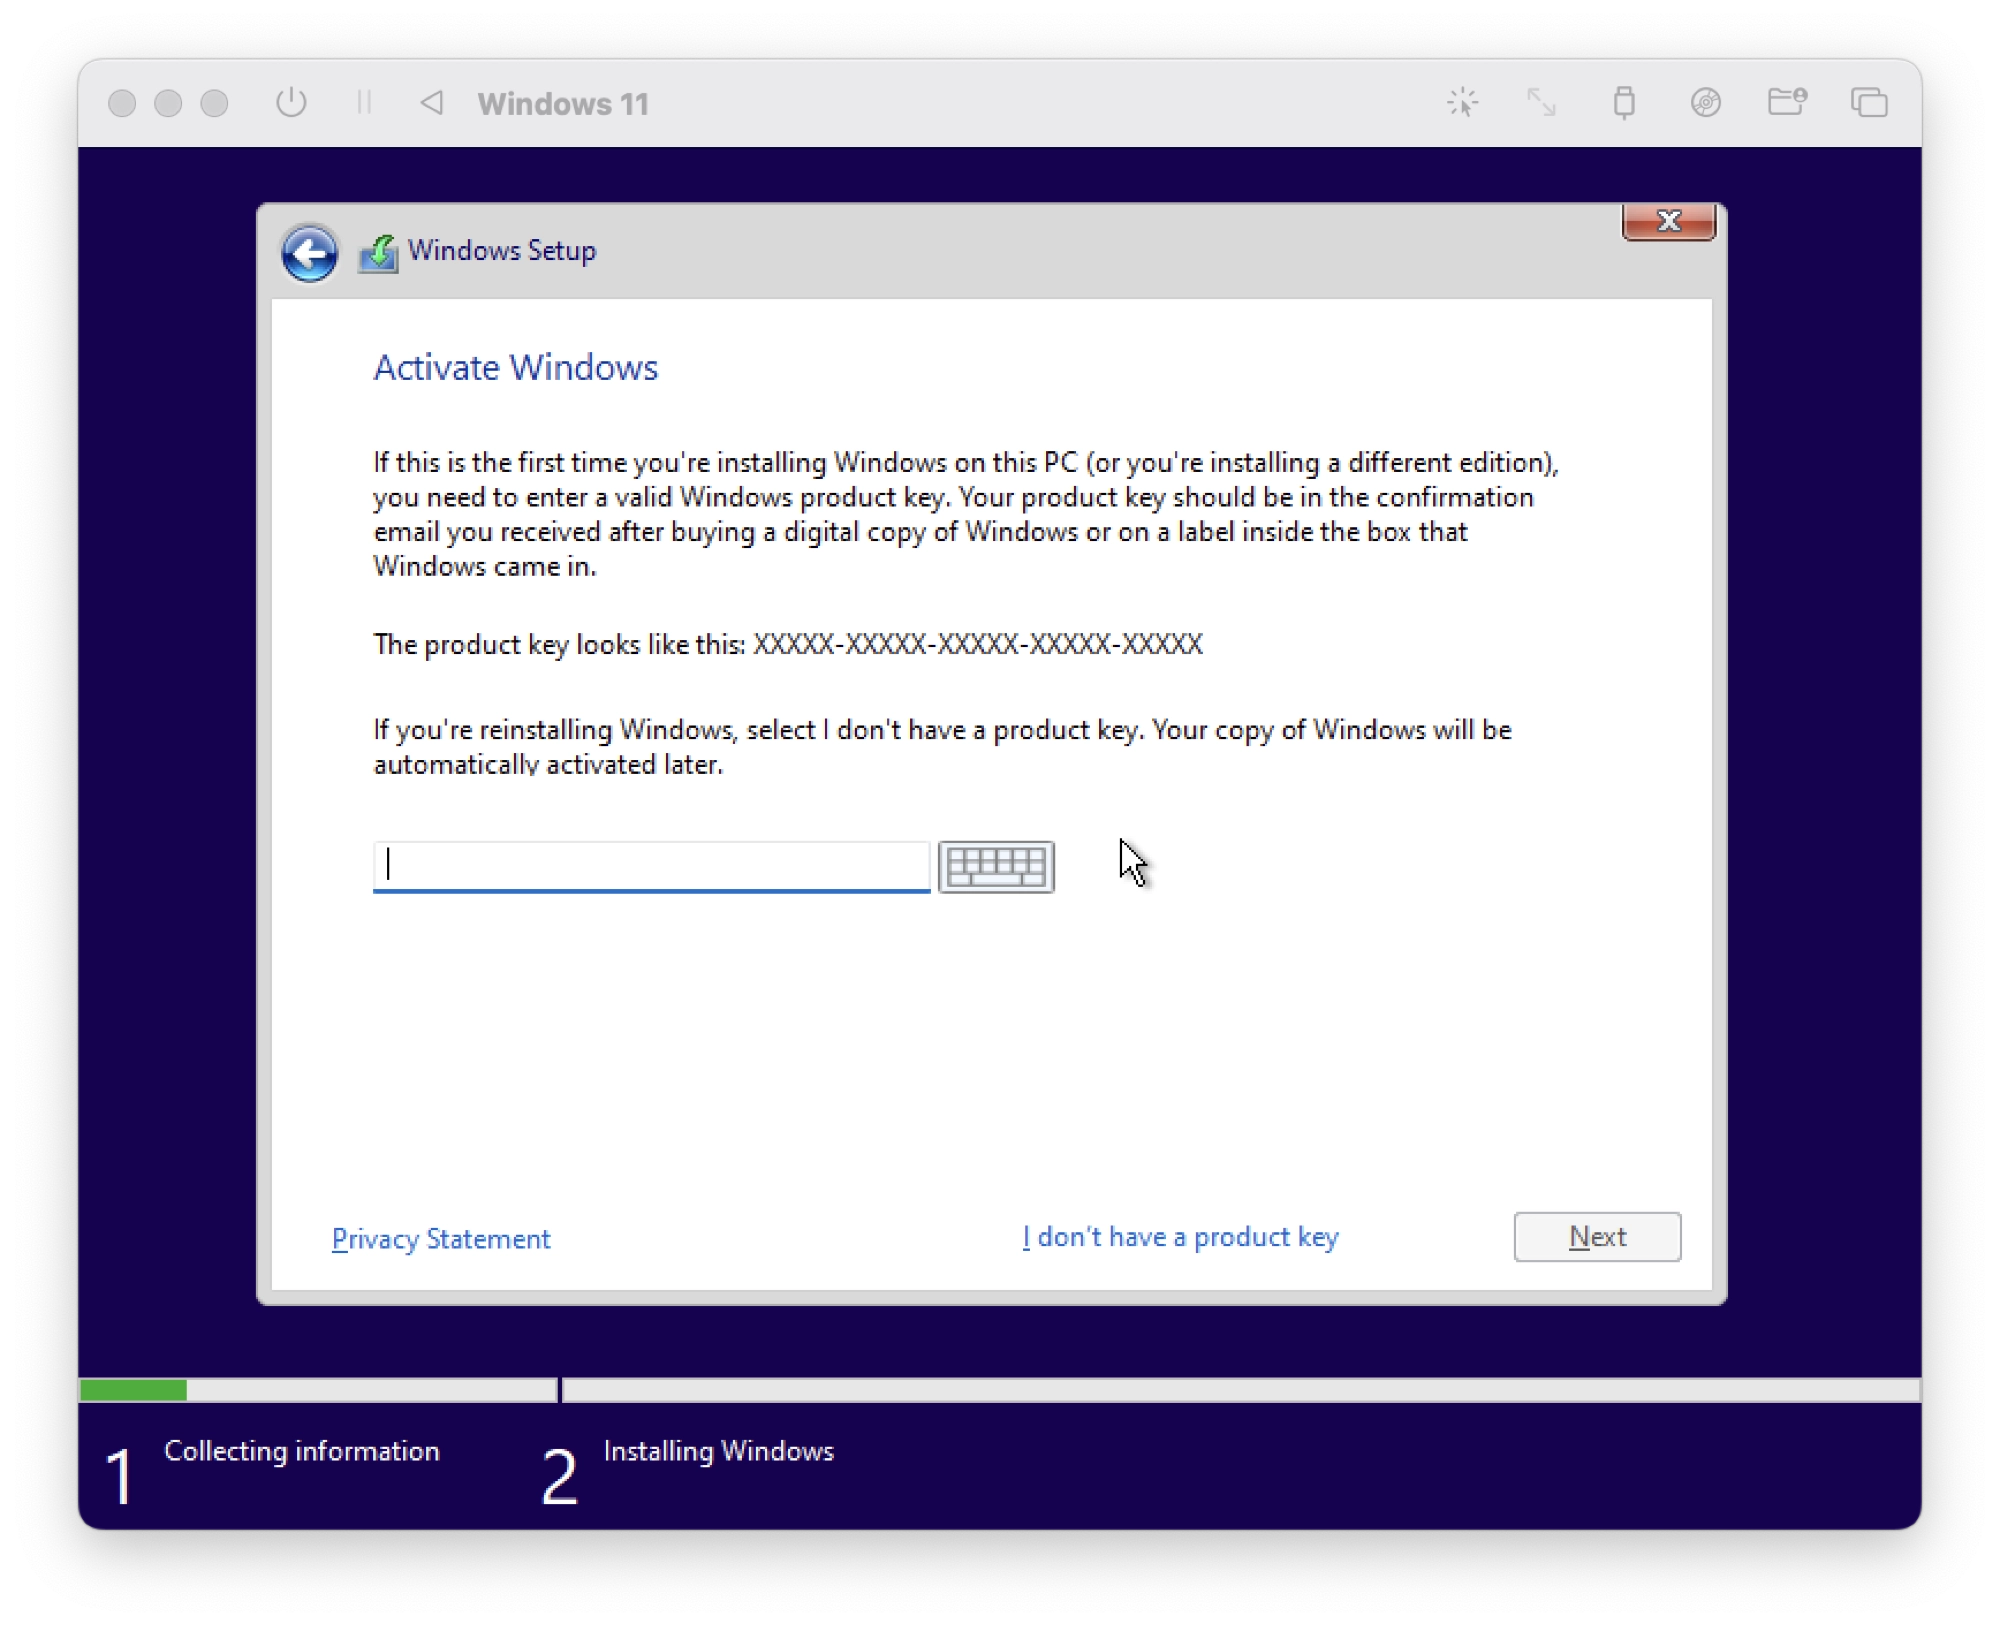
- Next, input your windows product key and click Next. If you don’t have a product key in hand, click I don’t have a product key (it is also a button):
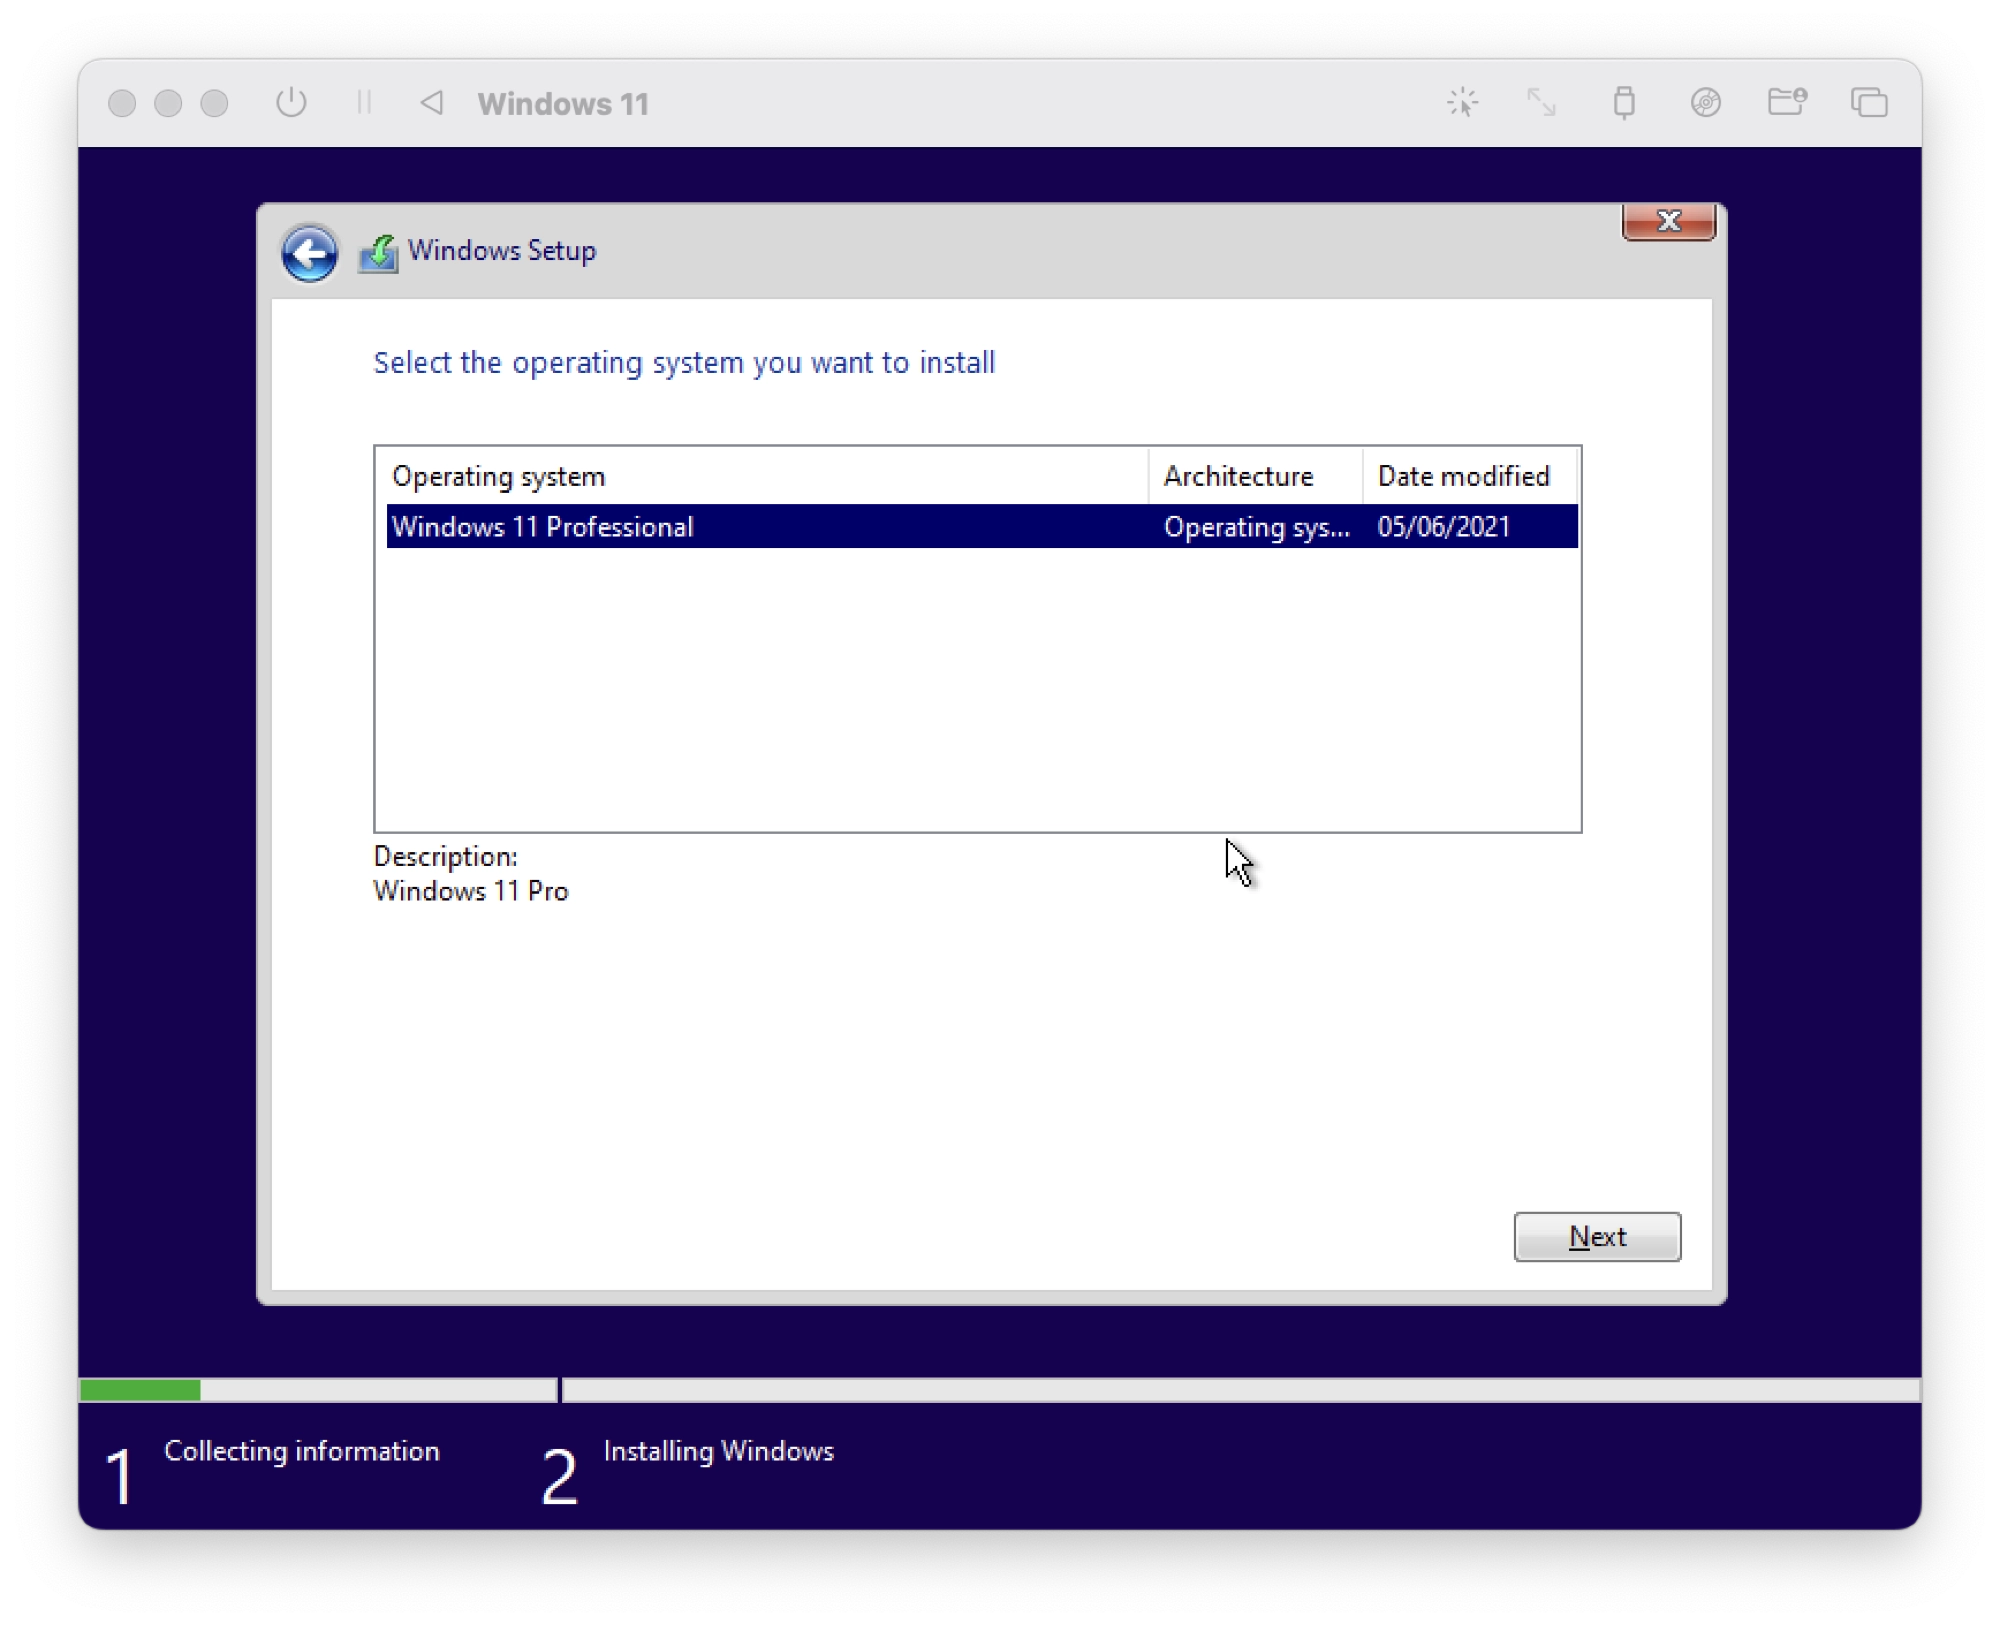
- On the next screen, choose the version of Windows 11 that you wish to install. In this example there is just a single version of Windows 11 Professional available but you may have other options to choose from:
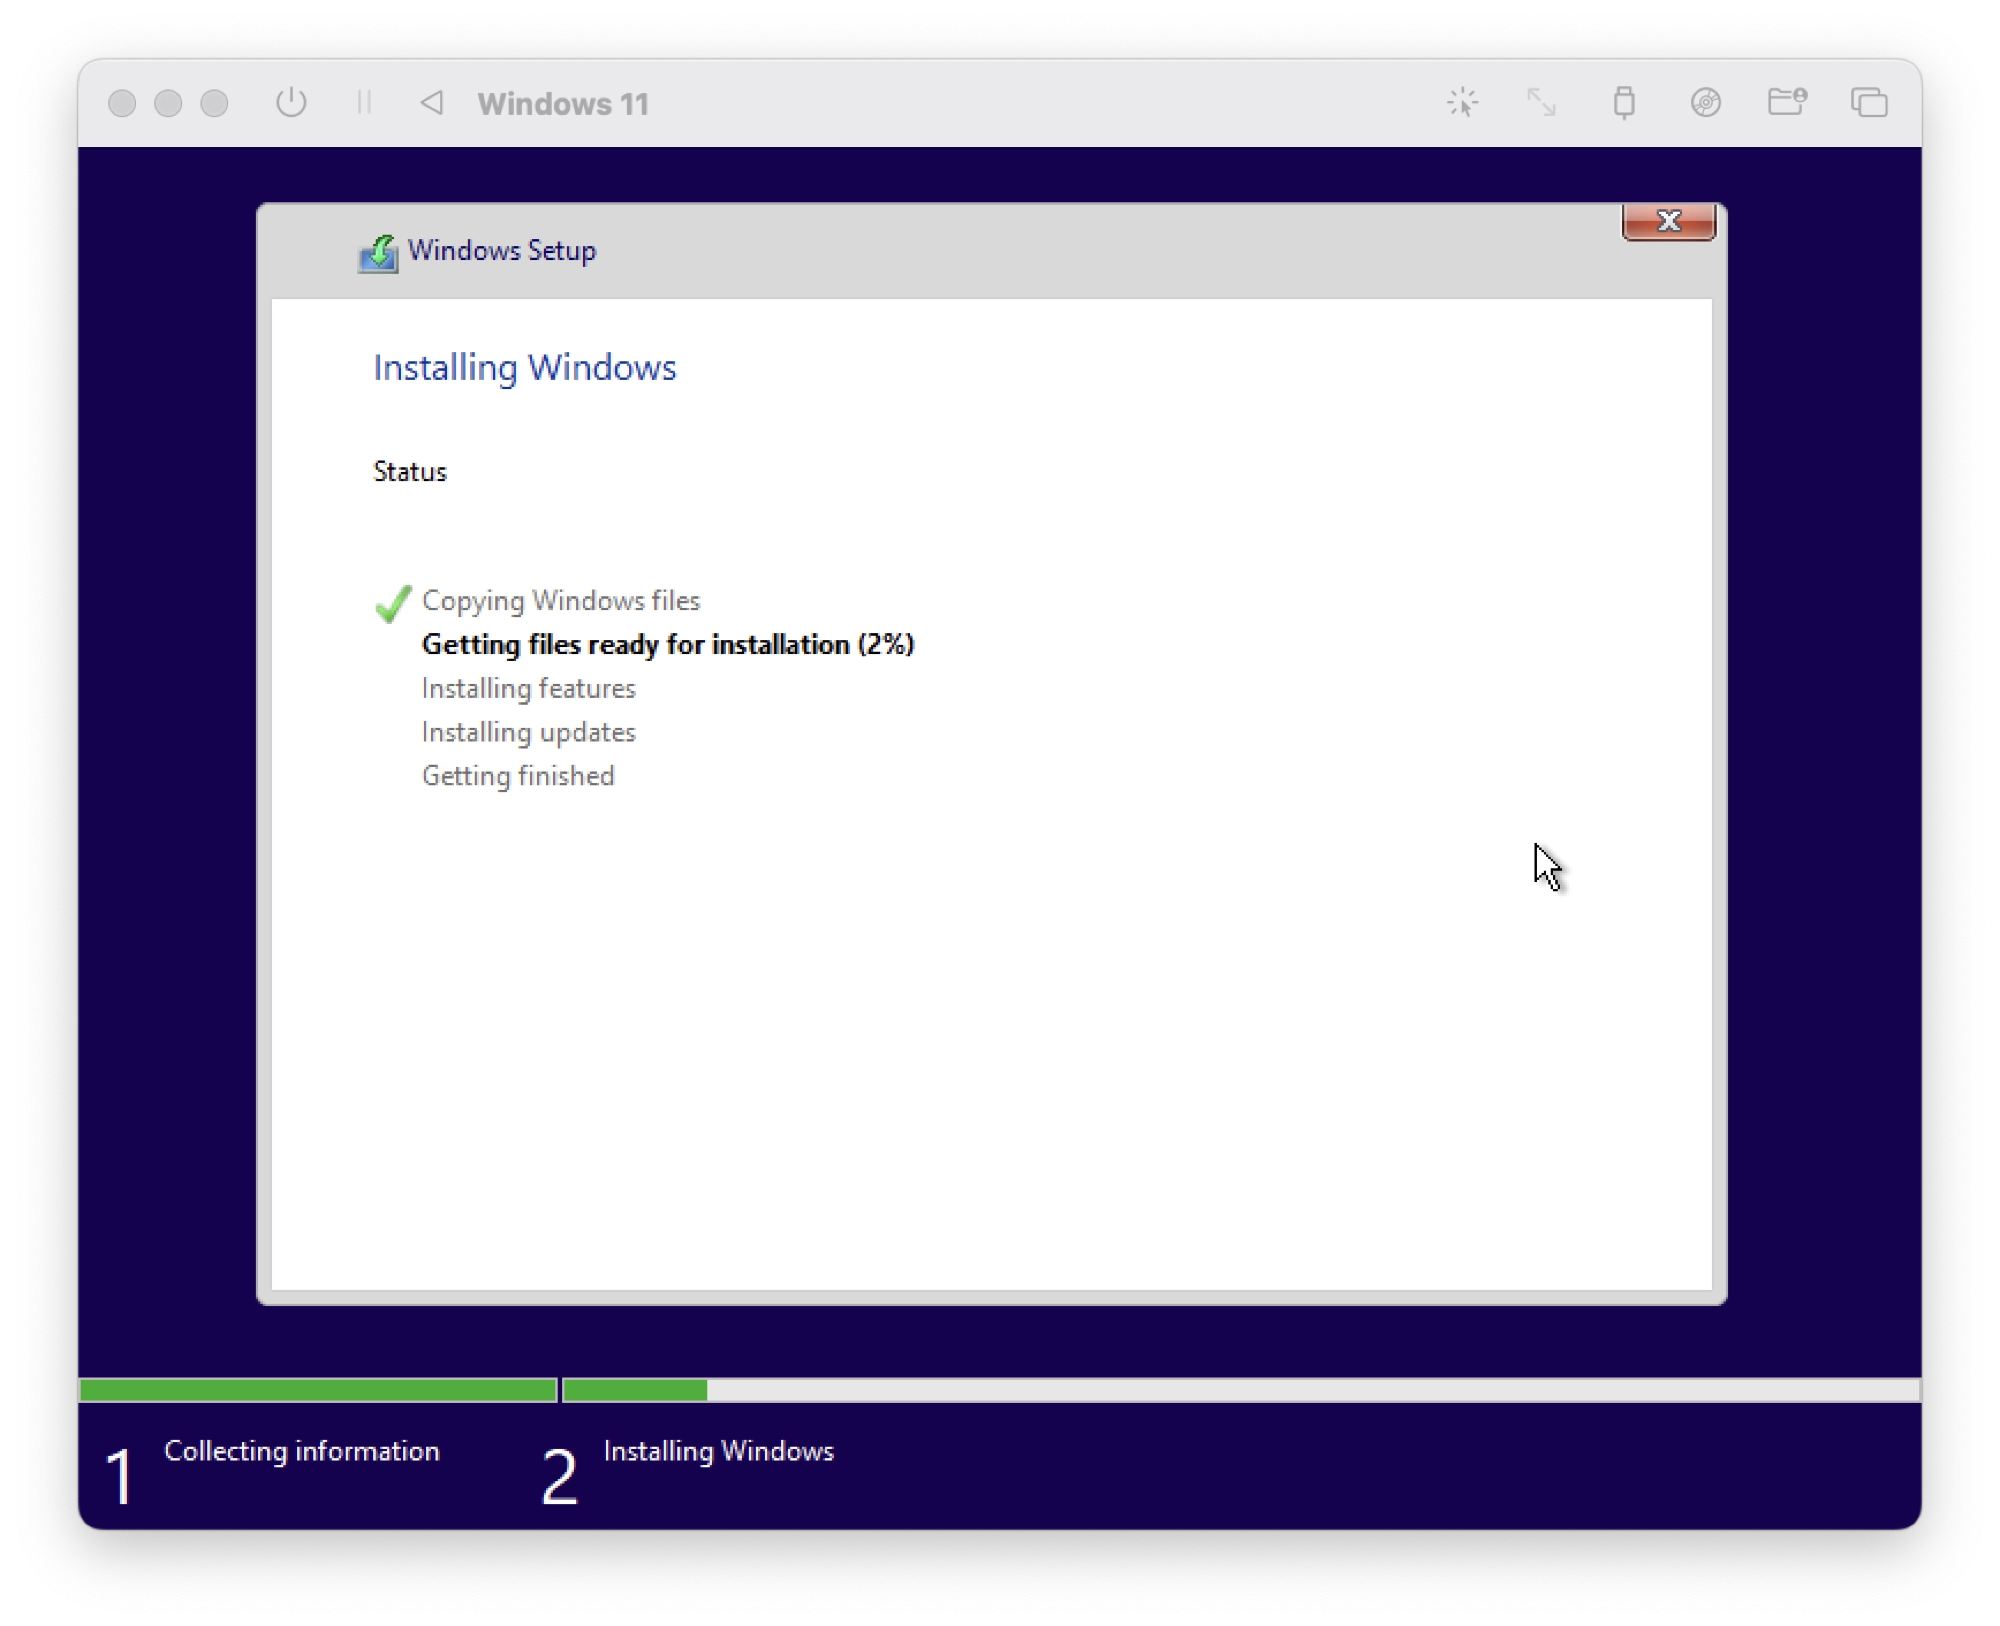
- Sit back and relax whilst the Windows 11 installer completes your installation of Windows!
- When the installation has completed, the virtual machine will restart. On this occasion do not press any key to boot from CD/DVD, otherwise the installation will begin again.
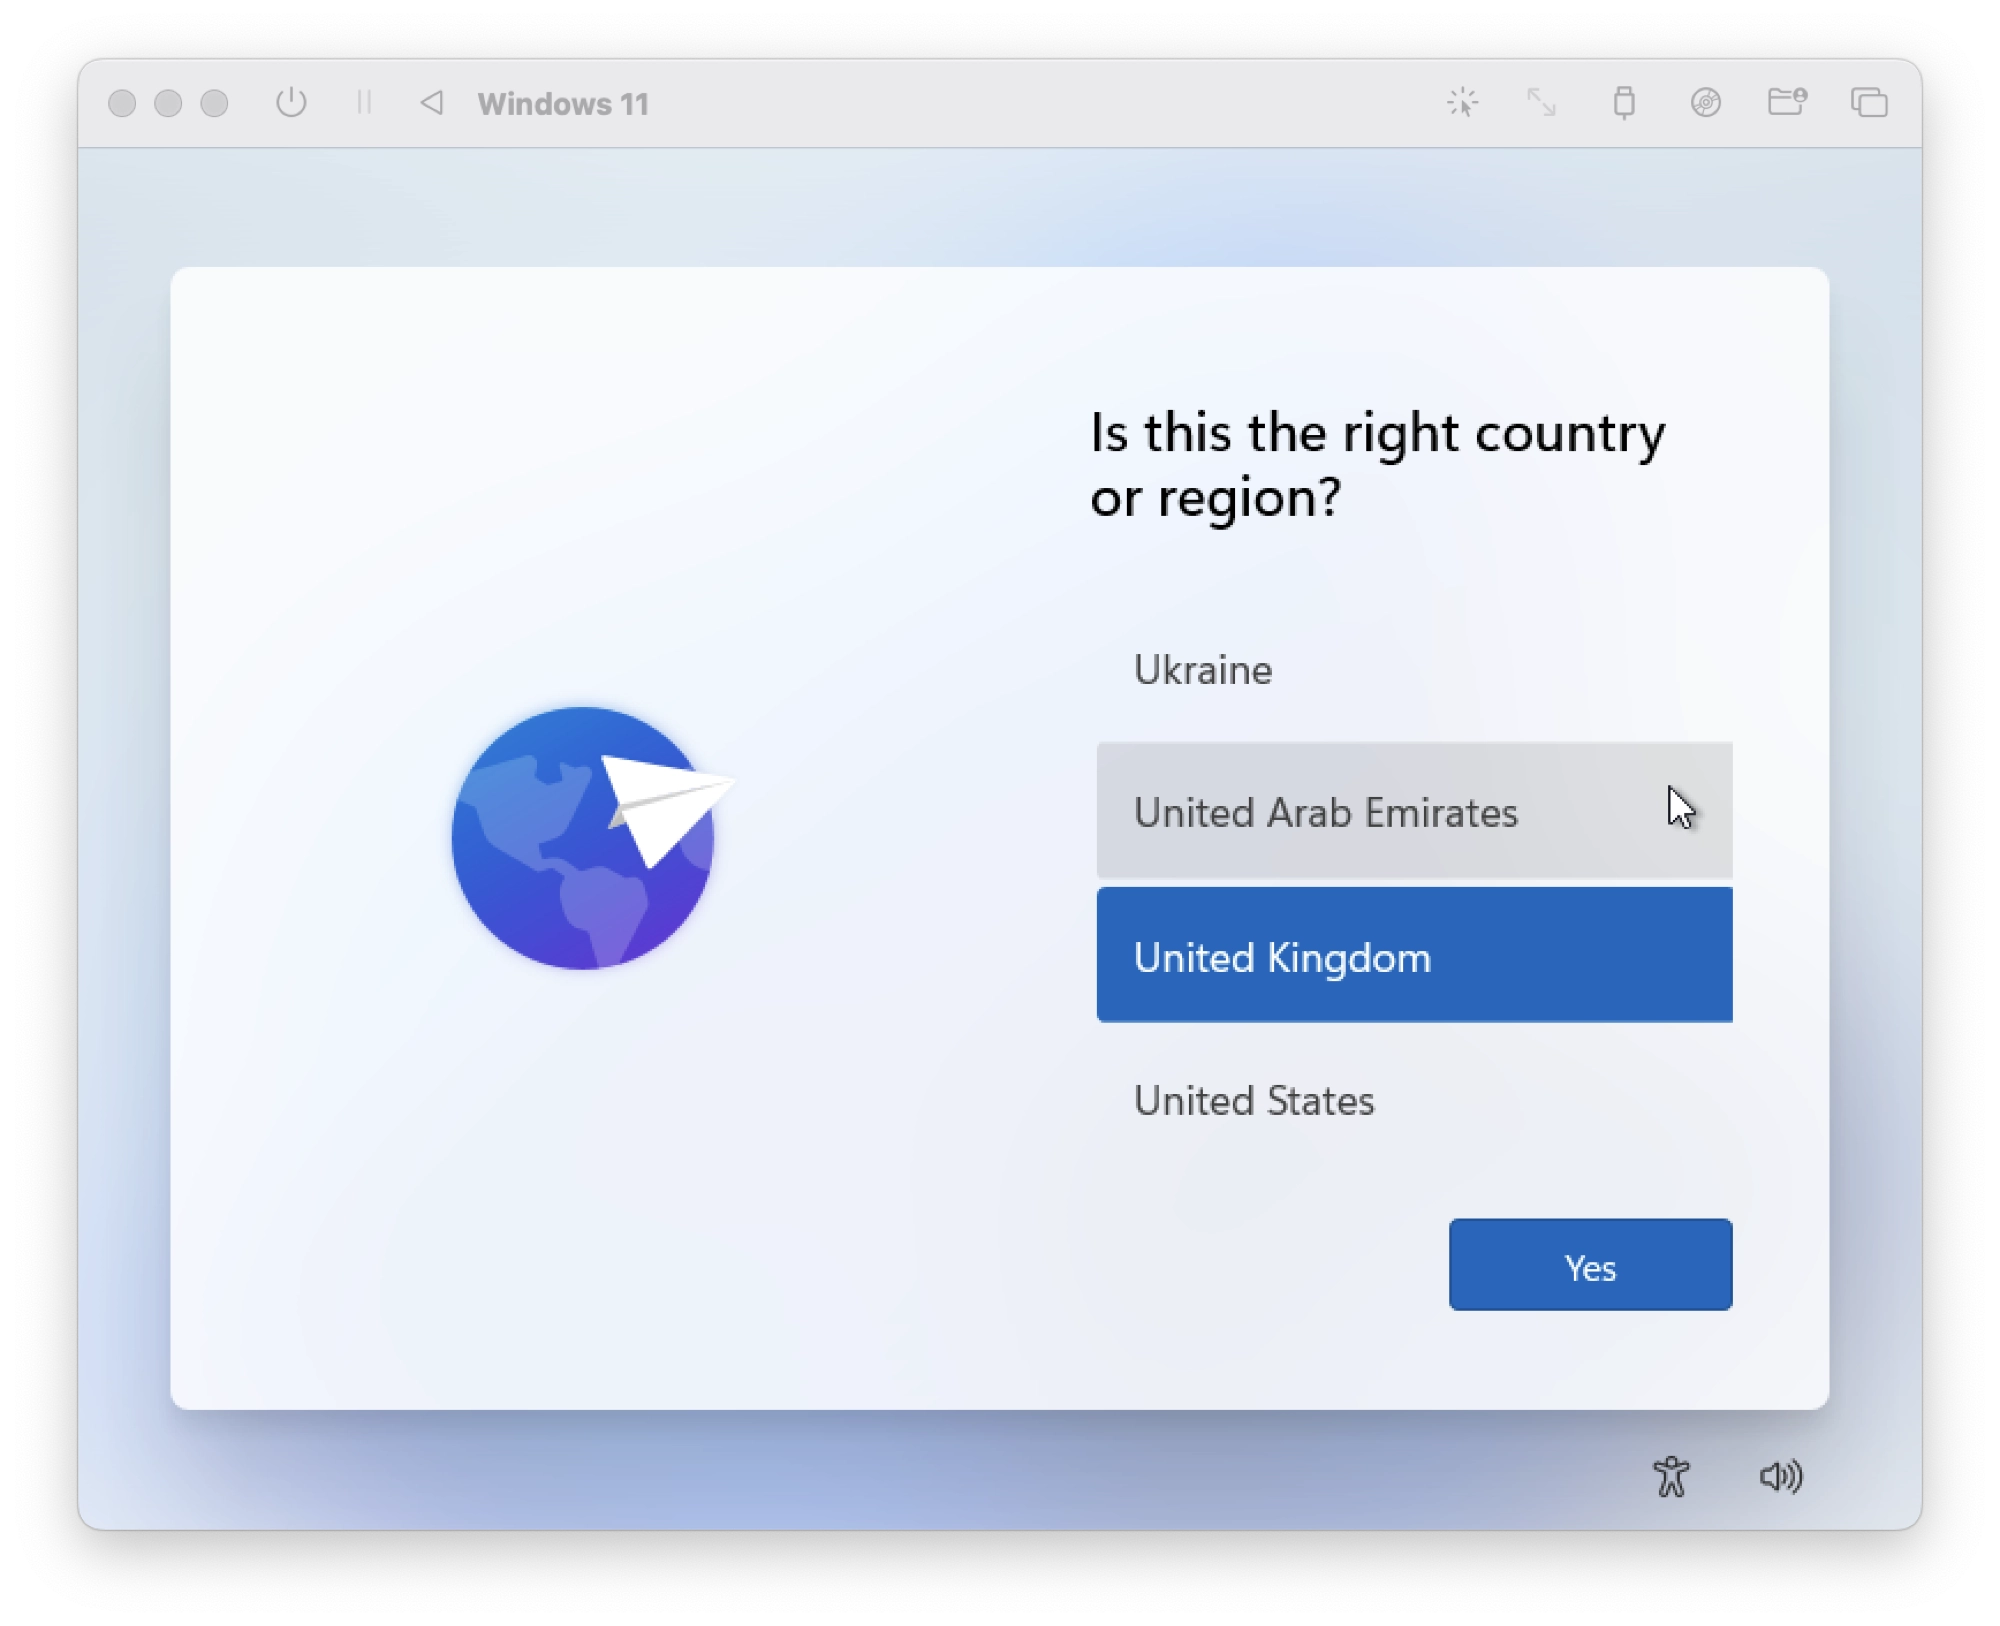
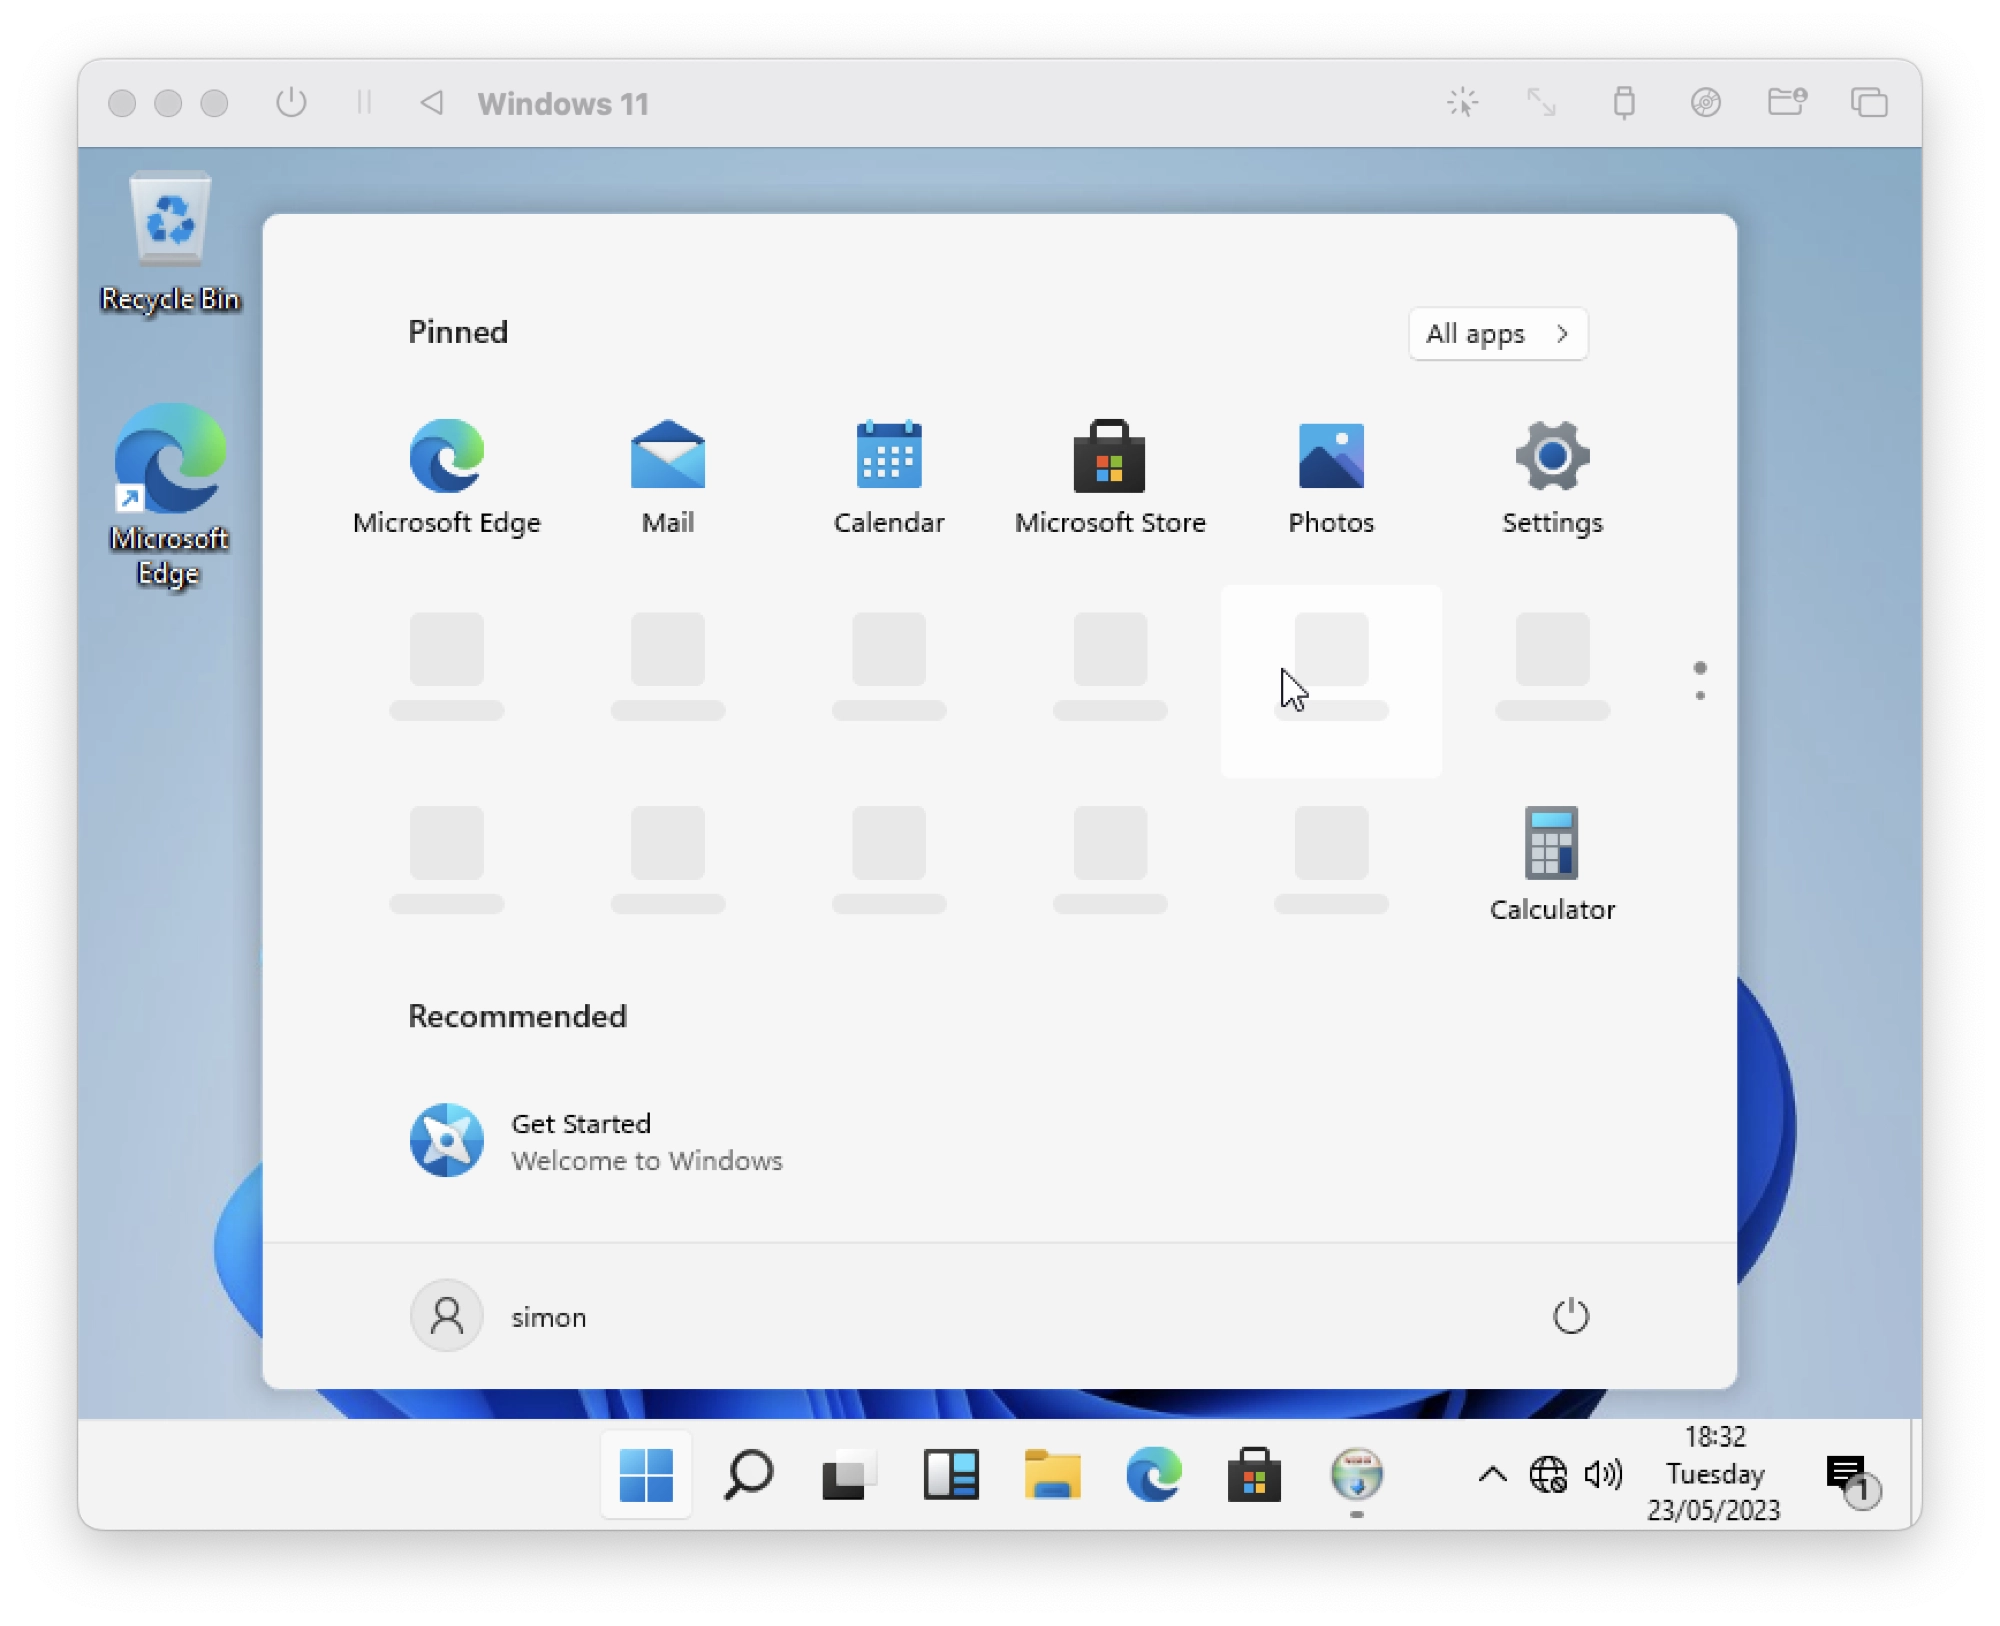
- Windows 11 will now boot the the onboarding screen where you can confirm your location and create a new user account.
- Once you have created a new account, I would recommend completing the final step of installing the guest support, see the next section of this guide.
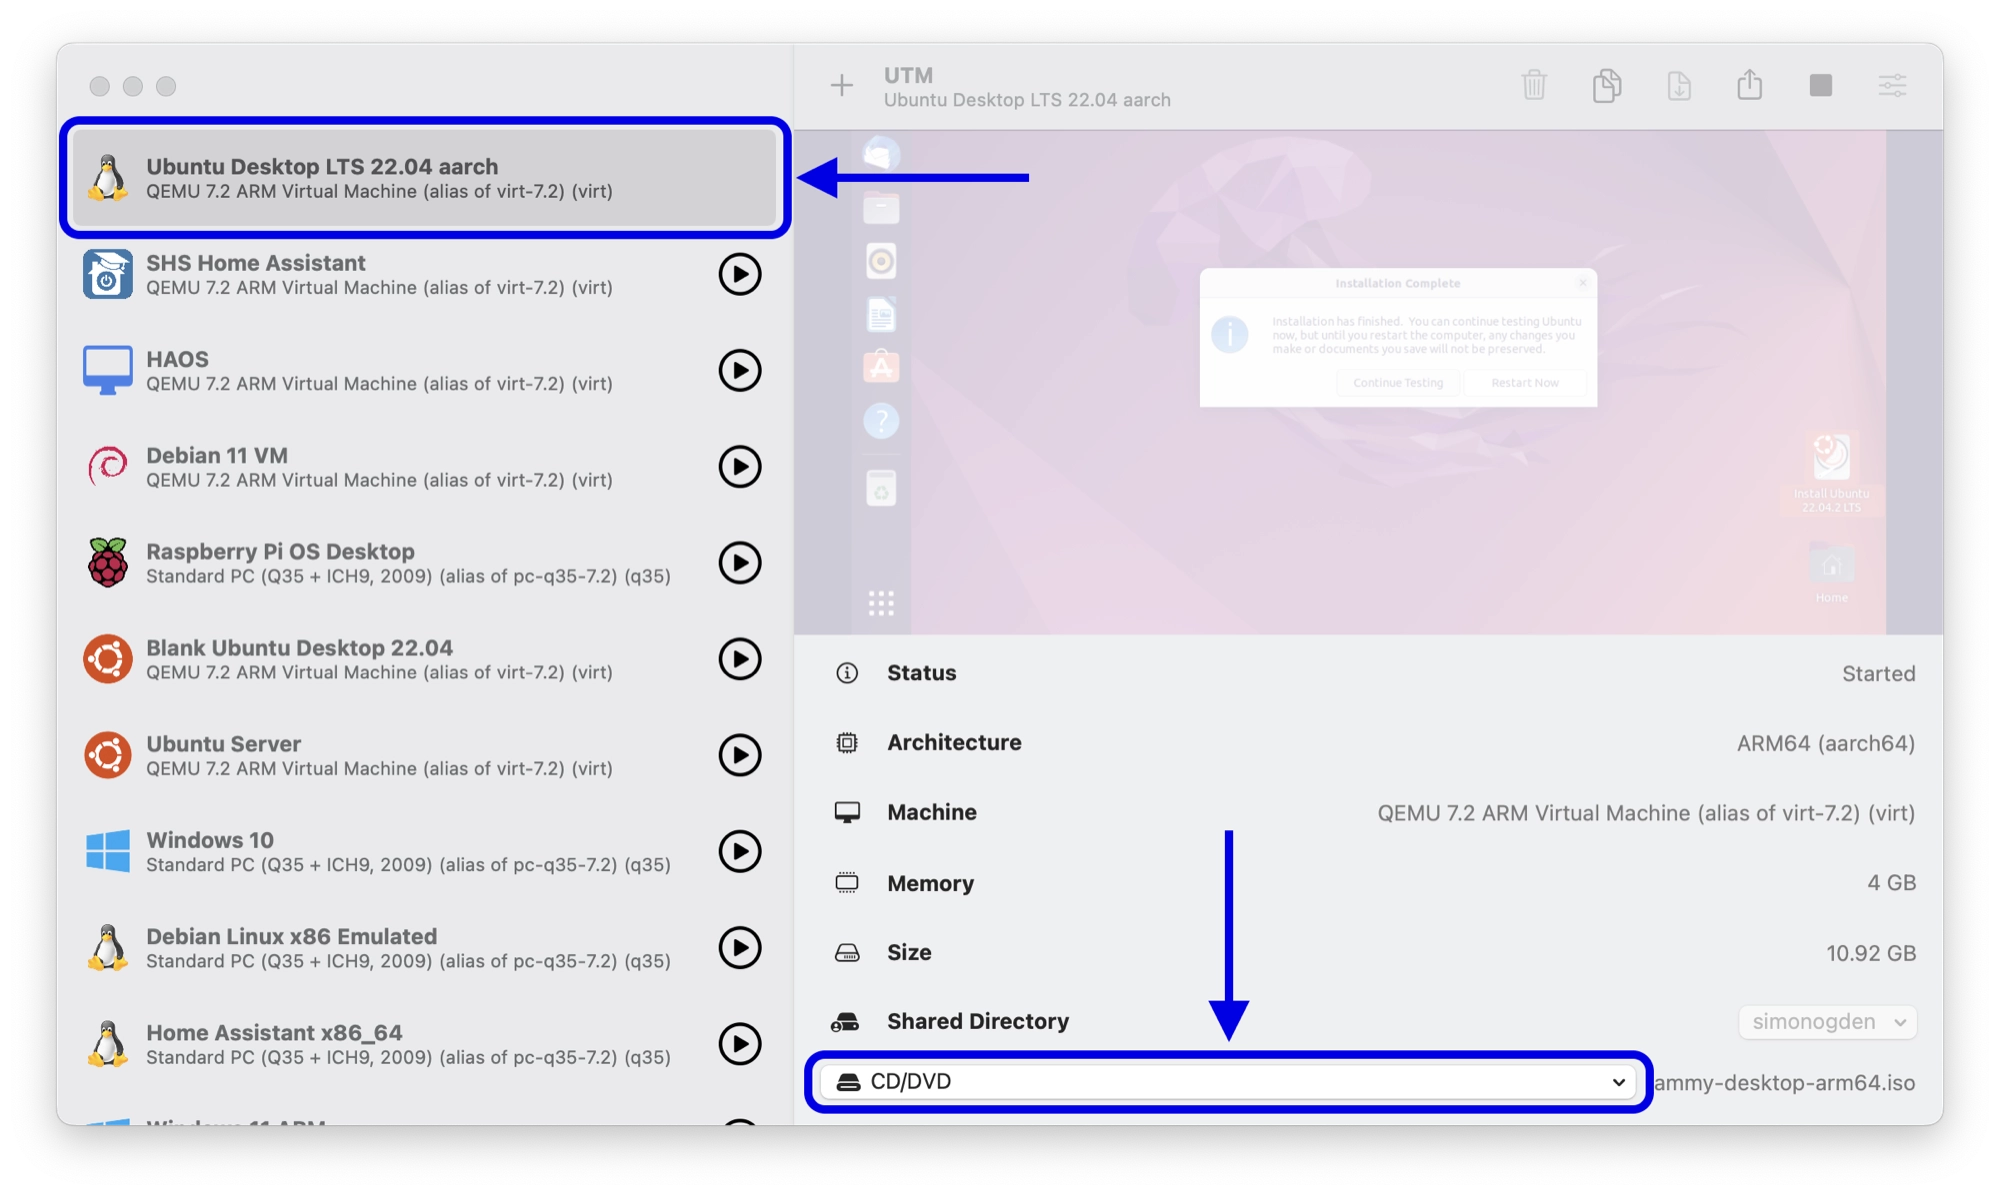
- The last thing to do is to remove the Windows 11 installation disk image from the virtual CD drive. First select the Windows 11 virtual machine in UTM so the details show in the right-hand window.
- Click the CD/DVD drop down menu at the bottom of the main screen.
- Click Clear to remove the Windows 11 installation disk image.
How to Install the SPICE Guest Tools in Windows 11 on a UTM Virtual Machine
The final thing that we need to do in order to complete the installation is to install the SPICE Guest Support tools, which will enable the following functionality:
- Directory sharing
- Clipboard sharing
- Dynamic screen resolution
- Mouse cursor without “capturing”
These are certainly useful functions to have so it is well worth installing the guest tools.
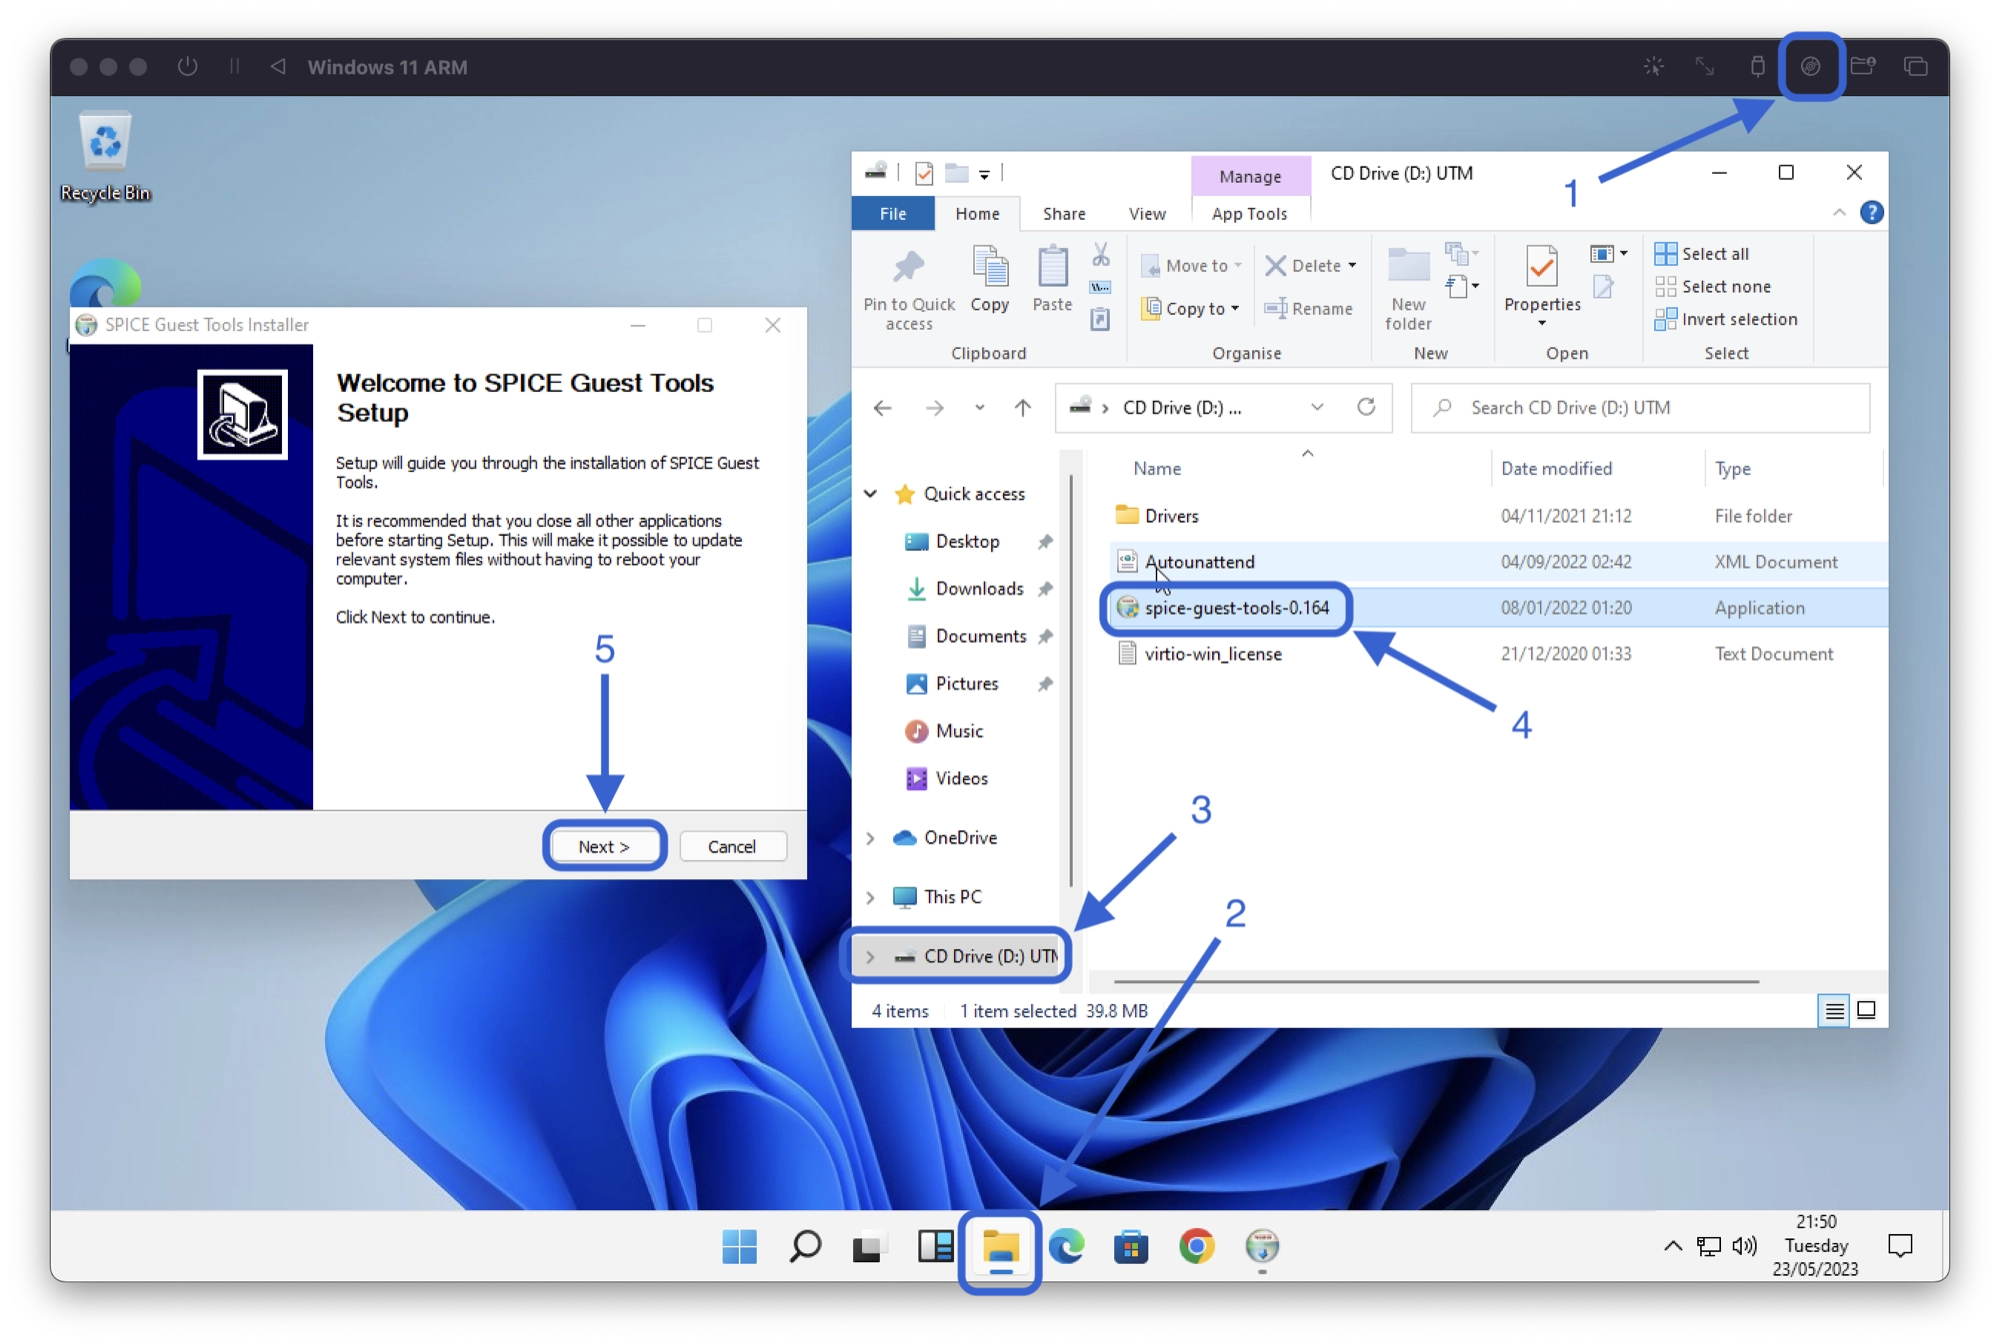
- Click the Drive image options button in the top right-hand corner of the virtual machine window and then click Install Windows Guest Tools.
- Open the File Explorer.
- Click the CD drive in the left-hand sidebar.
- Double click the spice-guest-tools installation file.
- Complete the installation wizard.
Conclusion
It is fantastic that in modern, it is possible to run one operating system on top of another. Running Windows 11 on macOS is a fairly straightforward process even if it is a little time consuming.
All credit must go to the UTM and QEMU developers who make the tools freely available so that we can do such things with ease.
If you did encounter any problems then get in touch by email [email protected], it would be great to hear from you. Thanks for reading!
Thanks so much for visiting my site! If this article helped you achieve your goal and you want to say thanks, you can now support my work by buying me a coffee. I promise I won't spend it on beer instead... 😏