
Not so long ago I was new to Home Assistant and I clearly remember the initial learning curve when first delving into the configuration.yaml file.
Home Assistant is one of those platforms that seems mind boggling at first, yet once you grasp the basics it becomes pretty easy quite quickly. The first major milestone to overcome is understanding the primary configuration file, configuration.yaml.
What is YAML?
The fancy technical description of YAML is “human-readable data-serialization language.”
It is basically a kind of programming language that is meant to be easy for a human reader to understand but also for a machine to interpret.
Don’t be put off by the description or think that it is impossible to understand for someone who does not have a background in computer programming.
At first it can seem really daunting, but when you get the hang of it… it’s really easy!
To edit YAML in Home Assistant is as simple as writing a list with a little careful formatting. Once you get to grips with the way the system refers to the various components, you’ll be cooking on gas!
There are other ways to configure Home Assistant such as Node Red that try to adopt a more user friendly graphical approach.
However I believe to truly get the most from Home Assistant it is best to learn the basics of YAML and use it to create Home Assistant configuration files.
What is configuration.yaml?
The configuration.yaml file is the main YAML file used by Home Assistant to gather all of the information about the users desired configuration.
It is like one big settings page, only the options are stored in a written list rather than by a bunch of switches and check boxes.
You can write your entire Home Assistant configuration in this one file if you prefer to keep things simple, no additional files needed!
My example tutorials on this site always assume that everything will be written in this one file. Although as your configuration grows in size you may want to split it up into several files in order to make it more organised and easier to maintain.
When I write the tutorials here I make the assumption that a user who understands how to split up their YAML configuration will know enough to make the necessary amendments to the example code on my site.
However it is entirely optional, so you can copy and paste everything from my tutorials directly into configuration.yaml and it should work just fine.
Oh, and there is one very important thing about YAML that I should mention…
YAML is very fussy when it comes to tabs and spacing. You should maintain the correct tab/spacing to avoid any syntax errors, exactly as it is written in the examples.
Home Assistant file structure
Home Assistant creates a root directory structure, where the main configuration file configuration.yaml is located.
All of the user defined configuration is read from this file.
The configuration.yaml file is located in the main configuration directory along with all other necessary configuration files.
The location differs depending on the operating system used.
| OS | Path |
|---|---|
| Home Assistant OS | /config |
| Docker Container | /config |
| OS X | ~/.homeassistant |
| Linux | ~/.homeassistant |
| Windows | %APPDATA%/.homeassistant |
How do you edit Home Assistant YAML files?
There are two ways that you can edit the YAML files in Home Assistant.
The easiest way is to use the file editor add-on, however you can also edit them with your favorite text editor if you prefer.
How to edit YAML with the Home Assistant File Editor
In order to edit files with the built-in file editor, you first need to install it from the add-ons store.

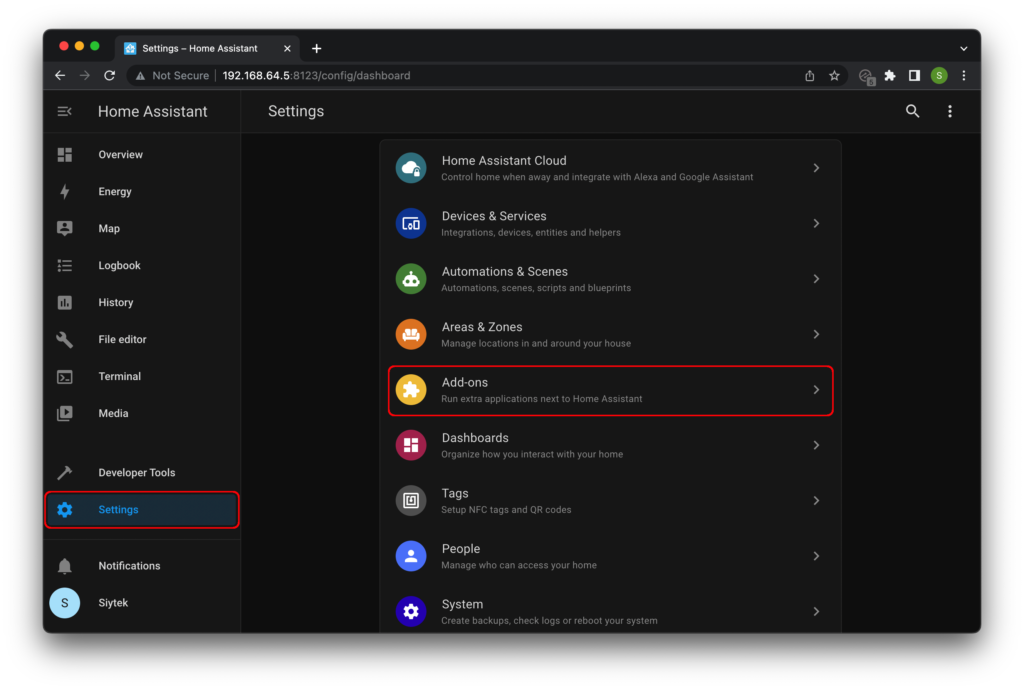
It can be found by clicking Setting in the sidebar and then the add-on store tab, followed by the add-on store button in the lower right of the screen.
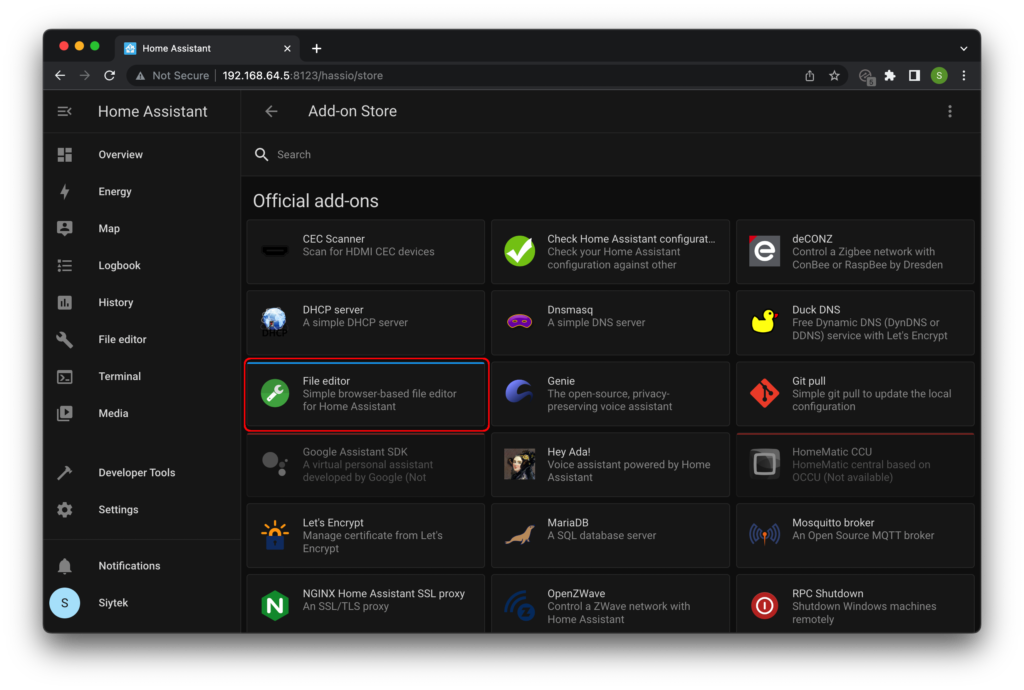
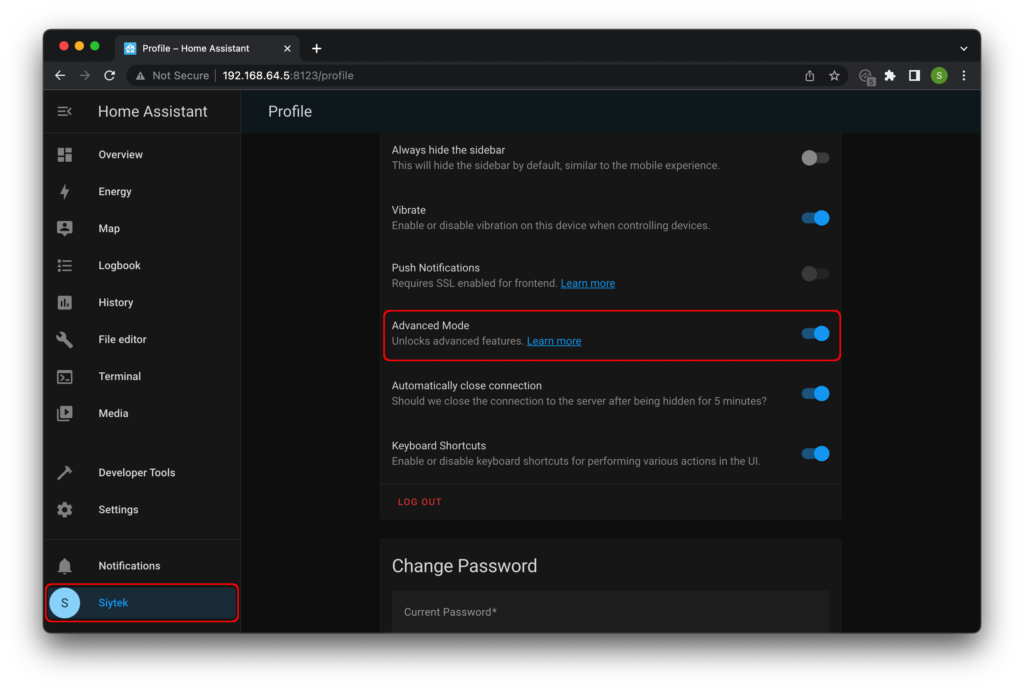
If you are unable to see File Editor in the list of official add-ons, you may need to turn on Advanced mode.
One of the main advantages of using the file editor is the built-in tool to reference various elements you have in your Home Assistant setup.
This saves a lot of time searching for the names of entities or the service that you require, for example.
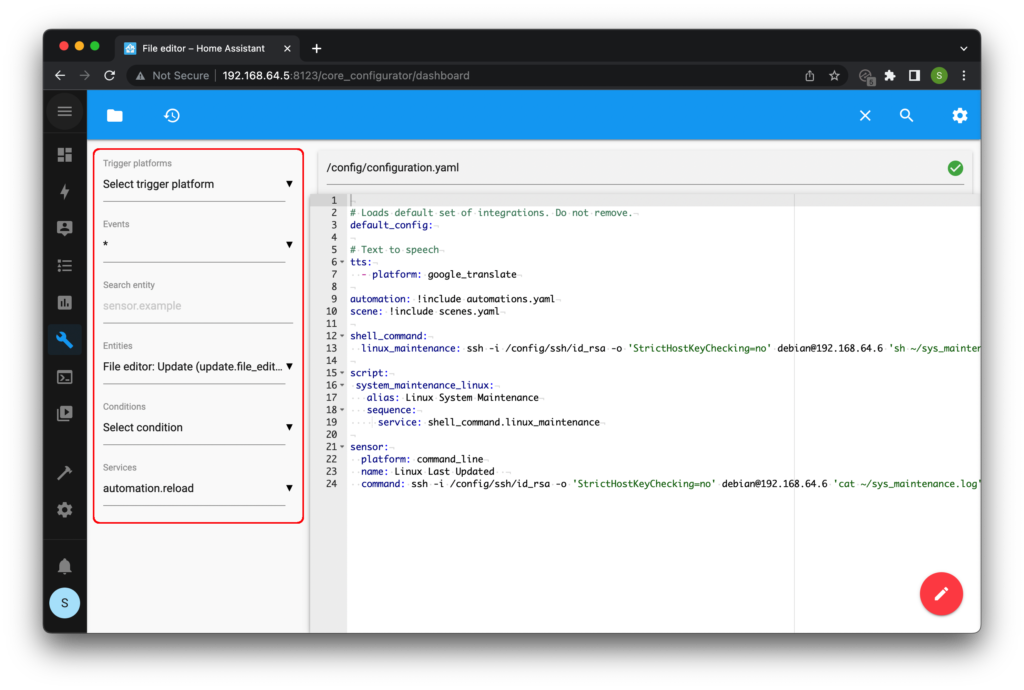
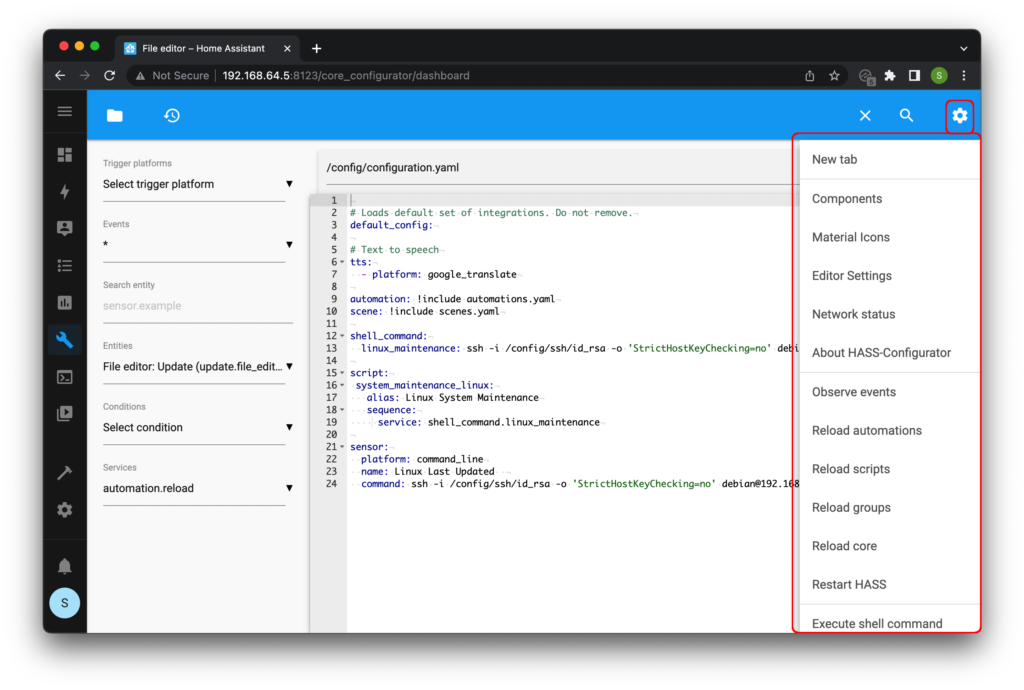
There is also a handy settings menu where you can carry out various useful tasks.
You can also create new tabs and restart Home Assistant from this menu, something that is required each time you wish changes in YAML files to take effect.
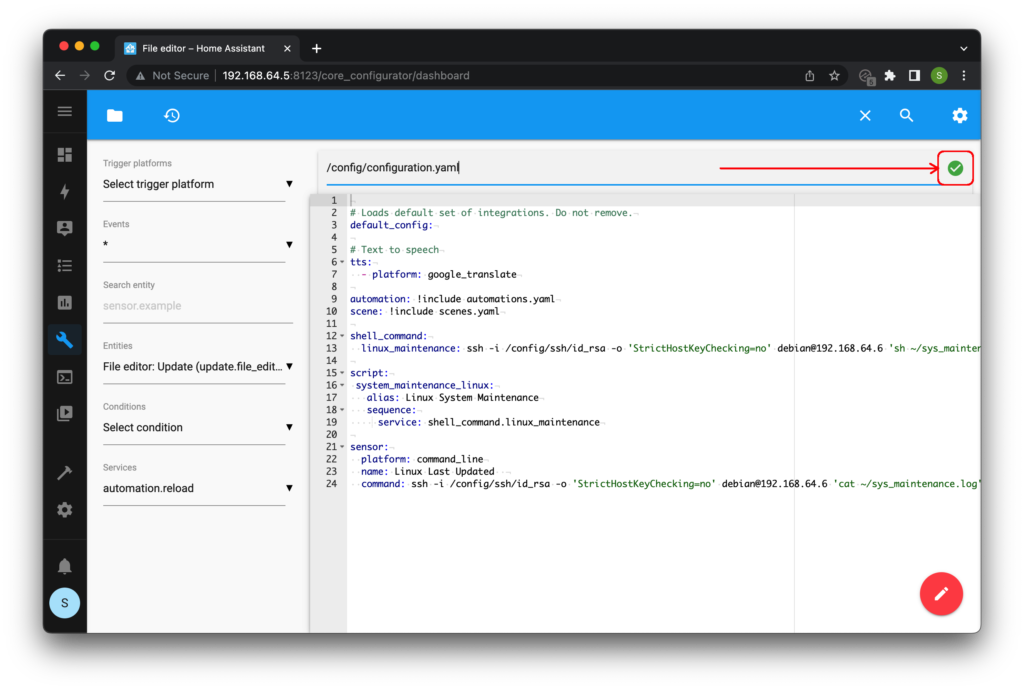
Another very useful feature of the file editor is it’s build-in syntax checking. YAML utilises spaces as part of it’s syntax and it is quite easy to produce a syntax error from incorrectly formatting the file.
A correctly formatted YAML file will be denoted by the green circle in the top right-hand corner.
A green circle with a tick means the file is good, whereas a red circle with an exclamation mark means the file editor has found a problem with the file.
How to edit YAML with your preferred text editor
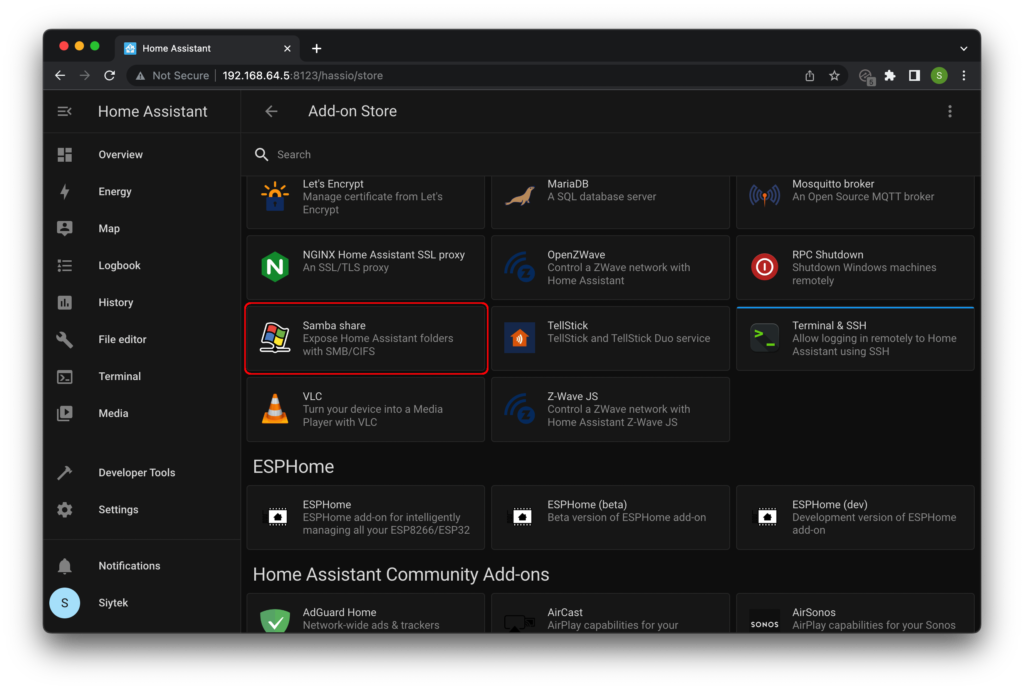
If you wish to use your favorite text editor then it is possible to access the files using Samba Share.
This add-on can be installed from the add-ons store.
You can then access your files through the a file explorer interface in your OS.
If you prefer to use a text editor then you should use one with syntax highlighting.
My preference is Sublime Text available for Mac, Linux and Windows.
If you are working with a text editor external to the Home Assistant web user interface, you will not have the syntax checking ability of the built in file editor.
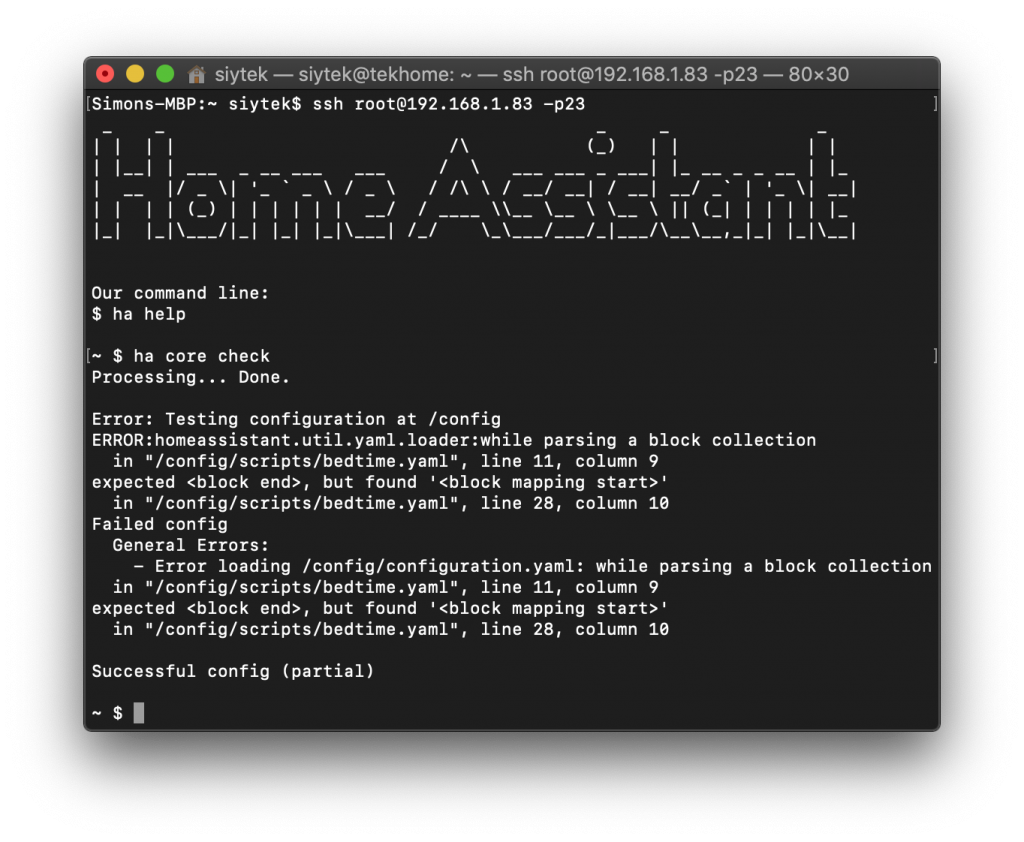
Instead you can connect to the supervisor using SSH and run the following command to check the integrity of the files.
ha core check
This will produce a confirmation if all files have the correct syntax.

However if there is something wrong the error will be given in the terminal. This is the error produced by an indentation formatting error.
What are Integrations in Home Assistant?
Integrations link and unite Home Assistant with many tools, services, and other things.
Such an integration consists of all the logic that handles implementations specific to vendors and devices, such as authentication or unique protocols, and brings them into Home Assistant in a uniform manner.
There are generic integrations for devices such as lights and switches. There are also bespoke integrations for particular hardware offerings or other services within Home Assistant.
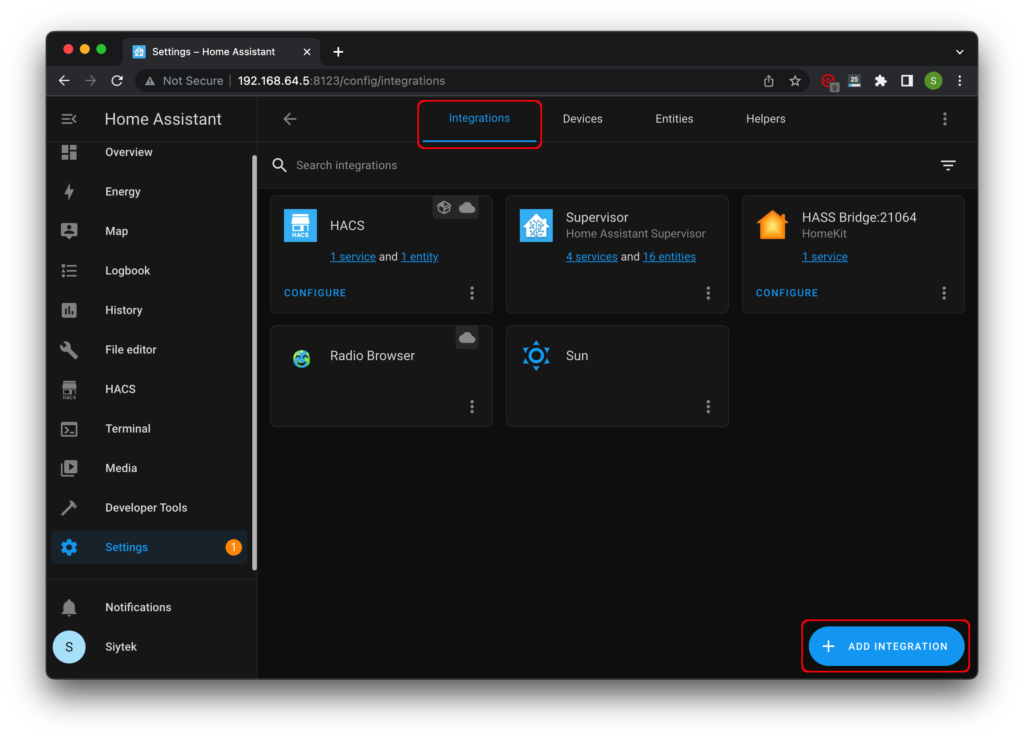
There are two ways that you can add an integration. The easiest way to add an integration is through the menu system.
You can find integrations by going to Settings > Devices & Services > Integrations. You can also get there by clicking this button:

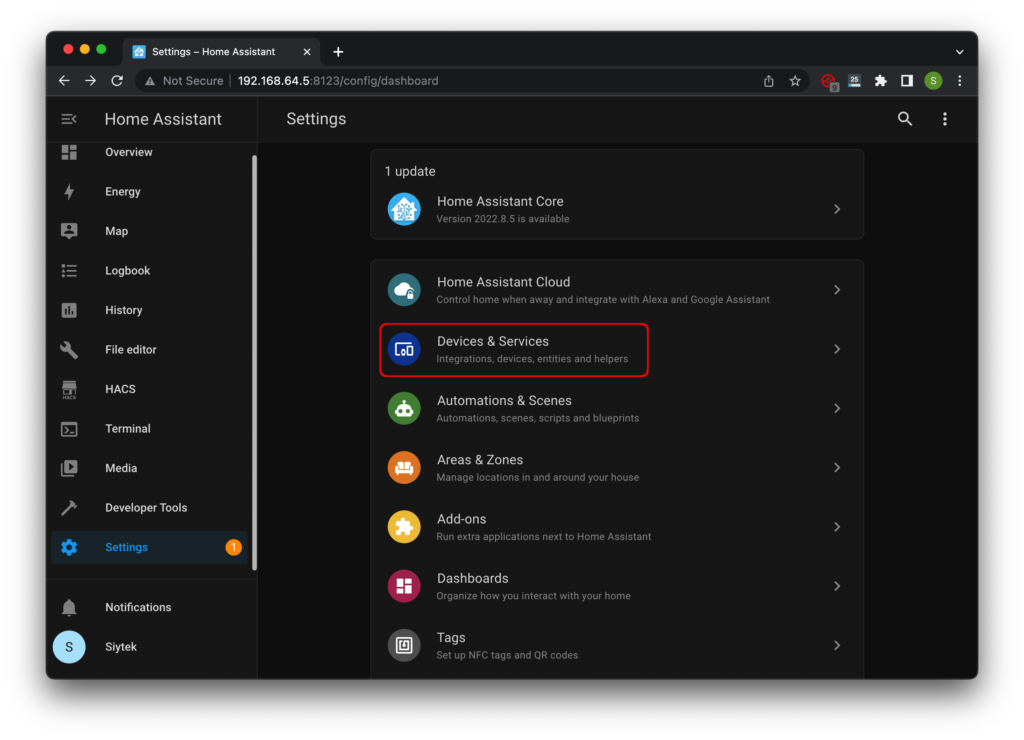
Go ahead and click the integrations tab and then choose add integration in the bottom right corner to add a new integration.
However sometimes it is necessary or prefered to add an integration to Home Assistant by entering them directly into the configuration.yaml file.
All integrations can be specified and configured from within the configuration.yaml file and often there can be a lot more flexibility when doing so.
How do you add integrations to Home Assistant using configuration.yaml?
In order to add and configure integrations to the configuration.yaml file, go ahead and open it in your prefered text editor.
There are many components supported but a good example of a common component would be automation or script.
Let’s look at an example for the light integration. In order to add the light integration, we simply add it to our YAML file:
light:
It should be noted that an integration should only be added to the configuration file once.
For example the integration light: would be written once in the YAML file and all platform instances would be listed beneath with indentation.
Let’s take a look at an example by using the group platform within configuration.yaml in order to form several groups of lights.
In order to do this we will add a group platform to the light integration. We will then add several light entities to each group.
light:
   - platform: group
     name: Studio Lights 1
     entities:
      - light.bulb_1
      - light.bulb_2
In this case each of the entities given above represents an actual light that is connected to Home Assistant.
Now if we wish to create another group, we can add another platform instance beneath this code, but we do not add the light component again.
light:
   - platform: group
     name: Studio Lights Group 1
     entities:
      - light.bulb_1
      - light.bulb_2

   - platform: group
     name: Studio Lights Group 2
     entities:
      - light.bulb_3
      - light.bulb_4
It takes a little time to get used to the syntax within Home Assistant YAML and to gain an understanding of what to write.
Stick with it! You will be surprised at how quickly you pick it up!
Beginner YAML tips
- Make sure you maintain the correct spacing. Indentation is very important and it is the primary reason for errors.
- If you have an error and you are unsure what is causing it, it is almost always due to indentation so check the formatting!
- I would recommend using the built-in file editor. Make use of the search entities and services feature as a reference to the objects you wish to include.
- Start by keeping everything in one single YAML file, your configuration.yaml file. It makes sense to split up the files later but wait until you are comfortable with basics first.
- Don’t over-complicate your setup when you are starting out. Start by getting a good understanding of how to use a simple light entity and including it in automations.
- Copy and paste some examples into your own configuration and start by adjusting the attributes such as changing the entities to your own devices. It’s a great way to get familiar with YAML before you try writing something from scratch.
- Check out the Cookbook on the Home Assistant website for some great examples!
Conclusion
YAML is a powerful part of Home Assistant and it is what gives it the flexibility that you don’t get with closed source and/or commercially available solutions to home automation.
In this modern era many people have an Alexa or Google device running their home automation. However these commercially available devices over-simplify everything and just don’t offer anywhere near the number of possibilities offered by a Home Assistant setup.
Learn YAML and harness the full power of Home Assistant to really blow your neighbours socks off!
If you are looking to level up your YAML skills even further, check out The Comprehensive YAML Guide for Home Assistant! Don’t forget to use the discount code SIYTEK10 to save 10%!
Article Updates
Aug 16th 2022 : Tested on Mac M1 and Mac OS 12.4. Screenshots updated to latest frontend, version 20220601.0. Fixed broken links in table of contents. Some additions to article information.
Article first published March 11th 2020.
Thanks so much for visiting my site! If this article helped you achieve your goal and you want to say thanks, you can now support my work by buying me a coffee. I promise I won't spend it on beer instead... 😏


Excellent article. One change I would recommend. You can’t use tab in a yaml file.
I just Googled it and I see what you mean, I had no idea tabs were not permitted in YAML! I have tabs in my configuration.yaml file so I guess the file editor must handle them appropriately. However I think it is best to correct this as per the YAML specification, thanks for pointing it out!
In the file editor you can restart the core, not the supervisor.
Good spot Bill! Duly noted and corrected
Really good article.
I did the installation on Home Assistant on Raspbian based on your previous article. All works fine.
One point I can’t resolve yet is how to get access to the configuration file. I can connect using ssh to my raspberry but when I listed the file under /home/homeassistant/ the directory is empty.
Maybe I miss something?
Thanks.
Hey Vincent, thanks for visiting! Do you specifically need to run Home Assistant under Raspbian? This is a more advanced way to do the install and is usually chosen by those with a specific requirement to do so. You might find it easier to follow the basic installation and run Home Assistant under its own supervisor, without Raspbian (https://www.home-assistant.io/getting-started/). This is the most common way to run Home Assistant and my other content here will likely make more sense.
If you want to stick with Raspbian, if I remember correctly the config directory is hidden so maybe try /home/homeassistant/.homeassistant
How do you add to Configuration.Yaml for Home Assistant ??
Hey Greg, thanks for visiting! It should be in your configuration folder and you can edit it using the file editor add-on. Perhaps take a look at this for some further assistance.