Mac OS is a popular choice for operating system for running Home Assistant and it is now possible to run a fully featured Home Assistant with the supervisor on both Intel and Apple Silicon Macs using a freely available tool called UTM.
UTM (Universal Turing Machine) is an open source application that allows you to run virtual machines on your Mac. It can be downloaded for free on GitHub or if you wish to support the project, you can pay a small amount to purchase it on the Apple App Store.
In this article you will learn step-by-step how to use UTM to create a virtual machine that can run Home Assistant.
The end result will be a fully operational version of Home Assistant Supervised that features the add-ons store and that can be connected to external devices, the Home Assistant app and accessed from any browser.
The process of getting Home Assistant Supervised up and running on Mac OS is fairly straightforward but can take a lot of time to complete all of the necessary steps.
If you encounter any difficulties or you would prefer to get Home Assistant Supervised running on your Mac in just a couple of clicks, be sure to check out the pre-built image!
- A Newer Article is Available!
- What is Home Assistant Core?
- What is Home Assistant Supervisor?
- Do I Need to Run Home Assistant Supervised?
- Add a new virtual machine
- Select the Virtualization Method
- Choose an Operating System
- Add the Boot Image
- Choose the Hardware Settings
- Choose the Disk Size
- Include a Shared Location
- Finalizing and Starting the VM
- Set up Languages and Location
- Set Up the Accounts
- Set Up the Timezone
- Create the Disk Partitions
- Choose a Mirror
- Complete the Installation
- Install Dependencies
- Install Docker-CE
- Install OS-Agent
- Install Home Assistant Supervised
What is Supervised Home Assistant?
Home Assistant is designed to run inside of a container known as a Docker container. The primary benefit of bundling Home Assistant inside such a container is that it makes it easy for the developers to bundle everything into one package that can be run on different platforms.
What is Home Assistant Core?
The main Home Assistant application is called Home Assistant Core. This is the application that manages your smart home, providing all of the necessary functions and also the graphical user interface (GUI) that can be accessed with a browser.
The Home Assistant Core container can be launched on many different platforms as the container contains all of the necessary components required to run it.
There is also a wide variety of add-ons that can be used with Home Assistant, some of which are absolutely necessary for managing your Home Assistant configuration, for example the File Editor add-on.
These add-ons are separate applications and are therefore run in their own Docker containers. This is where the supervisor comes in.
What is Home Assistant Supervisor?
The Home Assistant Supervisor manages the Home Assistant Core and all add-on containers. The Supervisor performs many different tasks, such as helping to keep your Home Assistant installation up to date.
Once of the most useful features of the Supervisor is that it provides a seamless experience between the Home Assistant Core and Home Assistant add-ons.
When running a Supervised installation of Home Assistant, the process of adding and using add-ons is very simple. For the end user it is simply like the add-ons are just part of the main program, and can be managed with the Home Assistant GUI.
Do I Need to Run Home Assistant Supervised?
No, it is not necessary to run Home Assistant Supervised, you can run the Home Assistant Core only. You can also manage the add-ons yourself.
However running the Home Assistant Core alone means that you are responsible for installing and managing the add-ons yourself as well as keeping everything up-to-date.
There are some advantages to running the Home Assistant Core. It is easier to run the Core natively on a wider range of platforms and it can give you more control over your system.
However it is far more complex to manage Home Assistant without the Supervisor and only advised for expert users who are very familiar with the Linux operating system.
Home Assistant Supervised is the best choice for most users, most of the time.
Home Assistant on Mac: How Does it Work?
There are two main ways that you can run Home Assistant Supervised:
- Home Assistant OS – the Home Assistant Operating system is an operating system designed for the sole purpose of running Home Assistant. It is an ideal candidate for systems with fewer resources, such as Raspberry Pi.
- Home Assistant Supervised on Debian Linux – the official recommended and supported operating system for running Home Assistant Supervised aside from Home Assistant OS is Debian Linux.
In order to run Home Assistant on Mac, we will create a virtual machine using UTM that will run a minimal installation of Debian Linux, which in turn will run Home Assistant.
With this configuration, Debian Linux is referred to as the guest operating system (guest OS) and Mac OS is referred to as the host operating system (host OS).
UTM provides a complete bridge between the guest and host operating systems. This will allow you to use Home Assistant as if it were running natively on Mac OS.
For example, you can connect USB devices to your Mac and have them piped directly to Home Assistant. This allows you to use peripherals such as Zigbee and Z-Wave dongles.
You can also configure the UTM network settings to connect Home Assistant directly to your router, so that it has its own IP address.
This means that Debian / Home Assistant will appear on your local network as if it was a separate physical computer, allowing you to link IP-based smart devices directly, such as your smart TV.
In short, following the method in this article will yield a fully functioning Home Assistant Supervised installation that can run on Mac OS, no different to if you were running it directly on dedicated hardware (such as Raspberry Pi or an NUC).
Prerequisite
In order to get Home Assistant running on your Mac, you will need a Mac which meets the minimum system requirements of UTM and adequate disk space:
- Requires macOS 11.3 or later.
- Recommended 32GB or more free disk space.
- 4GB of RAM
If you have not done so already, you will need to download and install UTM. Once downloaded, place the UTM app in your applications folder and launch it from there.
You will also need the latest version of the Debian Linux installer. You will need to choose the download for the correct architecture that you are using, depending on what processor you have in your Mac.
You can find out what processor you have by opening the macOS Terminal and entering the following command:
uname -m
This will output the architecture that you are using. Next, go ahead and download the Debian installation disk image (.iso file) for architecture that matches your system:
- arm64 – Download Debian Linux for ARM architecture (Apple Silicon Mac)
- x86_64 – Debian Linux for Intel architecture (Intel Mac)
How to Create a New UTM Virtual Machine
In the first section of this guide we will create a new virtual machine in UTM that will become the platform where we can install Debian and Home Assistant.
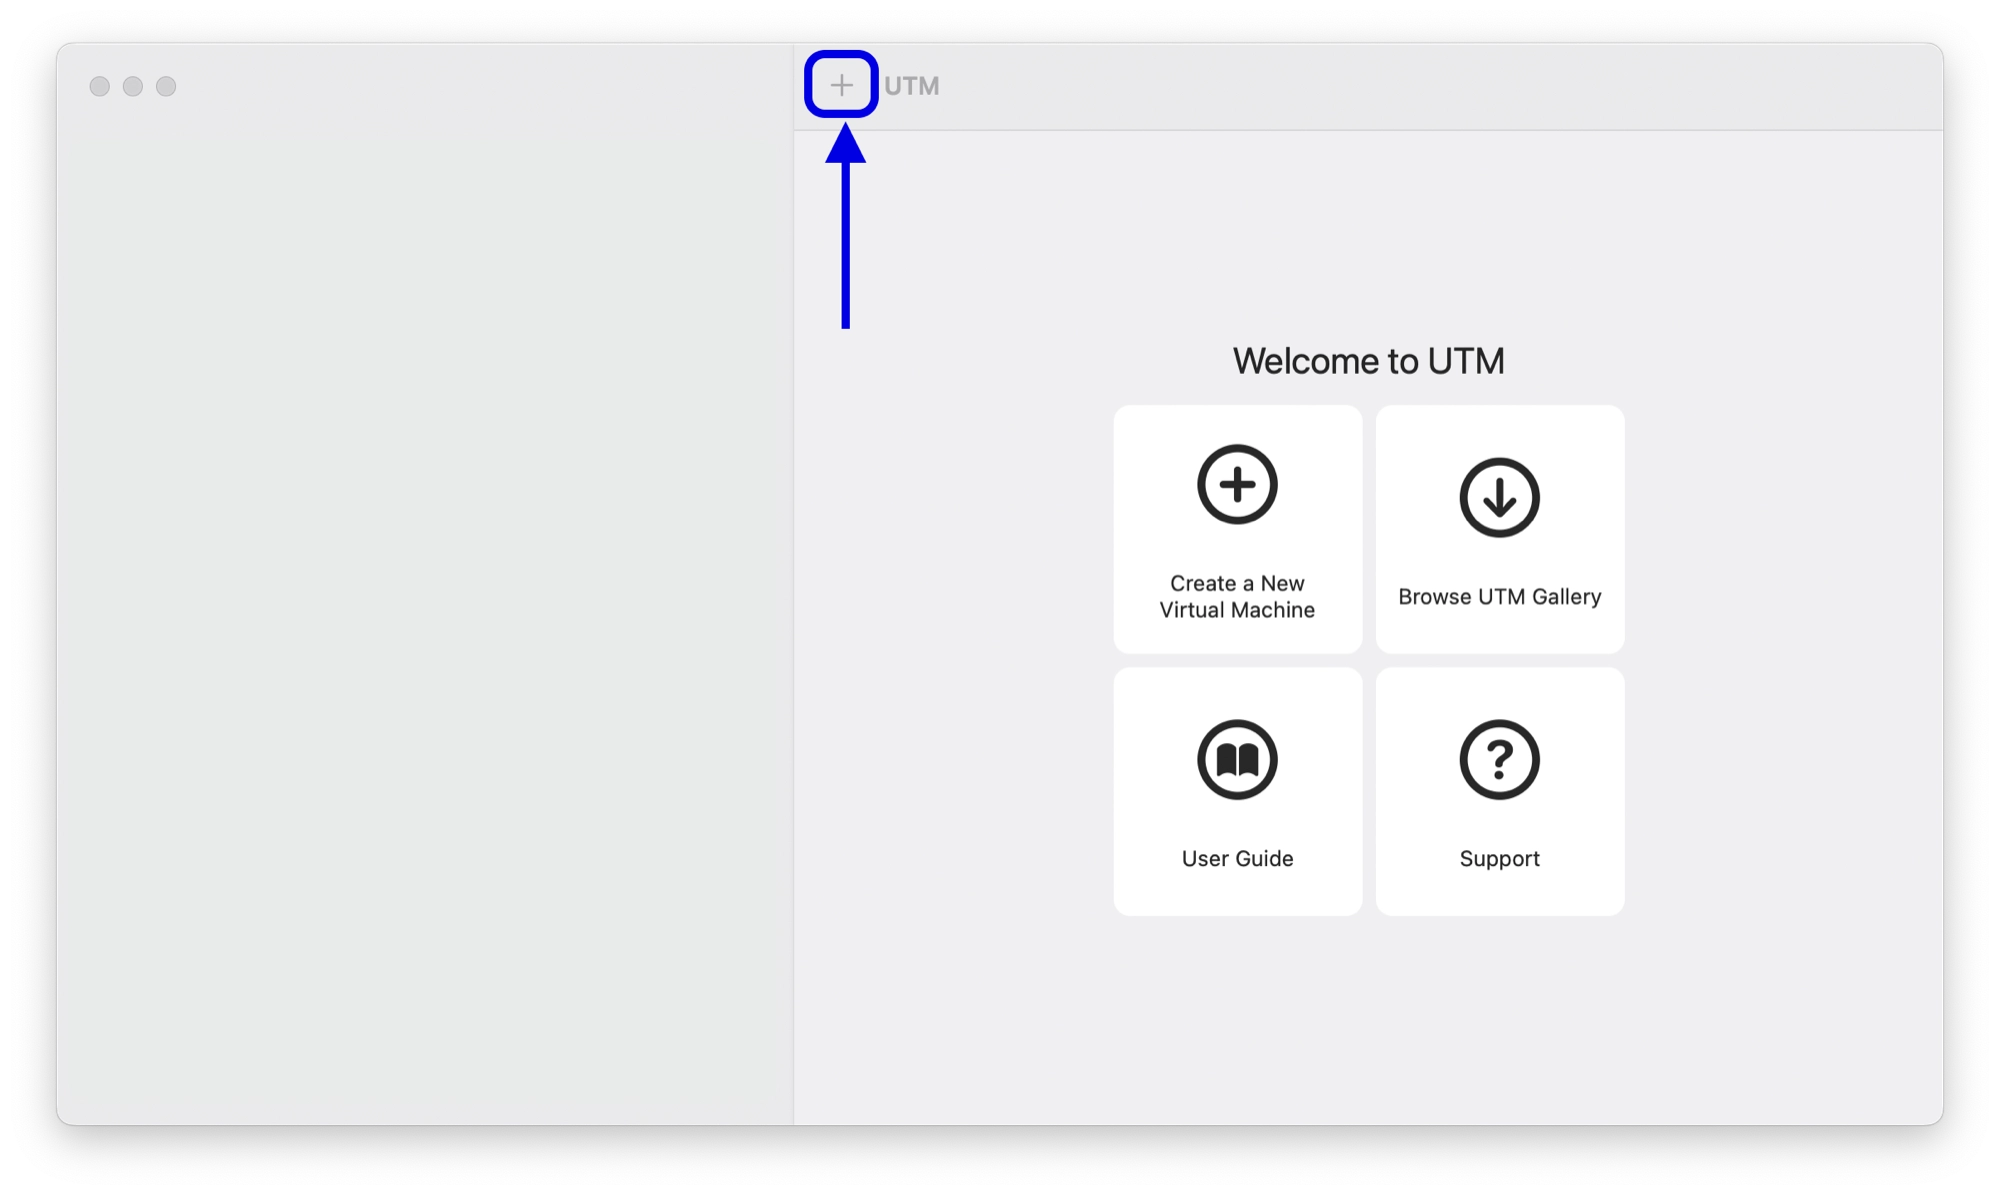
Add a new virtual machine
In order to add a new virtual machine in UTM, click the ‘+’ button at the top of the main window:
Select the Virtualization Method
On the first screen you will be given a choice of whether to use virtualization or emulation. Select the virtualization option by clicking the large button:
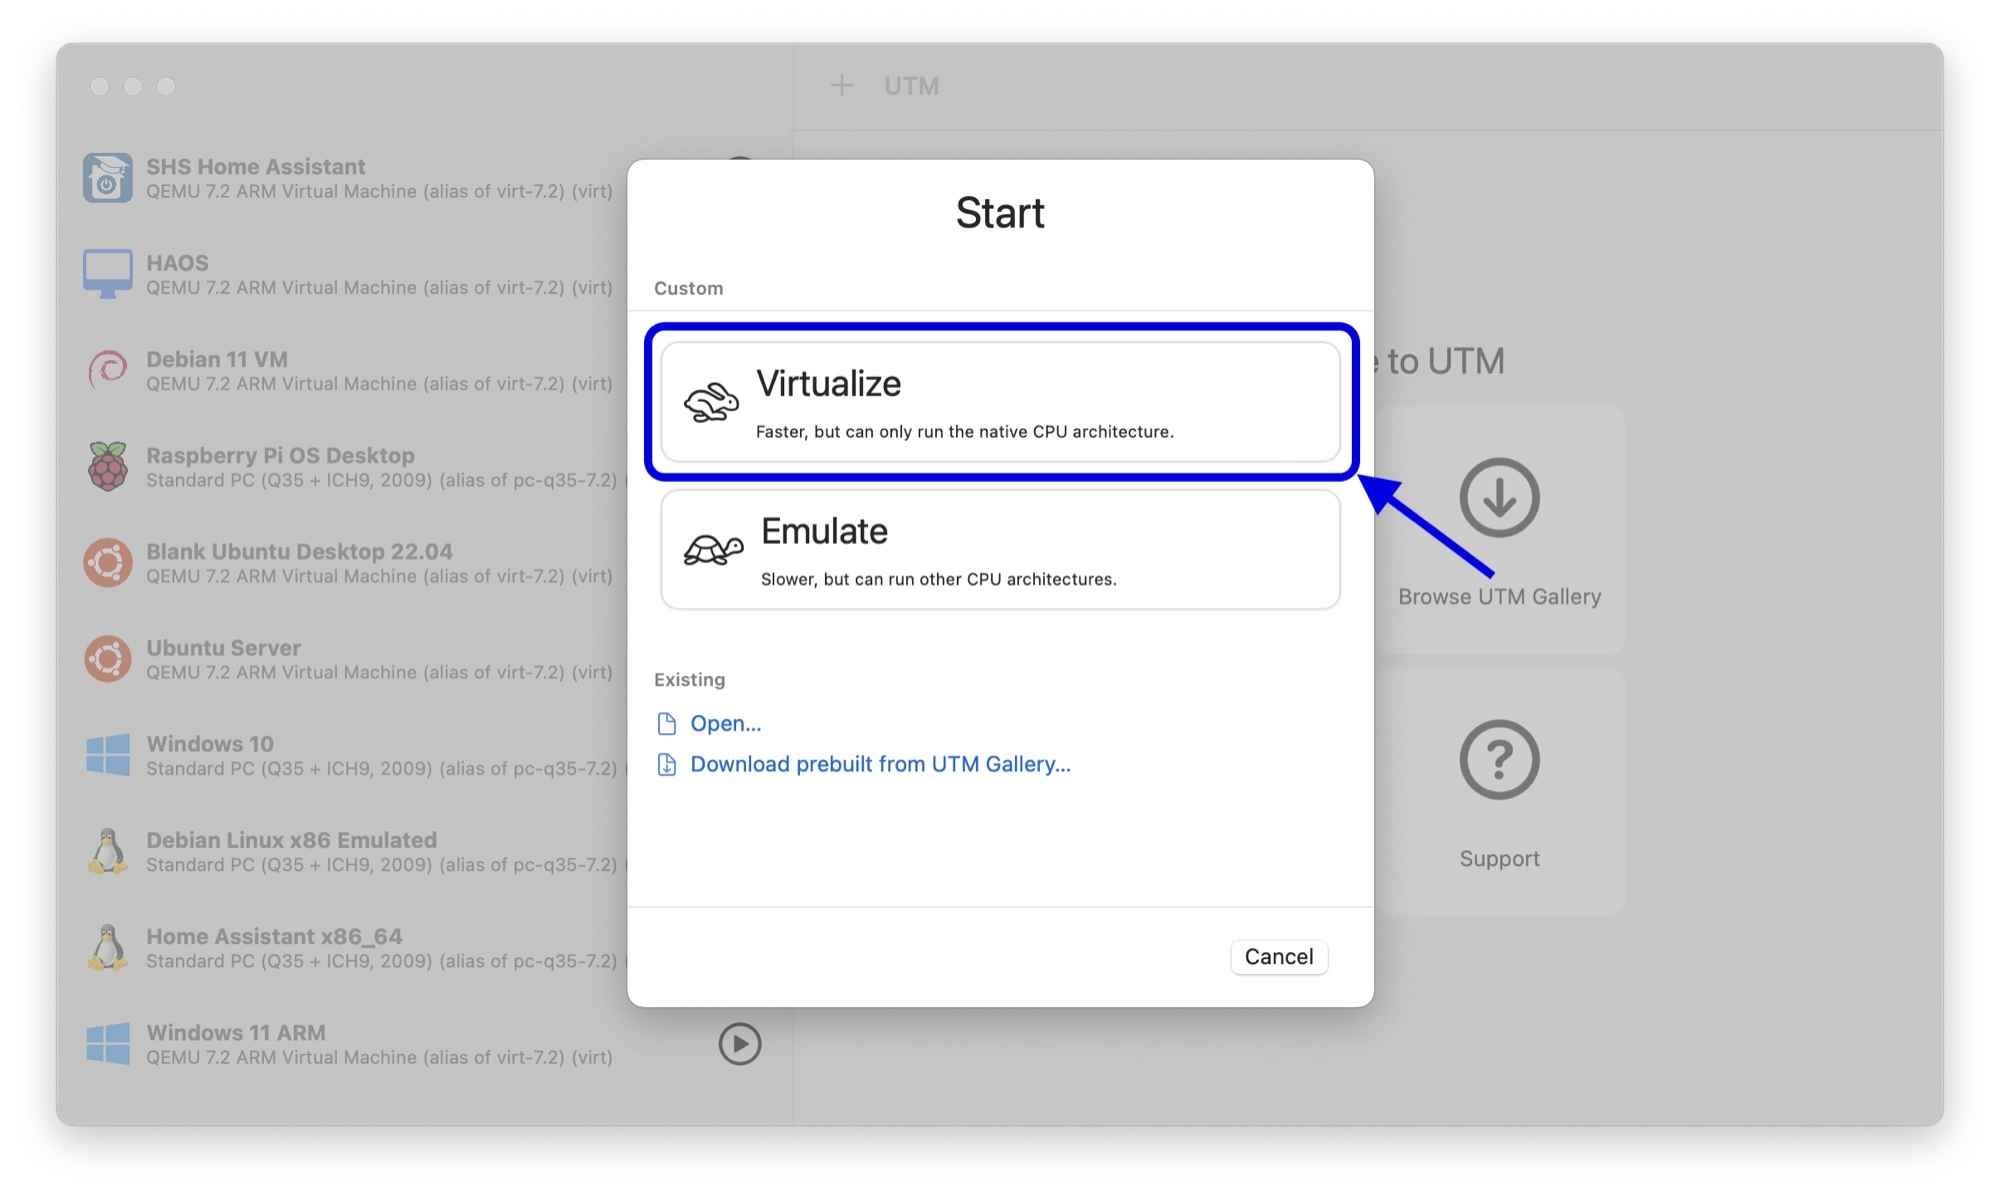
Virtualization is a far more efficient way of running a virtual machine and can be chosen when the guest OS is compatible with the host OS hardware.
As Debian can be downloaded for both ARM (Apple Silicon) and Intel hardware, we can choose to use virtualization for better performance. Just make sure that you have downloaded the correct version of Debian for your system, as explained in the prerequisite.
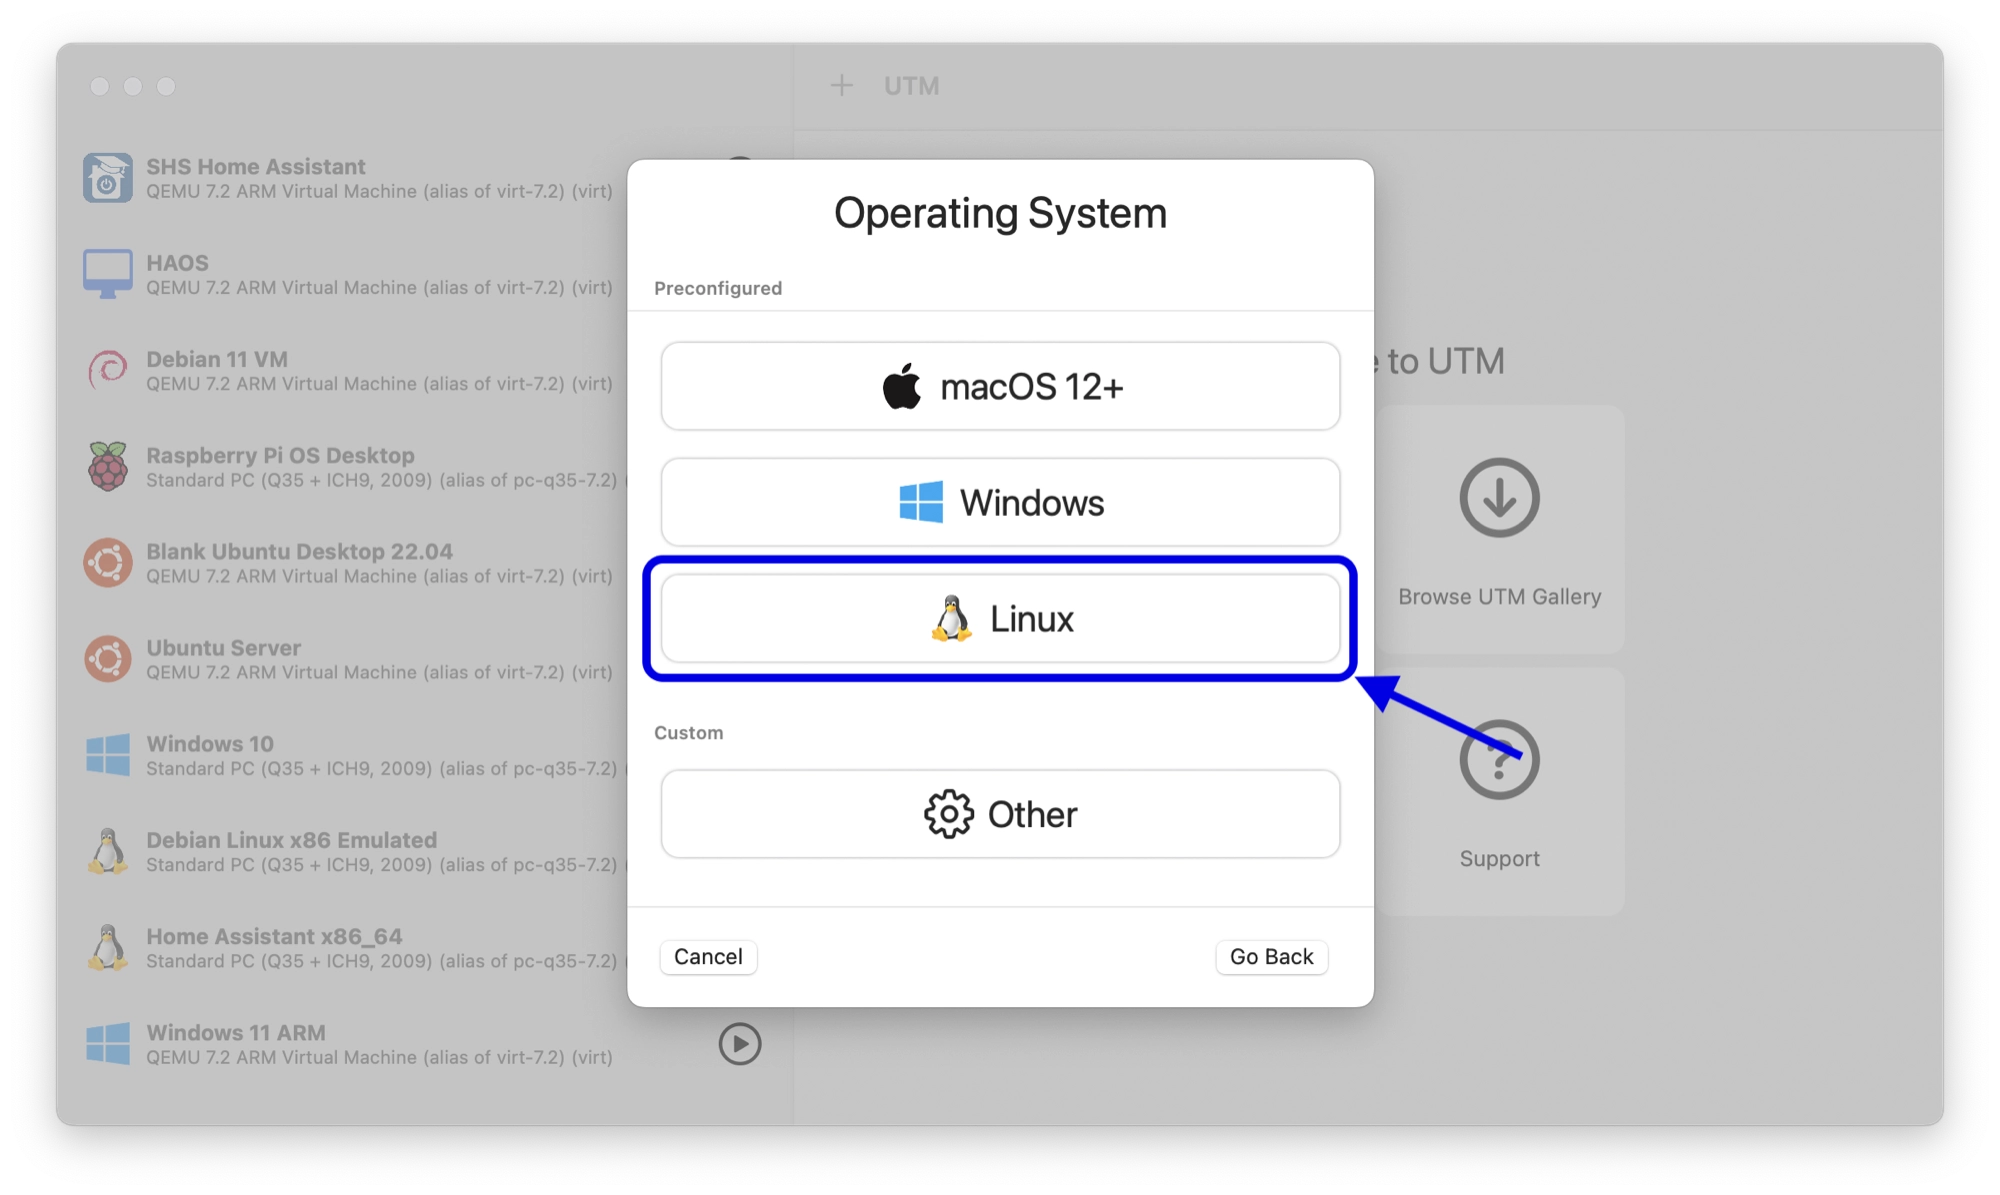
Choose an Operating System
On the next screen we are given the option to choose the type of operating system, which can help to simplify the configuration.
In order to run Home Assistant, we need to install Debian Linux. Therefore go ahead and choose Linux for the operating system.
Add the Boot Image
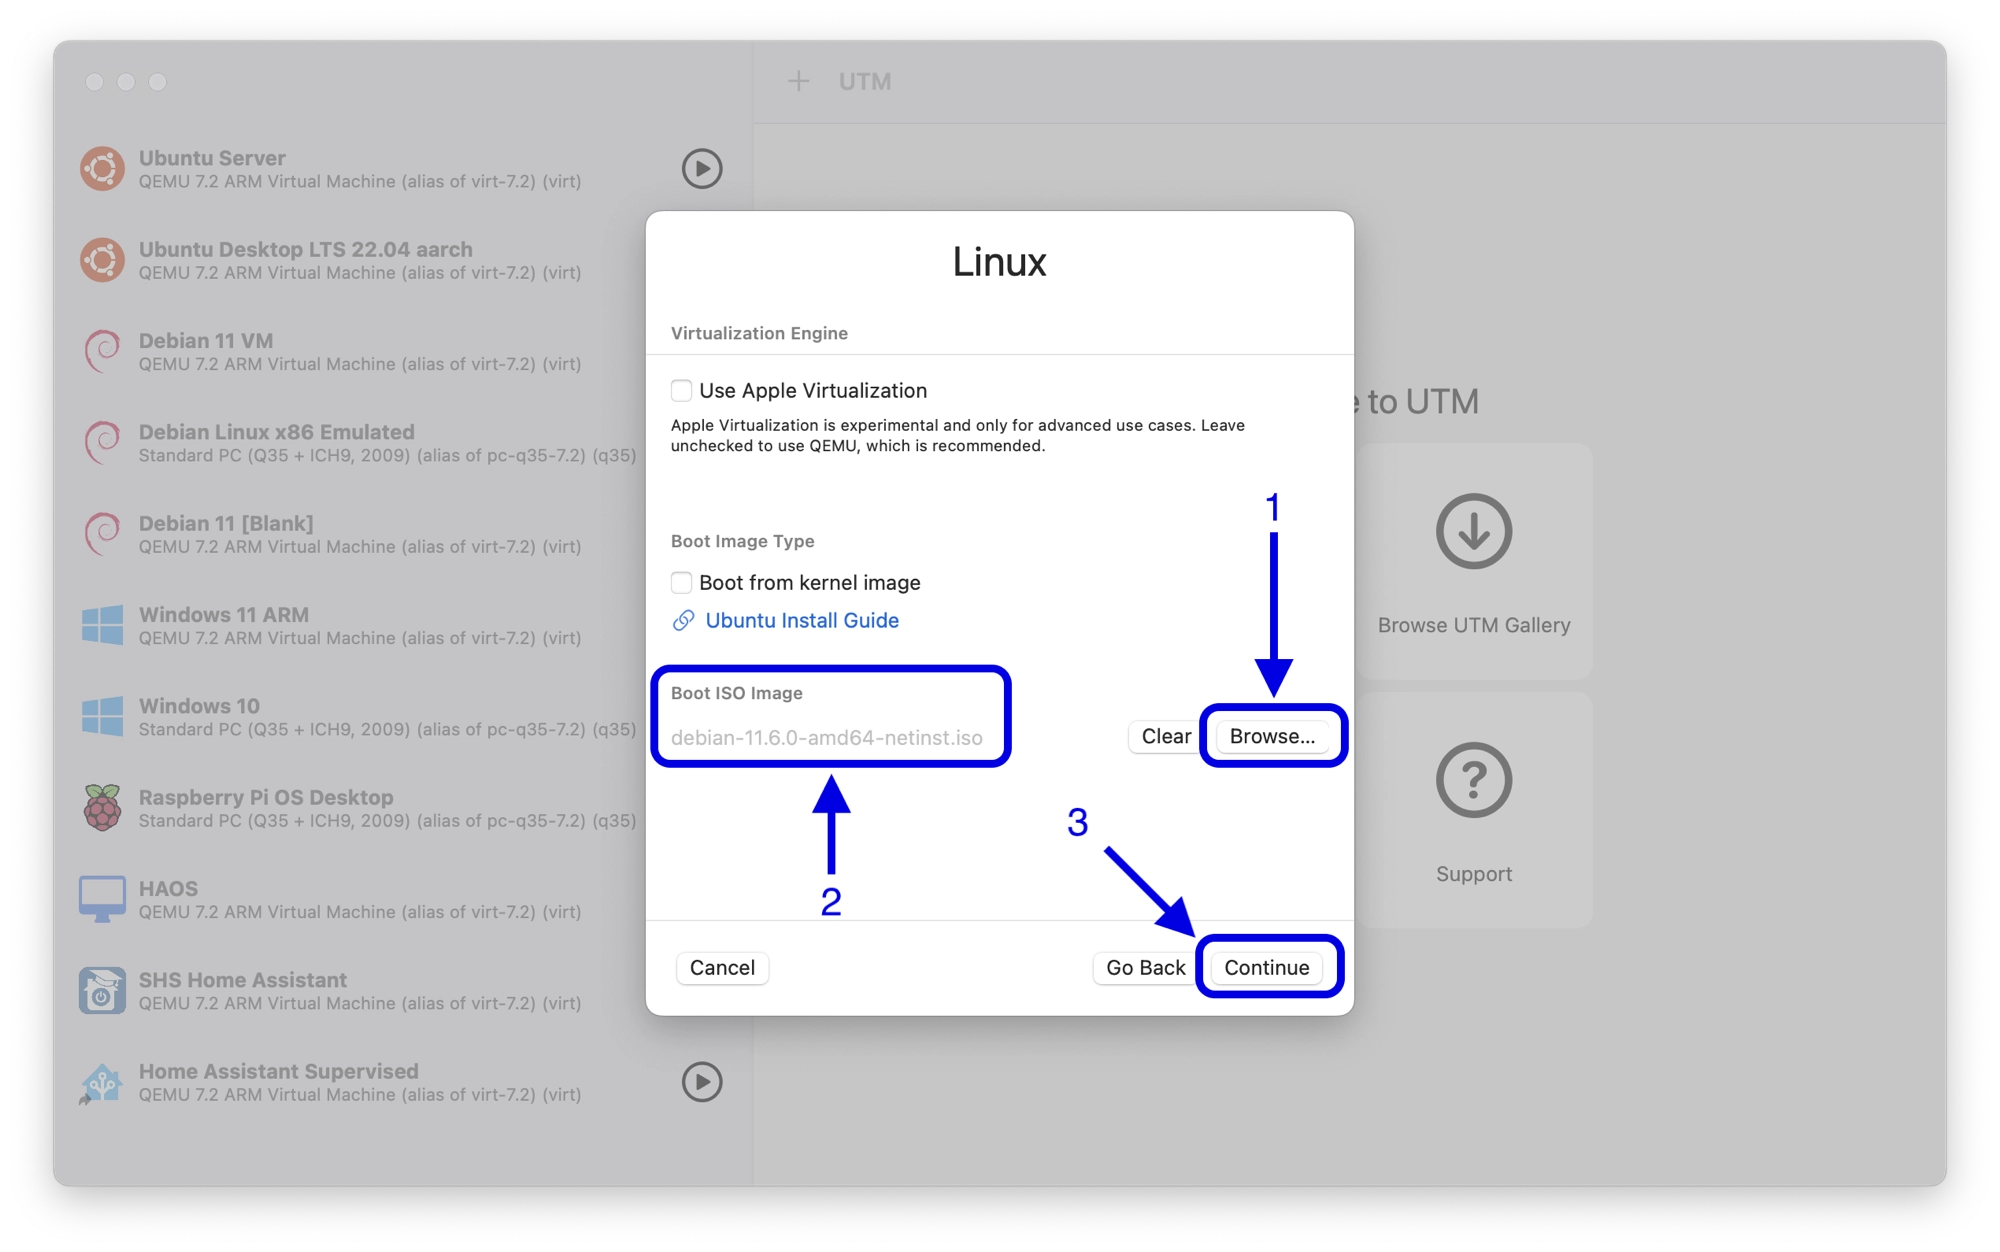
Next we need to supply UTM with a disk image that contains the Debian installer. Under the boot ISO image section, (1) click browse and select the .iso file that you just downloaded.
Once selected, (2) you will see the path to the .iso file. (3) Click continue to move to the next step.
Choose the Hardware Settings
Next, we will set the hardware settings to confirm to the Home Assistant minimum requirements. The Home Assistant minimum requirements are as follows:
- 2 GB RAM
- 32 GB Storage
- 2 vCPU cores
The minimum required RAM is 2 GB, however I would advise choosing a value that is half that of your system RAM. In this example I will use 4 GB.
For this virtual machine you can leave the number of cores set to default and allow UTM to manage the requirement.
Choose the Disk Size
On the next screen you can specify the size of the virtual hard disk. This is the size of disk that will be ‘seen’ by Debian.
A minimum of 32 GB of disk space is required, however I would recommend using 64 GB or more if you have plenty of free disk space.
Note that if you intend on doing anything that could be resource intensive, you may wish to increase these requirements.
For example if you plan to connect an IP camera network, you will likely need to increase the disk size considerably. In this case I would recommend a minimum of 128 GB.
Disk size can be increased at a later date but it is quite a complex task, see here for further information. It is much easier to specify the correct disk size during the initial configuration of the virtual machine.
Include a Shared Location
If you wish to share files between your guest and host operating systems, you can choose a shared folder that will be accessible by both.
Click browse and navigate to a folder that you want to share, then click open to select it. Once selected, you will see the path appear under the shared directory path.
You can also check the share is read only box if you wish to prevent the guest OS from writing to the directory.
Finalizing and Starting the VM
On the final screen you have the opportunity to give your new VM a name, such as Home Assistant Debian. You can review the settings and then click save to add your new virtual machine to UTM.
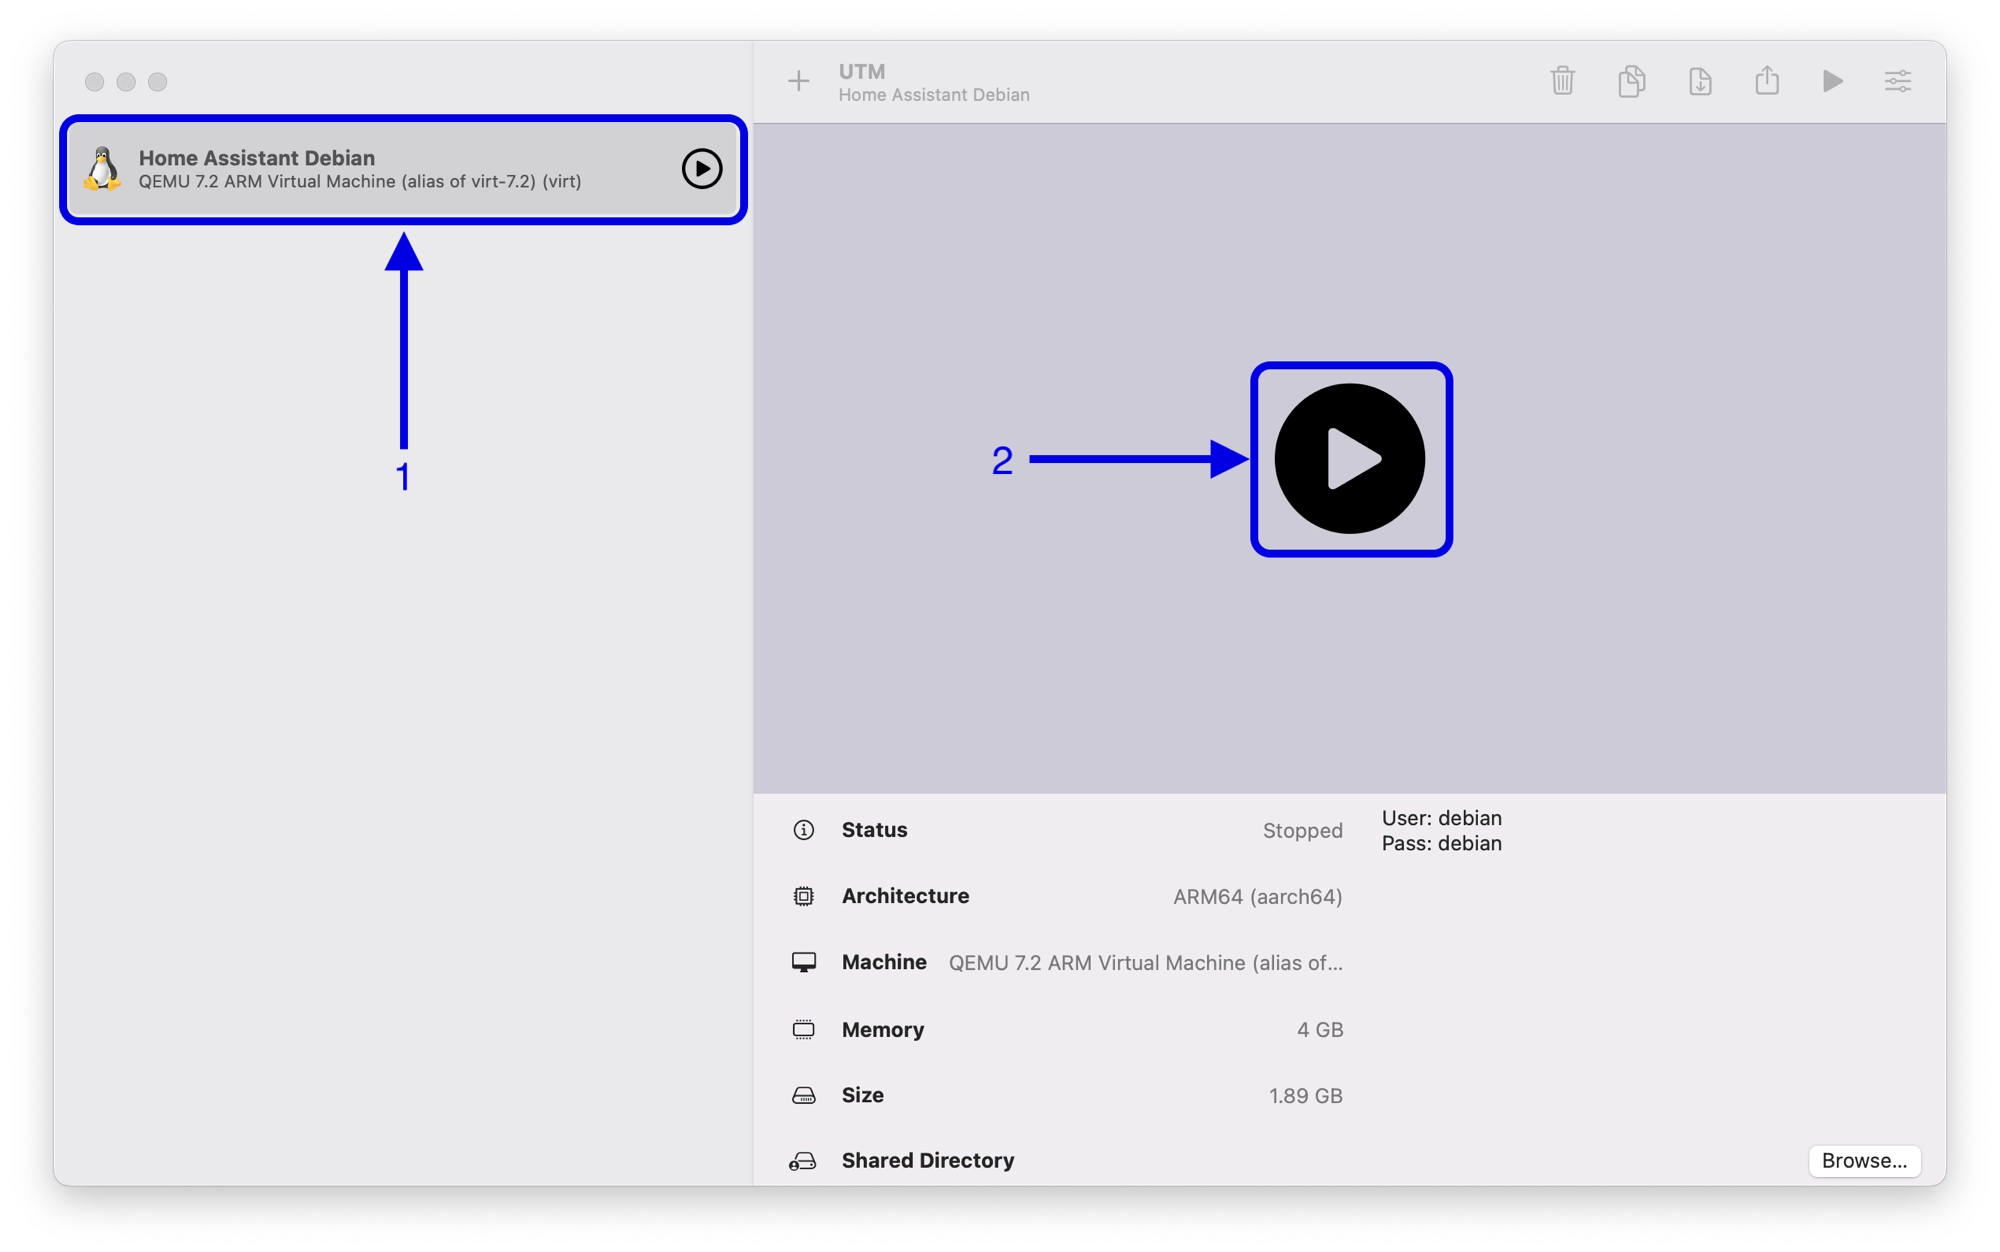
Select your new VM from the left-hand sidebar menu and then click the large play button to boot up the virtual machine.
Note that the default display and network settings should be adequate to get things up and running. You can adjust these at a later point if necessary.
How to Install Debian Linux on a new UTM Virtual Machine
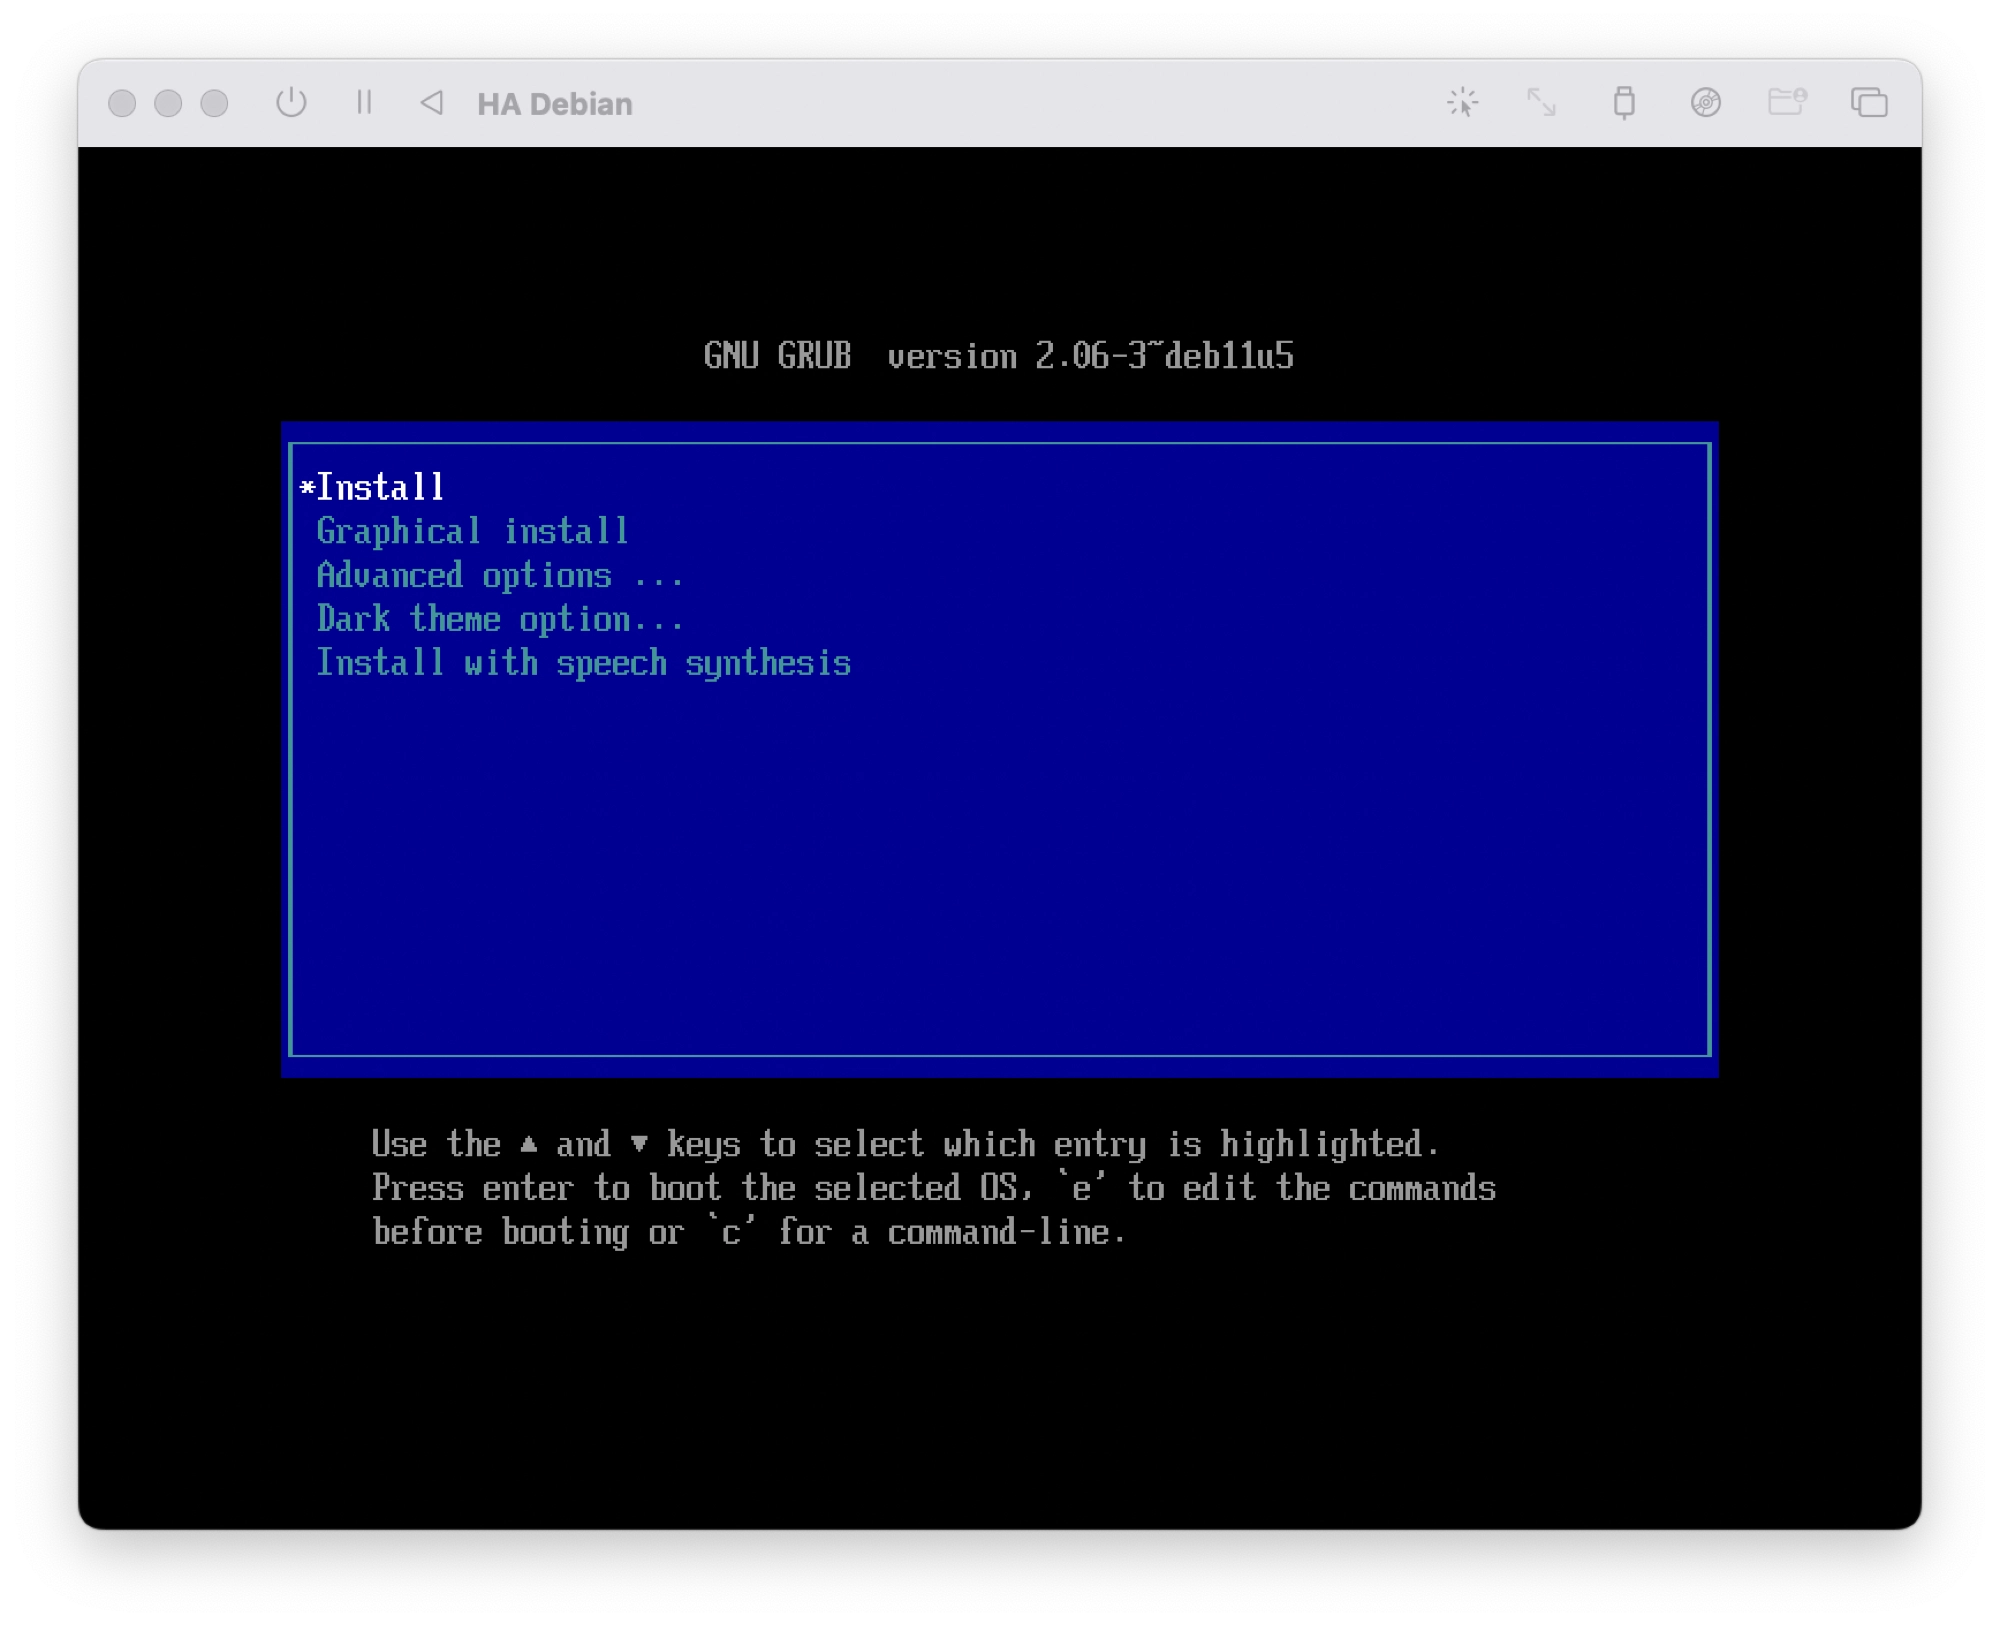
Once you have created a new virtual machine and attached the Debian installation disk image, the Debian installation will begin.
- Choose Install to begin the installation.
Set up Languages and Location
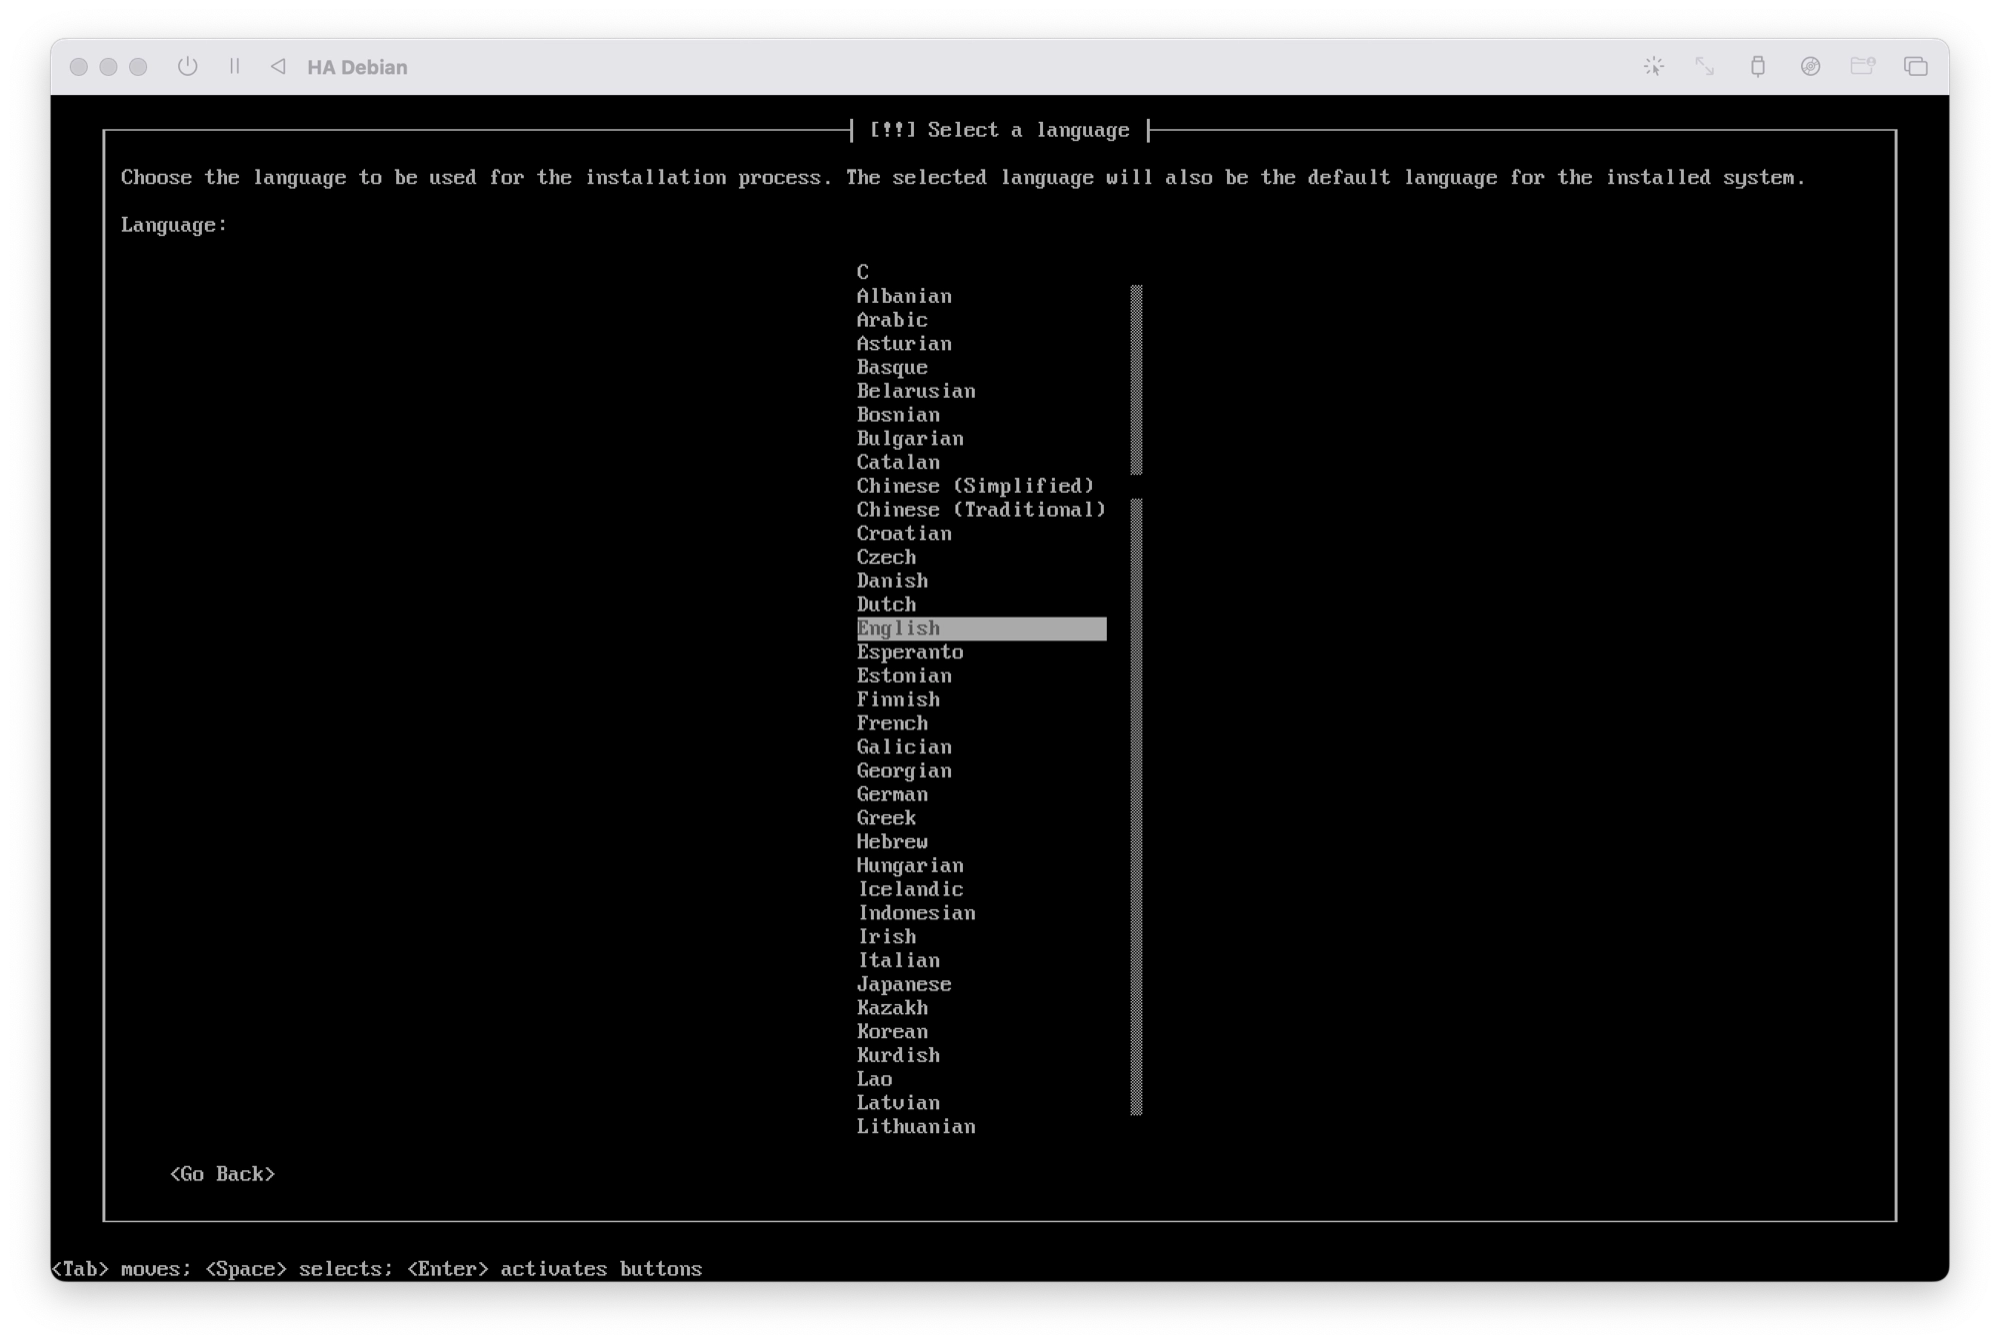
- First, choose the default system language. This will also be the language used for the installation process:
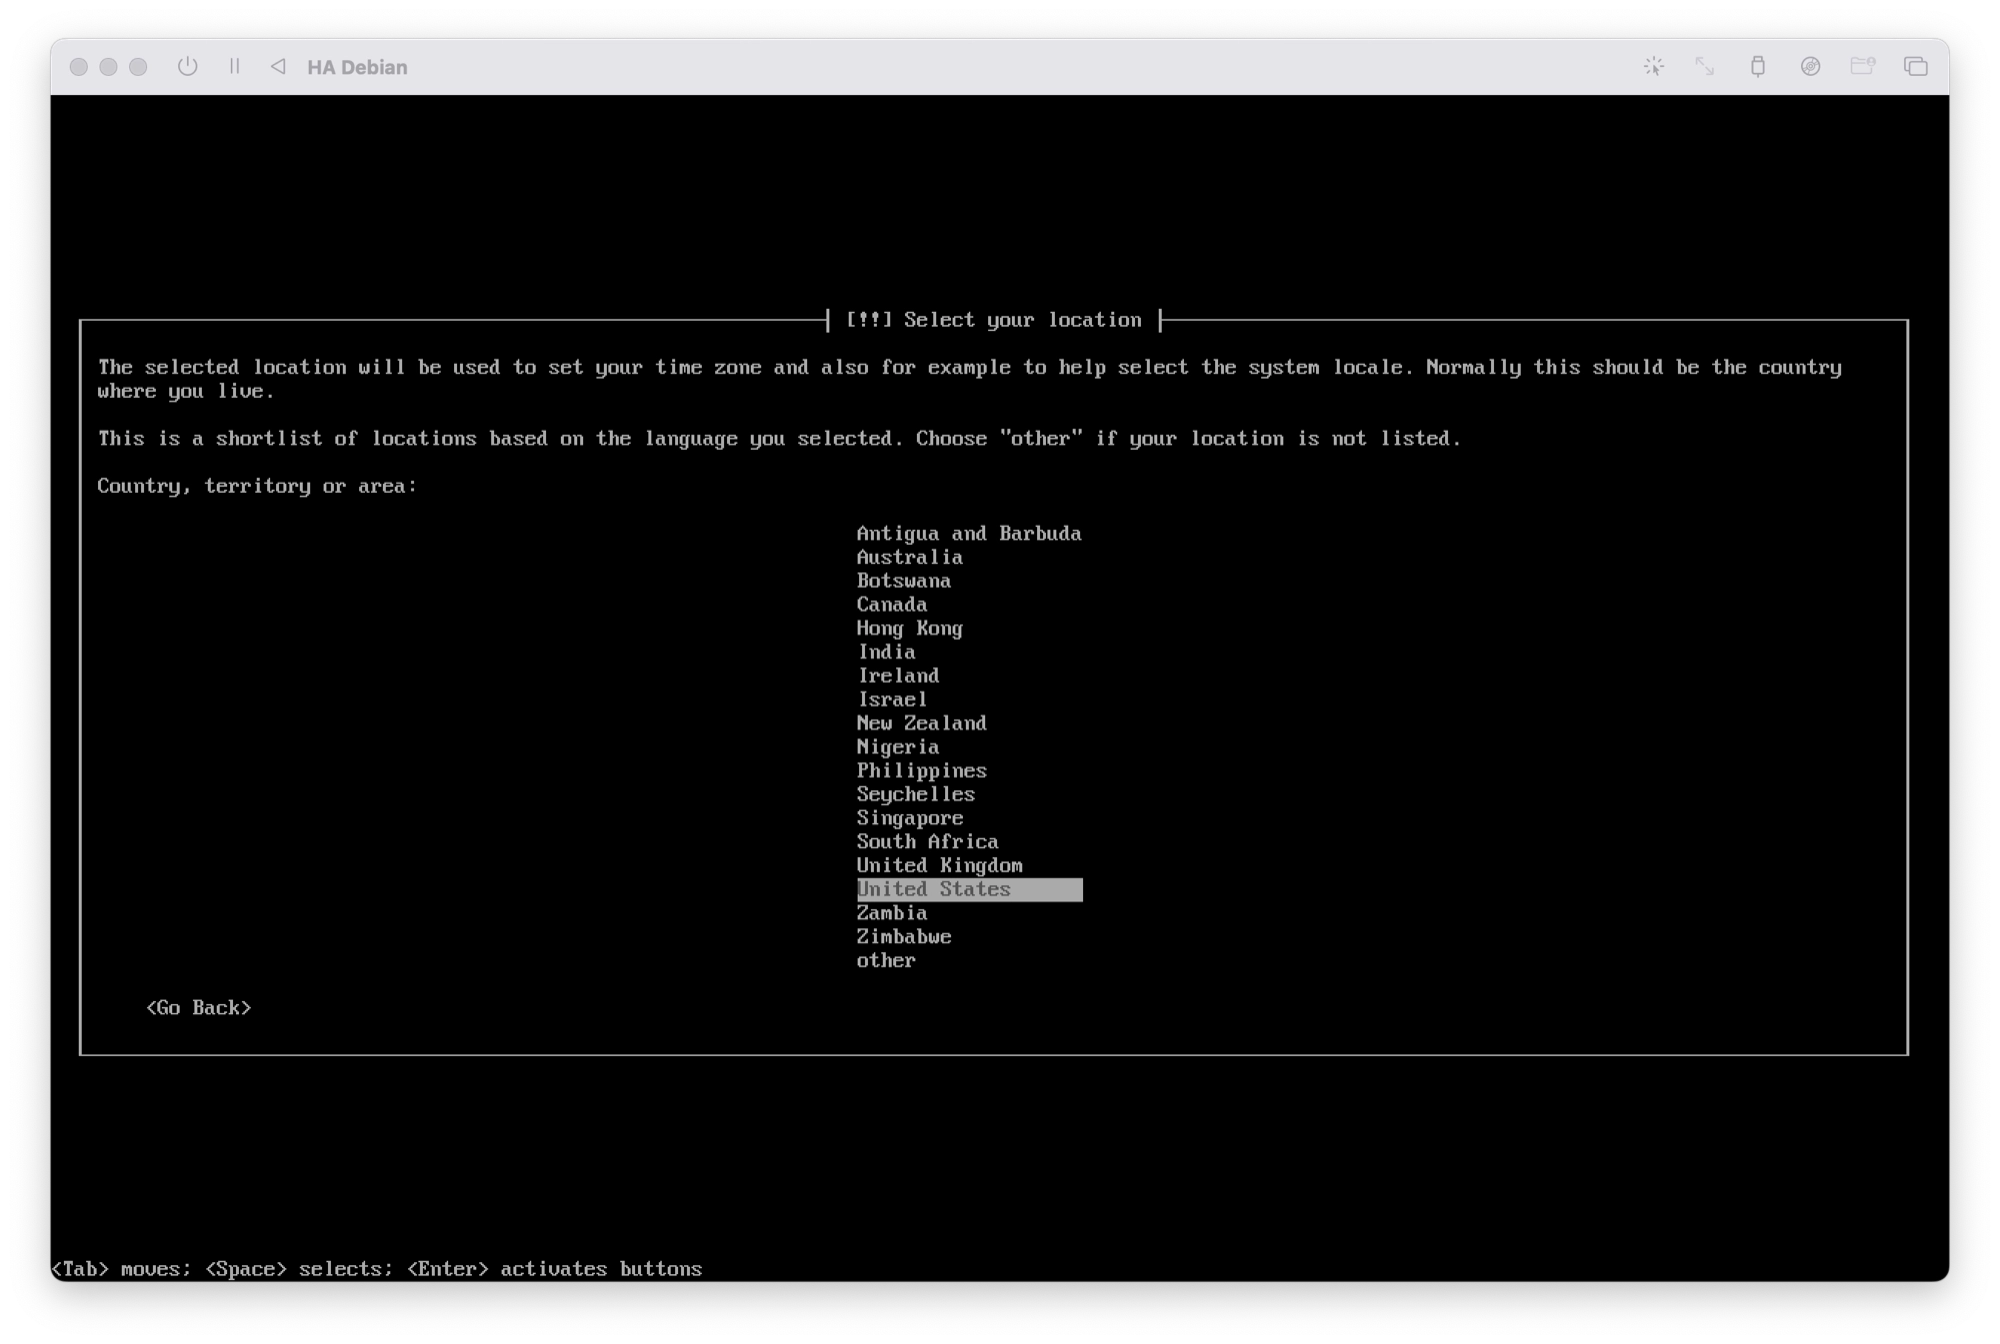
- Choose your home country. In this case the location of your Home Assistant home.
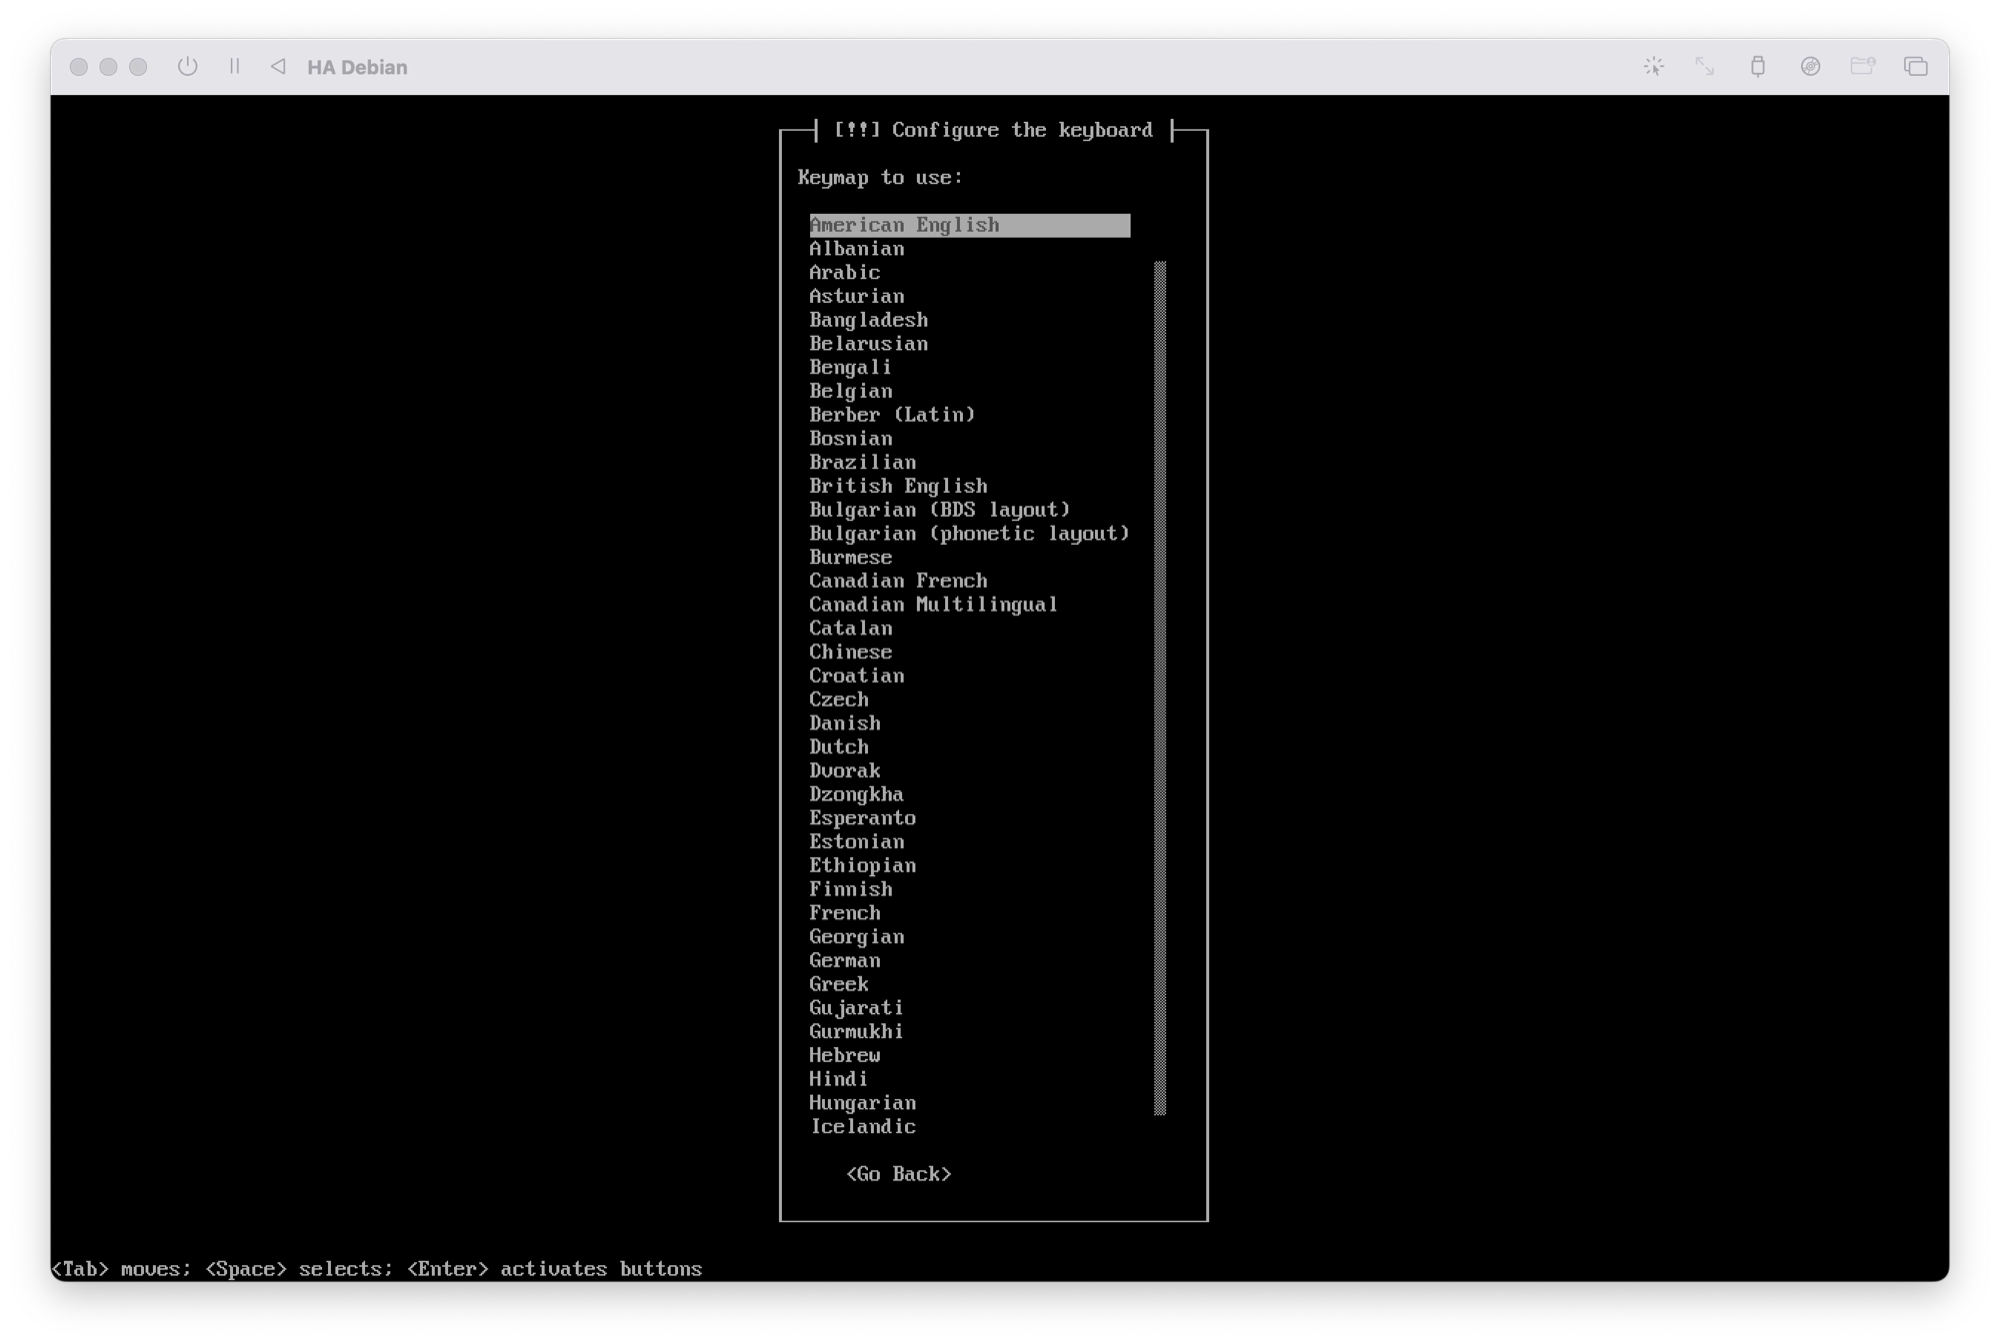
- Choose the language of your keyboard. Note that most English Mac keyboards have an American layout, so you may wish to choose American English here even if you purchased your Mac in a different english-speaking country.
Set Up the Accounts
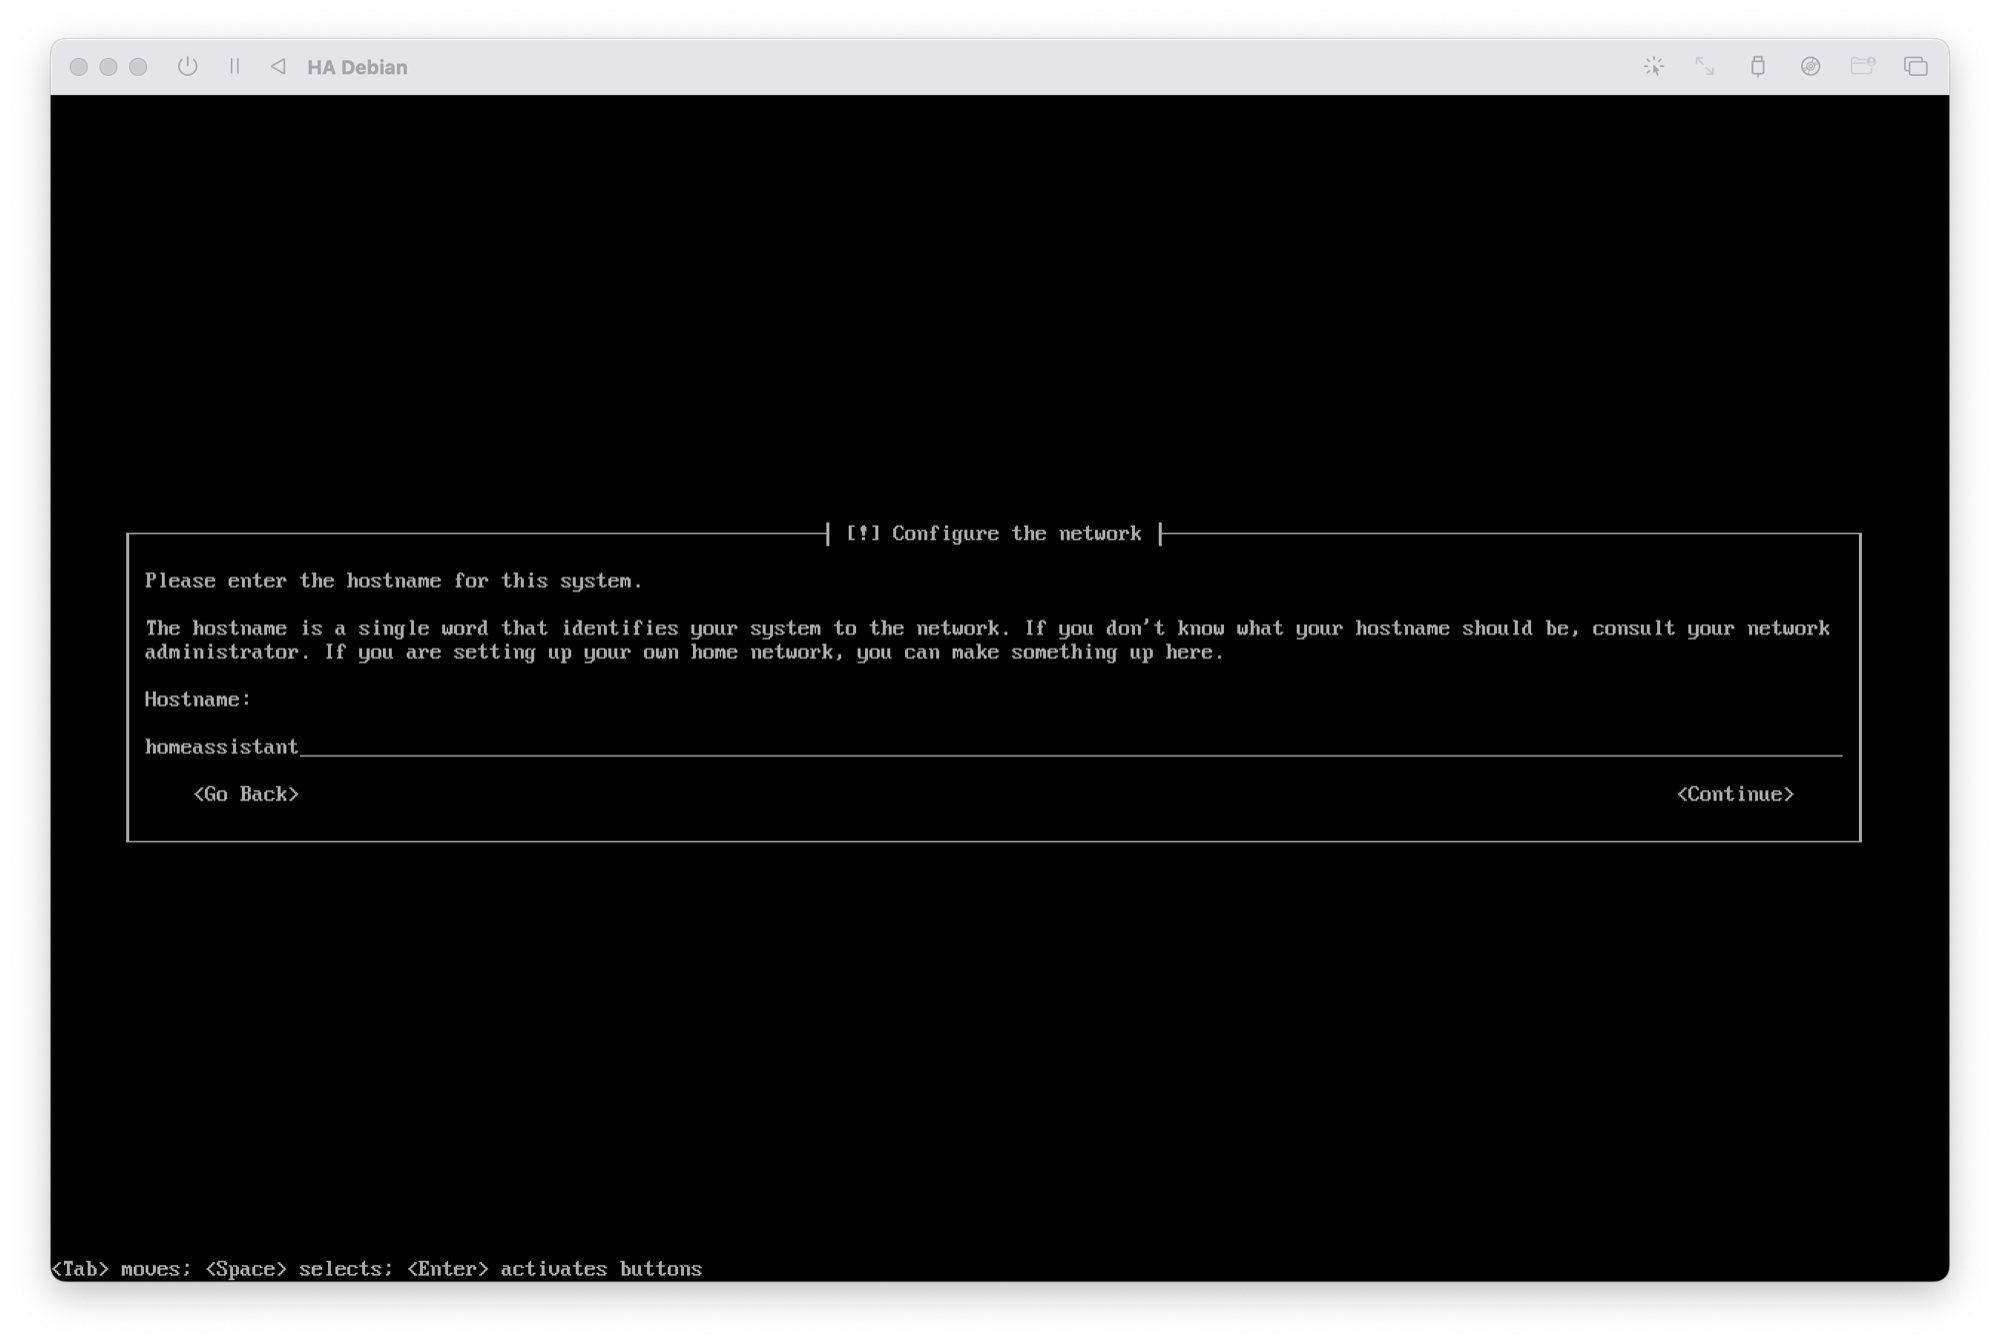
- The hostname is a single word that usually describes the system and can be thought of simply as a name for the system. Enter a hostname, for example homeassistant.
- A domain name is not required, leave this blank and press enter to continue.
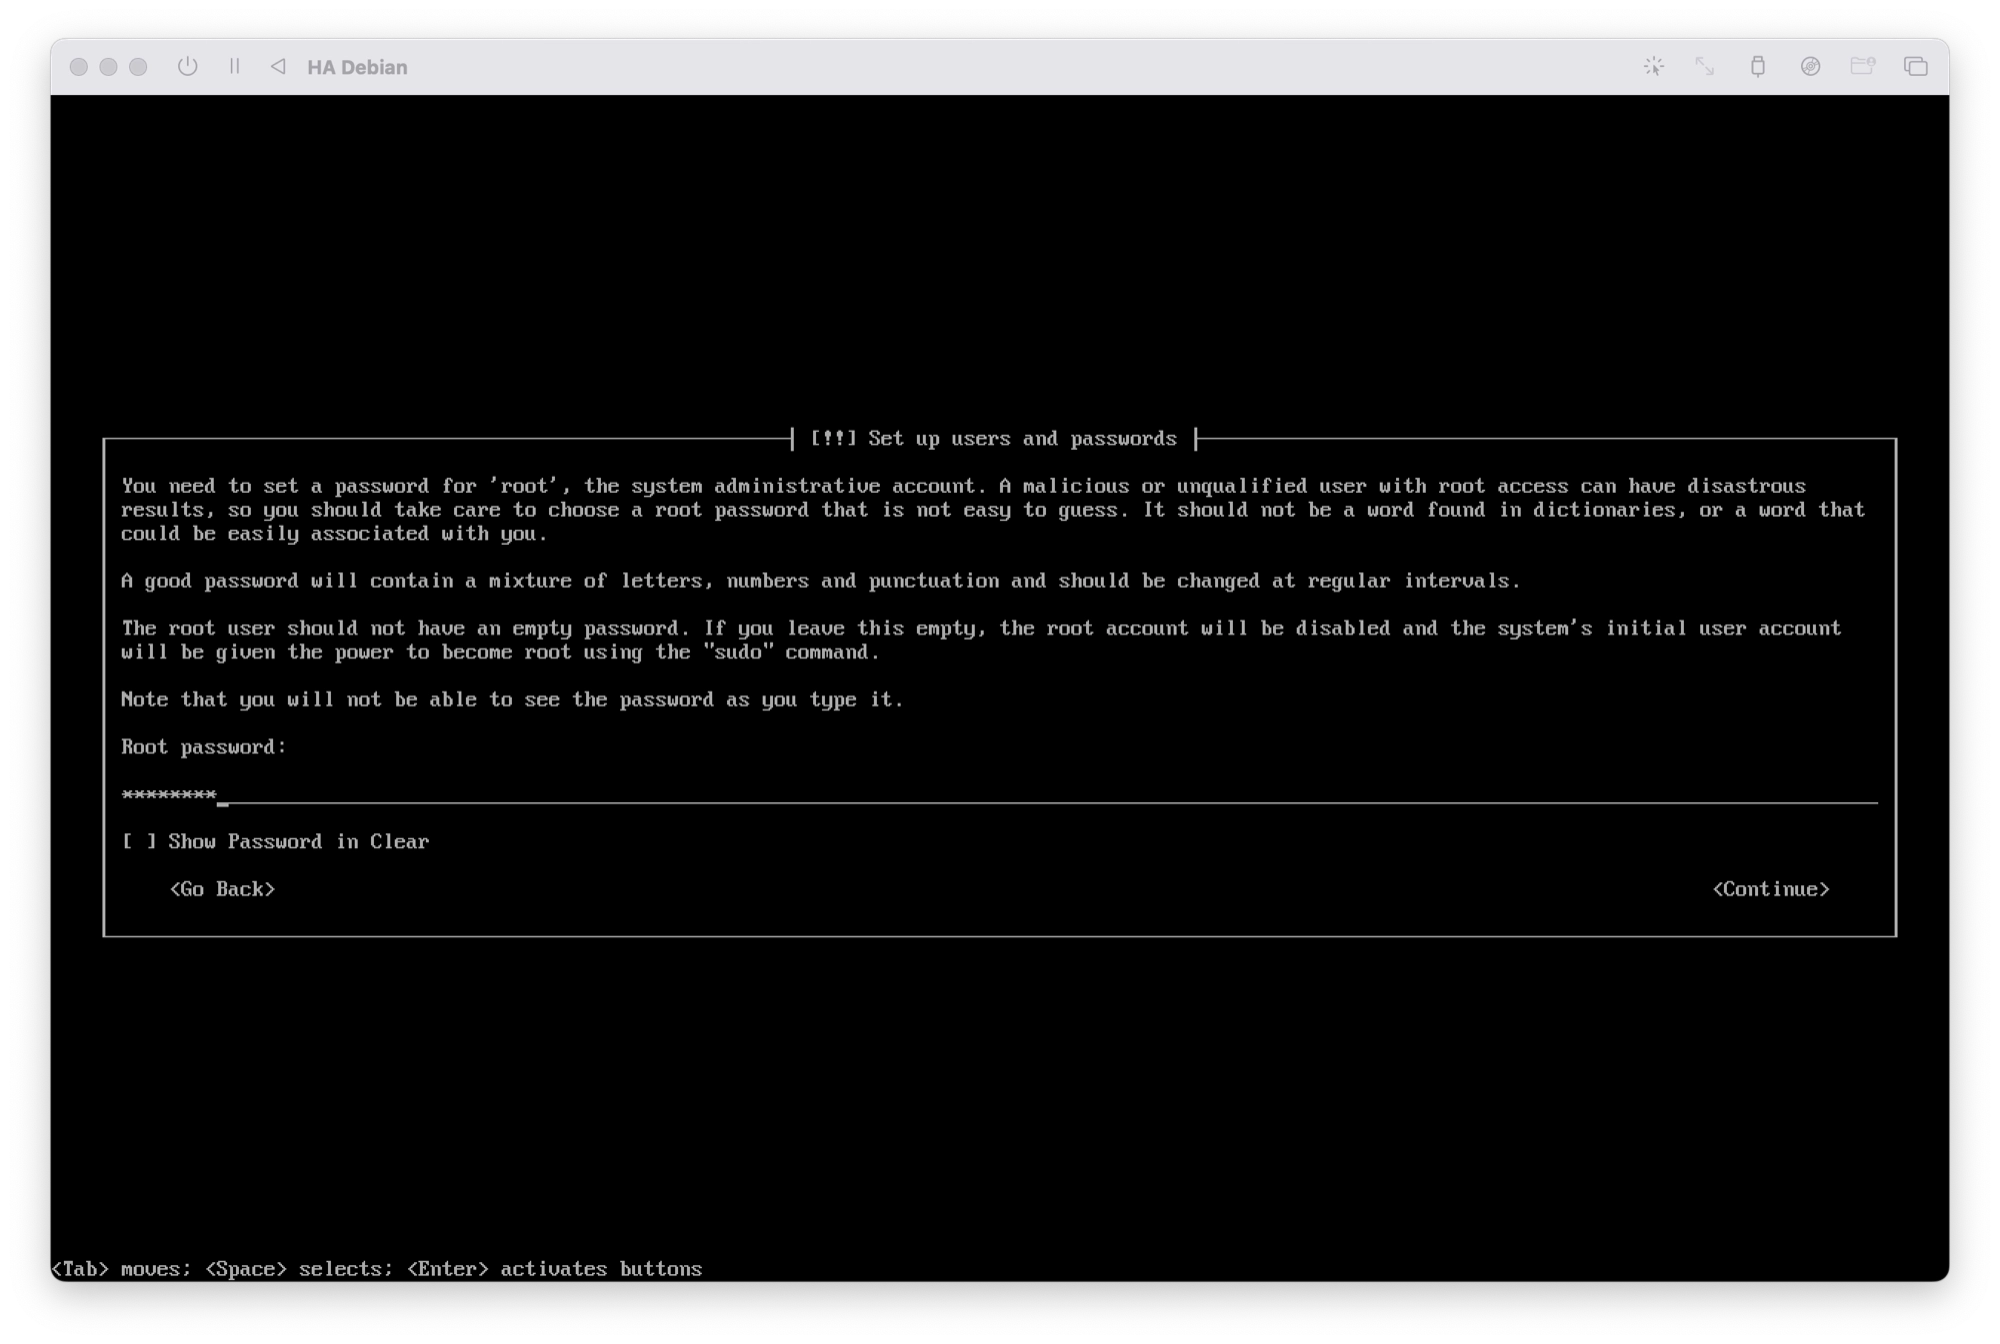
- Enter a password for the root user. Re-enter the password when prompted in order to confirm. It is important that you make a note of this password and keep it safe somewhere as it can be used to log in to the root account and perform any necessary system tasks.
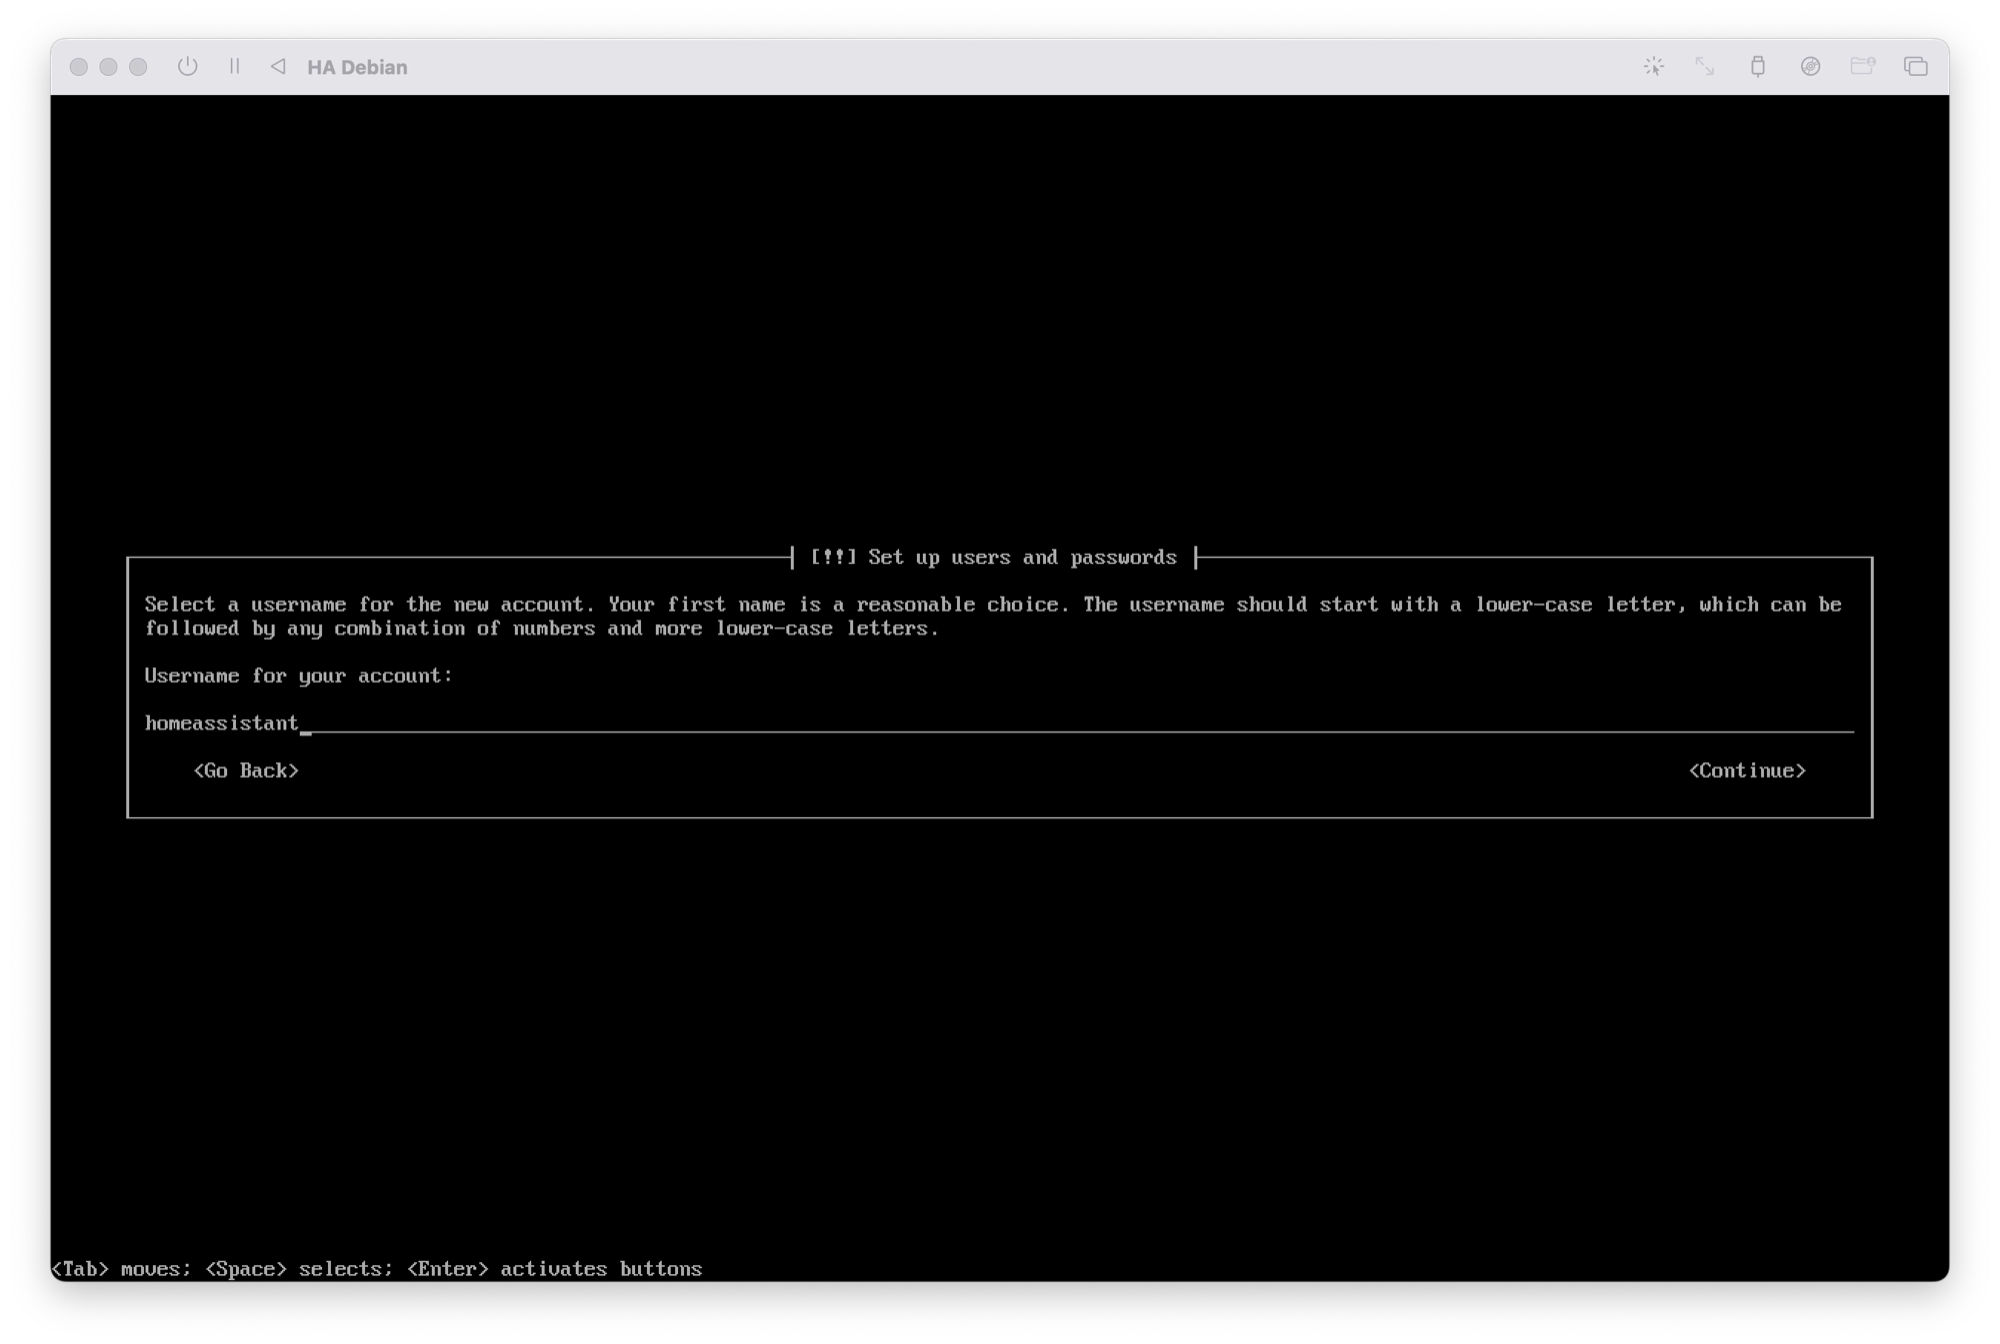
- Enter a name for the system user account. You can use your own name if you prefer but in this example I will use homeassistant.

- Enter a username for the system user account. This will be the username that you use to login to Debian. In this example I will create the username homeassistant.
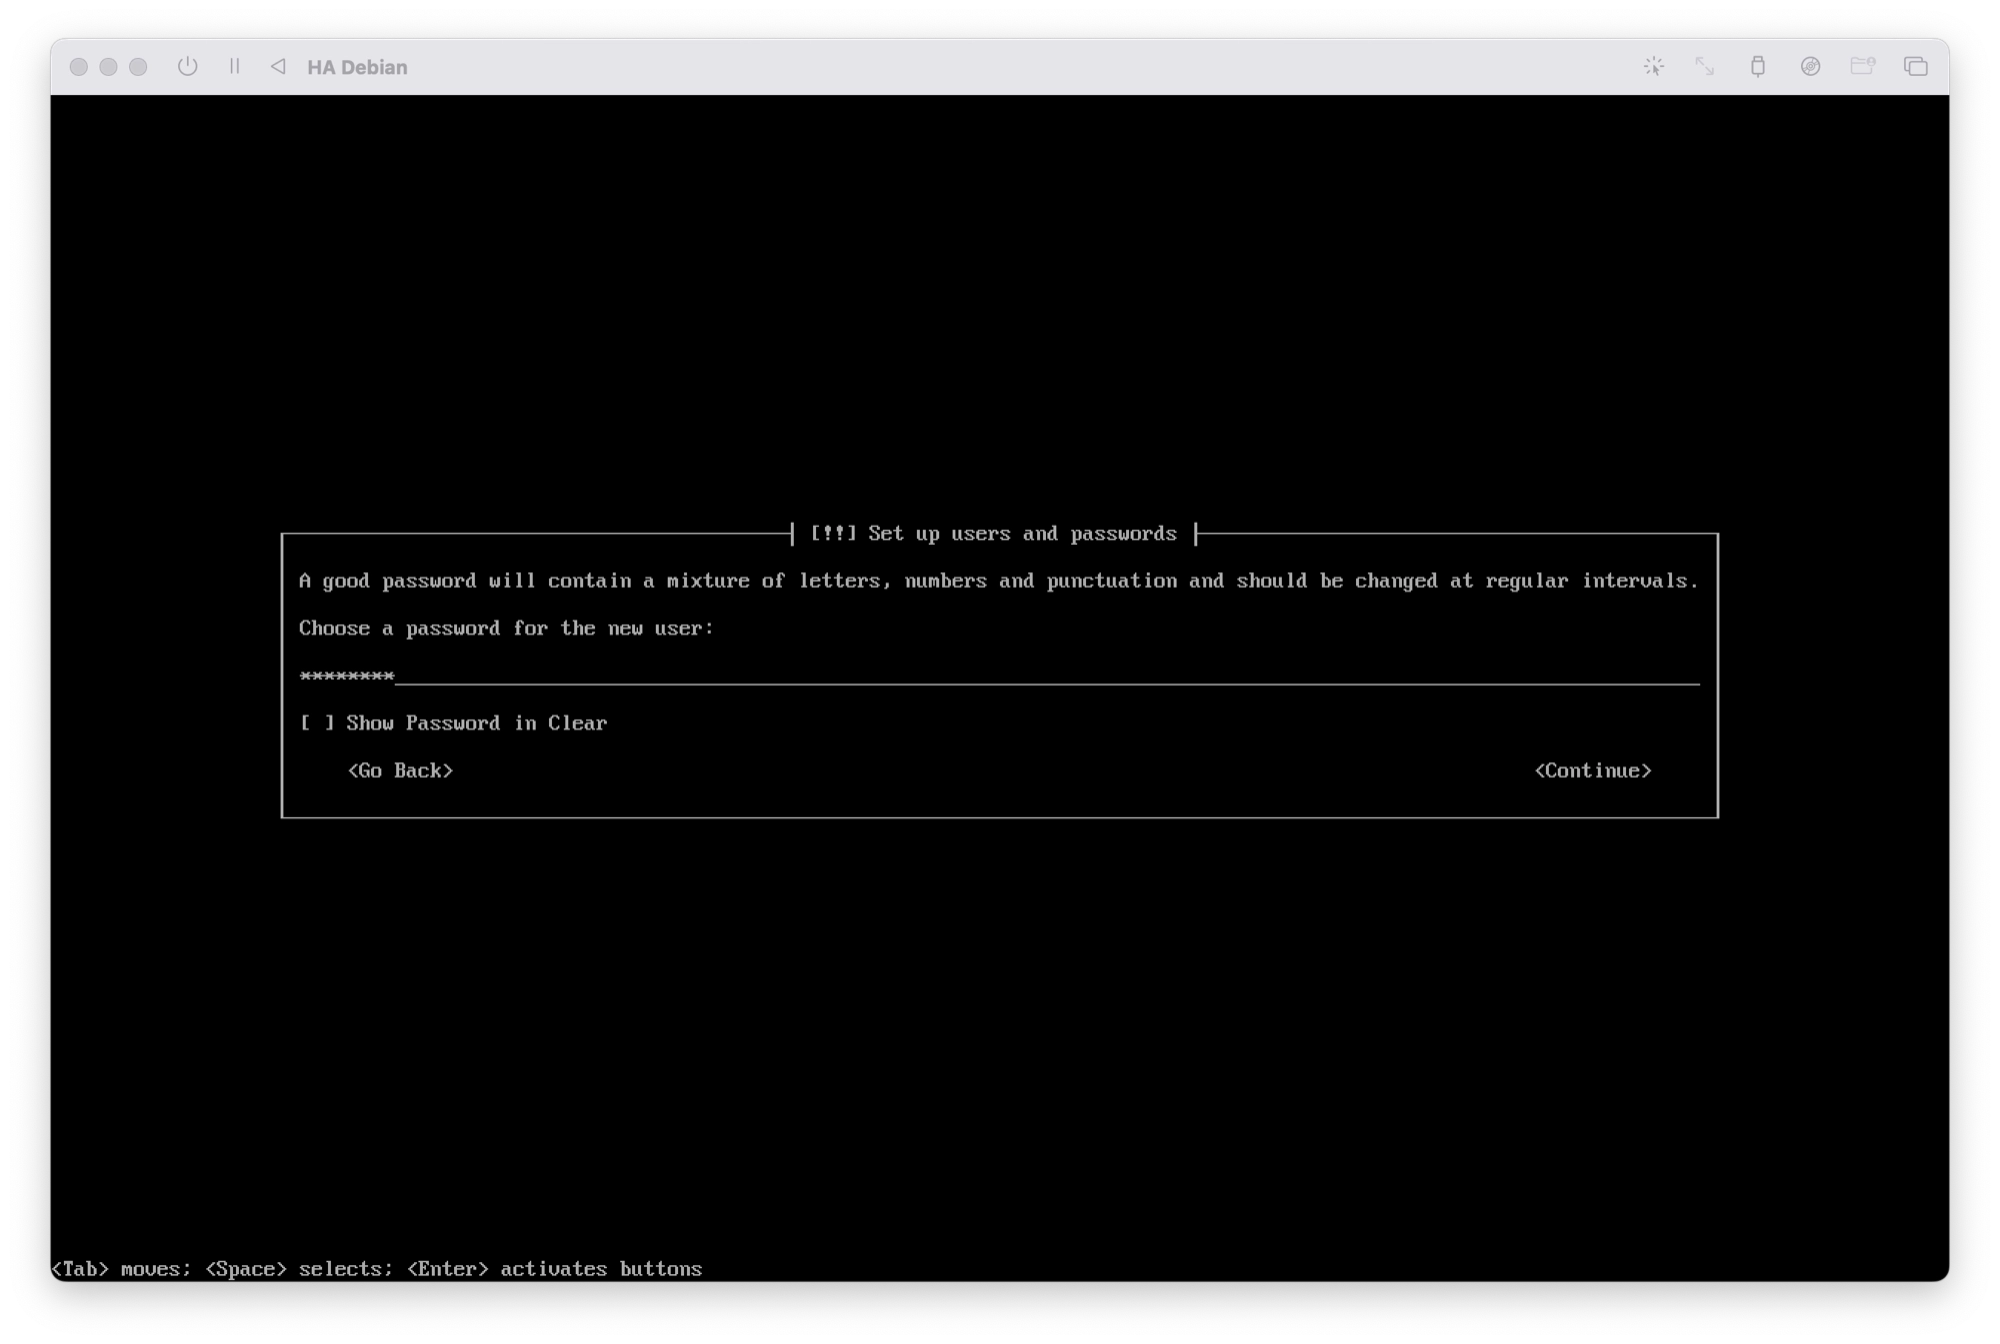
- Enter a password for the user account. This will be the password used to login to Debian. Re-type the password when prompted to confirm.
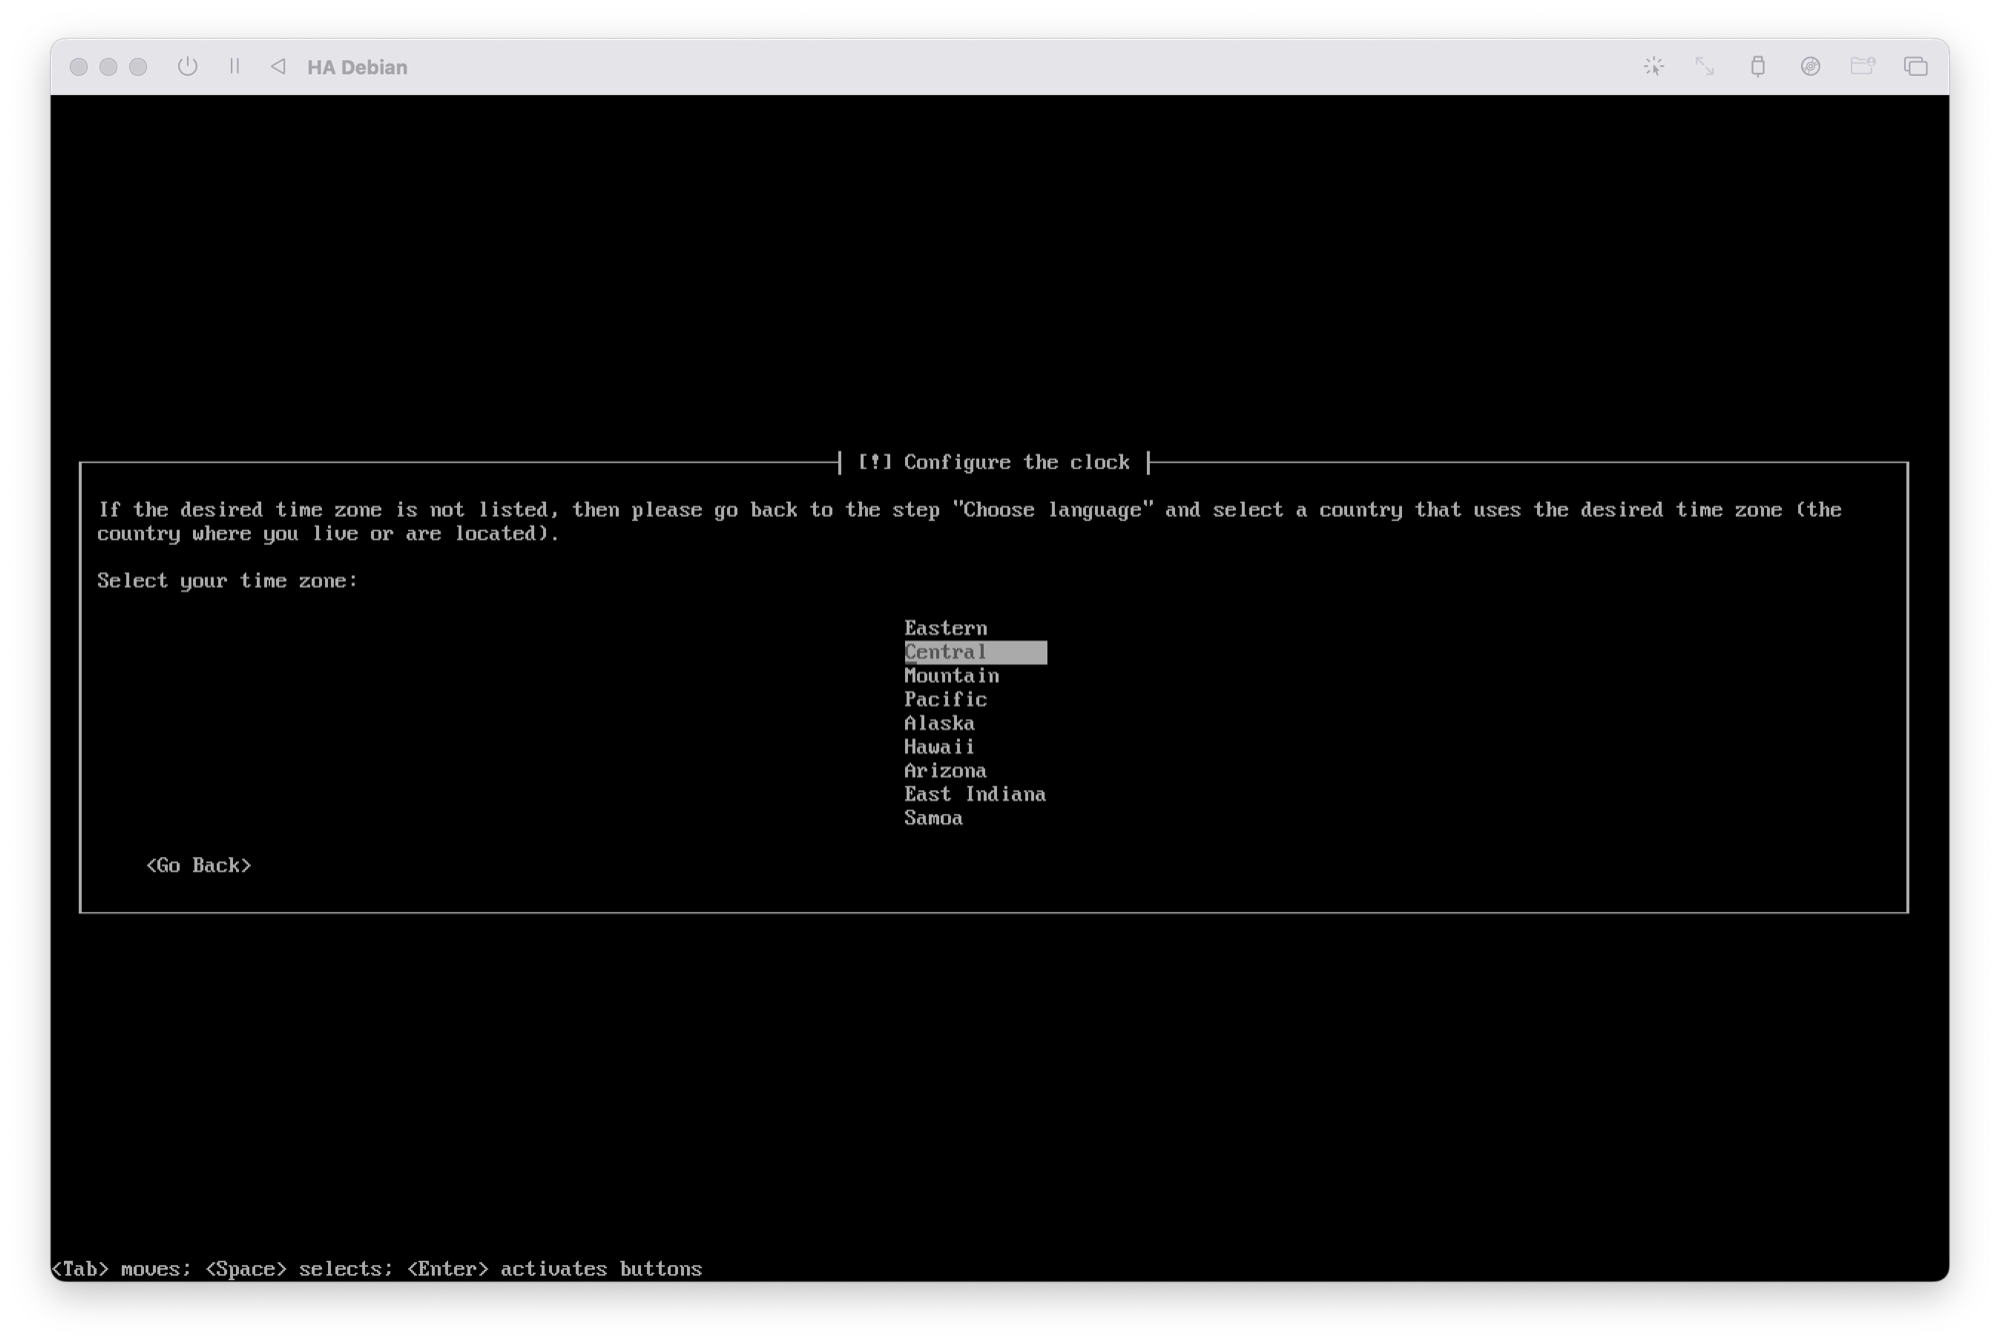
Set Up the Timezone
- Choose your timezone. If you do not see the correct timezone listed, you will need to go back and change the system language. Note that you can change the timezone after installation using the Debian command line.
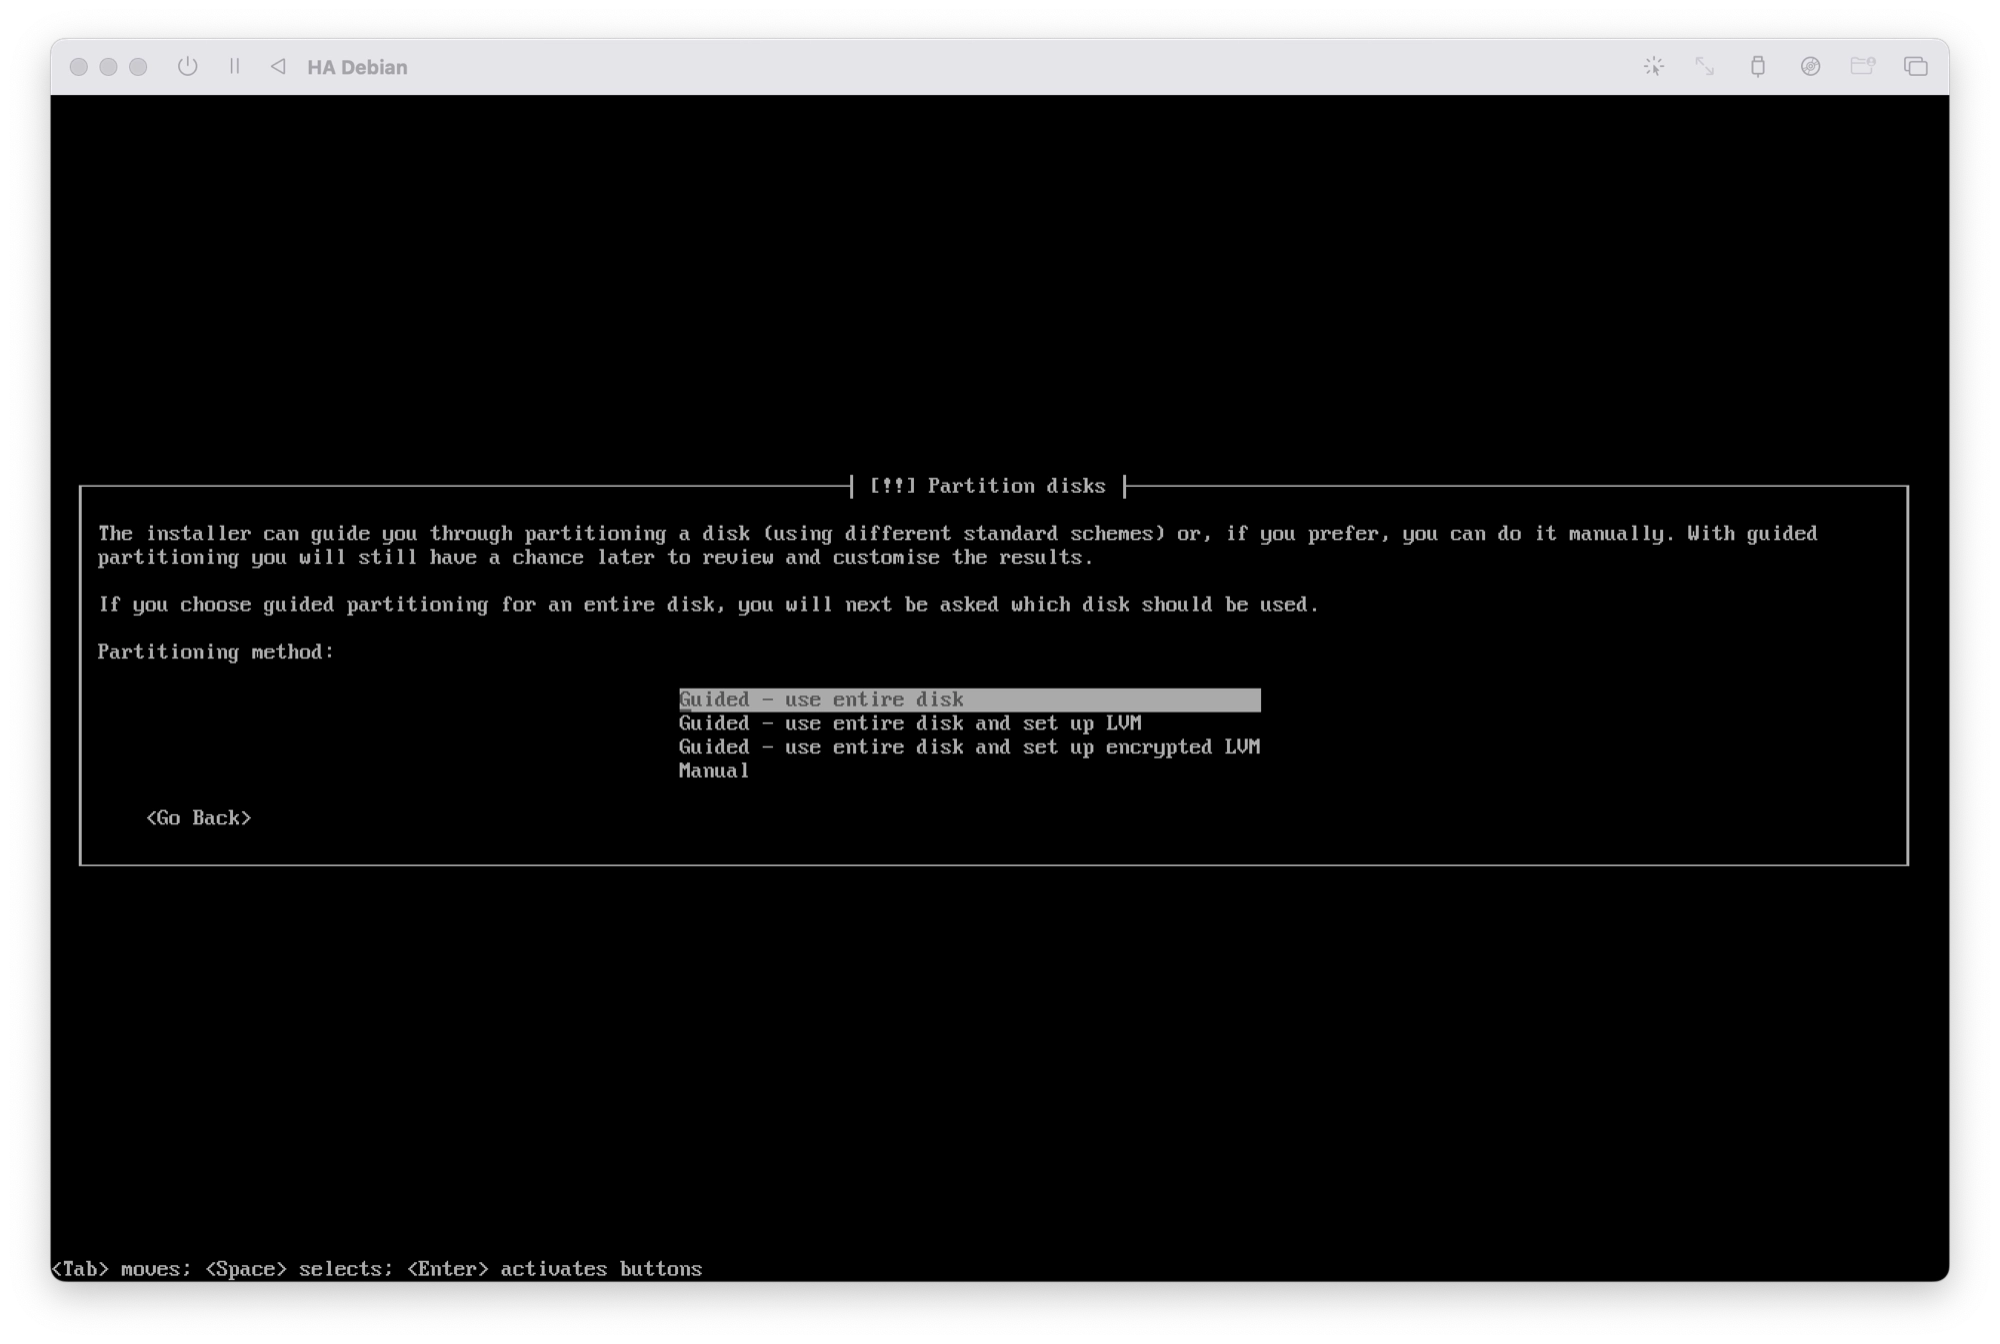
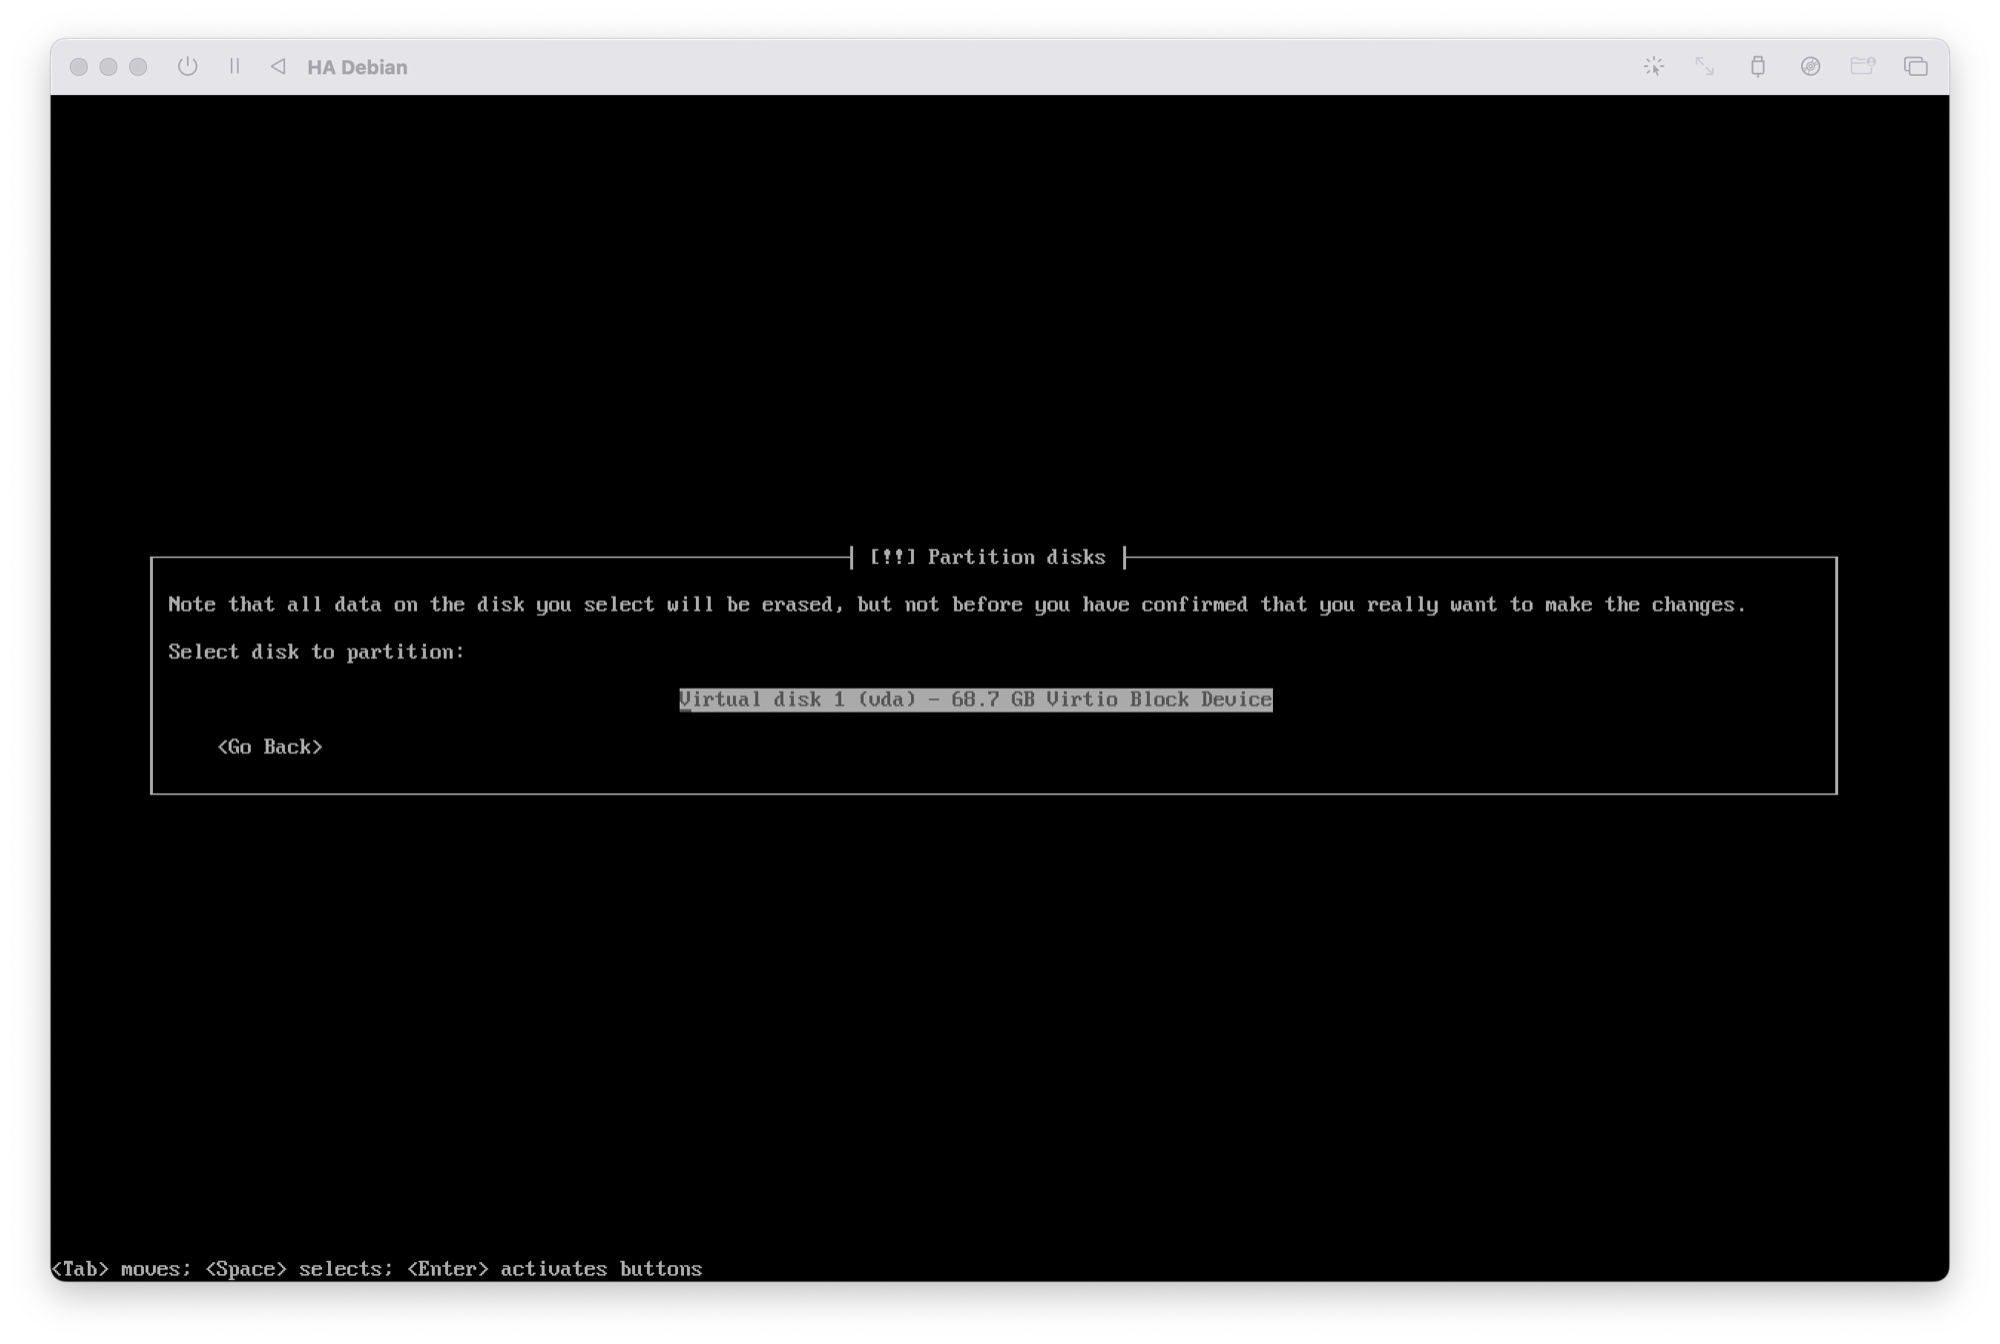
Create the Disk Partitions
- Next, Debian will create the disk partitions. Choose the guided – use entire disk option.
- Choose Virtual Disk 1, it should be the only option available.
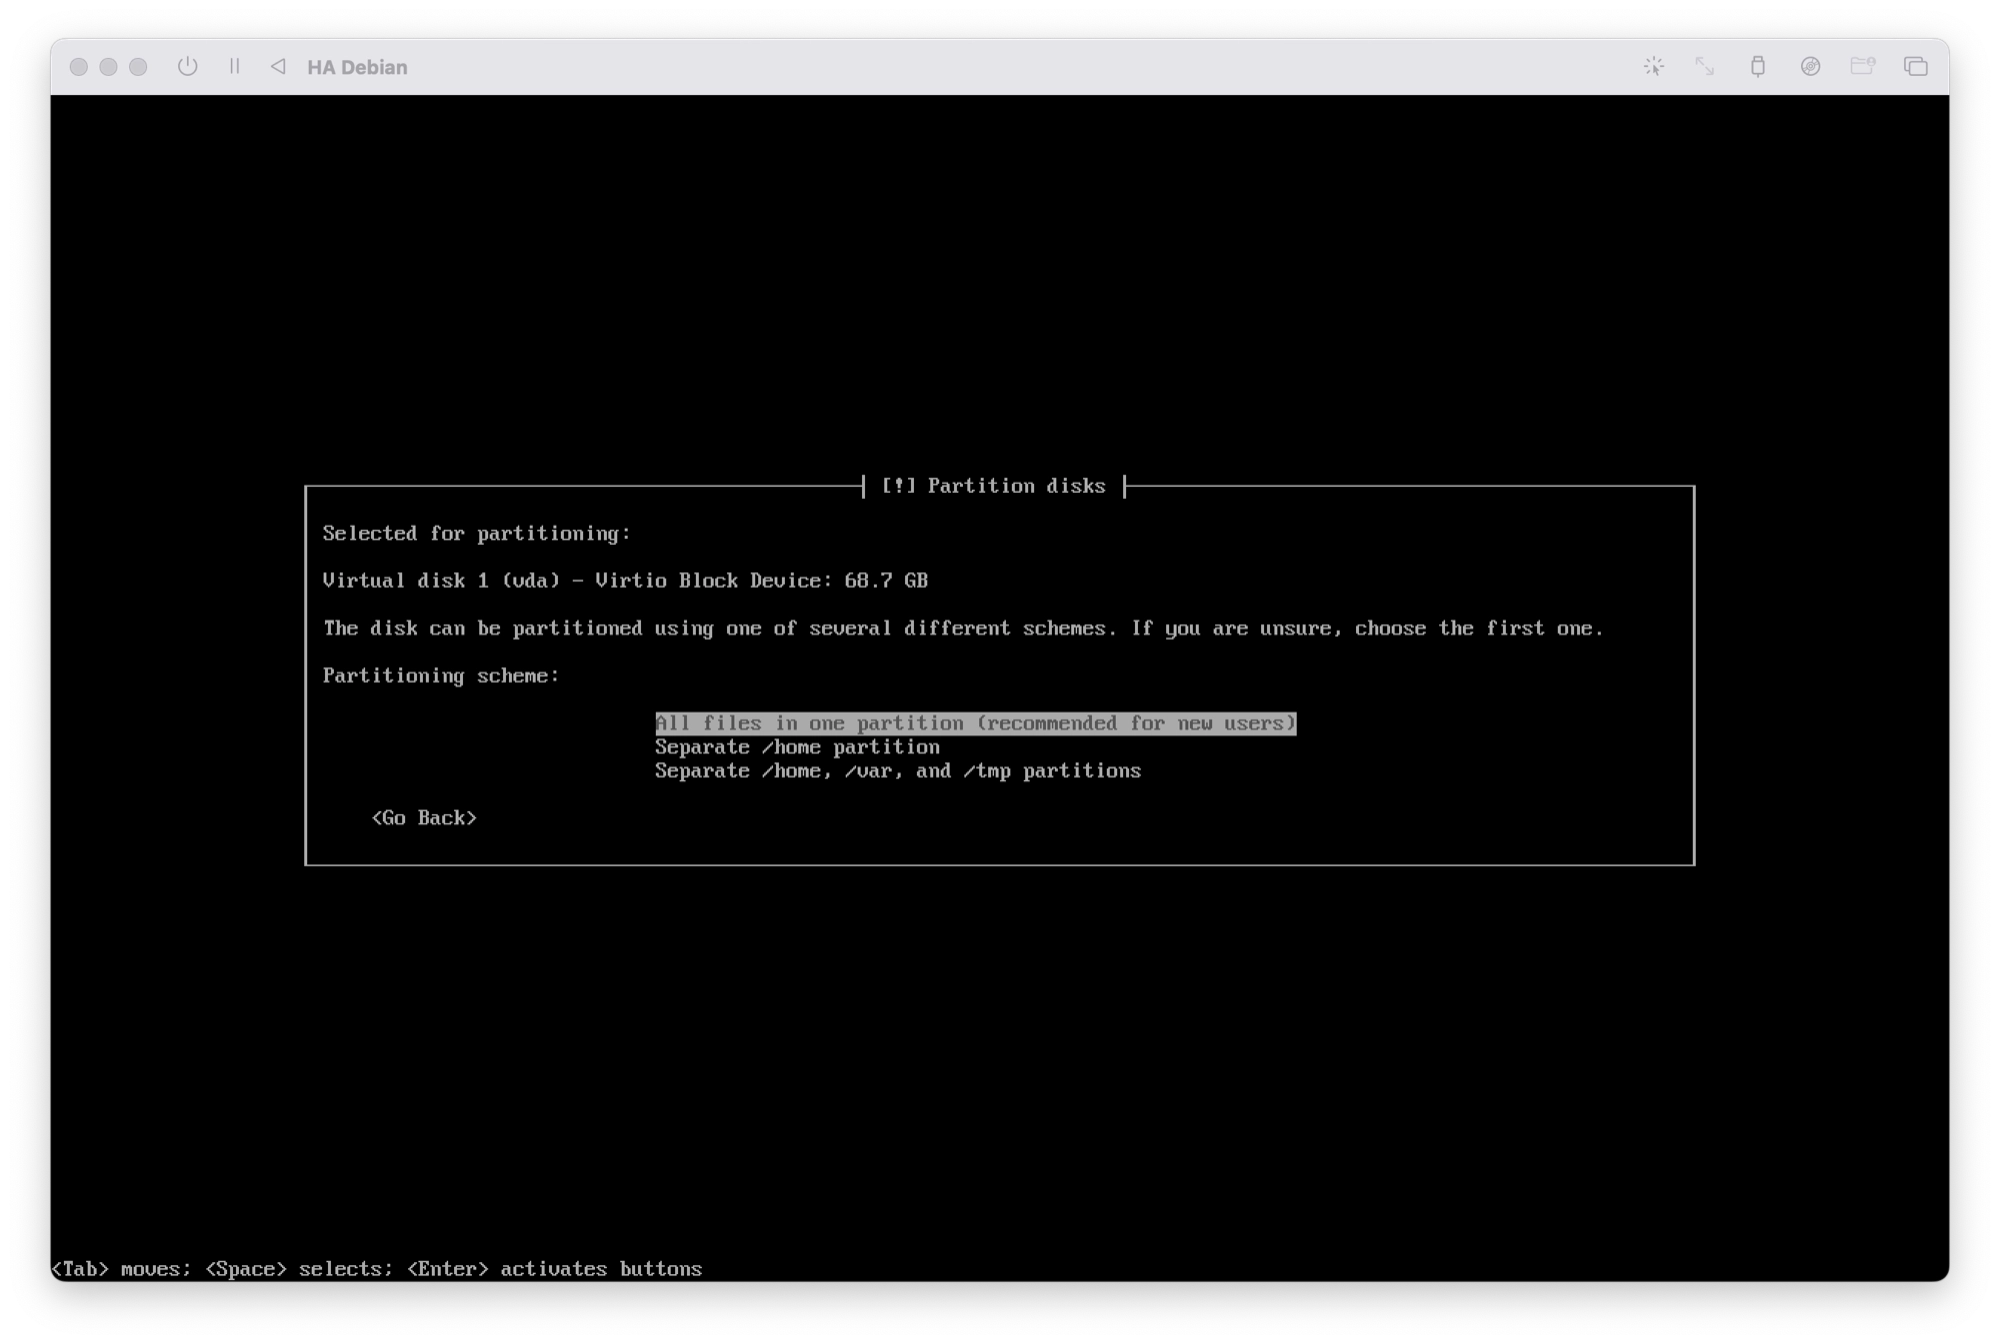
- Choose the option to put all files in one partition.
- You will be shown a summary of the partition settings. Select finish partitioning and write changes to disk and then choose yes in order to complete the process.
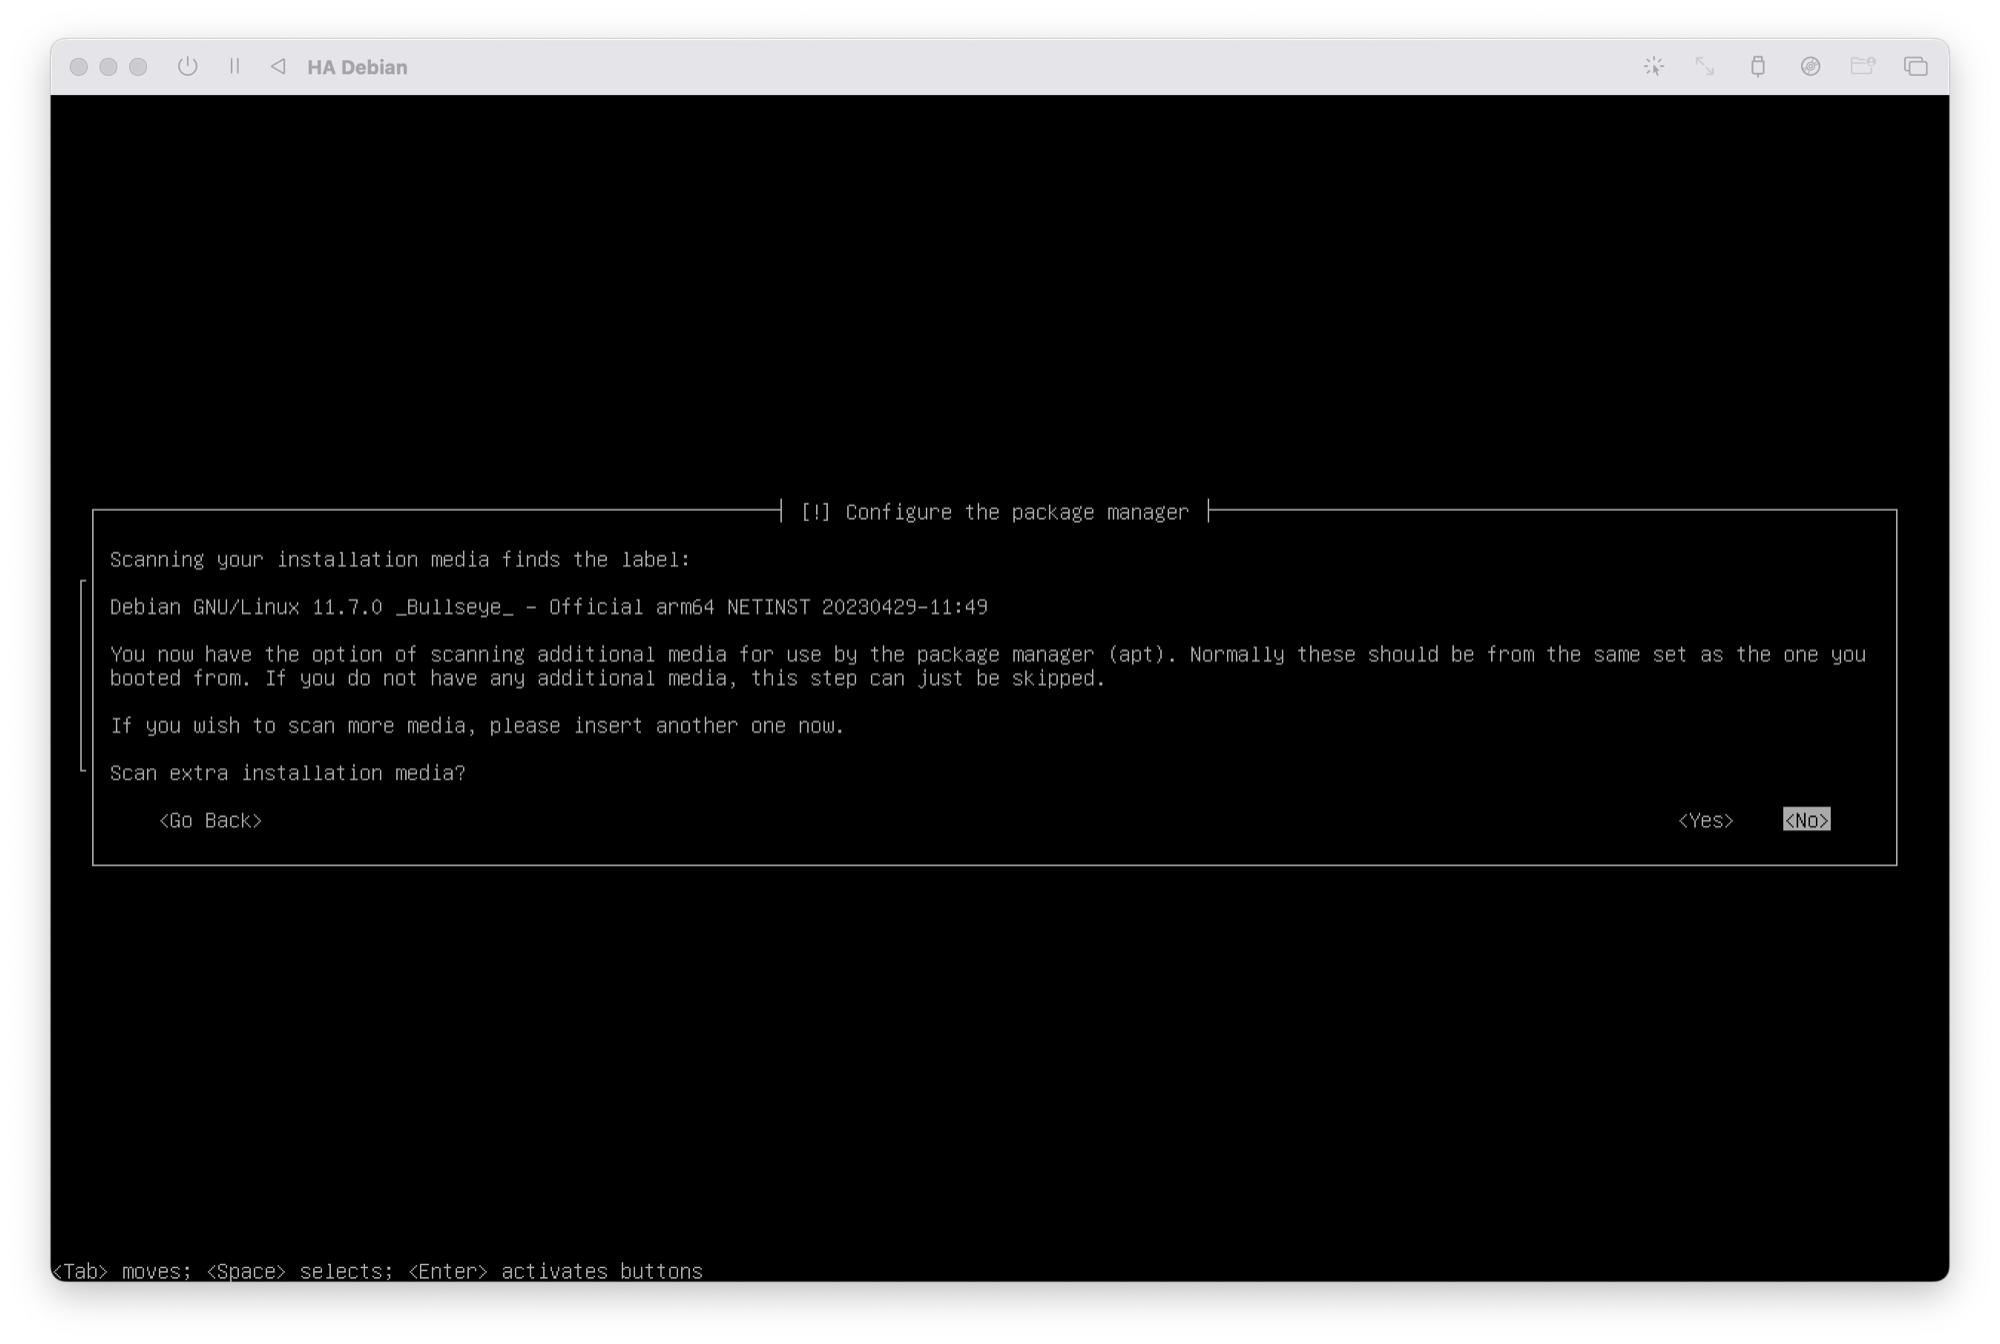
- Next, the base files will be installed and package manager will be configured. When prompted to scan extra installation media, choose no.
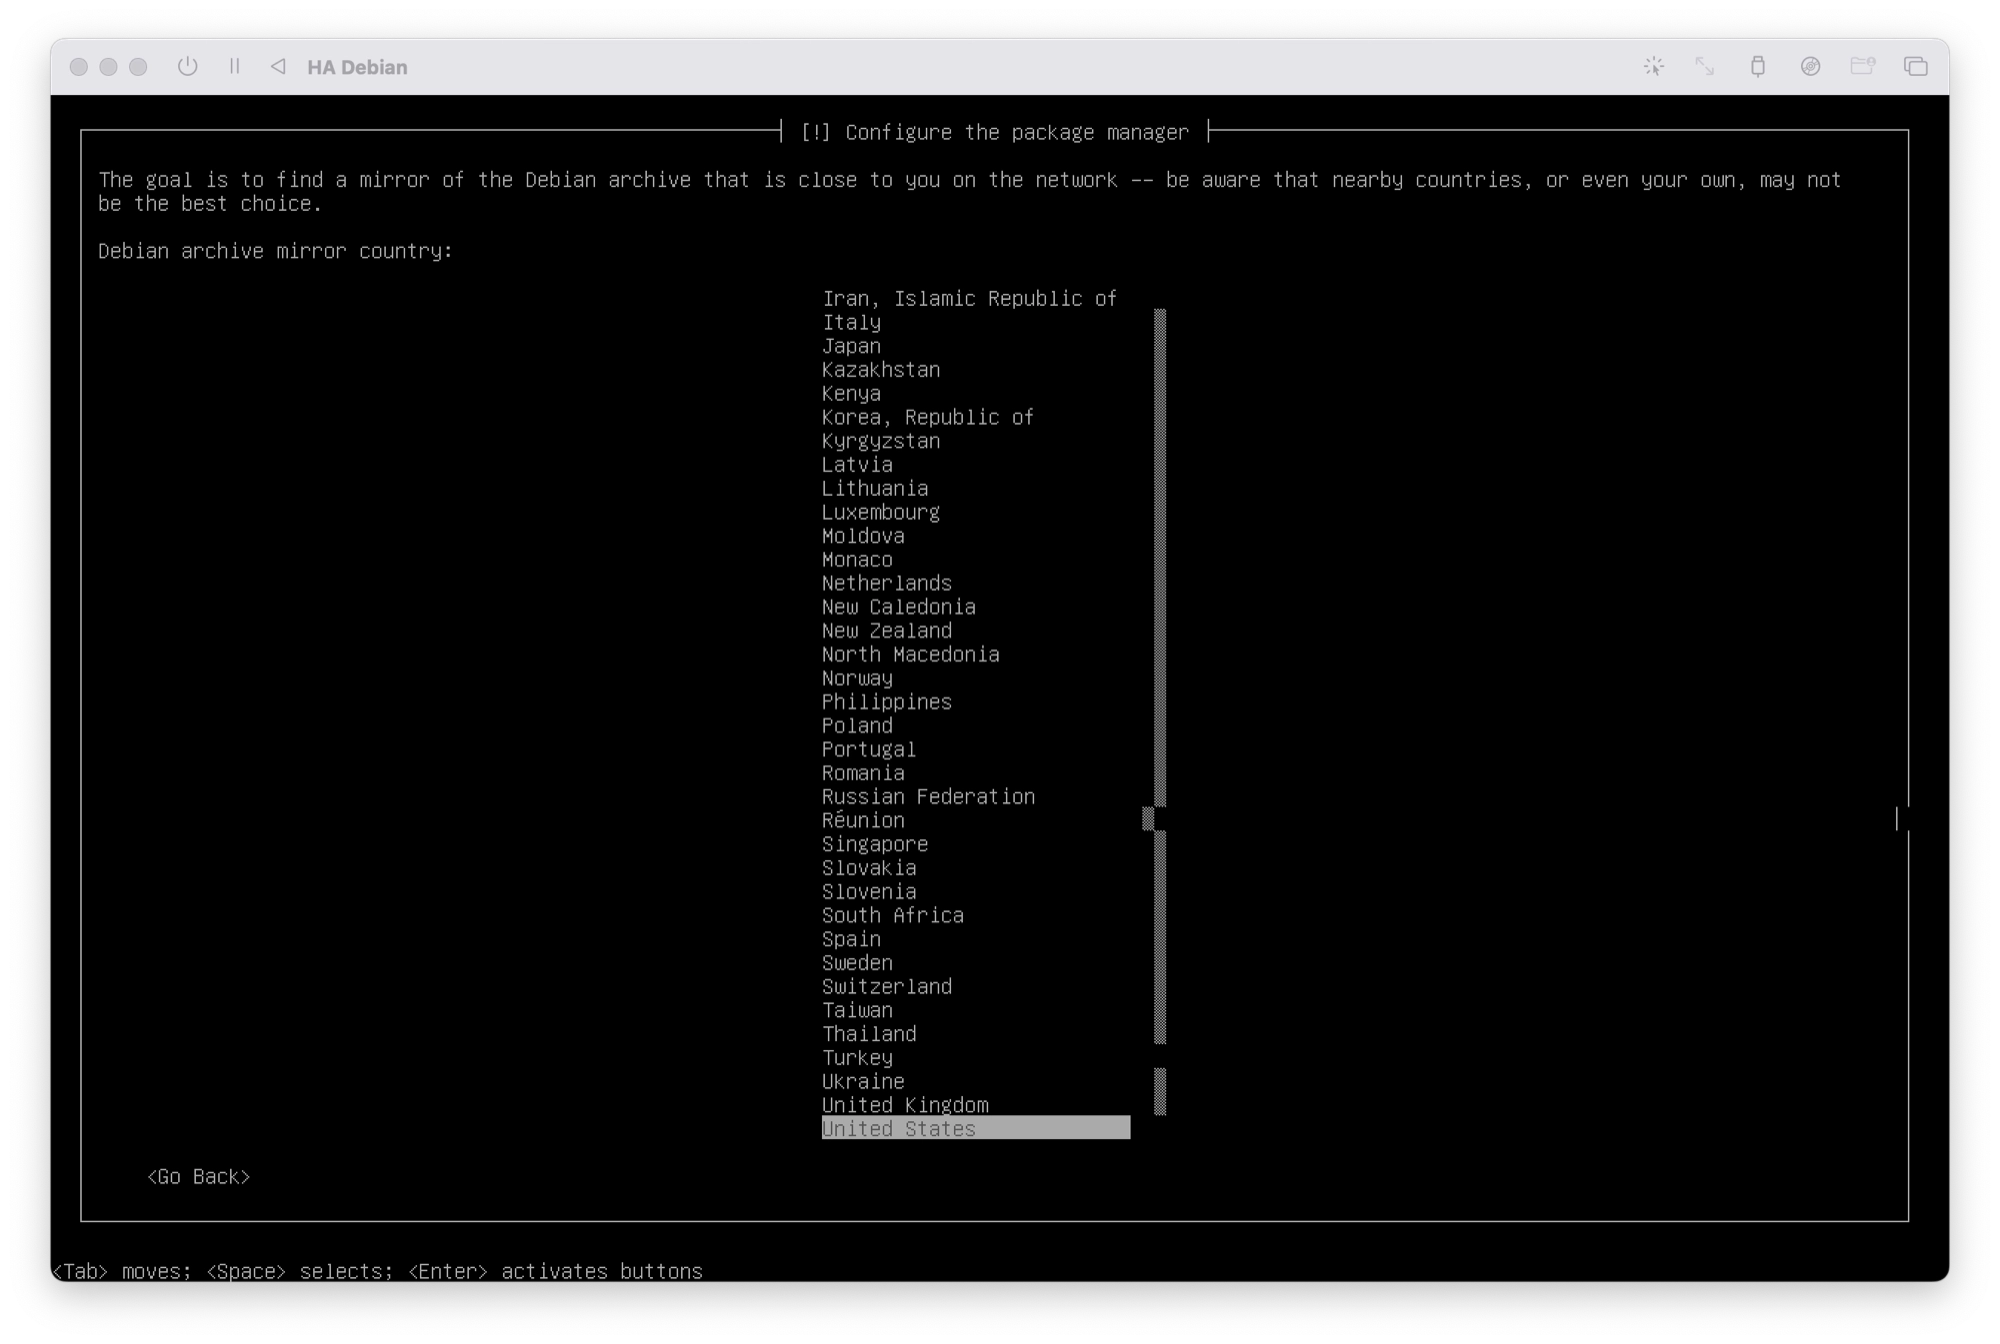
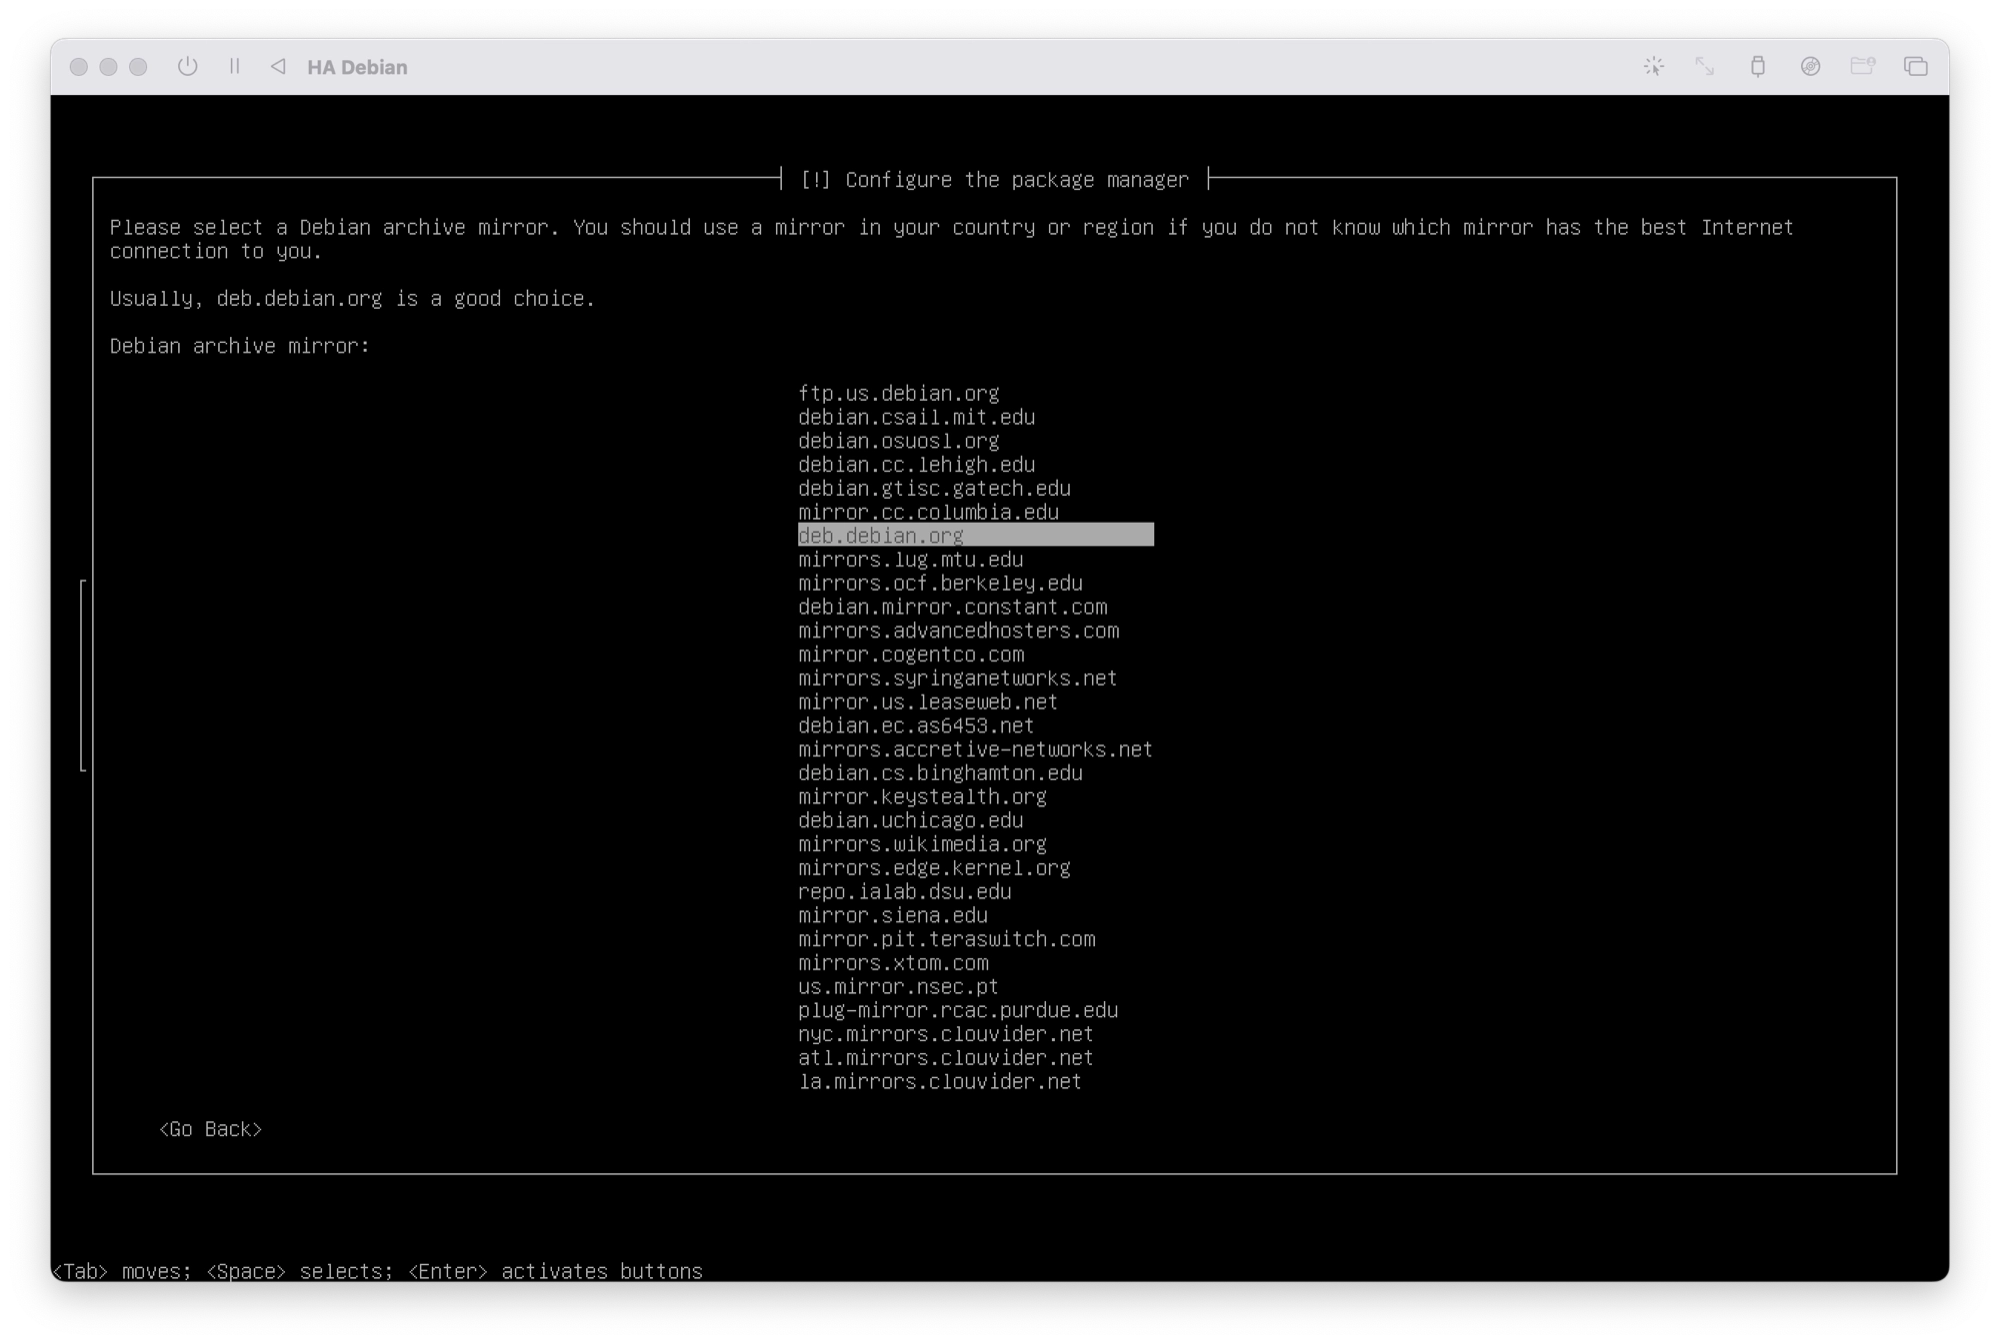
Choose a Mirror
- Next, Debian will connect to the internet to fetch the required files. In order to do this it will connect to one of the available mirrors. Choose the region closest to you in order to select the best mirror. This is not essential, but can speed up the installation process.
- Select a mirror from the list. If you are unsure of the best mirror to use, just choose
deb.debian.org. - When prompted to choose a proxy, just leave it blank and press enter to continue.
Complete the Installation
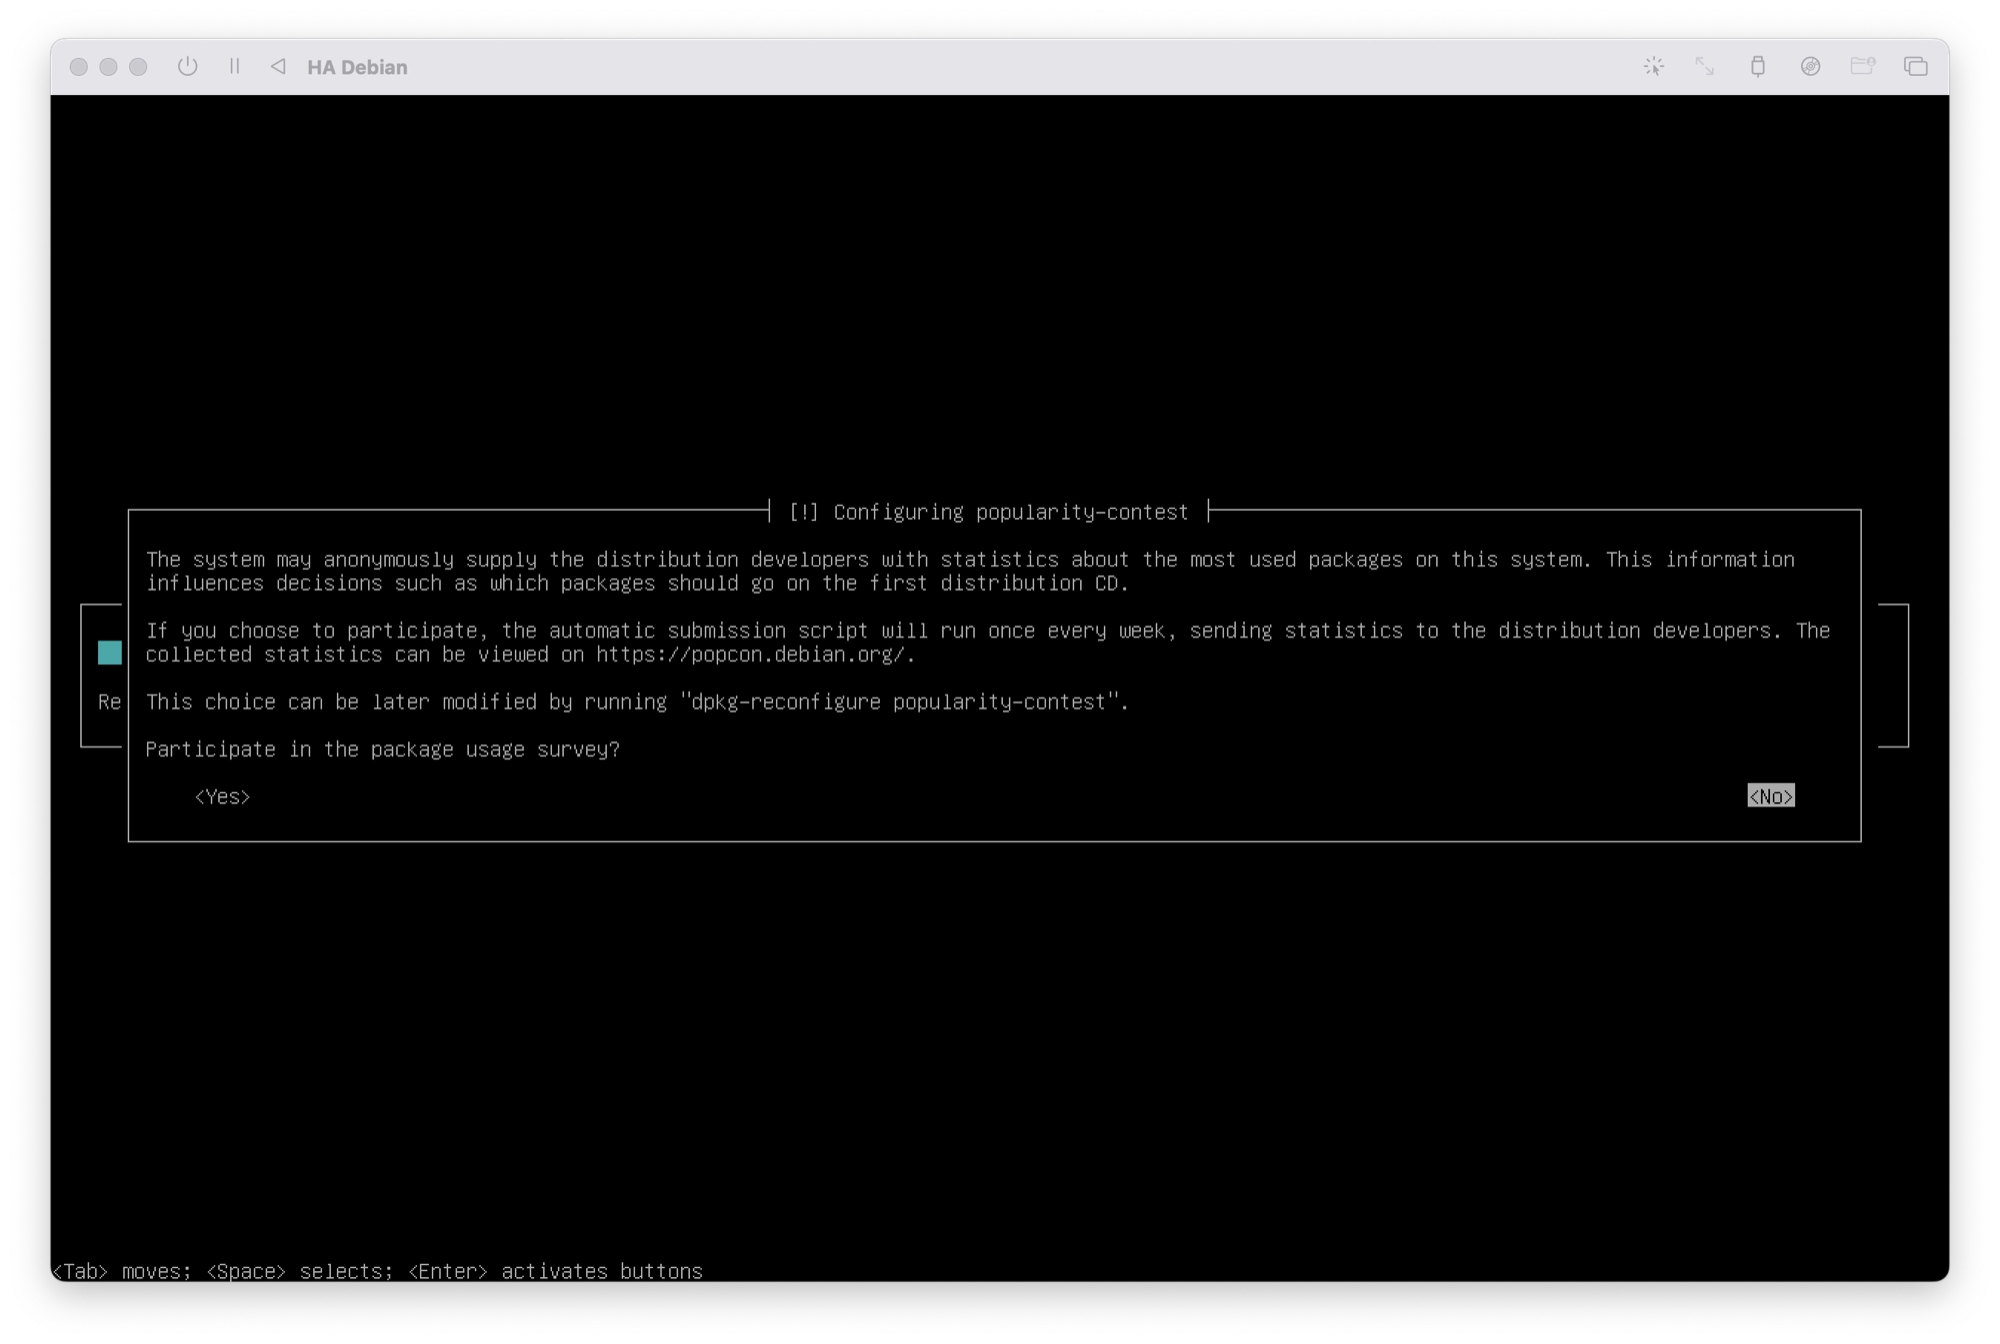
- Debian will now proceed to download and install the necessary files. When prompted to opt in to the popularity contest, you can choose whether or not you wish to take part. Including yourself in the popularity contest can help the Debian developers, however it is not mandatory. If in doubt, just choose no.
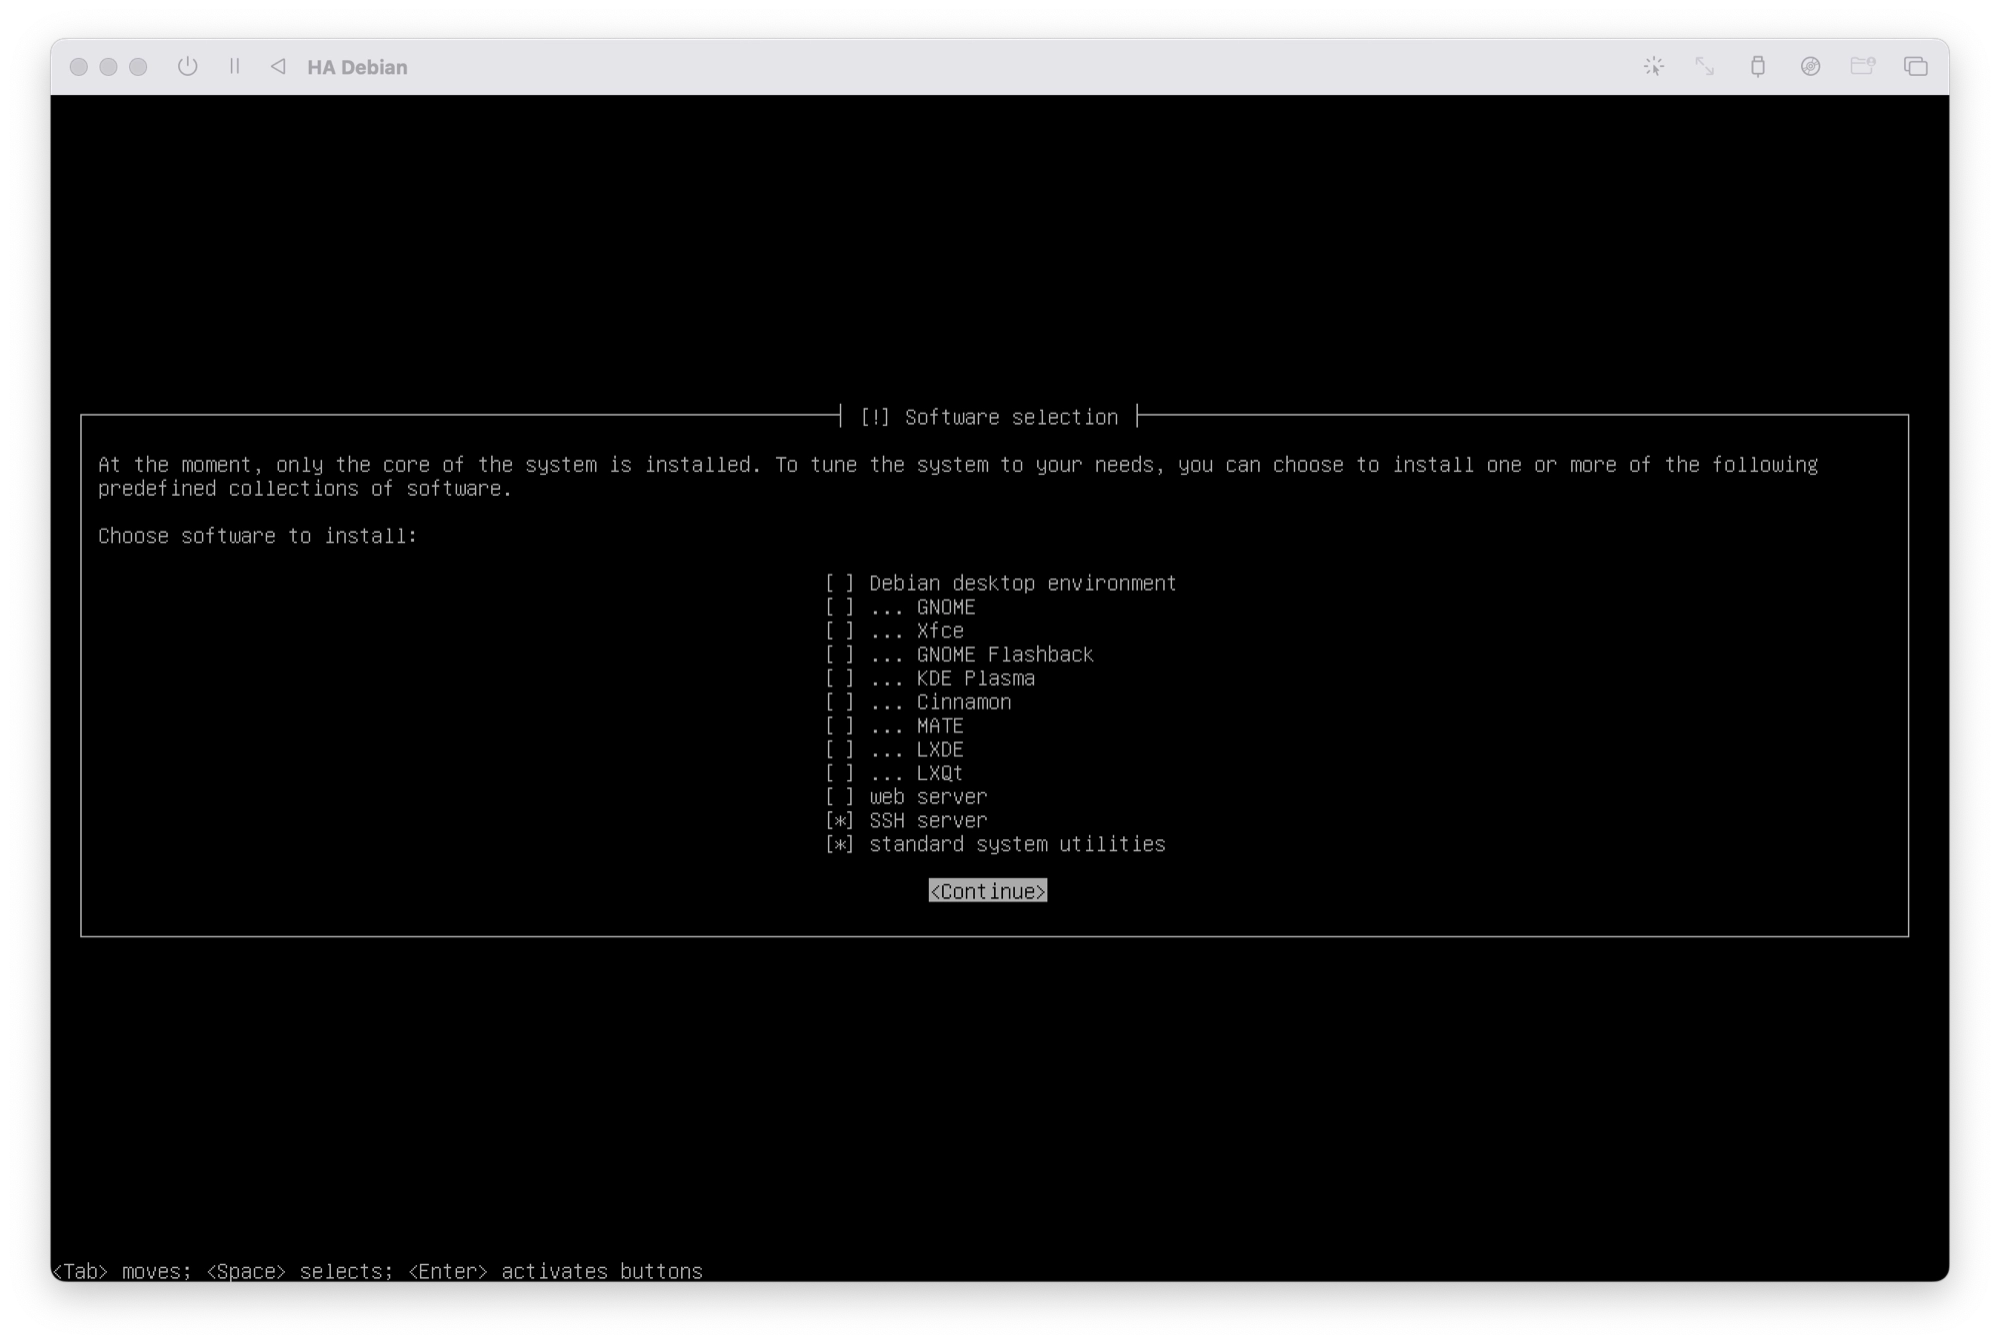
- You will now be given the choice of software tools that you wish to include. It is not necessary to install a graphical user interface (GUI) for running Home Assistant, which is highly recommended as it saves a lot of system resources. Therefore ensure that only SSH server and standard system utilities are selected.
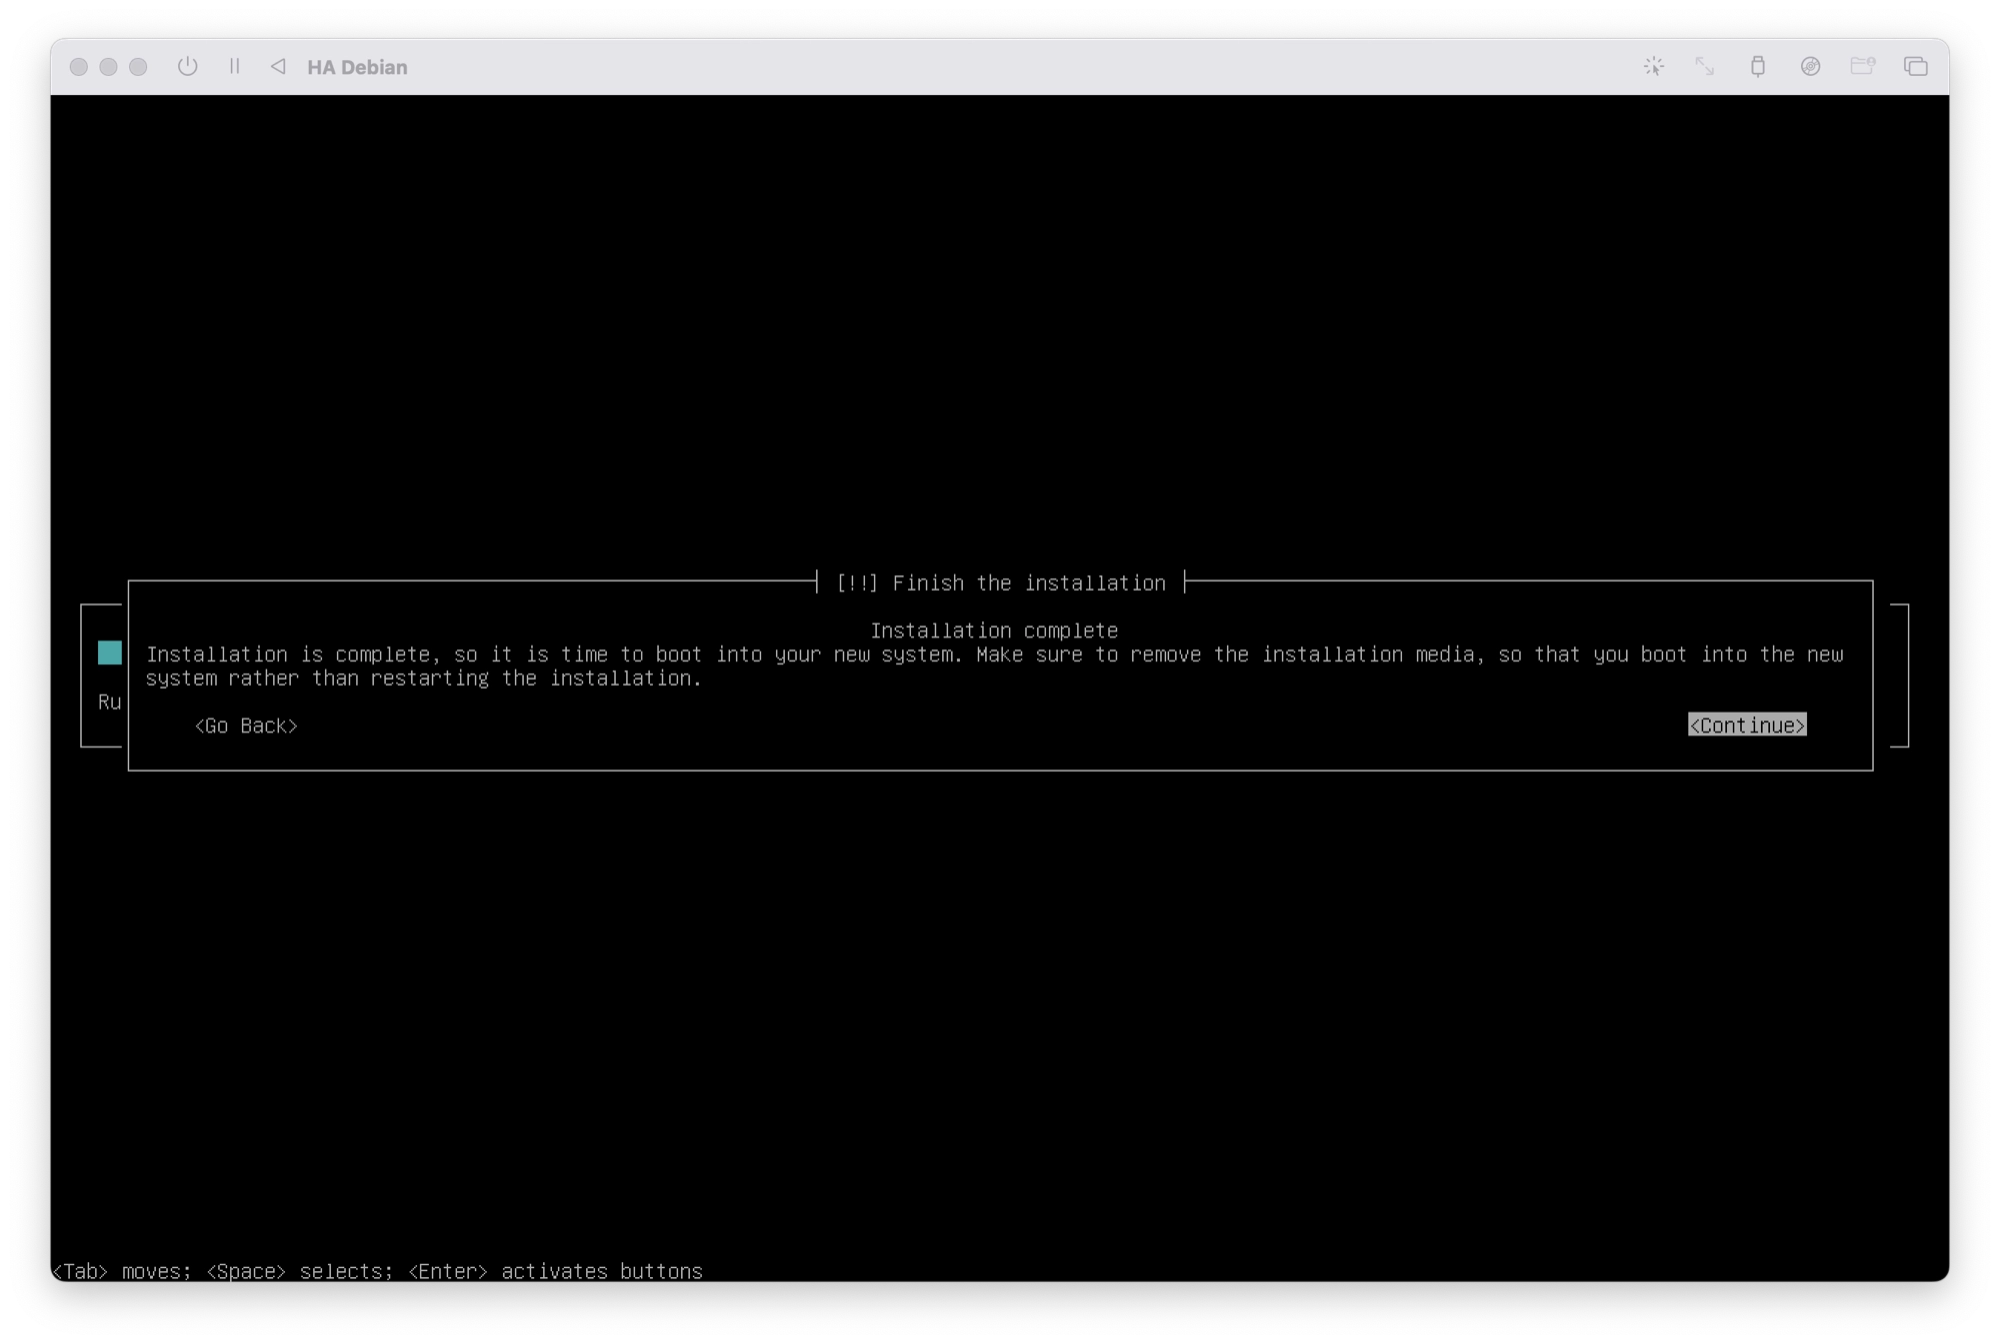
- Once the installation has completed you will be prompted to remove the installation media before continuing. Do not click continue yet. First you need to remove the installation media from UTM. From the main UTM window, click the CD/DVD dropdown and then click clear. This will remove the Debian installation
.isofile from the virtual CD drive. - Once you have removed the installation media, click continue to complete the installation.
How to Install Home Assistant Supervised on Debian Linux
At this stage you should have a working virtual machine running the Debian command line. The next step is to install Home Assistant.
For the first few tasks we need to be logged in as root, which we can do with the following command:
su -
You will need to enter the credentials that you chose during installation.
We will be using the Home Assistant supervised installer, which is found over on GitHub. I have linked it in case you need to reference it for any reason.
Install Dependencies
First go ahead and install the dependencies using the following command.
apt install \
apparmor \
jq \
wget \
curl \
udisks2 \
libglib2.0-bin \
network-manager \
dbus \
lsb-release \
systemd-journal-remote
-y
Install Docker-CE
Next we will install Docker-CE with the following command.
curl -fsSL get.docker.com | sh
Install OS-Agent
Next we will need to install the OS-Agent, which is used to connect the Debian operating system to Home Assistant.
The easiest way to download the latest version of OS-Agent is by using either of the following commands. Alternatively you can download OS-Agent manually.
Intel architecture:
curl -s https://api.github.com/repos/home-assistant/os-agent/releases/latest | jq -r '.assets[] | select(.name | endswith("x86_64.deb")) | .browser_download_url'| xargs wgetARM architecture:
curl -s https://api.github.com/repos/home-assistant/os-agent/releases/latest | jq -r '.assets[] | select(.name | endswith("aarch64.deb")) | .browser_download_url' | xargs wgetManual Download
The commands above will automatically download the latest version of OS-Agent for the specified architecture using the GitHub API. If for any reason these commands don’t work, you can also download OS-Agent manually.
To do this, first go ahead and visit the releases download page and locate the correct package for your architecture. You will need the package with a .deb extension in order to install it on Debian.
Right-click the package and copy the link address, then use this address with the wget command.
wget <OS-agent URL>
For example, at the time of writing the current version is 1.2.2, therefore the command would be as follows.
wget https://github.com/home-assistant/os-agent/releases/download/1.2.2/os-agent_1.2.2_linux_aarch64.deb
Installing OS-Agent
Once the package has downloaded, we can install it with dpkg followed by the package name.
sudo dpkg -i os-agent_1.2.2_linux_aarch64.deb
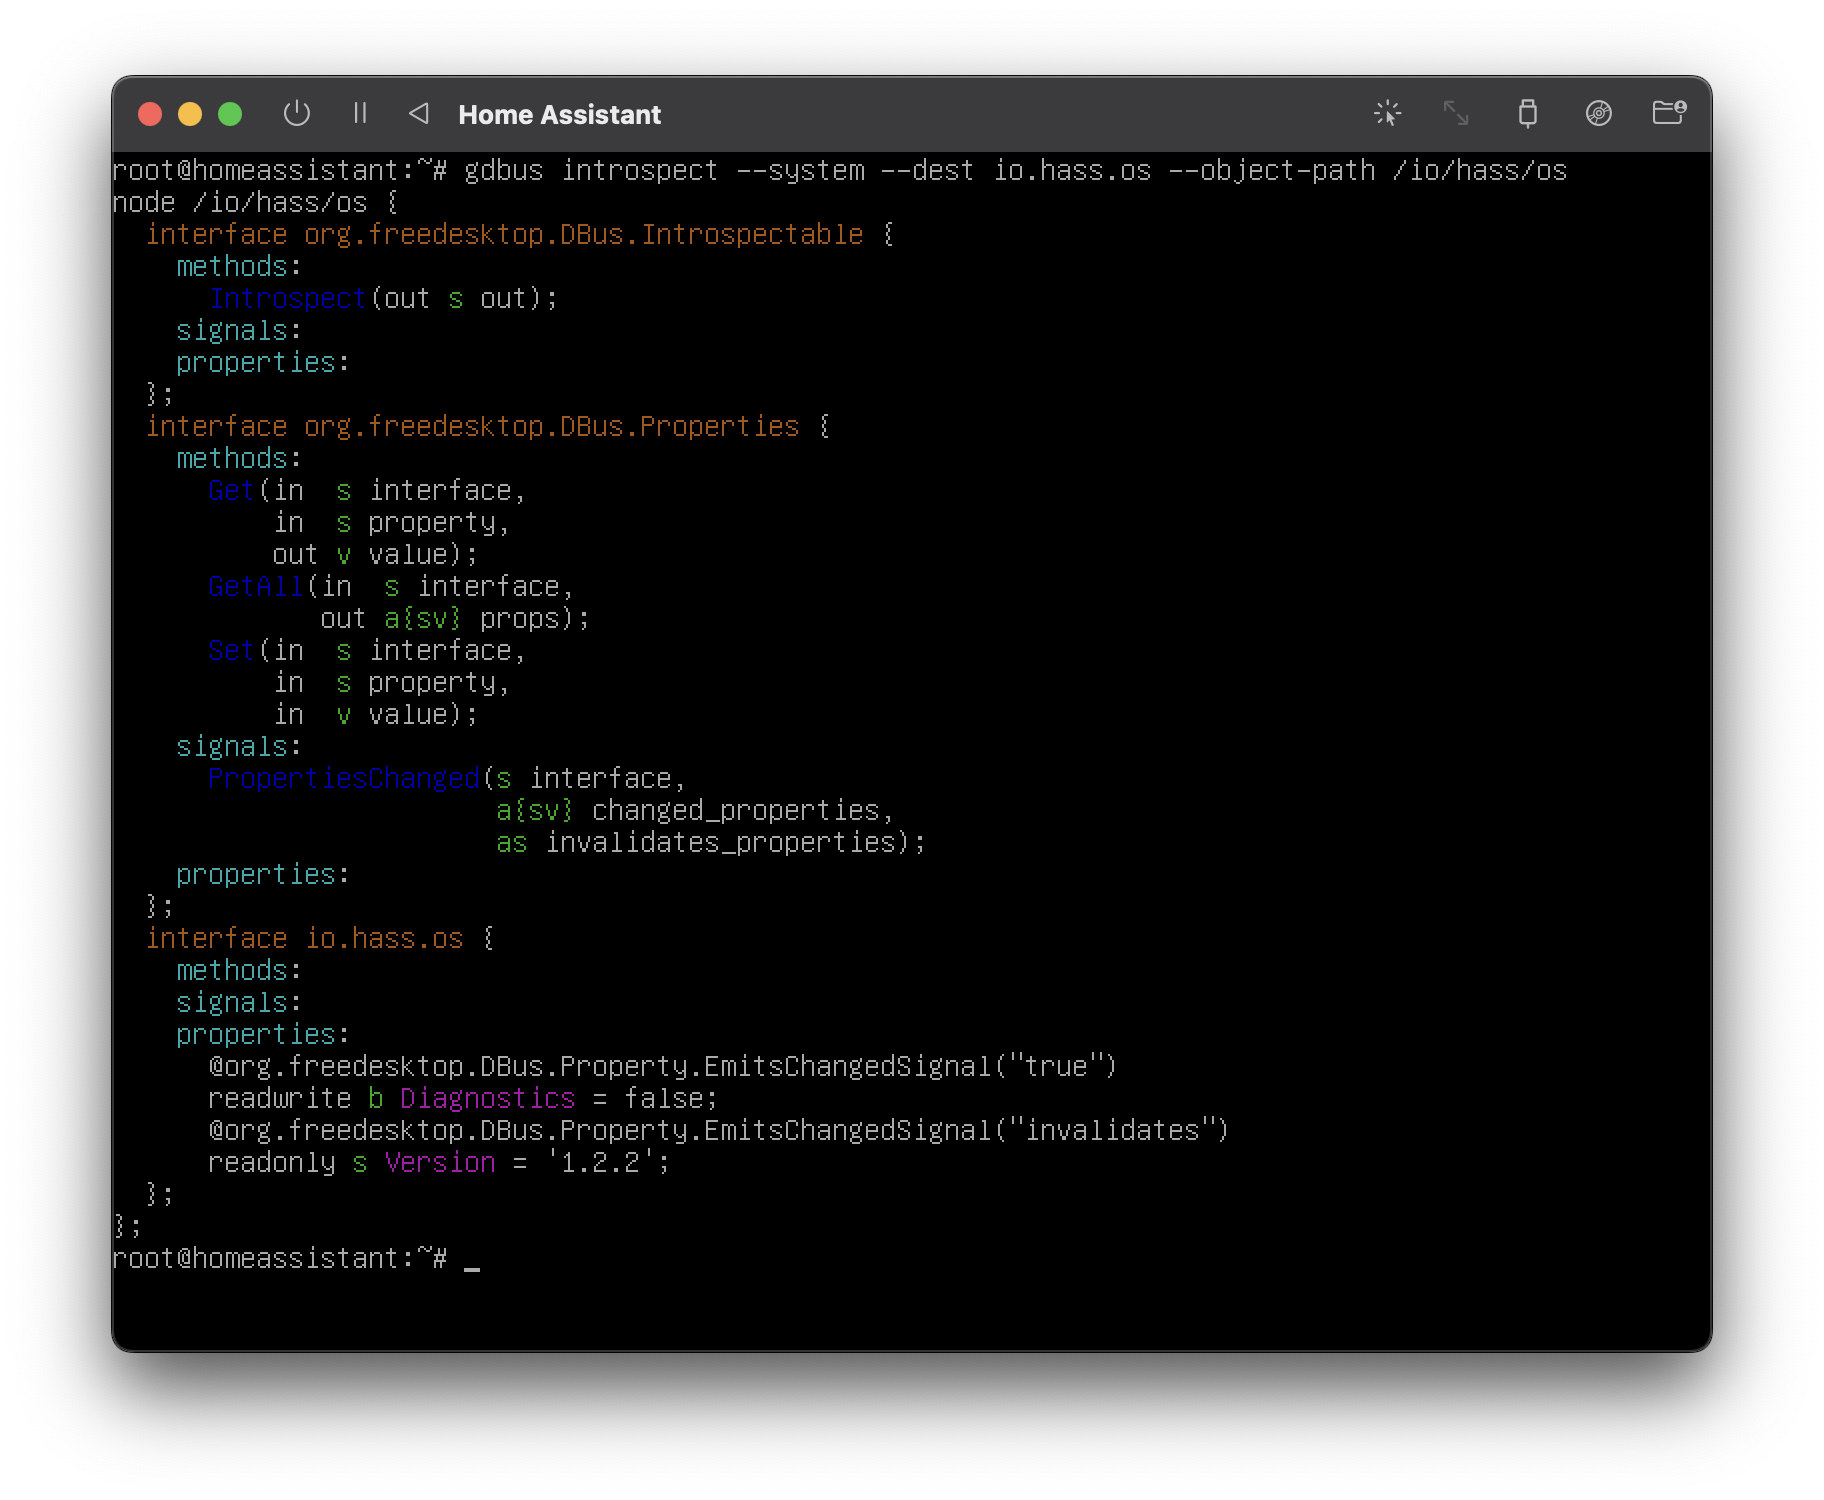
Once complete, you can test the installation with the following command.
gdbus introspect --system --dest io.hass.os --object-path /io/hass/os
This command should not produce and error. The output should look something like the following.
Install Home Assistant Supervised
The last thing remaining to do is install Home Assistant. This can be done with the Home Assistant supervised Debian package.
First we can go ahead and download the package using wget.
wget https://github.com/home-assistant/supervised-installer/releases/latest/download/homeassistant-supervised.deb
Once the download has completed, we can install it with dpkg.
dpkg -i homeassistant-supervised.deb
How to fix the systemd-resolved error
If you are getting installation issues relating to systemd-resolved, this could be due to bug in version 1.5.0 of the installation script.
In this case, you can work around the problem by using the following command to install Home Assistant:
sudo dpkg -i --ignore-depends=systemd-resolved homeassistant-supervised.deb
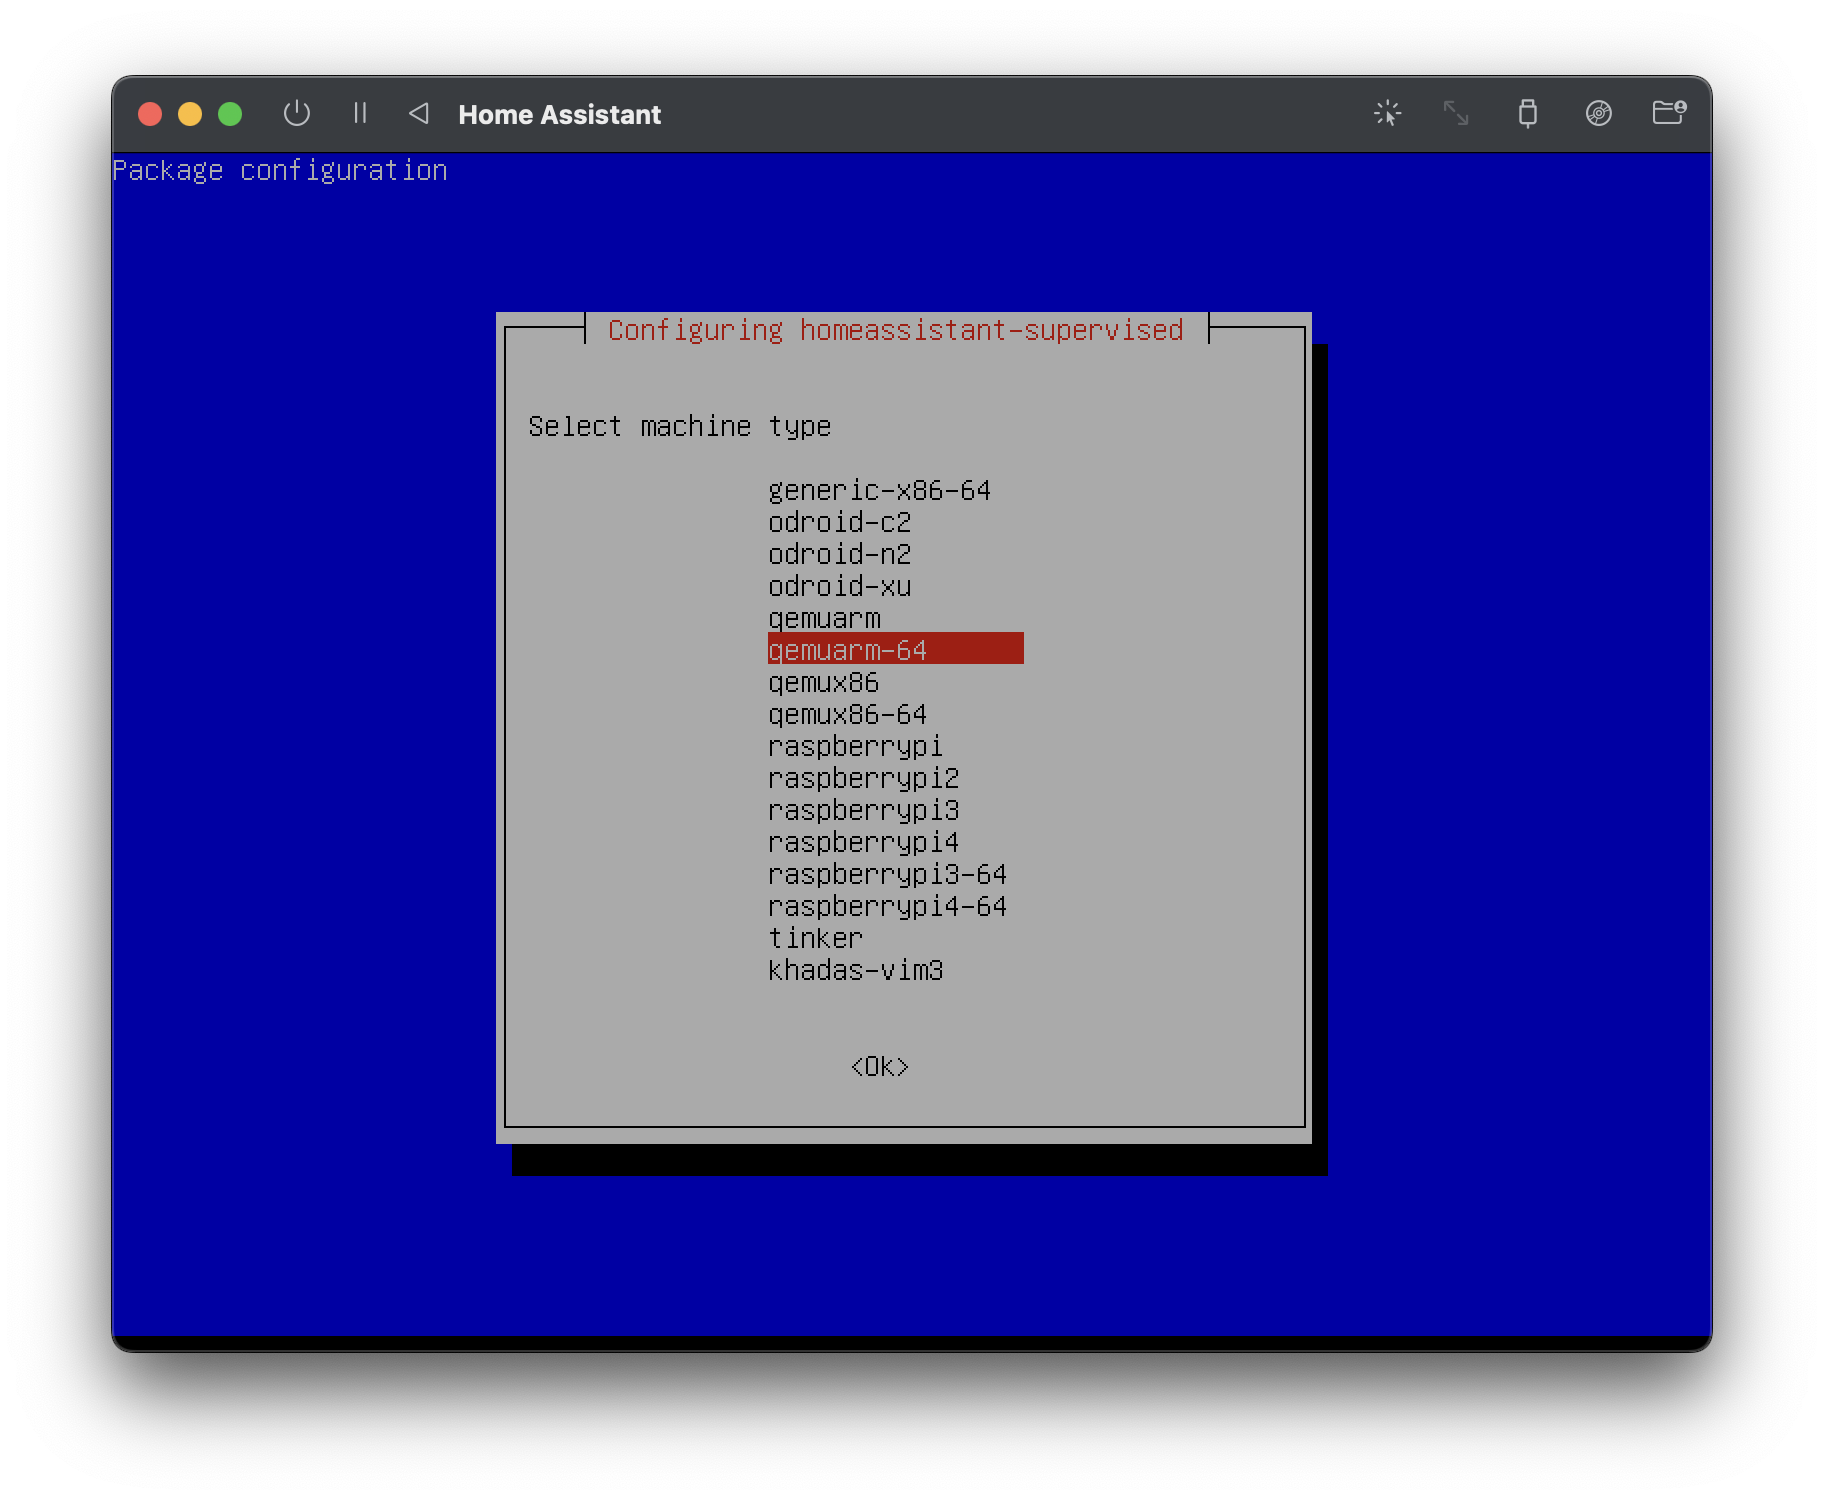
Choose a machine type
You may need to select a machine type. For Apple Silicon Mac builds running Debian arm64, choose qemuarm-64. For Intel Mac builds running Debian x86_64, choose qemux86-64.
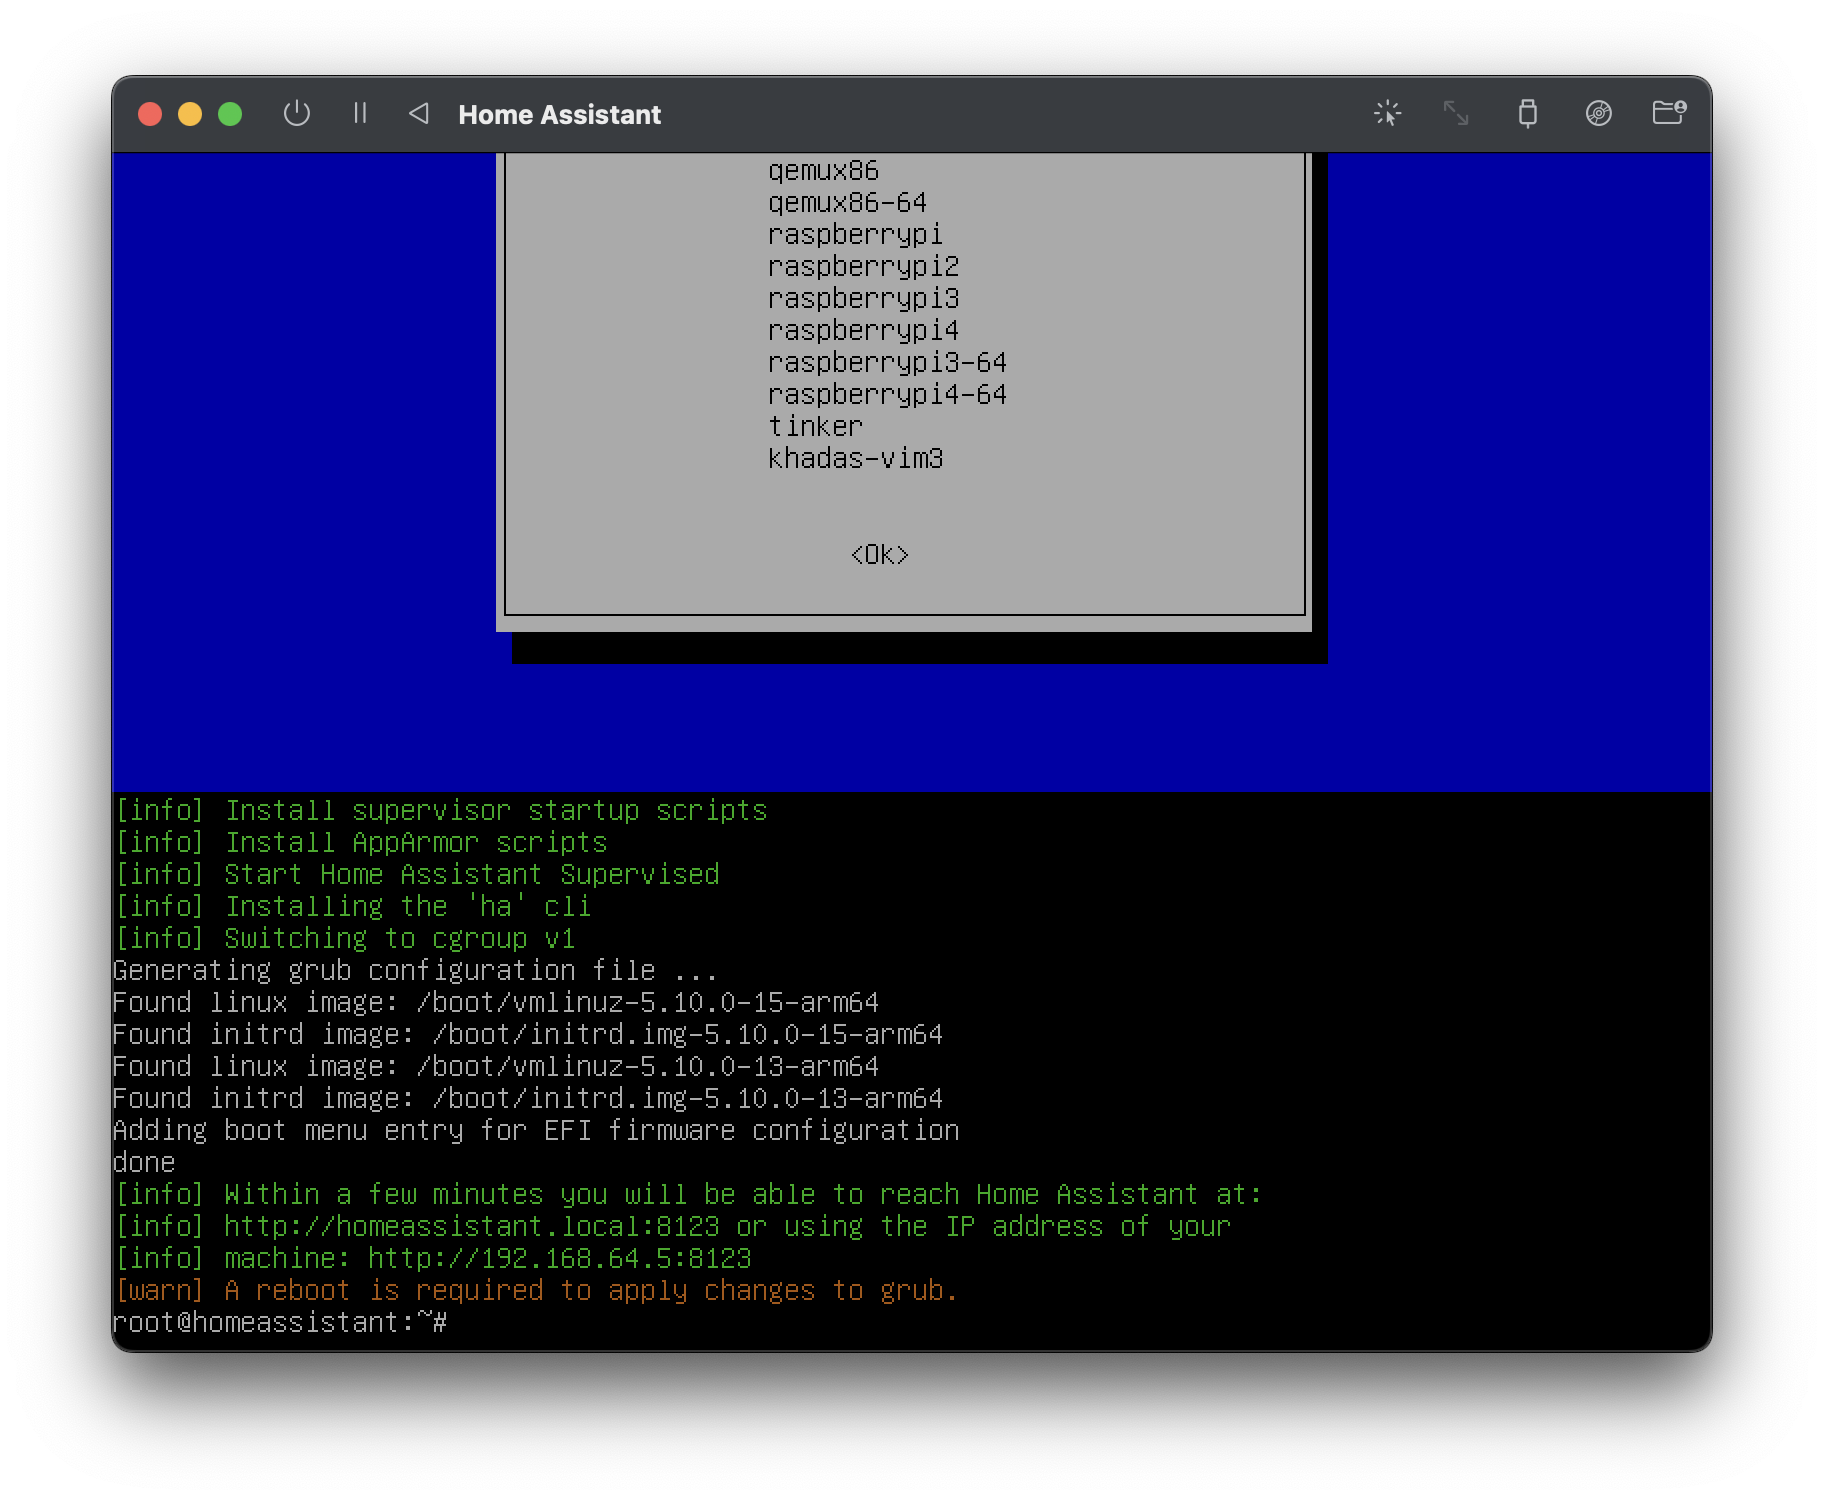
Once the installation has completed, Home Assistant will start up but it will take a few minutes before we can access it.
The IP address of our Home Assistant server is given at the end of installation, in my case 192.168.64.5:8123.
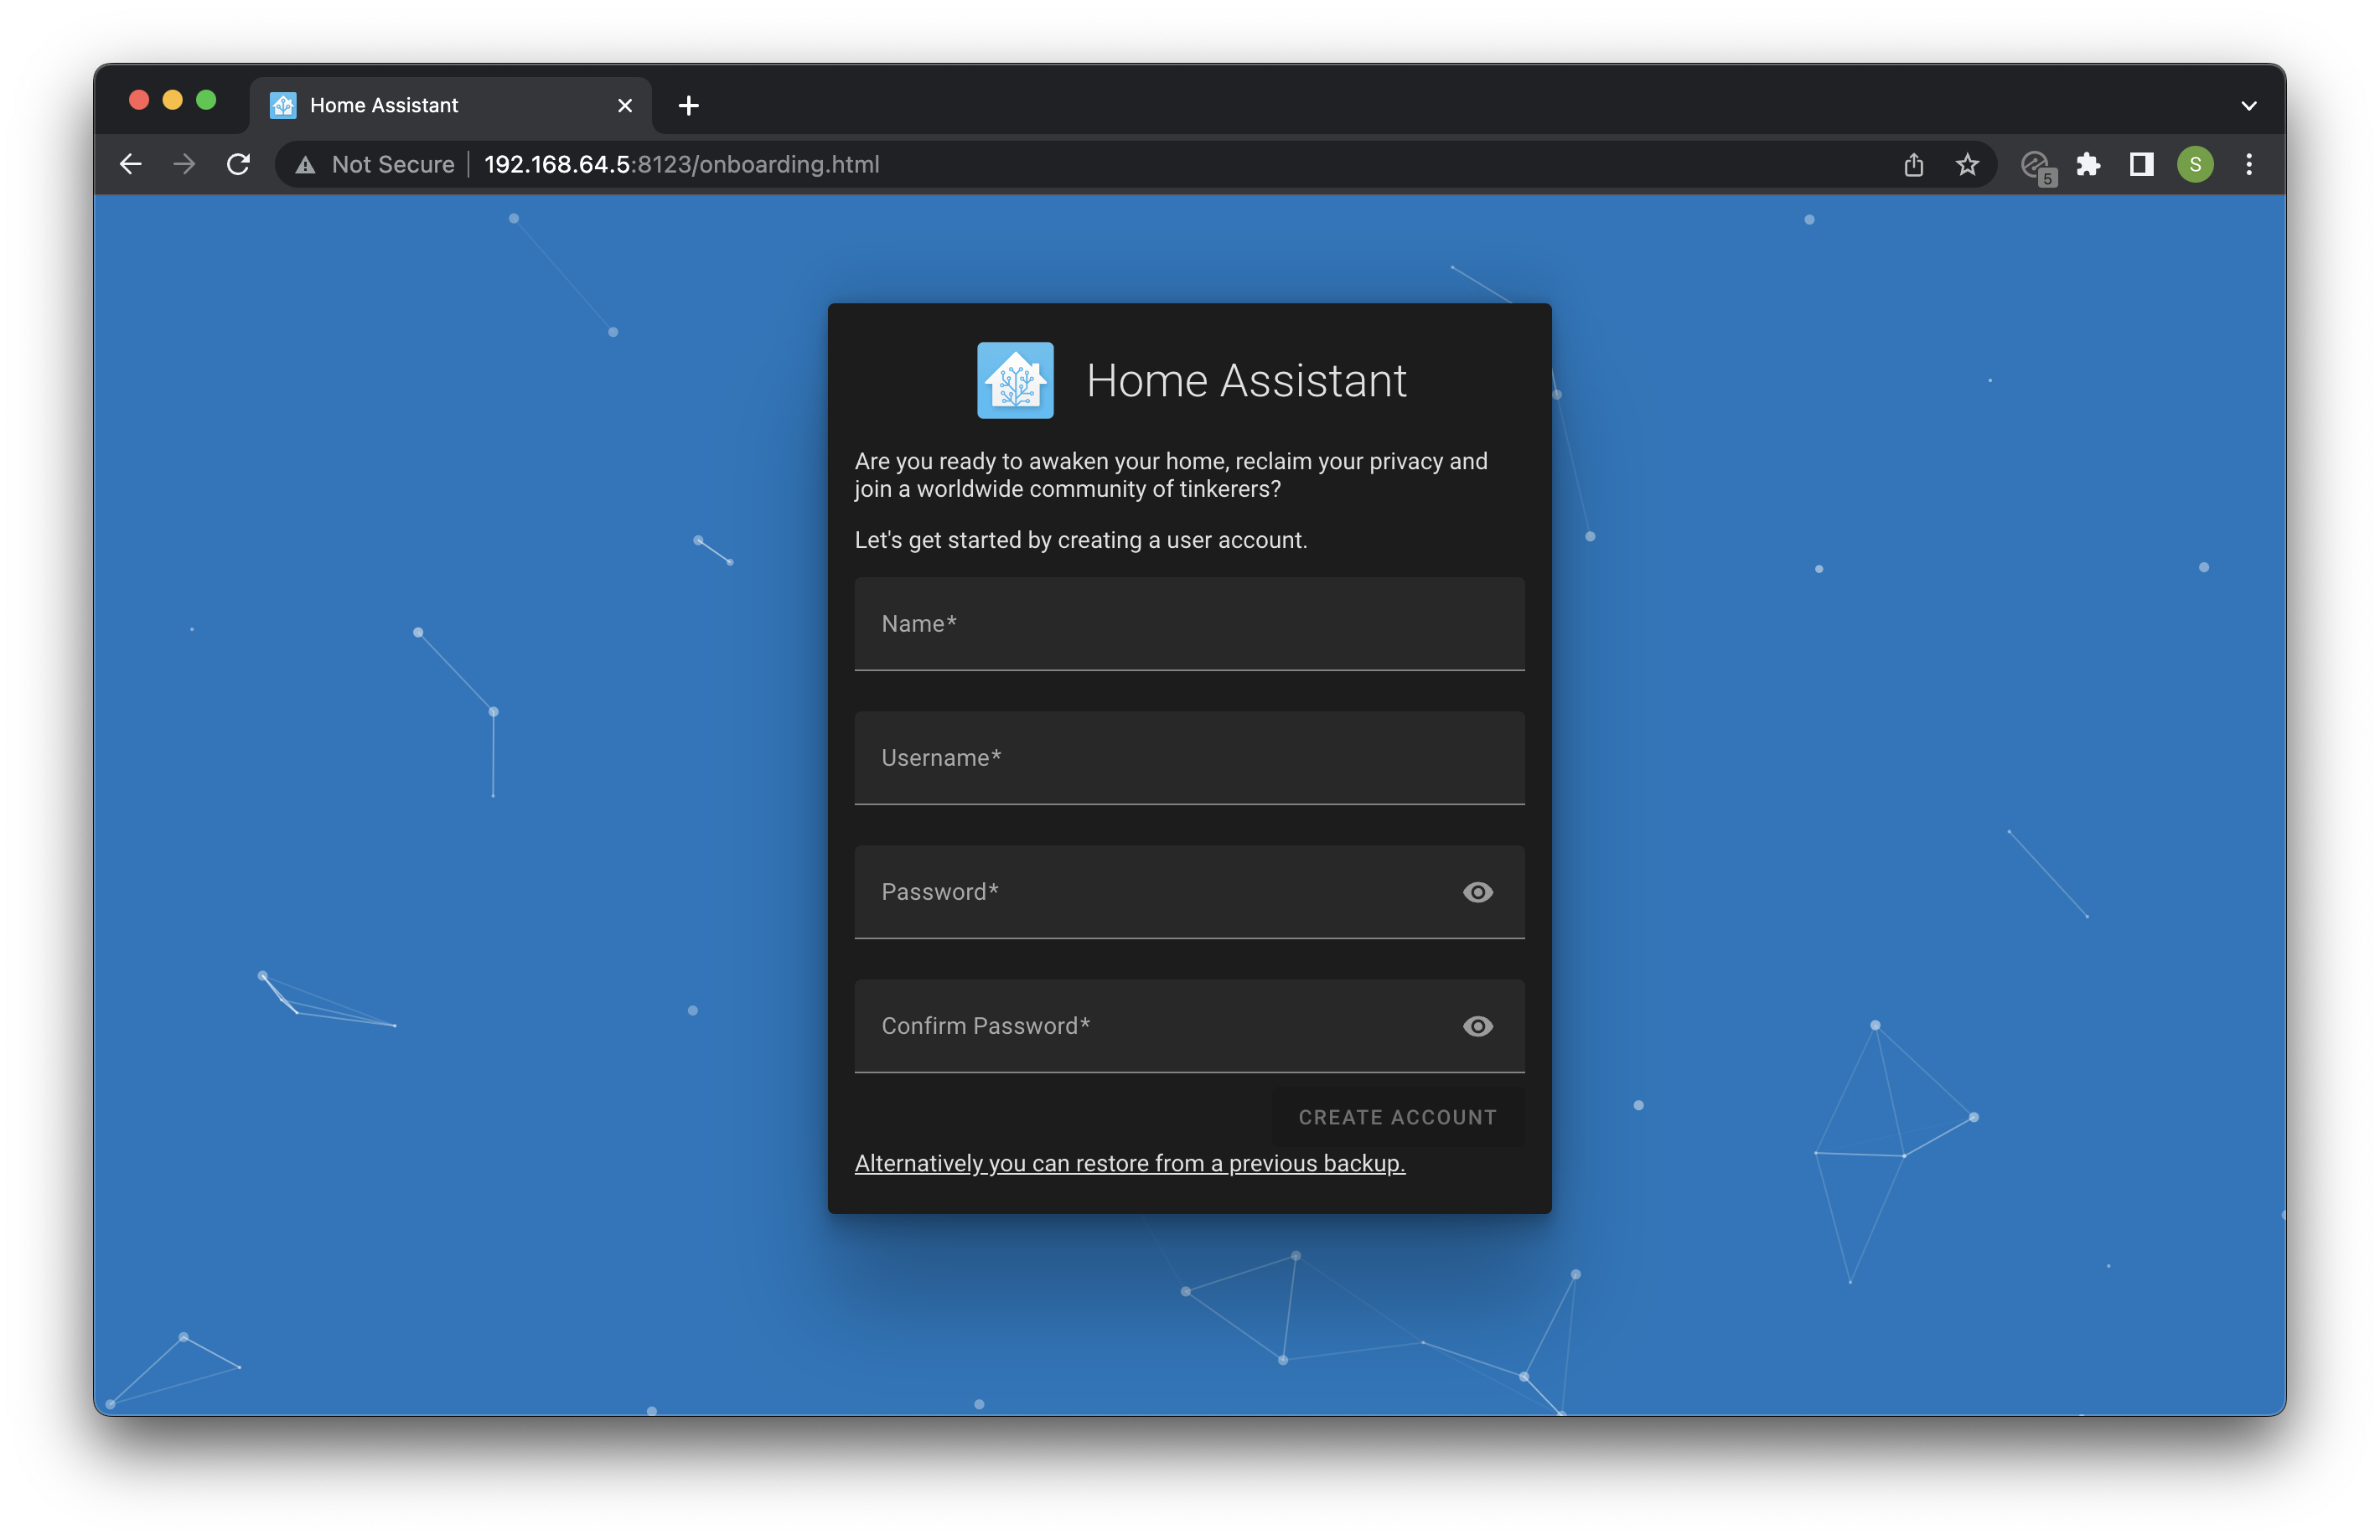
In order to check that the installation was successful, go ahead and visit the IP address using a browser.
http://<your-ip-address>:<your-port>
So in my case it would be as follows.
http://192.168.64.5:8123
Conclusion
Installing Home Assistant Supervised on Mac OS is a fairly straightforward process, although it can be a bit time consuming to get everything working correctly.
However with a little effort it is possible to turn any Mac OS system into a fully functioning Home Assistant build. This is an excellent way to repurpose that old Mac you had lying around whilst avoiding the need to invest in additional hardware for Home Assistant.
If you encountered any difficulties or you simply want to avoid investing a lot of time in to this process, be sure to check out my pre-installed Home Assistant image, which can get Home Assistant up and running on Mac OS in just a couple of clicks!
Thanks so much for visiting my site! If this article helped you achieve your goal and you want to say thanks, you can now support my work by buying me a coffee. I promise I won't spend it on beer instead... 😏


