
If you want to put Home Assistant on something other than a Raspberry Pi, it is likely you will want to use Linux. There are many different versions of Linux, so which is the best one to use for Home Assistant?
If you want to install Home Assistant on a computer you plan to use as a desktop machine, Ubuntu is a good choice. You can also try out Home Assistant on your Silicon or Intel Mac, by creating a virtual machine.
If you want to set up a computer (server) that is dedicated to Home Assistant, the best option is to install Debian Linux. In this article we will learn how to install Debian Linux without the GUI, and then Home Assistant.
Note that this article will walk you through the process of installing the Home Assistant Core only.
How To Install Home Assistant on Debian Linux
- Step 1: Install Debian Linux
- Step 2: Install Necessary Dependencies
- Step 3: Install Docker and Portainer
- Step 4: Run the Home Assistant Container
- Step 5: Begin Using Home Assistant
If you already have Debian Linux installed and connected to your network, you can skip to step 3.
Step 1: Install Debian Linux
First, we will install a fresh copy of the latest Debian Linux:
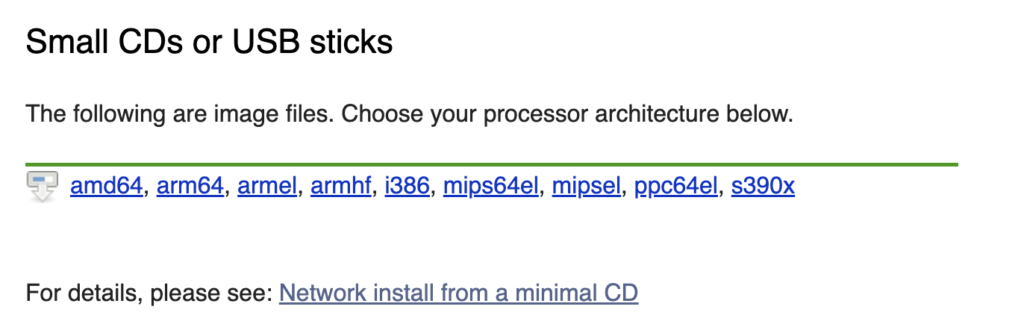
- Head over the download page for the Debian Small CDs or USB sticks installer.
- Download the correct version of Debian for your machine:
- 64-bit Intel/AMD based machines should download the amd64 architecture.
- 32-bit Intel/AMD based machines should download the i386 architecture.
- 64-bit ARM based machines should download the arm64 architecture.
- If you are building a physical machine, you will most likely need to create a bootable CD or USB stick. If you are configuring a virtual machine, you can skip this step.
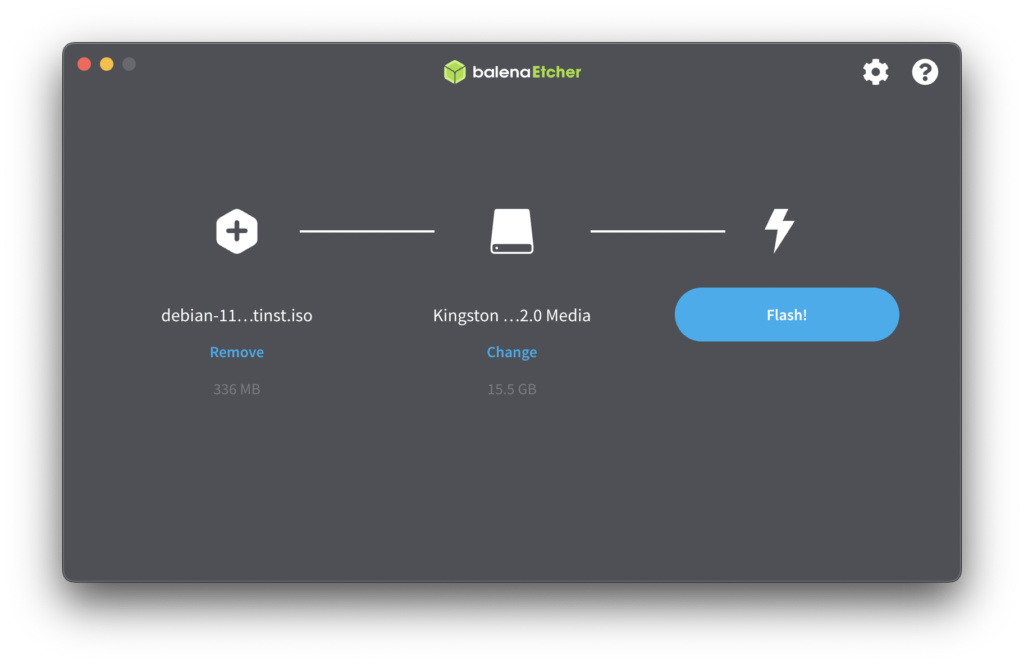
- Download and install BalenaEtcher.
- Insert a USB drive (note that it will be fully erased).
- Open BalenaEtcher and then choose flash from file. Select the Debian installation .iso that you downloaded in step 2.
- Choose select target and then set the target as your USB drive.
- Click flash to create the Debian bootable USB.
- Now we need to boot up our machine using the Debian installation .iso. Your machine should boot to the GNU GRUB menu.
- If you are building a physical machine; insert the bootable USB and restart the machine.
- If you are configuring a virtual machine, select the Debian installation .iso directly.
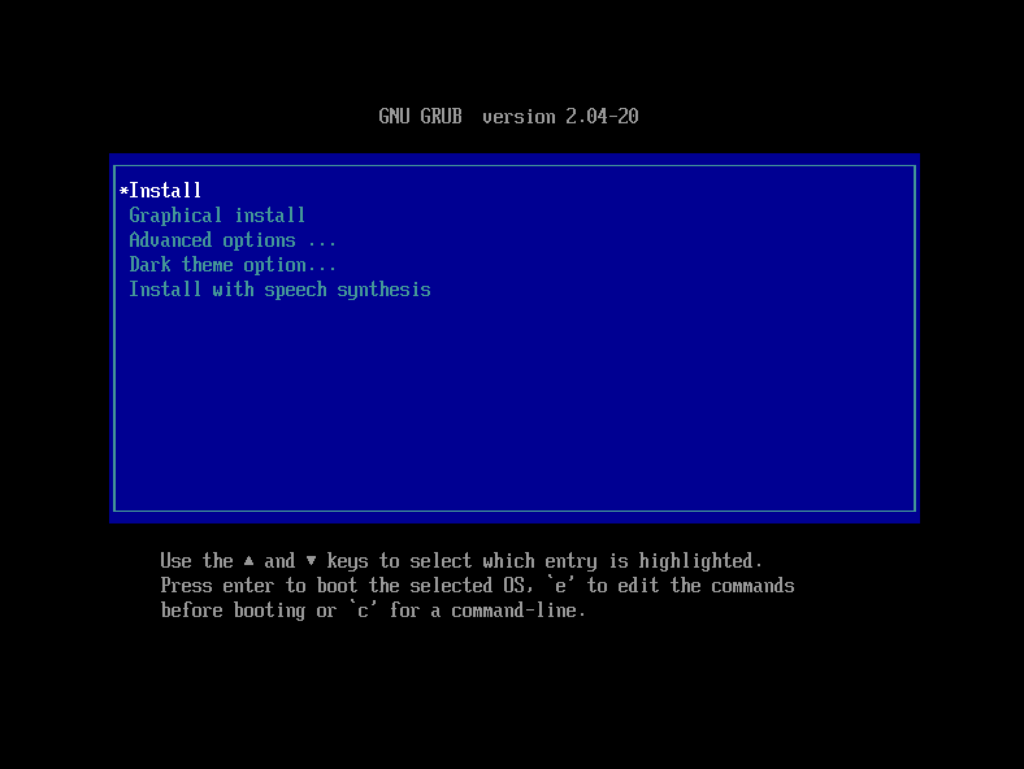
- Select install to begin the installation:
- Set your language, location and keyboard settings as your prefer.
- Enter a hostname, such as homeassistant. This will be the name of your machine on your network.
- Domain can be left blank if you don’t have one.
- Enter a password for the root user.
- Enter a name, username and password to create a new standard user account. This is what you will use to log in, so make a note of it!
- Set your disk partition options. Use guided entire disk and then select the full partition.
- Set the partitioning scheme to all files in one partition.
- Choose finish partitioning and write changes to disk. You will be given one last chance to check the configuration. Choose yes to write the changes.
- The base system will begin installing. When prompted to scan additional installation media, choose no.
- Choose your country so that Debian can find the closest server for package manager. Then select an archive mirror of your preference. If in doubt, just choose deb.debian.org.
- If you do not use a HTTP proxy, or if in doubt, leave the HTTP proxy blank and click continue.
- Choose whether you want to partake in the popularity contest. If in doubt, just choose no.
- When presented with the software selection, ensure that only the following components are installed:
- SSH Server
- standard system utilities
- When you get to the installation complete screen, remove the USB stick or installation media, then click continue to reboot.
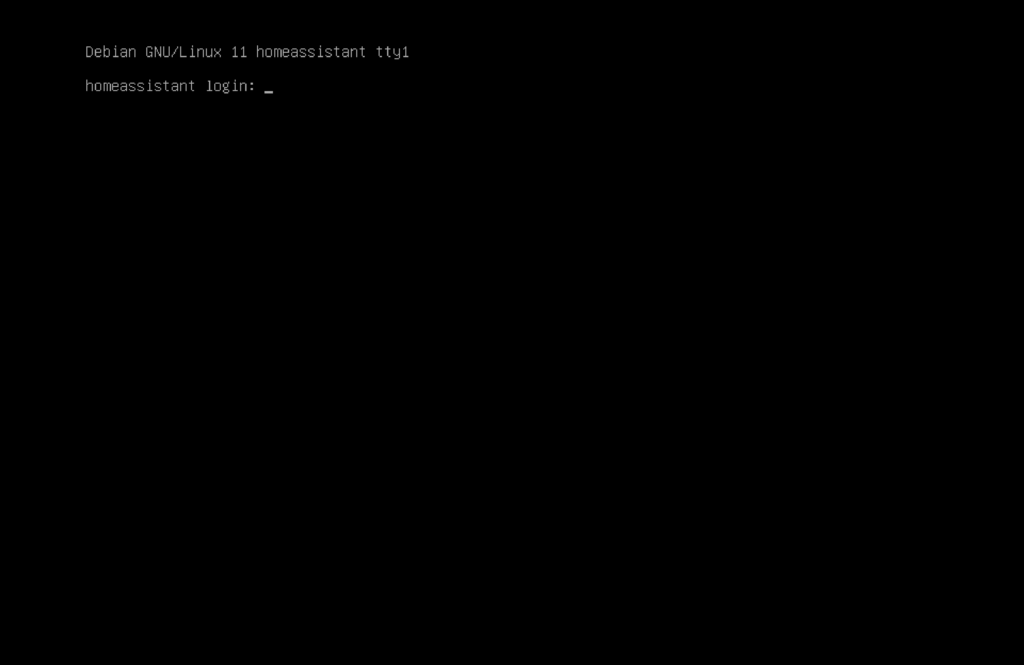
- Once your machine boots to the Debian login prompt, go ahead a log in with the credentials you created during installation.
Note that we did not install the GUI, as it is not required for Home Assistant.
Step 2: Install Necessary Dependencies
Now that we have installed Debian, we need to install some additional tools in order to install Home Assistant.
- Log in as the superuser by entering the command
su - - Enter the superuser password that you choose whilst installing Debian. The prompt will change to root@yourmachine.
- Install cURL by entering the command
apt-get install curl
Step 3: Install Docker-CE
In order to run Home Assistant, we will use a container manager called Docker.
- In order to install Docker-CE we can use the installation script simply by entering the following command:
curl -fsSL get.docker.com | sh
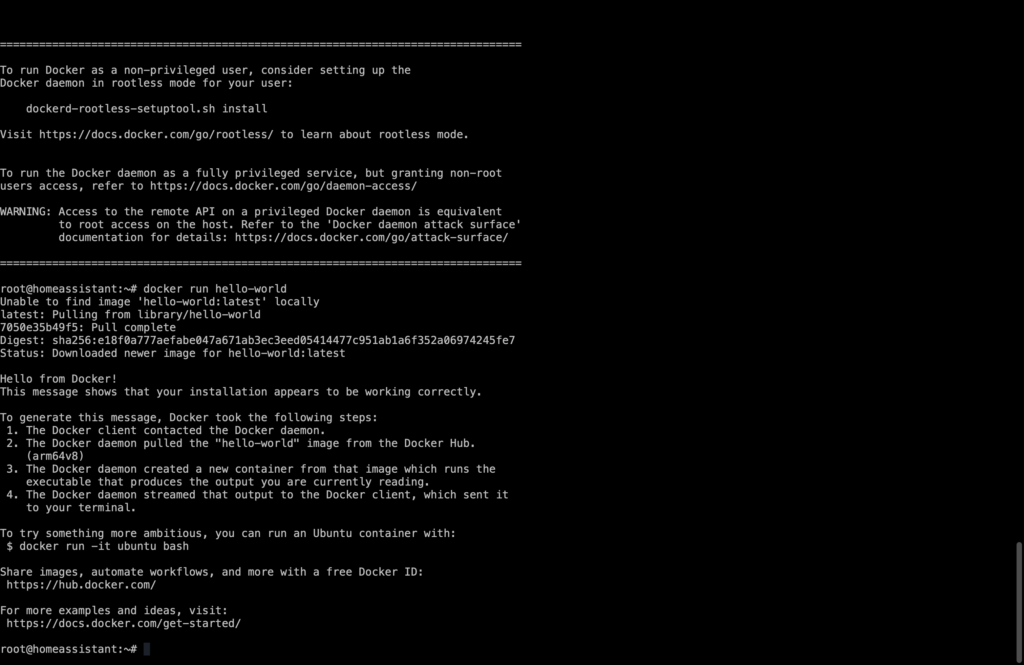
- Once the script has finished, we can test that it is working correctly by running Docker Hello World:
docker run hello-world
If the container executes correctly, you will see the message “hello from Docker!”
Step 4: Run the Home Assistant Container
Next we can install a container that has everything needed to run Home Assistant.
There are two placeholders that need to be replaced with your desired values:
/PATH_TO_YOUR_CONFIGpoints at the folder where you want to store your configuration and run it. If in doubt, you can just use/homeassistant/configMY_TIME_ZONEis a tz database name, likeTZ=America/Los_Angeles. Use the link to look up the correct name for your timezone.
Enter the following command, replacing the placeholders with your desired values:
docker run -d --name homeassistant --privileged --restart=unless-stopped -e TZ=MY_TIME_ZONE -v /PATH_TO_YOUR_CONFIG:/config --network=host ghcr.io/home-assistant/home-assistant:stable
Step 5: Begin Using Home Assistant
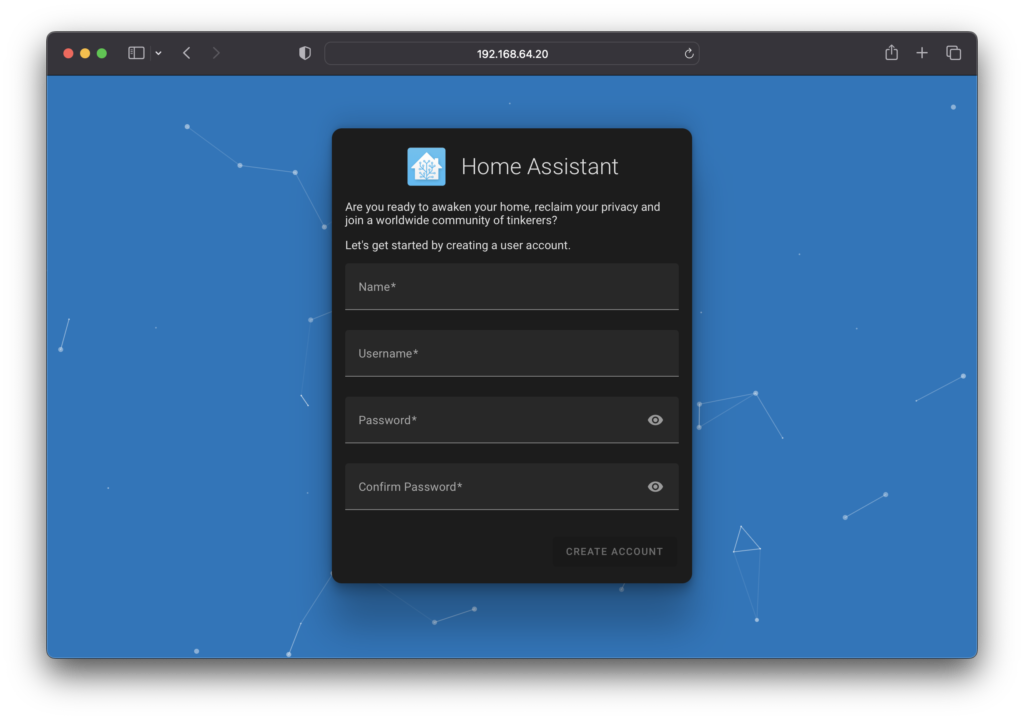
Once the Docker container has downloaded and started, we should be able to access Home Assistant!
But first we need to know the IP address of our machine, in order to access it from a remote browser.
- Type in the following command in order to show your IP address:
hostname -I
- Navigate to your IP address using the default Home Assistant port, 8123. This will take you to the Home Assistant log in screen.
http://<your-ip-address>:8123
Whats’ Next?
If you have got this this stage, congratulations! Hopefully you now have Debian and Home Assistant up and running.
If you are new to Home Assistant, the next step is to check out the YAML beginners guide.
If you have some Home Assistant experience, why not go ahead and check out some of my other Home Assistant tutorials!
Thanks so much for visiting my site! If this article helped you achieve your goal and you want to say thanks, you can now support my work by buying me a coffee. I promise I won't spend it on beer instead... 😏


thanks for this. appreciate your work.
No problem! Thanks for taking a moment to leave a comment 🙂