If you are looking to get started with building a smart home, or you want a solution to centralize the control of your existing smart devices and remove the need for numerous apps then you have a number of solutions to choose from.
If you would have asked me personally which platform to choose for building your Smart Home, the answer would have been Home Assistant, undisputed open source champion of the smart home world.
That is until a new contender entered the ring packing some serious potential!
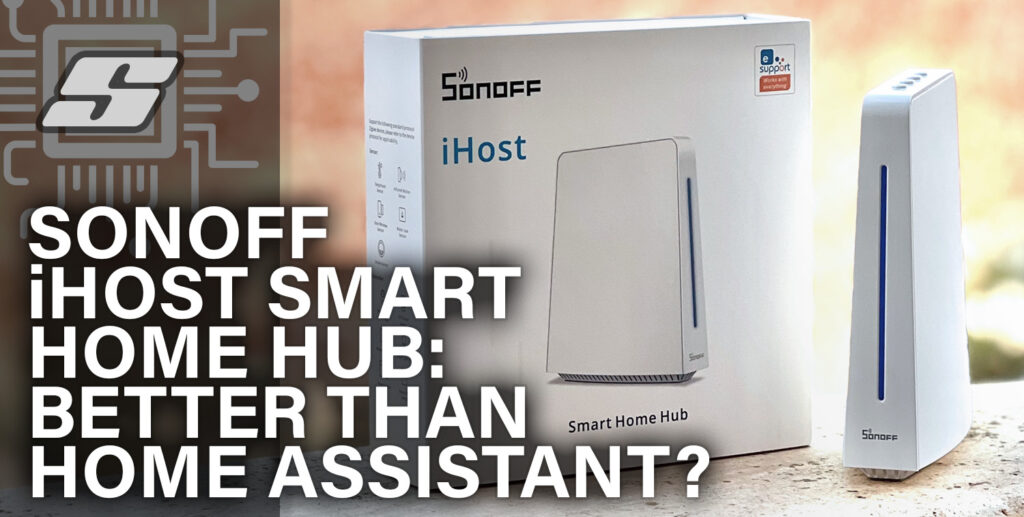
Meet iTead’s SONOFF iHost.
This article will give you all of the information you need in order to decide whether or not the iHost offers the right solution for you.
Looking for a great deal on SONOFF products? You can now purchase any SONOFF product using the SIYTEK discount code and receive 10% off your purchase!
We will take a look at unboxing, all of the key features and also the usability of the interface. We will also closely compare the iHost with Home Assistant, as I believe these two choices could cover 99% of people who wish to build a smart home.
I have always been a fan of SONOFF products, they have an ear to the ground and listen attentively to the needs of their customers.
While other companies were trying all sorts of tricks to lock you into their cloud infrastructure, blocking their devices from being configured with custom firmware like Tasmota, SONOFF understood that this is what their customers wanted and they did the opposite.
They listened to their customers needs and adapted their products. They provided us with the means to easily configure and customize their devices however we wanted.
I can already say with confidence and from personal experience that SONOFF produce good products at fair prices.
However there is a big difference between a simple smart switch and the smart home hub itself. SONOFF will be competing with mature platforms that focus solely on the functionality of the smart home hub software.
Has SONOFF managed to create a product that can compete with some of the desirable solutions that already exist? Do we have a product here that could be a suitable alternative to the mighty Home Assistant?
And most importantly, is the SONOFF iHost the right solution for you?
This article aims to give you the overview of the iHost that you have been looking for. Let’s not get too deep into the technical mumbo-jumbo.
Instead we will uncover the essential information that you need to help you decide whether or not iHost offers the solution that you are looking for.
What is The SONOFF iHost?
The SONOFF iHost is a smart home hub that has been designed to address a common problem with smart home solutions. The iHost is designed to remove reliance on cloud networks.
This means that you can connect all of your smart home devices directly to the iHost using your local area network.
Not only does this provide a much quicker connection, allowing your smart home devices to respond instantaneously, but it also provides a much higher level of privacy.
It is also not uncommon for smart home device manufacturers to just “switch off” their cloud networks when they can no longer provide the service they promised. This ultimately renders the products useless.
The iHost circumvents this problem entirely by deleting the need for a cloud network.
Admittedly this problem has already been solved by the open source platform Home Assistant, which can be run on a variety of different hardware solutions.
However for most users the Home Assistant learning curve is exceptionally steep.
The SONOFF iHost is clearly making a good attempt at solving this problem. The iHost aims to provide a local smart home solution in the same way that Home Assistant does, only with a much friendly learning curve to suit most consumers.
Given the success of Home Assistant, yet the difficulties many users face, I am surprised such a product hasn’t come sooner!
Where To Buy SONOFF iHost
Looking to get your hands on the SONOFF iHost?
The best place to buy the iHost hub directly from the SONOFF store, as you can use my discount code SIYTEK and save 10%! Click here to visit the official SONOFF store.
How Much Does the SONOFF iHost Cost?
The SONOFF iHost base model RV1109, which features 2GB of RAM, is currently selling for $79.99, but you can pick it up for under $72 using this discount code.
The top spec model RV1126, which comes with 4GB or RAM is currently selling for $99.99, but you can pick it up for under $90 using this discount code.
Unboxing the SONOFF iHost
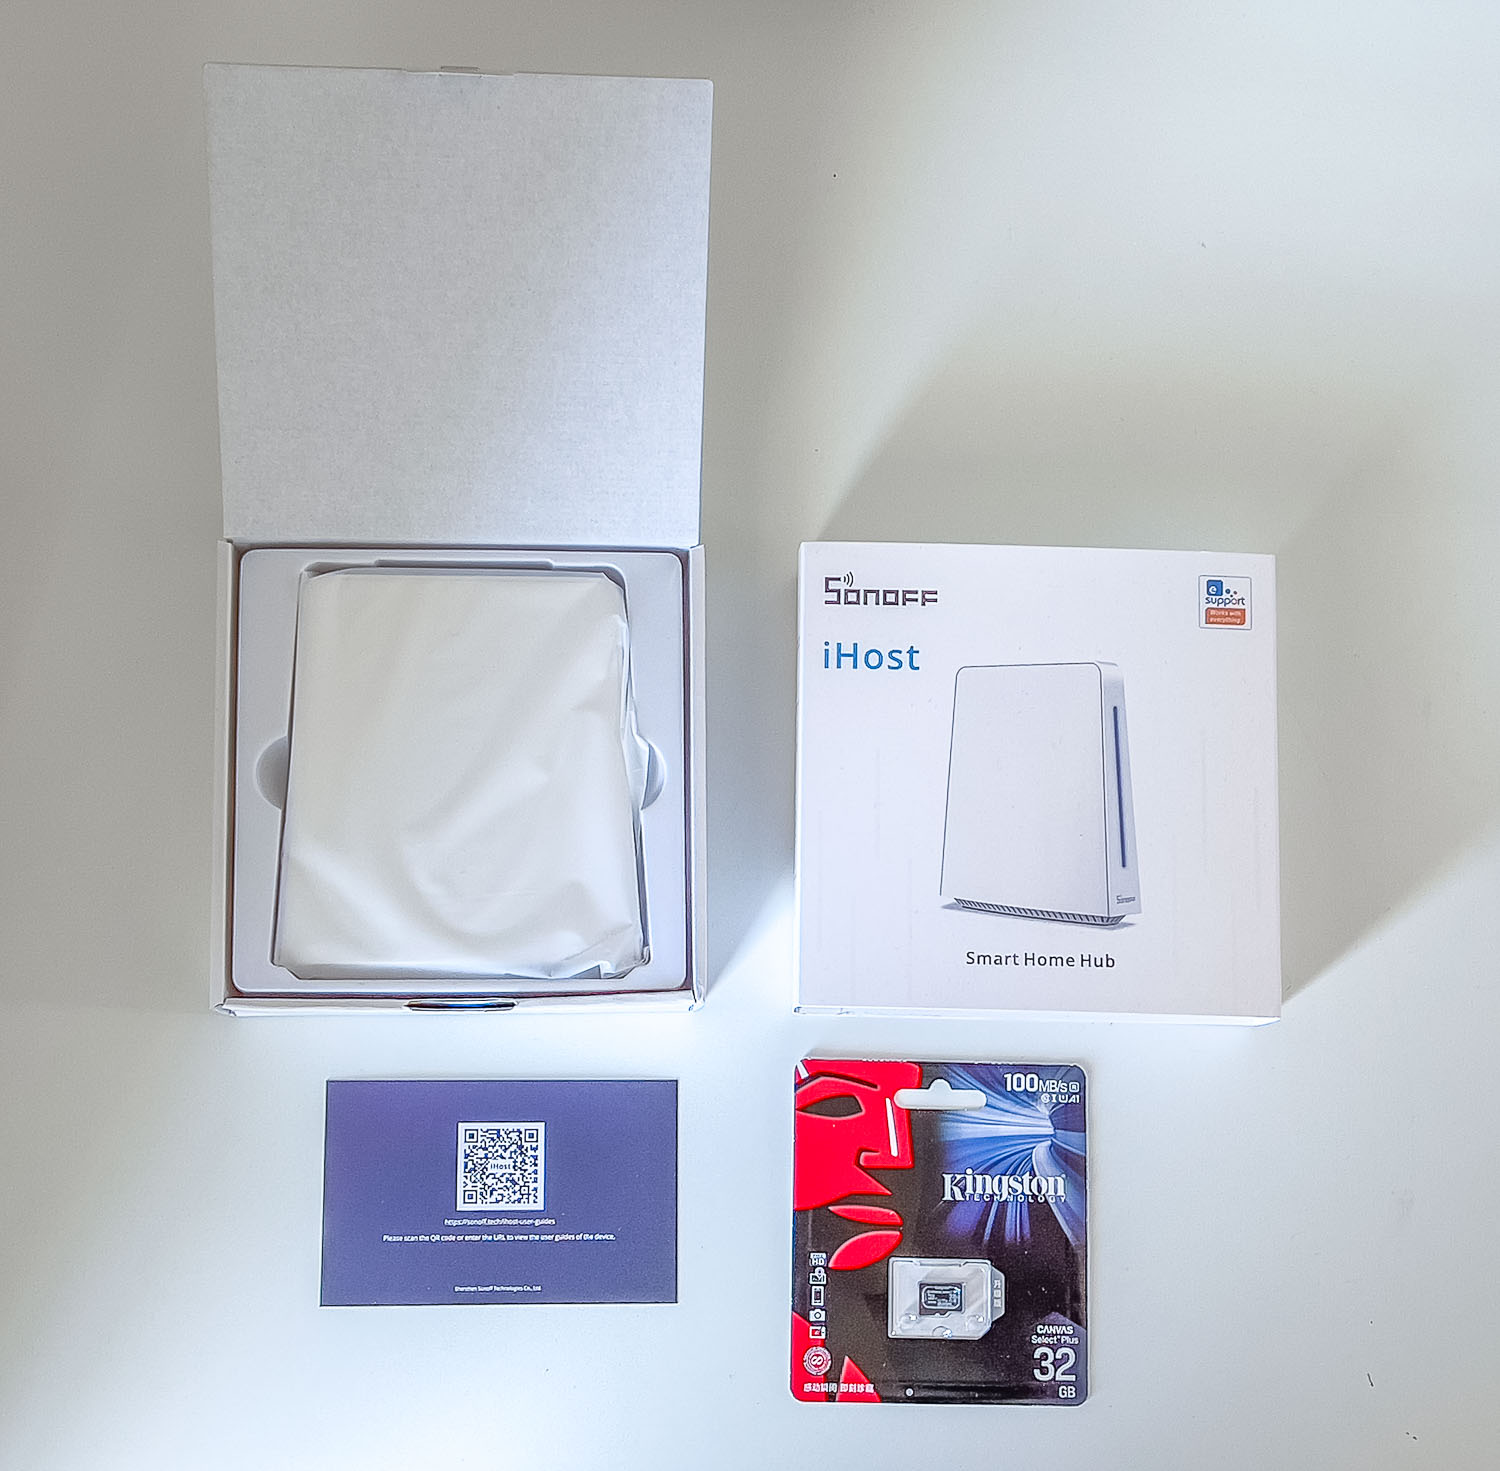
Unboxing the iHost is certainly a pleasant experience and it is evident that iTead have opted to take the Apple-esque route. I am a huge fan of the Apple unboxing experience so we are off to an excellent start!
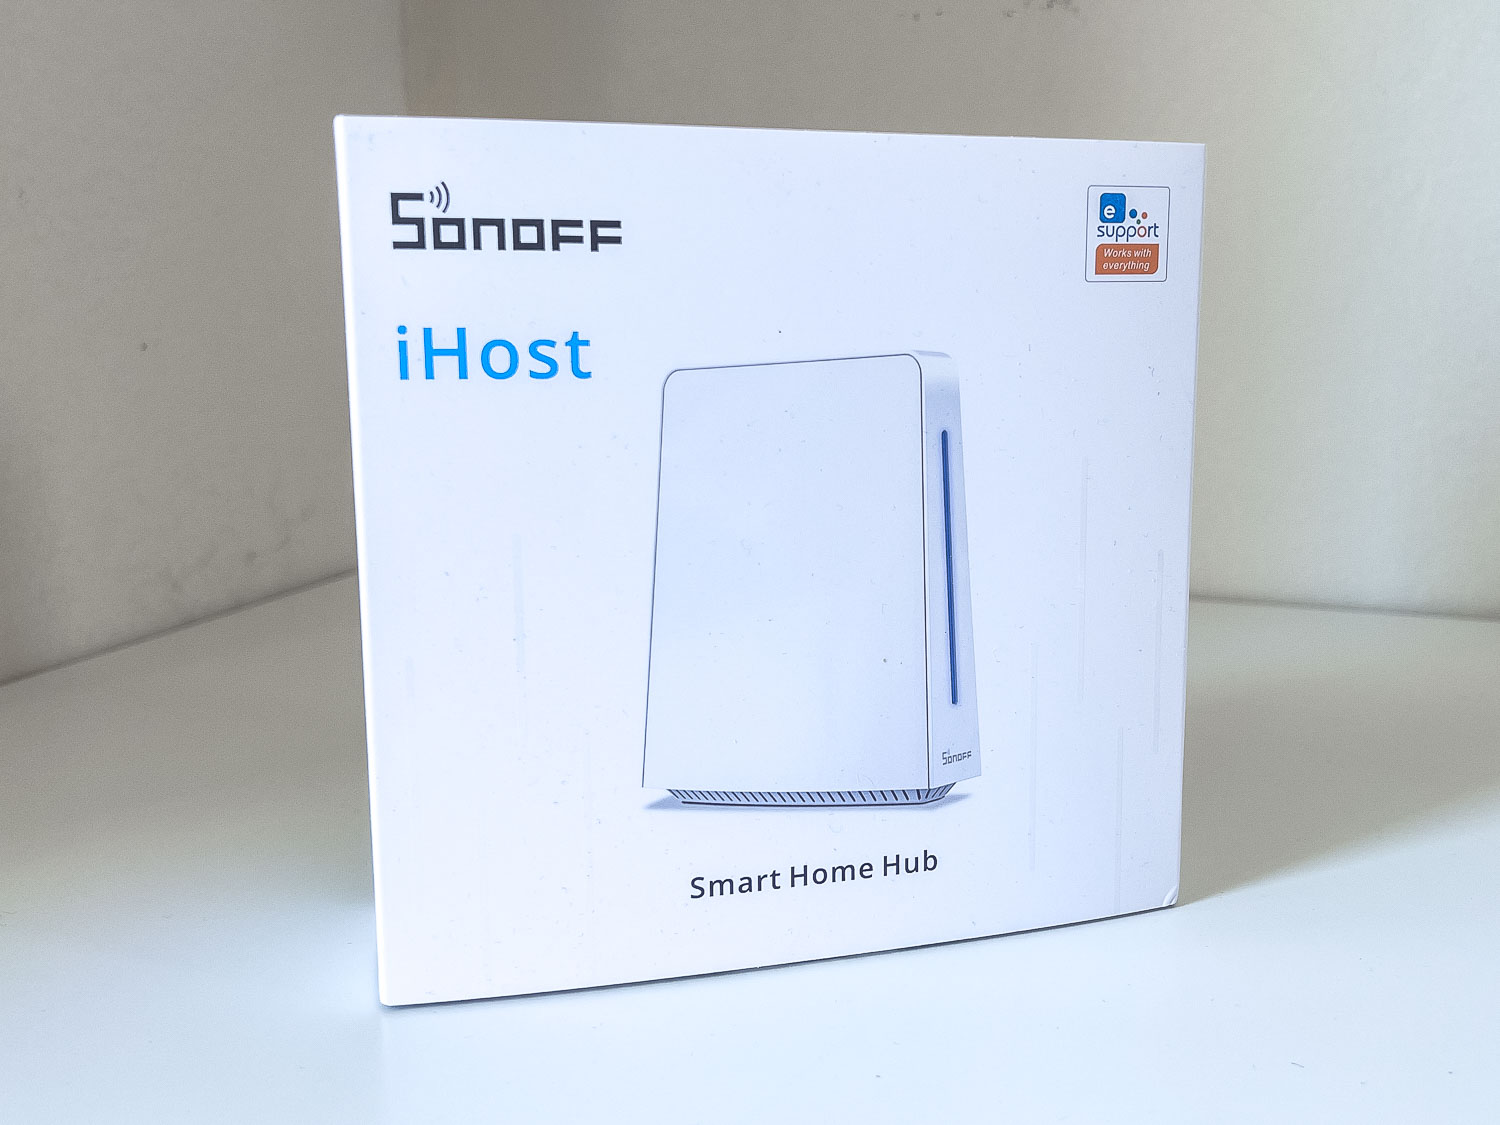
The outer card sheath slides off with some resistance to reveal a high quality card box with a tab that can be pulled in order to fold back the lid.
Inside the box you will find a card with printed QR code that links you to the manual on top of an injection moulded insert that supports the iHost.
Note that the Micro SD card is sold separately but there is an option to include one when purchasing from the SONOFF store.
The iHost unit is neatly wrapped in white packaging that feels silky. It is a very nice experience to remove the product and iTead have clearly put some effort into the packaging!
Upon removing the iHost from the plastic insert you will find another smaller cardboard package that contains the included USB and Ethernet lead.
You will also find a small tool for pushing the reset button, not dissimilar to the tool Apple include for removing iPhone SIM cards.
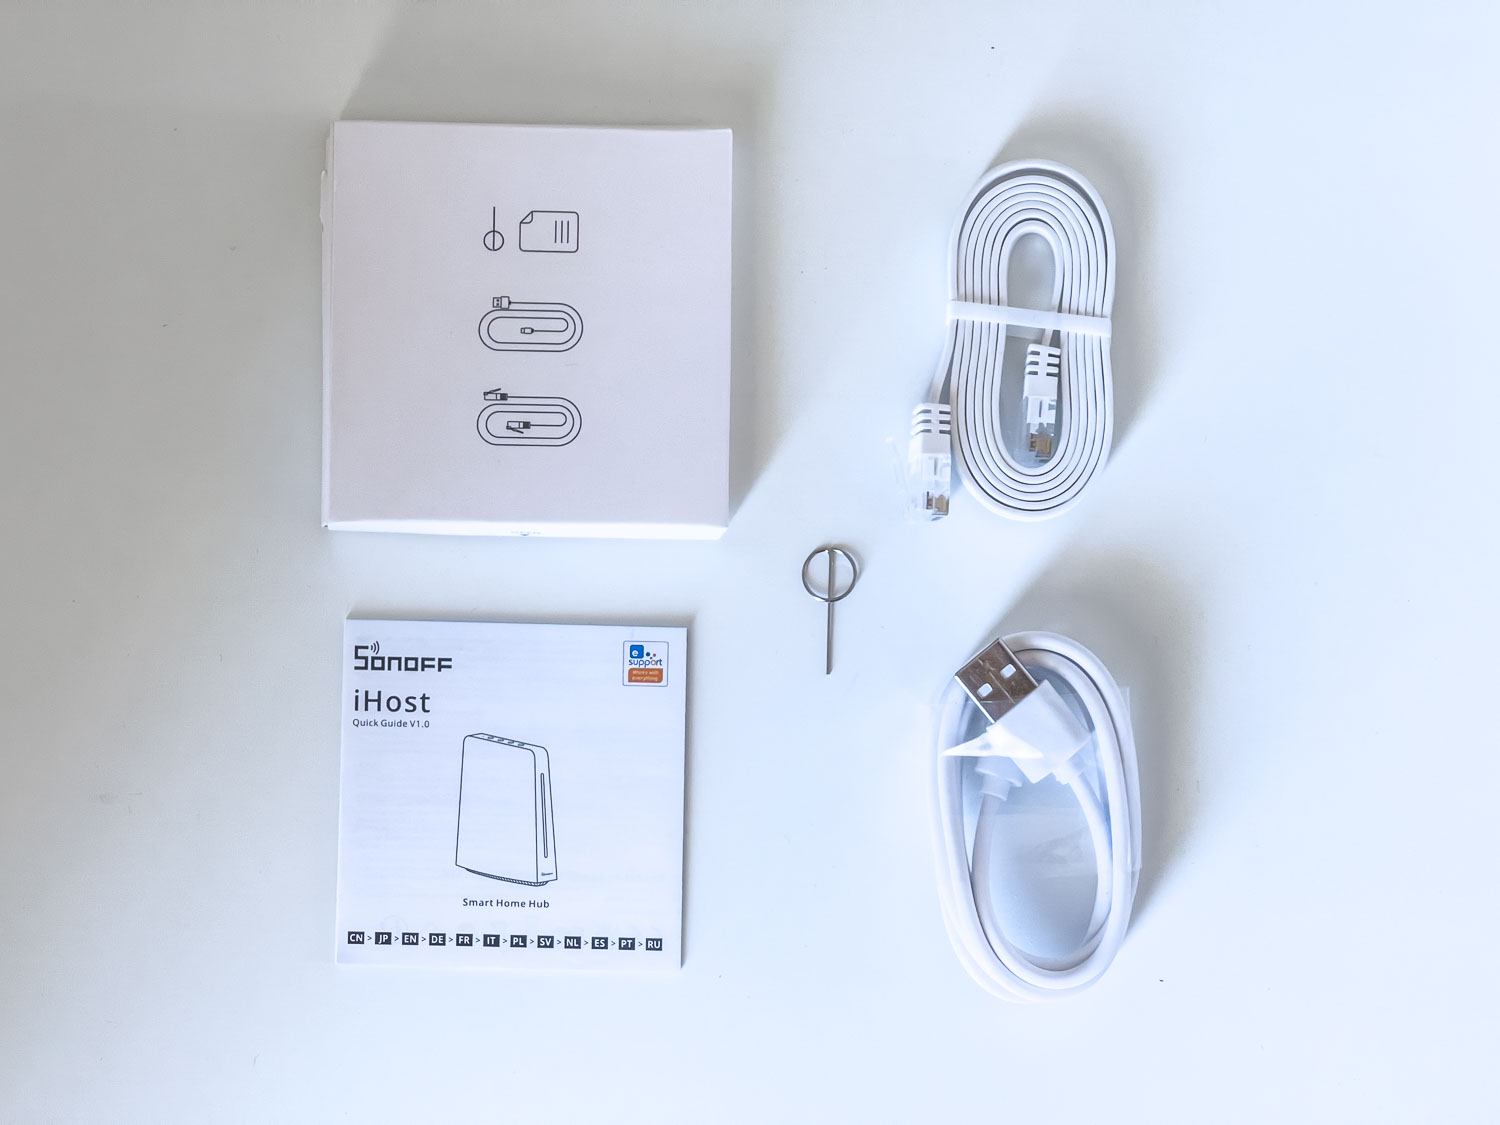
When a company puts such thought and effort into the packaging it creates an excellent first impression. At this stage I have high hopes for the iHost.
Overall I was very impressed with the unboxing experience. It might not quite match up to that of a brand new iPhone, but then we are talking about a product that is 10 times cheaper.
Perhaps my only criticism would be the use of a plastic insert where a cardboard option could have been feasible. I am absolutely an advocate of reducing the amount of plastic that we use.
SONOFF iHost Specification
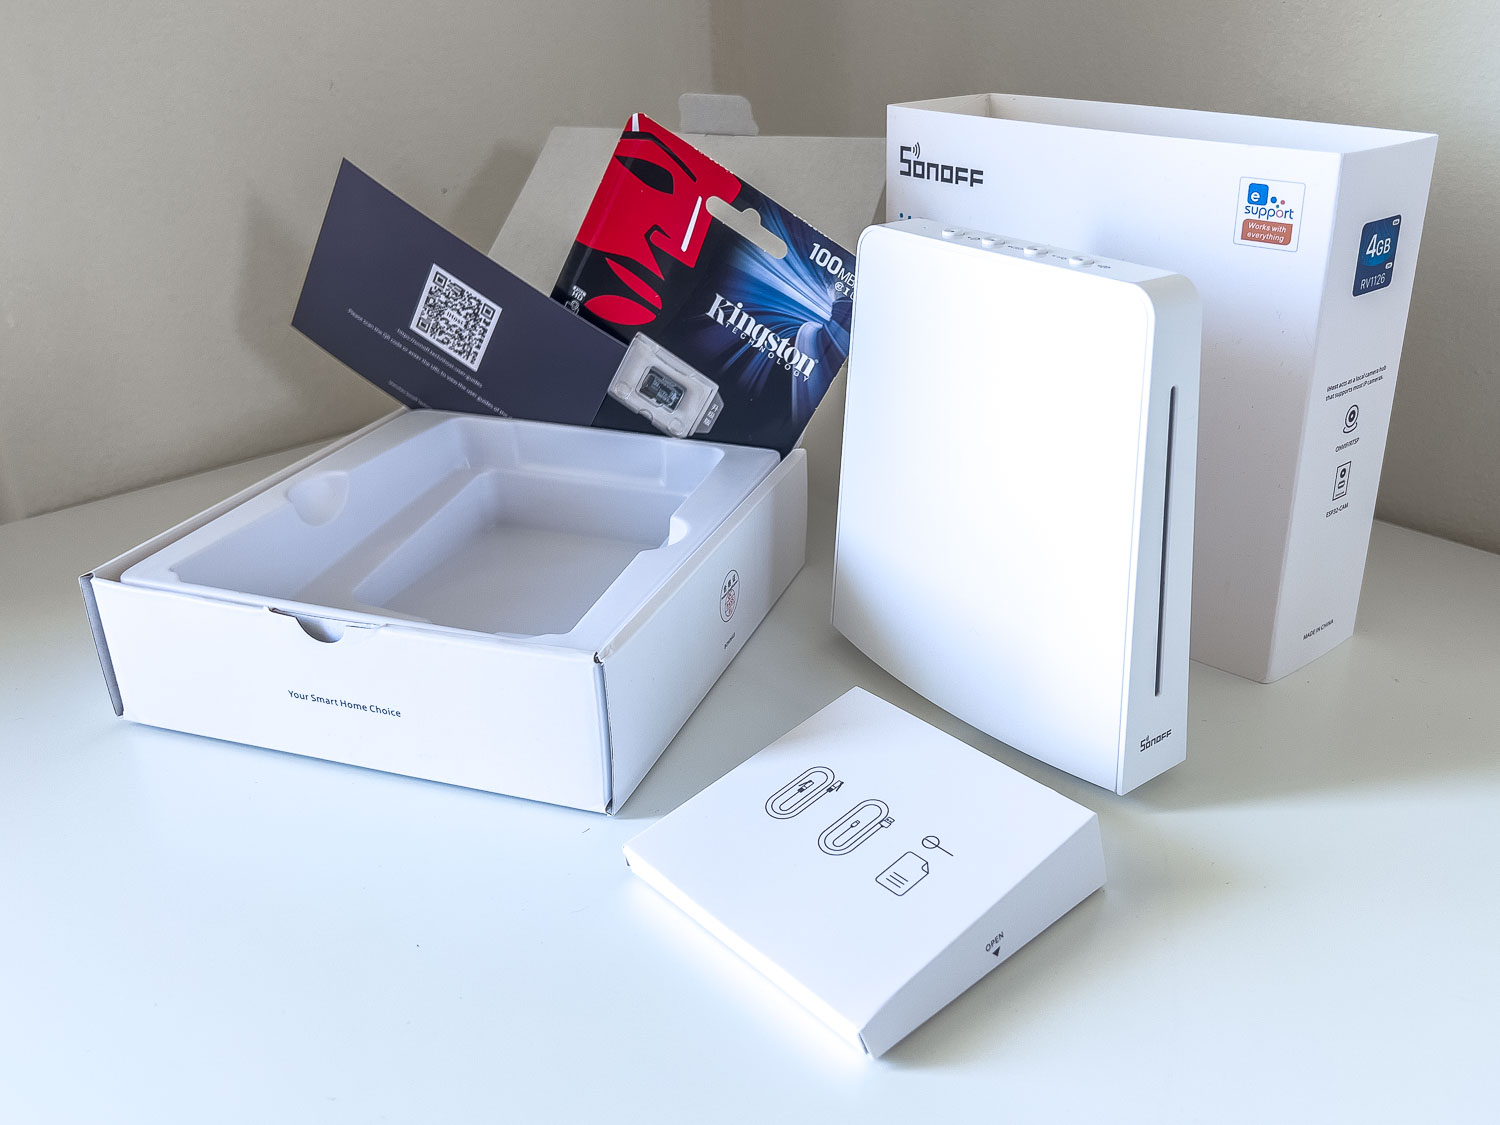
Following unboxing the main iHost unit, you will find the following features:
- A long diffused RGB LED on the front of the unit
- 4x function buttons, including power on/off
- USB-C power supply port
- RJ45 port for 100Mbit Ethernet
- 1x USB-A 2.0 port
- MicroSD card slot
- Reset button (requires the included tool)
SONOFF iHost Teardown
For those interested in a teardown of the technical details, the iHost has the following hardware specification:
iHost RV1126 4 GB RAM model
- Rockchip RV1126 – Quad-core Arm Cortex-A7 @ 1.5 GHz
- SEC210 KLM8G1GETF-B041 – Samsung 8 GB eMMC memory
- SEC210 – K4A8G165WB-BCRC – Samsung 2 GB RAM
- RTL8201F – Realtek 10/100 Mbit Ethernet controller
- EFR32 MG21 – ZigBee IC Silicon Labs
- FN-LINK 6223A-SRD – 2.4G Wi-Fi BT4.2
- YC1175 – Bluetooth 5.2
iHost RV1109 2 GB RAM model
- Rockchip RV1109 – Dual-core Arm Cortex-A7 @ 1.5 GHz
- SEC210 KLM8G1GETF-B041 – Samsung 8 GB eMMC memory
- SEC210 – K4A8G165WB-BCRC – Samsung 4 GB RAM
- RTL8201F – Realtek 10/100 Mbit Ethernet controller
- EFR32 MG21 – ZigBee IC Silicon Labs
- FN-LINK 6223A-SRD – 2.4G Wi-Fi BT4.2
- YC1175 – Bluetooth 5.2
SONOFF iHost Key Features
The SONOFF iHost is a well thought out product, designed to meet the needs of most smart home enthusiasts whilst also pleasing the budget-conscious.
Let’s take a look at the key features of interest:
Private Local Server
SONOFF are placing a lot of emphasis on the iHost’s ability to function securely, without a connection to the internet.
This is one of the most important features of iHost, which sets it apart from other smart home solutions and gives it the ability to compete with solutions such as Home Assistant.
When talking about smart home tech, cloud solutions offer several distinct advantages, primarily the question mark over security but also the longevity of the product.
If you purchase a cloud-based smart home product and the company “just decides” or is forced to cease operations and shut down their cloud services, your fancy smart home product will serve as nothing more than a shiny paperweight.
This is a big problem and is more common than you might think.
SONOFF iHost solves both of this major problems in the same way that Home Assistant does. It provides a cloud-free solution that manages your smart home from your local network. No need to worry about bricked devices.
There has been some discussion around whether or not SONOFF offer the privacy that they claim, especially as they are a far-eastern company.
However as the iHost is fully functional without the need to connect to the internet, you can simply firewall it on your network and then you know for sure that your data is safe.
Simple and Slick Looking Design
The SONOFF iHost is a really nice looking bit of gear. Photos of the device do not fully show how nice it looks sat on your desk next to your router.
The casing is slim, sleek and has a look of quality. I like the minimal design and compact form factor. There is not a Raspberry Pi case on earth that can make a Raspberry Pi look as good as the SONOFF iHost!
The SONOFF iHost is small enough to hide away in many places if that is your preference. But in my opinion this is a device that will compliment the aesthetics of your home (office) rather than detract from them.
There are four function buttons on the top of the iHost and those who like RGB LEDs (who doesn’t?!) will enjoy the elongated and colorful display on the front.
A speaker can be found on the base of the unit, allowing the iHost to produce audible feedback, as well as a microphone on the top. This also paves the way for future voice assistant compatibility.
Alexa… your fired!
On the rear you have a slot for memory expansion by means of a microSD card, a USB 2.0 port, a USB-C port for power and a 100Mbit Ethernet port.
It is worth mentioning that the USB 2.0 port and 100Mbit ethernet are both somewhat technologies of yesteryear.
The choice of 100Mbit ethernet makes sense as for this application, there is not any need for anything faster. However the choice of USB 2.0 could be somewhat limiting depending on what it is used for.
Adding functionality (such as a Z-Wave stick) to this USB port would be more than sufficient, however it is not optimal if you were to use the port for expanding the storage with, for example, an external hard drive.
With that said I believe this choice of hardware is fit for purpose, taking the price point into account.
Those who want huge amounts of storage space for complex home security camera systems will likely be looking for a more sophisticated (and costly) solution, such as running Home Assistant on a dedicated Debian server.
Hardware Specification
The iHost is currently available in two flavours, each containing a different amount of RAM and different processor specification.
The base model RV1109 features 2 gigabytes of DDR4 with a dual-core processor clocked at 1.5 GHz, where the upgraded model RV1126 features 4 gigabytes of DDR4 with a quad-core processor also clocked at 1.5 GHz.
At the time of writing the RV1126 is just $20 more, so I would certainly recommend getting the more powerful model. This is a small price to pay to ensure that you are future-proofed against any updates.
Both models feature an onboard eMMC memory chip giving 8 gigabytes of internal storage, which can be further expanded with a microSD card.
Wireless Compatibility
The SONOFF iHost comes with WiFi and Zigbee compatibility out of the box.
I am a little biased here as these are the two primary wireless protocols I used in my home setup. This means that everything in my existing configuration was immediately compatible with iHost.
However this may provide a bit of a road block for those using other protocols, such as Z-Wave.
A Realtek RTL8723 module provides WiFi connectivity and also features Bluetooth 4.0.
Web Dashboard and Mobile App
On the software side, SONOFF has opted to provide access to the iHost dashboard by means of a web interface and mobile app.
This tried and tested means of access has been proven to be very successful in the Home Assistant echosphere and I personally like this concept a lot.
It gives you the freedom to control your smart home by any means that you choose.
You can log in and access your smart home directly from any of your computers at home, or from your mobile phone or tablet by using the app.
You could also configure a tablet to act as a central controller for your smart home. Many people like to mount a tablet to the wall somewhere in the home in order to provide a futuristic touch screen interface to the home.
Like with Home Assistant, the SONOFF iHost makes this possible.
Will SONOFF iHost run Home Assistant?
The SONOFF iHost is technically capable of running Home Assistant, however it is not officially supported.
This has been confirmed by Daniel Zhan from iTead:
“Yes, it is possible as the iHost is based on Linux development. However, it is not recommended to do that as we are not sure you will succeed or not, and there is a risk that you may encounter issues that my team can not help out with. Once you load your own OS, you are not able to return to iHost official firmware as our firmware is confidential and not open to the public.”
Daniel Zhen – SONOFF | From the Home Assistant Forum
Unsurprisingly the community have dived on the opportunity to port Home Assistant over to the iTead as there is no doubt it provides an excellent platform for a Home Assistant hub. A platform that I personally would be proud to display on my desk.
Officially, the iHost does not run Home Assistant… yet.
The iHost is light years ahead of the Home Assistant Yellow in terms of aesthetics and although the Yellow is a great concept, next to the iHost it kinda looks like a school project (sorry HA devs!).
For me the Home Assistant Yellow fails “the significant other test” where the iHost passes with flying colors!
The SONOFF iHost is designed to be used with its own proprietary software, which has similarities to Home Assistant. It is clear that the development of the iHost has been influenced by the Home Assistant ecosphere.
The main question for most Home Assistant users at this stage will be whether or not it is worth a migration from Home Assistant to a new uncharted platform.
The answer to this question will depend on what kind of Home Assistant build you have. Casual Raspberry Pi users who just want a smart home hub solution that is secure and works offline may very well find this an exciting prospect!
Setting Up and Using The SONOFF iHost
In stark contrast to even the most basic Home Assistant setup, getting connected to the iHost is extremely easy and it is clear that SONOFF have worked hard to make sure the process is pain-free for the end user.
I had zero difficulties getting to the login screen by following the simple steps given in the user guide:
How to Get Started with the SONOFF iHost
- Unbox the iHost and locate the included USB and Ethernet cable.
- Connect the USB cable to the USB-C port on the iHost and a 5V USB power source.
- Connect the Ethernet cable to the iHost and a spare port on the router.
- Power up the iHost by pressing the power button on top of the device.
- Open a browser and navigate to http://ihost.local/
Note that the iHost does not come with a 5V power supply, and I fully support this decision. There is far too much electrical waste in this world and I am all for repurposing those spare iPhone chargers!
Also your router may have a USB port on the back, making it super-easy to power the iHost. Simply connect the USB-C port of the iHost to the USB-A port on your router and you are good to go.
Powering up the SONOFF iHost
When the iHost first powers up, the LED indicator on the front will show red indicating that the network is not connected. After a couple of seconds when the network connection has been established, it will turn to blue.
The status of the device is also indicated by some pleasant sounds that emit from the built-in speaker, a pleasant surprise and something missing from Home Assistant, at least in my experience.
Connecting to the SONOFF iHost Dashboard
Opening a browser and navigating to the http://ihost.local/ address will take you to the iHost login screen. Simply enter your desired password and click the Login button.
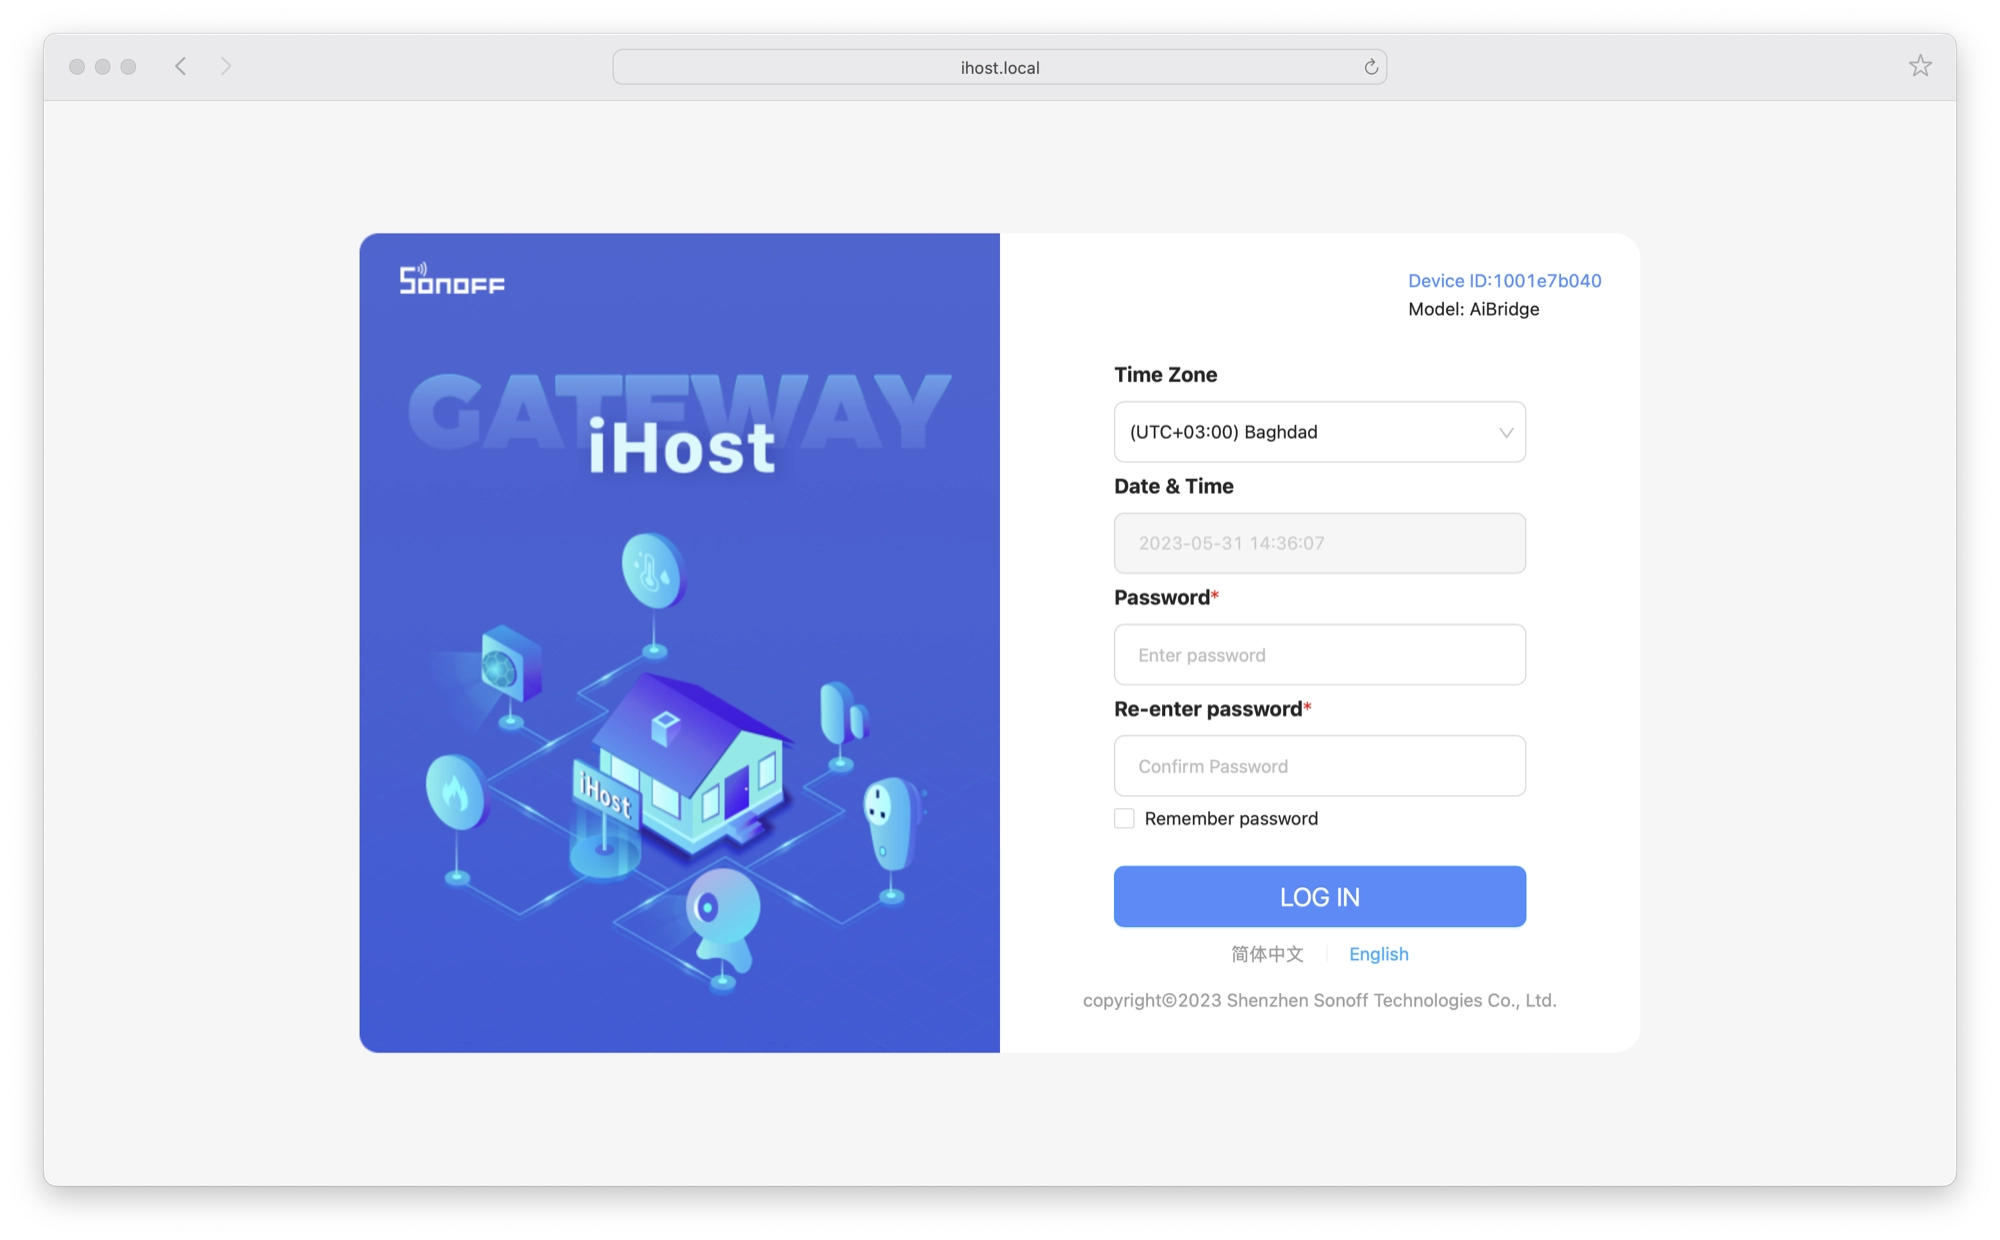
Once logged in you will be presented with the dashboard, which is not unlike Home Assistant and features the main navigational tools on the left with a main workspace area to the right.
I was impressed by the speed that the pages loaded, it seemed slightly quicker than Home Assistant, although this would not be a reason to choose iHost over Home Assistant because both options are certainly quick enough.
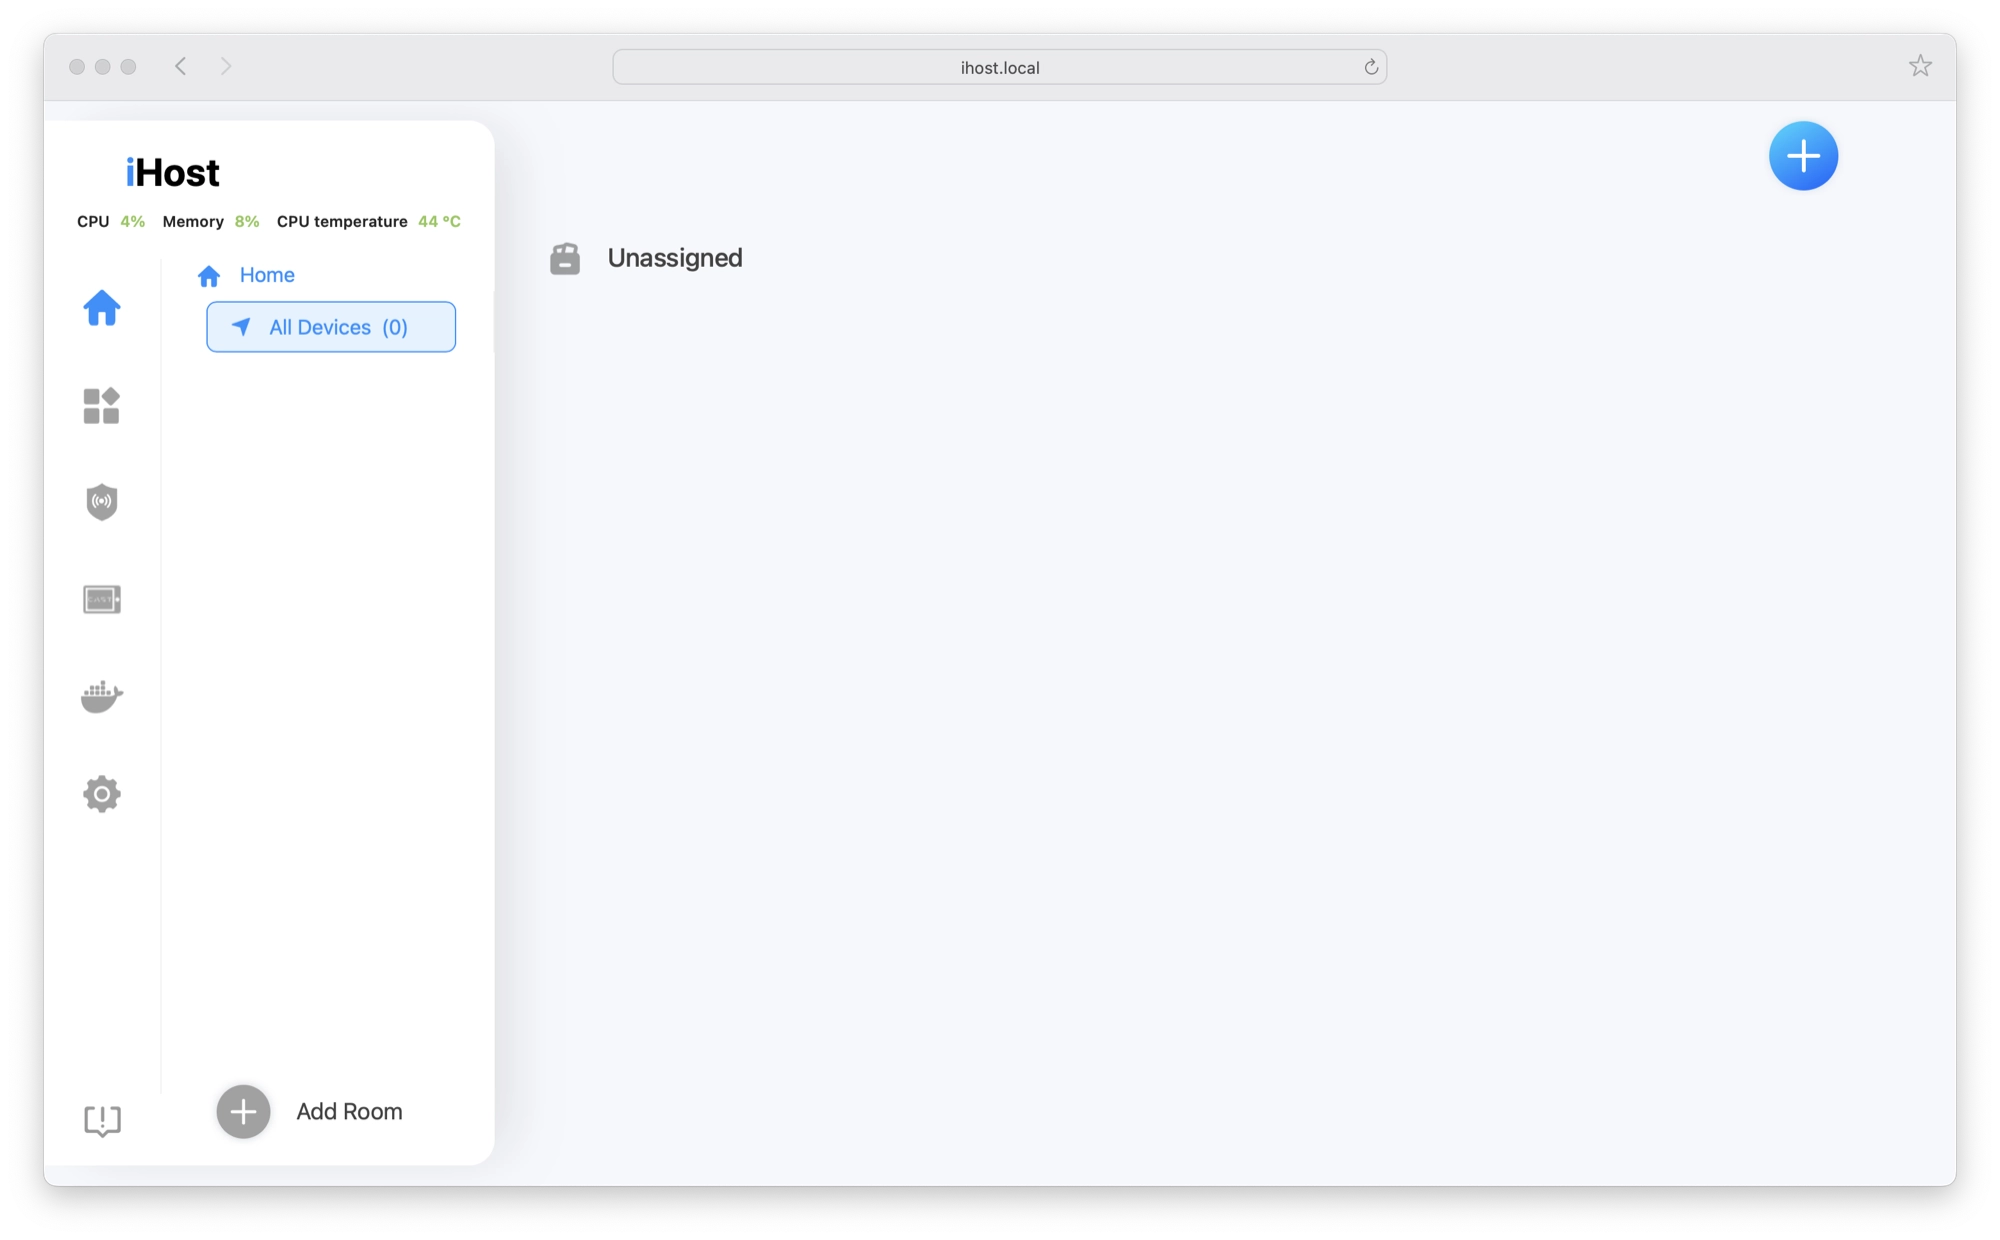
At the top of the left-hand sidebar there are some details about CPU, Memory and CPU temperature. Personally I think this is a bit of strange decision.
The iHost is clearly trying to take the concept of Home Assistant and deliver it in a neat package, without the need for complicated setup processes.
It also adopts many Apple-esque features of design both in the way that it looks and functions, as well as the user experience. Having system performance displayed in this way does not conform to minimalism and adds unnecessary clutter.
There should be no need to display such information to the standard consumer user, as the device should manage these resources without the need for the consumer to have to change something.
This makes me wonder whether the end user is expected to monitor these resources and leaves me with the question, will this device overheat?
After clicking some buttons and poking around the interface for a couple of minutes, I felt that I had managed to explore everything there. This is very much in contrast to Home Assistant, whereby I still don’t think I have exhausted the options after several years of use!
SONOFF iHost Dashboard and Options
At first you may think that the iHost is a little underwhelming and lacks options. This is true to a certain degree but I believe this is intentional for two reasons:
- It makes the iHost super-easy to use.
- The iHost is a very new product and the software is still being developed.
I have spent a number of years blogging about Home Assistant and helping people overcome issues, many of which are encountered during setup and installation.
I understand the pain points that people have with Home Assistant and I believe what SONOFF is trying to do is bring a product to market that caters to the less technical group of people who want the features of Home Assistant, as well as the casual consumer looking for more than a couple of smart bulbs and a mobile app.
In short, from my experience, there is a gap in the market for this product for sure and I don’t think it is a bad thing that the interface is more basic when compared with Home Assistant. I actually think it is the ideal choice for filling the gap in the market.
Let’s take a closer look at the options on the iHost dashboard:
Home
The Home screen is the main dashboard area where you can see all of your devices. There are options to add another device or create a room.
You can use rooms to group devices into their respective rooms, making everything a little more neat and tidy.
Clicking on a device reveals a nice looking control panel that slides out from the right-hand side of the screen, which you can use to change the device properties.
I like the fact that all device properties can be accessed in a single place, I prefer this to the solution offered by Home Assistant, whereby color and brightness are on seperate tabs.
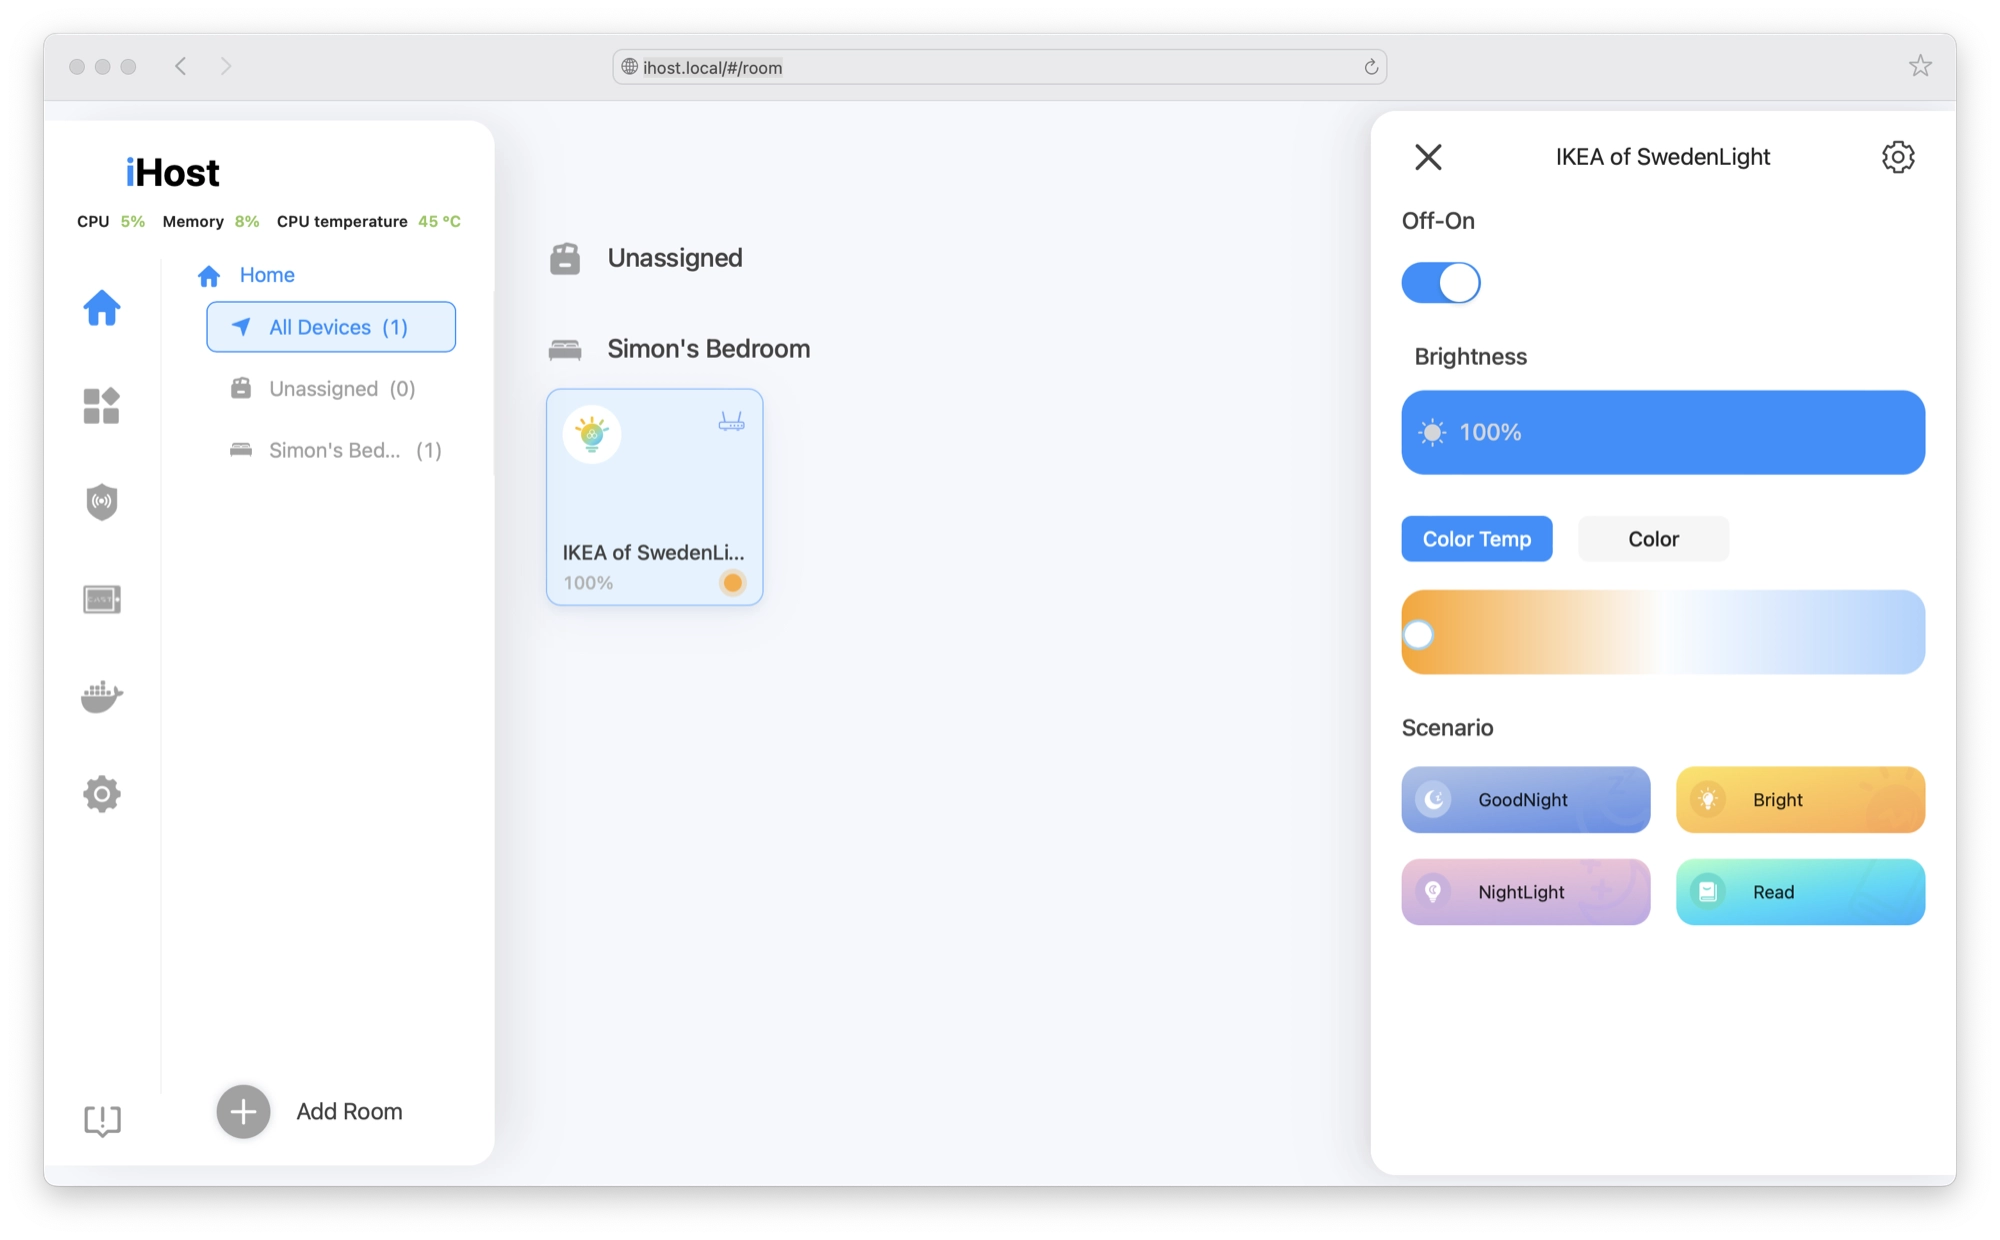
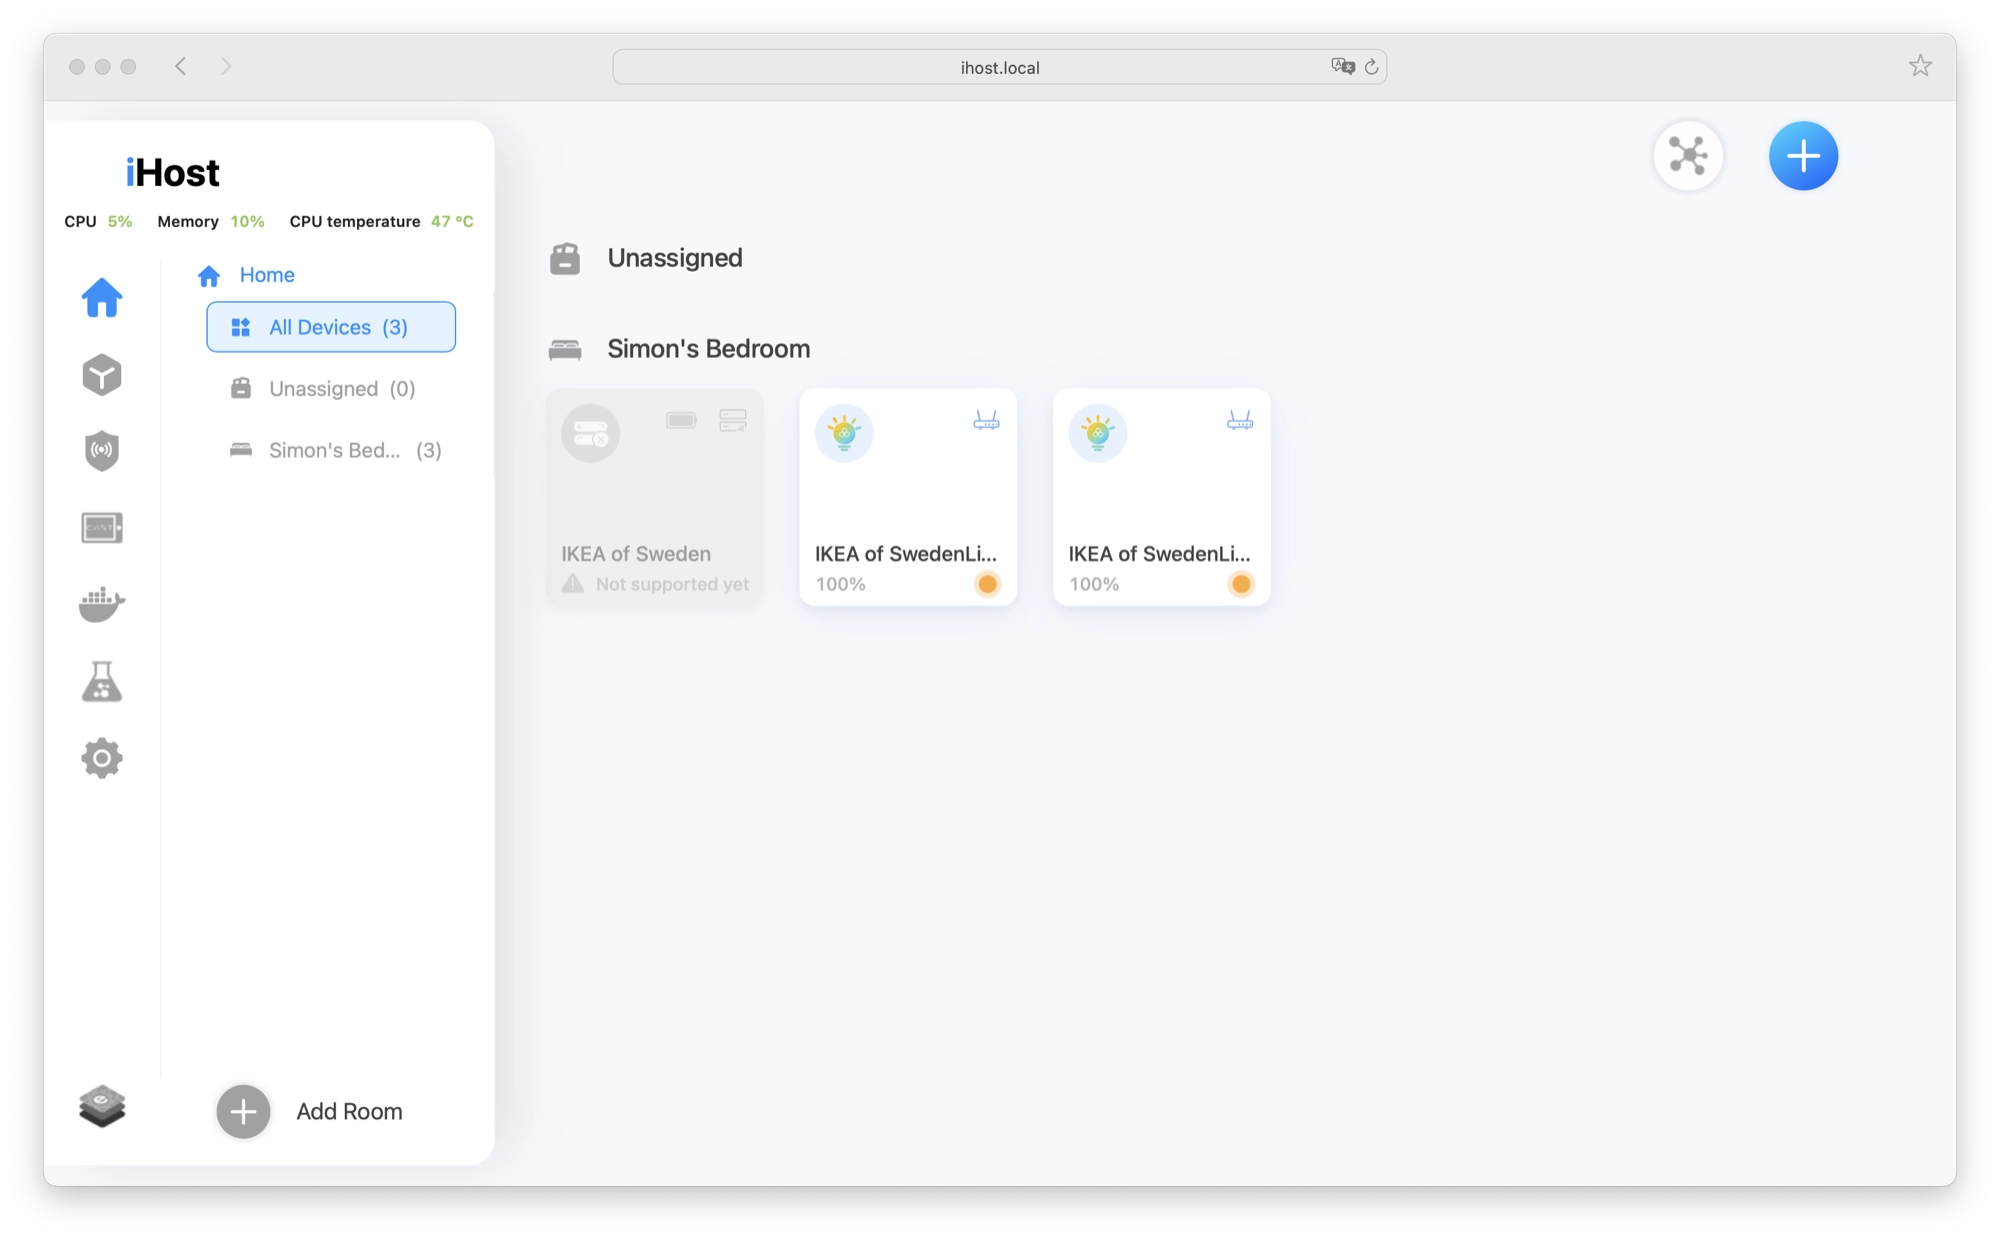
One disappointment I had is that unfortunately not all Zigbee Devices are supported yet. As of now I am unable to connect my IKEA bulbs to an IKEA dimmer switch, meaning I cannot control my bedroom lights.
With that said, I am sure device support will improve in time as at the time of writing, the SONOFF iHost is a relatively new product.
Scene
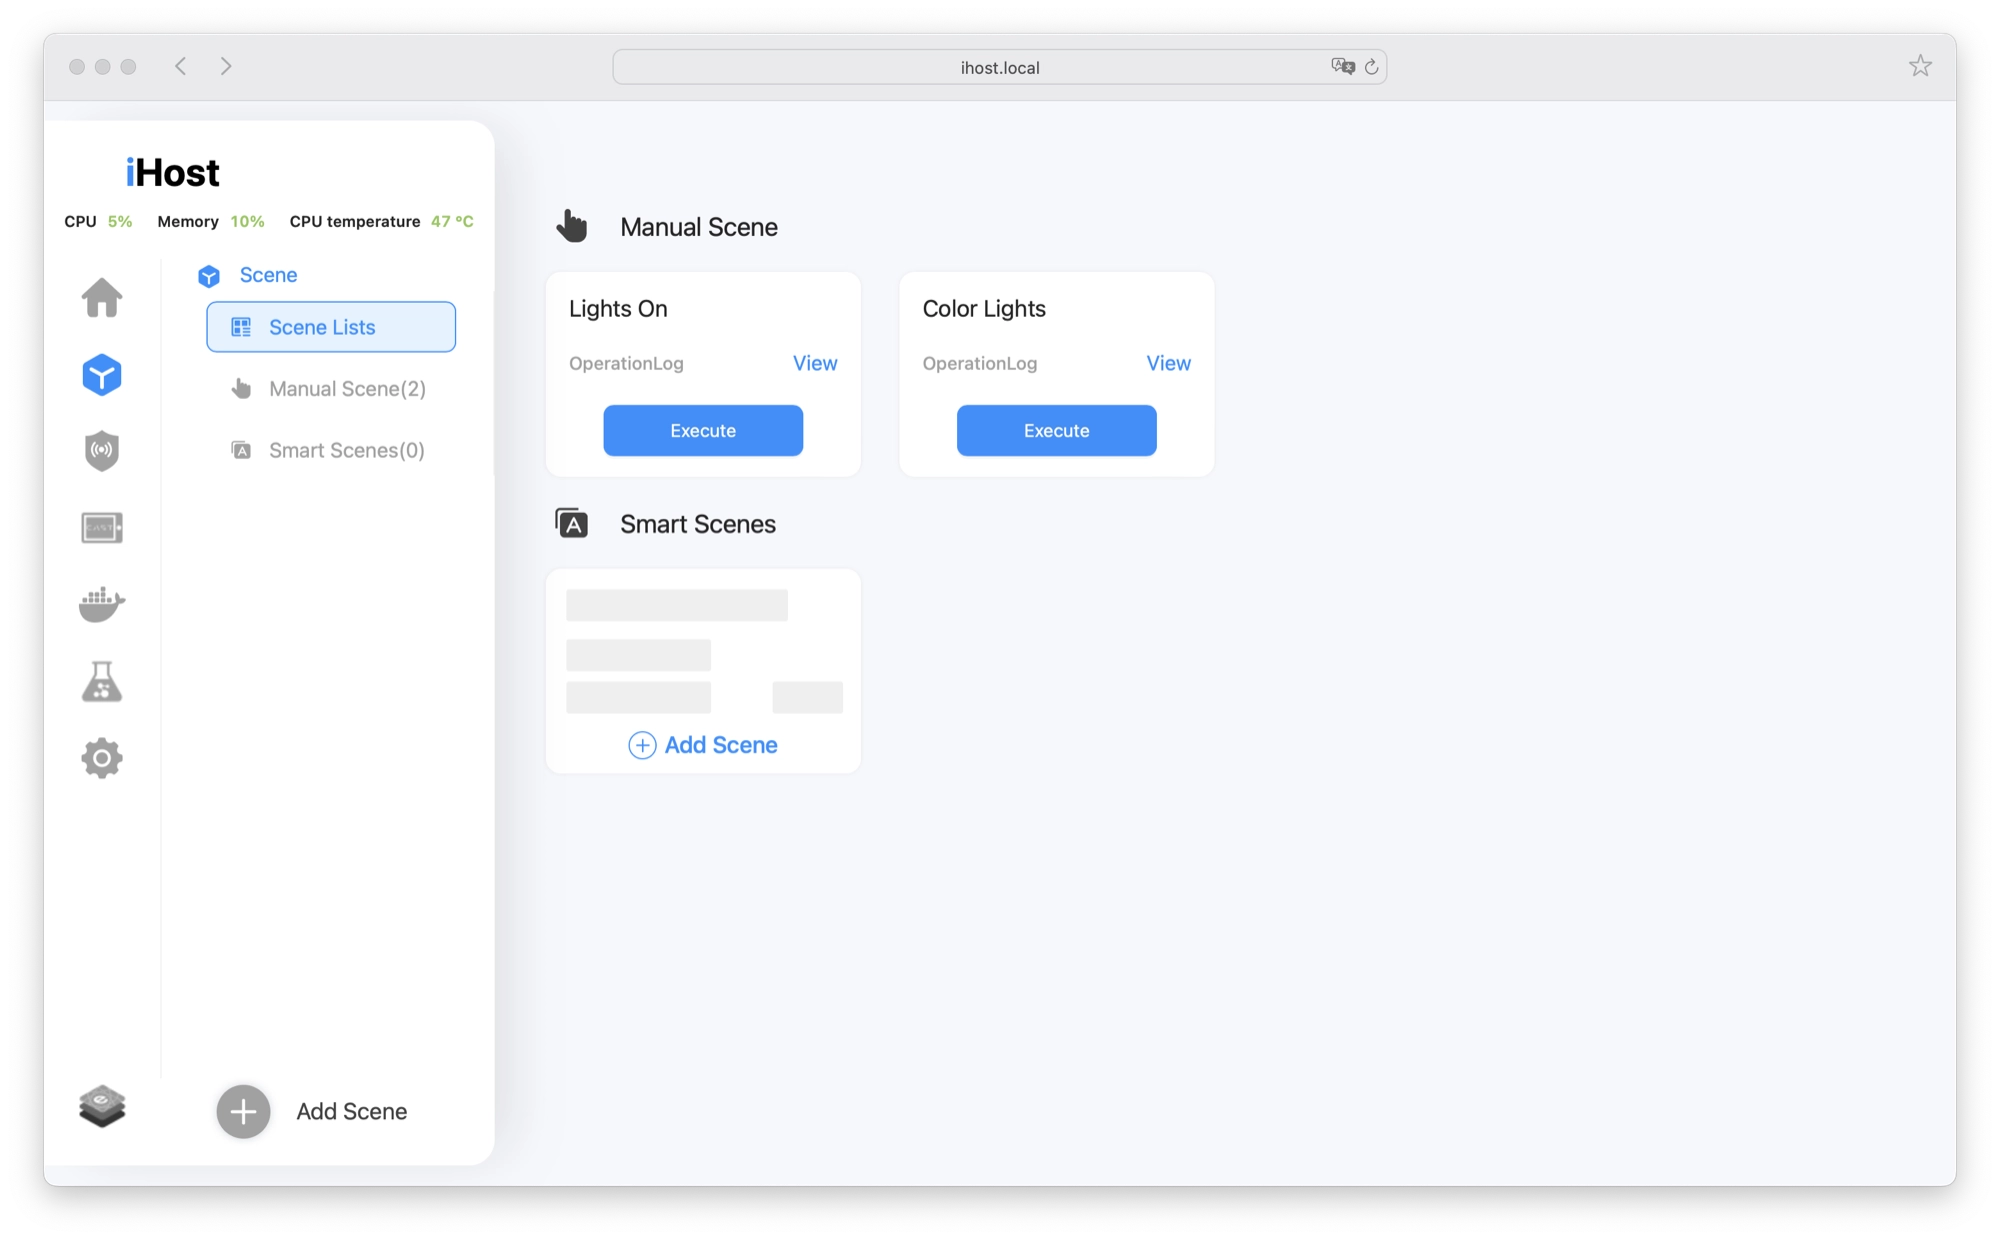
The scenes menu presents you with an easy to use scene builder that you can use to automate your smart home.
On the main page you can see all of the scenes in your system as well as execute the ones that are set to be executable from the dashboard.
You can use the scene builder to link devices together, for example you can link a smart switch to a smart bulb so that when the switch is pressed, the bulb turns on.
You can also control the other attributes of the device such as the color and brightness of the bulb. For example two different switches could turn on the same light but in a different color or brightness.
Creating a scene is really super-simple. If you are familiar with If This That Then (IFTTT) then you may notice some similarities, as if SONOFF has been inspired by the ease of use that IFTTT offers.
First you simply give your scene a name. Next, choose a trigger that will activate the scene, such as pressing a smart switch. Lastly, choose the devices and the settings that you want to activate when the scene is called.
In the simple example below, tap to run allows the end user to activate the scene from a button on the scene dashboard. This scene turns on two IKEA smart bulbs and sets them to 50% brightness.
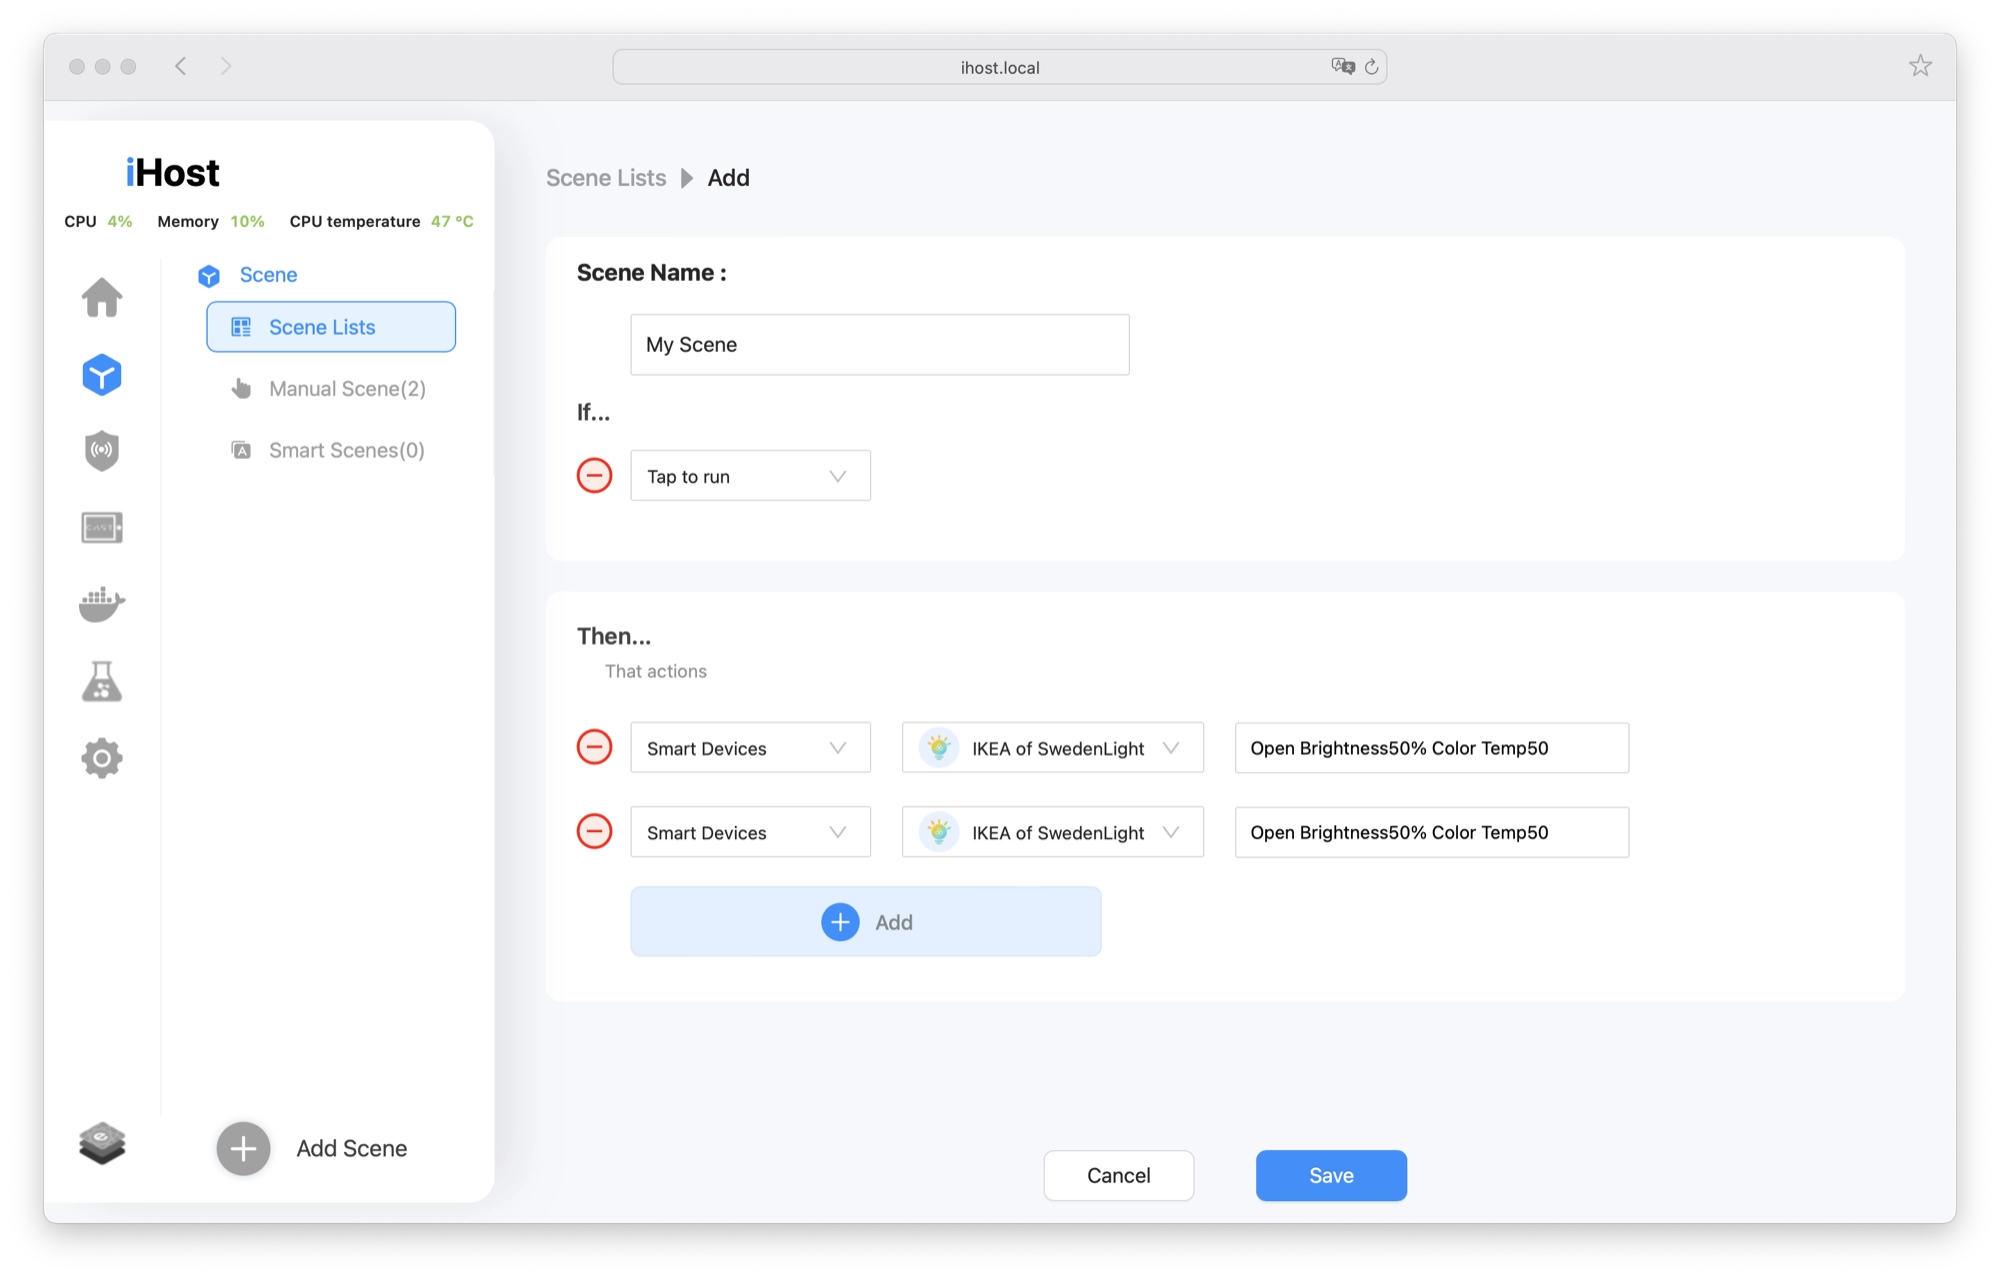
You can of course set the trigger to be an actual physical switch, however unfortunately at the time of writing my IKEA dimmer switches are not yet supported, therefore I cannot include a demo of this in the article!
I am a little disappointed about that, seeing as I already use the SONOFF Zigbee stick with Home Assistant and have no problem using the switches with that setup.
However since I originally published this article, SONOFF have sent me their own SNZB-01P wireless switch and I must say it works fantastically well with the iHost! Click here to check out the review if you are looking for a great smart switch for your iHost.
Smart Security
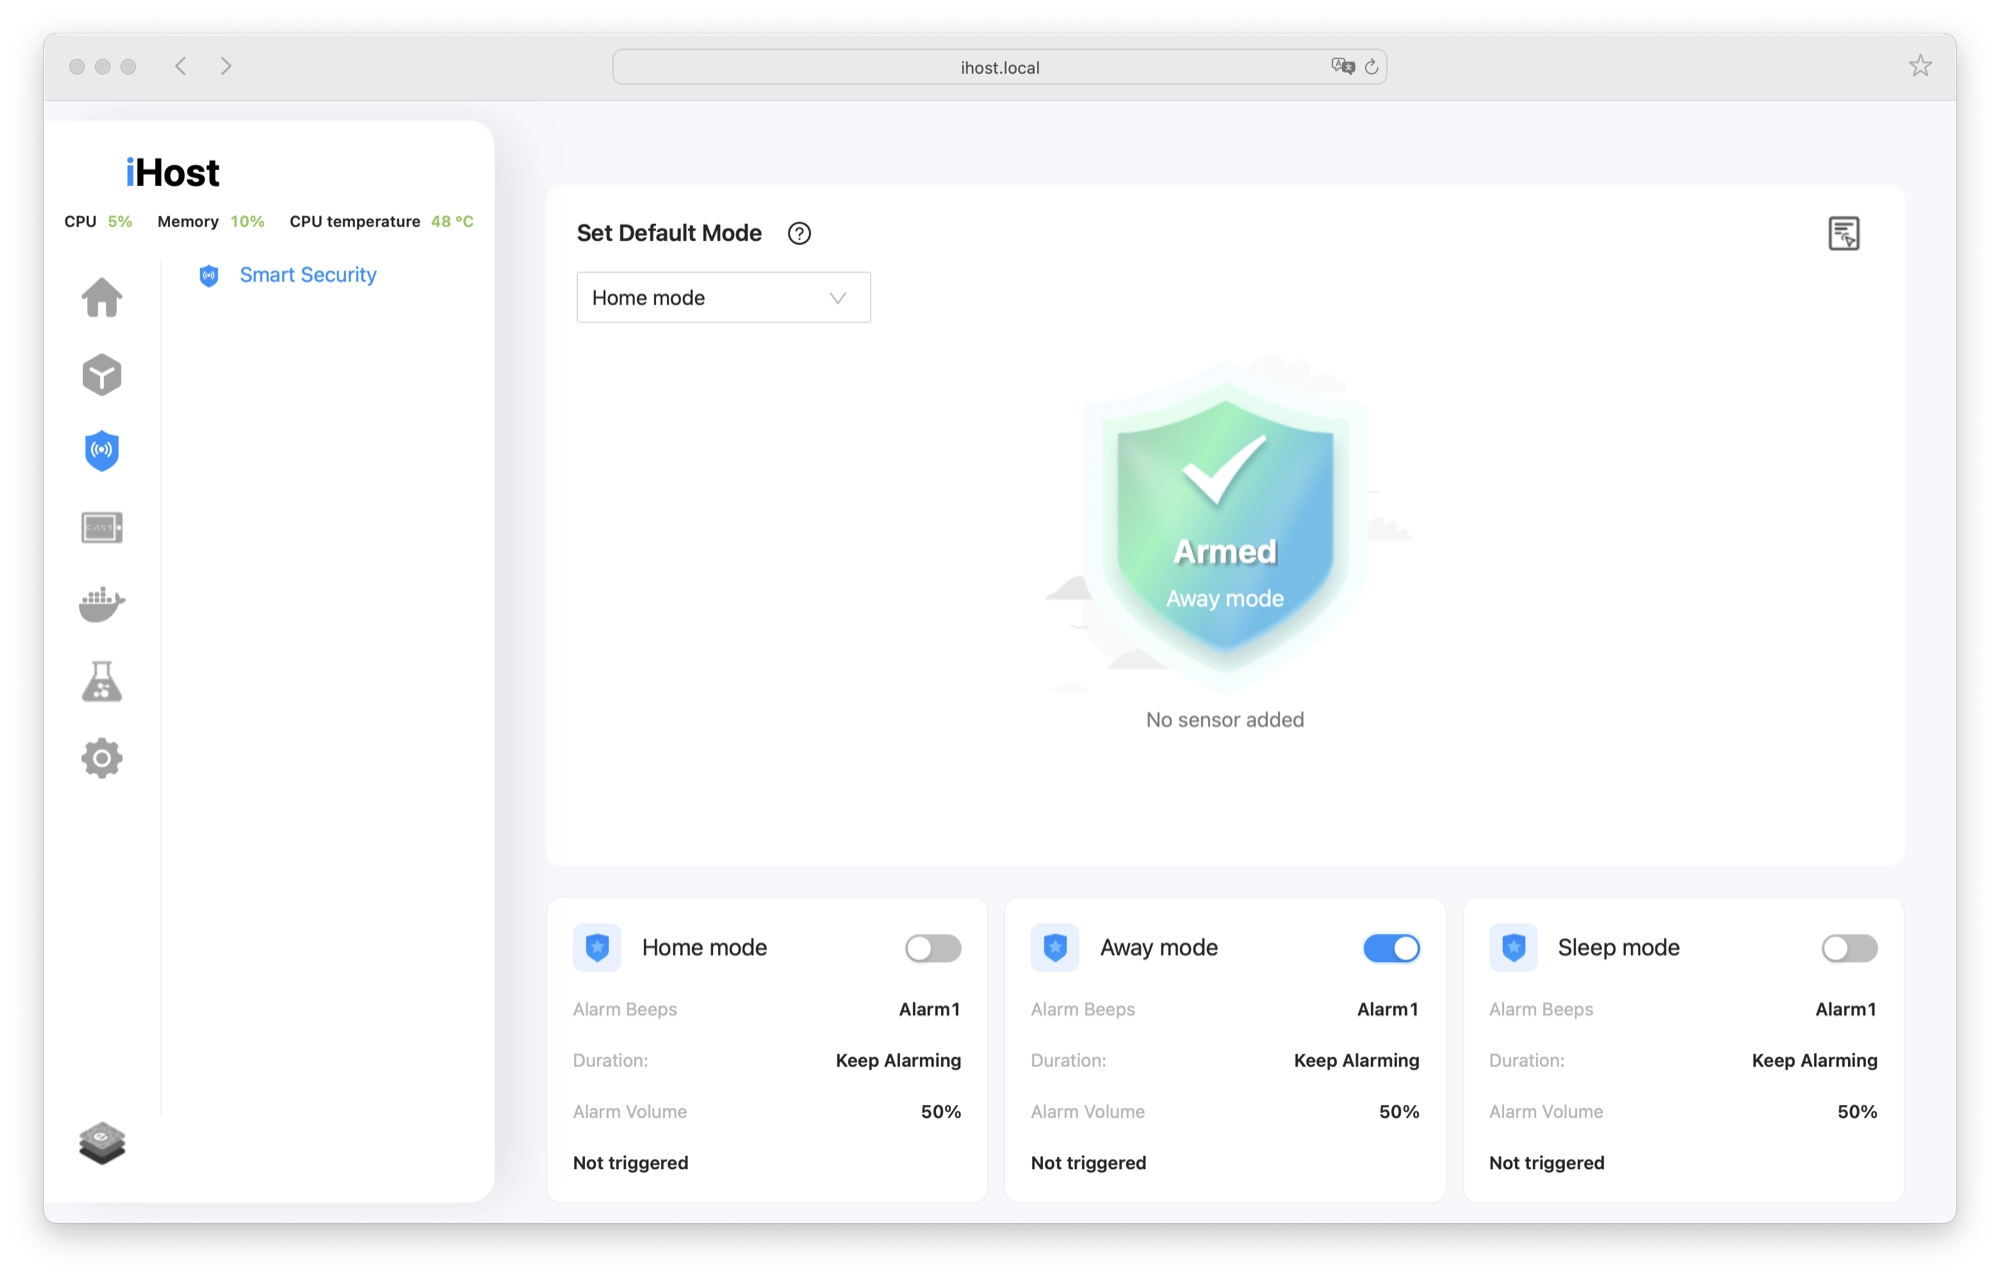
The Smart Security panel allows you to integration your SONOFF security devices in order to create a unified home security system. It makes used of the built-in speaker and can even sound different sounds such as an alarm or beeper.
There are three available modes that you can customize, including the name, choice of sound, volume of sound and how long the alarm sounds for.
You can choose one of the three modes when arming security and you’ll hear a sound when the security features are enabled and disable. The sound is much like the sound of a car locking and unlocking, which is rather fitting.
In addition there is also an activity log available that is capable of storing 2000 entries and can be sorted by by date.
Cast
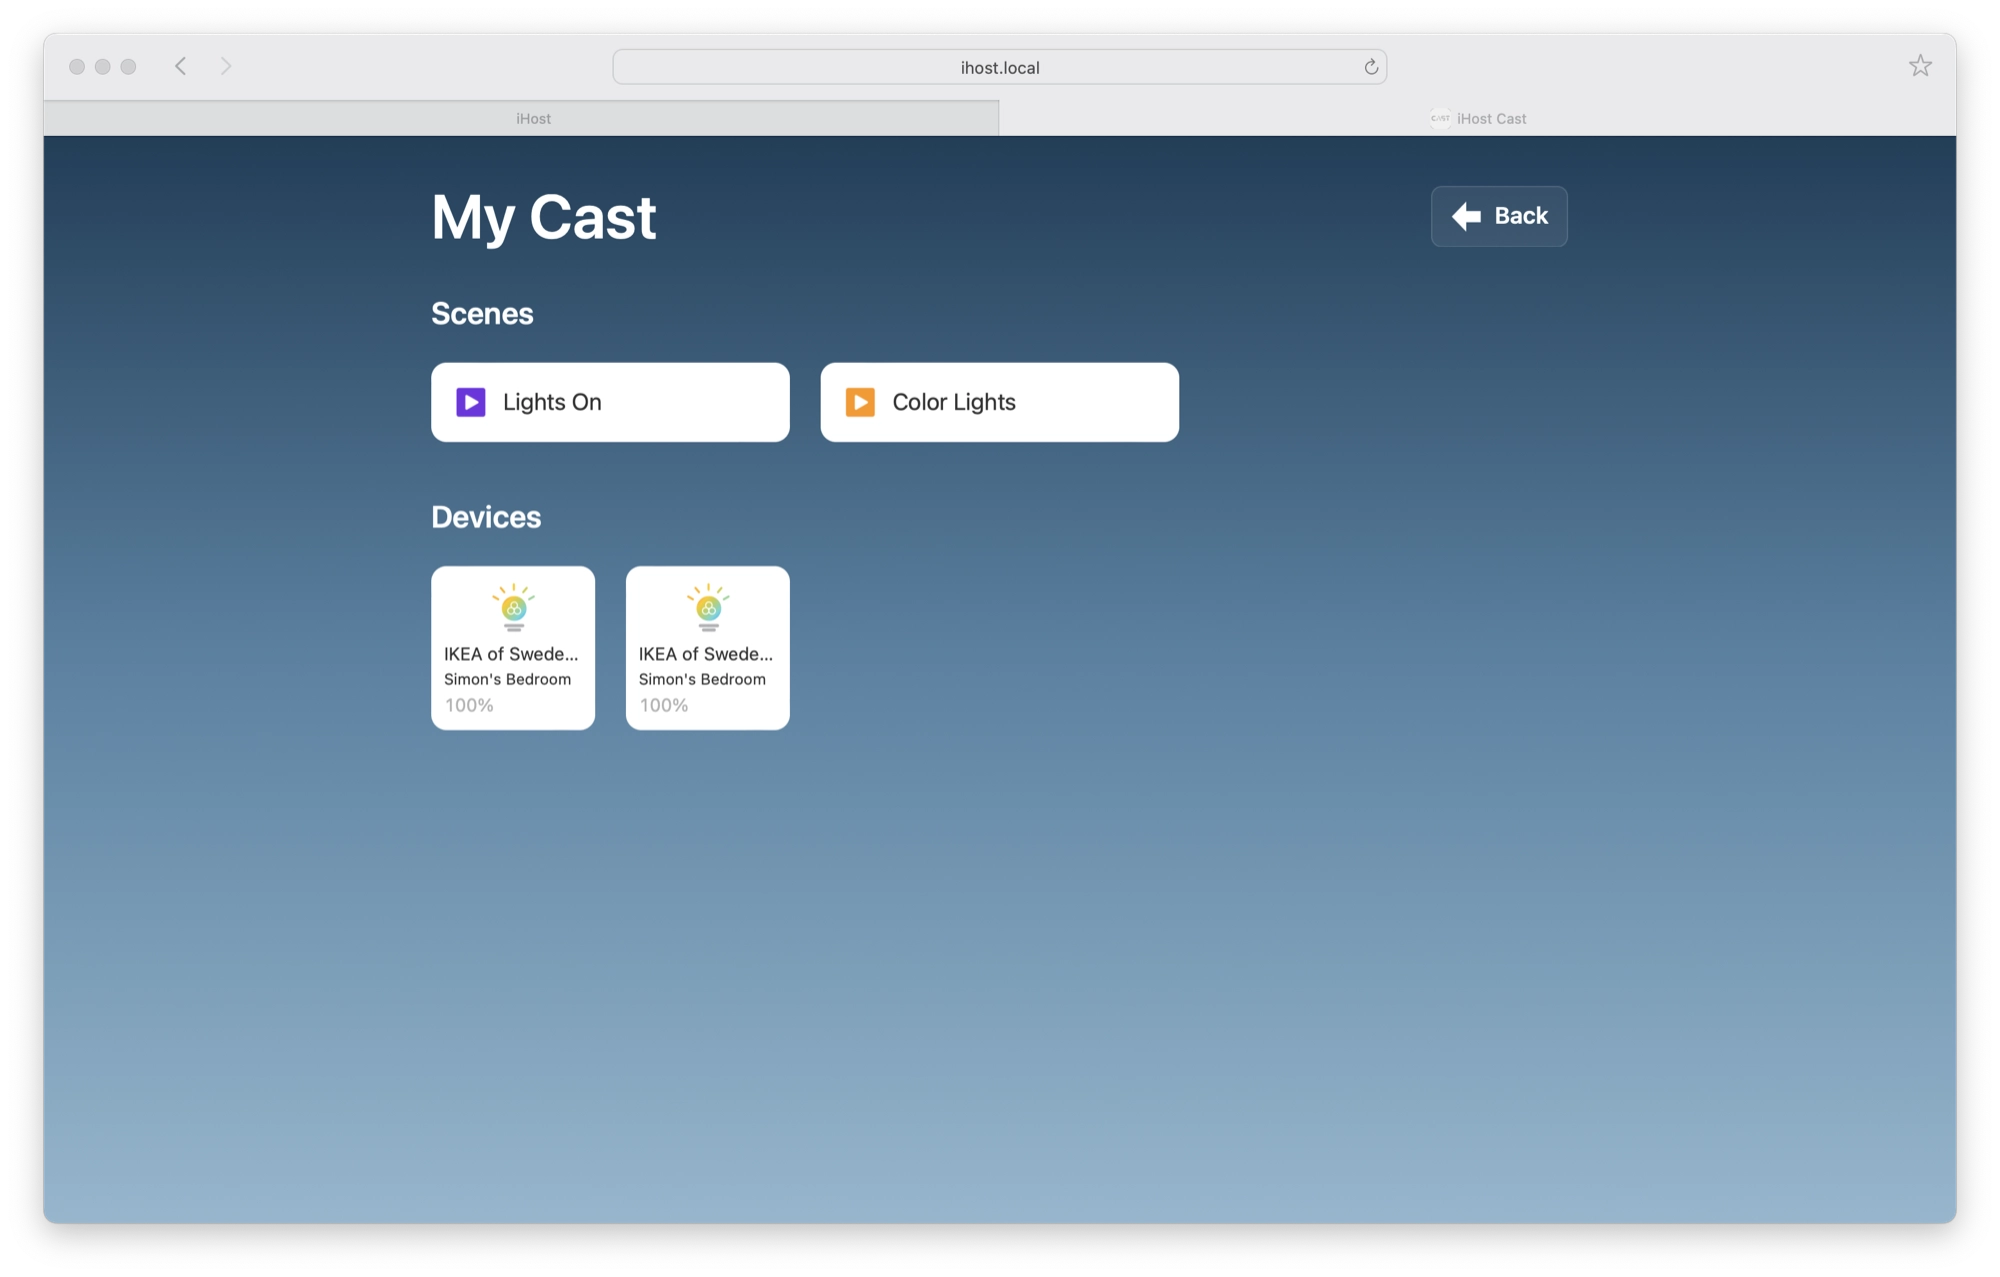
The Cast feature of the SONOFF iHost is basically a dashboard builder, ideal for if you want to mount a flashy tablet to the wall of your house somewhere.
It allows you to choose devices and scenes to include on your dashboard, as well as additional features such as the security modes.
Once you have created a dashboard, you can access it from a browser using the URL http://ihost.local/cast
This will take you to the main dashboard screen and from there you can choose to display any of the dashboards that you have created.
I really like the idea of this cast feature and it has been implemented quite well. It is easy to use and does the job required without being overly complex.
However I am a little disappointed with the amount of configuration options. There does not seem to be much thought behind color schemes and there are no options to change the way the dashboard looks.
With that said this feature is billed as a new feature, so let’s hope the developers continue to work on it and add some more customization options.
Add-ons
The add-ons menu is a place where you can add, remove and manage your add-ons. You can also view the remaining space on the microSD card.
Interestingly the developers have made it obvious that Docker is used for managing add-ons. You don’t necessarily need to understand anything about Docker to use the add-ons store, but it is clearly another nod towards Home Assistant.
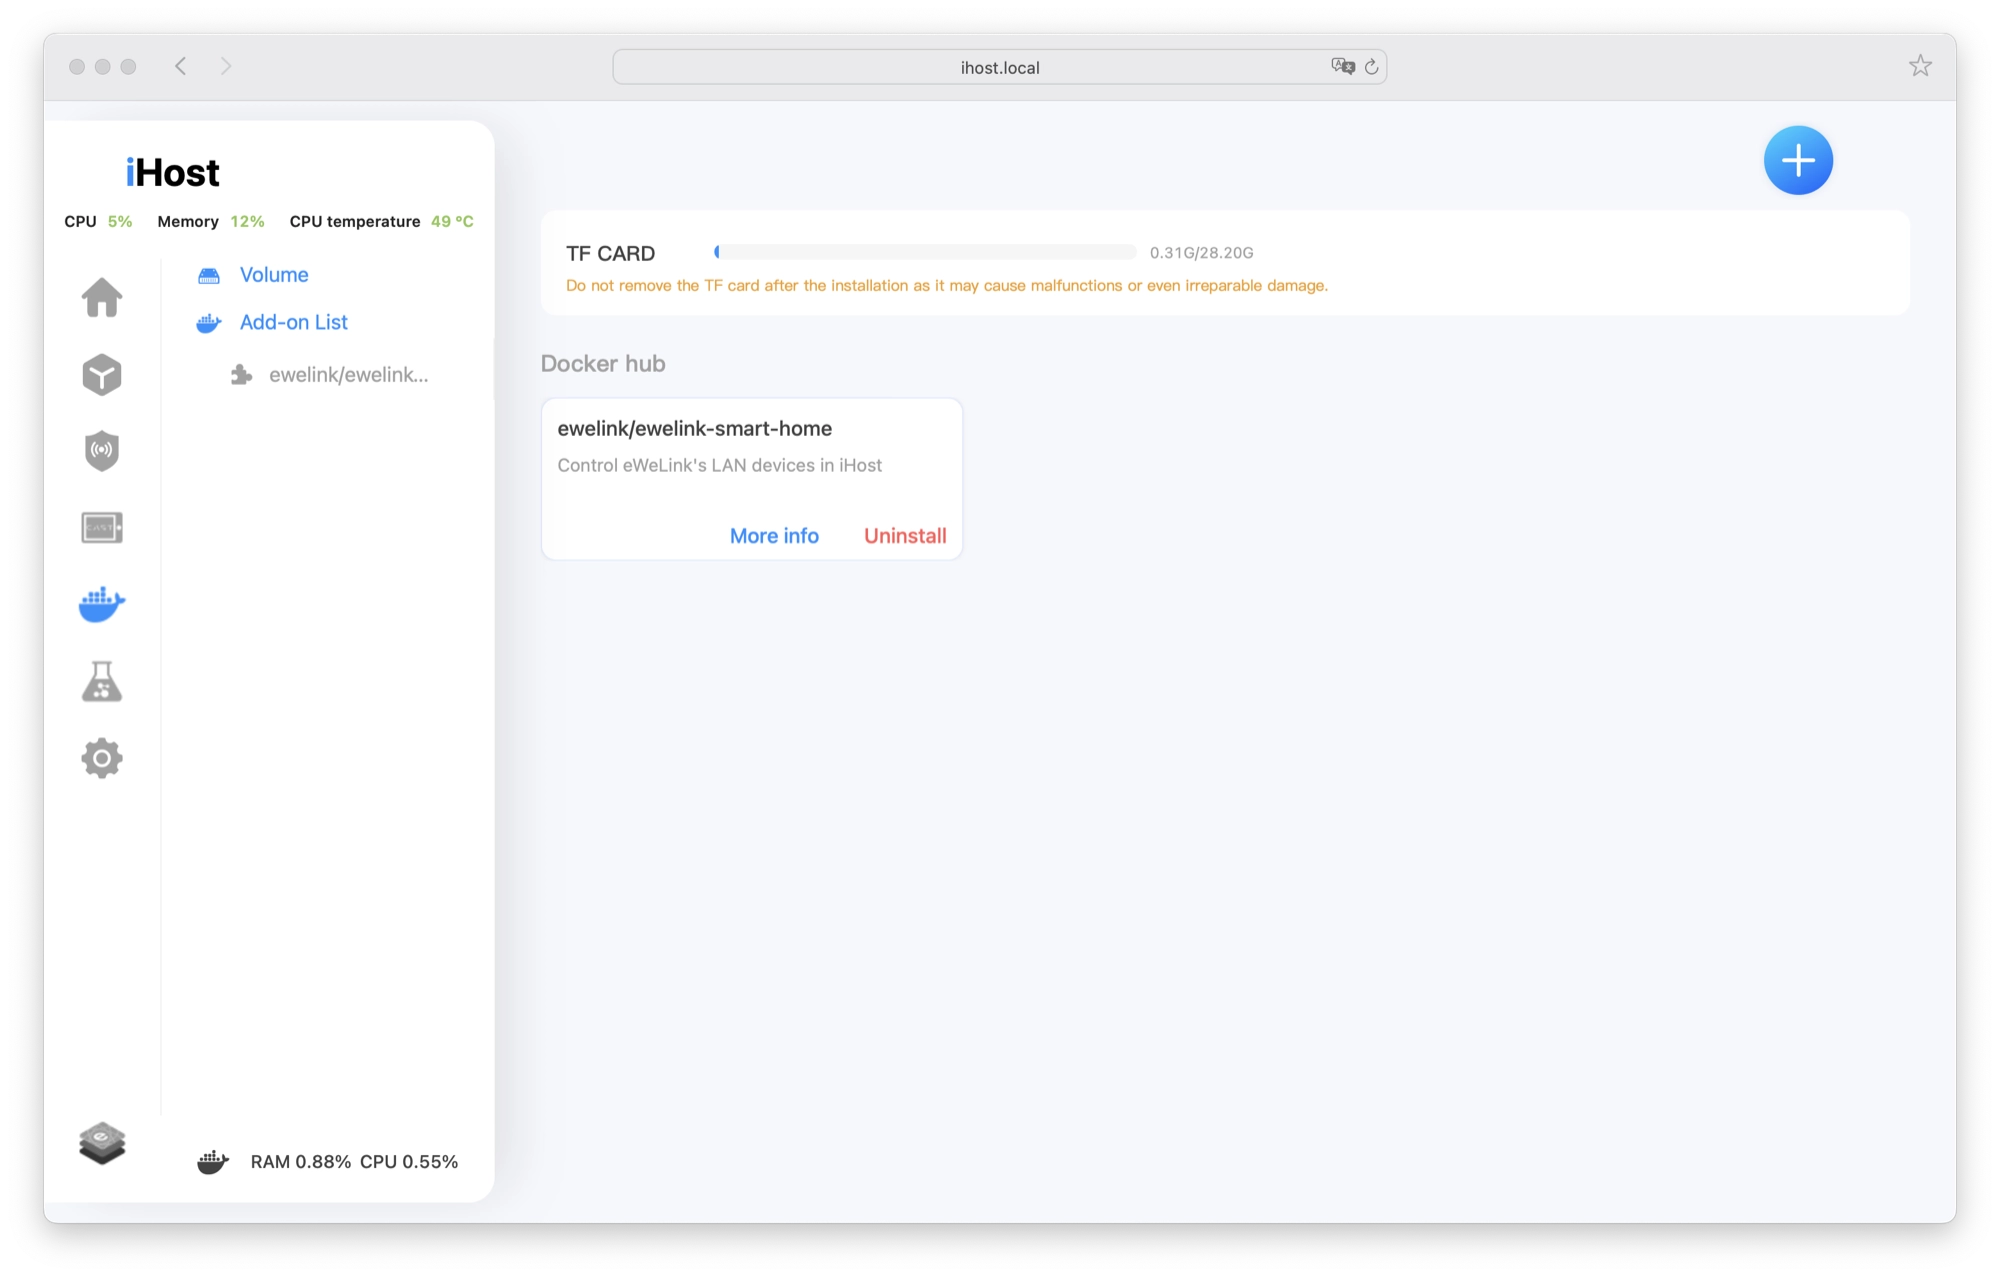
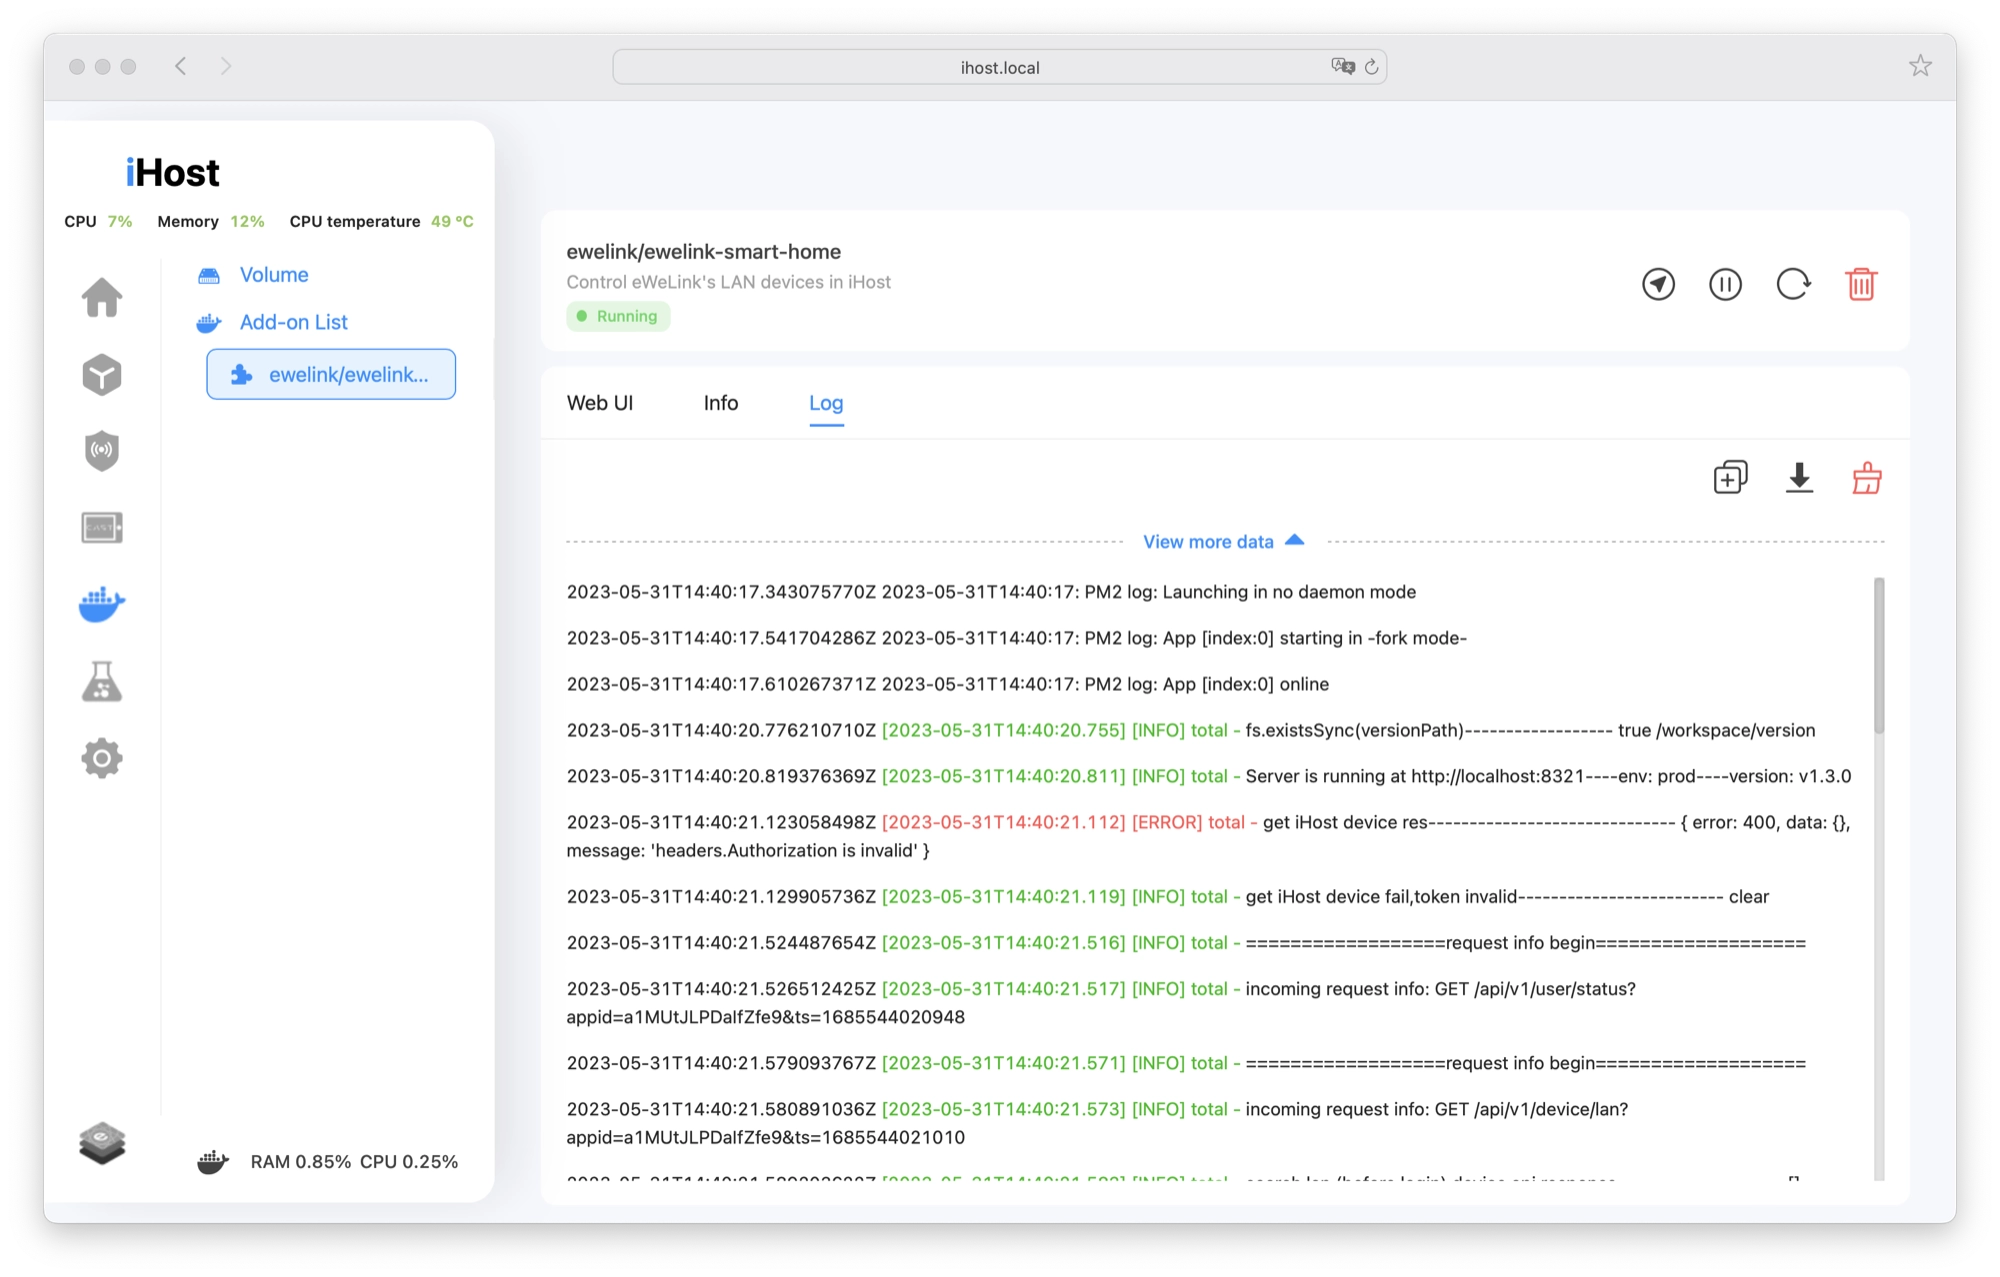
I downloaded the ewelink add-on to test out the functionality. On first run there is a whole bunch of confusing information that you can enter, such as ports and environment variables. However ignoring all of that and just clicking the run button seemed to work.
Once added to the add-ons list, you can access various parts of the add-on. At the top there are buttons to start and stop the add-on, as well as open it in a new browser tab which is a nice touch. You can also access it beneath the tools on the Web UI tab.
On the Info and Log tabs you will find a whole host of information well beyond the understanding of any normal user. Like with including the CPU and RAM details on top of the sidebar, I find this decision unusual.
Unless required for technical support, I believe excluding this information would be beneficial to the end user that they are targeting. Even then a remote login would be a far cleaner way to provide technical support.
Aside from that and there not really being many add-ons available at the time of writing, everything works pretty good.
Pilot Features
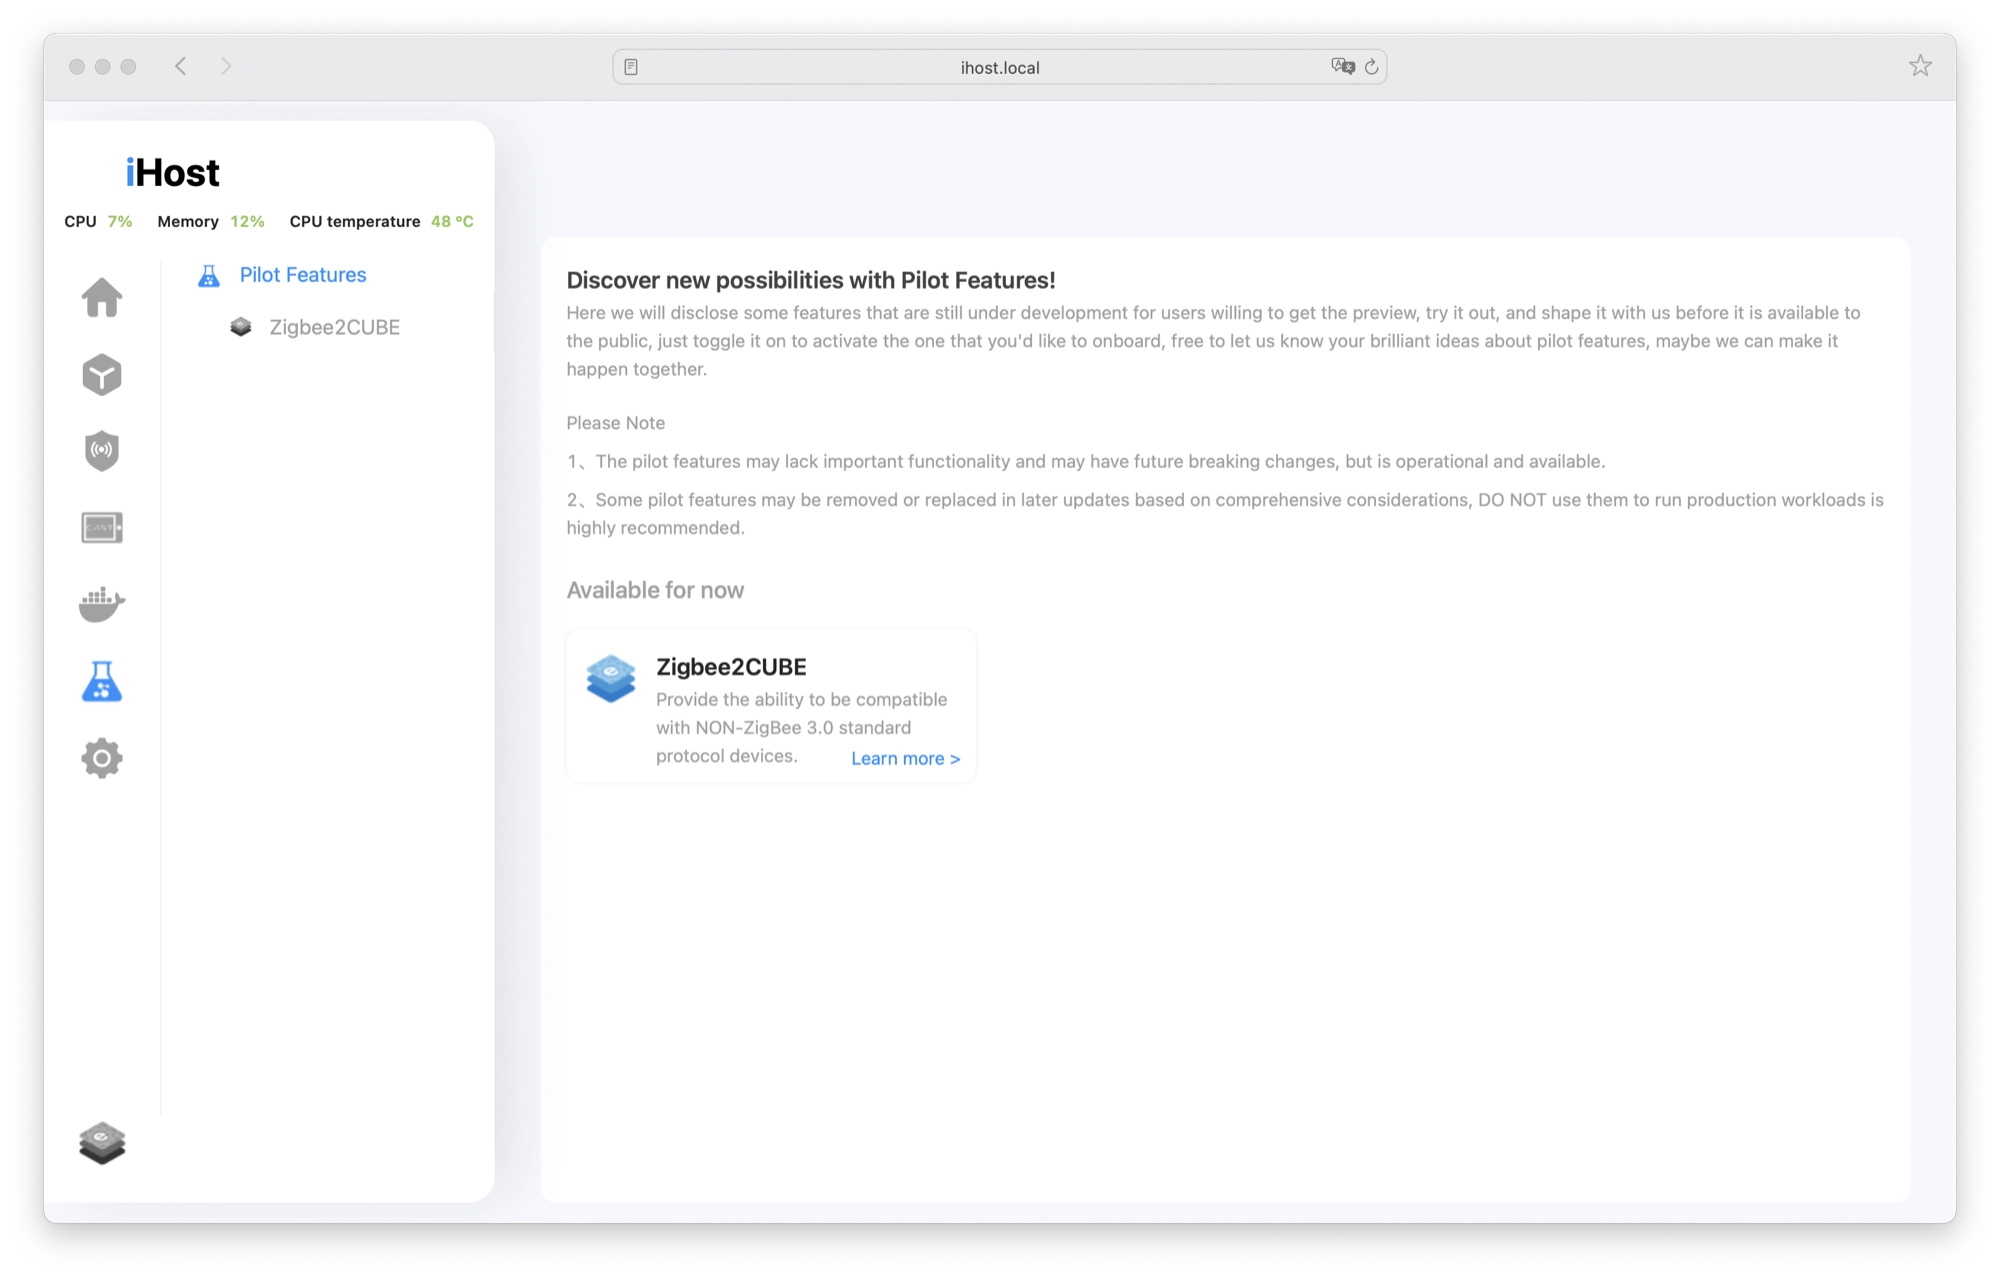
Next up we have the pilot features menu. This is quite simply a place where you can test out the new features which are under development.
I think this is a really good idea. It gives the end user a chance to see what is up and coming as well as take a sneaky preview. It will also help the developers speed up development time and make improvements through feedback.
At the time of writing the Zigbee2CUBE feature was available. This allows non-standard Zigbee devices to be supported on the iHost.
Enabling this feature actually allowed me to connect the IKEA dimmer switch that I mentioned earlier, which initially could not be detected by the iHost.
My excitement was short lived however, as I quickly found out that the switch is still not fully supported and as a result it still didn’t work.
Settings
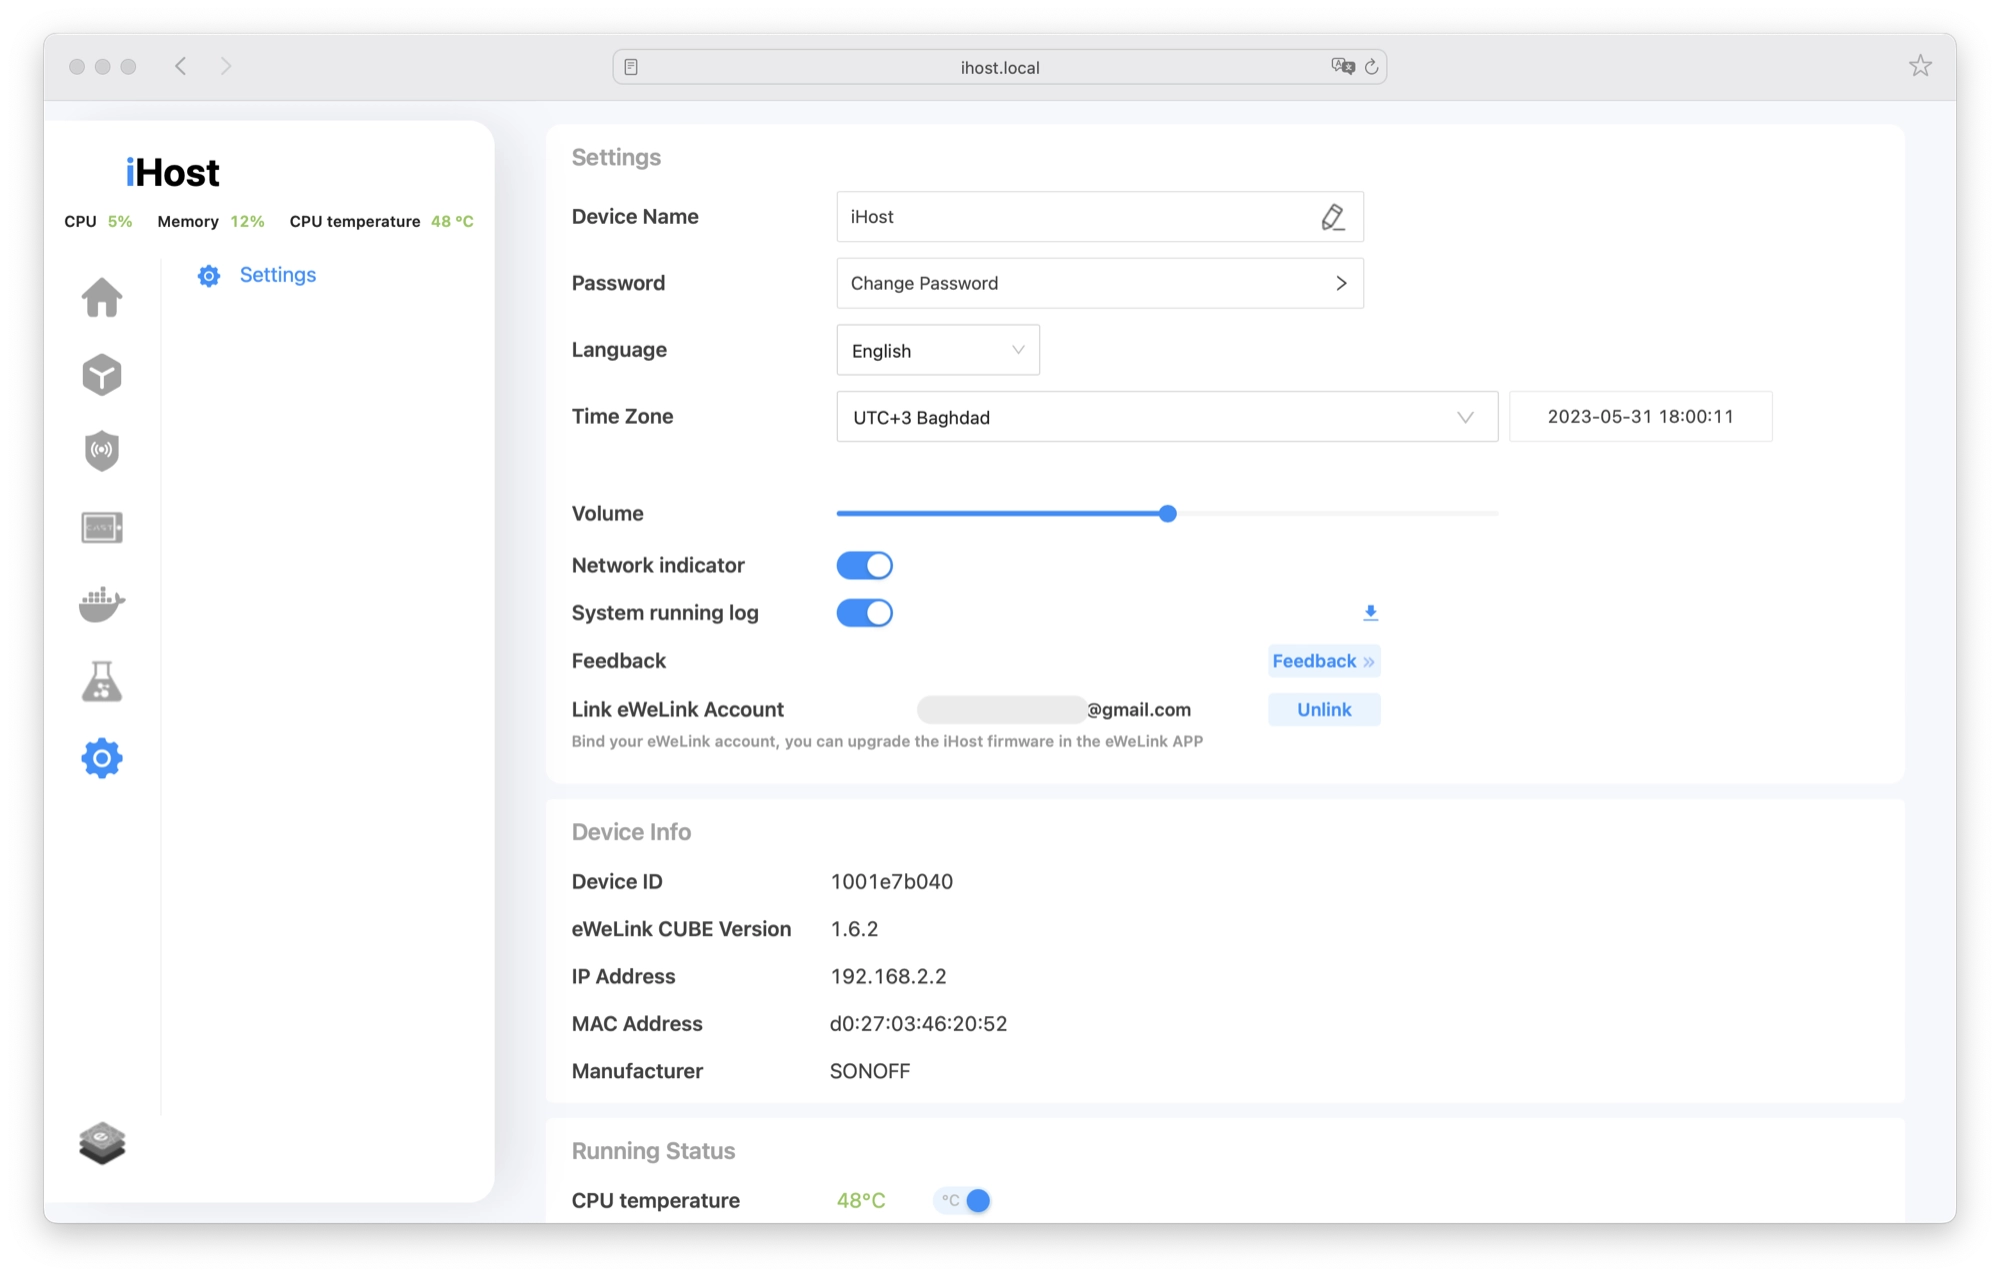
Lastly we have the settings menu, where you can change common settings such as the device name, the password for accessing the iHost, the time zone, language and volume.
You can also log out and restart the iHost using the buttons at the bottom of the page.
There is also various system information, such as the device IP address and current firmware version. When new firmware is available you will see an option to download it next to the current firmware version.
This was not entirely evident to me at first and I believe it may have been because the button does not show up if you don’t have a microSD card inserted.
To access new firmware you also needed to sign up for a (free) ewelink account, which I believe is something to do with the system that manages firmware updates.
Who Should Buy the SONOFF iHost?
The SONOFF iHost is perfectly suited to those who are looking to build a smart home that is a little more capable that what you get with a more basic mobile app, whilst avoiding the complexities of a more feature rich solution such as Home Assistant.
The iHost removes the need to have a cloud service, therefore it lets you build a more secure and future-proofed smart home when compared with just using apps and cloud services.
Overall I was impressed with the iHost and it certainly has some strengths. However it doesn’t yet come close to matching what Home Assistant is capable of.
If you want to build “the ultimate smart home” and are prepared to put in the work, Home Assistant is the only way to go. Click here to get started!
However if you want to build a smart home with simple smart devices like bulbs, switches and sensors, and you don’t want to get into anything too technical, like YAML, the SONOFF iHost would be a perfect product for you.
The SONOFF iHost is available at a surprisingly cheap price on the official store, click here to check it out now!
Thanks so much for visiting my site! If this article helped you achieve your goal and you want to say thanks, you can now support my work by buying me a coffee. I promise I won't spend it on beer instead... 😏
