
This simple illustrated guide will get you up and running with Ubuntu Desktop on your Mac. We will also install Guest Additions, allowing easy drag and drop between your dual operating systems.
Virtualbox is a powerful tool that allows many different operating systems to be run from other operating systems within a window.
Also, you want to know the best thing?
All of this functionality is totally free!
We are not limited to just Ubuntu, we could run all different flavours of Linux and even Windows (yes, Windows is a nightmare but sometimes it is the only option).
- Virtual machine vs dual boot
- Prerequisite
- Install Virtualbox
- Create a new virtual machine
- Install Ubuntu
- Running the installation
- Change the screen resolution
- Install Virtualbox Guest Additions
- Conclusion
Virtual machine vs dual boot
There are two ways that we can run Ubuntu on the Mac.
We can either setup a dual boot or we can run Ubuntu as a virtual machine. We will be using the virtual machine method in this tutorial.
There are pros and cons to each method, however a virtual machine will be plenty adequate for most dual operating system requirements.
Nevertheless we will take a very quick look at a comparison of the two options.
Dual boot
With a dual boot system the operating system is installed to a seperate partition on the hard drive, or a seperate hard drive all together.
When booting up the computer, the user is given the option as to which operating system to load. In our case we could load Ubuntu on our Mac instead of OS X.
The advantages to setting up a dual boot are the secondary operating system, Ubuntu in this case, can have full access to the system resources.
In some cases it may be necessary to run a program that requires the full system resources. This is probably the main reason we would want to configure a dual boot system.
The disadvantages are that it is less convenient to keep rebooting your machine each time you want to switch operating systems. It can also be more difficult to link the two operating systems for tasks such as file sharing.
Virtual machine
The term virtual machine in this context refers to a secondary operating system, also known as a guest operating system, running on the host operating system.
In effect both operating systems can be run simultaneously and used in parallel, although one is the primary operating system running on the host computer.
In order to create a virtual machine, software is required to create a hypervisor on the host machine.
The hypervisor runs on the host OS and serves as a bridge between the virtual machine and the host device hardware.
The main advantage of running a virtual machine is convenience.
Having both operating systems running together means the secondary operating system can be loaded on demand and resources can be shared as easily as dragging and dropping files between them.
The only real disadvantage is the system resources must be shared between the two operating systems.
This only becomes an issue if there are not adequate resources for the virtual machine, depending on the task required of it and the resources available.
If system resources are inadequate for running a virtual machine then a dual boot system may be the solution.
Prerequisite
In this tutorial we will learn how to install Ubuntu Desktop on a Mac OS X host using Virtualbox, a completely free virtual machine software.
You will need to be running a fairly recently version of OS X (I will be using Mojave).
You will need a copy of Virtualbox, so go ahead and download the latest version for an OS X host.
You will also need the latest version of Ubuntu, you can download it from the official website.
Both downloads are completely free. Awesome!
Install Virtualbox
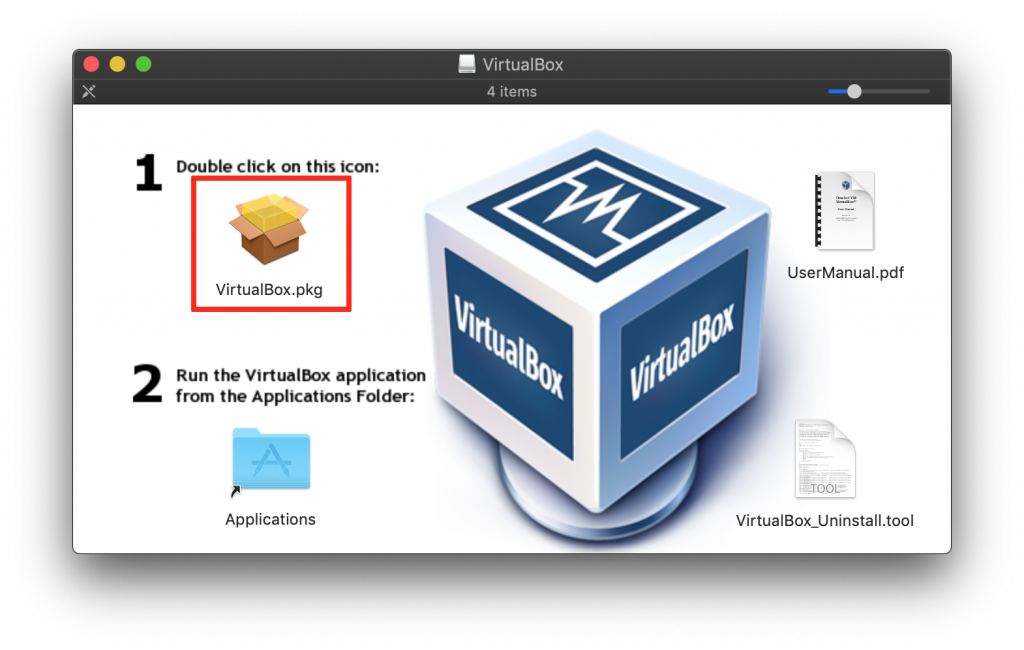
First we will go ahead and install Virtualbox, simply download and open the .dmg file and then run the .pkg file contained within the disk image.
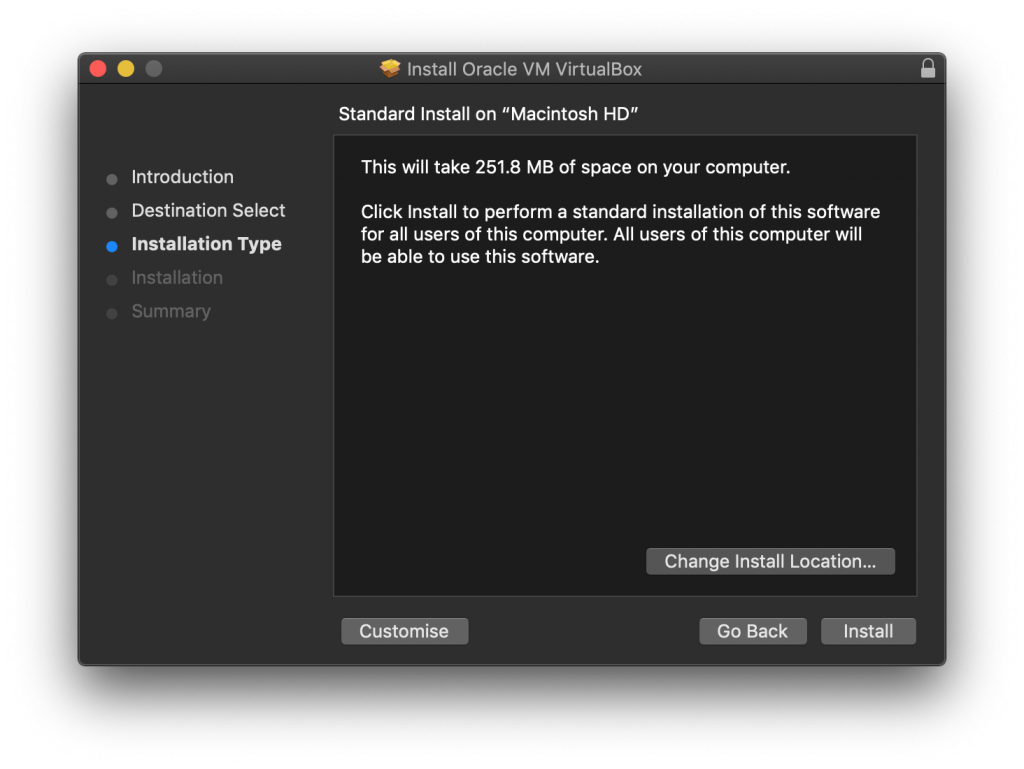
You can change the installation directory if you wish, then just run the installer. Once you click the install button you will need to enter your credentials.
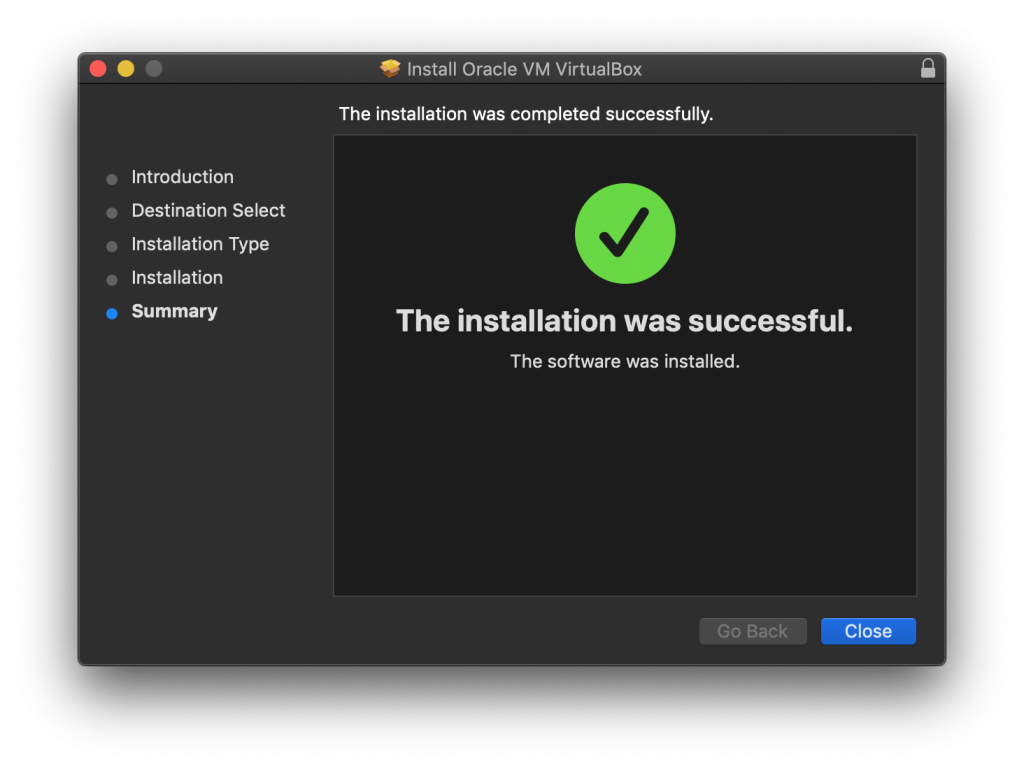
Once the installation has completed you can go ahead and click close. Virtualbox will now be installed to your applications folder.
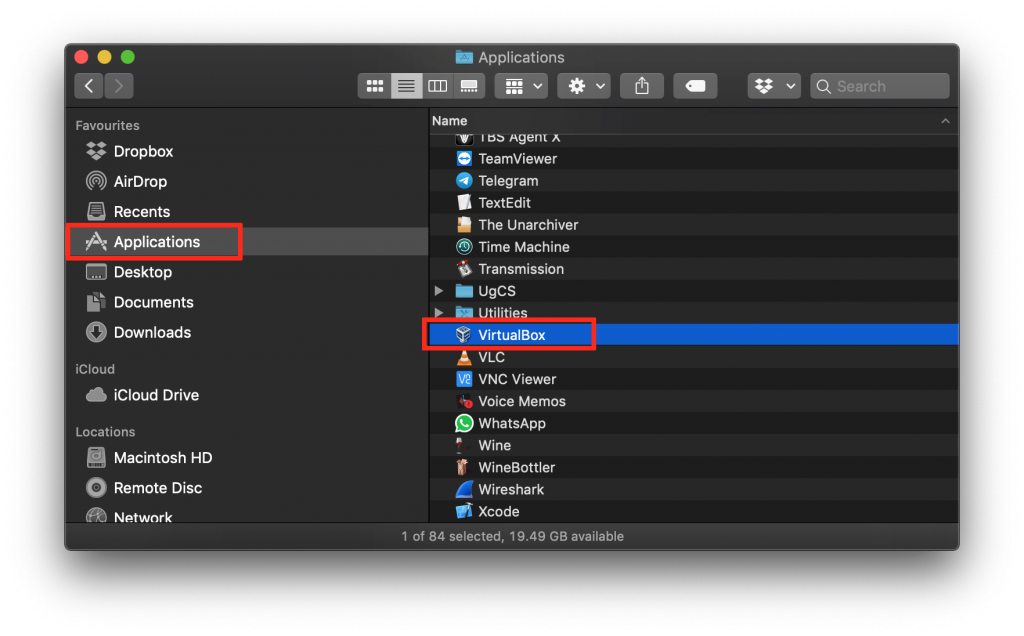
To run Virtualbox, simply navigate to the program in the applications folder. If you drag the program to the desktop or dock menu it will create a convenient shortcut.
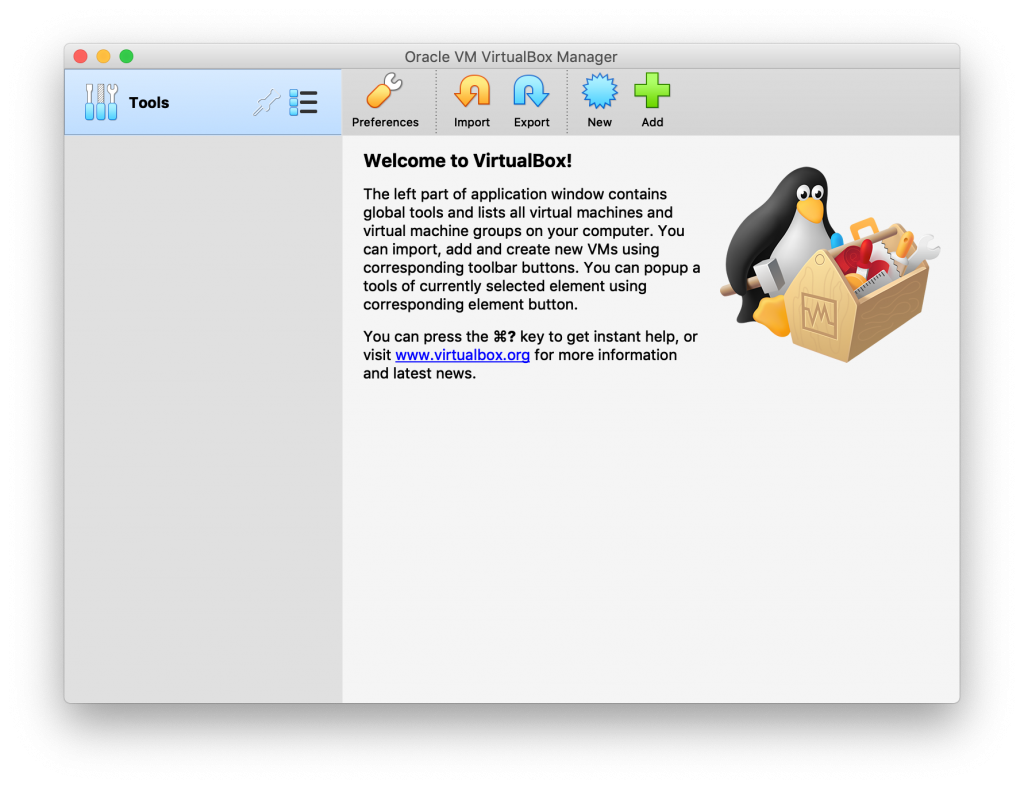
On launching Virtualbox you will be presented with a rather warm and friendly welcome screen.
The interface is very intuitive and easy to use, with chunky icons at the top of the screen to represent the main tools that we will need.
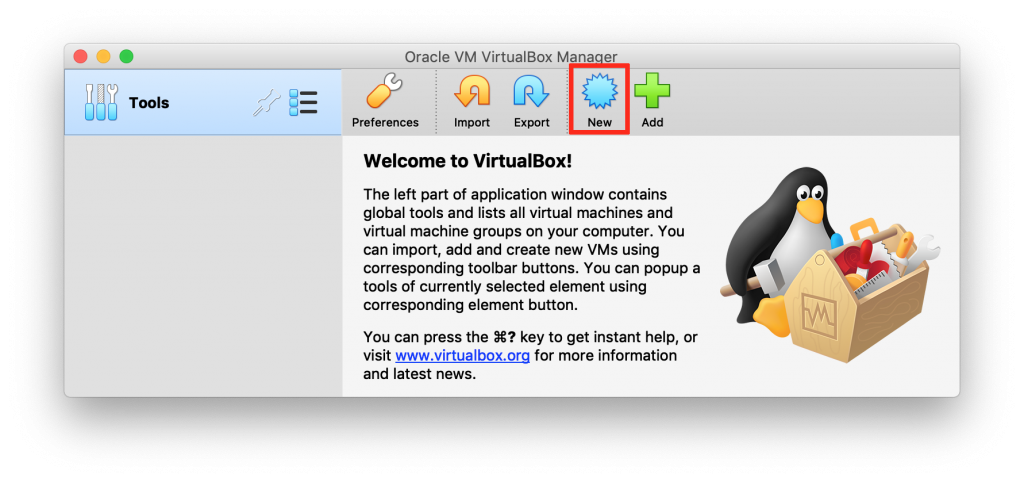
Create a new virtual machine
First we will need to create a new virtual machine in which to install Ubuntu, so go ahead and click new from the menu at the top of the screen.
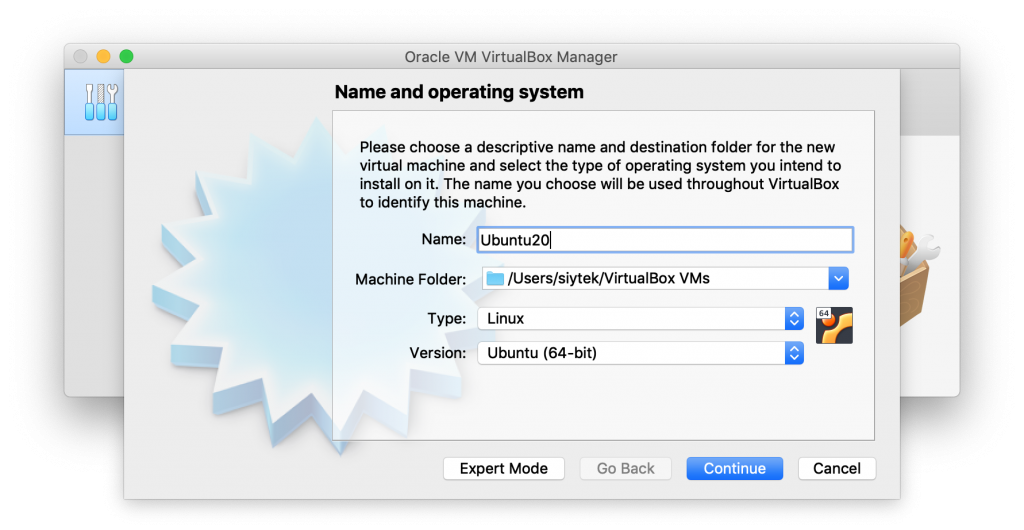
Configure a new virtual machine
This will present a menu where we can configure our new virtual machine.
Go ahead and give your virtual machine a name and select the folder where you wish to locate the machine.
Within this folder a .vdi file will be created that will represent the hard drive of our virtual machine.
It doesn’t really matter where this file is located so you can leave the folder set to default if you like.
We also need to choose the correct type and version, so go ahead and choose Linux and Ubuntu 64-bit.
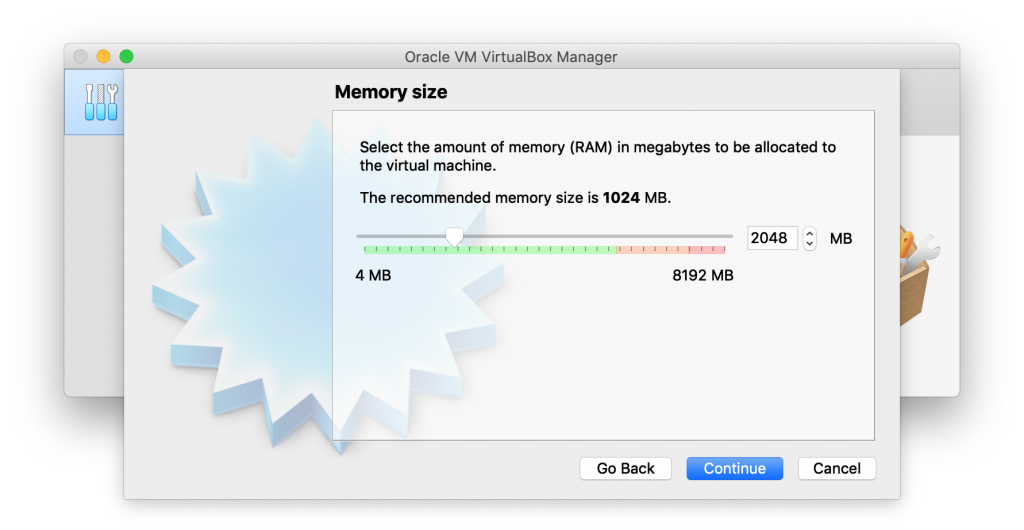
Allocating RAM memory
Next we need to specify how much RAM memory is allocate to the virtual machine.
We need to give the virtual machine enough to run comfortably, but as a rule of thumb it is best not to exceed half of what is available on the host.
If we allocate too much memory to the virtual machine, the host will not run efficiently, which will have the knock-on effect of slowing the performance of the virtual machine.
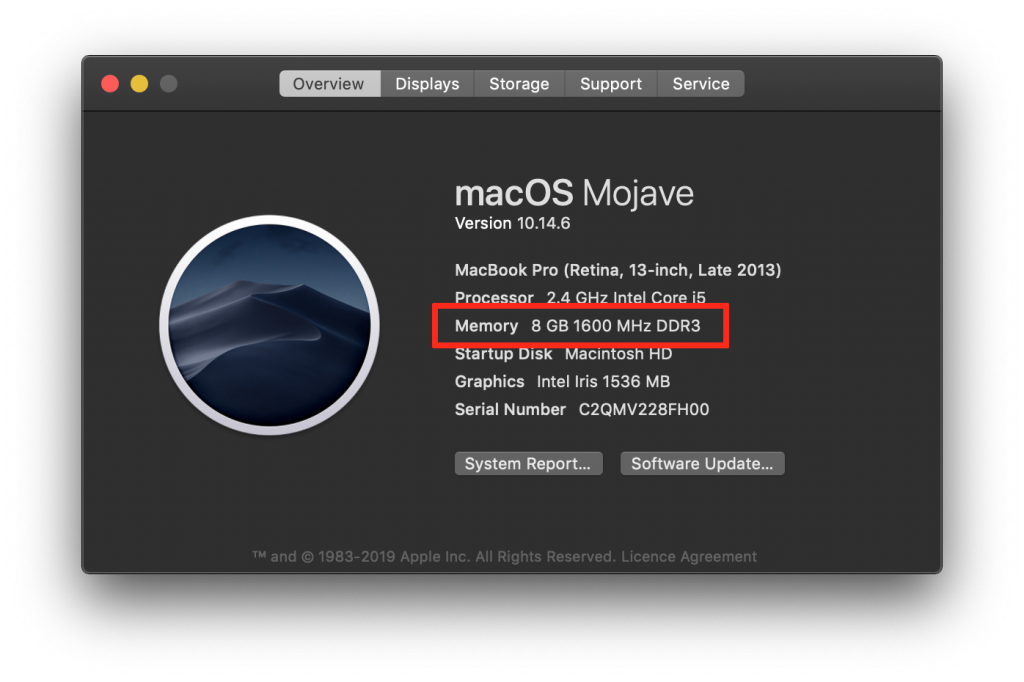
If you don’t know how much RAM memory you have on your Mac, simply click the little apple icon in the very top right-hand corner of the screen and then click about this Mac.
This will open a dialog box where you can see the amount of RAM you have on your system.
To start with we can allocate 2GB of RAM to Ubuntu. This should be enough to get everything up and running and we can change it later if we need to allocate more.
Note that when we move the slider, the number does not usually change to a nice round figure.
This is due to memory being divided up into groups of bits divisible by 8, known as a byte. We can choose 2048MB of RAM, it’s close enough to 2000MB, which is also the same as 2GB.
Create a virtual hard disk
Next we will create a virtual hard drive for the virtual machine.
All of the data that we store on the main hard drive in Ubuntu will be stored within a .vdi file on the host system.
First we need to select create a virtual hard disk now and then click create.

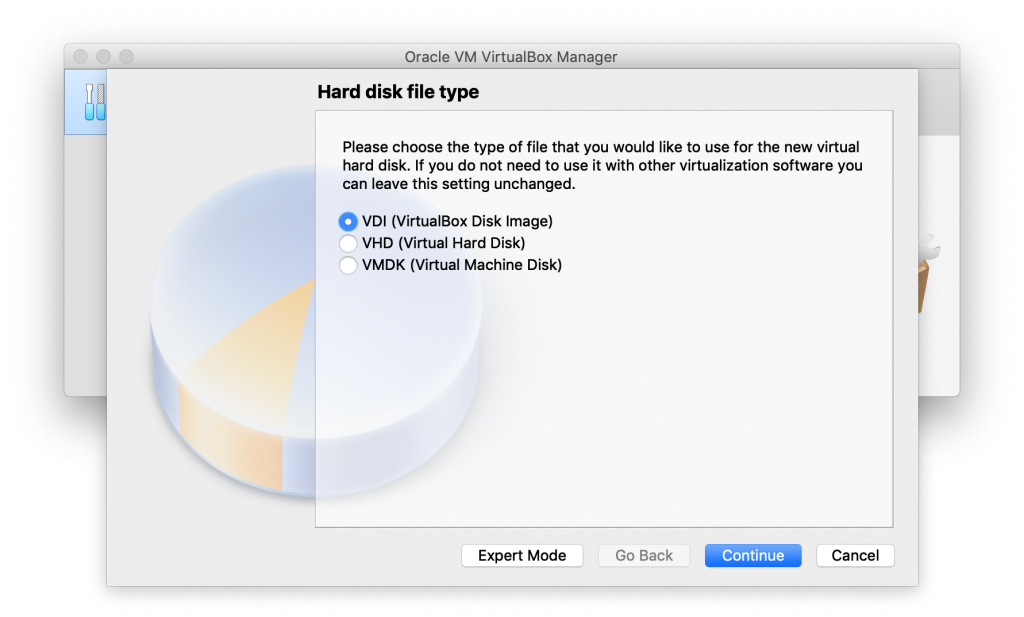
We will then be presented with the option to choose the kind of virtual drive that we wish to create.
There is no need to change this from the default option unless we need to use the virtual drive file with other software. Therefore leave it set to VDI (VirtualBox Disk Image) and click continue.
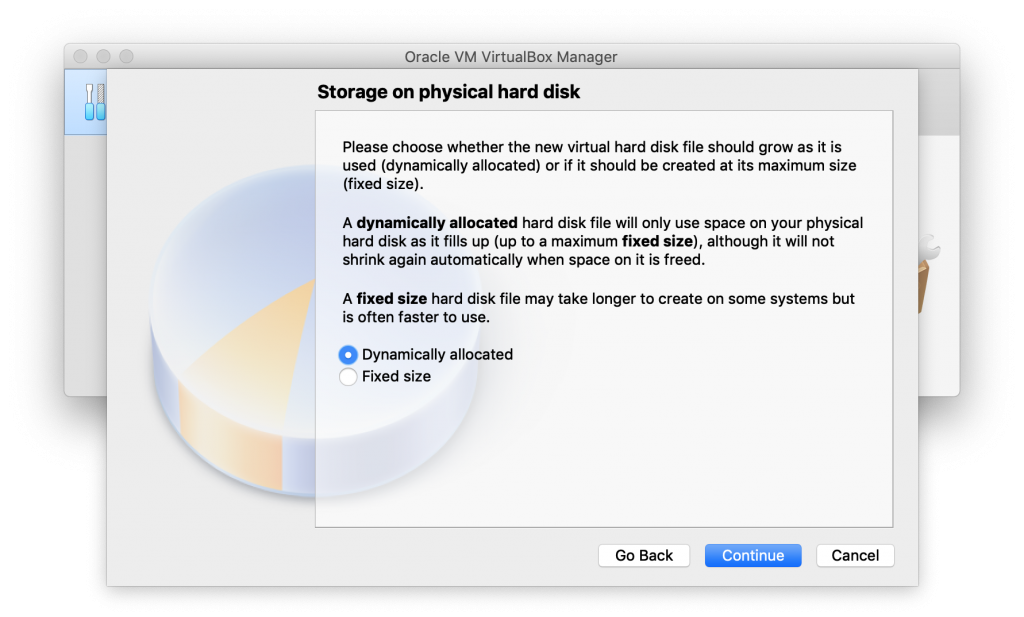
Next we need to choose whether or not we want a dynamically allocated or fixed size hard disk. You can choose from either option, however if you are unsure, leave it set to the default dynamically allocated.
Fixed sized hard disk
A fixed size hard disk will consume a portion of the physical hard drive on our host computer, depending on how large we set it (on the next screen).
The disadvantage with this type of disk is that we must sacrifice all of the space on the physical drive immediately. However in doing so we will gain some performance.
Dynamically allocate hard disk
A dynamically allocated hard disk still has a fixed maximum size that we will specify (on the next screen), however it does not consume this portion of space on the physical drive until it is actually needed by the guest operating system.
Finally we need to choose the size of our hard disk and the location where the file is stored. We can leave the file location set to default unless you need to store it elsewhere, such as on a secondary physical hard drive or USB drive.
I would recommend increasing the size from the default of 10GB, especially if you are using a dynamically allocated hard disk. The first time I used Ubuntu with Virtualbox the 10GB caused me some headaches!
You can change the size after it has been created, but you must use terminal commands.
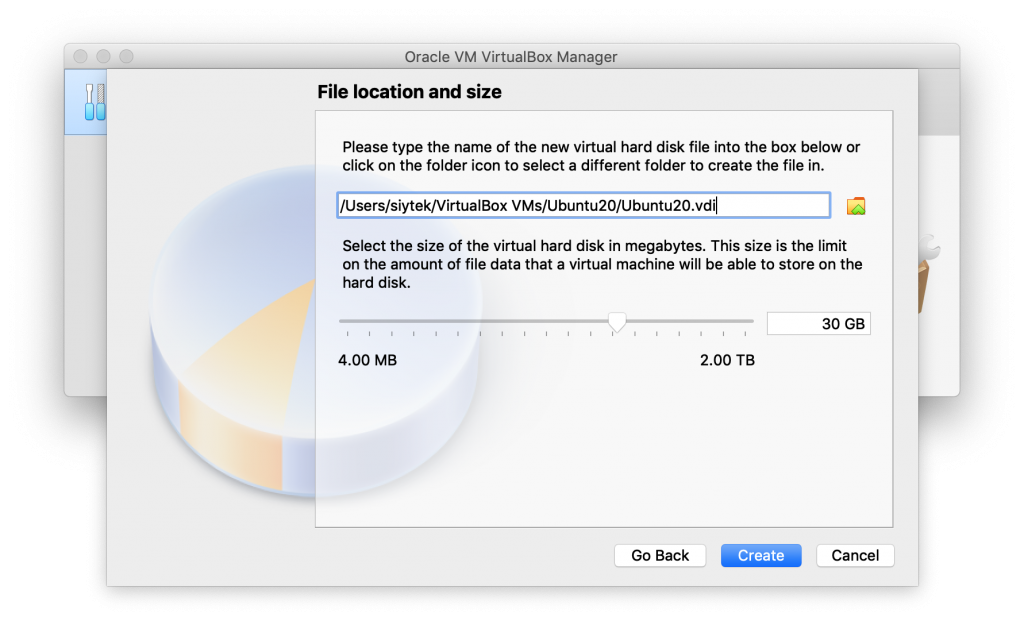
Once you have entered the details go ahead and click create.
This will create the virtual machine and take you back to the main screen, where you should now see your new virtual machine. Awesome!

Install Ubuntu
Now that we have a brand new virtual machine, we are ready to install Ubuntu.
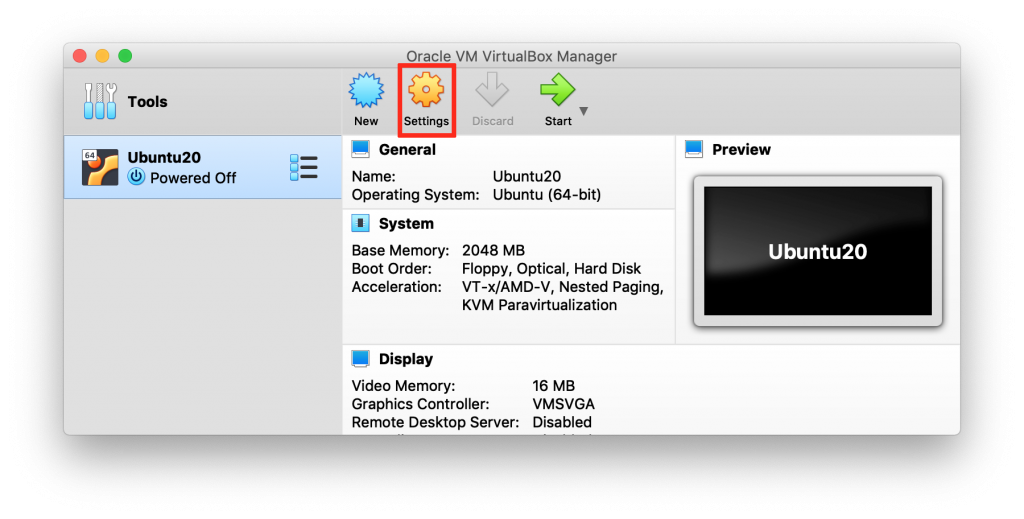
First go ahead and click the settings button from the top of the main screen.
In order to install Ubuntu, we need to use the Ubuntu image that we downloaded earlier as a virtual disk.
This will make the Ubuntu installation file appear to the virtual machine as an installation disk.
Adding a virtual disk
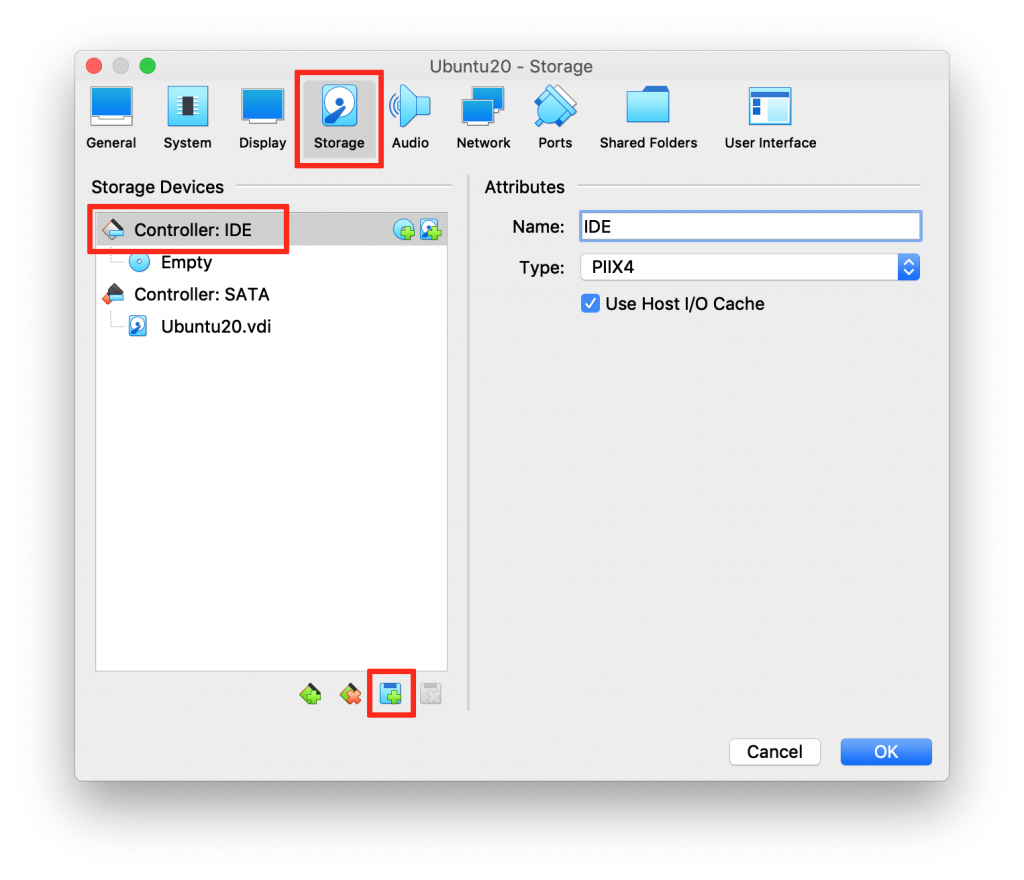
First go ahead and click storage from the top menu and then select controller: IDE from the storage devices menu on the left-hand side.
To add a new disk just click the little disk icon with the green plus at the bottom and then select optical drive.
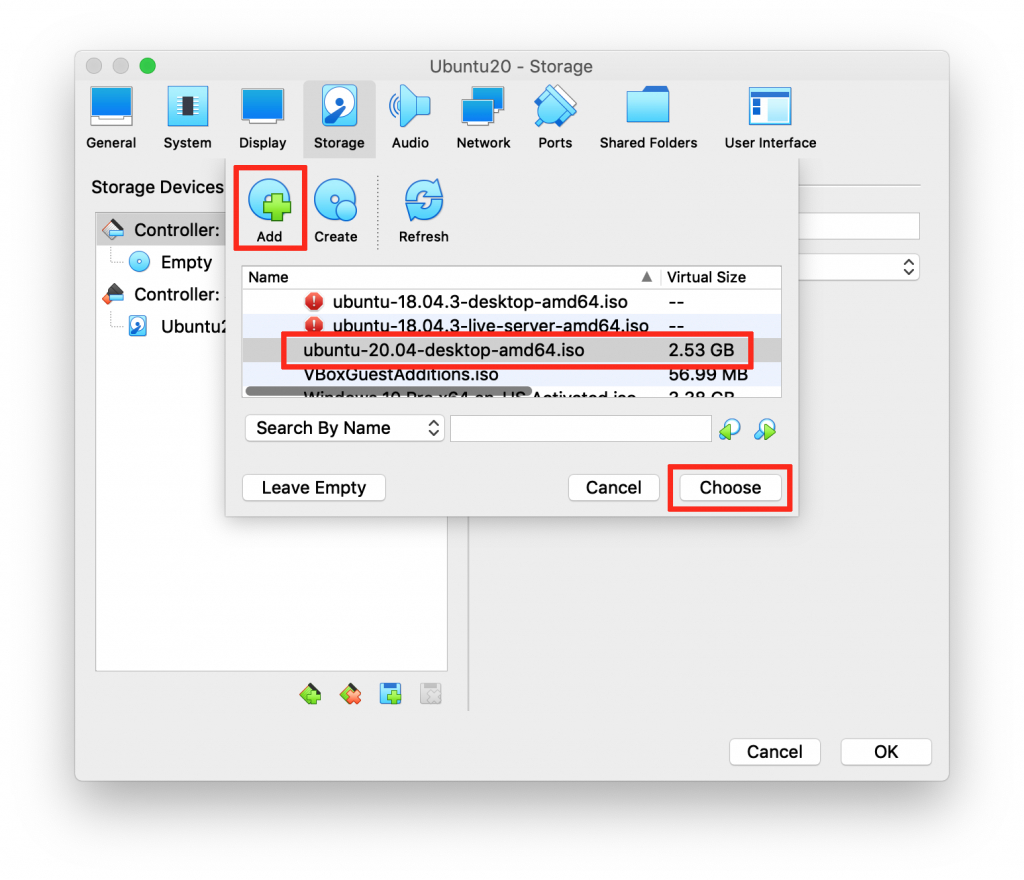
Next go ahead and click on the add button at the top of the dialog box.
This will allow us to locate the Ubuntu installation file that we downloaded earlier. Select the file and click ok to add it to the list.
I have a few other files in my list from earlier installations, but you will probably just have the latest Ubuntu in the list.
Click on it to highlight it and then click choose.
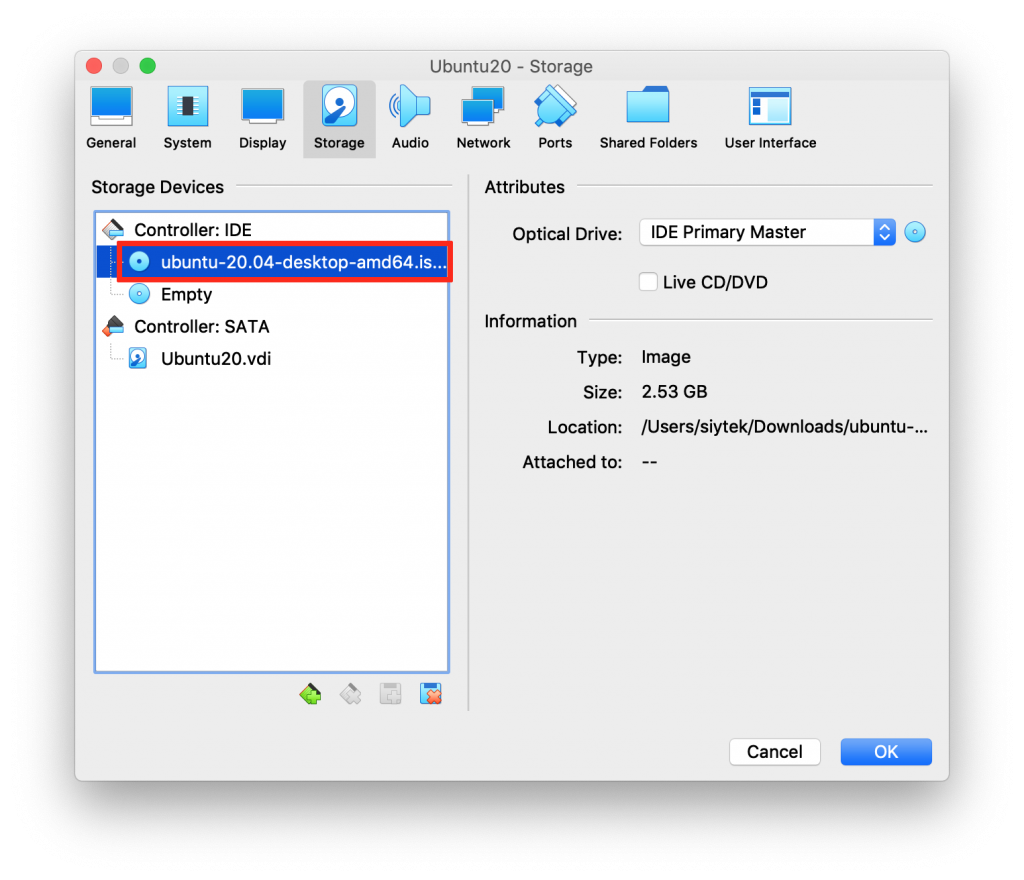
Now we should see a new disk for Ubuntu under the IDE controller, which can now be used for the Ubuntu installation.
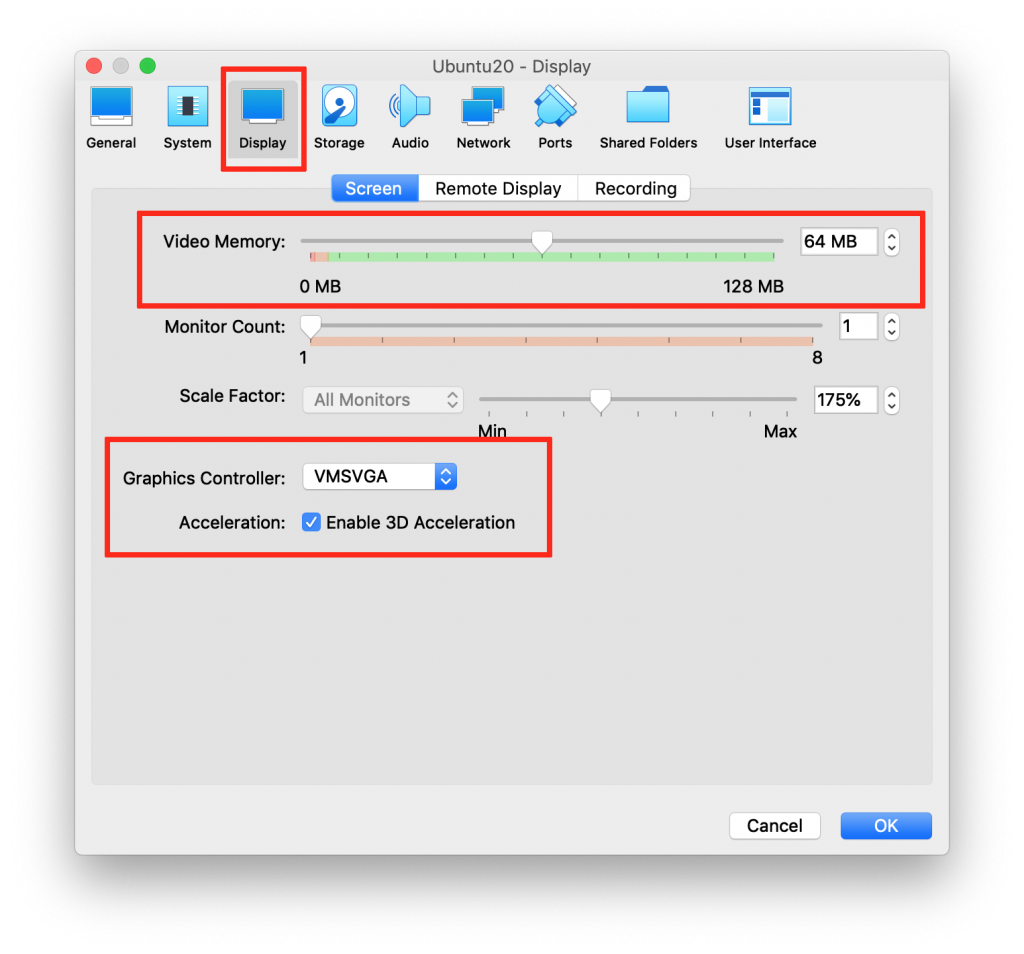
Setting the video memory
Something that I have seen missed from other tutorials is settings required for video memory.
The knock-on effect is that the Ubuntu desktop will be cropped on the right-hand side, making it difficult to access certain options.
Go ahead and select display from the menu at the top. We need to set the video memory to at least 64MB.
We can also set the graphics controller to VMSVGA and enable 3D acceleration.
If you have any issues where the installation hangs on a black screen, try again without 3D acceleration.
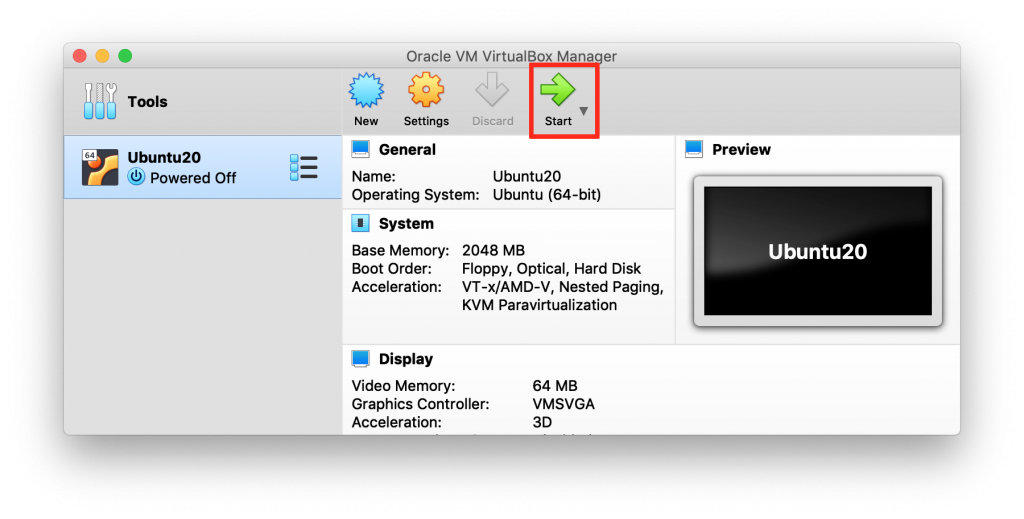
Running the installation
Now we are finally ready to install Ubuntu on the virtual machine!
First we need to start the virtual machine by selecting it in the left-hand menu and then by clicking the start button at the top.
No bootable medium found? No problem!
You may encounter the error no bootable medium found. It is very easy to fix, simply click devices > IDE (primary master) > Ubuntu … iso to ensure that the virtual disk is inserted.
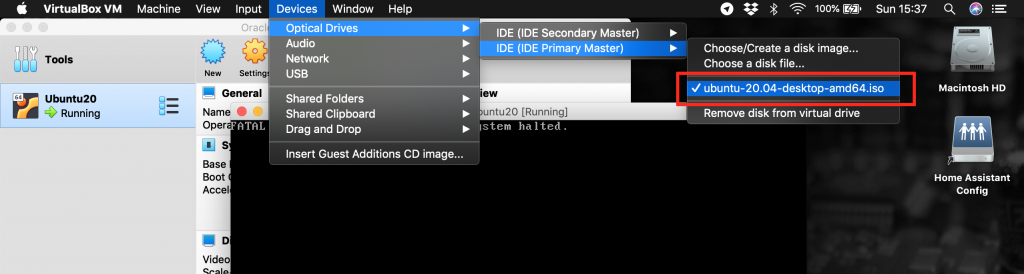
Then click machine > Reset to reboot the virtual machine.

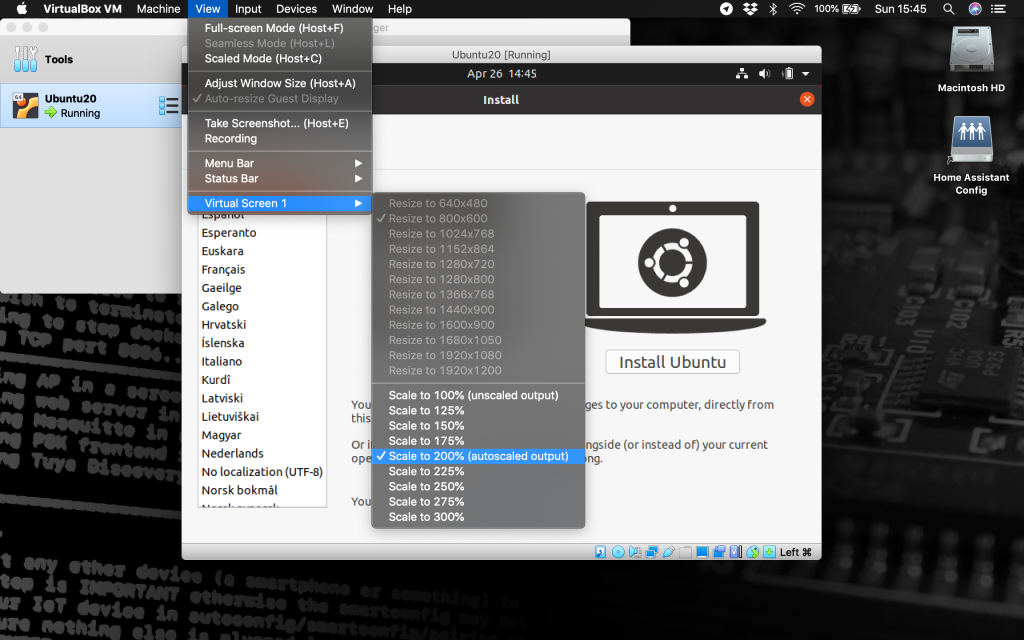
Enlarge the screen
The first thing you may notice once Ubuntu begins to boot is that the screen is tiny.
We will correct the graphics at a later point in the installation but for now we can temporarily enlarge it so we are not squinting at the screen!
Simply click view > virtual screen 1 from the menu bar at the top and choose a size that you are comfortable with. I generally find 200% works just fine.
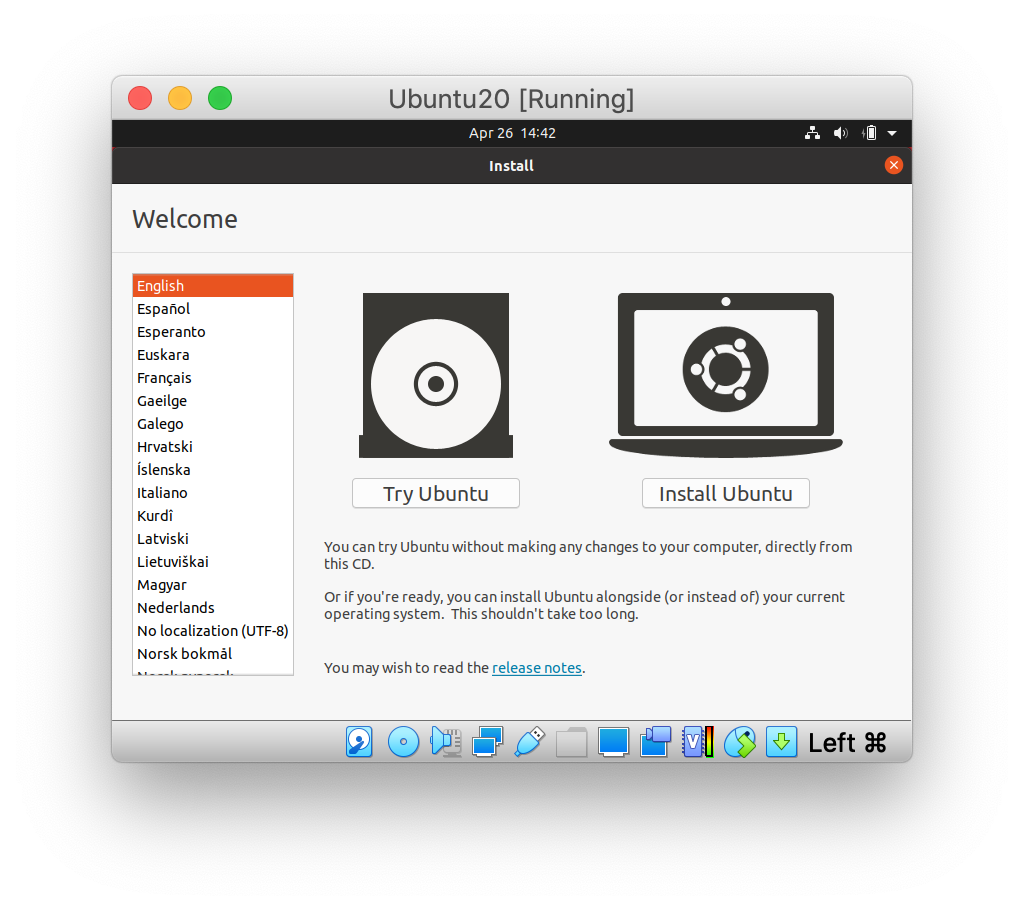
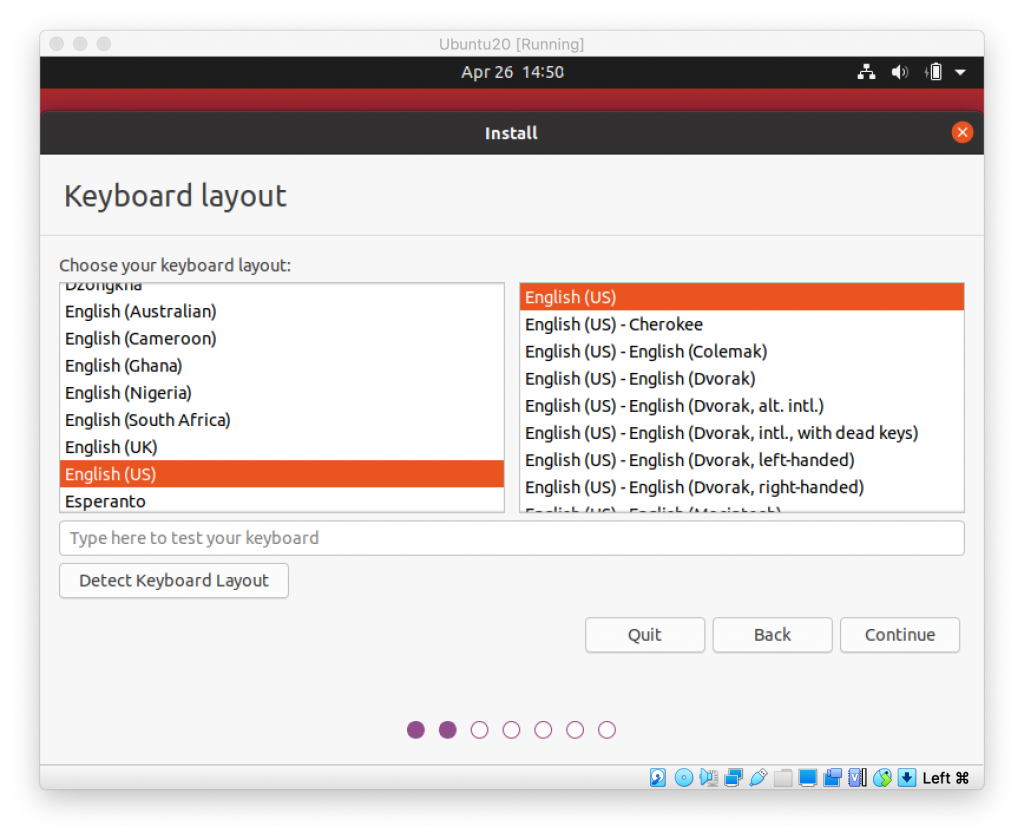
Choosing a keyboard layout
Go ahead and click on install Ubuntu to begin the installation.
First we need to select our keyboard layout. Generally we will want to select English (US) to match the layout of our Mac keyboard. Once you have chosen go ahead and click continue.
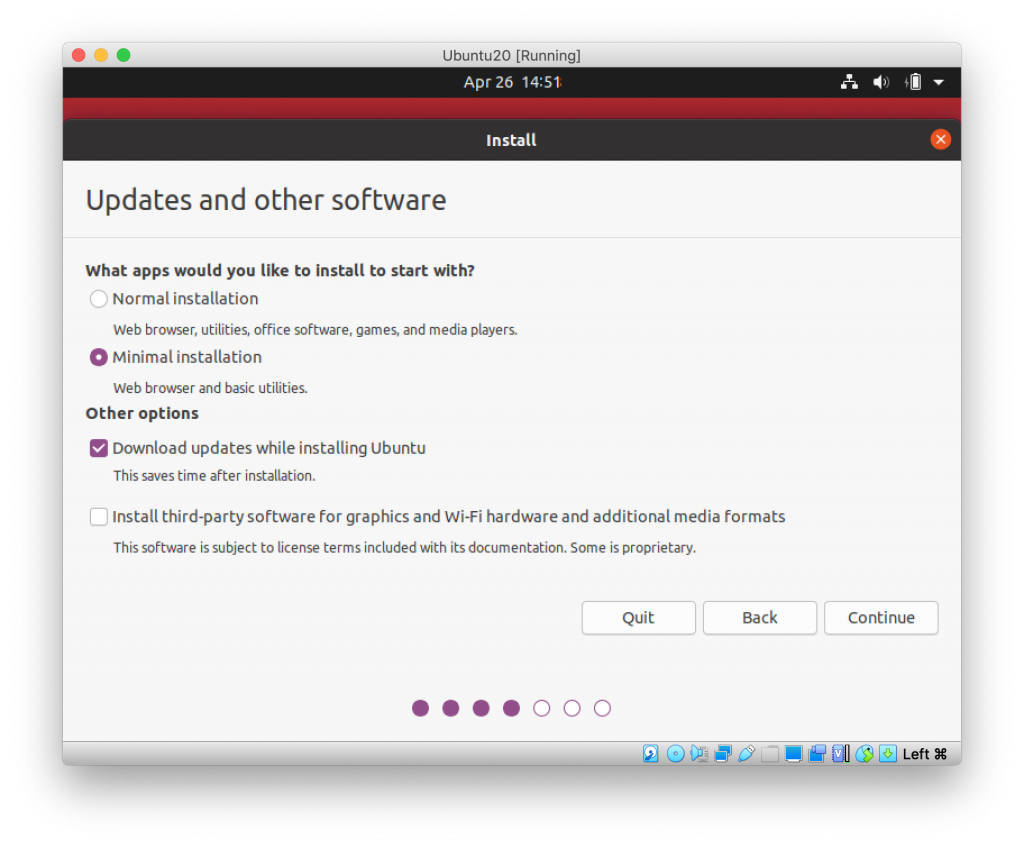
Updates and other software
Next we have some options for updates and other software.
You should choose either normal installation or minimal installation depending on what you want to use Ubuntu for.
I only want to run a couple of Linux-only programs on this installation, therefore I will be choosing minimal installation.
I would however recommend that you leave download updates while installing Ubuntu checked to ensure that everything is up to date when you finish the installation.
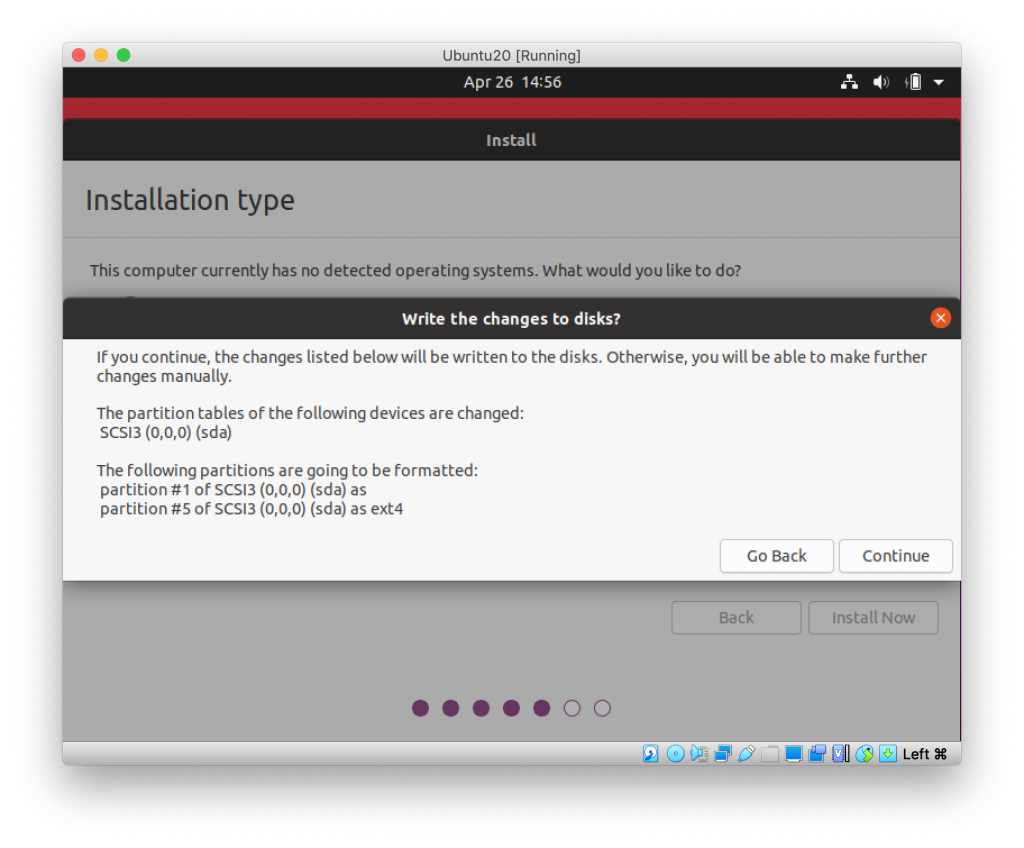
Erasing the drive
On the next screen we are given the opportunity to change options for the installation type.
We can leave this set to the default erase disk and install Ubuntu, so go ahead and just click Install Now.
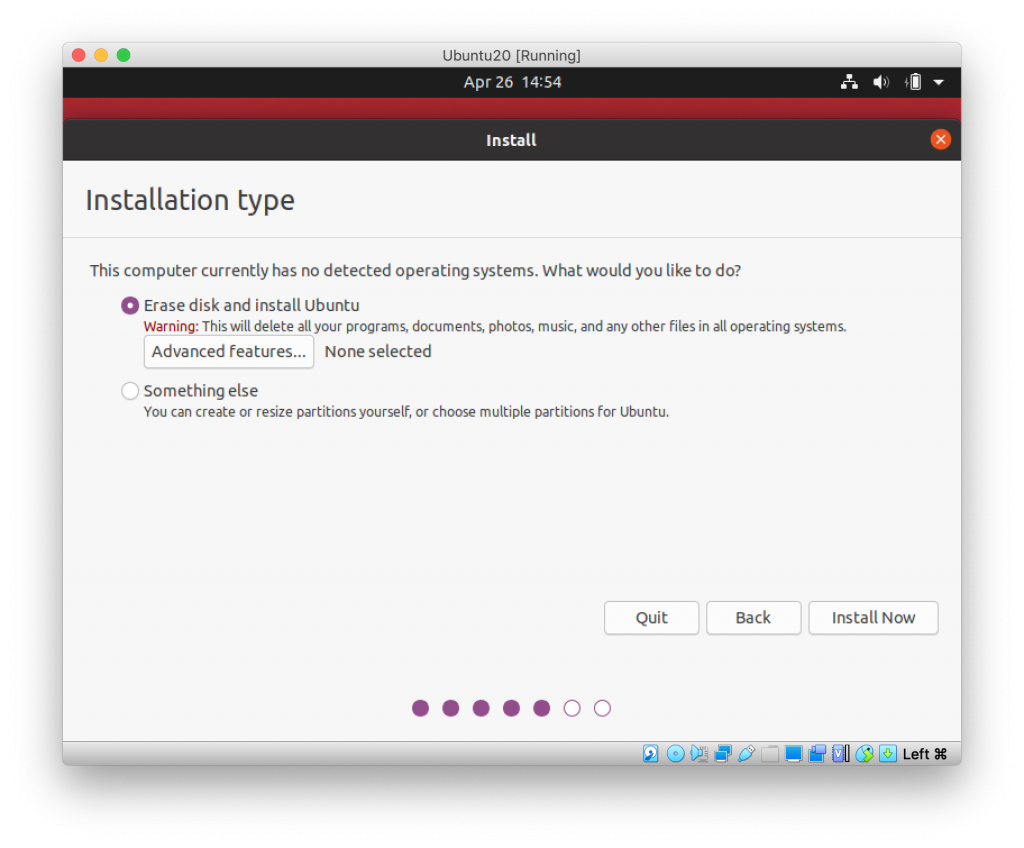
You will be given a final prompt, referencing some partitions to the hard drive. Go ahead and click continue.
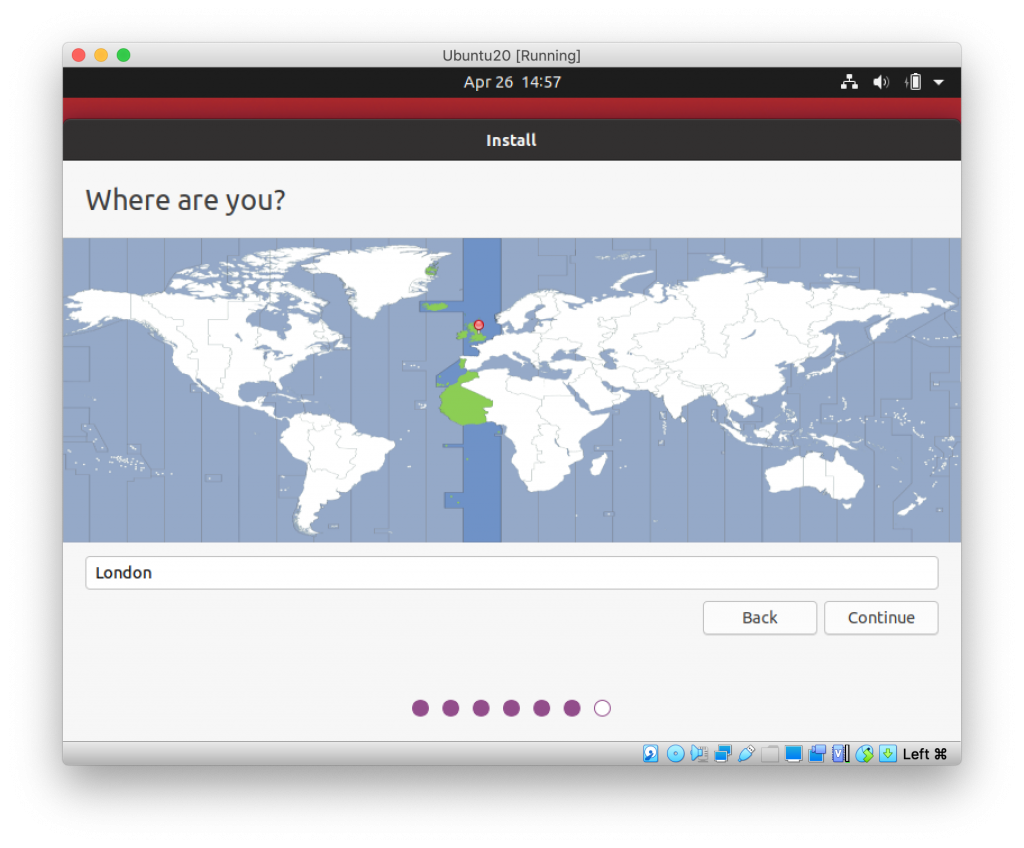
Set the timezone
Next we can go ahead and choose the correct timezone for the machine. For me the default is correct, but you can go ahead and change it if you need to.
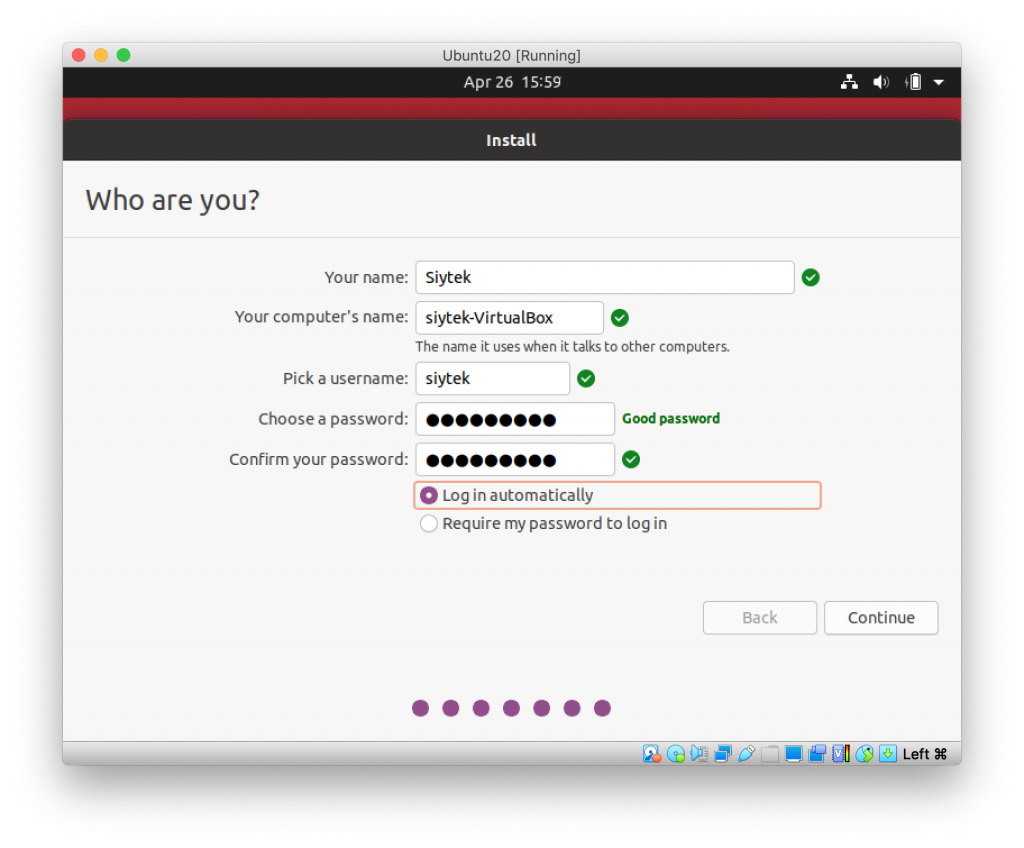
Set your machine credentials
Now we can go ahead and enter the credentials for the machine.
You can choose a name for yourself and the computer as you prefer. Enter a password and choose whether you wish to log in automatically or require a login password.
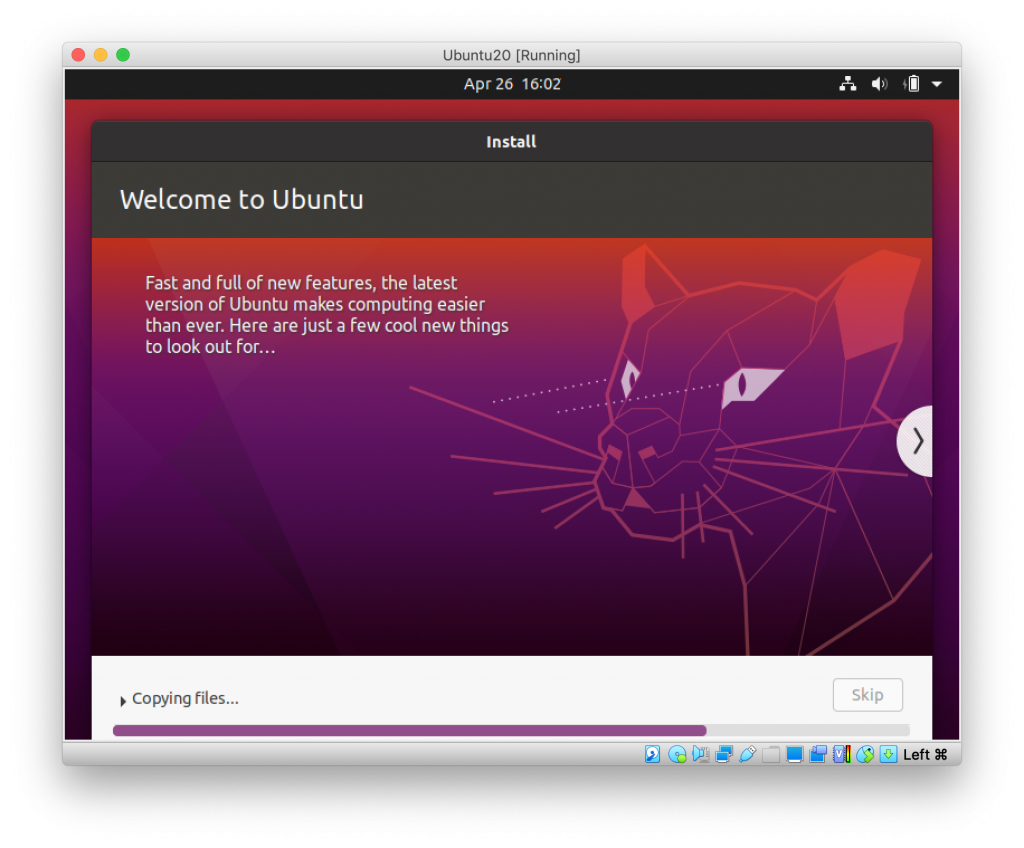
Completing the installation
Whilst we were entering the timezone and credentials, Ubuntu has been working hard in the background to install all of the necessary files.
We just need to wait for this to complete if it has not done so already.
Once the installation has completed, we can go ahead and restart our virtual box.

When you are prompted to remove the installation media, just press enter as virtual box will have already removed the installation media.
If you need to manually remove it, on the menu bar at the top click devices > optical drive > IDE (primary/secondary) and ensure the Ubuntu image is not ticked.

Congratulations! Ubuntu should now boot to the desktop! There are however a few more things that we need to do in order to complete the installation.
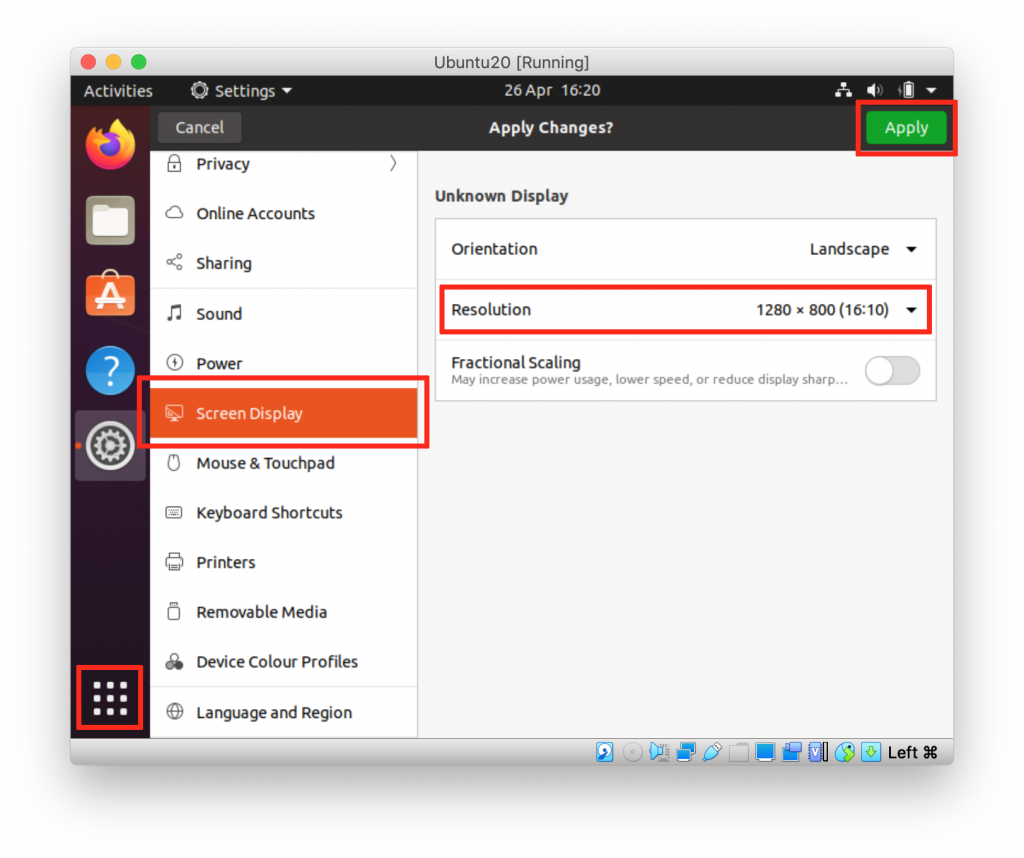
Change the screen resolution
Now that we have Ubuntu up and running, lets go ahead and change the screen resolution to something more usable. First click the menu icon in the bottom left of the screen and then click screen resolution.
Set the screen resolution to something more desirable. If you are unsure then you can set the resolution to match your host computer display, or perhaps the next size down.
If you don’t know what the resolution of your host computer is, you can easily check it on this website.
Install Virtualbox Guest Additions
The Virtualbox Guest Additions are a set of tools that we can install in order to activate some great additional features.
Guest Additions allows us to copy & paste between both operating systems, or the ability to drag and drop files between both desktops.
Install additional packages
First we need to install some packages using the terminal.
Don’t panic! You can just type the command from here into the terminal (copy and paste will not work from your host yet as we haven’t installed the Guest Additions).
Click the menu icon in the bottom left of the screen and click on terminal top launch the terminal.
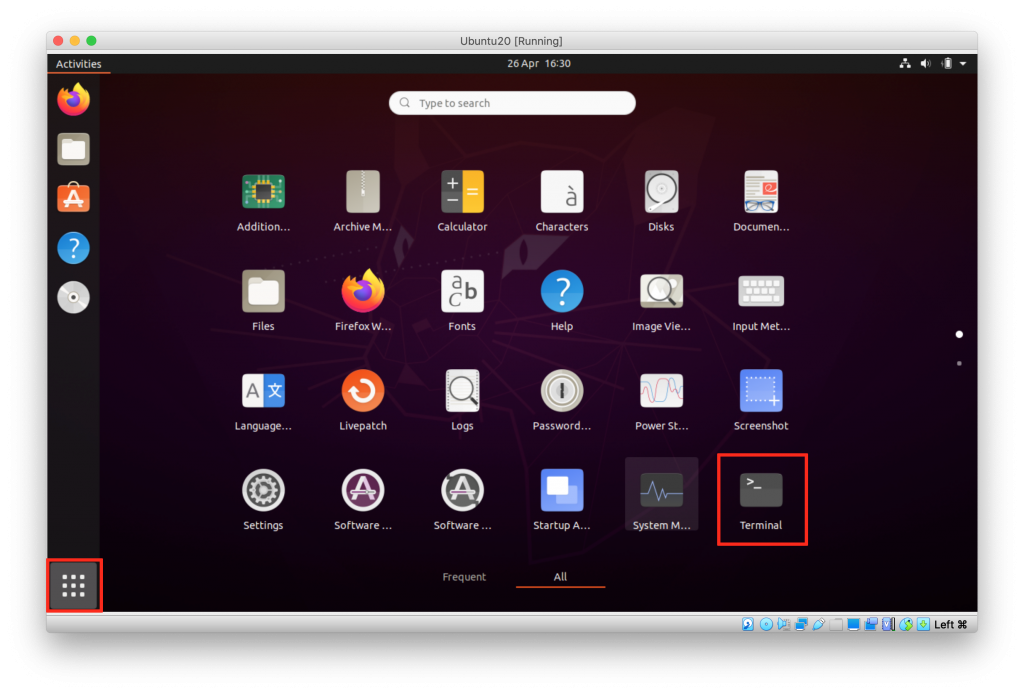
Once the terminal opens, go ahead and type the following command. Make sure that it is typed exactly as it is written here. Alternatively you could just visit this page in the Ubuntu browser and copy & paste it.
sudo apt install virtualbox-guest-utils virtualbox-guest-dkms -y
Add the Guest Additions CD image
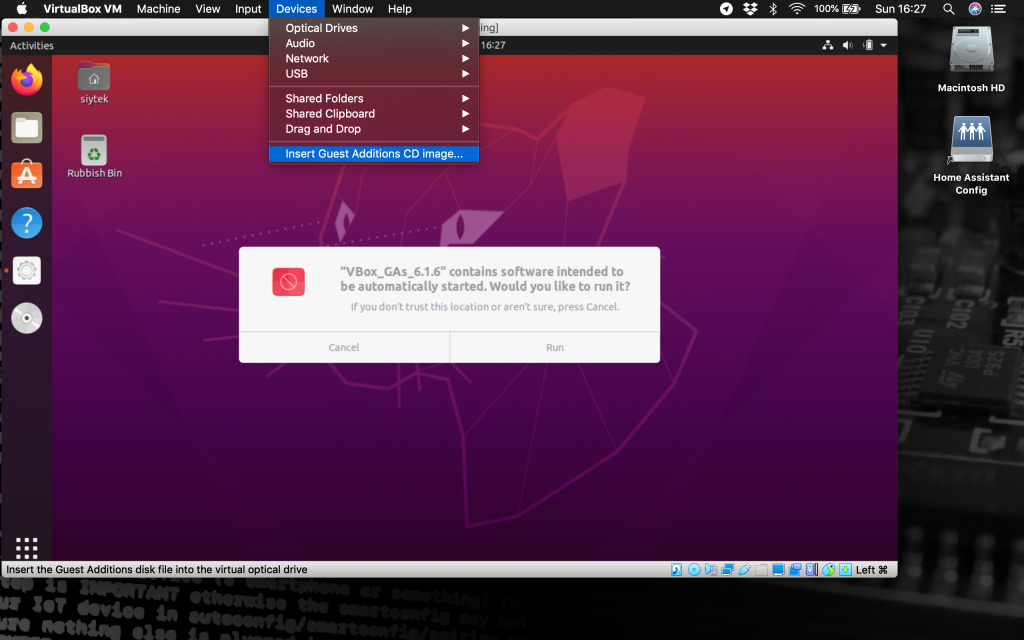
Next we need to add the Guest Additions CD image. From the devices menu on the menu bar at the top of the screen, click insert guest additions CD image.
If you do not get a pop-up you can access the disk in the menu on the left-hand side of the Ubuntu desktop. Go ahead and run the Guest Additions installer.
Once the installation has completed you should be presented with the message press return to close this window. Go ahead and press return to close the terminal.

Finally we need to restart the virtual machine. You can either click the small arrow in the very top right-hand corner of the screen, or you can enter the reboot command into the terminal.
sudo reboot
Enable drag, drop, copy and paste
We can now enable drag and drop, as well as copy and paste, between the host and guest operating systems. Awesome!
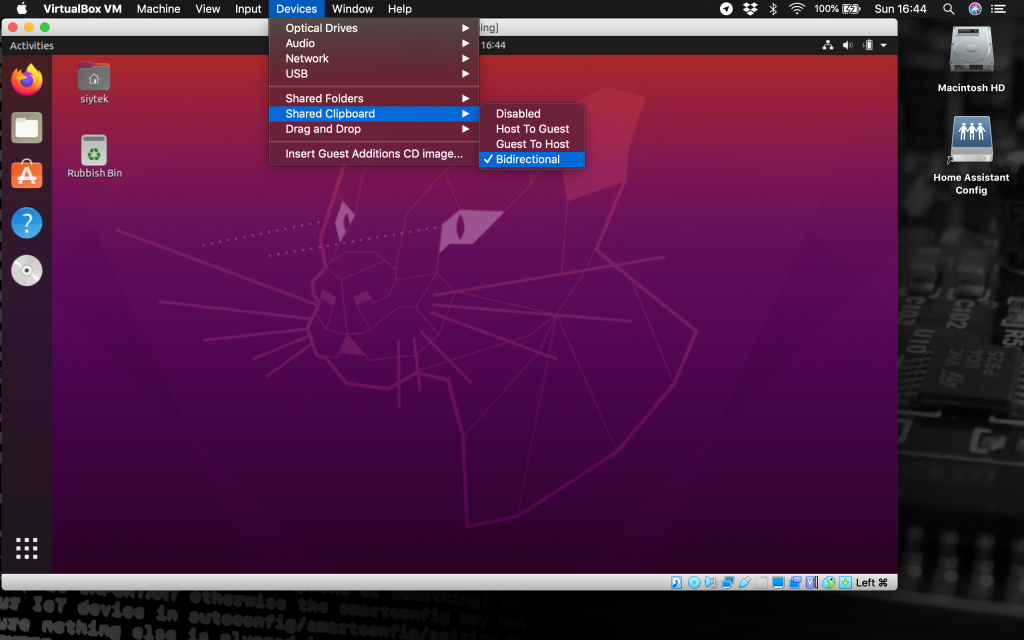
Go ahead and click devices from the top menu bar. Under the menu options shared clipboard and drag and drop, set both to bidirectional.
You should now be able to drag and drop files between each desktop. Copy and paste should also work between each operating system too.
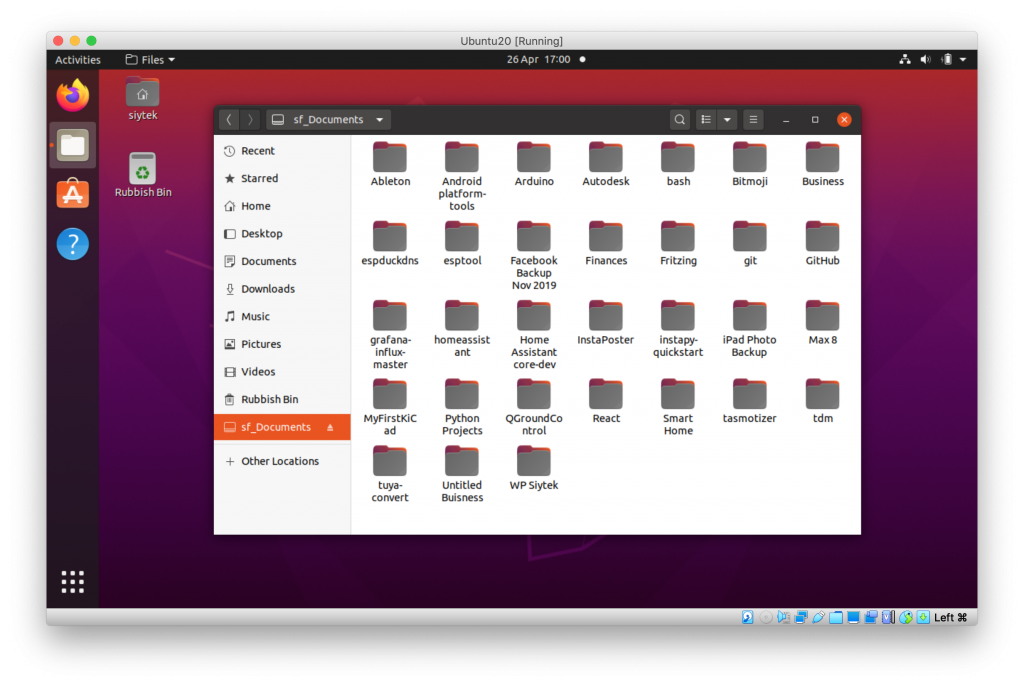
Sharing folders
It is also possible for us to share folders between the guest and host operating systems. In order to get a folder from OS X to appear in Ubuntu go ahead and click devices > shared folders > Shared Folder Settings… from the menu bar at the top.
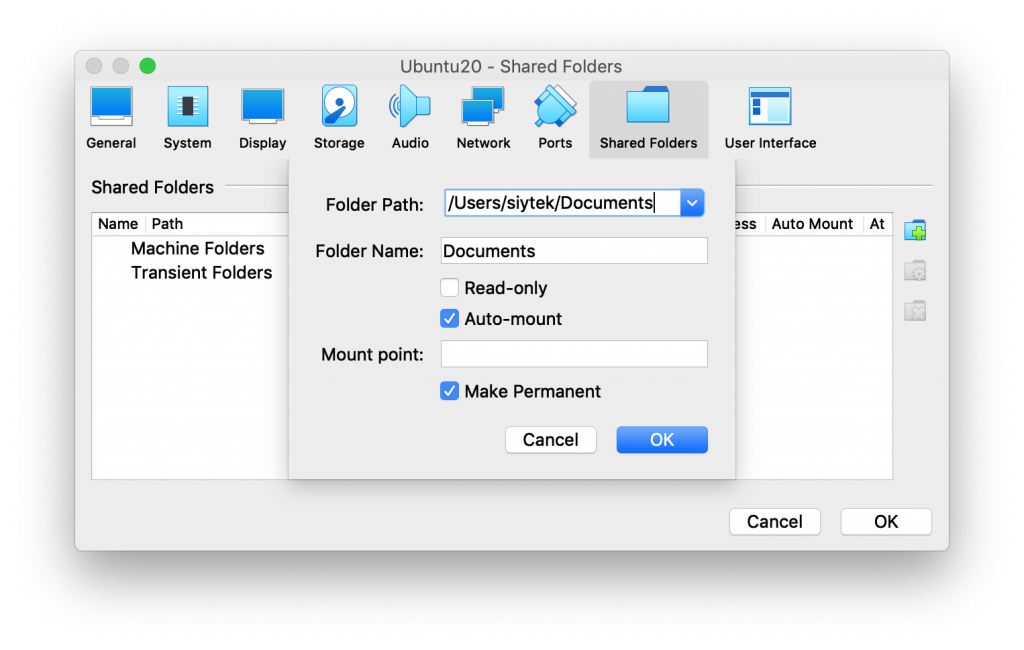
This will bring up a dialog box where we can add a shared folder.
Go ahead and choose a folder path from OS X that you wish to share. You can change the name and set it to read-only if you prefer.
If you want the folder to be permanently shared, choose the auto-mount and make permanent options.
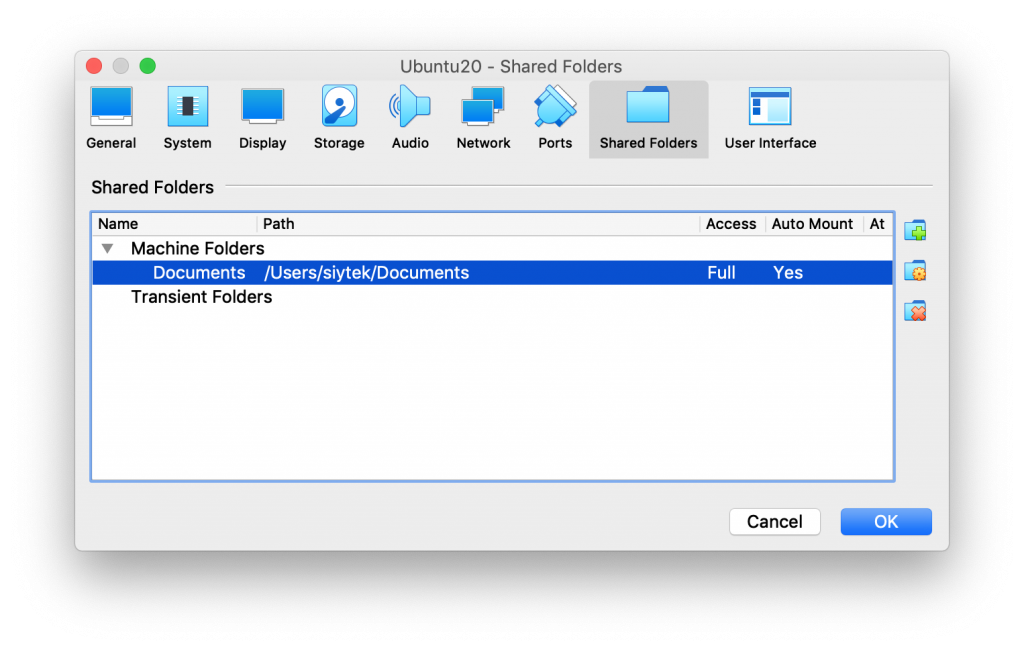
This will add the folder to your list of shared folders. You can add, remove and amend shared folders using the icons on the right-hand side of the dialog box. Once you are done, go ahead and click ok.
The folders that you share will appear as network drives in the Ubuntu file explorer, however you may get a permissions error.
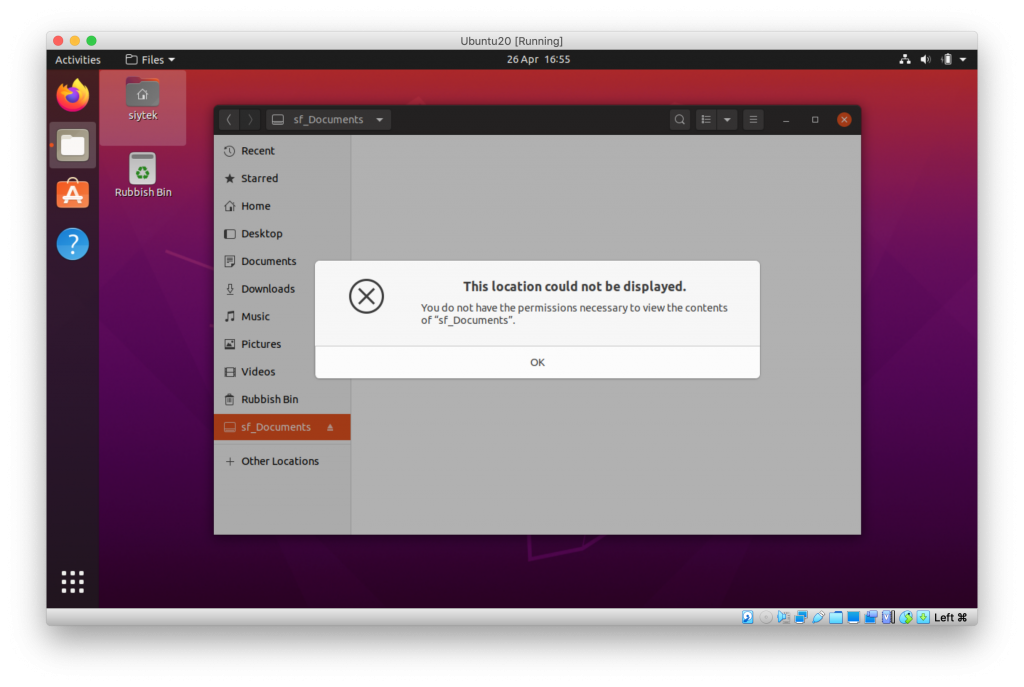
In order to fix this we are going to need to enter a command into the terminal.
Go ahead and enter the following command but you will need to replace $USER with your Ubuntu username.
sudo adduser $USER vboxsf
Once you have entered the command into terminal, go ahead and reboot Ubuntu.
Once you have logged back in you should now have access to the shared folder. Awesome!
Conclusion
Virtualbox is a must-have tool for the modern tech enthusiast.
It is inevitable that access to additional operating systems will be necessary whilst on a quest to do DIY technology and this is the easiest and most convenient way to run multiple operating systems on one machine.
The Virtualbox user interface is clean and friendly, making the whole process a lot easier.
It is possible to run into problems during setup but there is a lot of community support, so if you have problems just go ahead and Google it!
Congratulations for making it to the end! Now that you have Linux up and running, why not go ahead and check out some of my other awesome Linux tutorials!
Thanks so much for visiting my site! If this article helped you achieve your goal and you want to say thanks, you can now support my work by buying me a coffee. I promise I won't spend it on beer instead... 😏


I was banging my head against a wall trying to figure out the Folder share piece for Mac to Ubuntu with VirtualBox and you, sir, are now my hero. Thanks!
Glad to be of service Bob! 🙂