If you want to design and make your own desktop application for macOS then you will probably be interested to learn just how easy it can be using Xcode and Swift.
SwiftUI is a special toolkit made by Apple that helps developers create the visual parts of apps for iPhones, Mac computers, Apple Watches, and Apple TVs.
It’s a newer way of building user interfaces, which are the screens and buttons you interact with when using an app. Xcode is a free tool provided by Apple, which you can use to build apps using the SwiftUI.
By the end of this article you will have learned several different ways that you can import images and audio into xcode. We will also cover how to import images and turn them into an icon for your app.
This article is the second part in the complete beginner series for Xcode and Swift. If you would like to learn how to build a macOS app from start to finish, you may want to consider starting from part 1.
Complete Beginners Guide: Swift & Xcode
- Part 1 – How to Make a macOS Desktop App: Beginners Start Here
- Part 2 – Beginners Guide to Adding Images, Sounds and Icons to Xcode
- Part 3 – An Easy Beginners Guide to Making a macOS GUI using Swift
- Part 4 – How to Add Audio to your macOS App Using Swift
- Part 5 – Beginners Guide to Xcode & Swift: Completing the App
Prerequisite
If you have never heard of Xcode and you are completely new to app development, I would suggest that you check out part 1 of this tutorial first as a primer to this article.
If you have already heard of Xcode but don’t yet have it installed, you can download and install it here.
You will need a Mac running macOS version 11.0 or later (Big Sur).
Note that this tutorial is written using Xcode 14 on macOS 14 (Ventura). However the code is compatible with macOS 11.0 and later.
Creating a New Xcode Project
In the previous part of the tutorial we learned how to create and configure a new project. See this section of the previous tutorial if you need a quick recap on how to create a new project.
If you have not followed on from the part 1 tutorial, go ahead and create a new macOS App project and name it Finger Drums. Make sure that the Interface is set to SwiftUI and the language is set to Swift.
As the title suggests, we will be creating an app that turns key presses into drum sounds! Complete this tutorial and you’ll be able to take your finger drumming to the next level!
I chose this project for my beginners guide as it covers the use of both audio and images in a project, which I believe allows it to be adaptable for a lot of different project requirements.
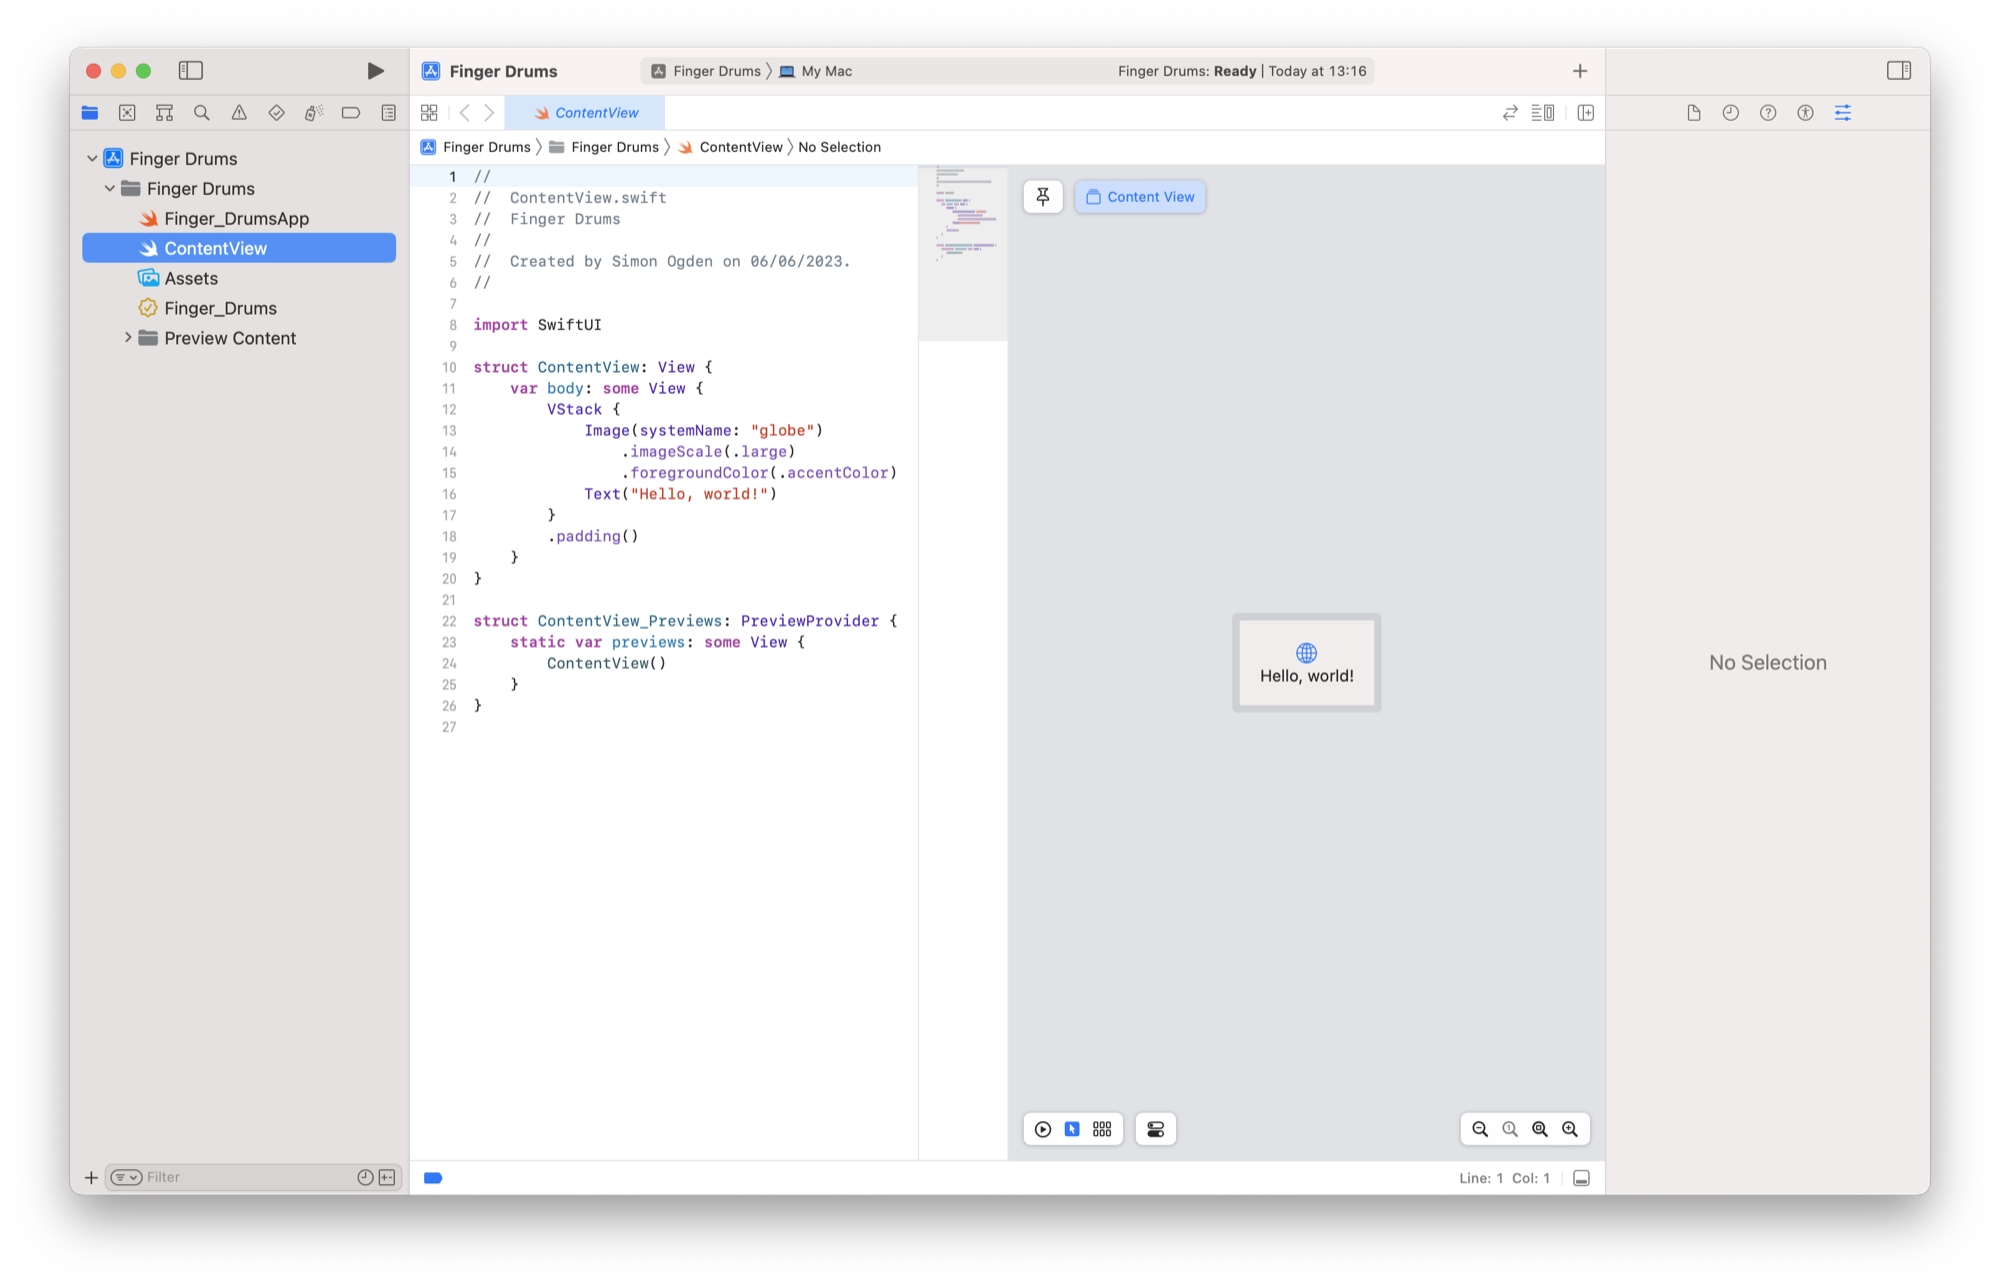
Once you have created a new project, you will be taken to the main Xcode application window:
Changing Project Settings
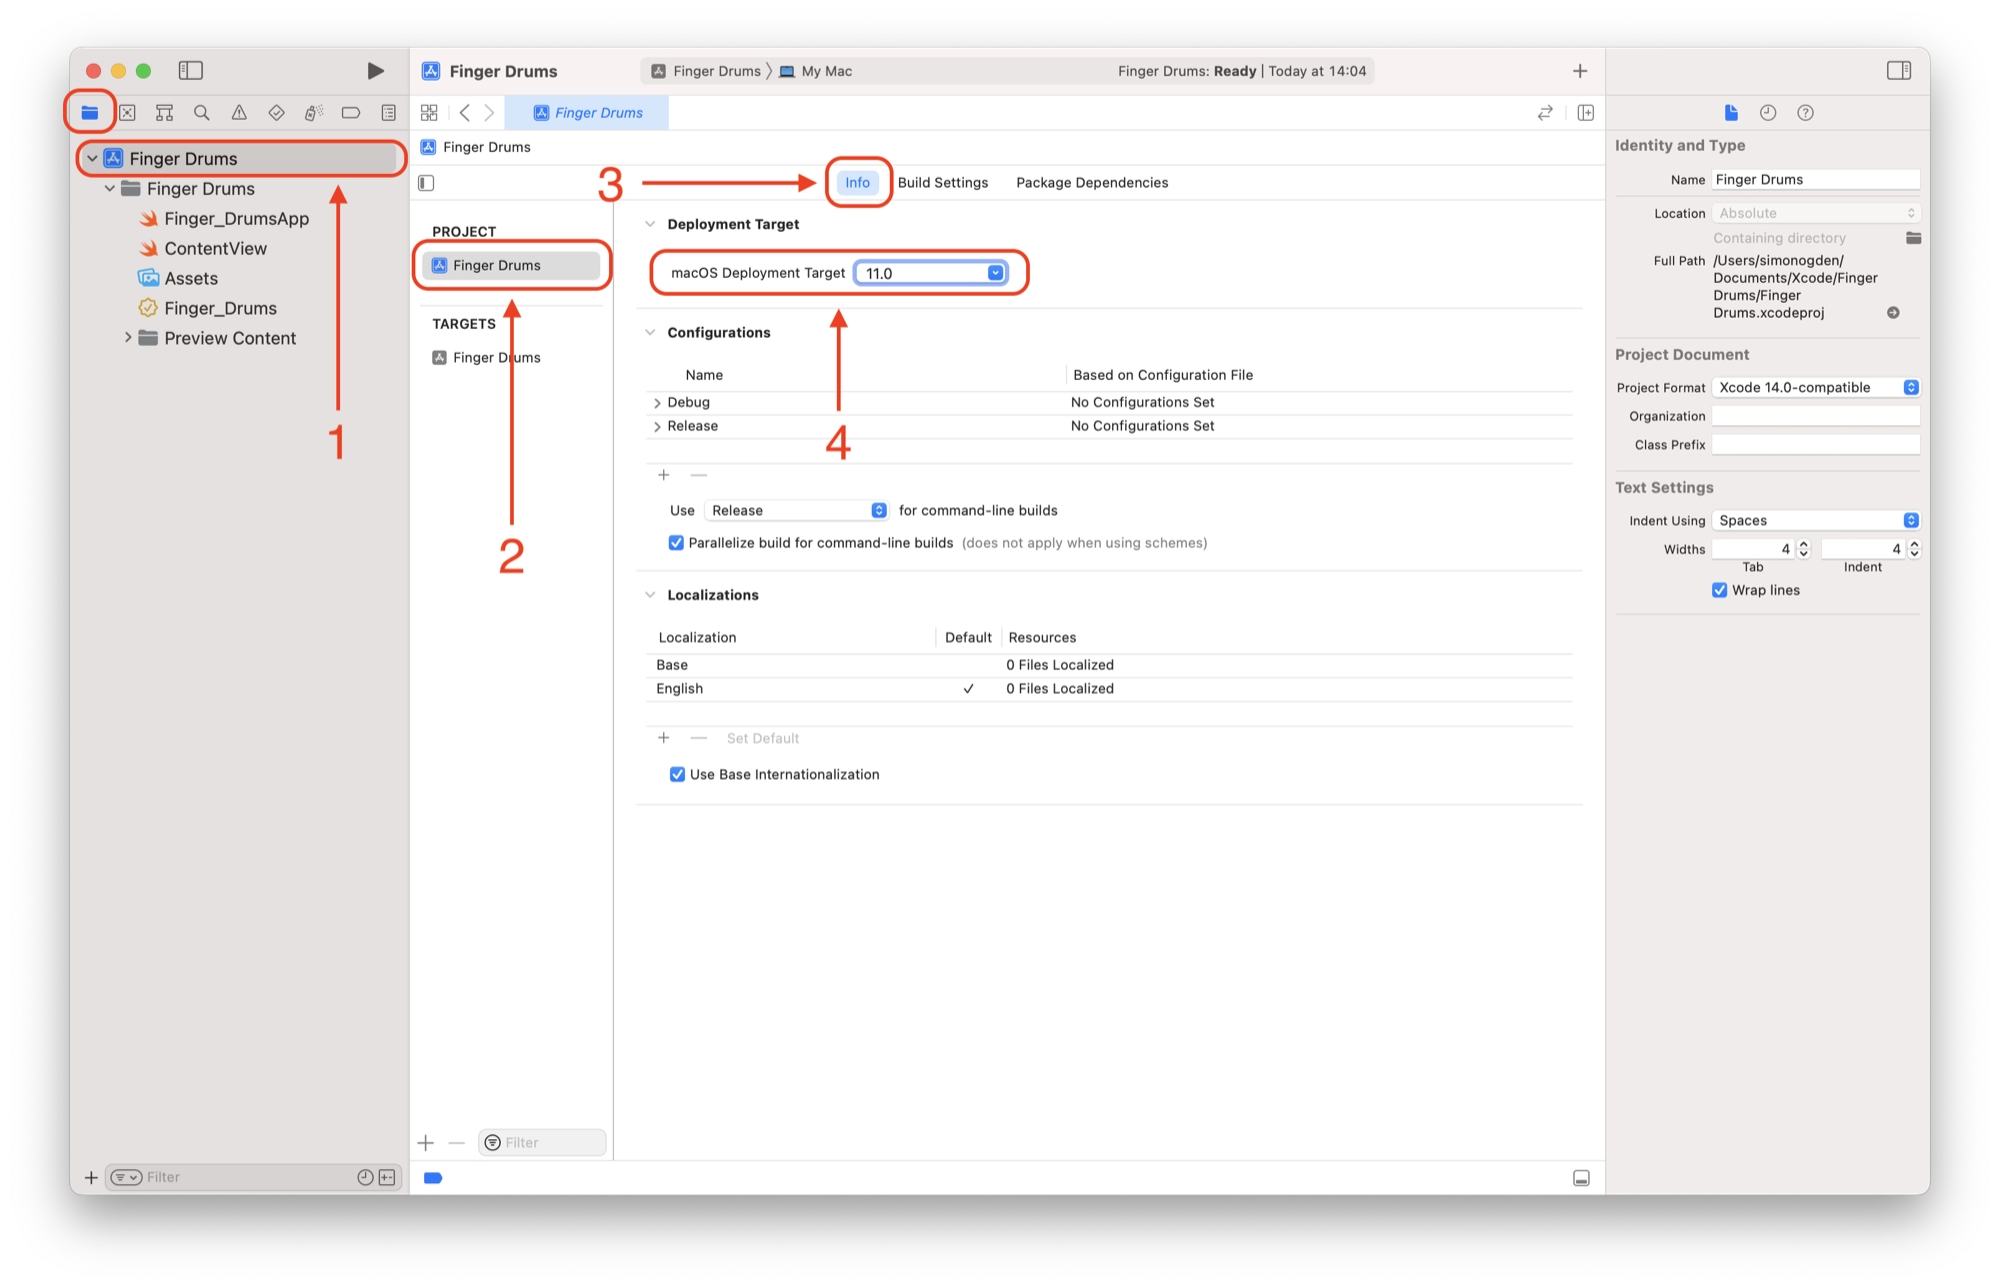
The first thing that we are going to do is take a look at the project settings. These can be accessed using the Navigator:
- Click the Project Navigator icon at the top of the Navigator side-bar. It is the small folder icon on the far left side of the icons found at the top of the Navigator side-bar.
- Click the Finger Drums project at the top of the file tree.
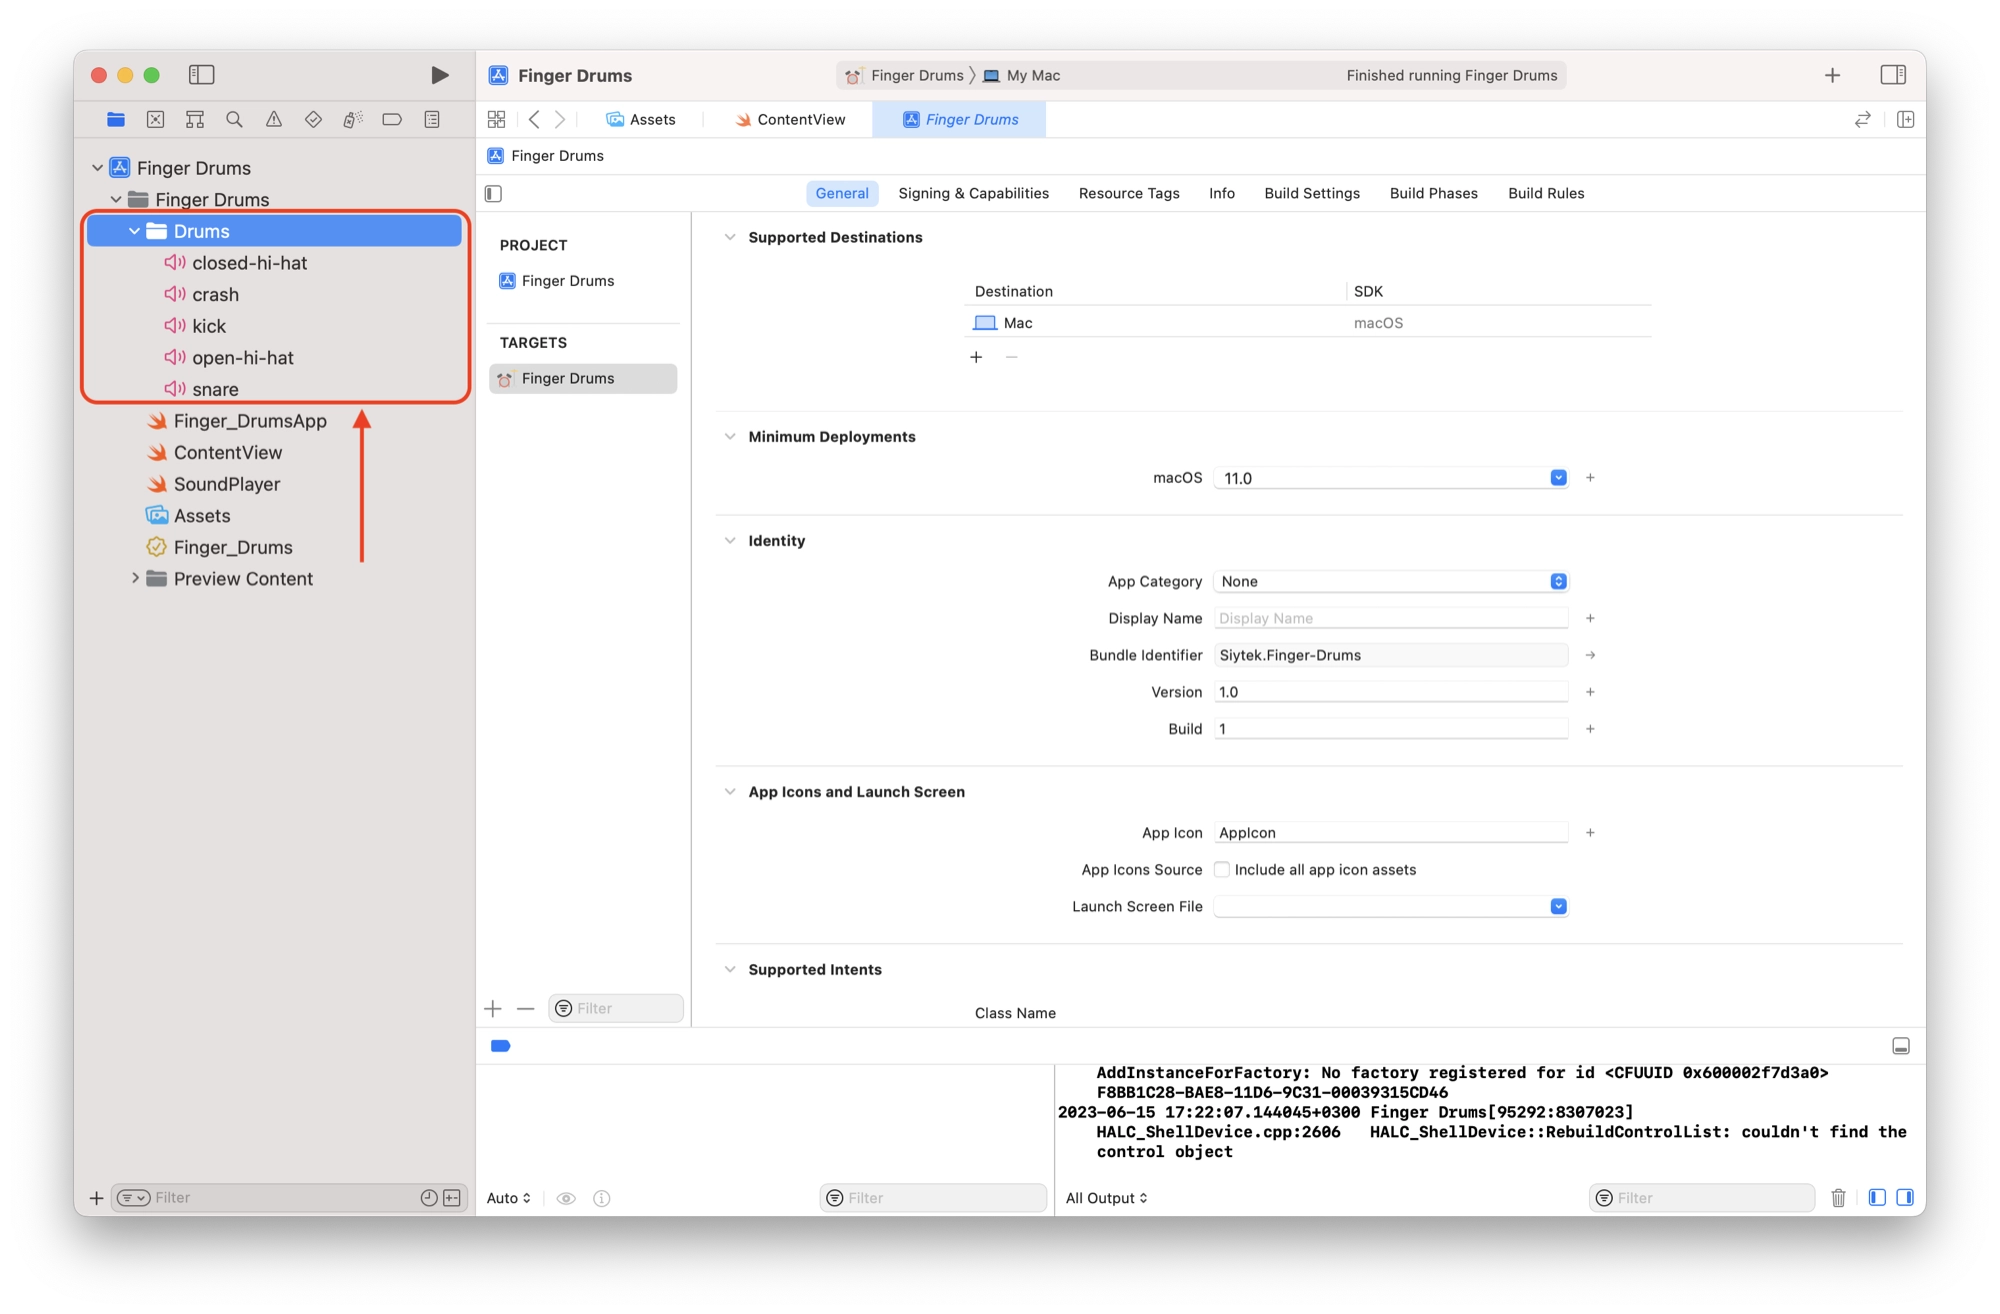
- In the main central window, select the Finger Drums project in the PROJECT section.
- Click the Info tab to display the general project information settings.
At the top of the screen under the Deployment Target you will see that the macOS Deployment Target is set to the most recent version, in my case 13.3 (for Ventura), but yours might be different if you are using an older version of macOS and Xcode.
This means that our project will only run on macOS 13.3 and newer, which is a bit limiting as we cannot share our project with anyone who is using an older version of macOS.
The advantages to limiting the project to newer versions of macOS is that it opens up the newer features available in Xcode, which are only compatible with newer versions of macOS.
Therefore our goal is to be able to set the macOS Deployment Target to as lower number as possible in order to make our app compatible with as many version of macOS as possible.
Depending on the purpose of our app, we may need to use features that are only available in newer versions of macOS. In this case we would need to limit the application to the particular version of macOS that is compatible with the features we need in Xcode.
The code used in this project is compatible with macOS 11.0 and newer, as I have opted not to include any features that require newer than macOS 11.0.
Therefore let’s go ahead and change the macOS Deployment Target to 11.0.
Adding Project Assets to Xcode
The next thing that we are going to do is add all of the necessary assets to our project.
Assets are the additional files that we need for our project, such as the drum sounds and the images that we will use for the buttons.
Download the Project Assets
I have bundled all of the required files that you will need for this project into a neat little .zip file that you can download for free. Click the button below to download the project assets and unzip them to a location of your choice:
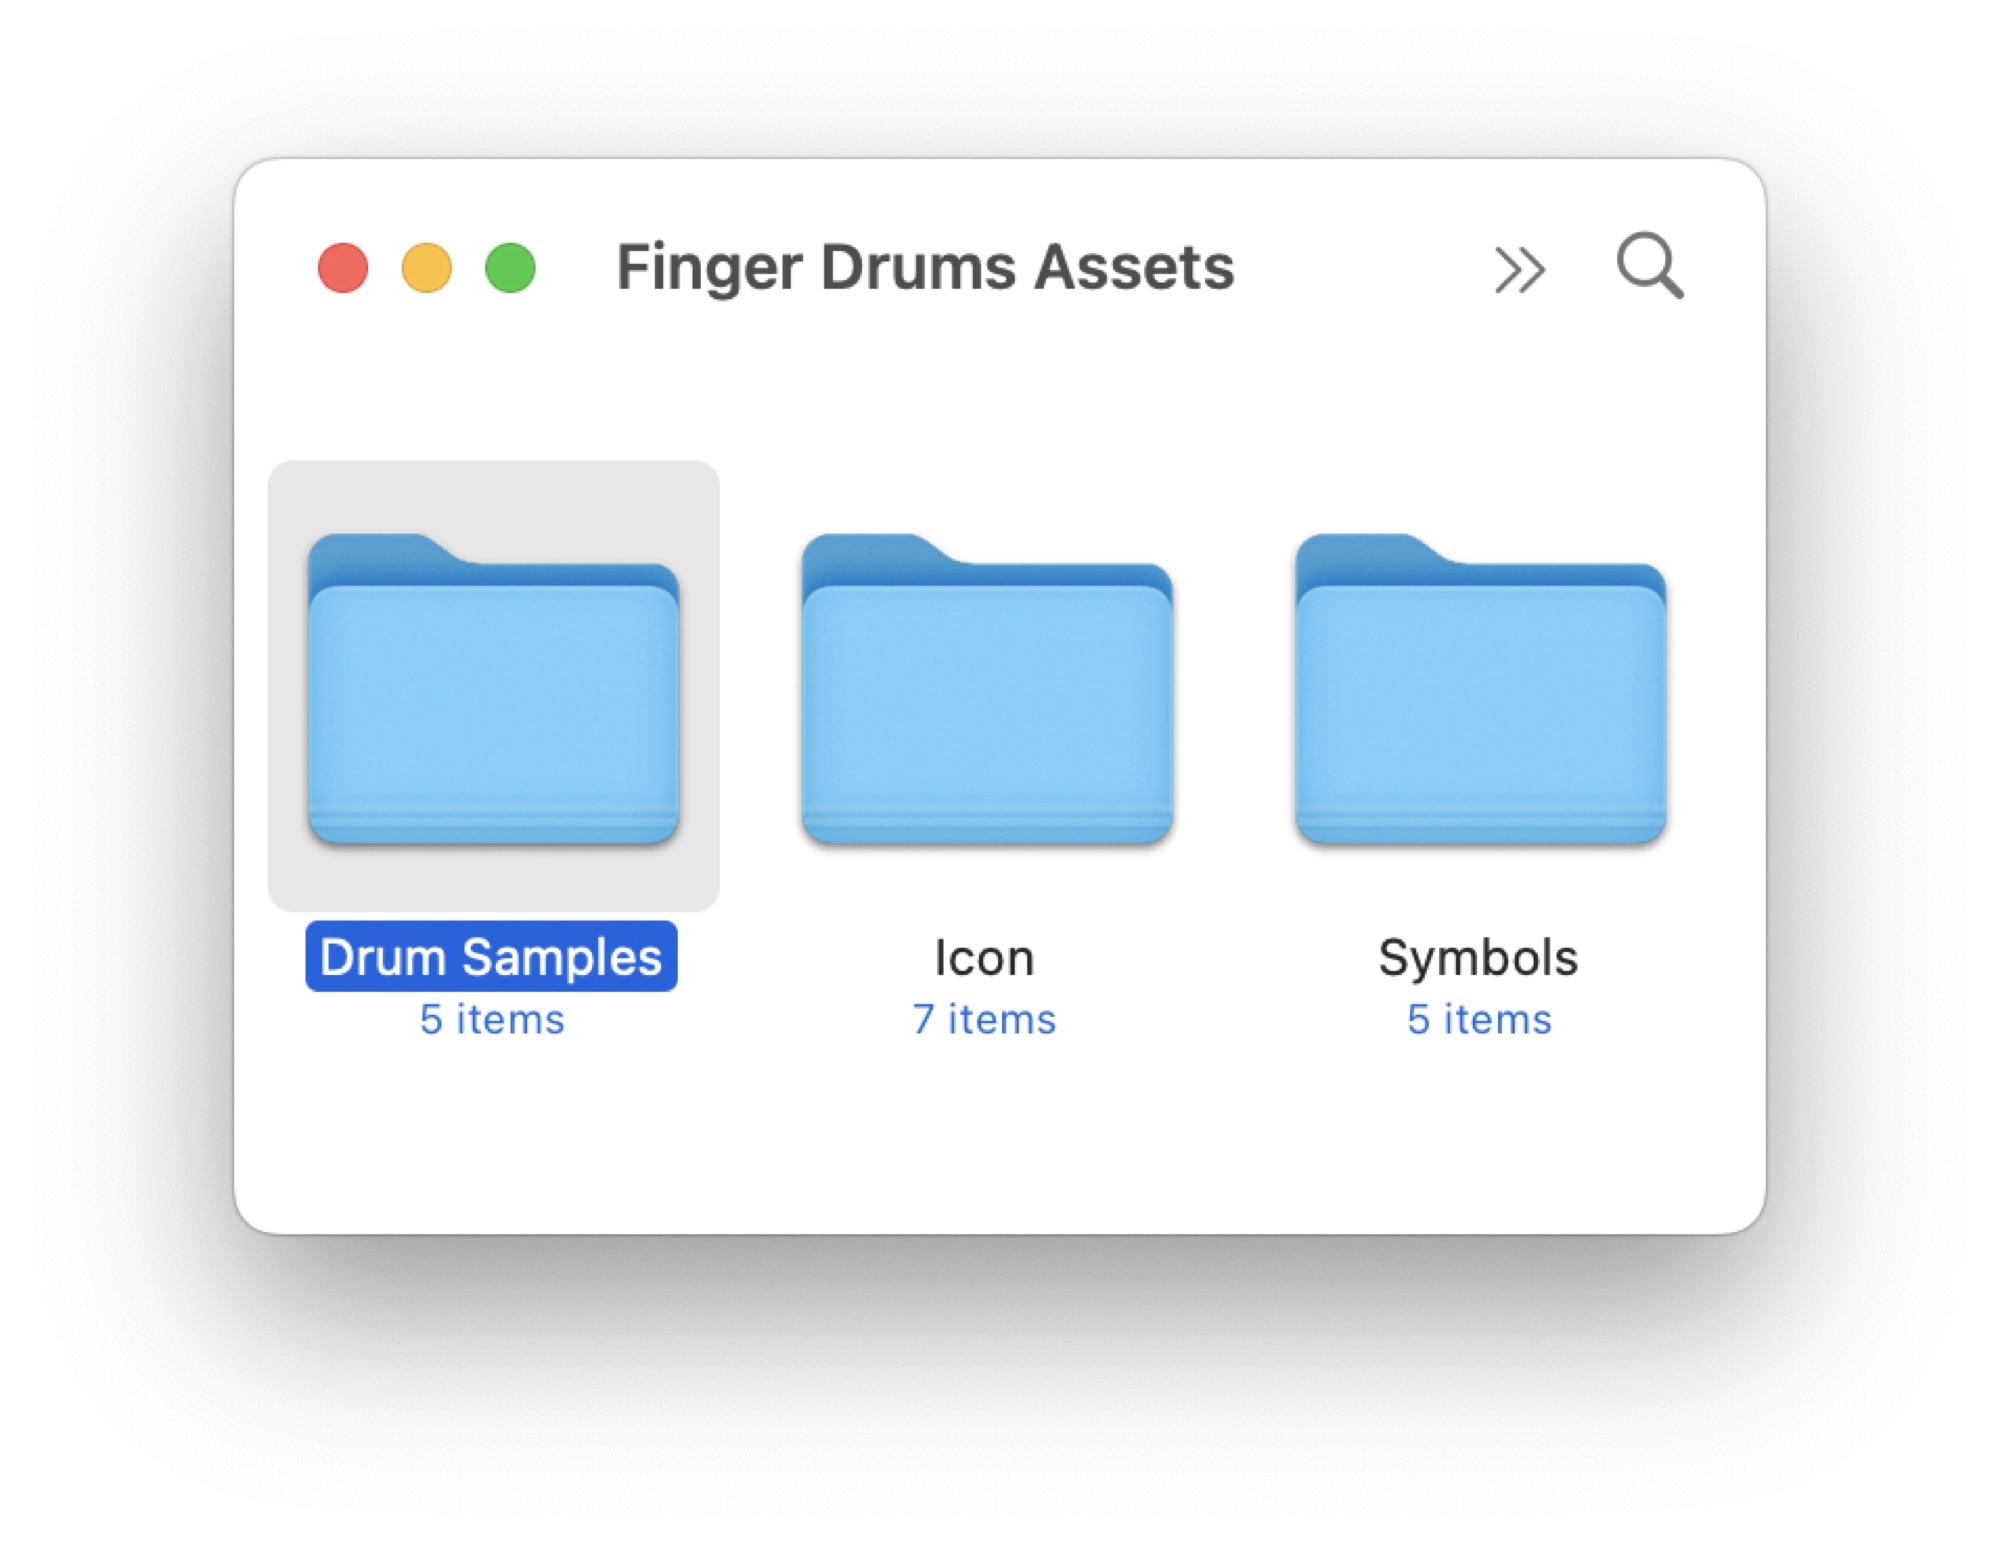
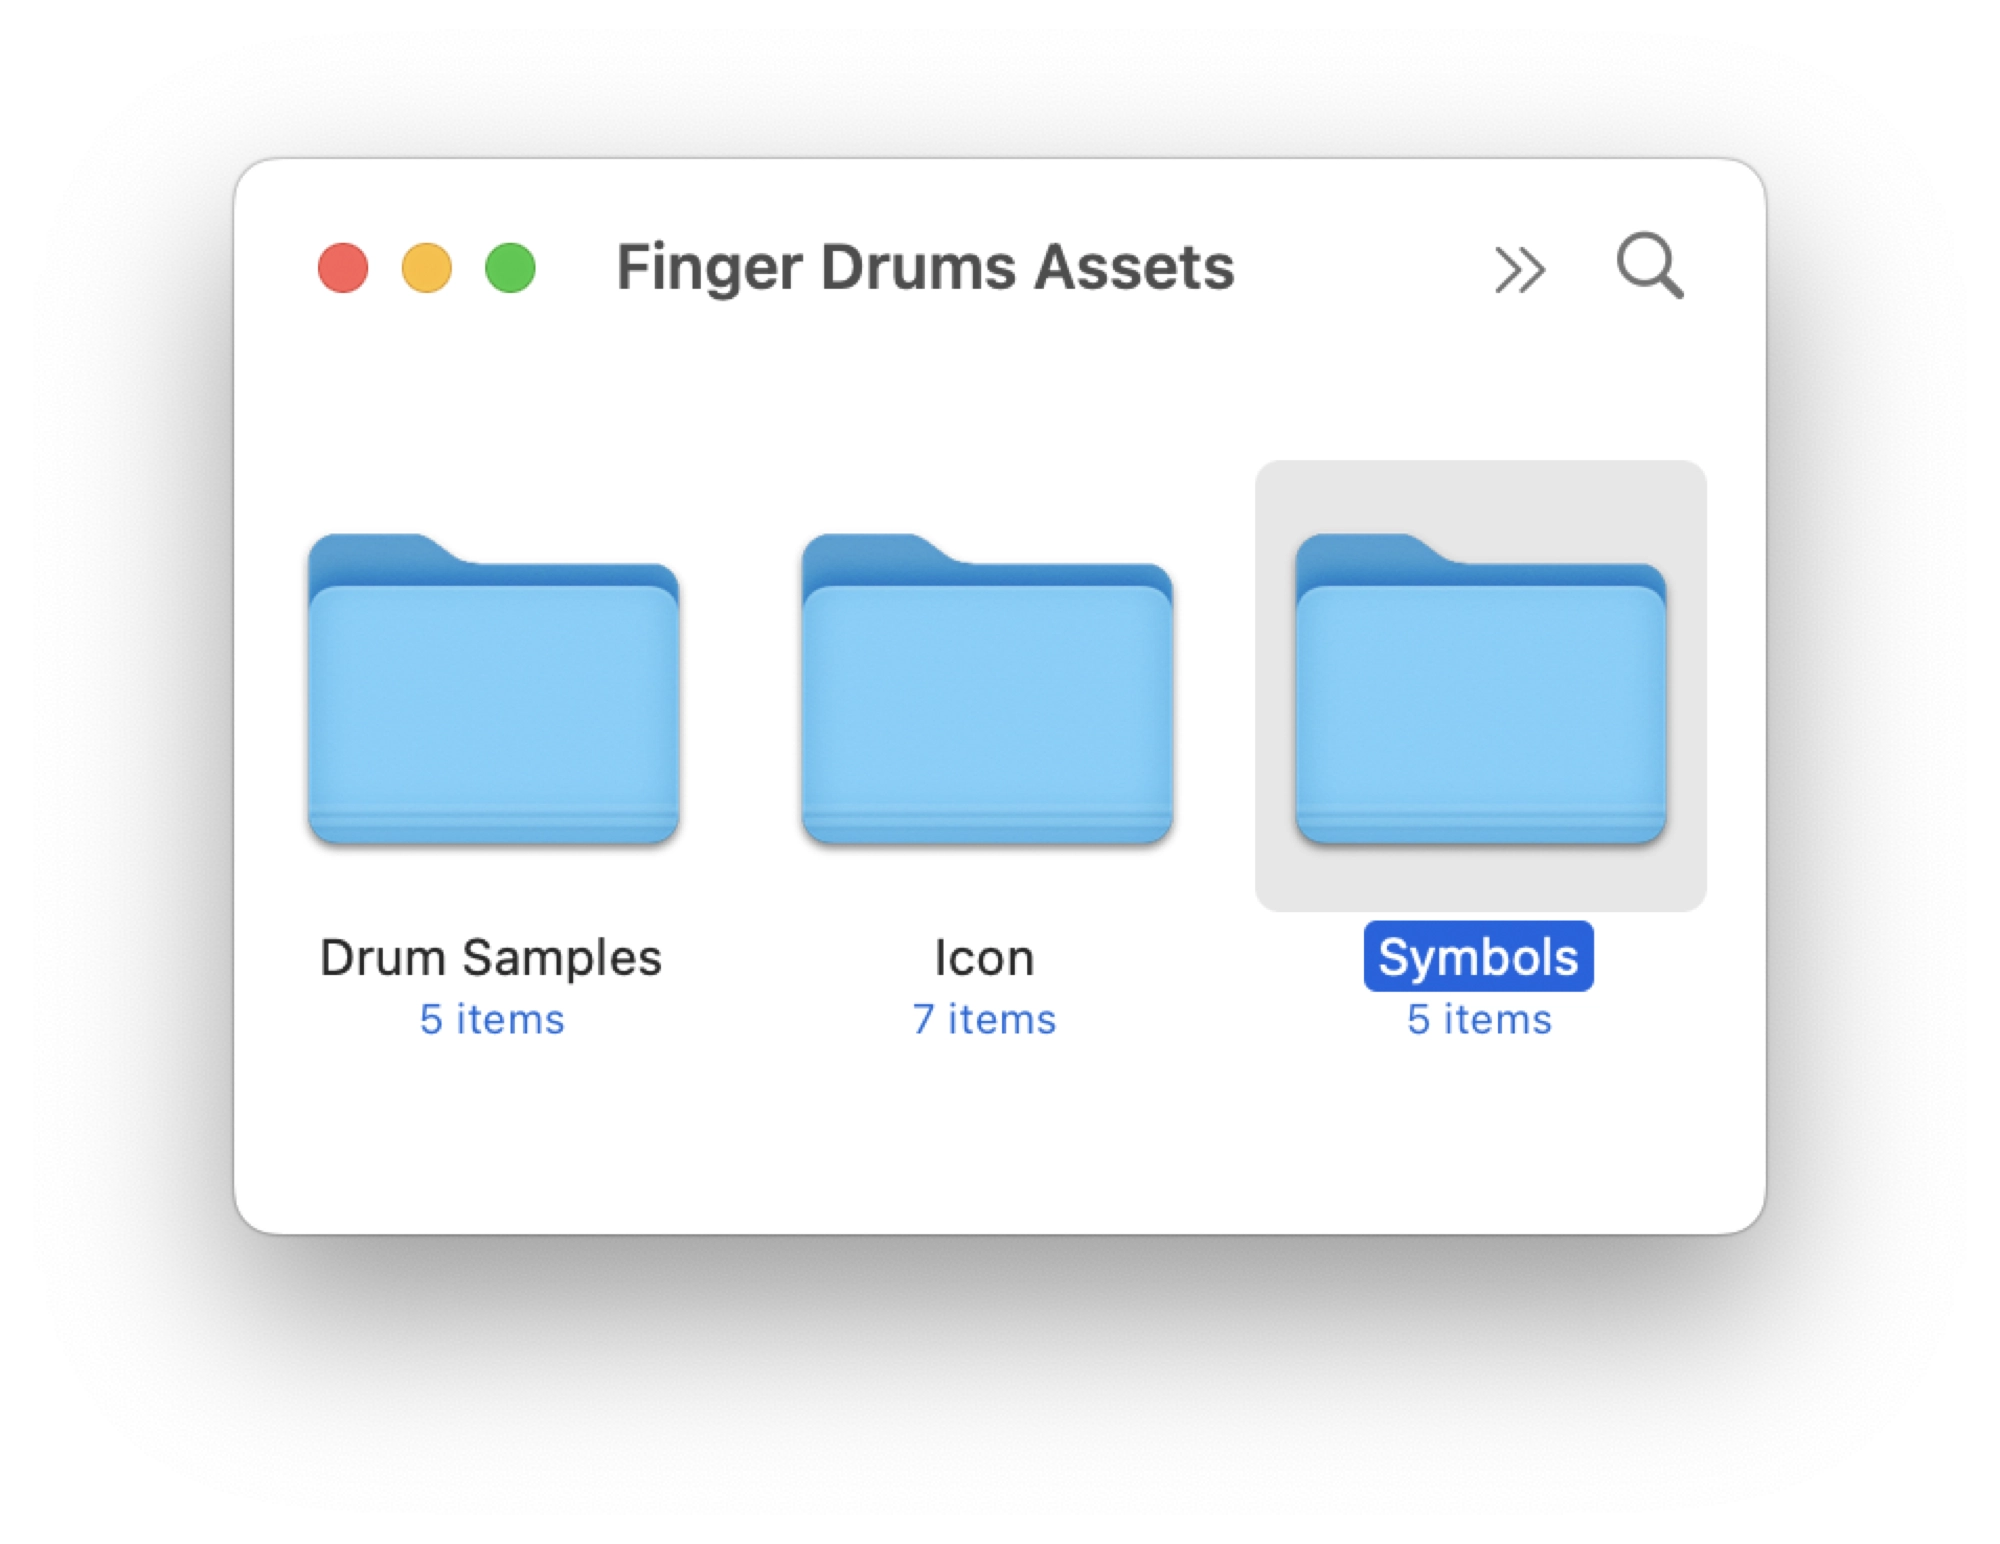
Within the project assets .zip file you will find the following folders:
- Drum Samples – a collection of drum sounds in the
.wavaudio format - Symbols – a collection of drum images to be used for the buttons in the project, in the
.pngimage format - Icon – a collection of images to be used as the app icon in a variety of resolutions, in the
.pngimage format.
There are several ways that we can import assets into Xcode and we will need to use a slightly different method for each of these folders.
Drag and Drop Assets to the Xcode Navigator
The simplest way to add assets to Xcode is to simply drag and drop them into the project Navigator. However before we can drop our audio files into the project, we need to create a new group in the Navigator tree.
Right-click the Finger Drums folder and select New Group. This will create a new (grey) folder just under the primary Finger Drums folder. Name the folder Drum Samples.
Next, open the Drum Samples folder from the Finger Drums assets folder and drag all of the files into the newly created Drum Samples folder.
Drop it just under the folder. This will open a dialog box that gives you some options regarding copying the files.
In the dialog box that options, you will be given a few choices for how you wish to import the files.
It is important that our project is selected in the Add to targets section, as this will automatically configure Xcode to include these files within our project when we compile the application. You should also ensure that Copy items if needed is selected.
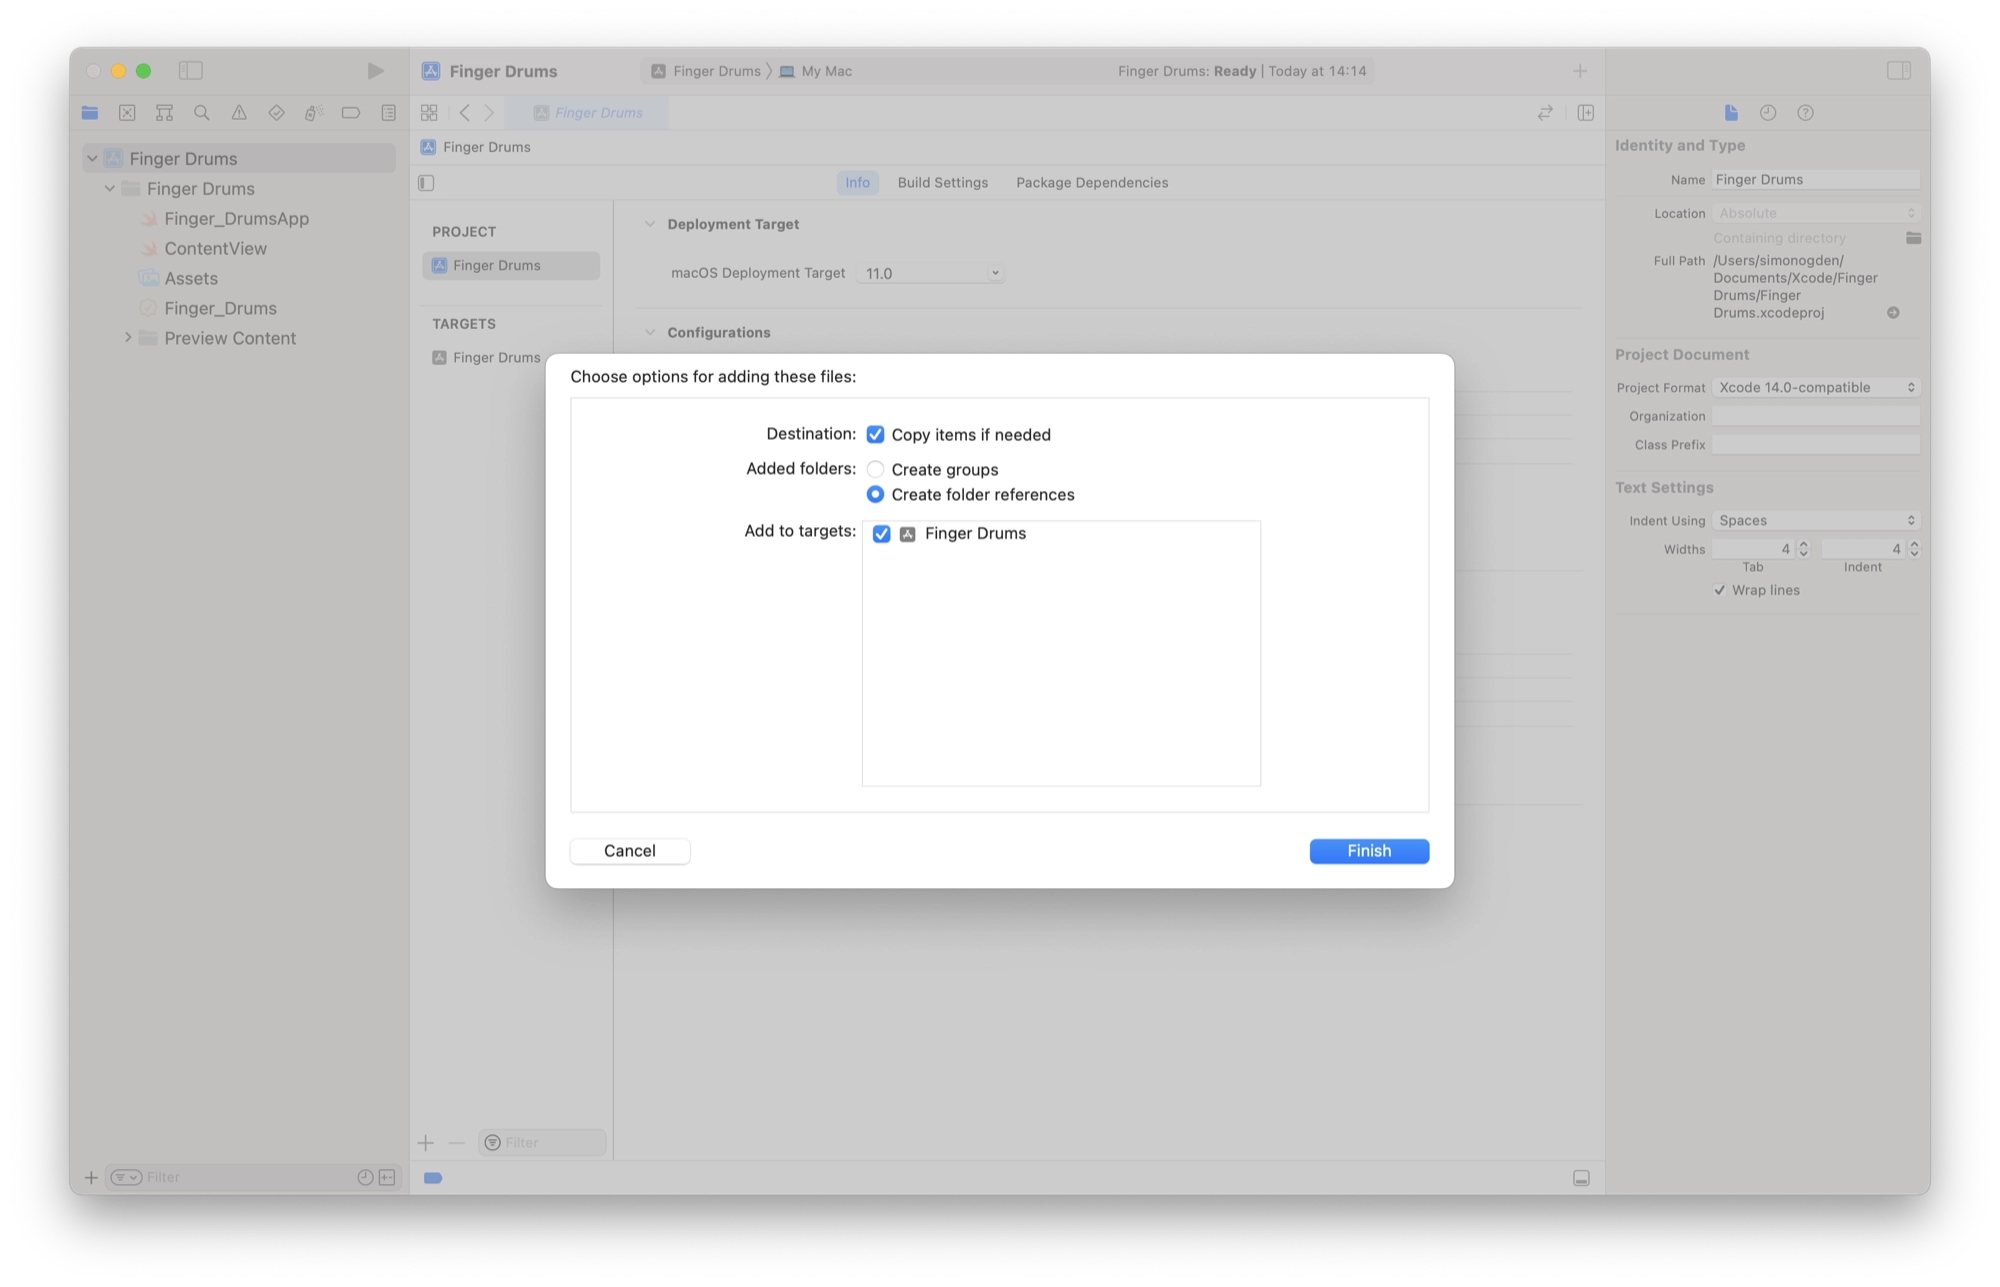
Click Finish in order to import the assets folder into Xcode. The folder should appear under the Finger Drums folder within the project.
If you accidently dragged it to the wrong place, don’t worry! You can just drag it to the correct place, shown in the following screenshot:
Adding Assets to the Assets Library
Xcode also has a convenient assets library for managing images, icons and color schemes.
It is better to use the assets library for assets that you want to include, which are of these supported types. Using the assets library simplifies the code required in order to include the particular asset in the project.
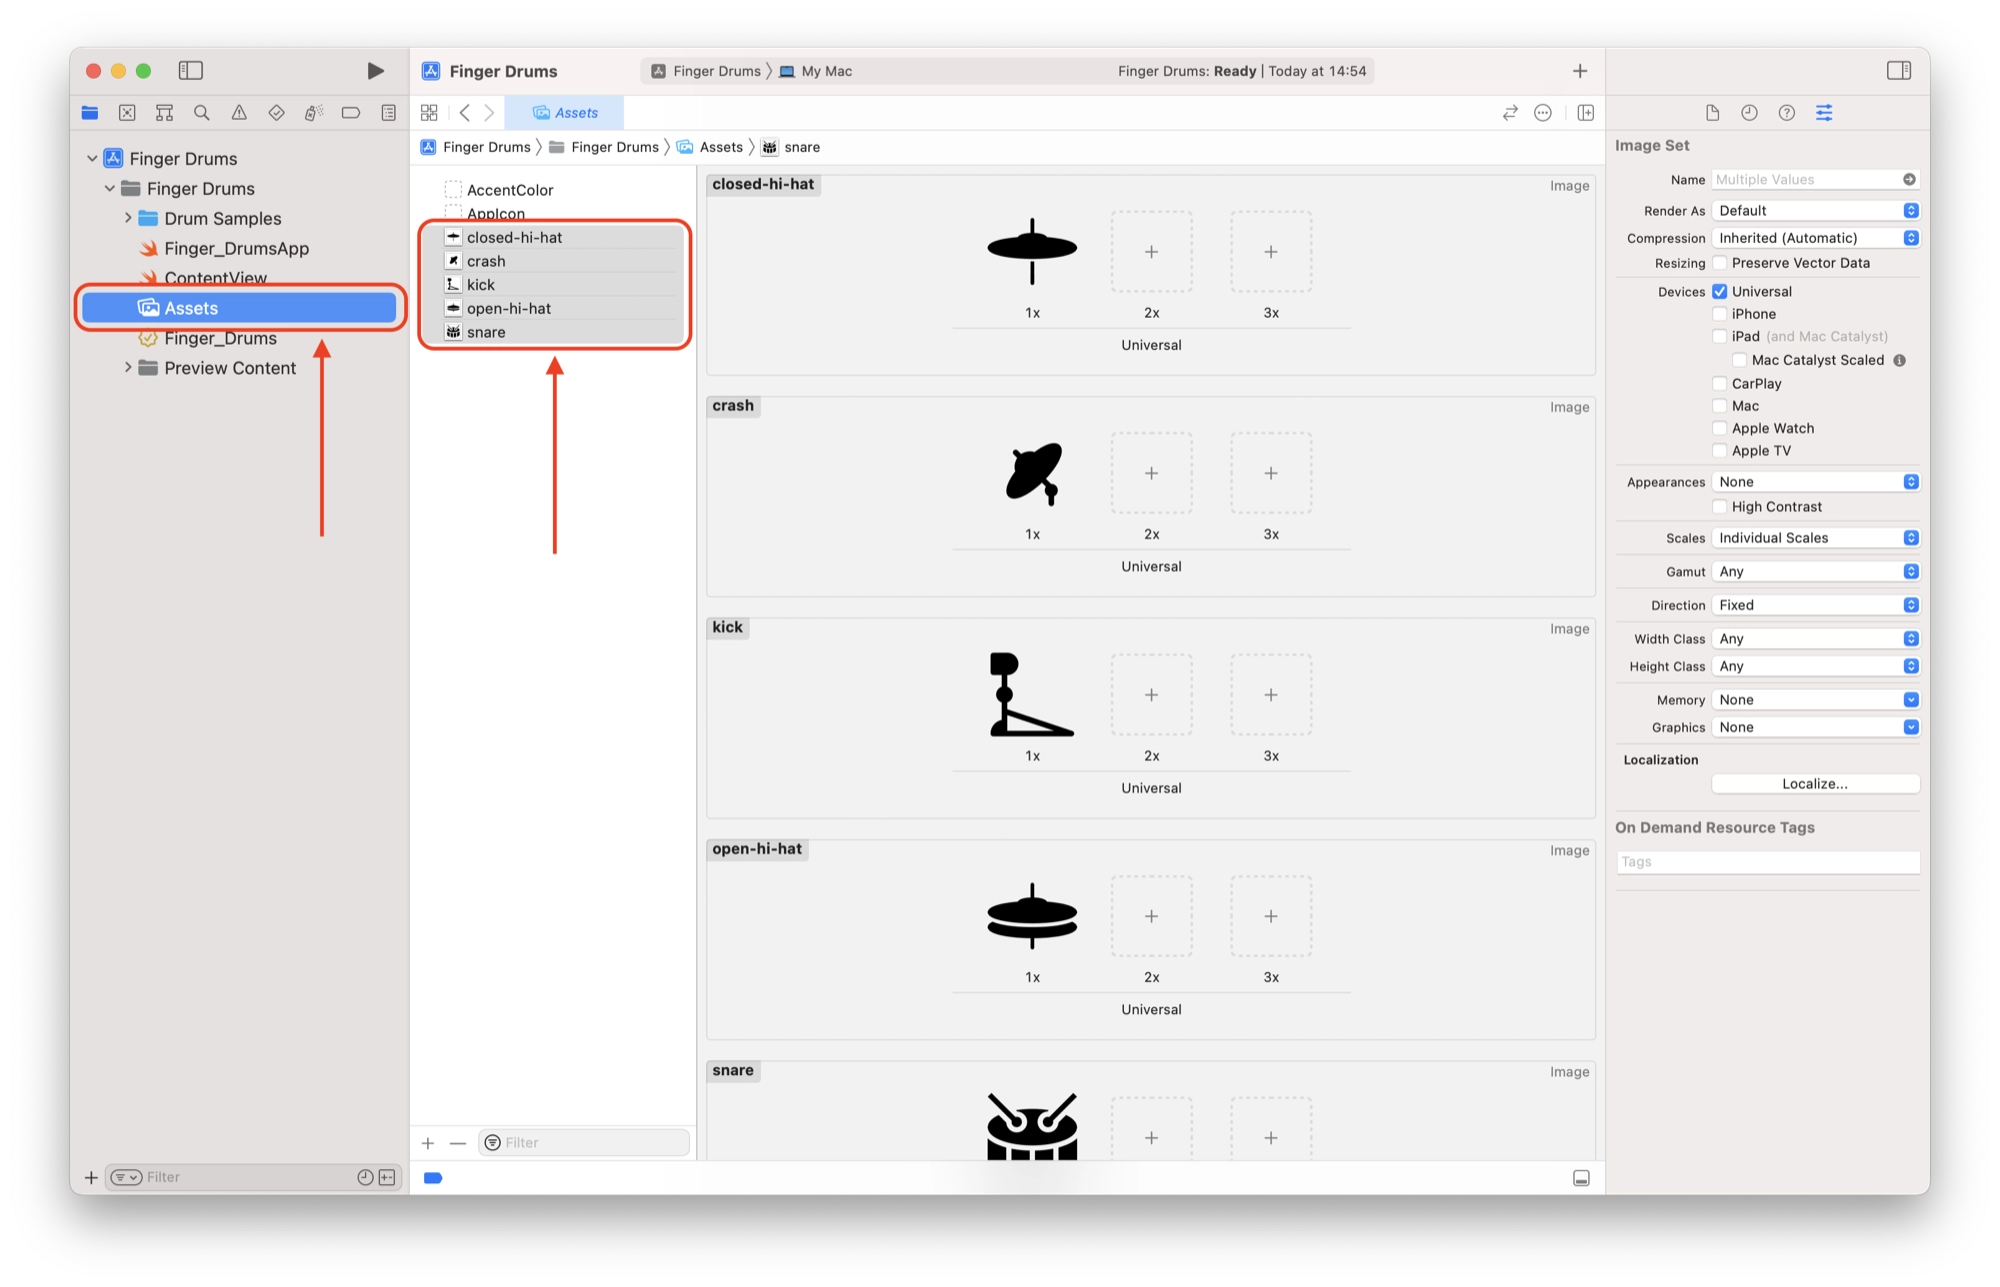
Locate the Symbols folder found in the Finger Drums Assets that you downloaded earlier.
Click the Assets library in the Navigator and then drag the images located in the Symbols folder into the assets library.
Creating an Icon for your Xcode Application
Lastly we will add the assets necessary for creating an icon for our Xcode project. This is the icon that will be used for our main program and it will also appear in the App store, should you choose to release your project.
In the Assets library you should find an empty icon called AppIcon. Click AppIcon in order to open it in the central window.
If you don’t see AppIcon in the Assets library, you can create it. Right-click in the blank space beneath and choose macOS > New macOS App Icon.
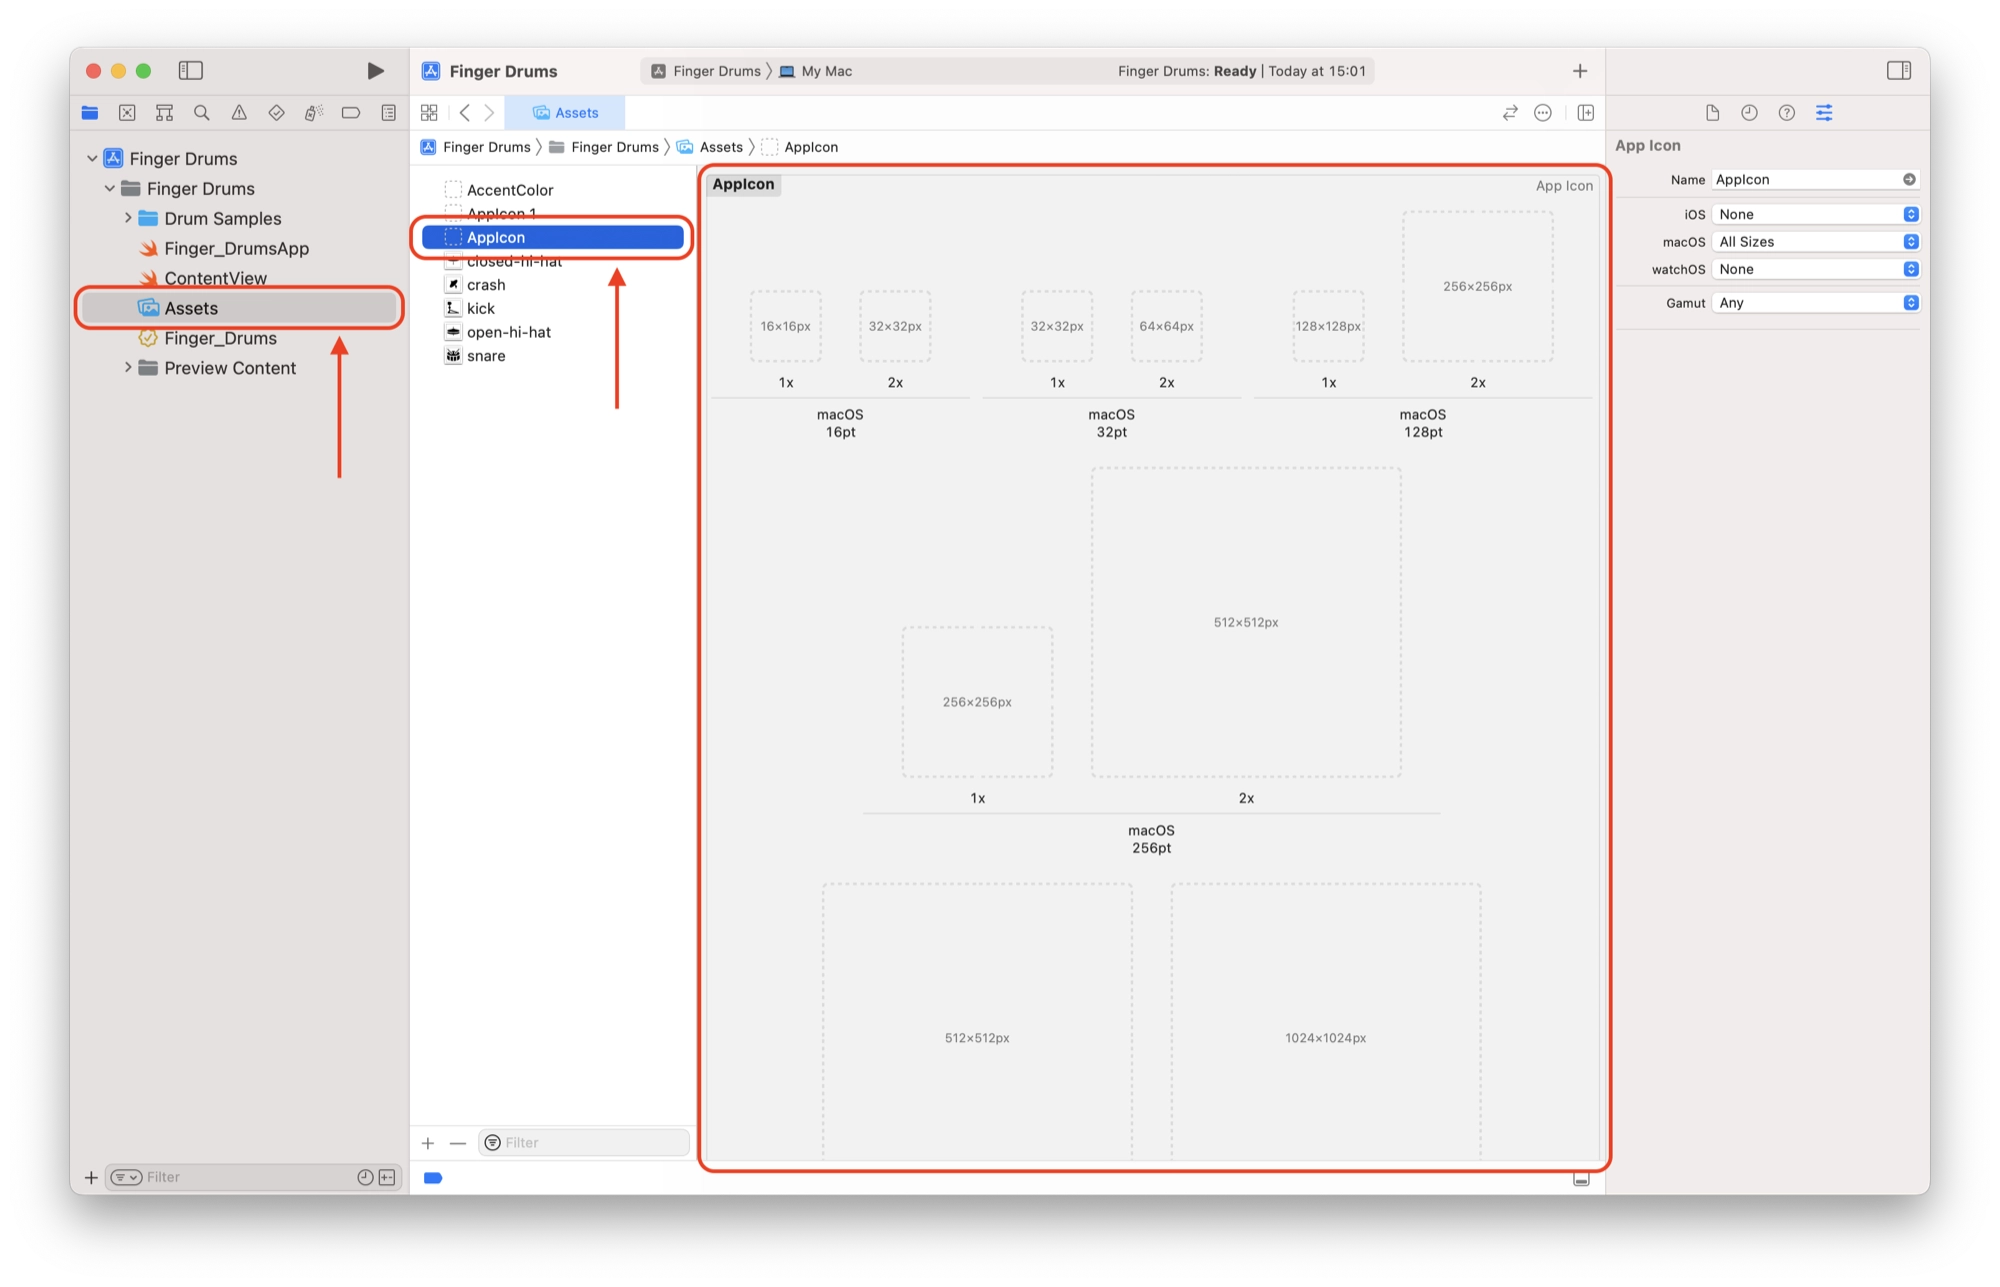
You will notice that there are a whole bunch of placeholders where you can add images. The Apple ecosphere requires images of different resolutions in order to maintain consistency with the visual appearance of their platform.
Open the Icon folder found in the Finger Drums assets that you downloaded earlier. Here you will find a set of images files that consist of the icon design in a variety of different resolutions.
Each image has a number on the end of the filename that corresponds with the resolution, for example drum16.png is 16×16 resolution and drum512.png is 512×512 resolution.
Drag and drop the drum image file that corresponds with the requested resolution into each of the placeholders within the AppIcon file.
This will create an ICNS file that will be used as your application icon. The end result will look like this:
Using Assets in Your Xcode Application
In this article we have covered the main ways that you can import images and sounds into Xcode, as well as creating an ICNS icon for an Xcode project.
The next step is to actually be able to use these assets in your Xcode project. We will do this by writing some code in Swift.
In part 3 of this tutorial we will get started with writing the Swift code that will make our Finger Drumming application functional!
Credits
- Drum Samples – Music Radar
- Bass Drum Icon – Flaticon
- Snare Drum – Flaticon
- Open Hat – Flaticon
- Crash Cymbal – Flaticon
- Drum Kit Icon – Icons8
Thanks so much for visiting my site! If this article helped you achieve your goal and you want to say thanks, you can now support my work by buying me a coffee. I promise I won't spend it on beer instead... 😏