Did you know that the Arduino IDE can be run from the command line?
This means that we can create and flash sketches using the Raspberry Pi terminal and this tutorial will guide you through the process step-by-step.
So why might it be super-useful to be able to flash Arduino from the Raspberry Pi Terminal?
Firstly this allows us to flash Arduino devices with both Raspberry Pi OS and Raspberry Pi Lite (no GUI) installations.
Secondly it means we can make use of the built-in serial port available via the GPIO header.
No FTDI, no problem!
This is very handy for flashing devices that do not have a built in USB-to-serial adapter.
Table of Contents
- Prerequisite
- Configure Arduino
- Create a new sketch
- Connecting the board
- Uploading the sketch
- Adding libraries
- Conclusion
Prerequisite
You will need a Raspberry Pi with the latest version of Raspberry Pi OS installed, either the GUI or headless version will do just fine.
If you need to install Raspberry Pi OS then go ahead and check out my Raspberry Pi OS Setup Guide.
You will also need a board compatible with Arduino connected to your Pi. You can either use a USB cable or you can wire your board directly to the onboard serial port.
If you plan on using the onboard serial port then you may want to check out this section of this tutorial which explains how to setup the port.
You may also need to manually reset your board as you begin the flashing process in order to put the board into bootloader mode.
Configure Arduino
First we need to go ahead and access the Pi terminal. You can either use a screen, keyboard and mouse or you can log in with SSH.
Once at the command prompt it is usually a good idea to update the system first so go ahead and enter the following.
sudo apt-get update && upgrade -y
Install Arduino-cli
Once the update has finished we can install the Arduino command line tools.
Just enter the following command to run the installation script, which will download and install Arduino-cli.
curl -fsSL https://raw.githubusercontent.com/arduino/arduino-cli/master/install.sh | sh
Go ahead and test the install by entering the arduino-cli command, it should produce a list of available commands.
arduino-cli
Adding to $PATH
If you get an error stating that arduino-cli cannot be found, you will probably need to add the path of the containing folder to .bashrc so go ahead and open it with nano.
nano ~/.bashrc
Next add the following line to the end of the file. You should only need to change the path if you altered it during the installation.
export PATH=$PATH:/home/pi/bin
Press ctrl + X to save and close the file, then reboot the Pi and the arduino-cli command should work upon rebooting back to the command line.
sudo reboot
Create a configuration file
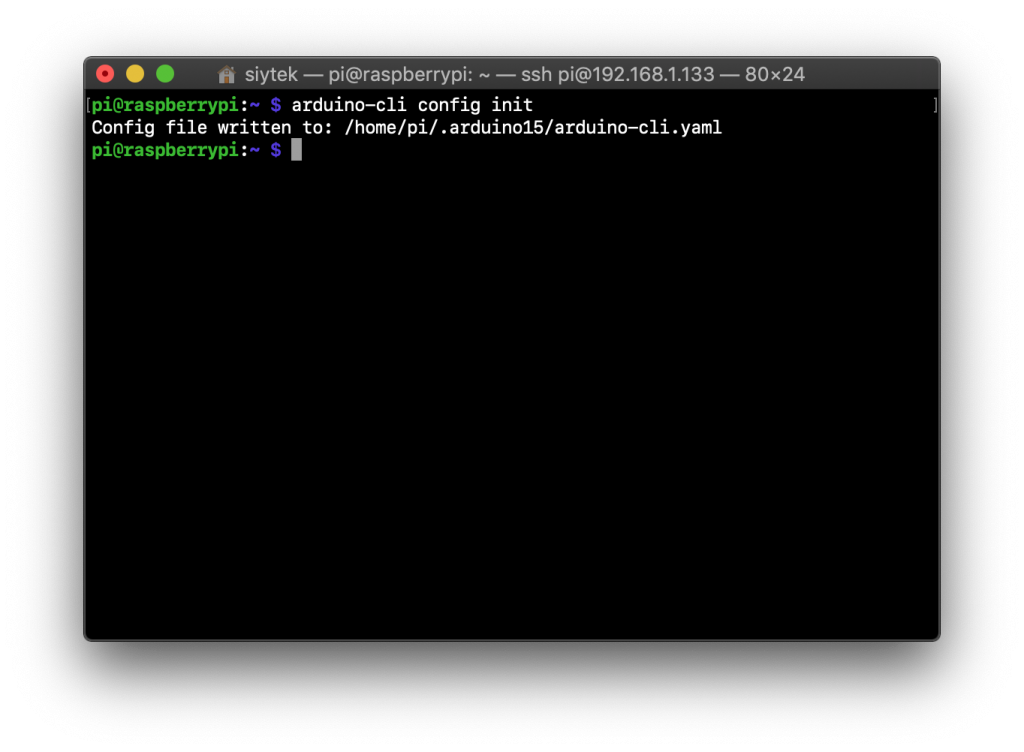
Once the installation script has completed we will first need to create a configuration file using the following command.
arduino-cli config init
This will create a configuration YAML file and echo the path in which the file was created.
Now we need to create our first sketch to upload.
There is some further configuration required so for now we will just create a basic blink sketch in order to complete the configuration.
Create a new sketch
Go ahead and enter the following command, it will create a new sketch folder within the current folder. For simplicity I will stick to the Pi user home directory.
arduino-cli sketch new blink
This will create a blank boilerplate code that we can open and add the blink code to.
Go ahead and enter the following to edit the file in nano, or feel free to use a different editor if you prefer.
nano blink/blink.ino
Once the file has opened, go ahead and add the blink code.
You may need to specify the LED pin differently depending on your board. Once you have added the code, go ahead and press ctrl + X to exit and save the file.
void setup() {
    pinMode(LED_BUILTIN, OUTPUT);
}

void loop() {
    digitalWrite(LED_BUILTIN, HIGH);
    delay(1000);
    digitalWrite(LED_BUILTIN, LOW);
    delay(1000);
}
Connecting the board
Next we need to connect the board and update the available platforms and libraries by entering the following command.
arduino-cli core update-index
We can now search for the board to see if it has been recognised.
arduino-cli board list
The output should present a list of recognised serial ports with some information about the board. We are interested in the FQBN and core values.
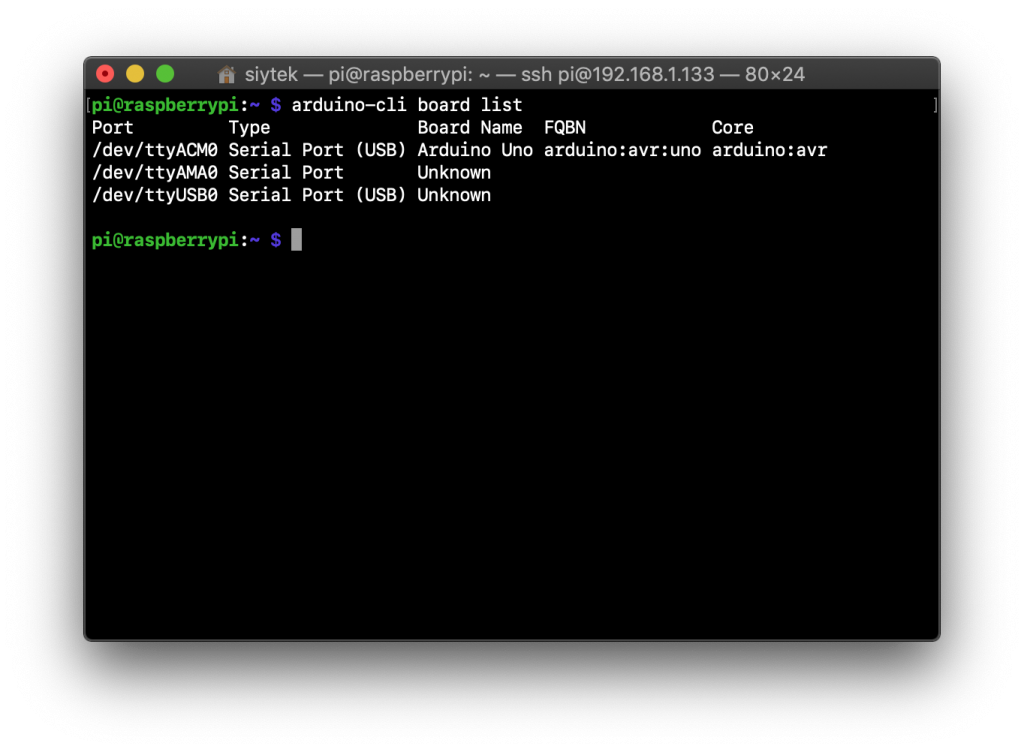
In the output above there are two boards connected to the Pi as well as the standard UART port available on the GPIO header. The UART port /dev/ttyAMA0 currently displays “unknown” as there is nothing connected to it.
However you may notice that /dev/ttyUSB0 also displays “unknown” despite there being an Arduino compatible board connected.
This is not a problem and the board should flash correctly but we will need to look up the information manually.
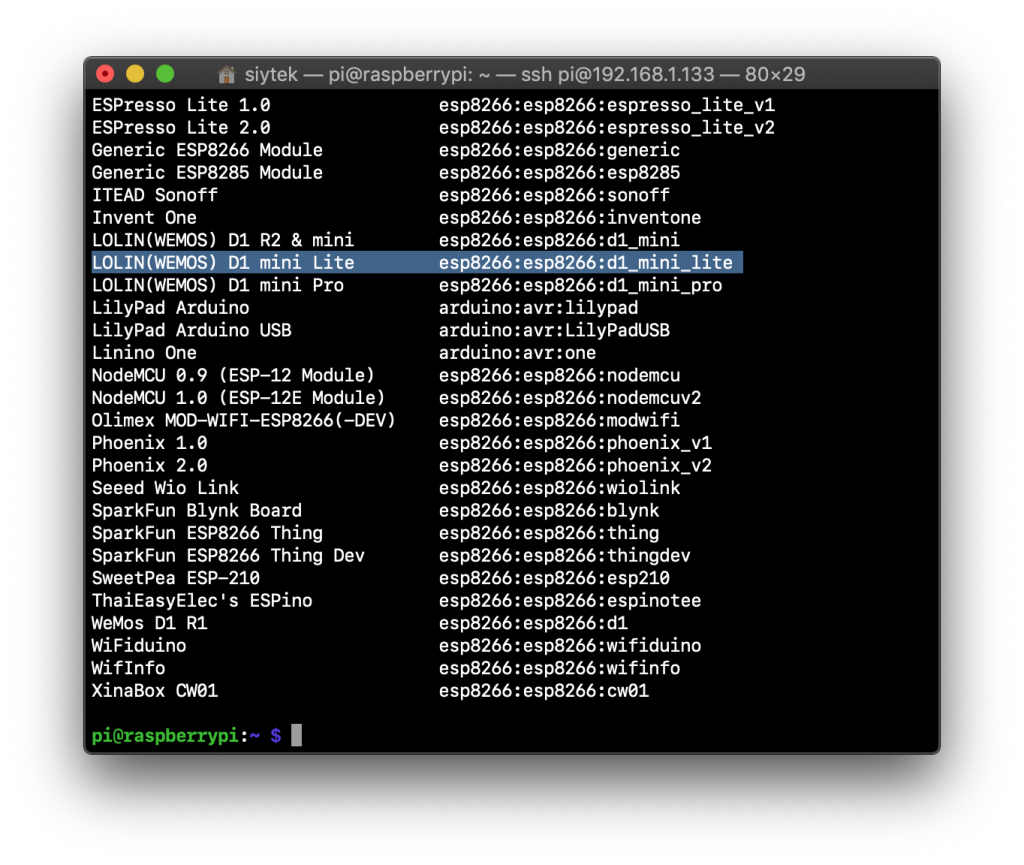
arduino-cli board listall
In my case the unknown board connected to /dev/ttyUSB0 is a Wemos D1 Mini Lite and here we can lookup the FQBN.
If you do not see your board listed then you will need to add the 3rd party core.
Adding a 3rd party core
If you are using a board that requires a 3rd party core such as boards that use the ESP8266 chip, we need to add the core URL to the configuration file.
Go ahead and open up the configuration file in your favorite text editor.
nano ~/.arduino15/arduino-cli.yaml
You can add the URL for each core you wish to install under board_manager and additional_urls.
Don’t forget that YAML is sensitive to case and spacing so they must be correct in order to produce suitable syntax.
board_manager:
  additional_urls:
  - https://arduino.esp8266.com/stable/package_esp8266com_index.json
  - http://another-url-here...
daemon:
  port: "50051"
directories:
  data: /home/pi/.arduino15
  downloads: /home/pi/.arduino15/staging
  user: /home/pi/Arduino
logging:
  file: ""
  format: text
  level: info
Once you have added the URL, go ahead and press ctrl + X to close and save the file.
Next we need to update the core index to tell the Arduino-cli about the newly added core.
arduino-cli core update-index
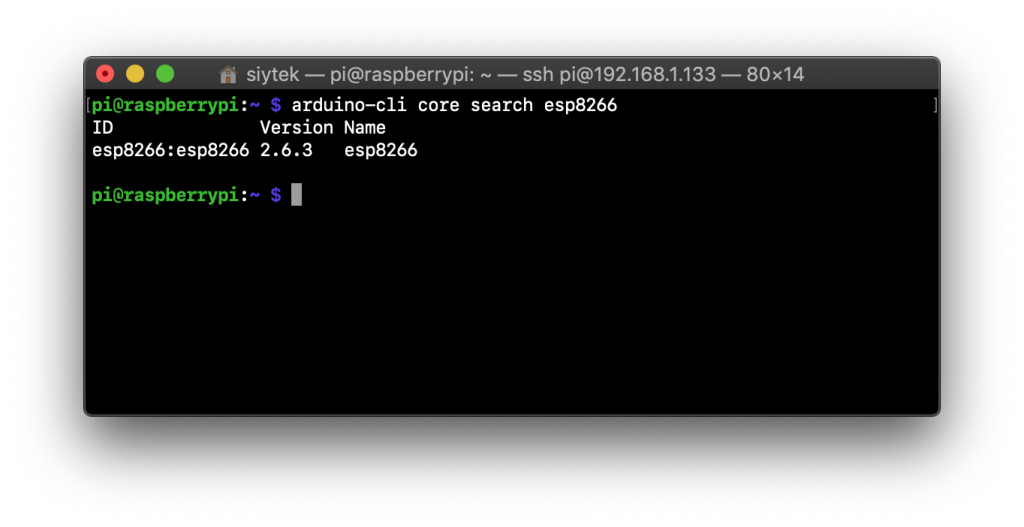
You can confirm that the core has successfully been added with the following command.
Don’t forget the replace the core name you are searching for if different from esp8266.
arduino-cli core search esp8266
Uploading the sketch
Ok we are done with the configuration and now we can compile and upload the sketch!
Compile
First we will compile the sketch using the following code. You should enter the values according to your board and the sketch you wish to compile.
arduino-cli compile --fbqn <fbqn> <sketch>
I am going to flash the Wemos D1 Mini Lite with the sketch we created earlier called blink, therefore the compilation will be executed with the following.
arduino-cli compile --fqbn esp8266:esp8266:d1_mini_lite blink
Flashing
Once the compile process has finished we are finally ready to flash our board!
This is done with the following command, now also specifying the port that your board is connected to.
arduino-cli upload -p <port> --fqbn <fqbn> <sketch>
To flash this to the Wemos D1 Mini I will use the following command but you should use the values relevant to your setup.
arduino-cli upload -p /dev/ttyUSB0 --fqbn esp8266:esp8266:d1_mini_lite blink
Adding libraries
Now that you have flashed the blink sketch you are probably going to want to flash something a little more complex.
This may require the use of external libraries, which you are probably familiar with from the standard graphical IDE.
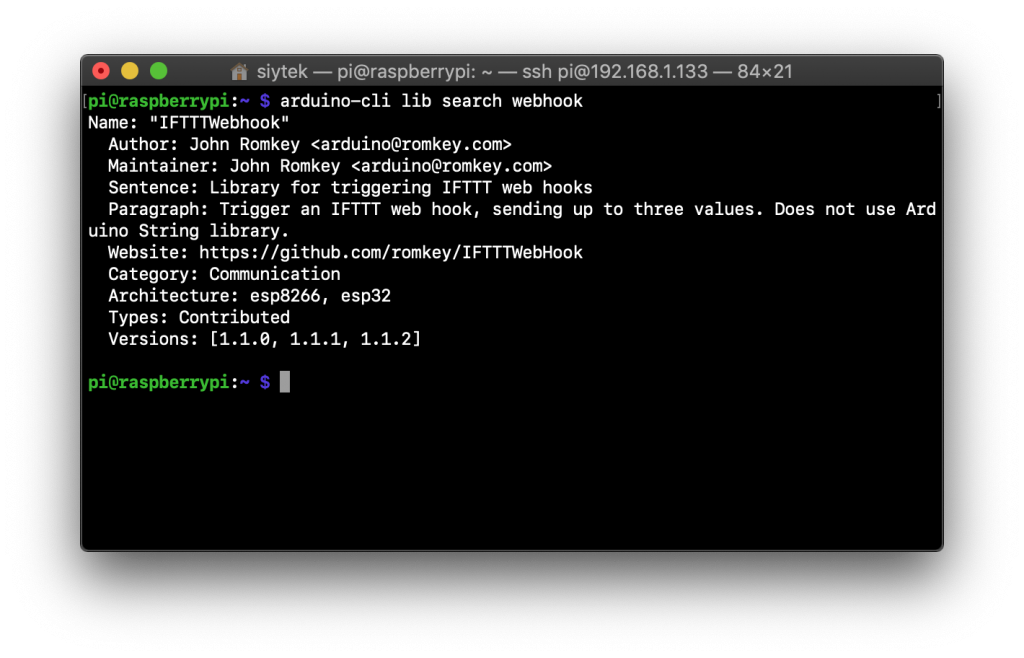
Just like in the GUI version of the IDE, you can search for libraries with the following command.
arduino-cli lib search <library>
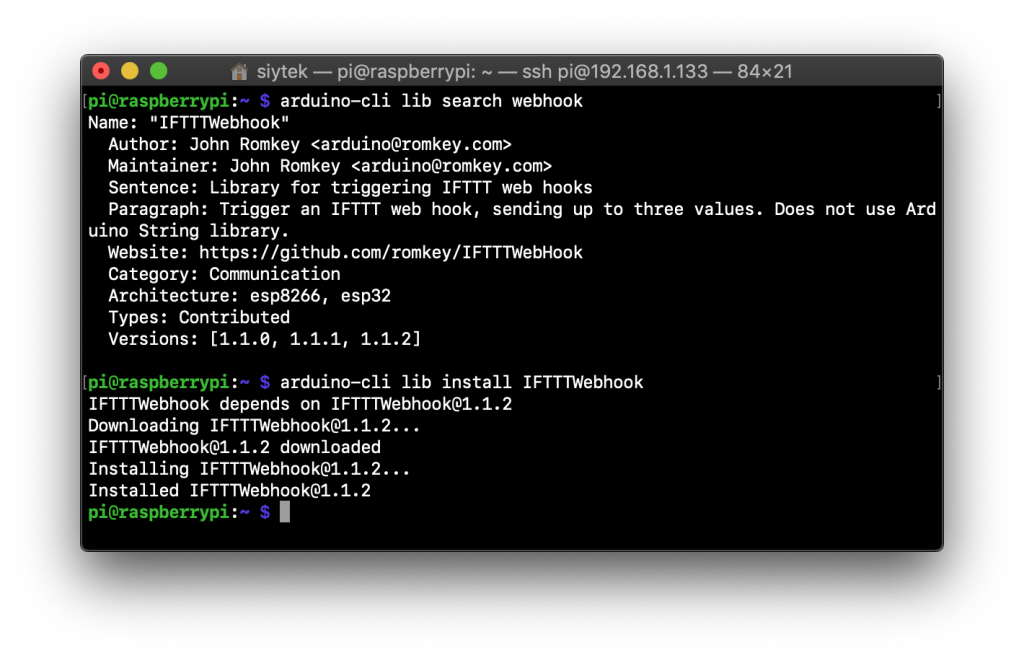
Once you have found a library you wish to add, you can add it using the following command.
arduino-cli lib install <library>
Conclusion
The Arduino-cli is fairly straightforward to install and very easy to use as far as terminal applications go.
It supports all of the main features that are required to write a program and flash the board and does a great job of offering this across all platforms.
It may seem like a waste of 30 minutes when you can just use the GUI, however there are certain applications where it may be very useful.
- If you want to use your own prefered text/code editor
- If you have the need to flash Arduino out on the road (e.g. drones/FPV)
- If you want to give another application Arduino flashing capability
- If you want to use the Pi UART port (help! I lost my FTDI adapter!)
- If you just want to feel like a hacker! 😉
So now you have completed this tutorial why not go check out some of my other awesome Raspberry Pi, Arduino or ESP device tutorials!
Thanks so much for visiting my site! If this article helped you achieve your goal and you want to say thanks, you can now support my work by buying me a coffee. I promise I won't spend it on beer instead... 😏


Nice tutorial! By the way, when I ran compile it gave me this error:
Error during build: platform not installed
So I had to run this command which fixed it:
arduino-cli core install arduino:avr
Thanks!
Hi, thanks for your well explained post to use arduino-cli on RaspberryPi. Since i am using the same, I followed all the steps you mentioned. I succeed till the compilation part but failed to upload with this error message:
Error during Upload: uploading error: cannot execute upload tool: fork/exec /home/pi/.arduino15/packages/OpenCM904/tools/opencm_tools/0.0.2/linux/opencm9.04_ld: exec format error
Could you please help me to resolve this. Thank You.
Hi Ash, thanks for visiting! What board are you trying to program? What Pi and OS? Exec format error usually relates to trying to run an incompatible binary on Linux, such as x86 compilation on ARM architecture.
Wow. Cool and simple overview of Arduino-CLI. Thanks!
It is also very useful if you want to integrate an Arduino environment into an CI/CD pipeline for automatic building, testing and deploying. 😉
Greetz
Thanks for visiting, glad it was helpful! 🙂