Want to know a quicker and easier way to to control a LED or relay with a web browser?
ESPHome is a powerful IoT tool that sits on top of the Arduino framework and it dramatically simplifies the process of building a custom IoT device using an ESP-based board.
Table of Contents
Prerequisite
ESPHome is widely used by smart home enthusiasts who operate the Home Assistant platform. If you are using Home Assistant then you should definitely check out this tutorial and consider using the ESPHome add-on.
It is also possible to use ESPHome completely independently of Home Assistant, making it an ideal choice for developing an IoT device that doesn’t require a server!
You will need a compatible ESP32 or ESP8266 device and you may also need a USB cable to flash your device for the first time. Once the device is flashed you will be able to flash it over the air (OTA) with WiFi.
Installing ESPHome
For this tutorial we will follow the process of manual installation of ESPHome and we will use the command line to configure everything.
In order to use ESPHome you will need Python so if you don’t already have it, go ahead and download it from the official page.
Once you have Python installed you will need to open up the terminal (or command line for you Windows folks) and install ESPHome.
pip install esphome
ESPHome is configured using the YAML data serialization language. Don’t worry, it’s not as complex as it sounds! There is a wizard that will do most of the hard work, we will simply enter a few lines to configure the device.
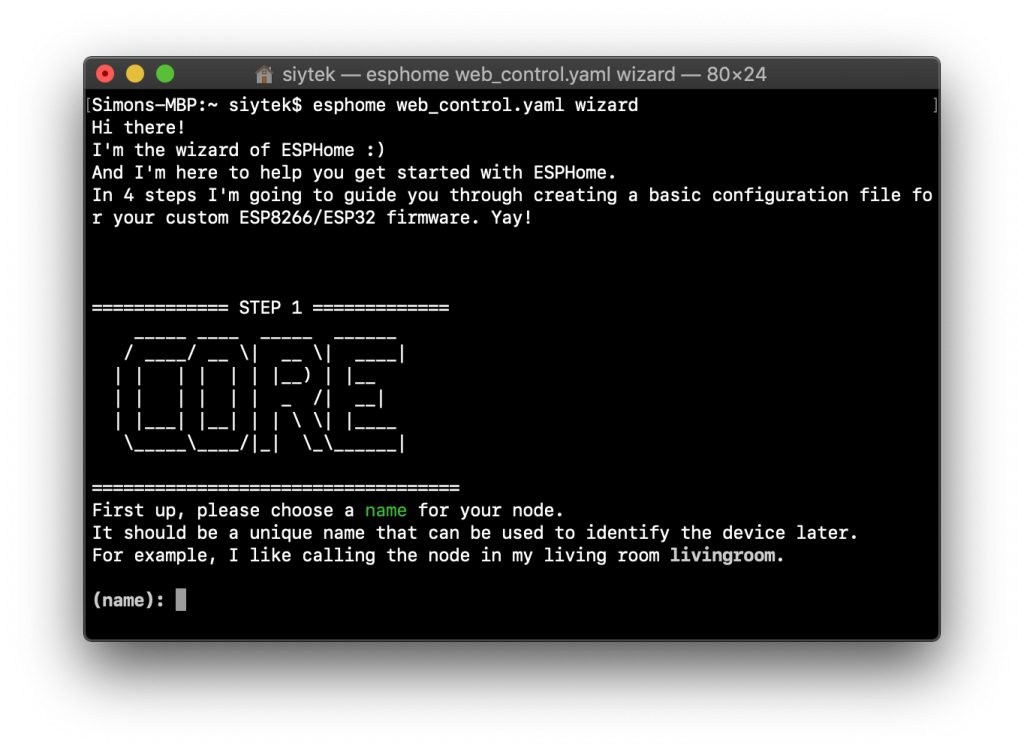
Once ESPHome has finished installing, we can create a new file called something like web_control.yaml using the wizard.
esphome web_control.yaml wizard
In the first step we will choose a name for our device. You can call it whatever you like.
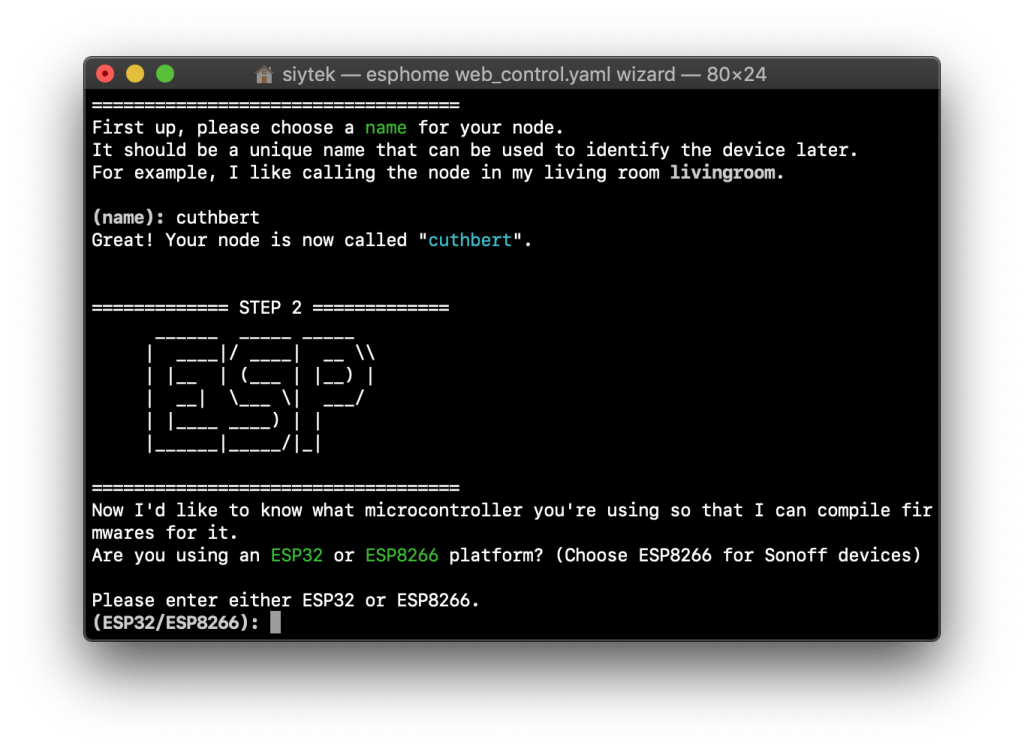
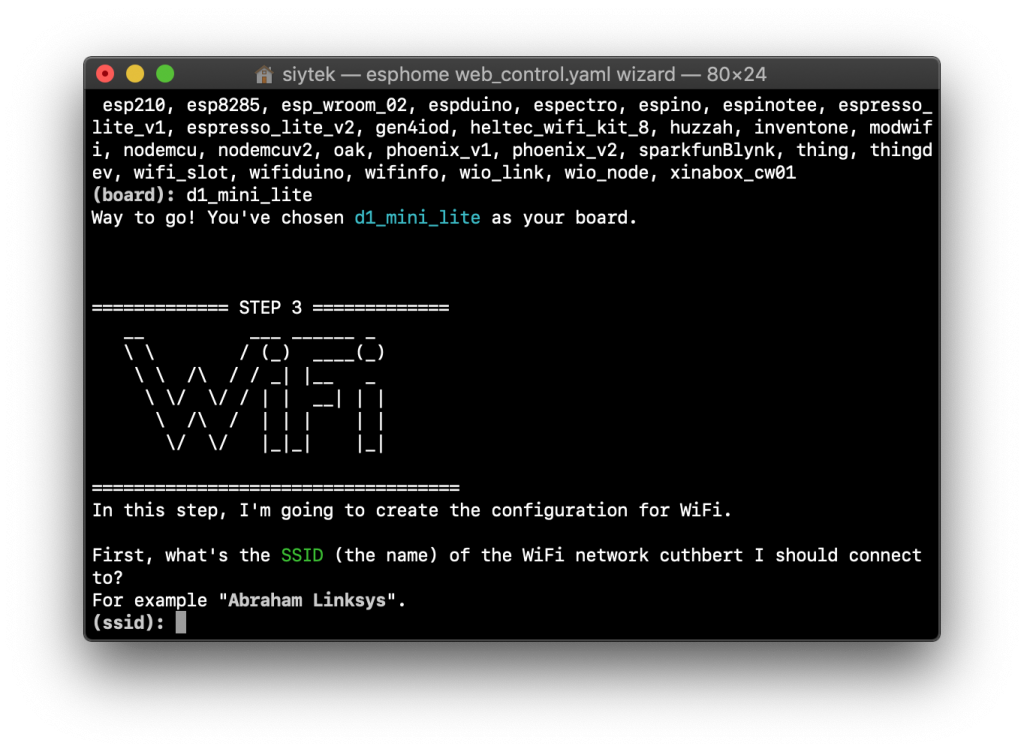
Next we need to specify whether the device is an ESP32 or ESP8266. I will be specifying the ESP8266 for this tutorial, but you can use an ESP32 if you prefer.
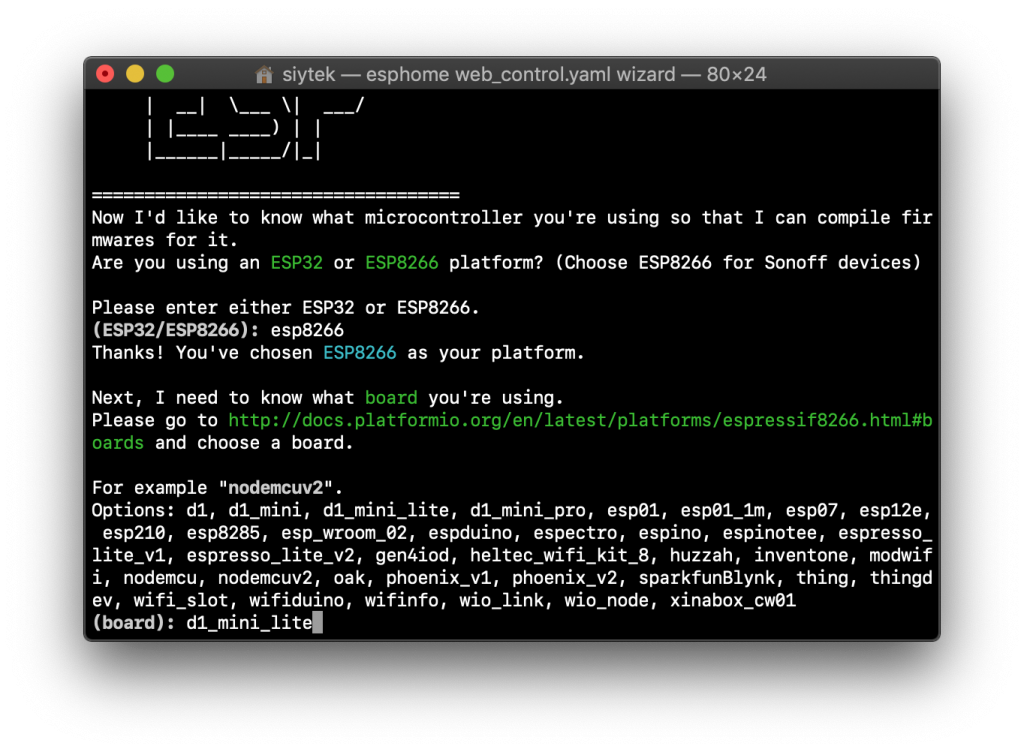
We also need to specify the type of device that we are using. In this example I am using a Wemos D1 Mini, but you should specify the device that you are using.
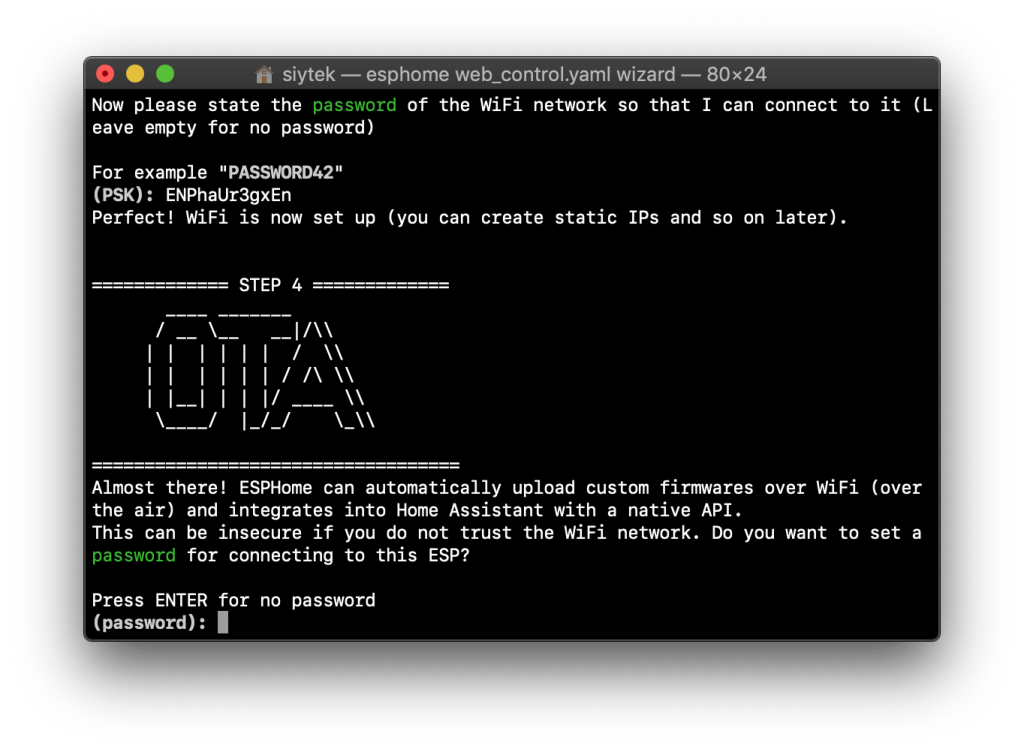
Next we need to specify our WiFi credentials for the router that we wish to connect to.
Finally we can optionally specify a password that will be used for OTA flashing. You can leave this blank if you do not wish to specify a password.
Configure ESPHome
Now that our device is configured we can open up the configuration file. The file will be saved in the folder that your command prompt is currently set to so go ahead and open it in your favorite editor.
Create a new device
If you are using Mac/Linux the quickest option is to use nano.
nano web_control.yaml
Once the file has opened, it should look something like this.
esphome:
  name: little_wemos2
  platform: ESP8266
  board: d1_mini_lite

wifi:
  ssid: "******"
  password: "***********"

  # Enable fallback hotspot (captive portal) in case wifi connection fails
  ap:
    ssid: "Little Wemos2 Fallback Hotspot"
    password: "a1MevJene8mT"

captive_portal:

# Enable logging
logger:

# Enable Home Assistant API
api:

ota:
Add the web server
One of the great things about ESPHome is it already has a web server built in that we can control remotely with GET and POST requests. Awesome!
All we need to do is enable it on a desired port so go ahead and add the following lines of code.
esphome:
  name: little_wemos2
  platform: ESP8266
  board: d1_mini_lite

wifi:
  ssid: "******"
  password: "***********"

  # Enable fallback hotspot (captive portal) in case wifi connection fails
  ap:
    ssid: "Little Wemos2 Fallback Hotspot"
    password: "a1MevJene8mT"

captive_portal:

# Enable logging
logger:

# Enable Home Assistant API
api:

ota:

web_server:
  port: 80
Adding the LED
Nxt we need to add the LED to the configuration. We will specify the monochromatic component and give it a name, something like Wemos LED will do.
We also need to specify an output, which we will use to link the LED to a physical output pin in the next section.
esphome:
  name: little_wemos2
  platform: ESP8266
  board: d1_mini_lite

wifi:
  ssid: "******"
  password: "***********"

  # Enable fallback hotspot (captive portal) in case wifi connection fails
  ap:
    ssid: "Little Wemos2 Fallback Hotspot"
    password: "a1MevJene8mT"

captive_portal:

# Enable logging
logger:

# Enable Home Assistant API
api:

ota:

web_server:
  port: 80

light:
  - platform: monochromatic
    name: "Wemos LED"
    output: output_component1
Adding an output
Finally we need to tie the LED to an output pin using the output component.
For ESP8266 boards this should be set to esp8266_pwm. ESP32 boards should use the ledc platform.
The LED on the Wemos D1 Mini is connected to pin D4, but you should specify the correct pin for the device that you are using.
You may also need to invert the pin if your on-off function is incorrect.
We also need to specify an ID for this instance of output. This should be the same as the output specified in the light component.
esphome:
  name: little_wemos2
  platform: ESP8266
  board: d1_mini_lite

wifi:
  ssid: "******"
  password: "***********"

  # Enable fallback hotspot (captive portal) in case wifi connection fails
  ap:
    ssid: "Little Wemos2 Fallback Hotspot"
    password: "a1MevJene8mT"

captive_portal:

# Enable logging
logger:

# Enable Home Assistant API
api:

ota:

web_server:
  port: 80

light:
  - platform: monochromatic
    name: "Wemos LED"
    output: output_component1

output:
  - platform: esp8266_pwm
    id: output_component1
    inverted: true
    pin: D4
We are done! Go ahead and save the file. If you are using nano, just press ctrl + X and save the file with the same name.
Flashing the firmware
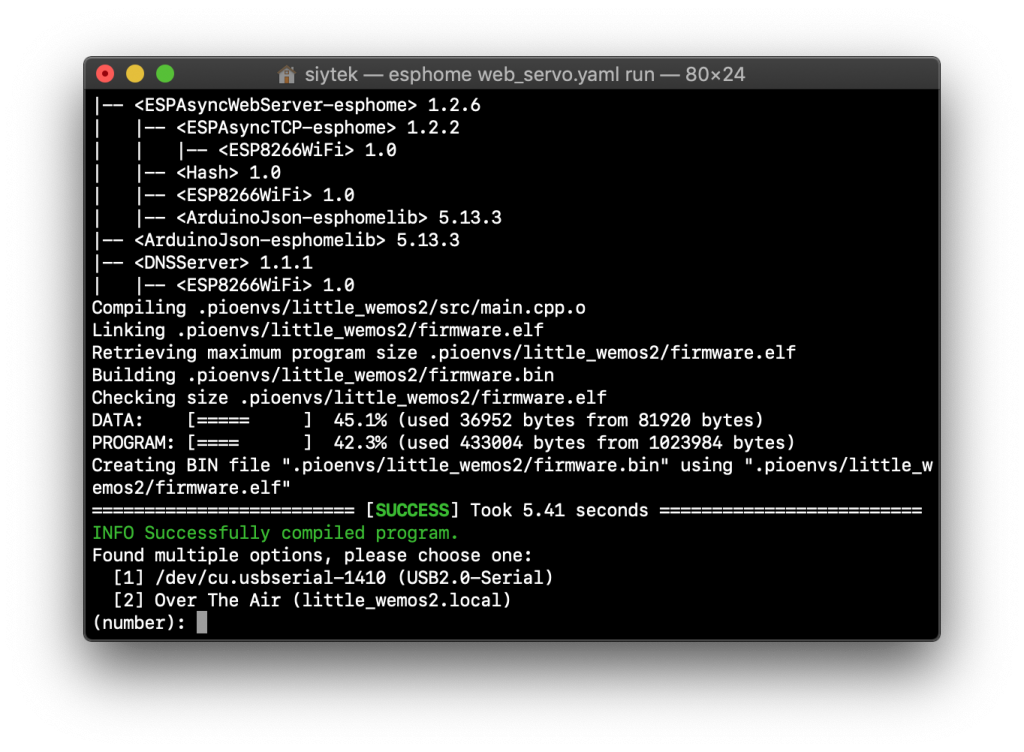
Now that our configuration is ready we can compile and upload the firmware. Go ahead and type the following command in to the terminal.
esphome web_control.yaml wizard
After some processing has completed you will be prompted for the device that you wish to flash. For the first time we will need to use the USB-serial flashing option but for future updates you can use the OTA option.
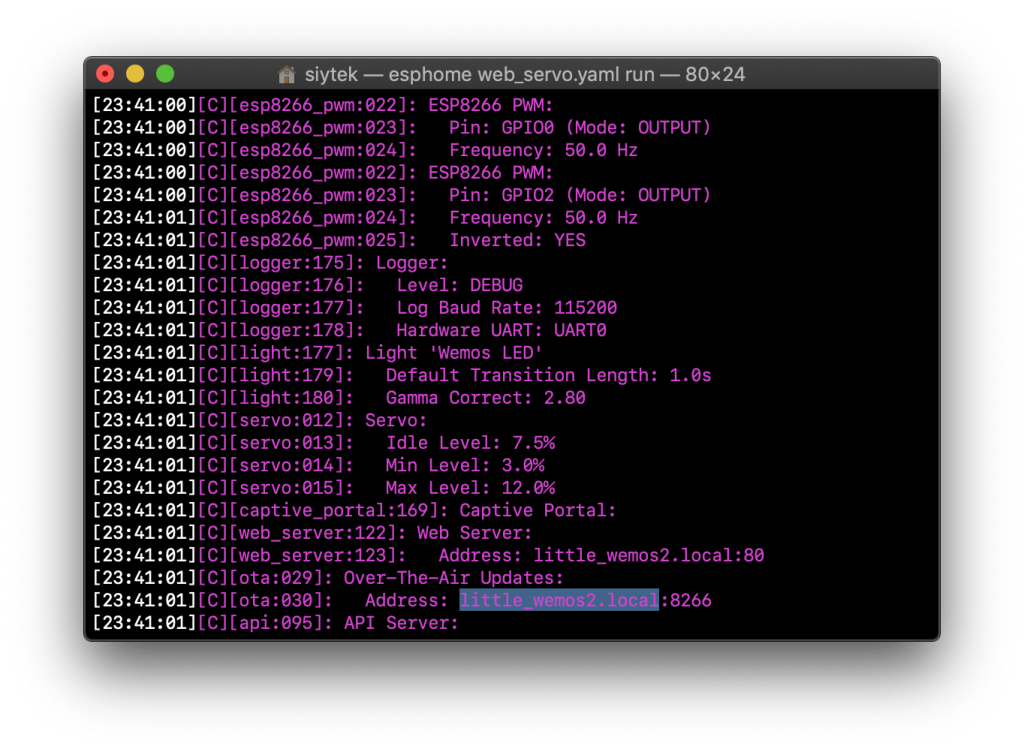
After the flashing has completed you will be taken to the ESPHome console output. Go ahead and make a note of the device address.
<your-device>.local
At this stage we are done, you can leave the console running if you like or just press ctrl + C to stop it and return to the prompt.
Controlling the device
Now that our device has been flashed and is online there are several ways that we can control it.
Web user interface
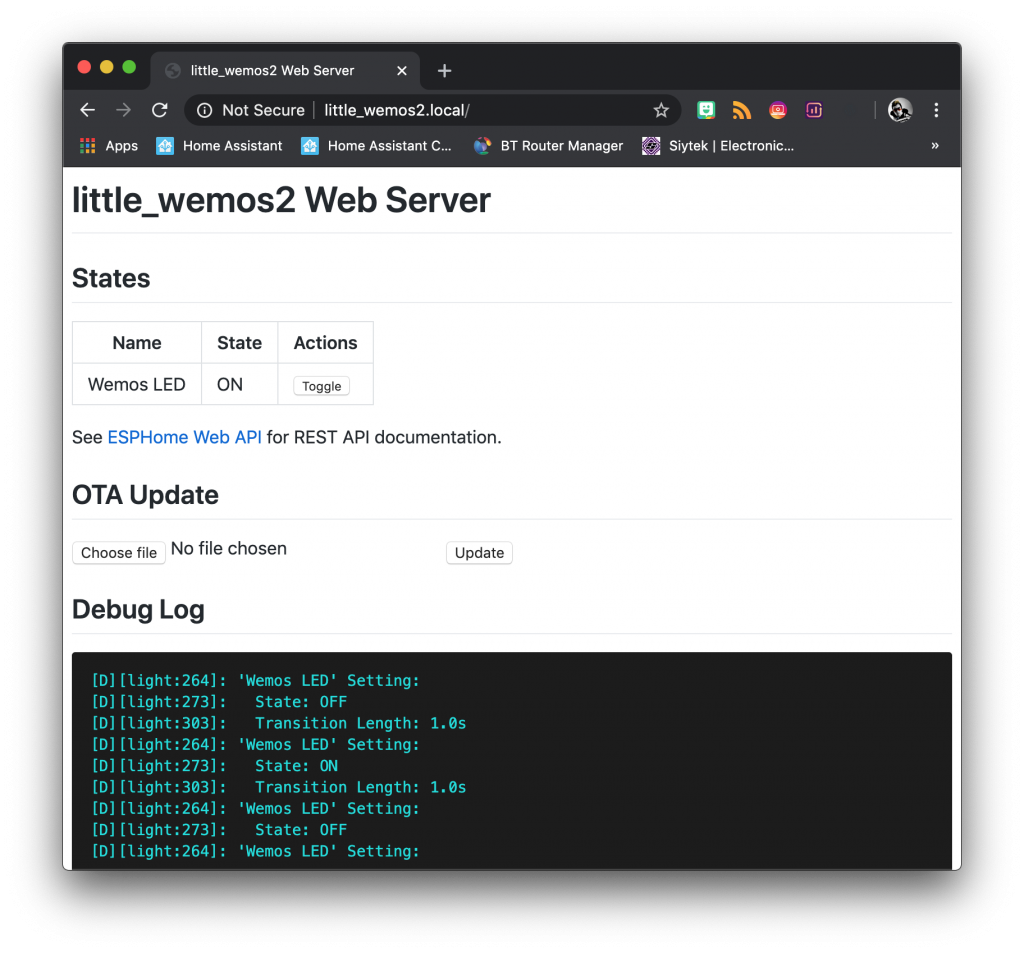
The device hosts its own simple user interface that can be accessed in any web browser. Go ahead and navigate to your device address and don’t forget to include http://. You can also specify your devices IP address instead if you have problems.
http://little_wemos2.local
This will display a web page showing the state of the devices specified and the debug log. You can also use it to flash updated firmware.
REST API control
If you wish to control your device with your own application or another device, it is possible to use the simple REST feature. To demonstrate we can use curl in the terminal. Windows users may need to install it first.
To send commands to the device we can use the following format. In this example the domain would be light and the name would be wemos_led.
Methods include actions like turn_on and turn_off. For more information, see the official documentation.
http://<your-device>.local/<domain>/<id>[/<method>?<param>=<value>]
Note that spaces are replaced with underscores, capital letters are made lowercase and non-alphanumeric characters are removed.
To turn on our LED using the curl we simply use POST and the URL with the format described above.
curl -X POST http://little_wemos2.local/light/wemos_led/turn_on
In addition to this we can specify additional parameters, such as brightness. The following command will set the LED to 50% brightness as the brightness ranges from 0 to 255.
curl -X POST http://little_wemos2.local/light/wemos_led/turn_on?brightness=127
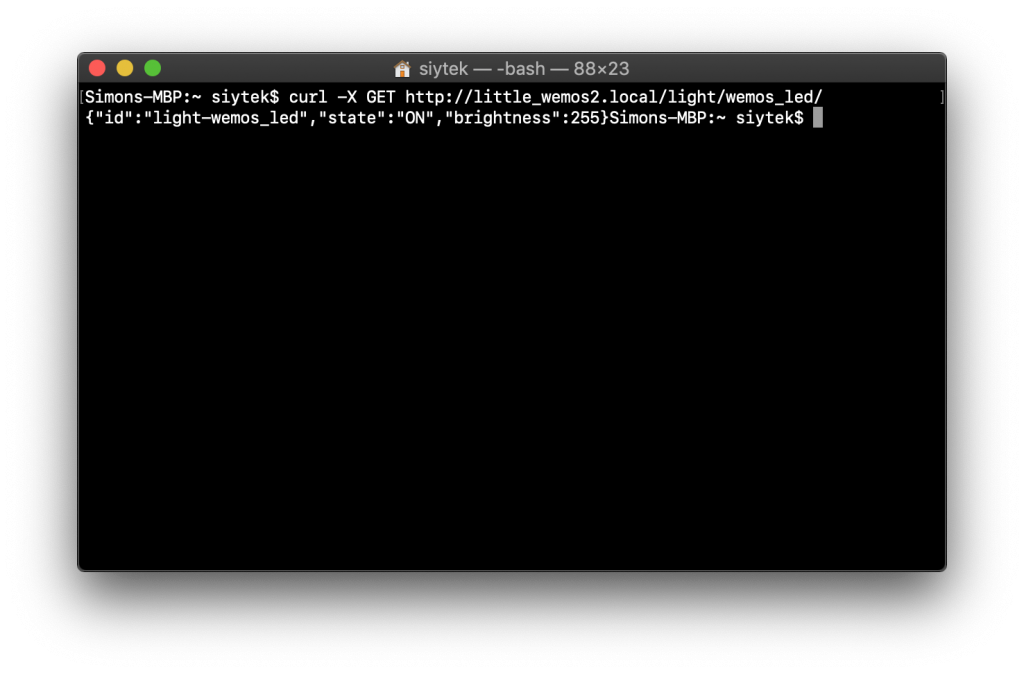
It is also possible to fetch information about the component using GET. The data is returned in JSON format and can therefore be parsed as necessary.
curl -X GET http://little_wemos2.local/light/wemos_led/
Browser control
As we are able to use simple POST requests to the device URL, we can now create a simple web interface to send these commands to the device.
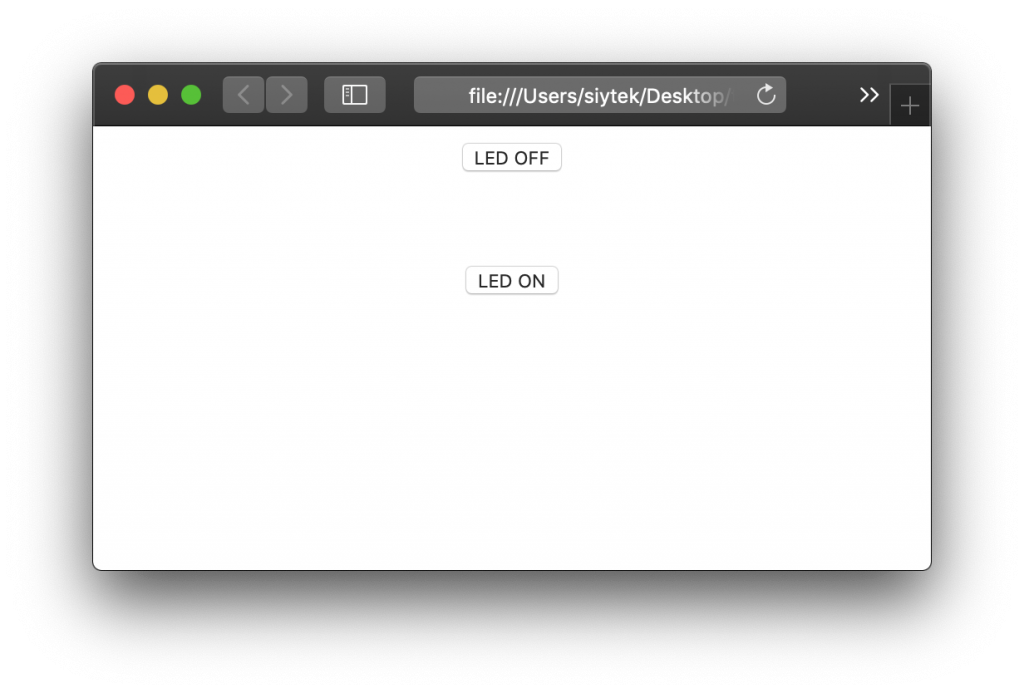
Go ahead and open up your favorite text editor and enter the following code. Save it with the file extension .html and open it in your browser.
<HTML>
<center>

	<form name="myform" action="http://little_wemos2.local/light/wemos_led/turn_off" method="post">
  	<button>LED OFF</button>
	</form>

<br></br>

	<form name="myform" action="http://little_wemos2.local/light/wemos_led/turn_on" method="post">
  	<button>LED ON</button>
	</form>

</center>
</HTML>
This code will create two buttons that allow us to turn the LED on and off. You could expand on this and add functionality for controlling the brightness. Awesome!
Conclusion
ESPHome is a simple yet powerful tool that is ubiquitous in the smart home community.
However additional features such as the web server and REST API allow us to use it for more bespoke and standalone purposes.
Now that you have this project up and running, why not go check out some of my other awesome tutorials using ESP devices!
Thanks so much for visiting my site! If this article helped you achieve your goal and you want to say thanks, you can now support my work by buying me a coffee. I promise I won't spend it on beer instead... 😏


