MicroPython is the perfect choice for beginners who are looking to get into programming the ESP8266 and it makes a great alternative to Arduino.
MicroPython is quick and easy for beginners to learn, who have no prior experience with coding or microcontrollers.
It is also a perfect choice for those migrating from software development to hardware development, who are already familiar with Python.
But do want to know the best part?
With this article you can be up and running with your first program in less than 10 minutes!
So without wasting anymore time, let’s get started with MicroPython on the ESP8266 microcontroller!
Table of Contents
- Prerequisite
- How to Access the REPL and WebREPL Command Prompt
- How To Use the MicroPython Internal File System
- Using an IDE for MicroPython Development
- Whats Next?
Prerequisite
In order to use MicroPython on an ESP8266 device you will need the following:
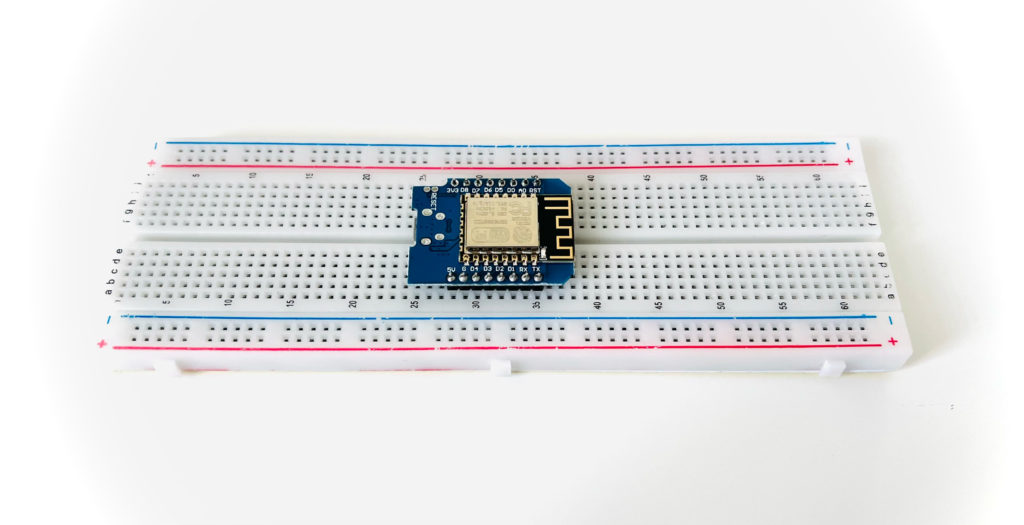
- An ESP8266 based development board such as the Wemos D1 Mini.
- a USB cable for connecting the ESP8266 to your computer.
- You may also need a USB-to-serial adapter if your development board does not have one.
- A computer and a terminal that can access the serial port.
This tutorial will be focusing on getting stuck into some programming.
In order to do so you will need to have a board with the MicroPython firmware flashed on to it.
If you haven’t flashed the MicroPython firmware on to your board yet, go ahead and check out my tutorial which explains how to flash MicroPython on to ESP8266 boards:
How to Access the REPL and WebREPL Command Prompt
The interactive MicroPython prompt that you may access on the ESP8266 is called REPL, which is short for Read Evaluate Print Loop.
If you have followed my tutorial that explains how to flash the MicroPython firmware, you will have already encountered the REPL prompt.
The simplest way to test code and run commands is by using the REPL prompt, you can check out more details here if you need further information.
However you might be wondering what is the WebREPL prompt?
Can you access REPL over WiFi?
Absolutely!
It is possible to access the MicroPython REPL prompt using a web browser and the ESP8266 WiFi network.
This is a very beneficial feature to those who will be installing their ESP8266 in a project that may be inaccessible, such as a remote weather station.
It means that you can still access the REPL prompt to implement firmware updates without having to physically access the USB / serial port on your ESP8266.
How to Access MicroPython REPL Prompt over WiFi
WebREPL allows the MicroPython prompt to be accessed in a web browser.
Currently at the time of writing, Chrome and Firefox are supported by WebREPL.
Due to memory limitations the web page that provides access to the prompt cannot be stored on the ESP8266 itself.
Instead it exists as an external app that can be accessed in two ways:
- Download the WebREPL page and use it on your local machine
- Access a live version of WebREPL on the official MicroPython site.
Connect to MicroPython with WebREPL
In order to use WebREPL you will need to connect to your ESP8266 using its IP address on port 8266 (unless you changed it).
ws://<your-esp8266-ip-address>:8266
First you will need to be connected to the same network as your ESP8266 in order to connect.
This can be done in one of two ways:
Connect directly to your ESP8266’s access point
Once the MicroPython firmware has been flashed, the ESP8266 will create a WiFi network called MicroPython-xxxxxx where the x’s are replaced with part of the MAC address of your device.
The password for this network will be micropythoN (note the uppercase ‘N’) and the default IP address will be 192.168.4.1.
This method is quicker and suitable for circumstances when it may not be possible to put the ESP8266 and your computer on the same network (in the absence of a router).
However if you connect directly to your ESP8266 then you cannot also be connected to a router and it can be inconvenient to give up your internet connection.
Therefore it is recommended to follow the next method for connection instead…
Connect your ESP8266 to your router (WiFi access point)
You can configure your ESP8266 to connect to your router and join the same network.
First access the REPL prompt either by using a wired serial connection, or by connecting directly to the ESP8266’s AP.
Then enter the following at the REPL prompt, replacing ssid and password for your router name and password:
import network
wifi = network.WLAN(network.STA_IF)
wifi.active(True)
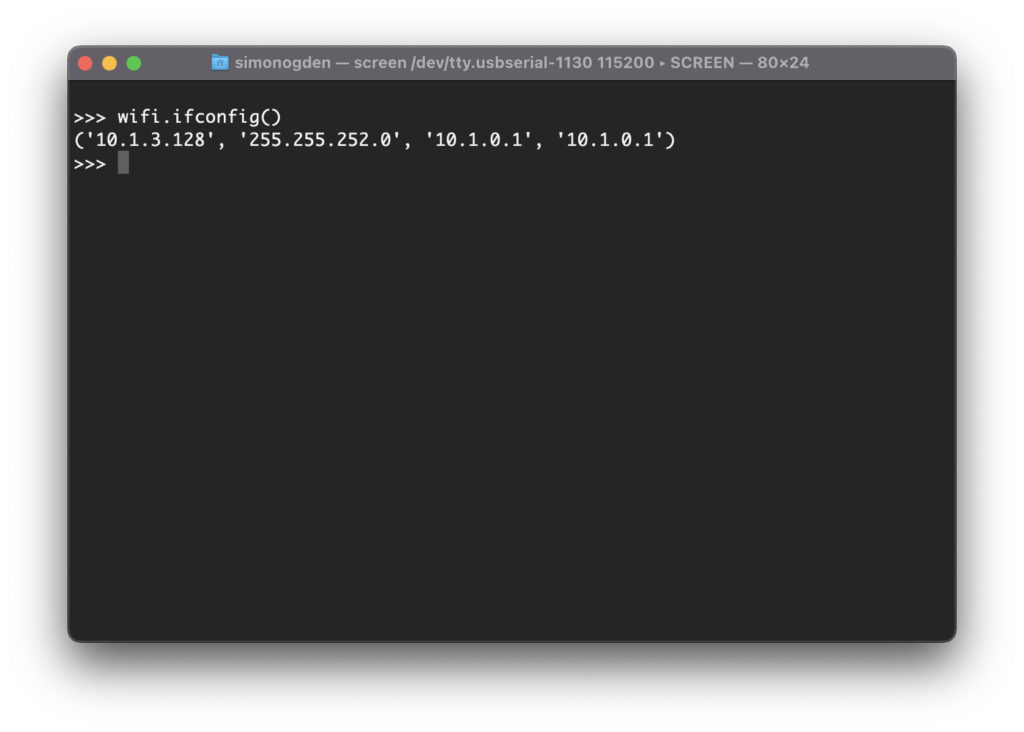
wifi.connect('ssid', 'password')Once the ESP8266 connects to your network, you can run the following command to check what IP address has been assigned to it:
wifi.ifconfig()
This will return the IP address, subnet mask, gateway and DNS server respectively.
You can also use the command to set these values, should you need to change them:
wifi.ifconfig(('<IP address>' , '<subnet mask>' , '<gateway>' , '<DNS server>'))How To Use the MicroPython Internal File System
When your device first boots up, it will be configured to include a filesystem if it has 1MB or more of storage.
This filesystem is stored in the flash memory after the MicroPython firmware and it uses the FAT file system.
Files in MicroPython can be accessed in the same way as Python, by using the open() function.
How to Read and Write to Files Using MicroPython
Let’s take a look at an example. We will use the following command to open a file:
file = open('<file name>' , '<read/write/text/binary>')Note that the second argument specifies whether we should open the file as a text or binary file and whether is should be read only or writable.
- w – write text file
- r – read only text file
- wb – write binary file
- rb – read only binary file
If no argument is specified the default will be used, which is a read only text file.
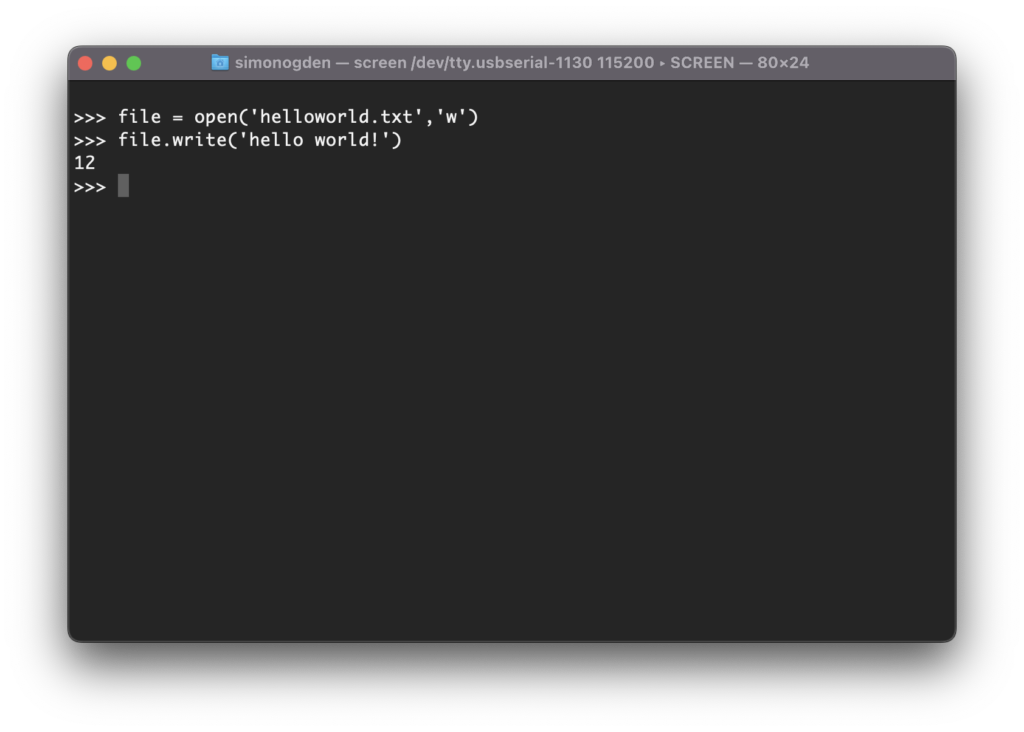
Go ahead and enter the following text at the REPL prompt.
file = open('helloworld.txt' , 'w')
file.write('hello world!')
file.close()
Note that as soon as you write to the file, the number of bytes written to the file is printed to command line, in this example 12 bytes.
Now we can read back the contents of this file. We don’t need to specify the second argument when using the open() function as the default behaviour is read only text file, which is what we require.
file = open('helloworld.txt')
file.read()
file.close()
How To Manage Files Using MicroPython
Now that we have learned how to create, write to and read from files, it would be useful to know how to manage them.
The os module will give us the ability to manipulate directories and delete files, but first we must import it:
import os
We can use os to delete files, such as the one that we just created:
os.remove('helloworld.txt')We can also use os to create directories:
os.mkdir('somefolder')Switch to directories that we have just created:
os.chdir('somefolder')Also to check what directory we are currently in we can use:
os.getcwd()
There is a full list of all of that commands made available by the standard os library over on the official MicroPython website.
Using an IDE for MicroPython Development
At this stage we have mainly covered the basic operation of MicroPython, including some of the basics of file management.
So far we have been using the REPL prompt to enter everything directly and in real time.
However as we begin to write programs that we wish to execute and compile it will become too cumbersome to enter everything directly into the REPL prompt.
The best way for us to develop programs in MicroPython would be to use an Integrated Development Environment (IDE) that specifically caters for MicroPython.
There are a number of IDEs to choose from that are suitable for MicroPython.
So you might be wondering…
What is the best IDE for MicroPython?
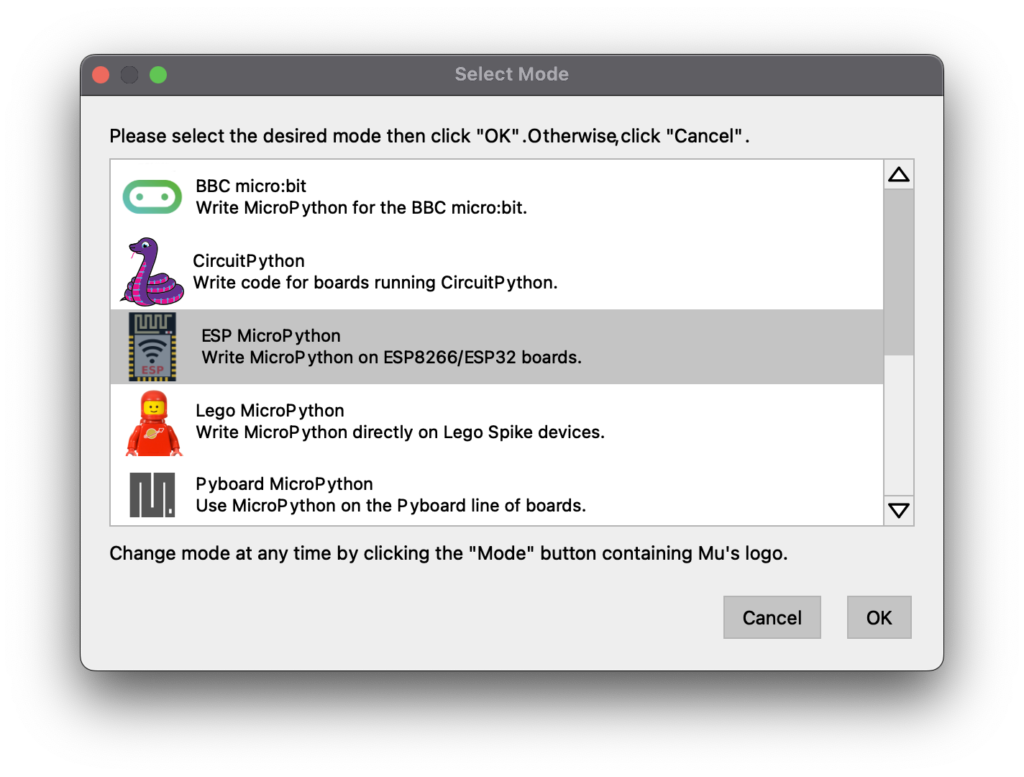
My recommendation would be to use Mu Editor, a wonderfully simple and free IDE designed specifically for MicroPython.
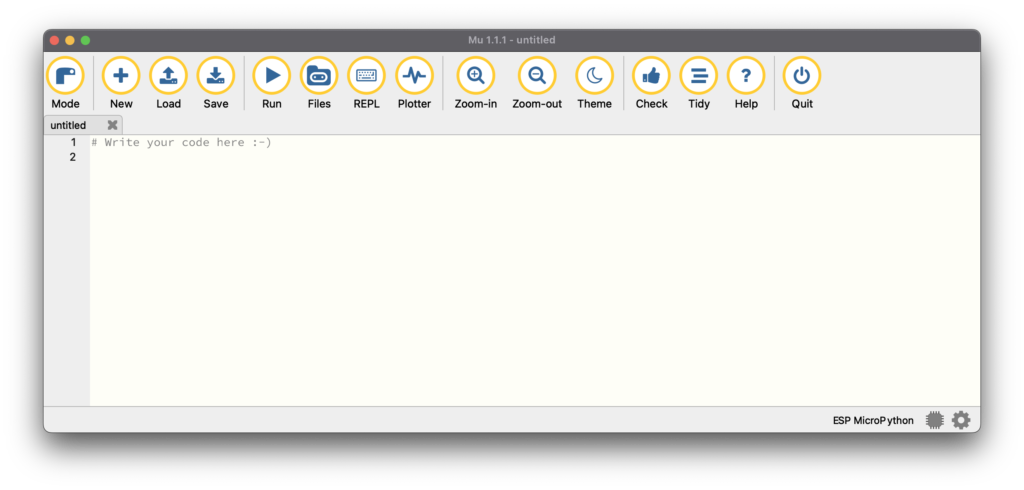
Mu Editor is available for Windows, Linux and Mac. It can be downloaded from the official site and it is a breeze to install.
It is compatible with various boards including the ESP8266 and also ESP32, as well as the BBC micro:bit and the Pyboard.
Mu Editor also has a built-in firmware flasher, so it can be used to flash firmware to new boards or reflash the firmware if necessary.
Mu Editor also has some other cool features, such as a tool that cleans up code and a tool that checks the code for mistakes.
You can write code and execute it on the ESP8266. You can also access REPL directly and enter commands in real time as you have done previously in this tutorial.
Whats Next?
At this stage you should be fully up and running with MicroPython and ESP8266. We have covered the basics of handling files and using REPL and WebREPL.
I would recommend getting Mu Editor, as it is a really great IDE for beginners. It has a good set of tools for developing MicroPython applications whilst not being too overly complex.
In the next tutorial we will delve deeper into MicroPython code and use the Mu Editor IDE to write a more in-depth program.
Thanks so much for visiting my site! If this article helped you achieve your goal and you want to say thanks, you can now support my work by buying me a coffee. I promise I won't spend it on beer instead... 😏


