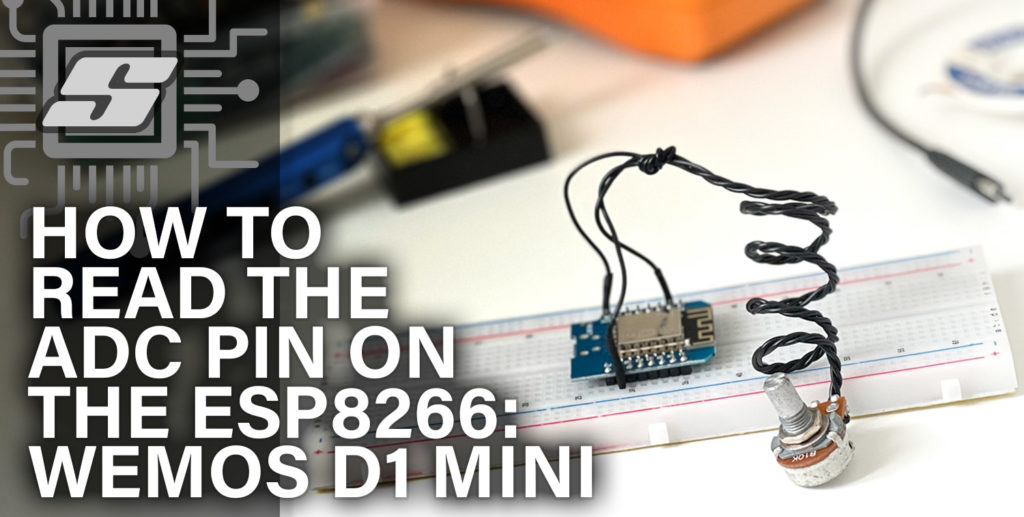
Did you even see that tiny little A0 pin hiding on your Wemos D1 Mini? Yes that is correct, your D1 Mini and all ESP8266 devices have a single analog input!
When you think about it, it makes a lot of sense to include a single ADC channel. Why? To read the battery voltage of course.
If the ESP8266 was designed to be a tiny WiFi node for IoT and similar applications, then the chip designers were smart to assume many applications would run from batteries.
Having a single ADC channel on the ESP8266 gives the chip the ability to read analog voltages i.e. an internal battery voltage!
- ESP8266 Analog To Digital Converter Specification
- How To Measure Voltage With The Wemos D1 Mini
- Conclusion
ESP8266 Analog To Digital Converter Specification
Let’s take a look in the ESP8266 datasheet and turn to page 17 in order to check out the specification for the ADC.
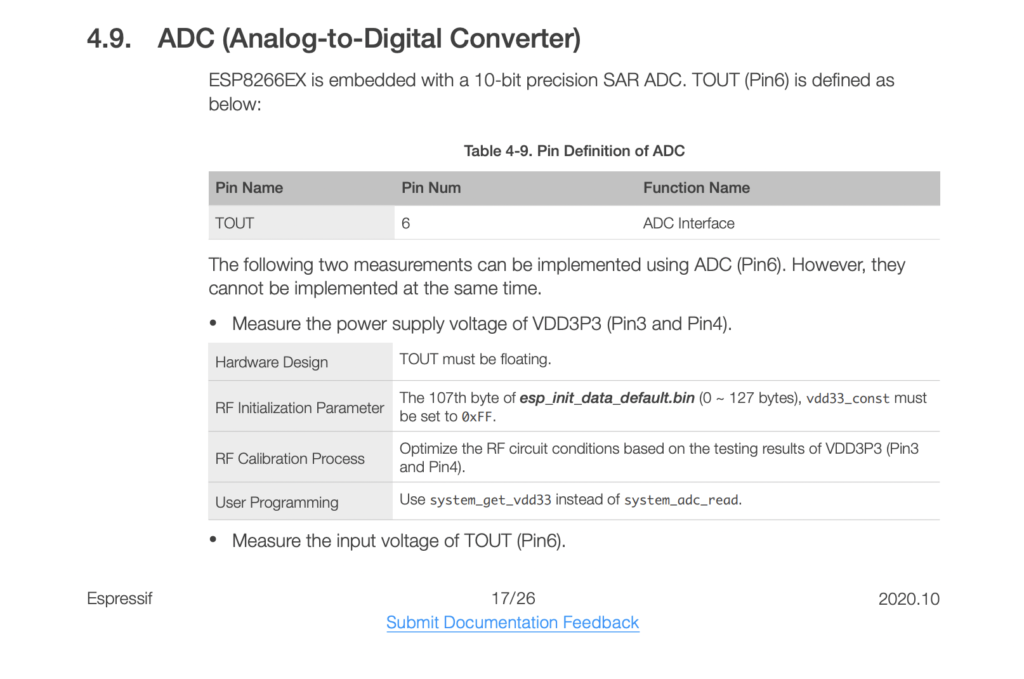
What is the name of the ADC pin on the ESP8266?
We see that the official name for the pin is TOUT, however you may hear it referred to as A0, ADC or Pin 6, all of which mean the same thing.
We shall refer to the pin as A0, as this is what it is labeled as on the Wemos D1 Mini.
What is the ADC resolution of the ESP8266?
The first thing we notice about the ADC is that it is has 10-bit resolution. What does this mean? It means that the chip can represent the analog voltage using a binary number with up to 10 digits, ones and zeros.
The lowest number on this scale would be ten zeros, 0000000000. In decimal this number would be 0.
The highest number on this scale would be ten ones, 1111111111. In decimal this number would be 1023.
This means that the voltage sensed on the ADC pin will yield a number in the chips memory between 0 and 1023.
It is beyond the scope of this article to go into detail about how binary works or how ADCs work, but you can find a great tutorial here if you wish you understand it better.
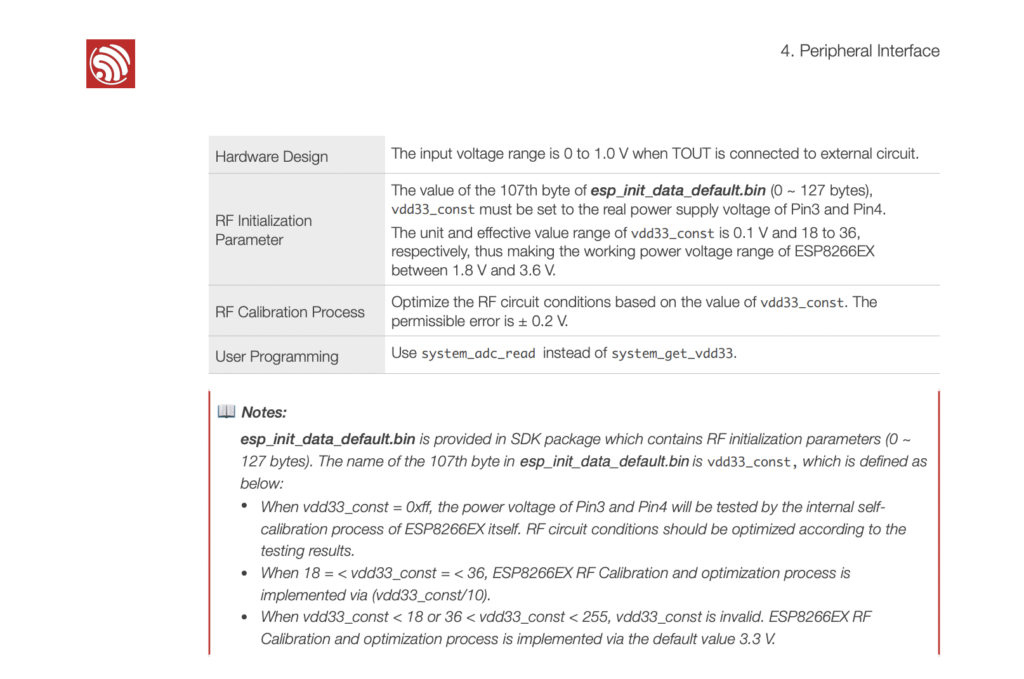
The ADC on the ESP8266 will accept any voltage within the 0 to 1.0 volt range. The value given will be converted into a nearest value in the range of 0 to 1023.
0V on the TOUT pin will give a value of 0.
1.0V on the TOUT pin will give a value of 1023.
0.5V on the TOUT pin will give a value of 512
0.75V on the TOUT pin will give a value of 767, and so on.
It is also worth noting that we are dealing with analog electronics here. There will be noise and inaccuracy so you can expect the value read to fluctuate a little.
What can you do with the ADC on an ESP8266?
After learning the official name of the pin and the resolution of the ADC, the datasheet teaches us that you can perform two functions with the ADC on the ESP8266.
However it is not possible to perform these two functions simultaneously. The criteria for each must be correct in order to perform the measurement.
Measure the power supply voltage of VDD3P3
With this function it is possible to measure the incoming power supply to the ESP8266’s amplifier power supply, the VDD3P3 pins.
In order to achieve this the TOUT (A0) pin must be left floating, meaning disconnected.
If this does not make any sense then fear not! This function is not really of any particular use to a Wemos D1 Mini user. We are a lot more interested in the other function…
Measure the input voltage of TOUT
Measuring the voltage on the TOUT (A0) pin is far more useful to us. This will allow us to measure the value of any analog sensor, or potentiometer for example, connected to the pin.
The most important point to mention that is given in the datasheet is about hardware design. The input voltage for the TOUT pin is 1.0V maximum.
However this maximum voltage is for the ESP8266 chip itself and not for the A0 pin on the Wemos D1 Mini.
What is the maximum Wemos D1 Mini analog to digital converter voltage?
If we take a look at the schematic for the Wemos D1 Mini you will see that there is a potential divider connected between the TOUT pin of the ESP8266 and the A0 of the D1 Mini.
This means that the A0 pin on the Wemos D1 Mini has the capability of accepting a 3.3 volt input! But how is this possible?
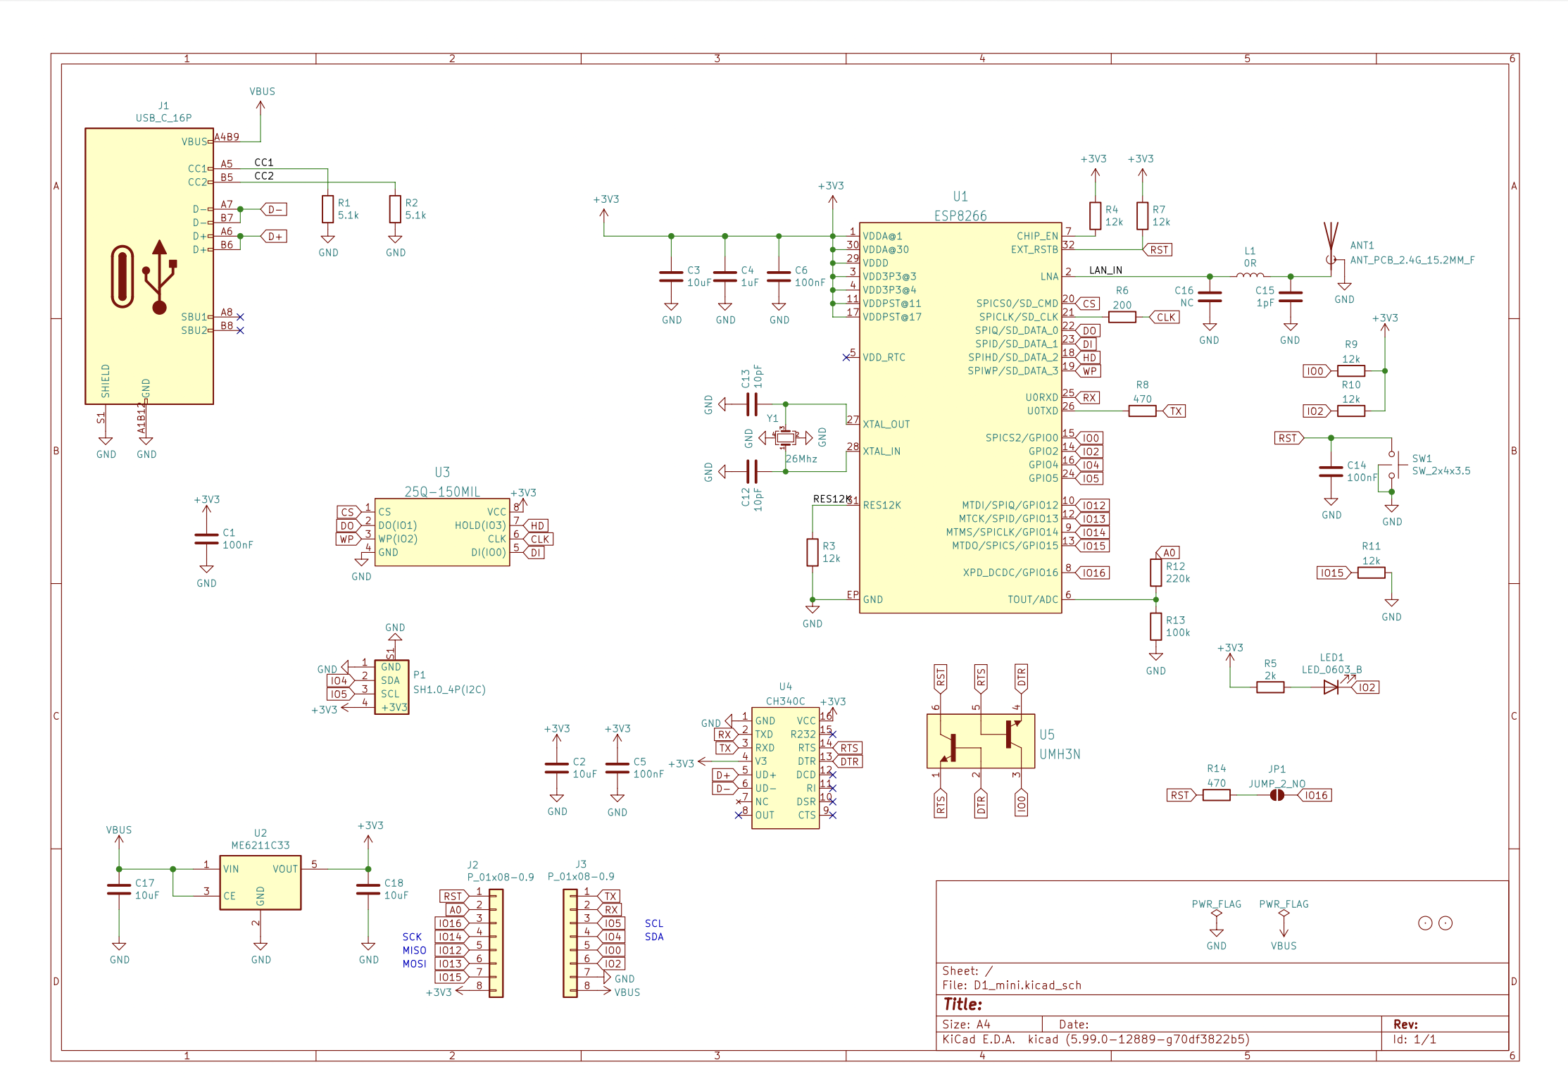
In section C5 of the schematic you will see resistor R12 and R13 forming a potential divider.
The incoming voltage at A0 is presented across the resistors R12 and R13 and the TOUT pin is connected between the resistors.
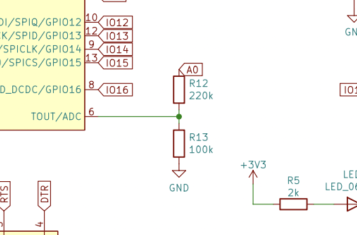
This means that the incoming voltage is divided up in the same ratio as the value of the resistors. Putting a 3.3V signal at A0 means that only 1V will be present at the T0 pin.
The potential divider scales down a 0 to 3.3V input, to a 0 to 1.0V input suitable for the TOUT pin.
Going back to our ADC conversion, this means that on the Wemos D1 Mini we are converting a voltage of 0 to 3.3 volts, to a scale of 0 to 1023.
0V on the TOUT pin will give a value of 0.
3.3V on the TOUT pin will give a value of 1023.
1.65V on the TOUT pin will give a value of 512
2.475V on the TOUT pin will give a value of 767, and so on.
How To Measure Voltage With The Wemos D1 Mini
Ok so now we have looked into the specification for the ADC on the ESP8266 and we know what is required in terms of hardware, let’s look at how to implement it.
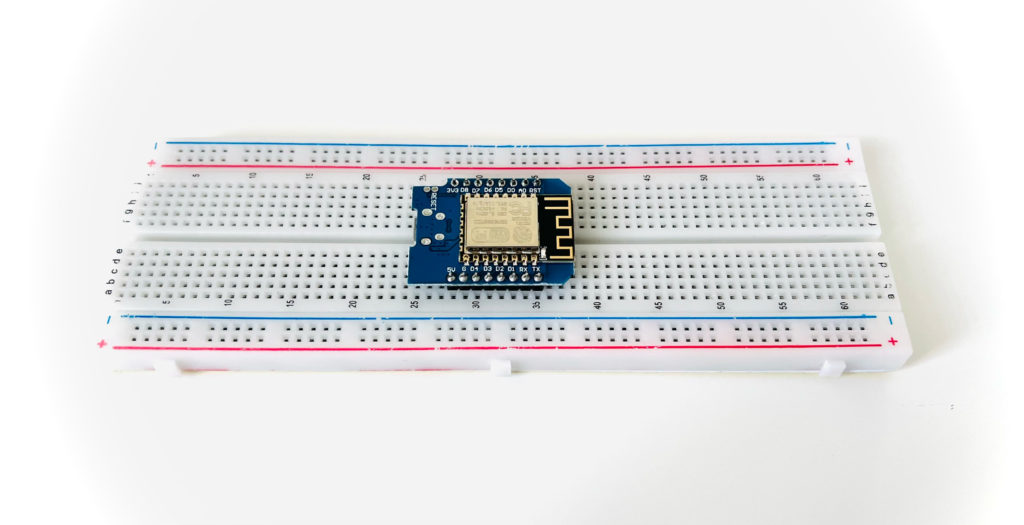
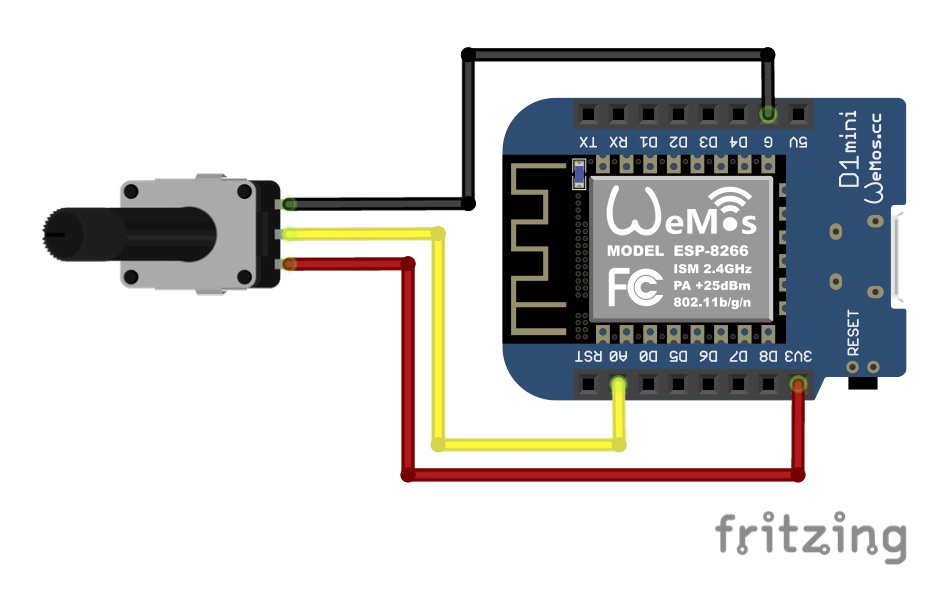
To test the ADC we can connect a potentiometer directly to the A0 pin as shown in the following Fritzing diagram.
This will allow us to adjust the voltage seen by the A0 pin to any value between 0 and 3.3 volts. However we could connect any voltage to the A0 pin that we wish to read, so long as it is under the maximum value of 3.3 volts.
Note that the reading of the ADC can affect the performance of the WiFi module during setup.
If you are using WiFi in your project, you should halt the ADC whilst you connect to the WiFi network.
How To Read The ESP8266 A0 Pin with Arduino
In order to read the analog pin with Arduino we will use the Arduino IDE to program the board.
If you have not used the Wemos D1 Mini with Arduino before, check out this tutorial.
In order to test the ADC we can read the value and print it in the serial console using the following code.
const int adc = A0;  // This creates a constant integer in memory that stores the analog pin
int value = 0;  // This creates an integer location in memory to store the analog value

void setup() {
  Serial.begin(115200);   // This starts serial communication at a baud of 115200
}

void loop() {
  value = analogRead(adc);  // This reads the analog in value

  // Then we can print the value read on the serial terminal window
  Serial.print("ADC Value: ");
  Serial.print(value);

  delay(2000);
}
How To Read The ESP8266 A0 Pin with MicroPython
In order to read the analog pin with MicroPython we will enter the commands into the REPL prompt.
If you have not used the Wemos D1 Mini with MicroPython before, check out this tutorial.
First we need to import the machine library and construct the analog pin:
import machine
adc = machine.ADC(0)
Then we can read the value of the analog pin with the following:
adc.read()
Conclusion
I have said it before, the Wemos is a superb little ESP board and every maker should have at least a couple in their tool box! It is versatile, easy to configure, cheap and has many features!
The ADC might not be the world’s greatest and there may only be a single channel, however considering the size, cost and other features this board has it is great there is a 10-bit ADC available!
In any case if your project requires more than one channel, it is possible to use an external ADC or to multiplex the single channel.
If you enjoyed this tutorial and found it useful, you should definitely check out some further useful information about the Wemos D1 Mini in this FAQ!
Thanks so much for visiting my site! If this article helped you achieve your goal and you want to say thanks, you can now support my work by buying me a coffee. I promise I won't spend it on beer instead... 😏


How measure the power supply voltage of VDD3P3?
I think it can be useful when powered by a battery.
Thank you for the very interesting article.