So you finally decided to make the move from EAGLE to KiCad? In my own opinion, since the release of KiCad 6 there has been no better opportunity.
I tried myself to make this migration several years back but back then I was not enough a fan of KiCad for the transition to stick.
Although I am of the controversial opinion that Autodesk has done good things to EAGLE, I eventually found myself wanting to complete a project that required a board size larger than the free version would permit.
The two layer limitation in EAGLE can also be frustrating, although arguably it has saved me money over the years as it forced me to stick to a 2 layer (cheaper to manufacture) design.
Why Import EAGLE files into KiCad?
So, what’s the solution to these issues? Need more PCB real estate? Need more layers? …move to KiCad! A completely free and open source solution without limitations, fantastic!
Further to this it is also possible to import EAGLE projects into KiCad!
I would always recommend starting with the basics and building projects from scratch in KiCad, even if it takes more time. However there are times when it may save time to import EAGLE projects into KiCad.
When I decided to make the switch to KiCad I had just completed a schematic design for some drone hardware. I needed more real estate than the free version of EAGLE allowed.
Rather than begin the project from scratch, I was able to import the existing schematic and then complete the board layout without size restriction in KiCad 6.
How To Import EAGLE files into KiCad
To demonstrate the EAGLE import functionality I will be using the EAGLE files for the Arduino UNO R3.
You can download the EAGLE files for this board here.
You will of course also need a copy of KiCad 6.
Step 1: Once we have the files downloaded and unzipped to some convenient location, we can open KiCad 6.
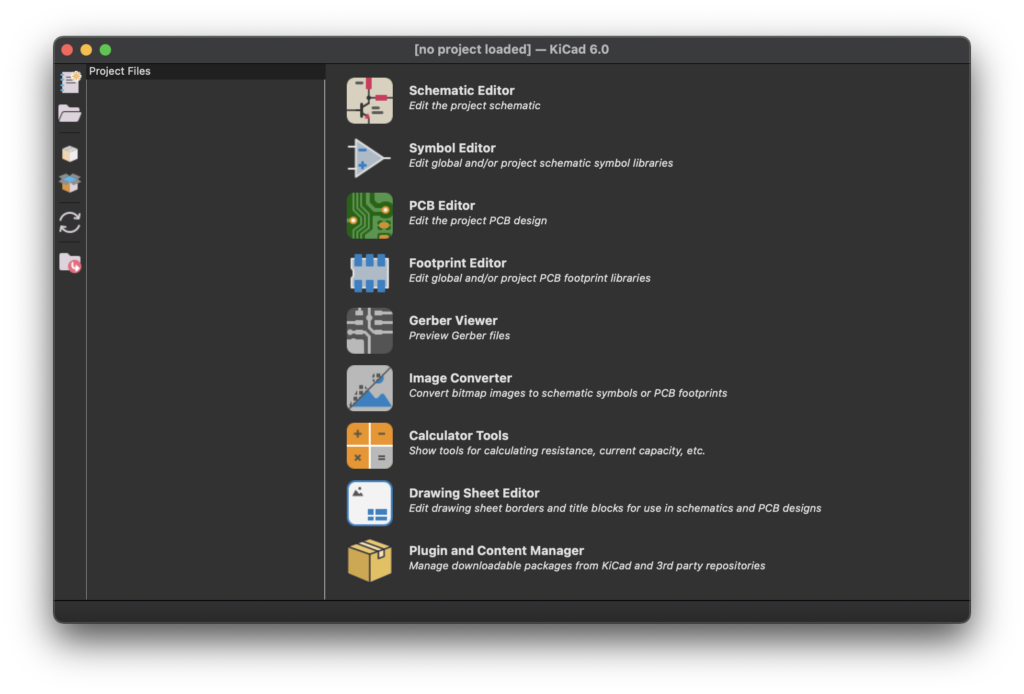
Step 2: Click file > Import non-KiCad project and select EAGLE Project. This will open a dialog box whereby you can select an EAGLE project to import.
Locate the EAGLE project you wish to import and click open. In this case we will open the Arduino UNO R3 schematic.
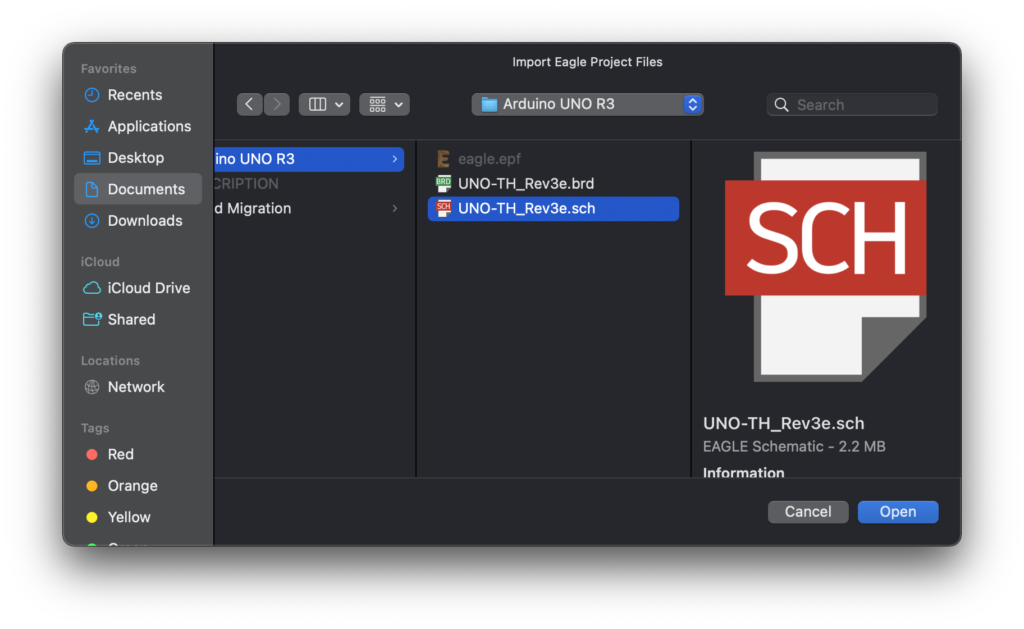
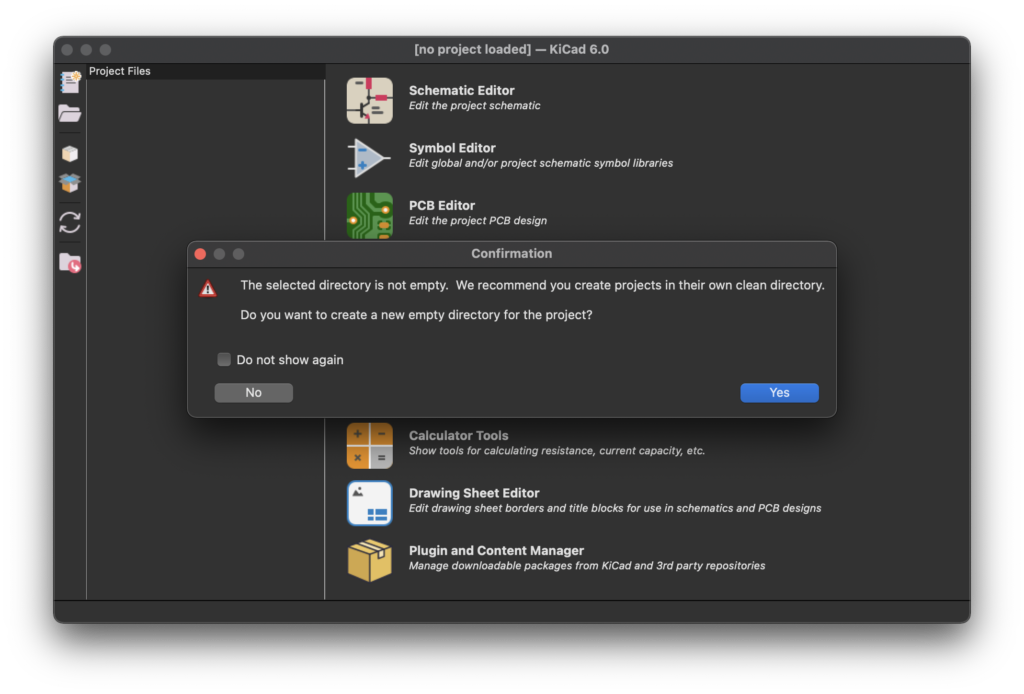
Step 3: Select the EAGLE schematic file that you wish to import. KiCad will then ask you for a location whereby you wish to store the new KiCad version of the project. Choose a convenient location and click open.
If you select a directory that is not empty, KiCad will ask if you wish to create a new directory within the chosen directory. As it is recommended to do so, we can click yes.
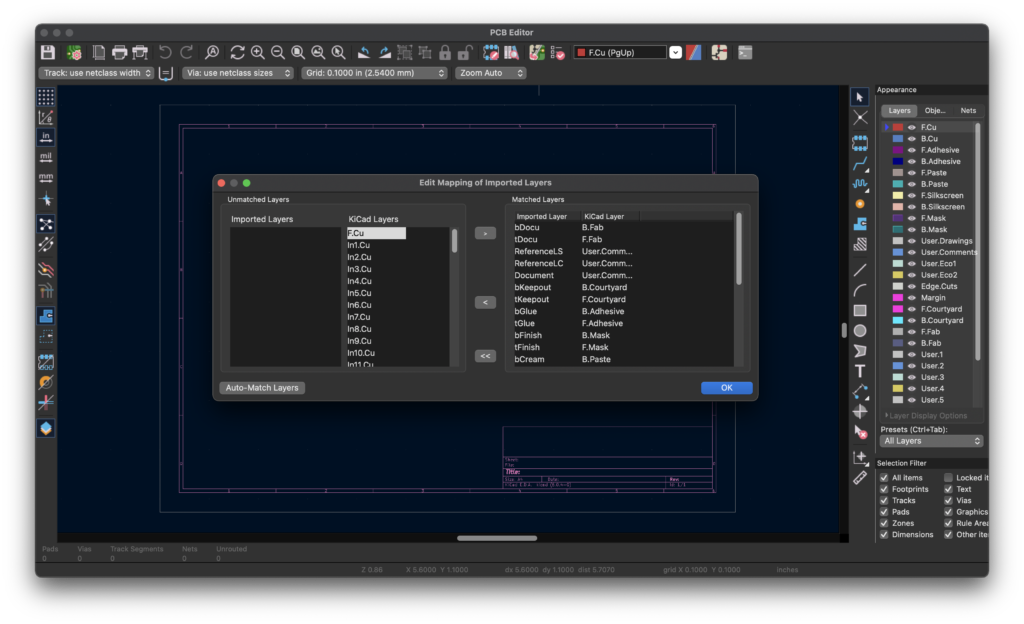
Step 4: Before the project is imported, KiCad will ask you to map the layers from the non-KiCad project. This can be done either by using the auto-match layers function or manually.
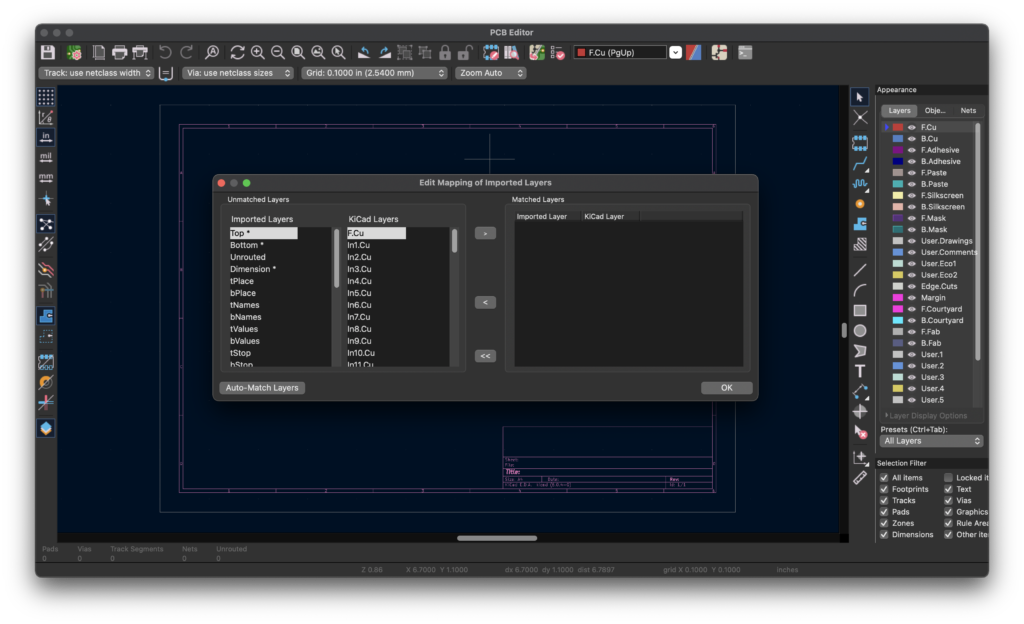
Click the auto-match layers button as this will map mostly all of the layers.
If there are any unmapped layers, these can be mapped manually by selecting which imported layer should match which KiCad layer and then clicking the > arrow to move the pair to the matched layers.
Once layer matching is completed, click ok.
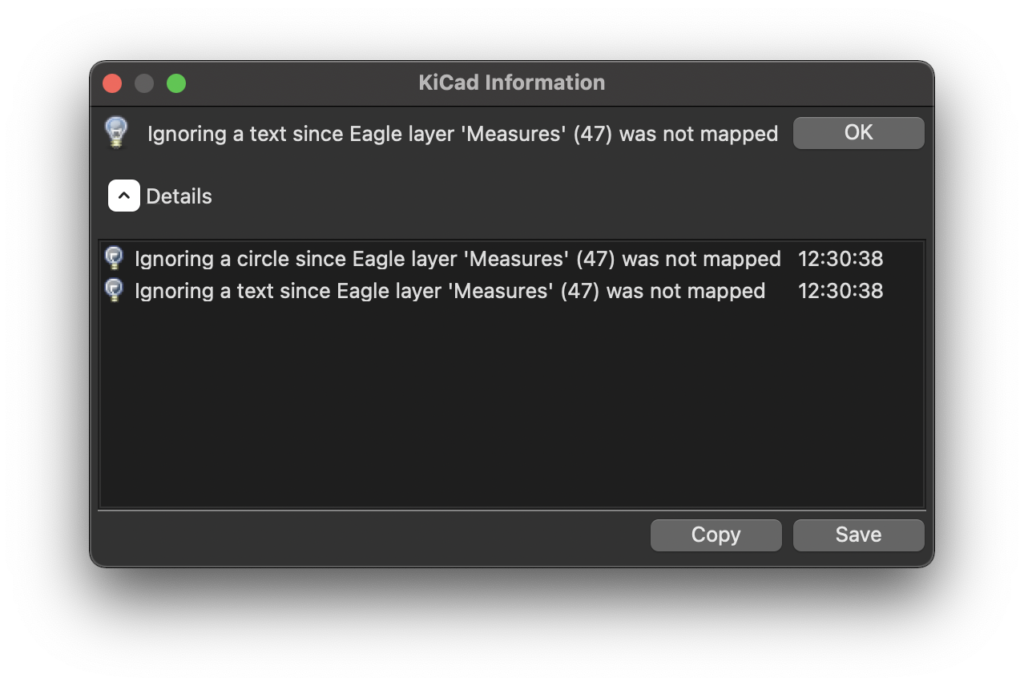
Step 5: When importing you may be presented with some errors. In this case the measurement layer (47) is not really relevant to the design, so it can be ignored.
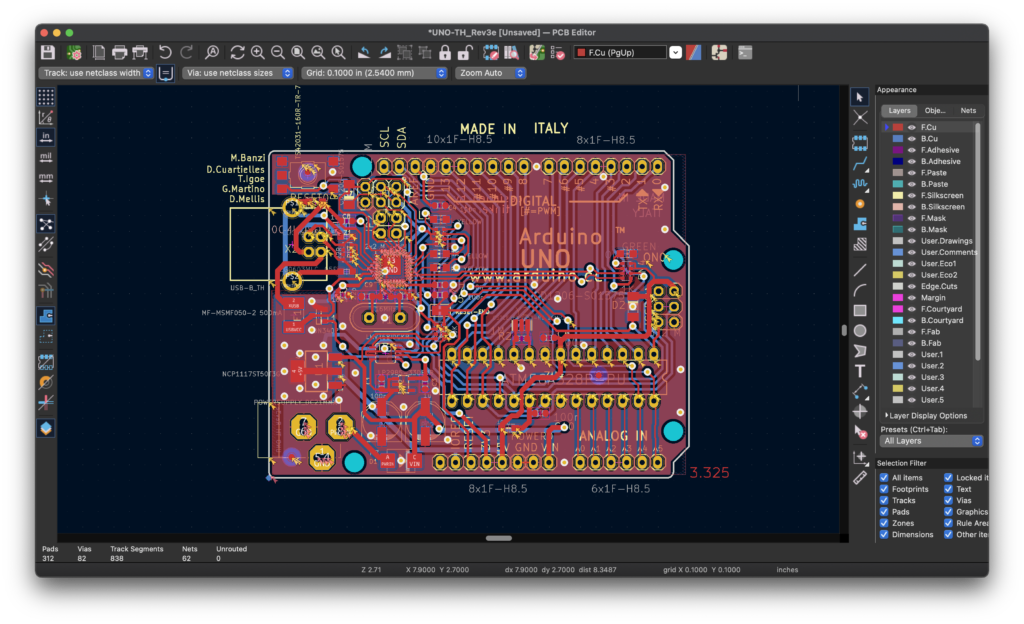
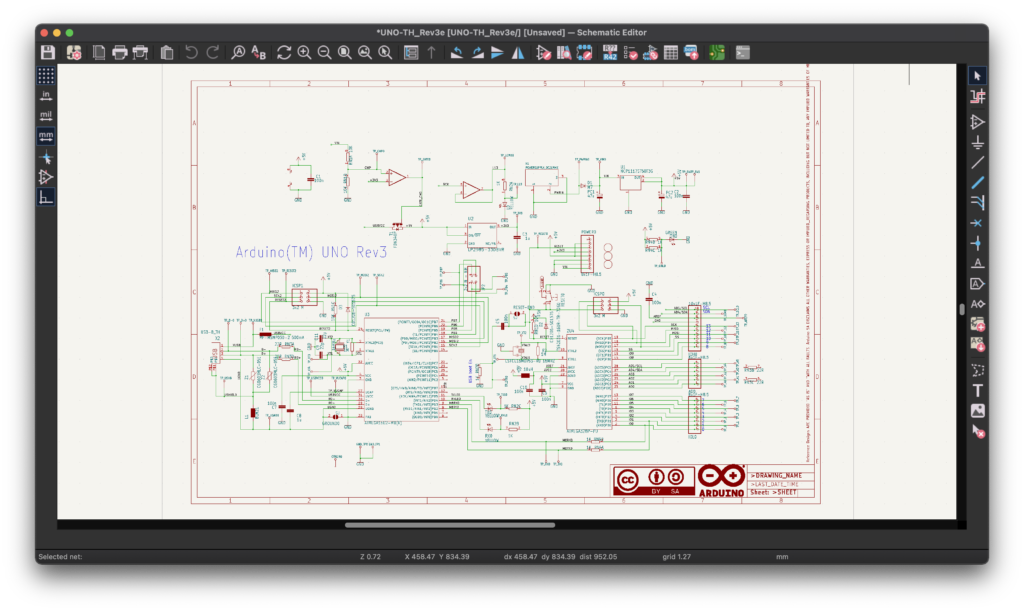
Following the error reporting, the schematic and board will have been imported into KiCad. Pressing ‘B’ to fill all zones will give a nice completed view of the Arduino!
Are There Any Pitfalls When Importing EAGLE into KiCad?
Unfortunately it is inevitable that this system will be less than perfect as EAGLE is an inherently different system to KiCad. The first thing I checked was the DRC…
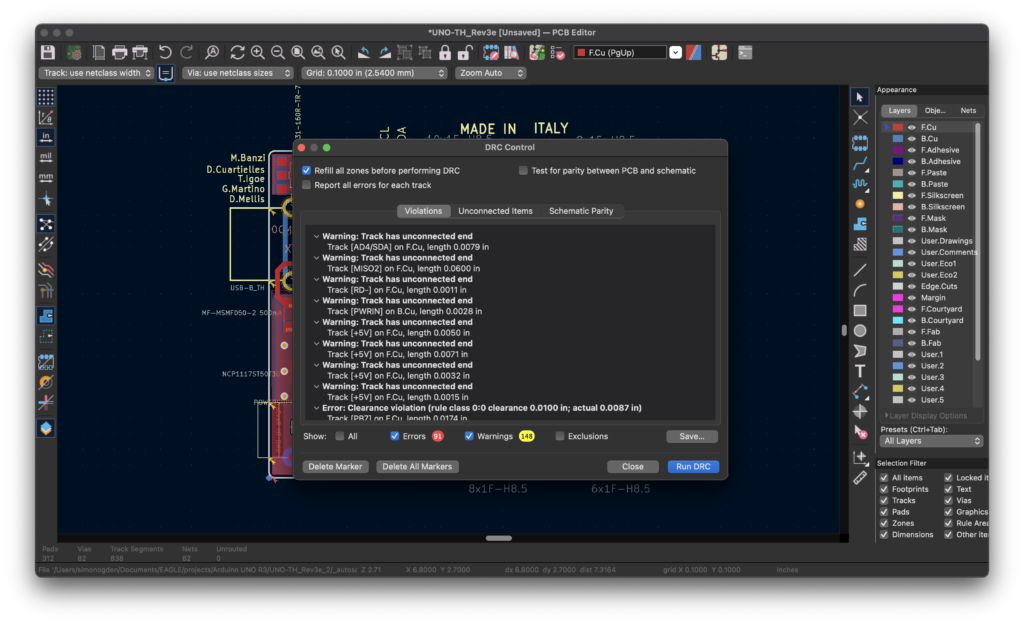
Taking a closer look at one of the errors…
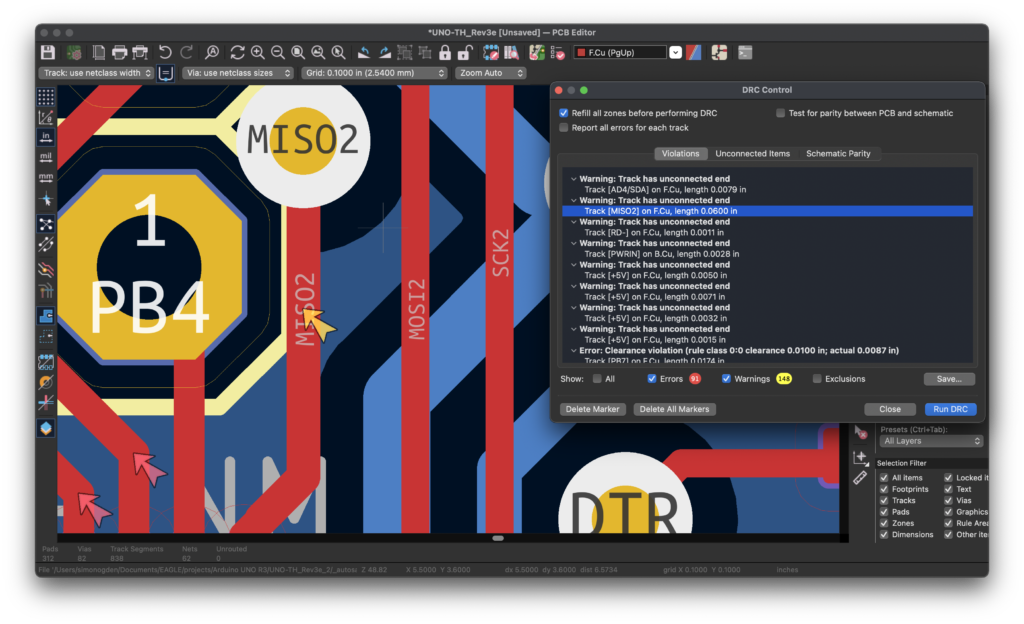
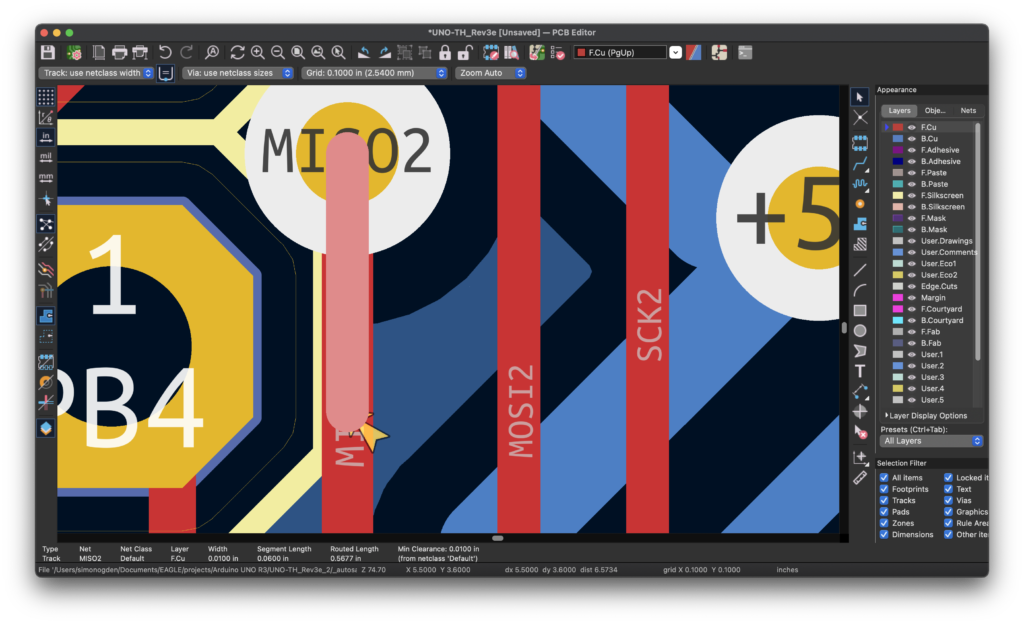
At first glance the net appears to be connected correctly, however under the main track there looks to be a stub track that is hidden, which is causing the DRC error. There are many other similar stubs causing the same DRC error.
Using the net inspection tool, it looks like the MISO pad of the processor is connected to the MISO pad of the programming header as intended.
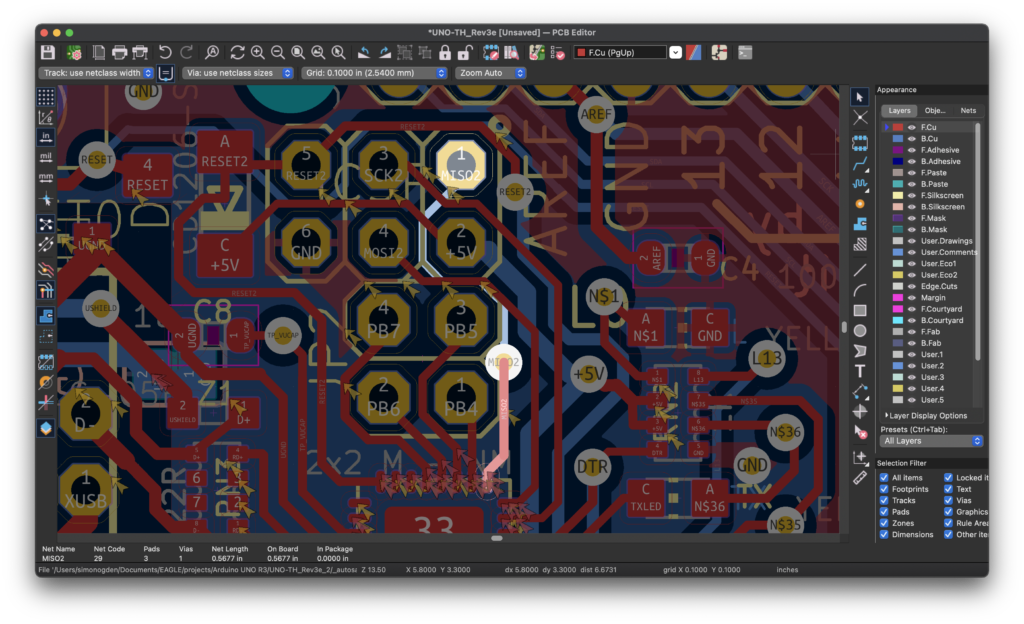
Therefore I would conclude that the imported data is good, but there are many false errors in the DRC due to import quirks.
This would either render the DRC useless or a large portion of time would be required to clean up the data and trawl through the DRC errors.
There are also some other considerations reported by other early adopters of the EAGLE import tool, although I believe some of these have since been fixed:
- Flags get converted into (tiny!) labels that might not be clear.
- The frame in schematics is gone. Not a big deal, but will look different than other KiCad projects.
- Some silkscreen layers will not map as expected.
- All footprints are imported from Eagle, since KiCad doesn’t know how to map existing footprints. This means that none of the 3D models are included.
Conclusion
At a first glance the EAGLE importer in KiCad 6 looks like a very useful tool for those who want to migrate from EAGLE to KiCad.
To date the import function works quite well, especially with the layer mapping tool. The imported schematics and boards look very good!
However after using the tool it becomes evident that there are some drawbacks.
The aforementioned problems with the DRC could make it pointless to import EAGLE files, if the cleanup of data and checking of the DRC takes longer than it would take to just remake the project from scratch in KiCad.
Whether or not it is worth using the importer would be entirely dependent on the complexity of the project and the reason for importing.
In any case it is good to see the KiCad developers attempting to add such a complicated tool and doing a pretty good job of it!
If you found this helpful, why not check out some more of my PCB posts!
Thanks so much for visiting my site! If this article helped you achieve your goal and you want to say thanks, you can now support my work by buying me a coffee. I promise I won't spend it on beer instead... 😏


