
Learn step-by-step how to add Arduino into an EAGLE project, for building your own shield or embedding Arduino into your own project design!
There are two ways that we can add an Arduino into an EAGLE project. The end goal is to have the desired Arduino board as a library component so that we can add it like any other component.
We can either design a brand new library component for EAGLE, however this can be time consuming and more difficult.
The easiest way to add an Arduino to EAGLE is by downloading an existing library that contains the desired Arduino board and then add it to EAGLE.
Here we will focus on the easier method and cover the acquisition of said required library and how to install it.
How To Add The Arduino EAGLE Library
In order to add Arduino to EAGLE, we will complete the following steps:
- Download the Arduino EAGLE library.
- Move the .lbr file to the EAGLE library locations folder.
- Start EAGLE and open a schematic.
- Open the add component dialog.
- Locate the newly added Arduino library.
- Locate the desired Arduino board you wish to add.
- Place the board on the schematic.
Download And Install The Arduino EAGLE Library
As previously mentioned, it is possible to for us to design boards from scratch and create a new library.
However the bright folks over at SparkFun have already created a library with the most popular Arduino boards.
You can download the Sparkfun Library here:
If you need a board that is not in this library, I would suggest continuing this tutorial to see how a board is added and used, then designing your own by following this guide.
The SparkFun boards library contains the following popular boards:
- Arduino Mega
- Arduino Pro Mini
- Arduino Uno R3
- Arduino Uno R3 Shield
- ESP32 Thing
- QDuino Mini
- Beaglebone Black Cape
- ESP8266 Thing
- Sparkfun Pro Micro
- Teensy & Teensy Extended
Don’t forget that all boards with compatible headers are also suitable.
For example if you wish to design a shield to fit a board with an Arduino Uno compatible header layout, you can use the Arduino Uno from this library.
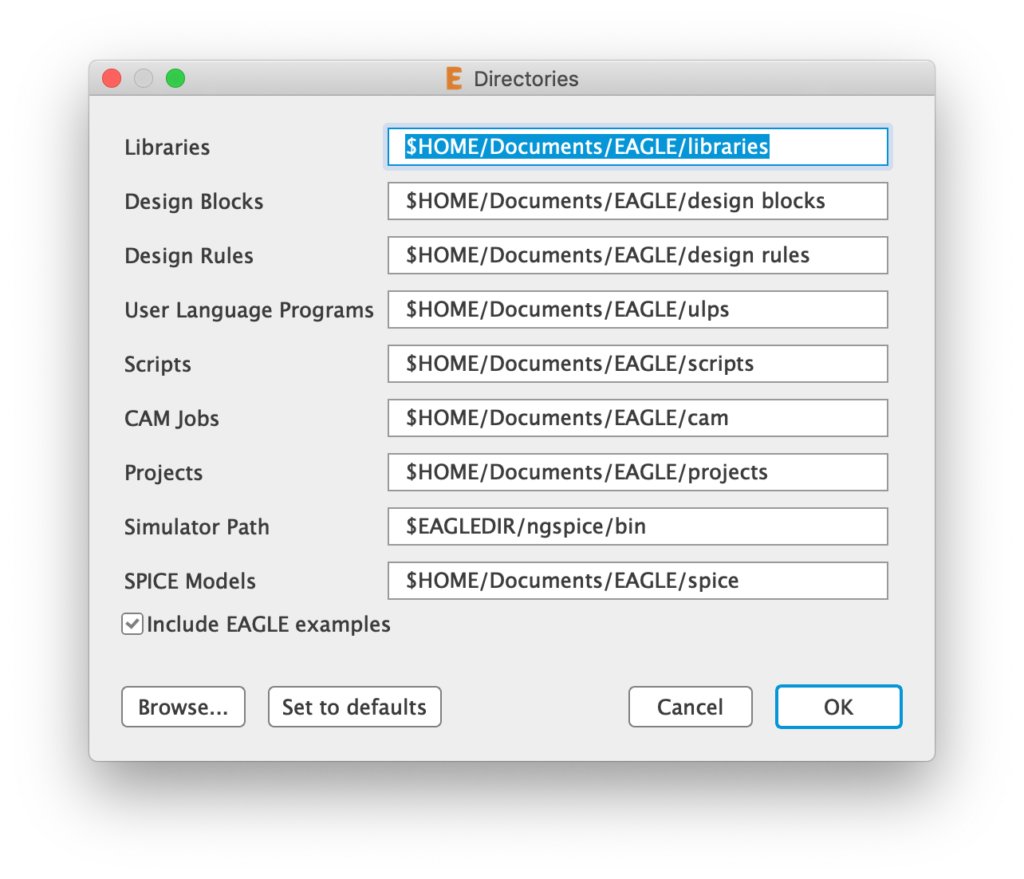
Once downloaded, move it into the user library directory. You can find your library location from the main EAGLE splash screen.

From here, click options > directories and you will see the path to your library folder at the top of the window.
Next you need to unzip the SparkFun library into the EAGLE libraries directory so it is located with the other libraries.

Add Arduino To An EAGLE Project
Adding the Arduino could not be more simple! If you have never created a schematic or added a component, or if you are new to EAGLE then I would also recommend checking out this article.
First load the schematic you want to add the Arduino to, or create a new one.
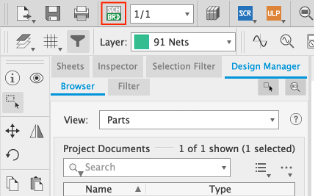
Then click the add part tool from the left-hand toolbar.
In the add parts dialog box, navigate to the SparkFun boards library, or search for it.
Choose a board and click ok. This will add a component that looks like a microchip, with all of the IO and connections found on the board.
For this example I will add an Arduino Uno R3.
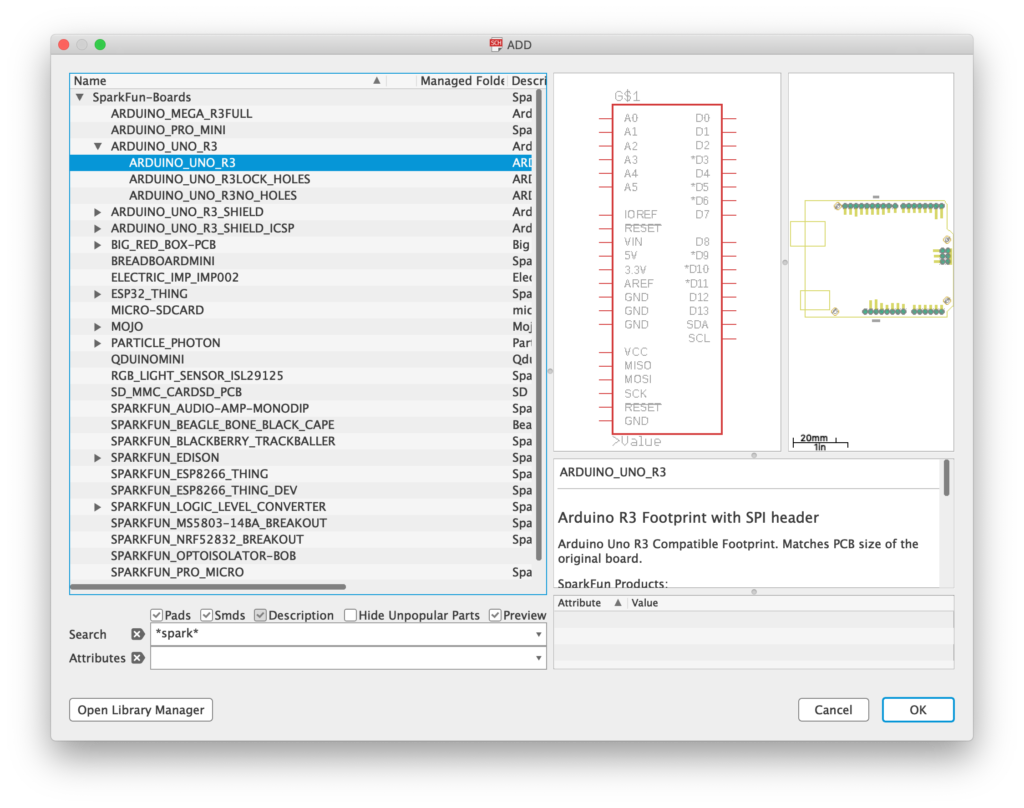
Choose the board you wish to add and click ok. Then choose a location and left-click, this will place the symbol for the board in the schematic.
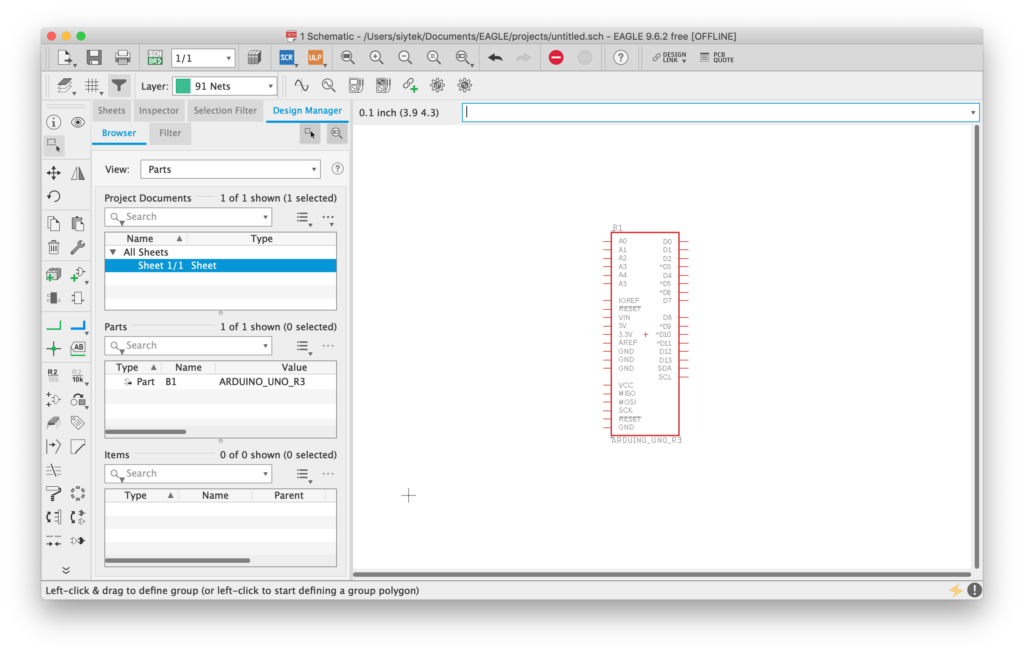
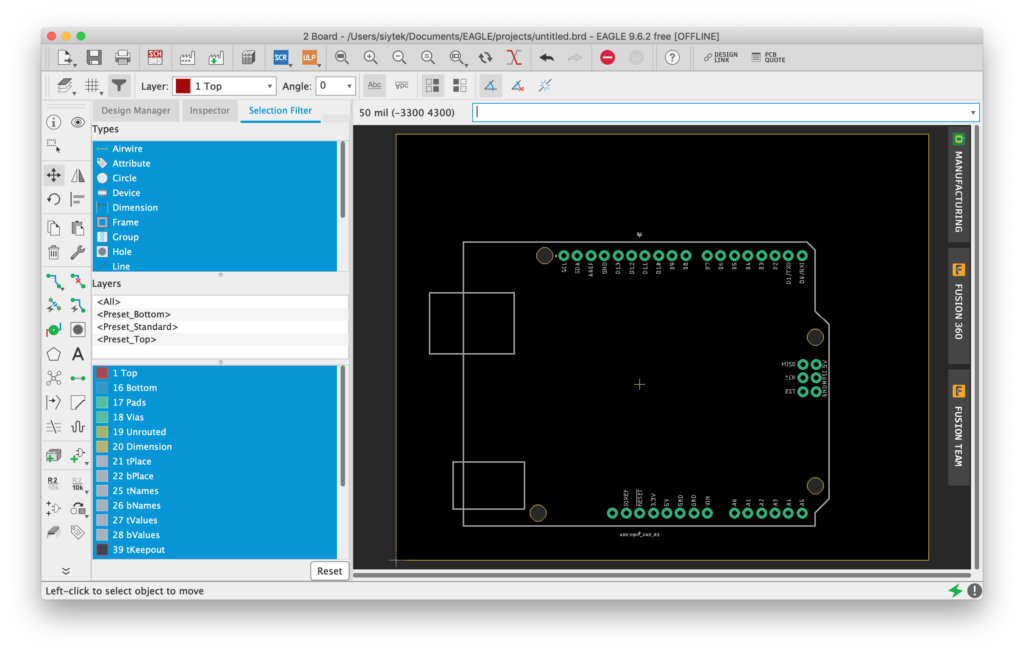
At this stage you can continue with the schematic design, connecting the board as you desire. Once you are happy with the design, click the sch/board button on the top toolbar.
Voila! Now you have an Arduino in your EAGLE design. You can now include an Arduino board in your design for control purposes, or perhaps even design your own shield.
Whats Next…?
Now that you know how to add an Arduino to your EAGLE design, you can go create something wonderful!
If you like saving money, I would definitely check out this article in order to learn how to design a PCB economically.
If you need a different board then my tutorial on how to create your own EAGLE library and add custom components will teach you exactly how to do it.
If you are fairly new to EAGLE and PCB design, you should check out my beginners guide series. It will walk you through the process of completing your first PCB design in EAGLE step-by-step.
Thanks so much for visiting my site! If this article helped you achieve your goal and you want to say thanks, you can now support my work by buying me a coffee. I promise I won't spend it on beer instead... 😏


