
Designing your own Arduino shield is WAY easier that you might think! In this tutorial we will learn how to design a shield in KiCad, which can be manufactured for just a small cost.
Nowadays its so easy and cost effective to get a PCB manufactured, most of the time it is preferable to just design the first revision and have it made rather than attempting to build everything on a breadboard.
KiCad 6 is fantastic and has come a long way since earlier versions. Personally I have mostly always used EAGLE to design boards. However since the release of version 6 I have switched to KiCad due to the limitations of the free version of EAGLE.
In this tutorial we will learn how to design an Arduino shield from scratch using KiCad 6.
Once the project is complete, you will be able to generate the manufacturing files and get your shield fabricated, should you wish to order it!
- Prerequisite
- Installing the Library
- Creating an Arduino Shield Schematic
- Creating an Arduino Shield PCB
- Conclusion
Prerequisite
There are just a couple of things that you will need prior to starting. This tutorial assumes some basic experience using KiCad.
If you are completely new to KiCad, I would recommend working through a beginners tutorial first and then returning to this after. Here is an excellent KiCad 6 beginners guide with a wealth of information included.
You will of course need KiCad 6 installed in order to complete this tutorial.
You will also need to download the Arduino KiCad library from here. This library contains the following component parts:
- Arduino 101 Shield
- Arduino Due Shield
- Arduino Leonardo Shield
- Arduino M0 Shield
- Arduino M0 Pro Shield
- Arduino Mega 2560 Shield
- Arduino Micro Socket
- Arduino Mini Socket
- Arduino Nano Socket
- Arduino Uno Shield
- Arduino Zero Shield
In this tutorial example we will create a shield for the Arduino Uno, however you can choose one of the other options from the library, should you wish to design a shield for a different board.
Installing the Library
Once you have downloaded the KiCad library you will need to install it.
Step 1: Unzip the downloaded .zip file to the location where you prefer to store KiCad library files. If you do not have any third party libraries yet, you can create a new folder such as;
~/Documents/KiCad/Libraries/Arduino
Step 2: In the schematic editor, go to Preferences > Manage Symbol Libraries.
Step 3: Choose from the tabs global libraries or project specific libraries depending on whether you would like the library to be accessible by all projects or only the current working project.
In this example we will add the Arduino library globally, so that it is accessible to all future projects.
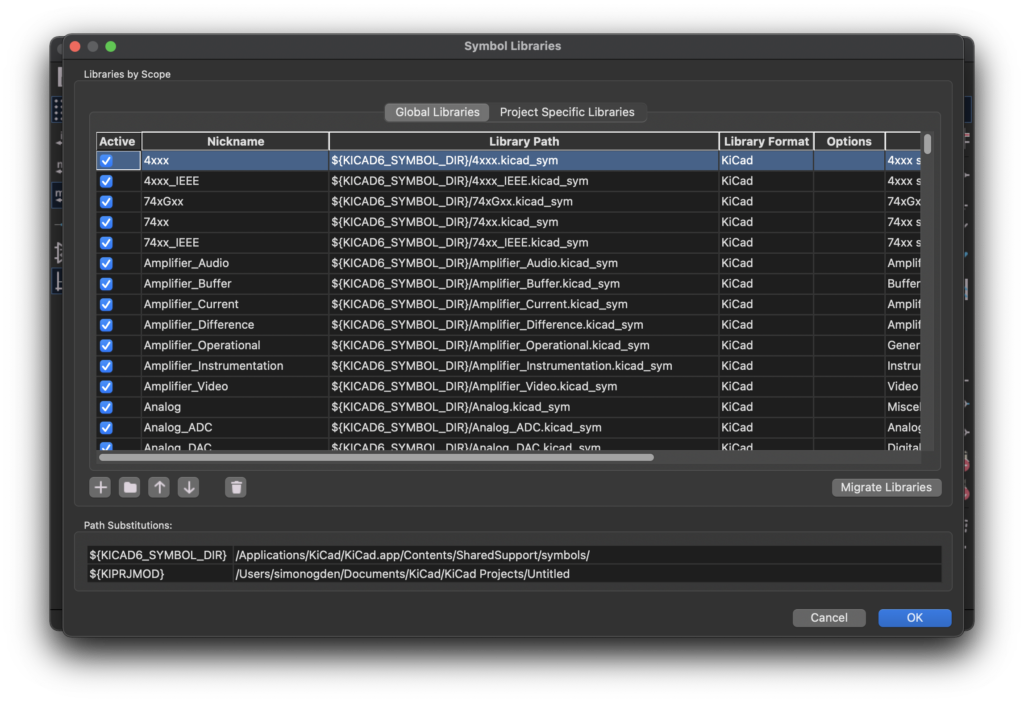
Step 4: Click the add existing library to table button (the folder icon next to the +). Locate the folder where you unzipped the Arduino library in step 1 and locate the arduino.lib file. Select it and click open to add the library to the table, then click ok.
Step 5: Open the PCB board editor and click Preferences > Manage Footprint Libraries…
Step 6: Choose from the tabs global libraries or project specific libraries depending on whether you would like the library to be accessible by all projects or only the current working project. In this case we will add globally again.
Step 7: Click the folder icon (next to the + icon) and select the footprints directory /Arduino.pretty from within the files unzipped earlier. Click open to add to the footprints library. Then click ok to close the footprints library.
Creating an Arduino Shield Schematic
Now that the library is installed, we can begin to design a shield. It is of course up to your own creativity to decide upon an electronics design, but for demonstration purposes we will create a simple LED-based shield.
Step 8: Create a new project in KiCad and open a new schematic in the schematic editor.
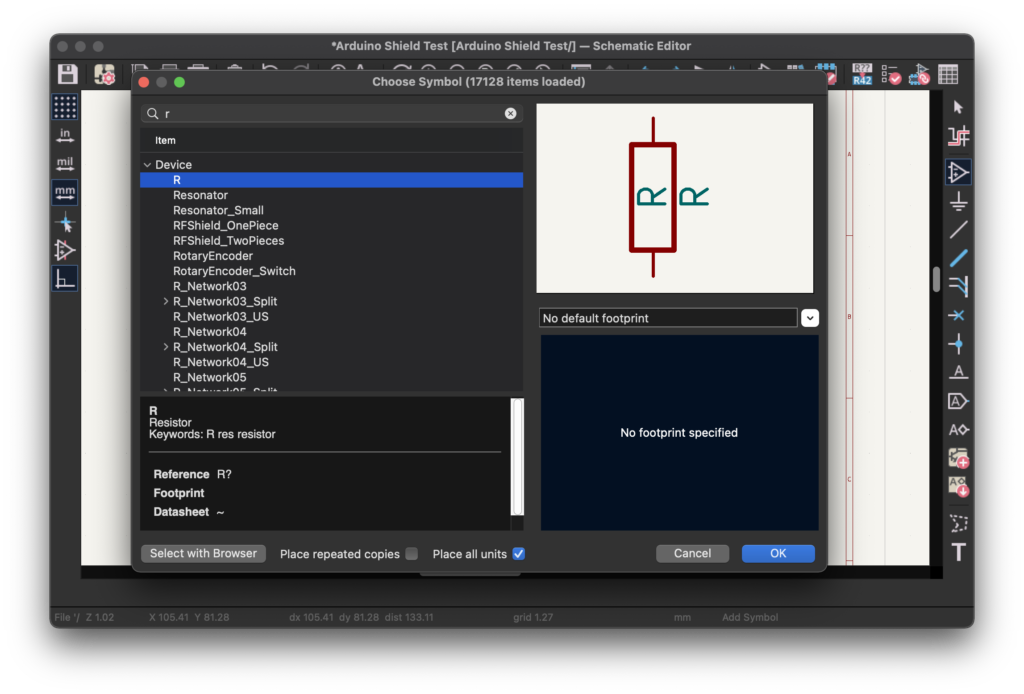
Step 9: Now we can insert the shield as a component, starting with the schematic. Click place > add symbol (or press the ‘A’ key) in order to add a new symbol.
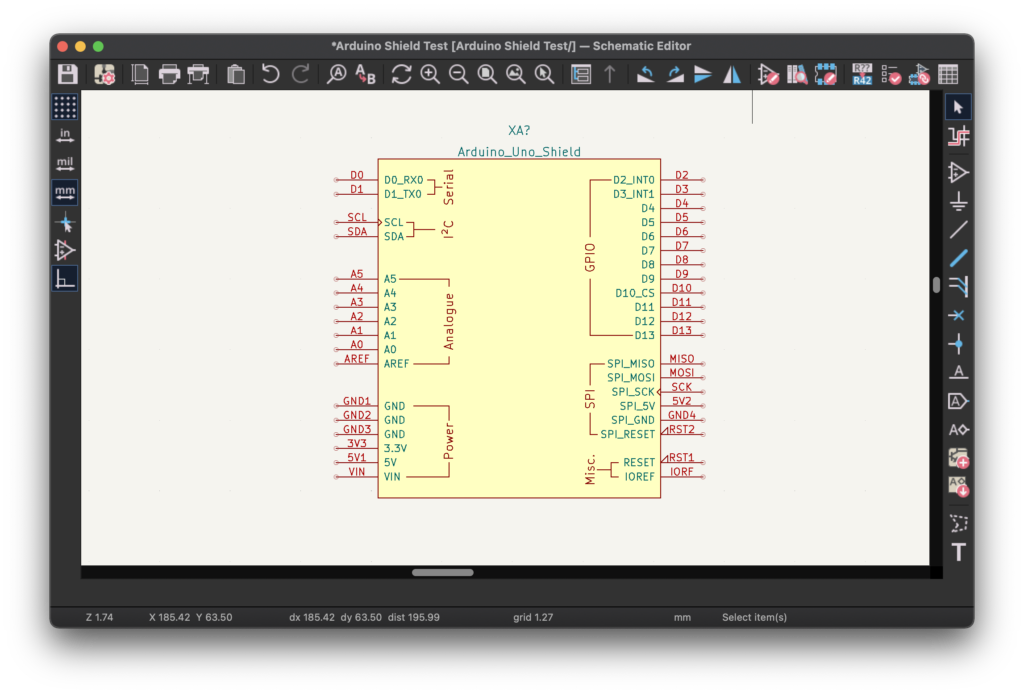
Locate the Arduino library and select the Arduino_Uno_Shield component.
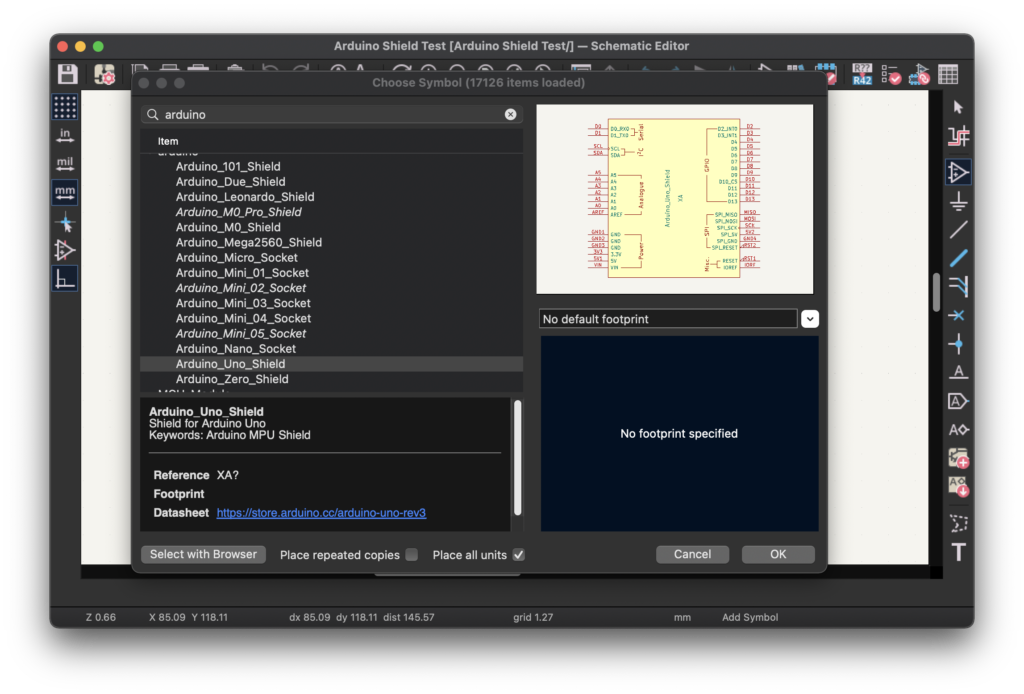
Click ok and then choose a location within the schematic window to place the component. Left-click to place the component within the schematic.
Step 10: For the purpose of this tutorial we will construct a basic shield with 8x LEDs connected to the GPIO pins. Press ‘A’ to insert a new component and locate a standard LED.
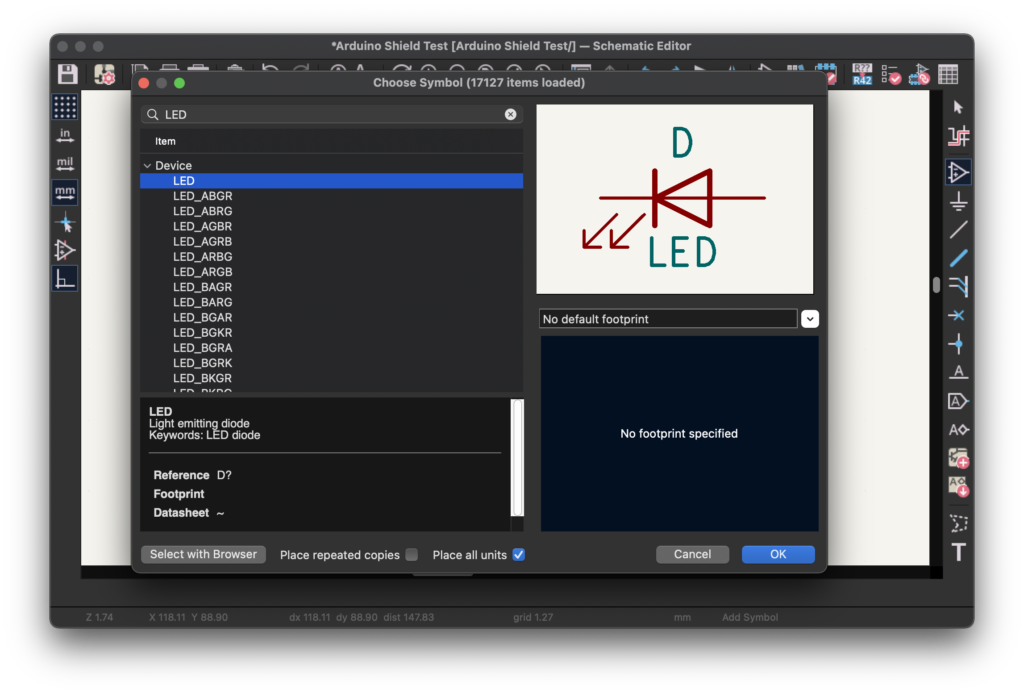
Step 11: Click ok and place 8x LED components into the schematic. Connect the cathodes to D2 through to D9.
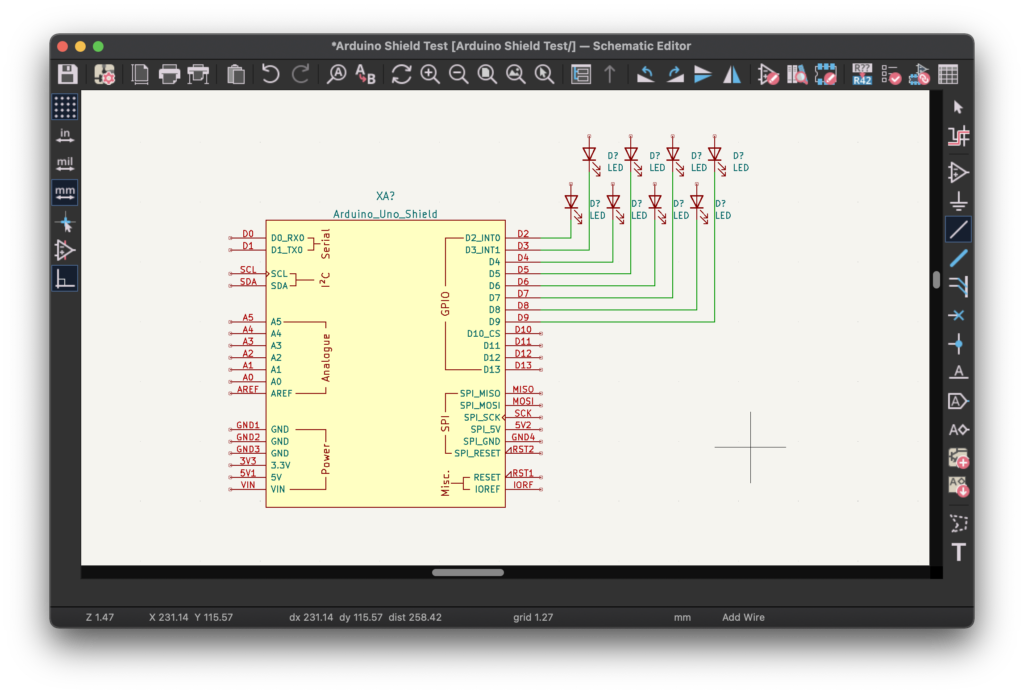
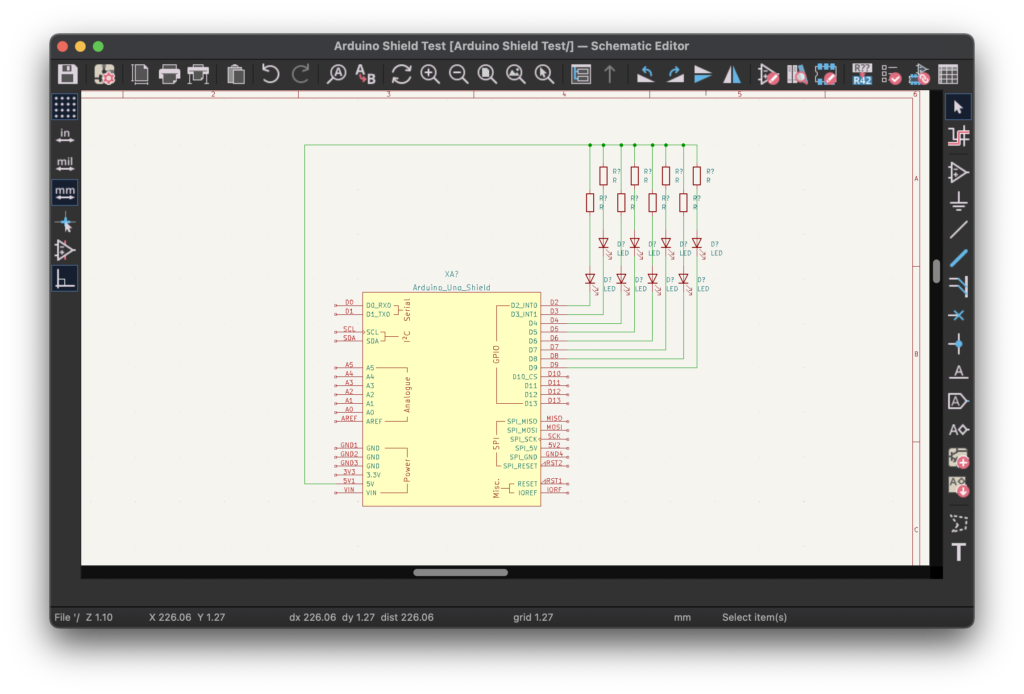
Step 12: Press the ‘A’ key to add another component and locate the standard resistor ‘R.’ Click ok to place the component.
Step 13: Add 8x resistors connecting the LED anodes to the 5V power supply from the Arduino. These LEDs will illuminate when the GPIO pin is set to 0 (sinking current).
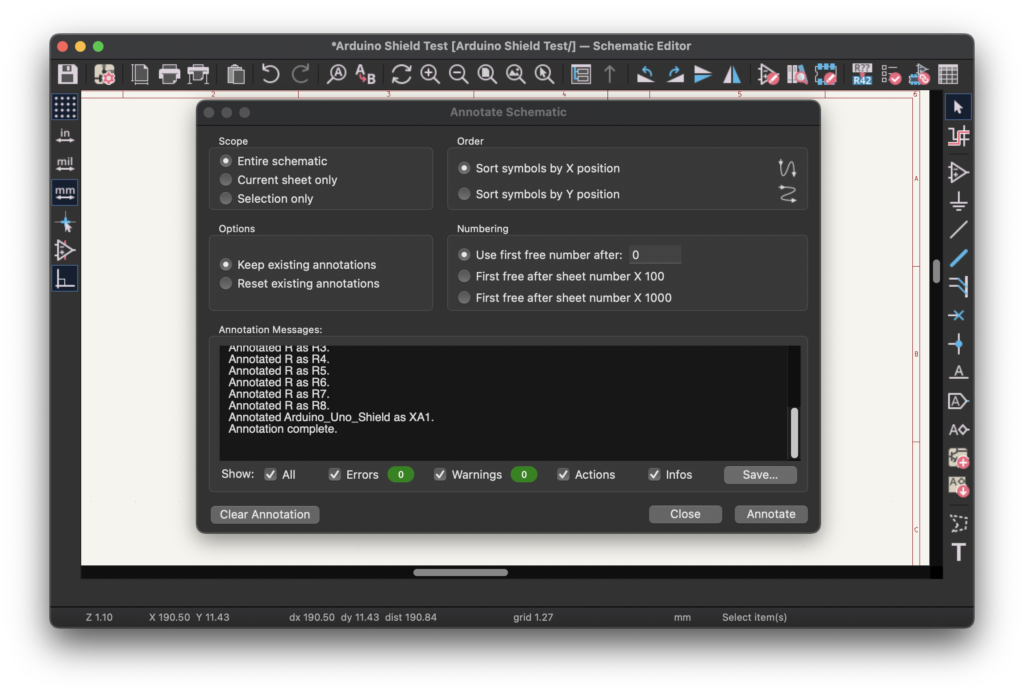
Step 14: Click Tools > Annotate Schematic and then click OK. This will add a reference designator to each component. You can leave the parameters as default, just click annotate and then close to close the window.
Creating an Arduino Shield PCB
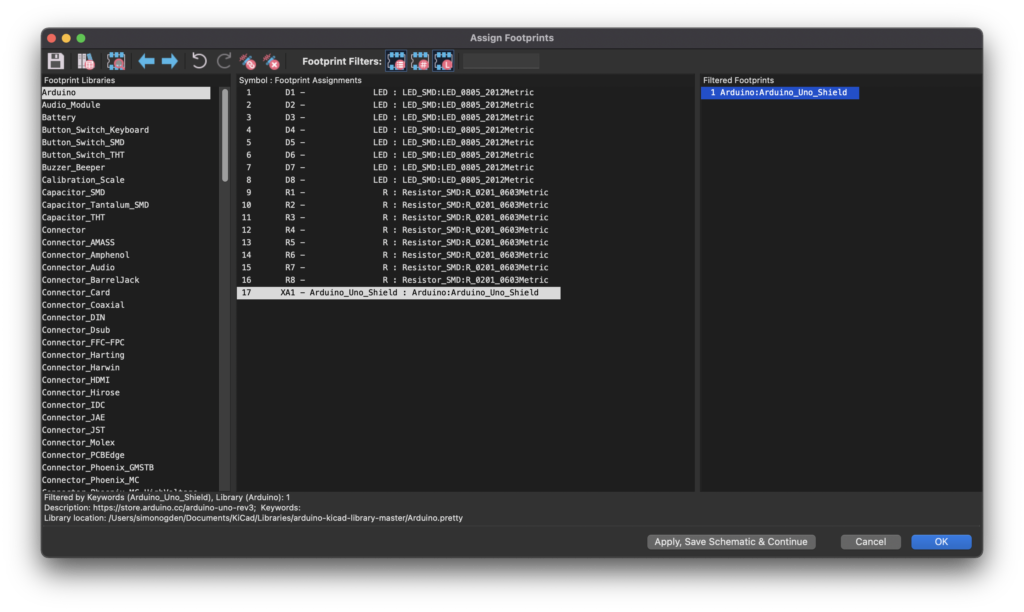
Step 15: Click Tools > Assign Footprints in order to open the Assign Footprints tool. Using the footprint filters, assign a suitable package for the LEDs and resistors.
In this example I chose a standard 0805 for the LED and 0603 for the resistor. If in doubt, copy the middle list in the following screenshot.
For the Arduino_Uno_Shield, select the Arduino:Arduino_Uno_Shield footprint, which can be found in the Arduino library.
For further information on assigning footprints, see here and here.
Step 16: Click Tools > Switch To PCB Editor in order to load the PCB designer.
Step 17: Click Tools > Update PCB from Schematic and click the update PCB button in order to populate the PCB design with the components from the schematic.
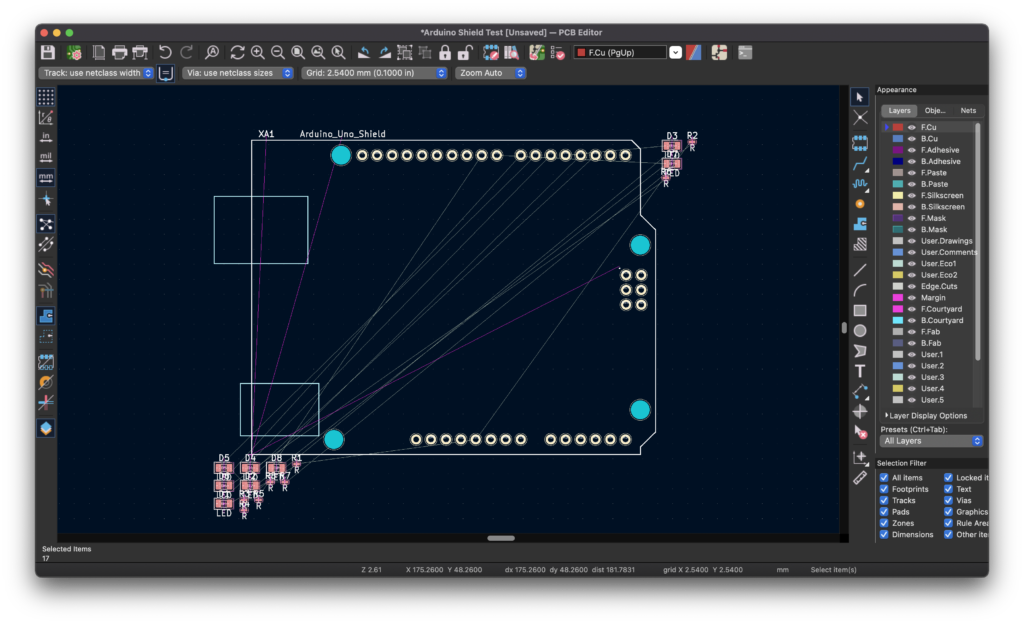
You can drop the components anywhere within the PCB design layout by left-clicking. At this stage you can begin the shield design. Creating the layout is beyond the scope of this tutorial but if you require assistance, there is some further reading here.
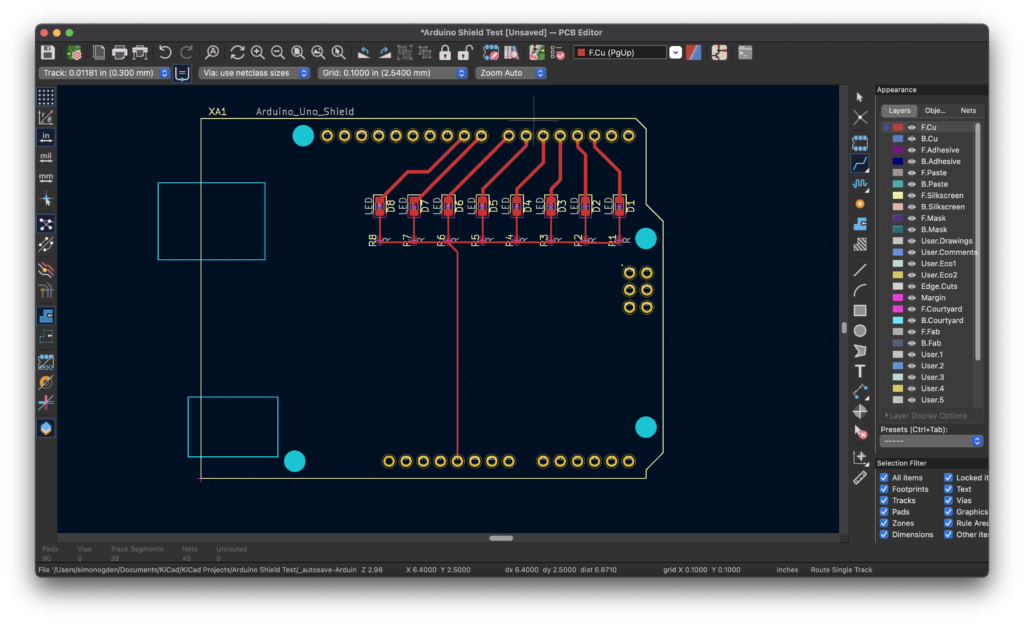
Once you are happy with your design, you can output the Gerber and drill data in order to send the design for manufacturing. Why not check out this tutorial which shows you how to output the necessary files so that you can order your design from a fabricator!
Conclusion
Hopefully this tutorial has given you enough information to quickly and easily design your own shield!
Thanks to the awesome effort by the KiCad developers combined with those who take the time to produce free libraries, it is possible to quickly and easily design a shield for Arduino!
Now why not go ahead and output those files from KiCad so that you can order your shield, or maybe check out some other cool PCB tutorials here.
Thanks so much for visiting my site! If this article helped you achieve your goal and you want to say thanks, you can now support my work by buying me a coffee. I promise I won't spend it on beer instead... 😏


As a complete novice in KiCad this was very helpful. Can I ask about your choice of arduino boards in the library? I was hoping to find a MKR layout as this is one board I have found very few commercial shields and I think I will need to make one. Is there an issue with the MKR boards or just wasn’t on your radar?
Hi Mark, really glad you found the tutorial helpful! I didn’t create the original library (you can find the original source here https://github.com/Alarm-Siren/arduino-kicad-library/). I don’t think there is a problem with the MKR, just probably that it is a less common footprint. This is probably why there are not so many shields, and also why the library author did not (yet) include it.
You should be able to create your own library with the required footprint. I don’t yet have a tutorial for creating a part KiCAD, so perhaps something I should add! However for now I can recommend the DigiKey KiCAD series on YouTube, should give you the info you need: https://youtu.be/c2niS9ZRBHo
Hey i cant find the .lib file you mentioned, if i use the search bar i also cant find it