The Wemos D1 Mini is like a tiny Arduino with WiFi capability based on the ESP8266 chip, in other words it is a superb little board that everyone should be using!
The official boards are produced by Lolin who are seemingly based in China, or at least their official store can be found over on Aliexpress.
The D1 Mini is widely available at places such as Amazon, although most likely these boards are clones. However don’t be put off from buying a clone, it is commonplace for open source projects such as those in the sphere or Arduino.
Also the official boards do not seem to be easily available anyway, so the best option is to grab one on Amazon Choice with good reviews.
- What Are The Different Types Of D1?
- Schematic Diagram Of The Wemos D1 Mini
- Pinout Diagram and Wiring For The Wemos D1 Mini
- Wemos D1 Mini Technical Specification
- How To Power The Wemos D1 Mini
- Does The Wemos D1 Mini Have Bluetooth?
- How To Program The Wemos D1 Mini
- What’s Next?
- Conclusion
What Are The Different Types Of D1?
There are several types of D1 boards available. There is in fact a ‘full sized’ D1 board available, albeit far less common.
The full-sized D1 board is basically an Arduino UNO board footprint. It features the USB and DC power jack in the same location as the UNO.
The full sized board is also compatible with the Arduino UNO shield form factor, so this board can be useful if you already have this type of shield.
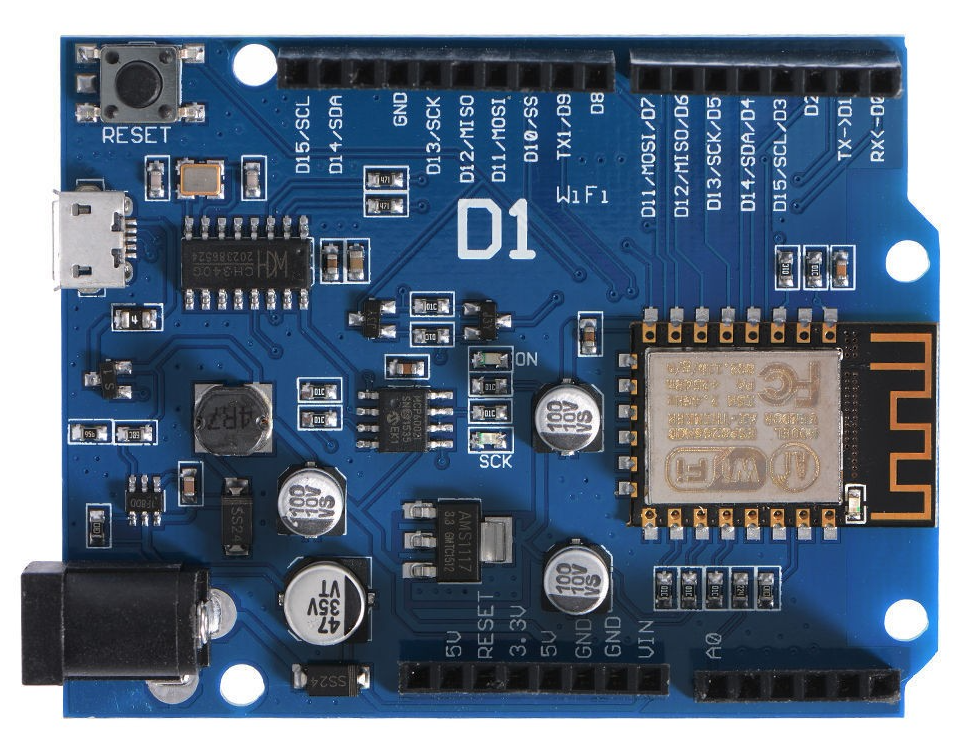
Lolin has however developed their own form factor. The Wemos D1 Mini board is approximately 1/4 the size of the Arduino UNO!
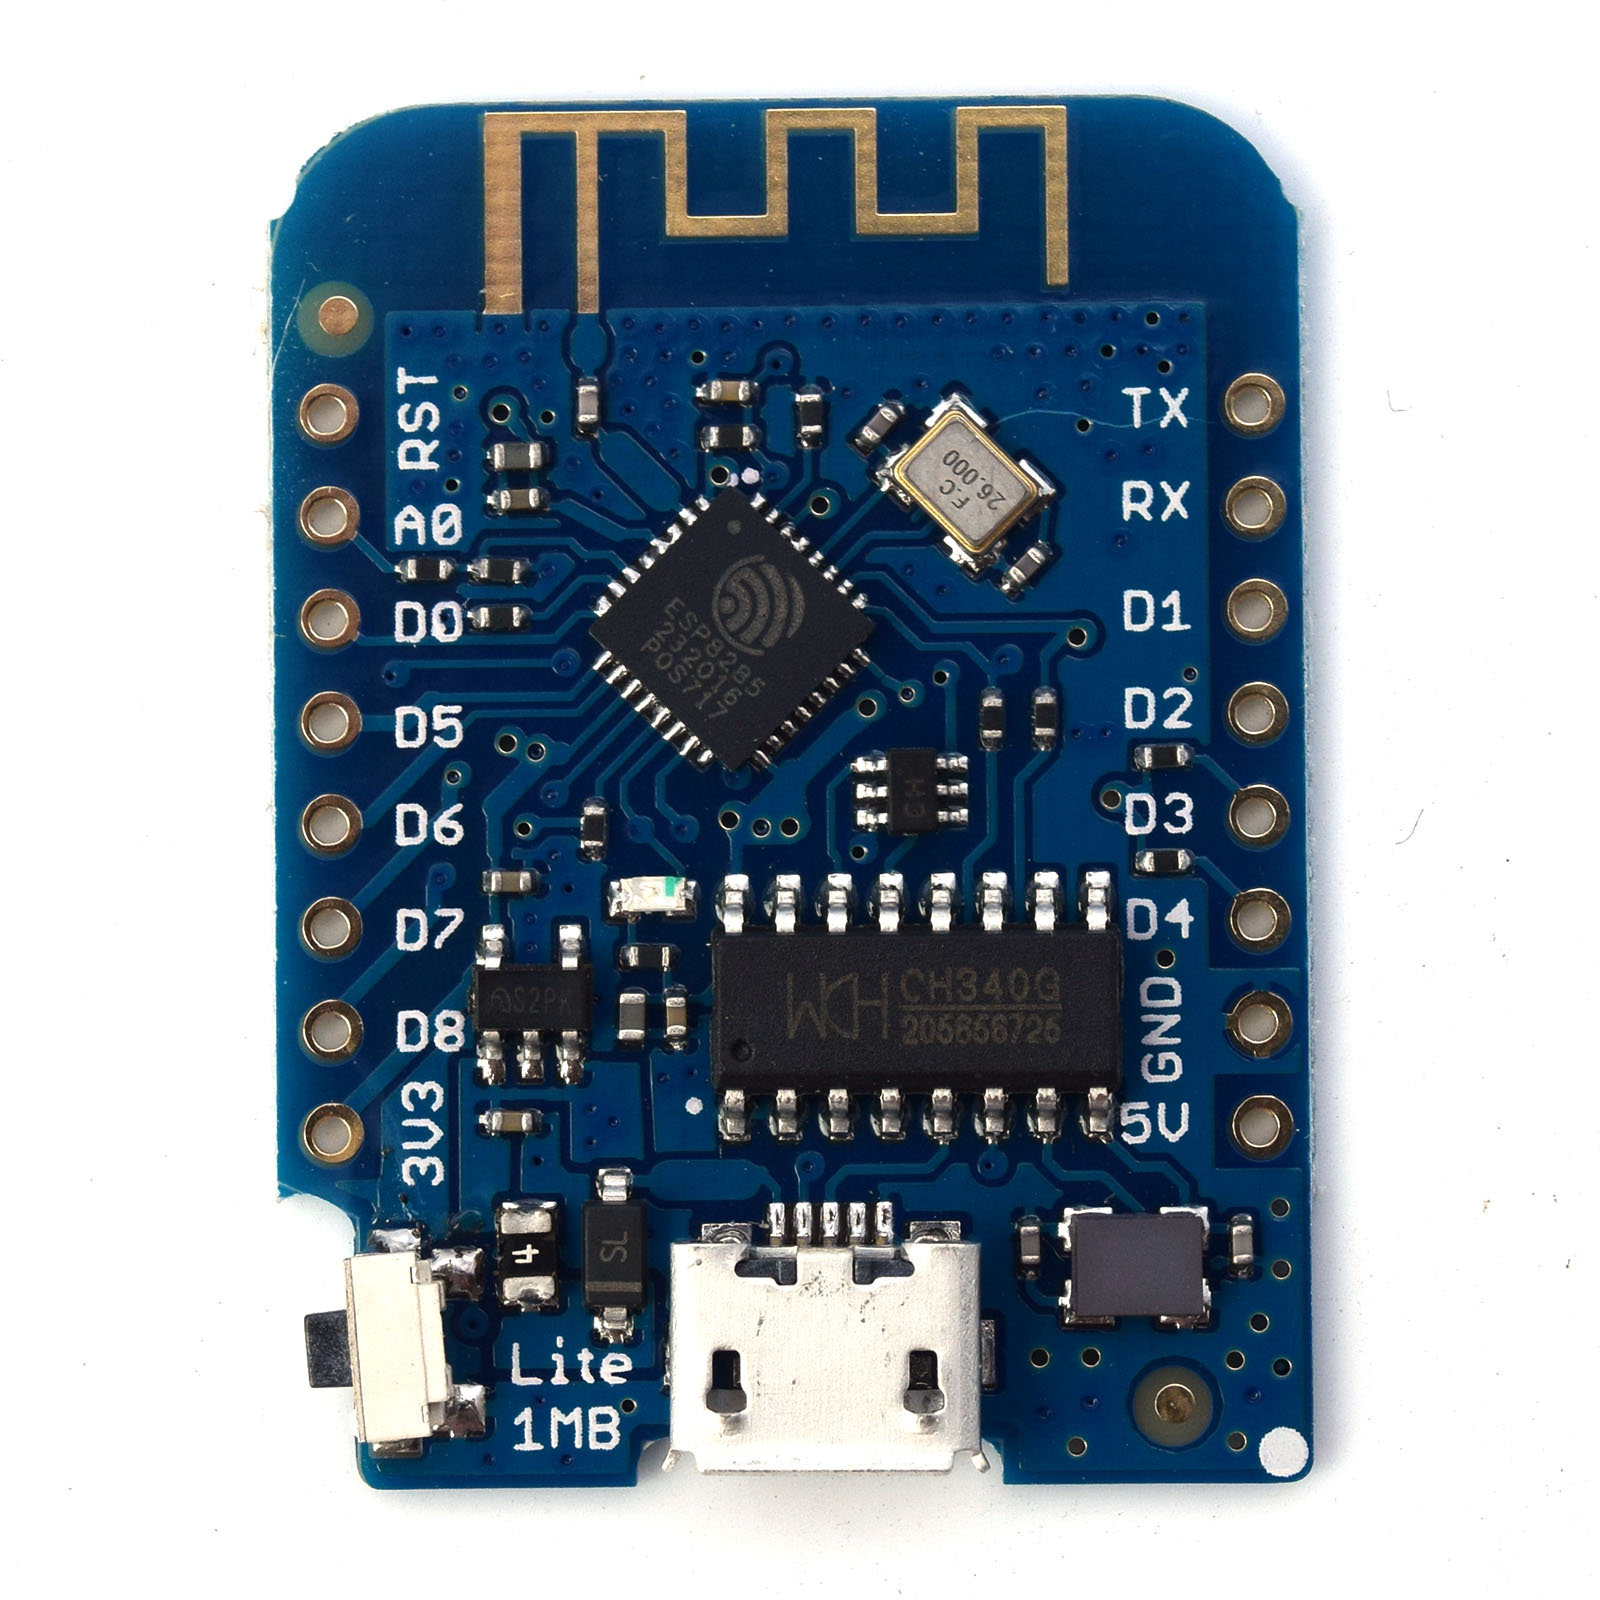
The official boards come in two flavours, the D1 Mini and the D1 Mini lite. The latter is based on the ESP8285 chip where the former is based upon the more common ESP8266EX.

The main different between these boards is the amount of flash memory. The D1 Mini features 4MB where the D1 Mini Lite features 1MB.
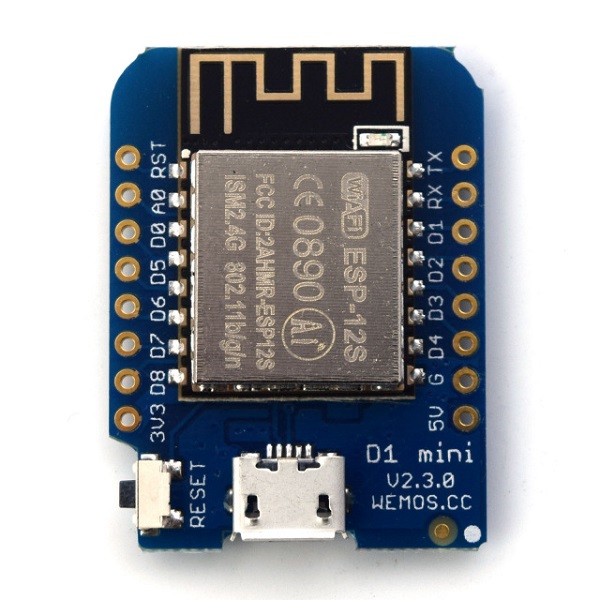
Another common derivative of the D1 Mini features the ESP-12S WiFi module, which is basically the same as the 8266EX based D1.
It shares the same footprint and pinout, with the reset button and USB port being located in the same place. The main difference is the use of an ESP module rather than using an ESP chip and ancillary components directly on the board.
This is likely a more cost effective way to produce the board. However there could also be the added benefit that the WiFi components are placed within an RF shield on the module.
Schematic Diagram Of The Wemos D1 Mini
There is a schematic for the official D1 Mini on the Wemos website. However it should be noted that this schematic is relevant for modules where the ESP chip is mounted directly on the board.
Click the button below to download the schematic in PDF format:
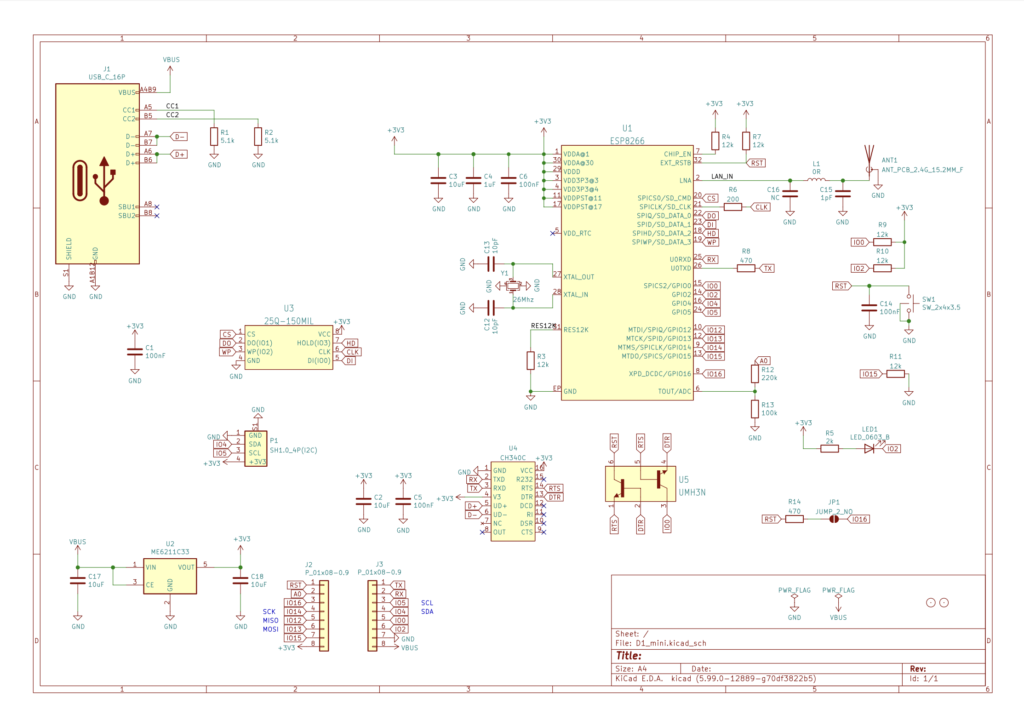
There is also a schematic for the ESP-12S based module, although this no longer seems to be available on the official site.
The following schematic may be useful to those using the ESP-12S based module who need to know how it is wired.

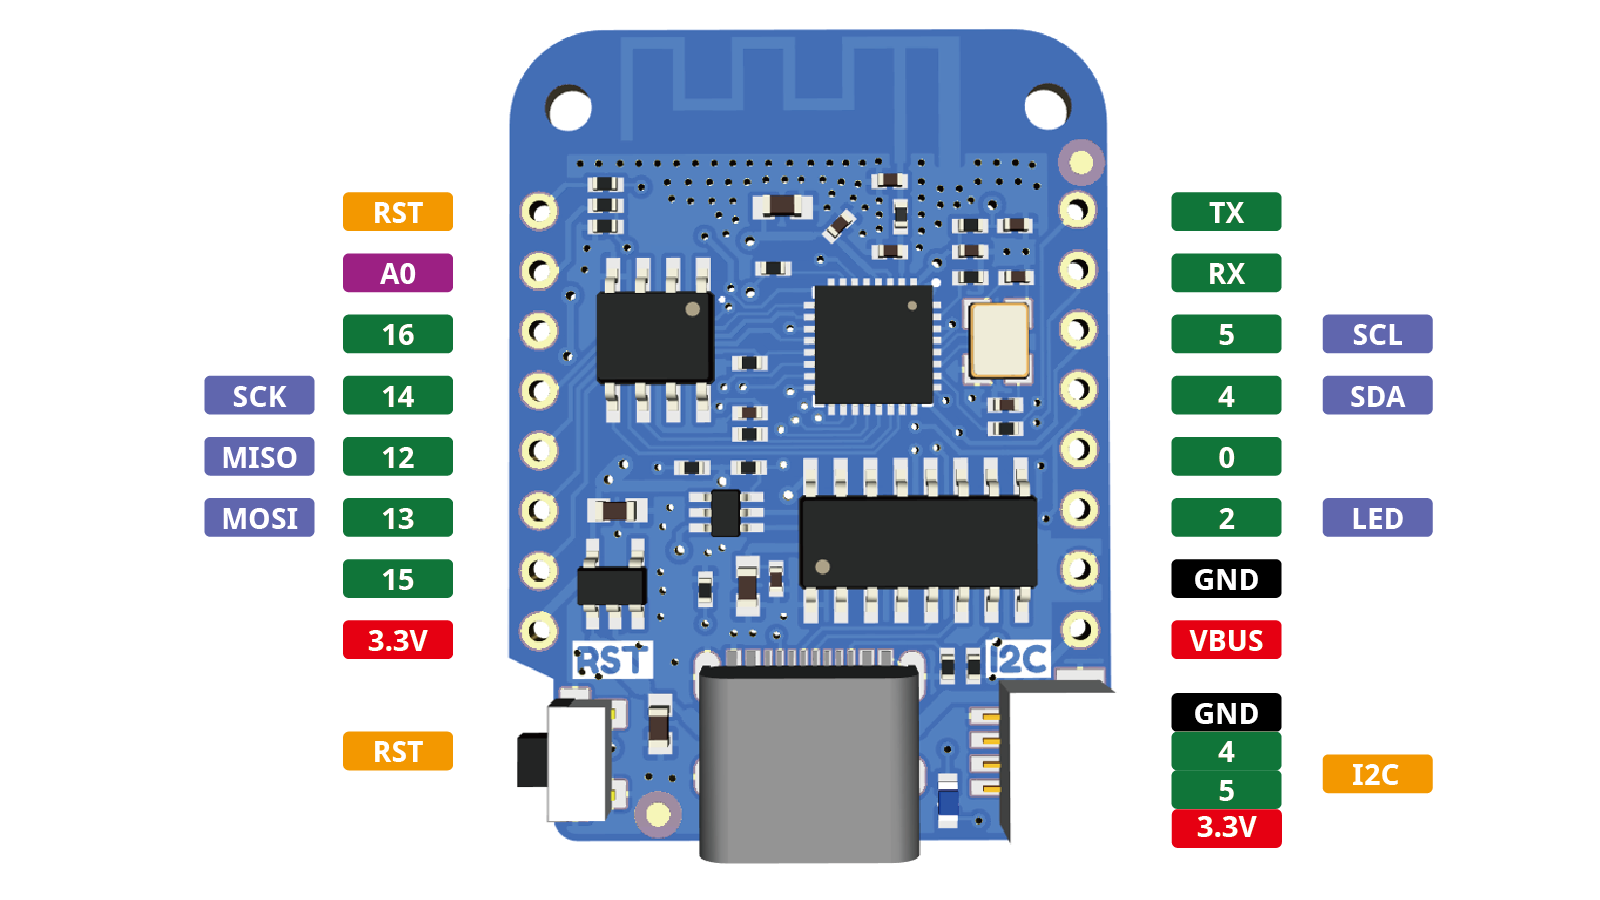
Pinout Diagram and Wiring For The Wemos D1 Mini
The following pinout is from the official Wemos website. I have added a description table for further explanation.
| D1 Mini Pin | ESP Pin | Function |
| RST | RST | Reset Pin – to reset the device |
| A0 | ADC0 | ADC – analog to digital convertor. This pin can read voltages between 0V and 3V3 via a resistive potential divider. |
| D0 | GPIO16 | GPIO – General Purpose Input or Output pin WAKE – This pin can also be used to wake the ESP chip from sleeping. |
| D5 | GPIO14 | GPIO – General Purpose Input or Output pin SCLK – Serial clock for SPI interface |
| D6 | GPIO12 | GPIO – General Purpose Input or Output pin MISO – Master In Slave Out for SPI interface |
| D7 | GPIO13 | GPIO – General Purpose Input or Output pin MOSI – Master Out Slave In for SPI interface |
| D8 | GPIO15 | GPIO – General Purpose Input or Output pin CS – Chip Select for SPI interface |
| 3V3 | 3V3 | 3V3 Power Input – how to power the Wemos D1 Mini |
| 5V | VBUS | 5V Power Input – how to power the Wemos D1 Mini |
| G | GND | Ground |
| D4 | GPIO2 | GPIO – General Purpose Input or Output pin |
| D3 | GPIO0 | GPIO – General Purpose Input or Output pin |
| D2 | GPIO4 | GPIO – General Purpose Input or Output pin SDA – Serial data for I2C bus |
| D1 | GPIO5 | GPIO – General Purpose Input or Output pin SCL – Serial clock for I2C bus |
| RX | GPIO3 | GPIO – General Purpose Input or Output pin USART RX – Serial receive pin |
| TX | GPIO1 | GPIO – General Purpose Input or Output pin USART TX – Serial transmit pin |
Wemos D1 Mini Technical Specification
The technical specification of the Wemos D1 Mini is really defined by the specification of the ESP8266 chip.
The Wemos D1 Mini serves simply as a carrier board, with some additional supporting circuitry such as voltage regulation and analog input division.
Official resources such as the technical datasheet can be found here on the Espressif website.
However the technical documentation can be complicated to understand, especially for a beginner. In order to make things more clear I have summarized the important parts of the specification into the following list:
| Operating Voltage | 3.3V or 5V |
| Digital IO Pins | 11 (3.3V max) |
| Analog Input Pins | 1 (3.3V max) |
| Flash Size | 4MB |
| Clock Speed | Up to 160MHz |
| Ports/Interfaces | USB/UART/ADC/PWM |
| Power Consumption | Continuous Transmission: ~71mA (500mA peak) Modem Sleep: ~20mA Light Sleep: ~2mA Deep Sleep: ~0.02mA |
| Operating Temperature | -20ºC ~85ºC |
| Dimensions | 34.2mm x 25.6mm |
How To Power The Wemos D1 Mini
The ESP8266 requires 3.3V to operate, therefore all iterations of the Wemos D1 Mini and other boards using the ESP8266 chip must have 3.3V onboard to function.
The Wemos D1 Mini has an onboard voltage regulator that connects to the VBUS and 5V input pin.
This means that the Wemos D1 Mini can run from 3 different power supply options:
5V from the USB port
When the USB cable is connected, the Wemos D1 Mini will be powered from the USB port.
The 3.3V voltage regulator will operate, supplying the ESP chip.
The 3.3V pin will output 3.3V from the voltage regulator. If used to power any external devices, the maximum current supplied from the regulator should be observed.
The 5V pin will output 5V from the USB VBUS. If used to power any external devices, the maximum current supplied from the USB port should be observed.
5V from the 5V input pin
When the 5V pin is coupled to a 5V supply, the Wemos D1 Mini will be powered from an external 5V supply.
The 3.3V voltage regulator will operate, supplying the ESP chip.
The 3.3V pin will output 3.3V from the voltage regulator. If used to power any external devices, the maximum current supplied from the regulator should be observed.
3.3V from the 3.3V input pin
When the 3.3V pin is coupled to a 3.3V supply, the Wemos D1 Mini will be powered from an external 3.3V supply.
The 3.3V voltage regulator will not operate. The ESP chip will receive 3.3V directly from the external power source.
The 5V pin will not produce any voltage and is not applicable in this configuration.
The Onboard 3.3V Regulator
The Wemos D1 Mini has an onboard voltage regulator. This may vary between the versions and also if the board is a clone.
The component given in the official schematic is the Richtek RT9013. The datasheet is available to download here.
This voltage regulator is capable of supply 500mA. As mentioned in the technical specification, the Wemos D1 Mini consumes around 71mA of current when transmitting, although it is capable of consuming up to 500mA peak current.
This should be considered if using the Wemos D1 Mini to power an external sensor from the 3.3V pin. Care must be taken not to overload the onboard regulator.
Does The Wemos D1 Mini Have Bluetooth?
The Wemos D1 Mini does not have bluetooth built in as the ESP chip does not have the functionality.
However it is possible to connect the Wemos D1 Mini to a Bluetooth module, adding Bluetooth functionality. Arduino compatible Bluetooth modules such as the HC-05 would be ideal for this.
It is also possible to add a Bluetooth module by means of a plug-in shield. This would by far be the easiest way to add Bluetooth, but it seems that this potential product still remains as a project.

The project also seems to be available on EasyEDA, along with schematic and other useful files, should you be interested in building your own.

How To Program The Wemos D1 Mini
The Wemos D1 Mini supports several different environments.
My prefered environment for the Wemos D1 Mini is the Arduino IDE. Check out my article on how to Add Wemos D1 Mini To Arduino IDE And Connect To WiFi!
If you are looking to use your Wemos D1 Mini in a smart home setup, you should consider flashing it with Tasmota or ESPHome.
It is also possible to program the Wemos D1 Mini with MicroPython. There are tutorials available on the official website.
What’s Next?
Here are some more of my Wemos D1 Mini tutorials that you might find interesting:
- Check out how to use the Wemos D1 Mini OLED display.
- Take a look how to use the Wemos D1 Mini LED Matrix.
- This tutorial teaches you how to use the Wemos D1 Mini analog input.
- Find out how to set up a web server on your Wemos D1 Mini.
- How to add your Wemos D1 Mini to Arduino and connect to WiFi.
- This tutorial shows you how to use the NodeMCU firmware with Wemos D1 Mini.
Conclusion
The Wemos D1 Mini is a super little board, extremely versatile and very cost effective! I am personally a huge fan of this little board, which is why I have used it a lot in various articles on this site.
There boards offer enough IO pins to do a variety of different projects, however it is also possible to expand this if needed.
The form factor is tiny, making it possible to embed the Wemos D1 Mini into many different projects. It is also easy to hide it in your house should you want to use it for a sensor.
It is possible that a single ADC channel may not be enough for some projects, but this is a limitation of any board based upon the ESP8266.
The simple solution to this is to add an I2C or other external ADC. Simple!
I hope you have found this article insightful and that it has given you the information that you need to make an awesome project with your own Wemos D1 Mini!
Need to get hold of your own Wemos D1 Mini? Check the latest prices here!
Thanks so much for visiting my site! If this article helped you achieve your goal and you want to say thanks, you can now support my work by buying me a coffee. I promise I won't spend it on beer instead... 😏