
Trying to decide whether Tasmota or ESPHome is the right firmware for your smart home application? Or perhaps you are using one and want to try the other? In which case this article is just for you!
Both Tasmota and ESPHome are valuable tools for the smart home enthusiast with the same end result. However depending on the application on or the other may be a better choice. In this article we will discuss the pros and cons as well as learn how to easily switch between them.
Personally I started with Tasmota as I discovered it first in an effort to get my first MagicHome LED strip to work with Home Assistant.
I quickly became aware of other offerings and wanted to try ESPHome to see how it compared. Now I use both of these awesome tools, depending on what I want to achieve. So which is right for you?
- The difference between Tasmota and ESPHome
- User interface
- Flashing
- How to migrate between Tasmota and ESPHome?
- Further resources
- Conclusion
The difference between Tasmota and ESPHome
For those of you seeking a quick answer, we can first summarize some of the main differences between the two firmware options. This table may rule out one of the other for your application, but if either are suitable then the rest of this article will aim to help you decide.
| Function | Tasmota | ESPHome |
|---|---|---|
| Flashing Method | Serial / OTA | Serial / OTA |
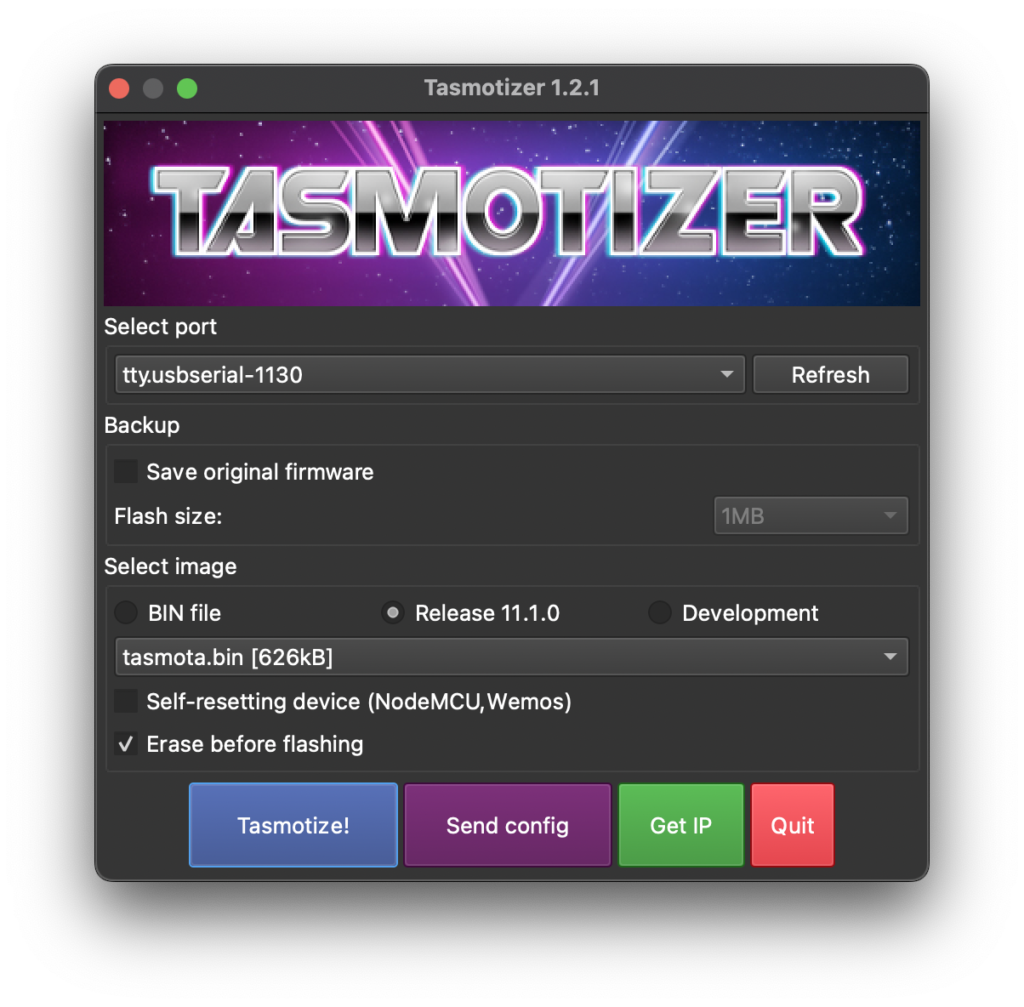
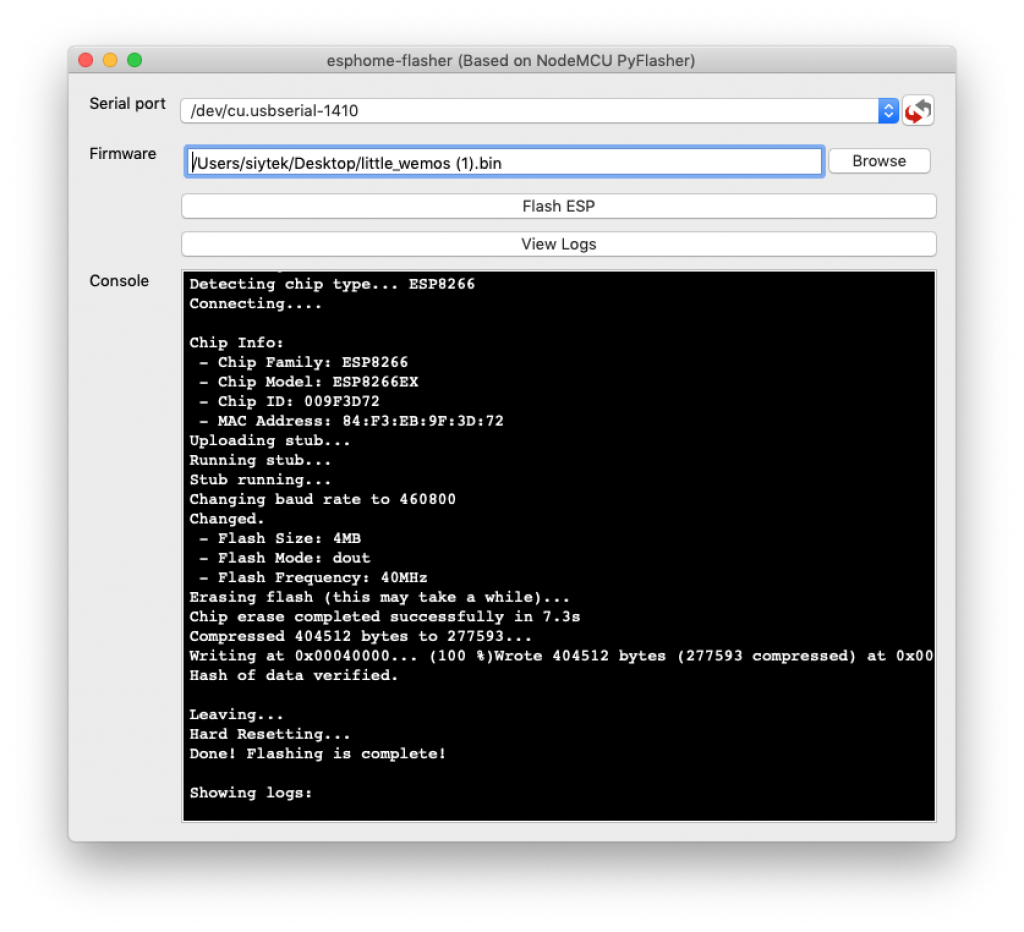
| GUI Flashing Software | ESPHome Flasher | Tasmotizer |
| Online Flashing | Yes | Yes |
| Tuya-convert | Yes | Yes |
| Device Compatibility | ESP8266 | ESP8266 / ESP32 |
| Setup Method | GUI Menu / Terminal | YAML Configuration |
| Interface | Web Browser / Serial Terminal | Text Editor / Home Assistant Add-on |
| Communication Method | MQTT | MQTT / Native Home Assistant API |
| Standalone Operation | No | Yes |
| Web Server | Yes | Yes |
| Internal Automation | No | Yes |
| Requires a Broker | Yes | No |
| Auto Discovery | Yes | Yes |
My personal opinion based upon the information in the table plus some additional experience is that ESPHome is a better option for some key reasons, however it has one main drawback that would make Tasmota attractive to many users. Bear in mind that at the time of writing I currently run many more Tasmota devices so I am not yet biased either way.
The main benefits of ESPHome (and the reason I am looking to change all of my devices in the near future) are firstly that it does not require an MQTT broker if you are using Home Assistant. Communication is done directly over the native API, which in my opinion is faster and more robust.
It is also possible to create automations within the devices themselves, which is a very powerful feature. If you are developing a custom device then there it is a no-brainer, ESPHome is the right choice. Also if you are using an ESP32 based device, ESPHome is the sensible choice as there is no official support for ESP32 devices in Tasmota.
With that said Tasmota has been around for along time, its tried and tested and the newest releases are proven and stable. There are a large number of devices supported and plenty of information in the community.
Setting up Tasmota is as easy as entering your WiFi credentials, MQTT credentials and choosing a supported device. There is no need to write a configuration. There are many people who would benefit from this ease of use.
Use ESPHome if…
- You are comfortable with YAML
- You are using Home Assistant and prefer YAML based configuration
- You want to develop a custom ESP-based device
- You are using an ESP32 device
- You don’t mind some trial and error to build a configuration for a commercially available device
- You want to avoid a “middle man” MQTT broker
- You want the best performance (albeit hardly noticeable)
- You need a device that can function standalone
Use Tasmota if…
- You want a quick configuration through menu options
- You are using Home Assistant and MQTT
- You are not using Home Assistant but are using MQTT
- You don’t like using YAML and prefer GUIs
- You want an easy solution for commercially available devices
- You prefer a platform with community support
- You are using a device not yet supported by ESPHome
User interface
Tasmota and ESPHome have a different approach for their method of configuration. Tasmota uses a traditional GUI menu system accessed by any web browser. ESPHome can either be configured with the Home Assistant add-on or by using the terminal.
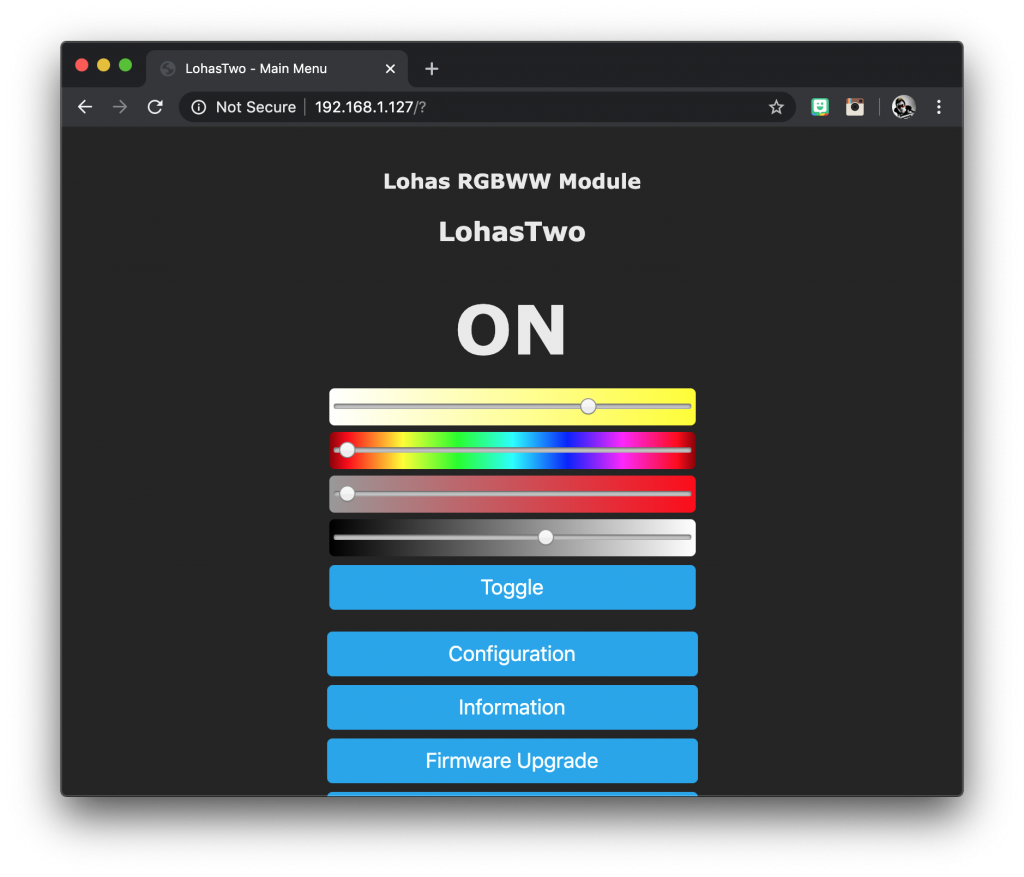
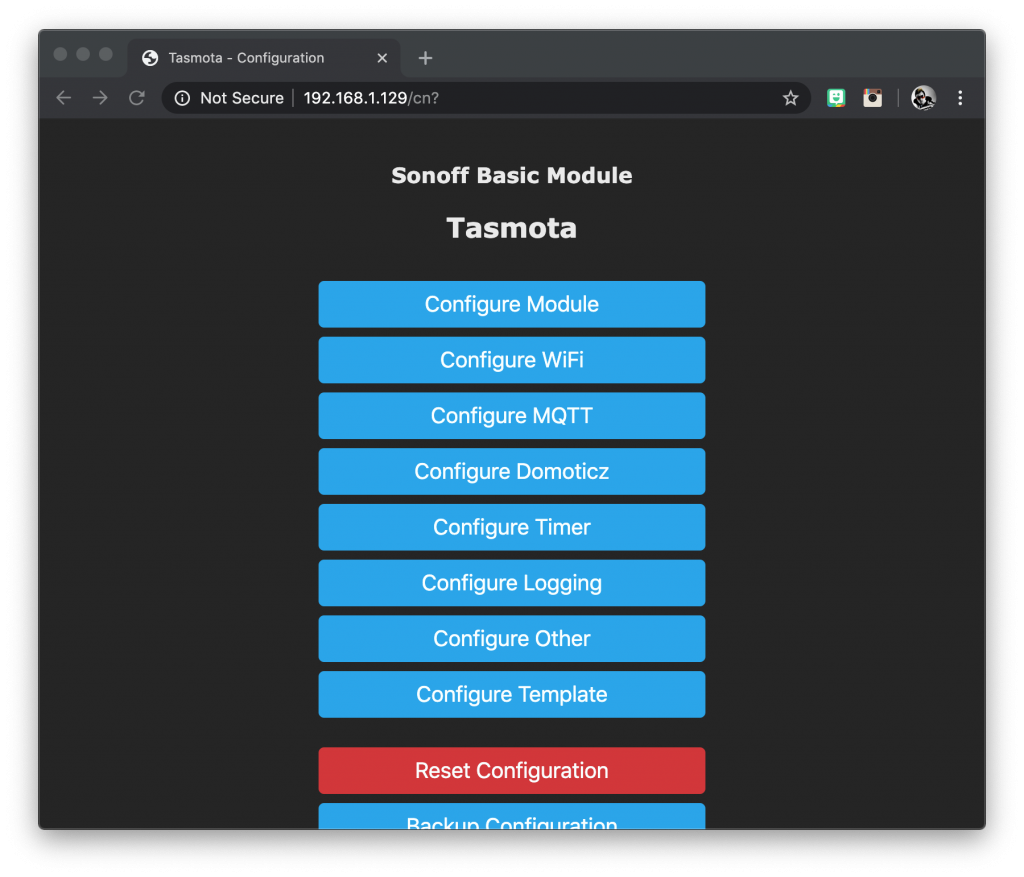
Tasmota Configuration
The Tasmota GUI is accessed simply by typing the device address into the web browser. It consists of a series of menu options where WiFi and MQTT credentials can be entered.
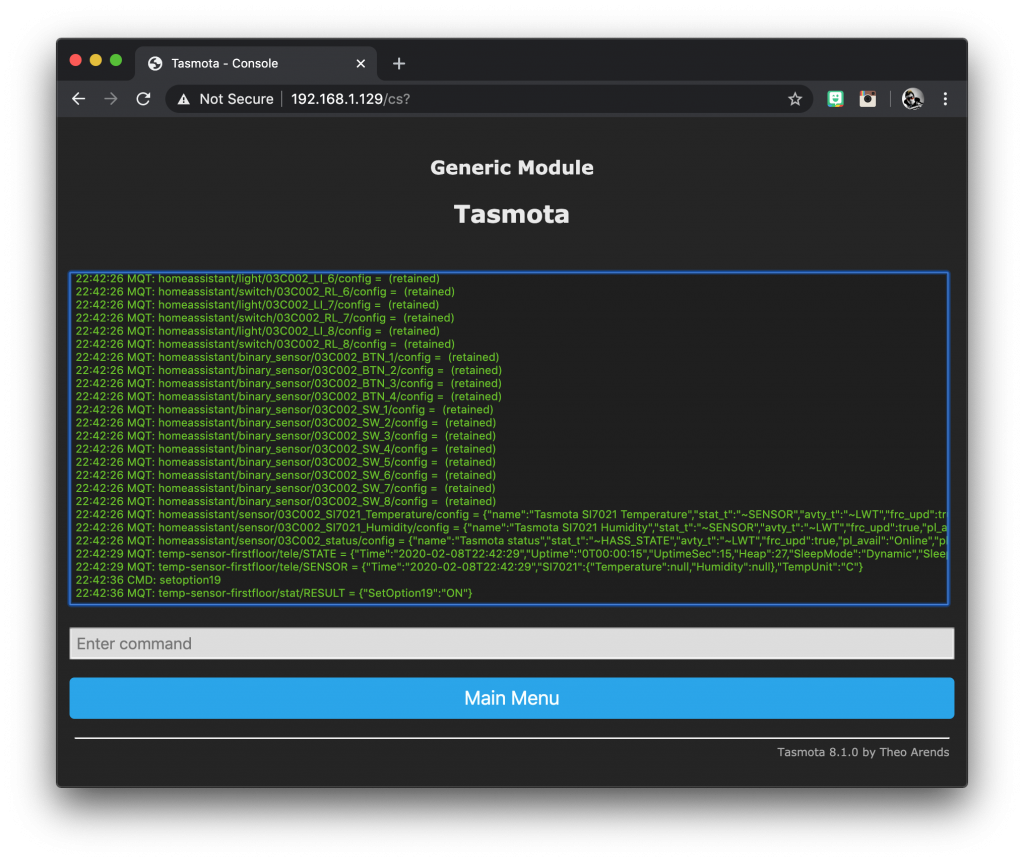
There is also a web-based terminal that allows commands to be directly entered, which is also useful for debugging. The average user will very rarely need to visit the terminal other than to perhaps enable auto discovery.
ESPHome Configuration
ESPHome is designed to be configured with YAML in the same way that Home Assistant is configured. This can be either a strong advantage or disadvantage depending on whether or not you are familiar with YAML configuration already.
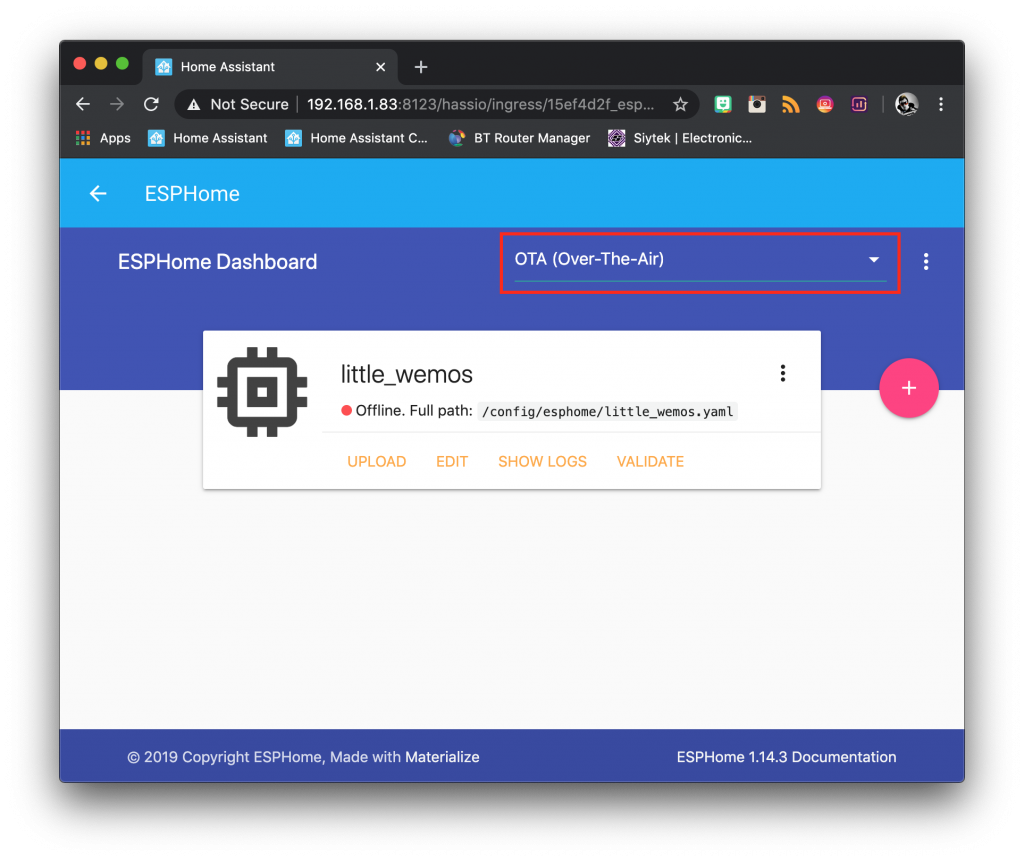
For mostly everyone choosing ESPHome, the best way to configure a device is by using the Home Assistant add-on. This gives a seamless experience as it integrates directly into Home Assistant.
Although ESPHome is heavily geared towards Home Assistant users, it is possible to use it to create a standalone device or communicate with it via MQTT, making it compatible with other platforms.
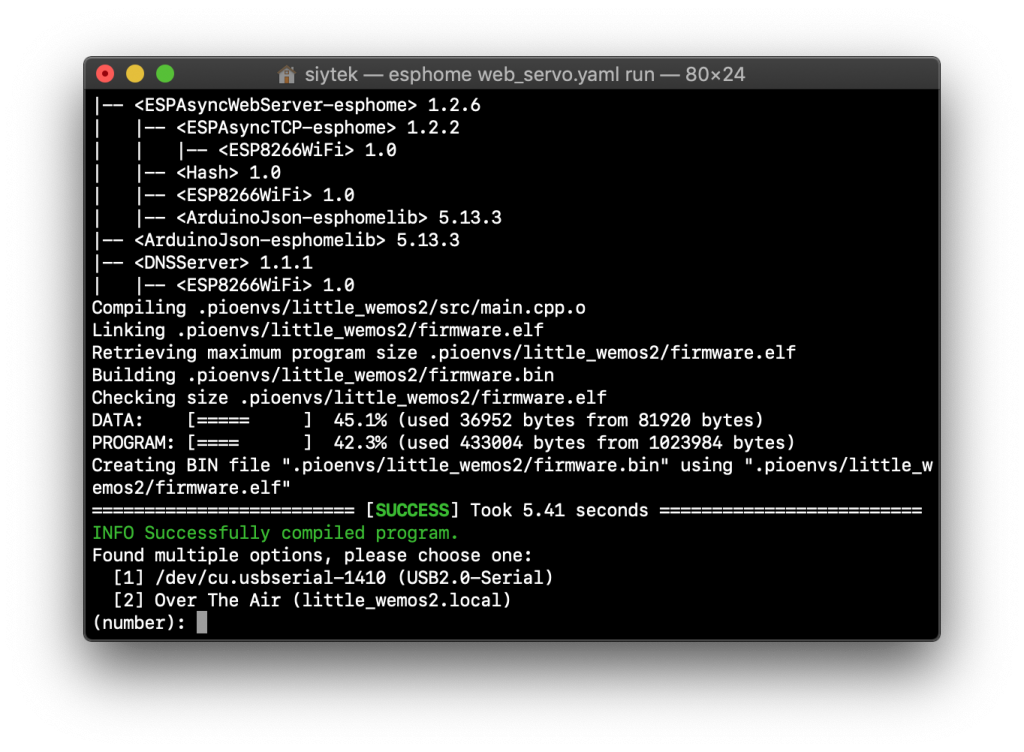
Therefore it is also possible to build configurations and flash them using the terminal and without the need for the Home Assistant add-on.
Flashing
Both ESPHome and Tasmota can be flashed with a serial connection or over the air (OTA). Both are compatible with Tuya-convert and both can be flashed with the serial terminal using esptool.
Flashing Online
Both Tasmota and ESPHome can now be flashed using a Chrome browser based tool. This is probably the easiest and most convenient way to flash the firmware to your device, so long as you are using Chrome browser.
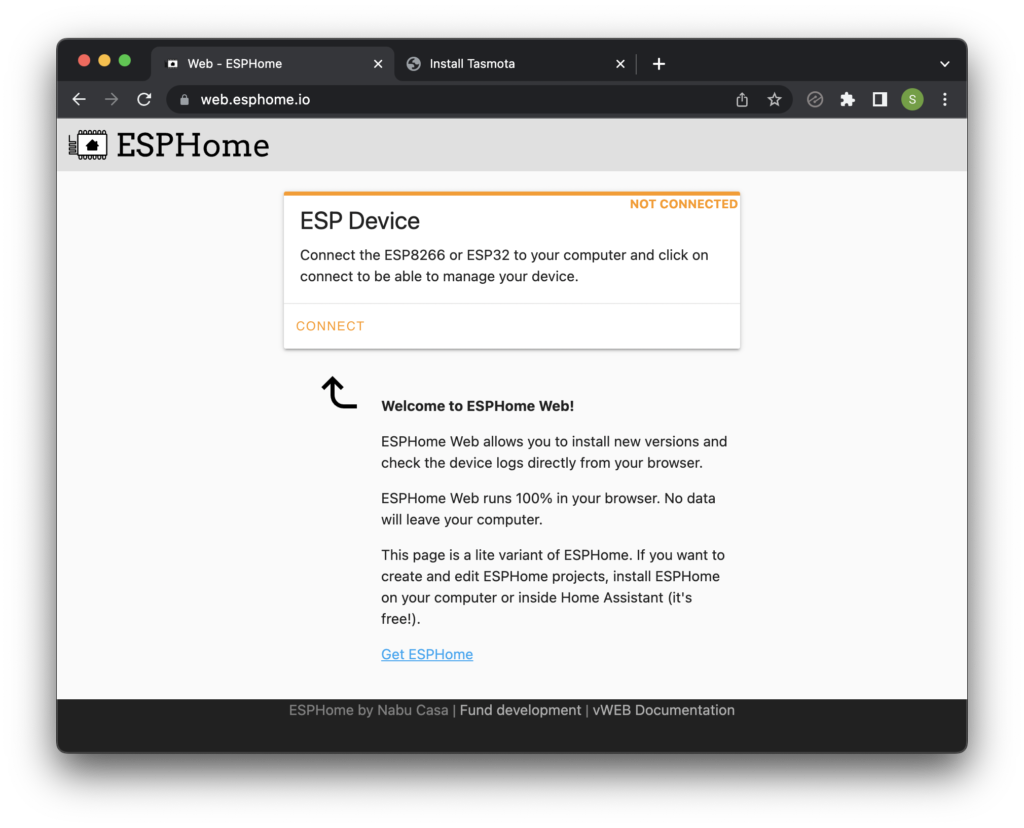
Flash ESPHome Online
To Flash ESPHome online with Chrome browser, go ahead and visit this link: https://web.esphome.io/
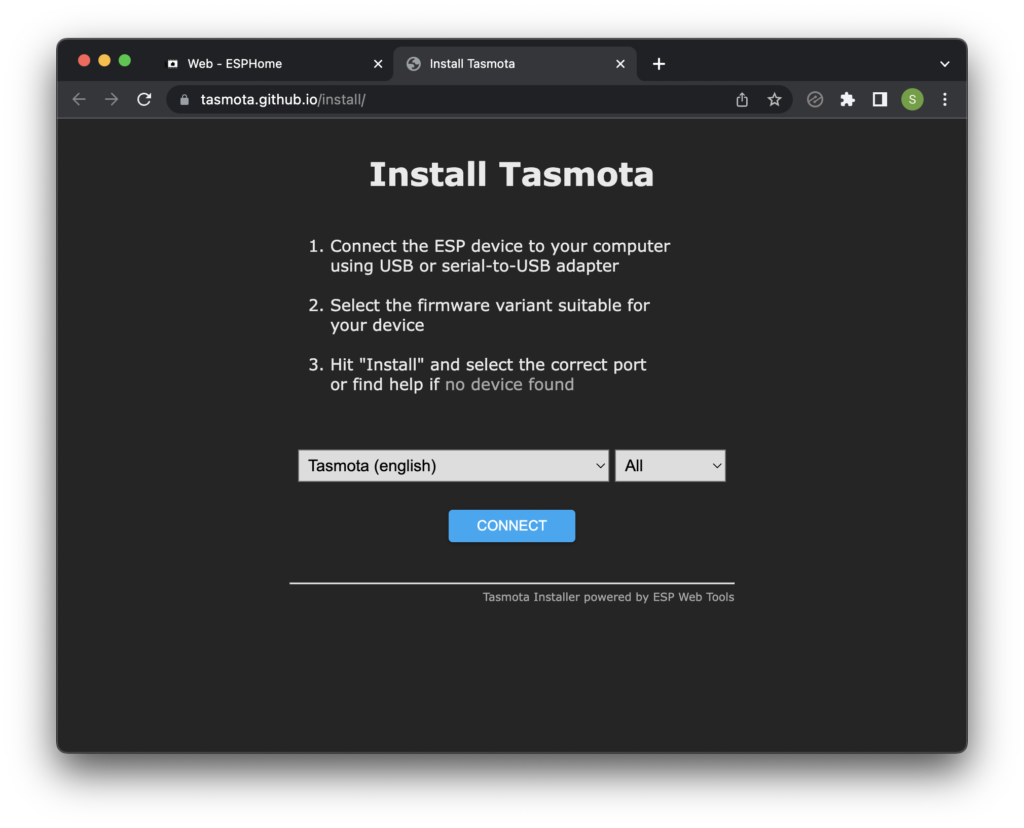
Flash Tasmota Online
To Flash Tasmota online with Chrome browser, go ahead and visit this link: https://tasmota.github.io/install/
If you do not have Chrome browser or you do not wish to download and install it, there are several other methods that you can use.
Flashing with serial
There is also a GUI-based flashing tool for each platform that is cross-compatible with Mac / Linux / Windows. This makes it super-simple to flash new firmware with a wired connection.
Flashing OTA
Both firmware options offer the option to flash over the air once the initial wired flashing has been completed. Both devices are also compatible with Tuya-convert, a program that allows the firmware on Tuya devices to be replaced over the air without the need for wired flashing.
ESPHome can either be flashed OTA using the Home Assistant add-on, terminal or via the web server if it is enabled.
Tasmota has a menu option accessible by the browser that allows the firmware to be flashed either from a URL or local file.
How to migrate between Tasmota and ESPHome?
It is very simple to switch between Tasmota and ESPHome making it easy to try both firmware options to see which one is right for you! You can of course just flash each one using a wired connection and the applicable flashing tool.
However once you have either of the two firmwares flashed to a device, you can switch the firmware OTA.
Tasmota to ESPHome
First you should follow my tutorial explaining how to setup an ESPHome device in Home Assistant. Alternatively you can use this tutorial if you are not using Home Assistant and wish to use the terminal.
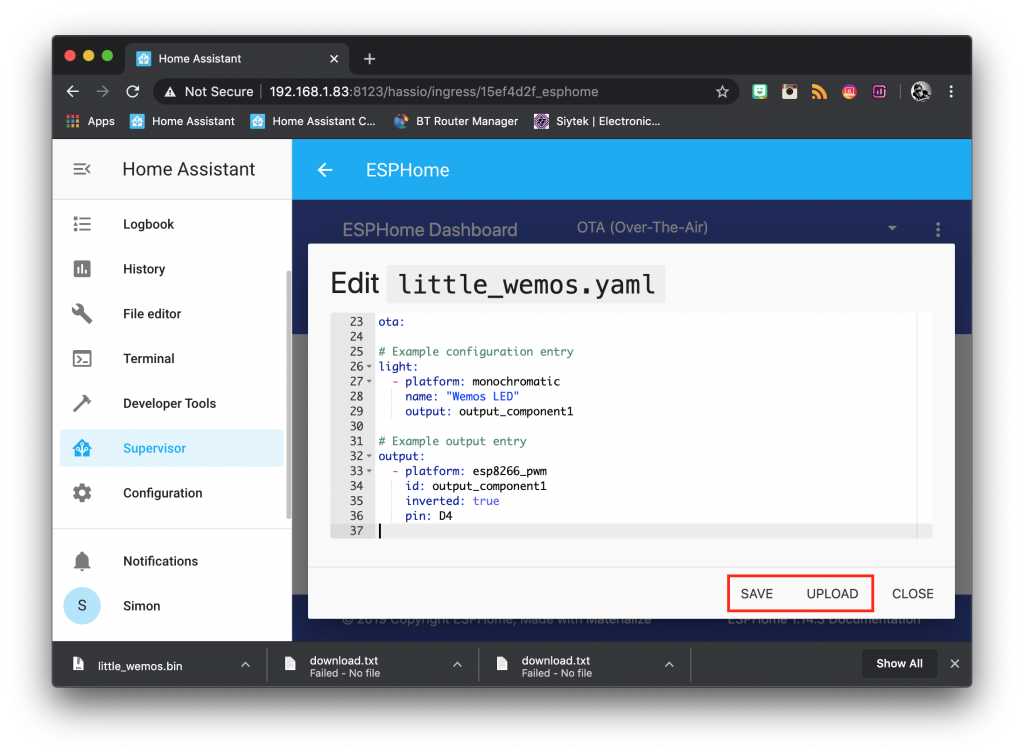
If you are using the Home Assistant add-on, go ahead and compile the binary for your device.
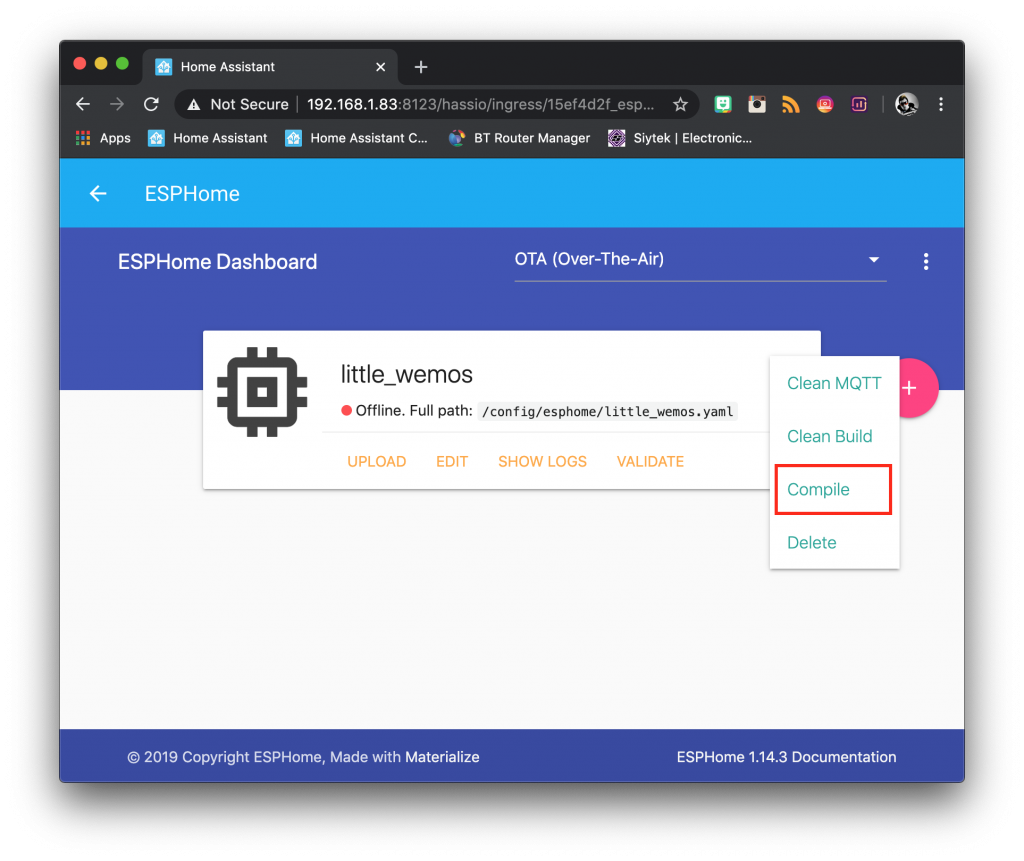
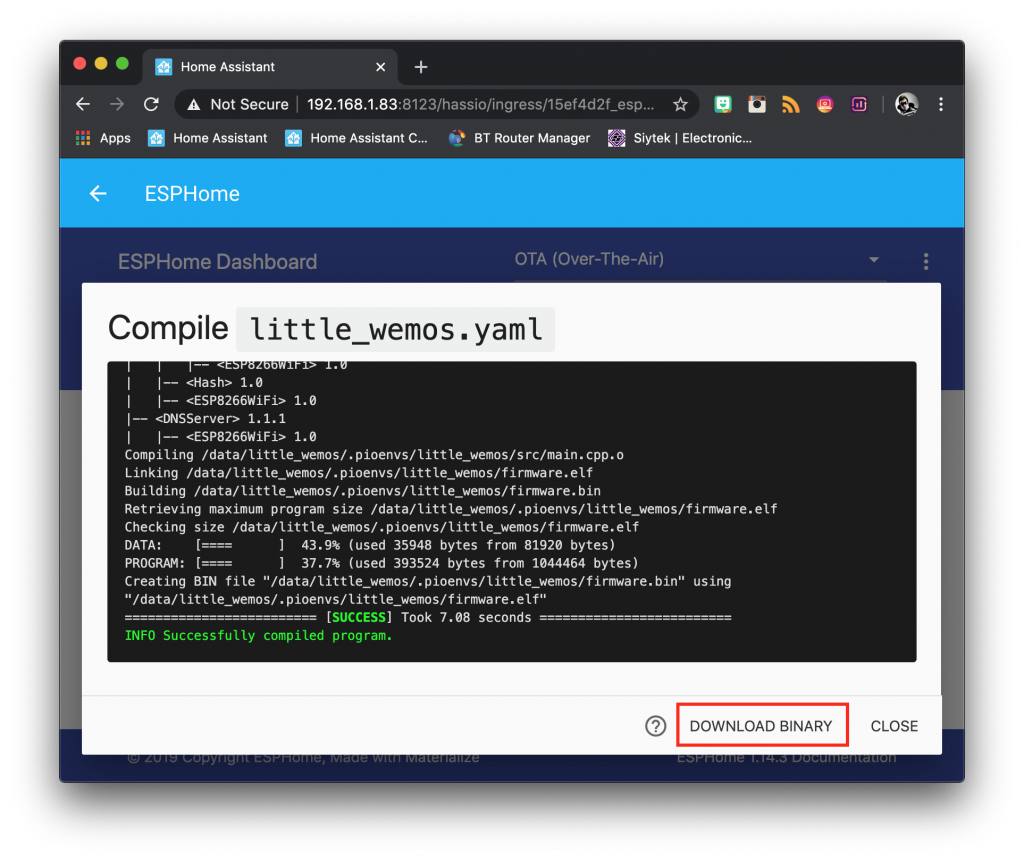
Once the compilation has finished you will have the option to download the binary. Go ahead and download it and move it somewhere that you can easily find it.
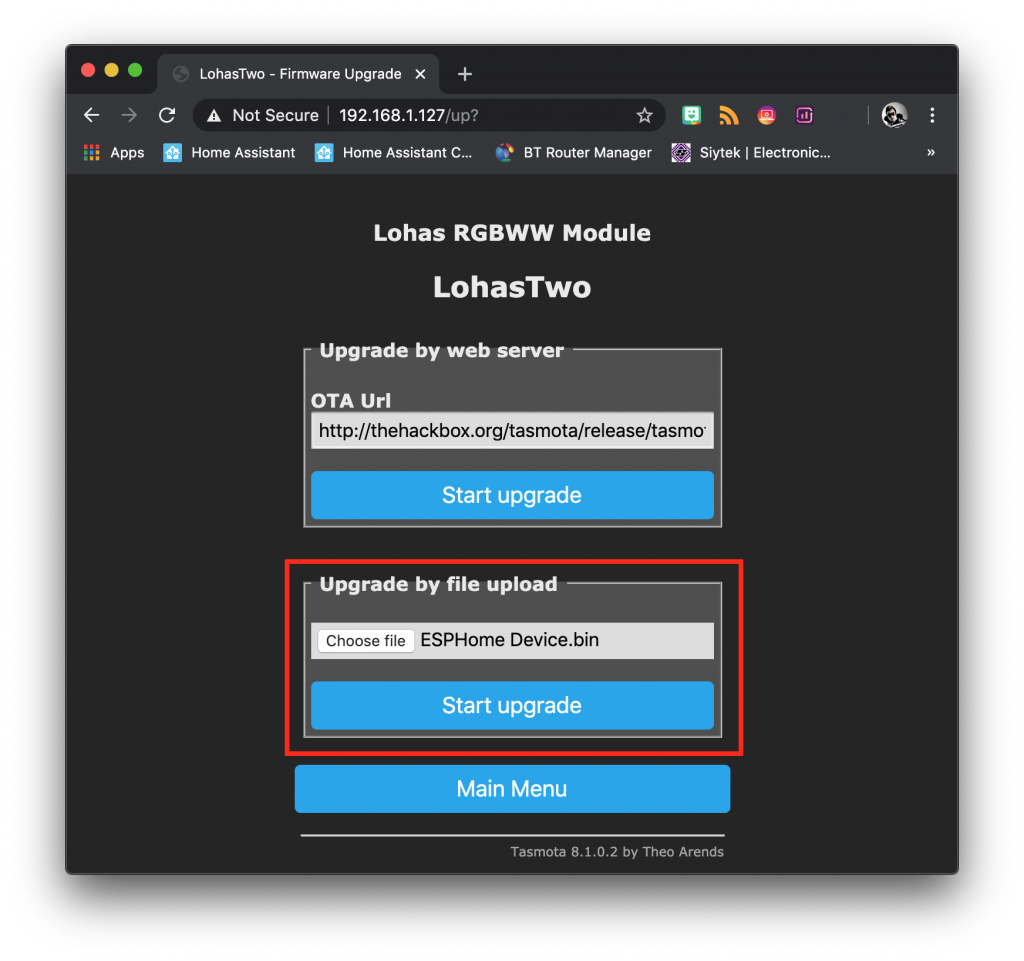
In order to switch your device, open the Tasmota configuration in your browser and navigate to firmware upgrade.
In the section where you can choose a file, select the ESPHome .bin file that you just created and click start upgrade. Once the flashing has completed, your device will restart with ESPHome running!
ESPHome to Tasmota
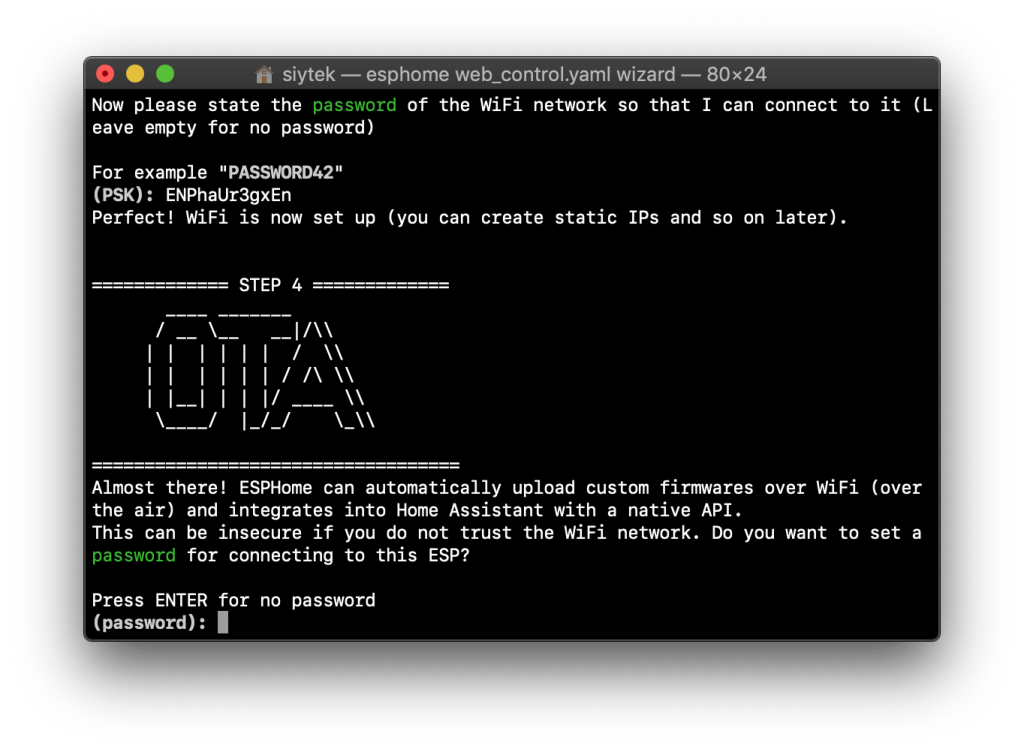
In order to flash an ESPHome device OTA without using the ESPHome tools, we can use the web interface. First you need to add the web interface to your device configuration.
esphome:
  name: little_wemos2
  platform: ESP8266
  board: d1_mini_lite

wifi:
  ssid: "******"
  password: "***********"

  # Enable fallback hotspot (captive portal) in case wifi connection fails
  ap:
    ssid: "Little Wemos2 Fallback Hotspot"
    password: "a1MevJene8mT"

captive_portal:

# Enable logging
logger:

# Enable Home Assistant API
api:

ota:

web_server:
  port: 80
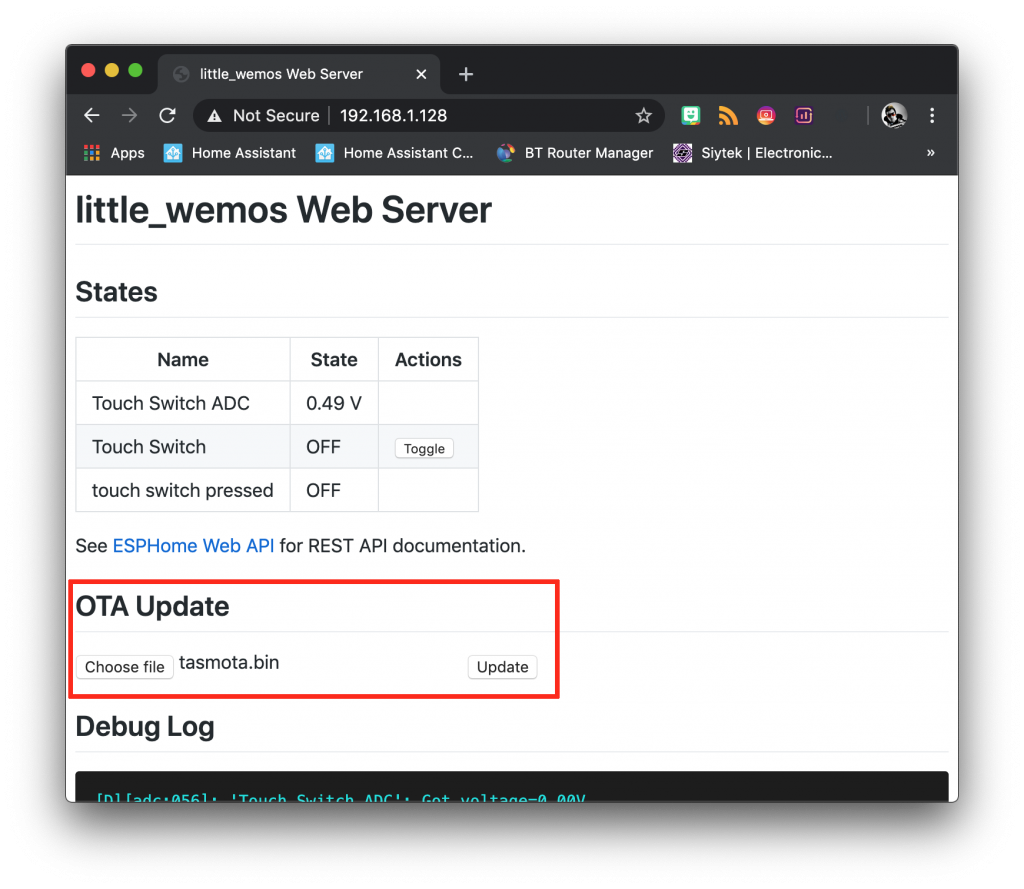
Once you have added the web server to your YAML configuration, go ahead and flash the device. While the configuration is compiling and the device is flashing, go ahead and grab the latest Tasmota firmware .bin file and save it somewhere easy to find.
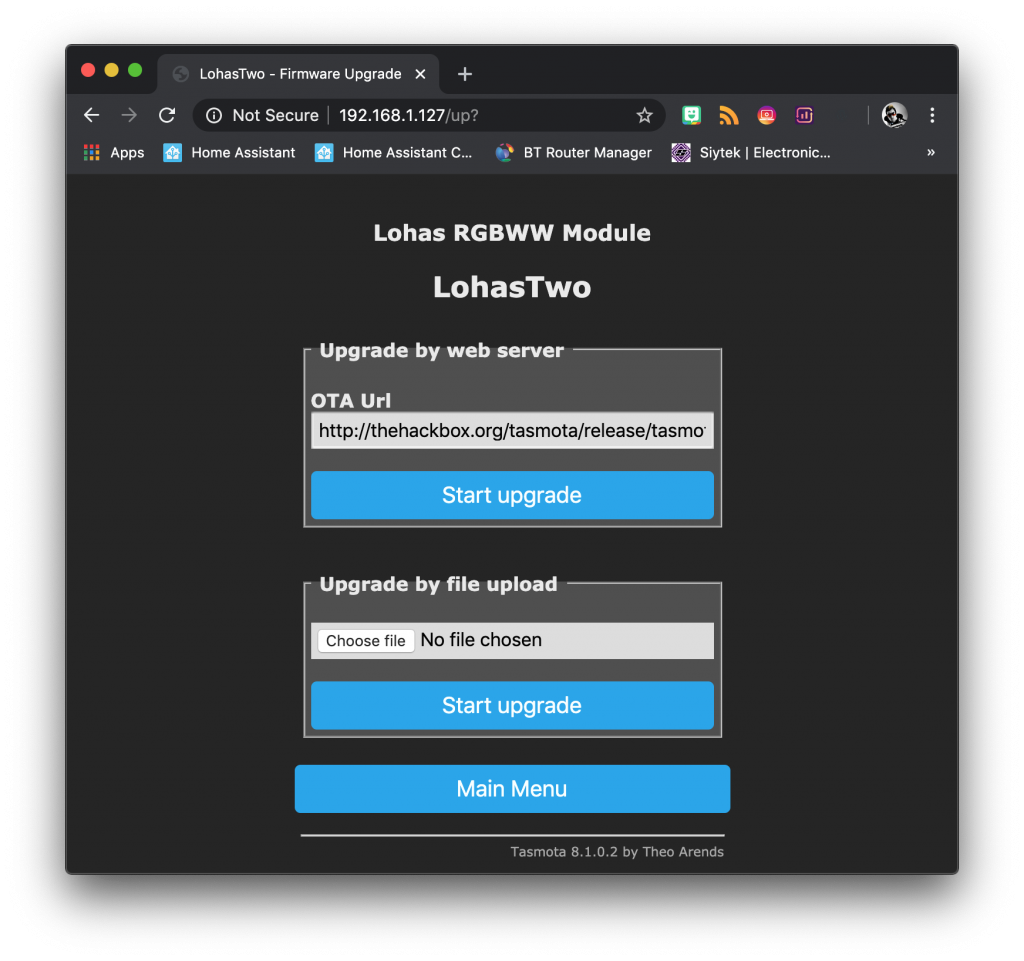
Once the flashing process has completed, you should be able to access the web interface by navigating to the device address in your browser. Go ahead and select the tasmota.bin file and click update to migrate to Tasmota!
Further resources
For further reading on either platform, go ahead and check out some of my other tutorials. You can also check out the official documentation for ESPHome and Tasmota.
ESPHome
- How To Add ESPHome To Home Assistant – the complete guide to installing ESPHome and setting it up in Home Assistant
- Home Assistant and ESPHome Servo Example – A good example of how to configure a device in ESPHome and Home Assistant
- Super-Simple Touch Switch For Home Assistant – A great example of a more advanced configuration in ESPHome using lambda
- Easier ESP8266 Web Server LED Control Using ESPHome – An application of ESPHome that doesn’t need Home Assistant
Tasmota
- Flashing Tasmota: 6 Great Methods – All the information you will ever need for flashing Tasmota devices
- Easy Home Assistant WiFi Temperature Sensor – An easy to follow guide for a DIY Tasmota device
- How To Create A Template In Tasmota – Advanced device configuration explained, useful for when your device is not listed in Tasmota
- How To Setup Tasmota Auto Discovery In Home Assistant – The complete guide to configuring MQTT and getting Tasmota to auto detect in Home Assistant
Conclusion
You should now hopefully have an insight into what is the most suitable firmware for your smart home devices. In my opinion both options are awesome and bring great value to the smart home community.
In the case that one option does not support your device then the decision is an easy one. However in many cases either option will be suitable and it depends on other factors.
If you want a quick setup with a GUI menu for configuration and you don’t mind using an MQTT broker, go for Tasmota. If you want more flexibility, localised automation and you like working with YAML, go for ESPHome.
So now you have made a decision, why not go ahead and check out some of my other ESP device and Tasmota tutorials!
Thanks so much for visiting my site! If this article helped you achieve your goal and you want to say thanks, you can now support my work by buying me a coffee. I promise I won't spend it on beer instead... 😏


__Communication is done directly over the native API, which in my opinion is faster and more robust.__
The whole idea about using broker is to ensure you have much more reliable communication between devices. Direct API (read web API) access for IoT is a bad thing and should be avoided.
that said, I don’t use any of the two, for me these devices do a lot of thing, but not well enough for my taste..
Color correction on LED with ESP is just done with max power. That is not color correction. (from https://esphome.io/components/light/rgb.html) I think Tasmota does a better job there.
Important if you want to make sure light is correct and not just blue or red.
Hi Ries, thanks for visiting! Yes perhaps you are correct regarding the broker, perhaps I need to re-word this section. My opinion is based upon real world experience and I find no noticable difference between the two in terms of performance or reliability, however I feel that ESPHome is superior here as it integrates more seamlessly with Home Assistant, more so than Tasmota with the MQTT platform. Plus both solutions absolutely annihilate any commercially available cloud based solution without suffering from the dreaded brick-on-demand service offered by the providers!
As for the color correction, I feel that sometimes the mathematics behind such things on paper does not always equal the best user experience. This was discussed in detail over on Tasmota’s Github page regarding the performance of fading using PWM. Tasmota performs a mathematically correct linear brightness fade at the expense of PWM flickering when below a certain brightness. Only an Engineer would be crazy enough to argue that the mathematically correct solution is better!
I believe they are now changing the algorithm to give smoother fading at the expense of providing a perfectly linear response. Personally I would gladly sacrifice a slight mismatch in colour to stop the damn thing having PWM flicker below 20% brightness! 🙂 Many agree with this and you can read about it here: https://github.com/arendst/Tasmota/issues/6942
Pingback: ESP32デバイス向けESPHome | あくまで暫定措置としてのブログ
Hi, great tutorial. However .. When I try to upload the ESPHome binary to my S2x module running Tasmota it tells me there’s not enough space available …
Any hints on how to solve this ?
Kind regards,
Tony
Hi Tony, thanks for visiting! Do you know what ESP chip is on the S2x? Need to make sure the correct chip is selected with regards to memory sizing.
Fantastic article. Great job dude, helped me a lot and undoubtedly others too.
Glad to be of assistance Bob 🙂
I think you might have “GUI Flashing Software” switched in your comparison table.
In 2019 tasmota was working with esp32, also broker was not required.
Same problem with the Sonoff S31 (using esp8266). Correct chip is selected in esphome when compiling.
The Tasmotizer app does an erase first when flashing the firmware, but the http variant running on the esp does not. Which I think is the issue.
Found the solution for anyone reading this. Have to flash the minimal tasmota fw first to make space to fit the esphome bin (read the note at the bottom):
https://esphome.io/guides/migrate_sonoff_tasmota.html
Solution is in the note at the bottom here.
https://esphome.io/guides/migrate_sonoff_tasmota.html
Have to flash the minimal fw first, then esphome bin.
A lot of this is plain wrong. Tasmota has ESP32 support, works standalone, has internal automation (the feature is called “rules”) and doesn’t require a broker if you don’t use HA.
Many thanks for the insight, I published this article in 2020 so a lot might have changed since then. I’ll add it to my audit list, cheers